
How to Correct a Time Entry in Workday
This guide shows you how to correct a time entry in Workday for your direct reports, including adding, editing, and deleting time blocks, entering time off, and submitting a completed time card for approval.
Video: C1 Workday Enter and Edit Time for Direct Report by C1 Workday (2015). All credit for the demonstration goes to the creator; watch the original on YouTube. The written guide below was generated from this video by Docsie. Creator? Request a change or removal.
This guide shows you how to correct a time entry in Workday for your direct reports, including adding, editing, and deleting time blocks, entering time off, and submitting a completed time card for approval.
Prerequisites
- You must have manager access with direct reports visible under the My Team worklet.
- Approved time off cannot be corrected directly; adjustments to approved time off require a separate form submitted to HR.
Access the Workday homepage
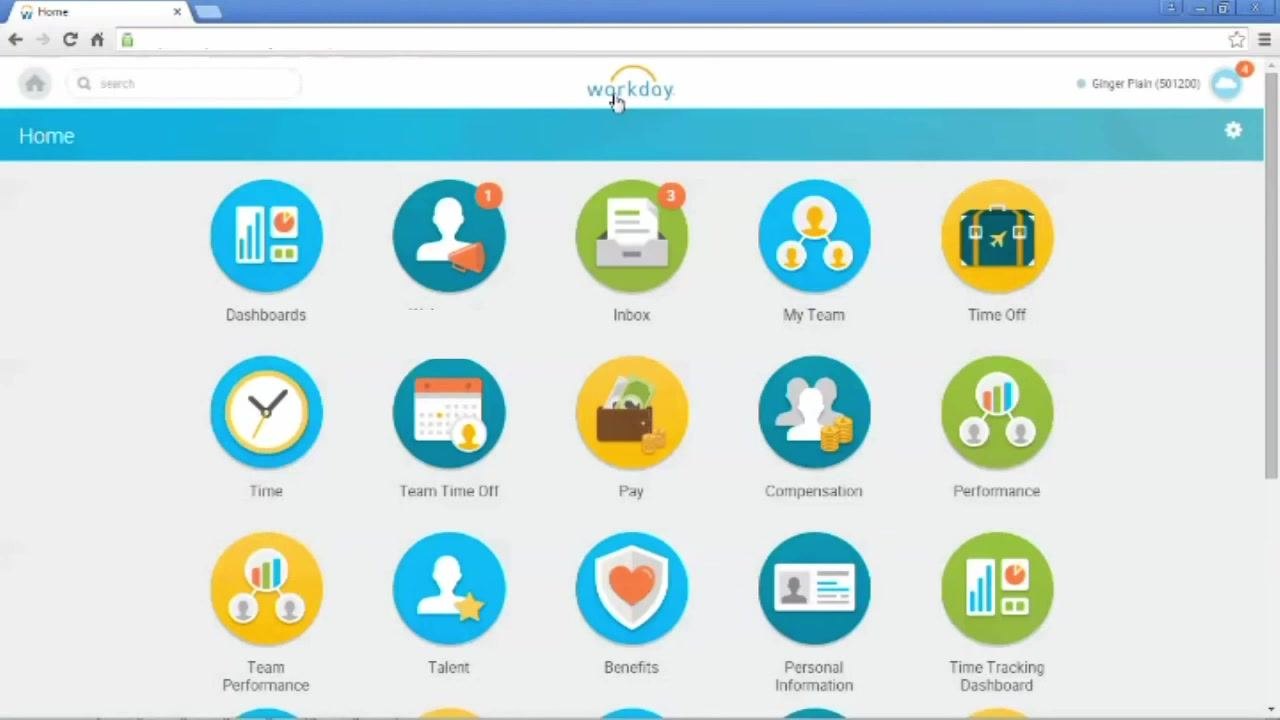
Open Workday in your web browser. The homepage displays several worklets, including Dashboards, Inbox, My Team, Time Off, Time, Pay, Compensation, Performance, Team Time Off, Talent, Benefits, Personal Information, and Time Tracking Dashboard. Locate the My Team worklet to begin managing time for your direct reports.

Select the direct report
Click the My Team worklet, then find the direct report whose time you want to correct (for example, Robert Thomas). Click the Related Actions icon (the small menu or three dots) next to the employee's name.
Open the Time and Leave actions menu
Hover over Time and Leave in the Actions menu to reveal a submenu of available actions and reports, such as:
- Enter Time for Worker
- Review Time by Week for Worker
- Submit Time
- View Time Calendar
- Enter Time Off
- Correct Time Off
- View Time Off Balance
- View Time Off Results by Period
- View Calculated and Override Balances
- View Carryover Balances
- View Leave Results
Open the time entry screen
Click Enter Time for Worker from the submenu to begin correcting time for the selected employee.
Select the date to correct
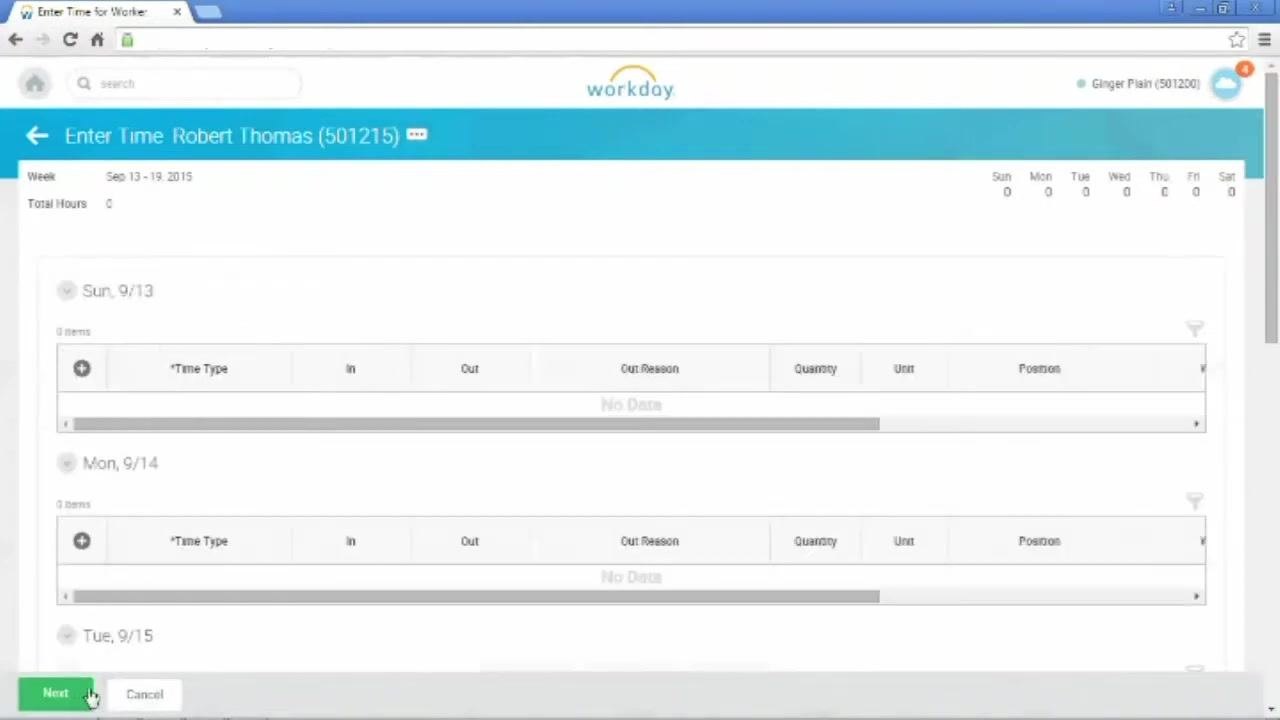
On the Enter Time screen for the employee, select the week and the specific date you want to correct, then click OK. The screen displays the days of the selected week, each with options to add time blocks.
Add a time block
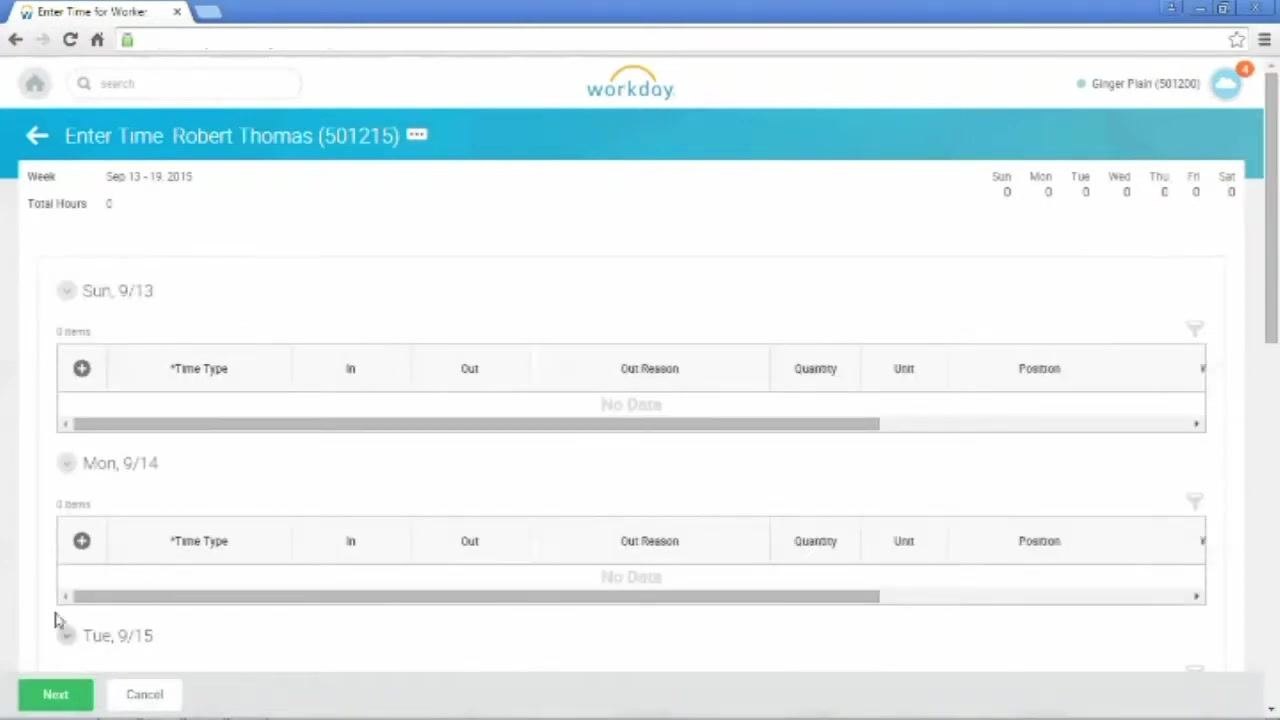
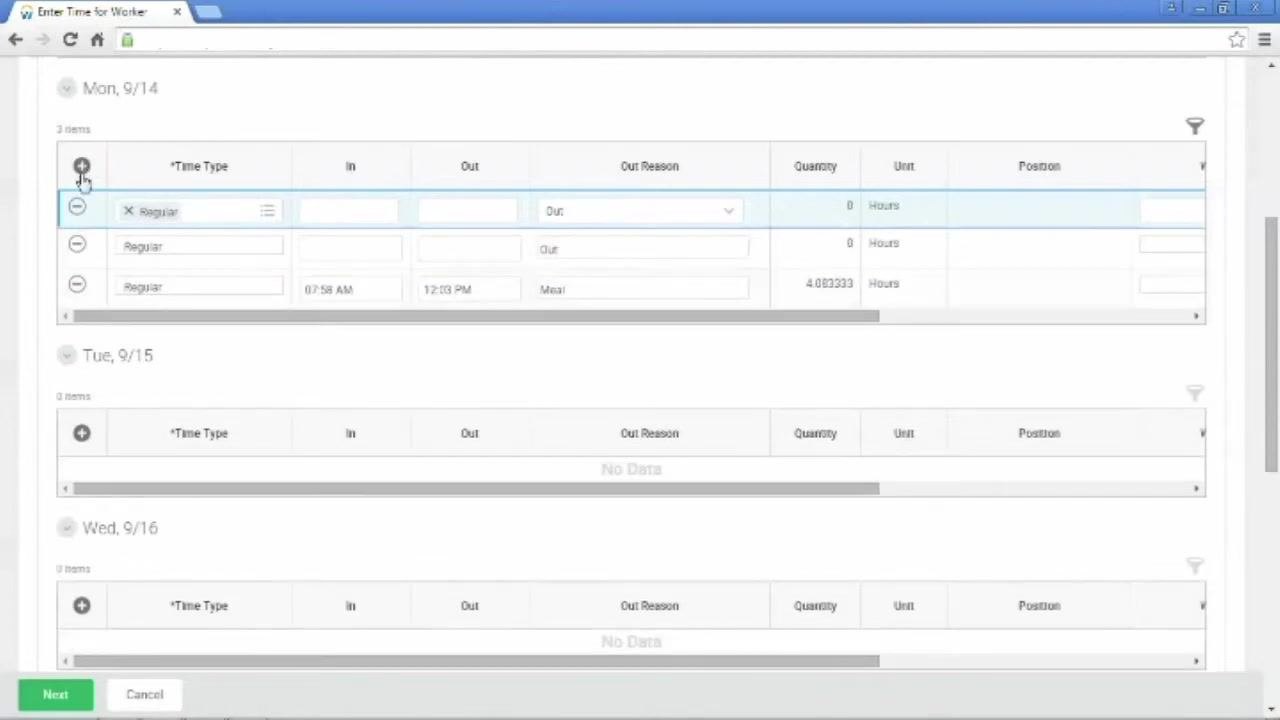
Click the plus (+) symbol next to the day you want to correct (for example, Monday, 9/14). A new row appears for time entry.
Enter time details
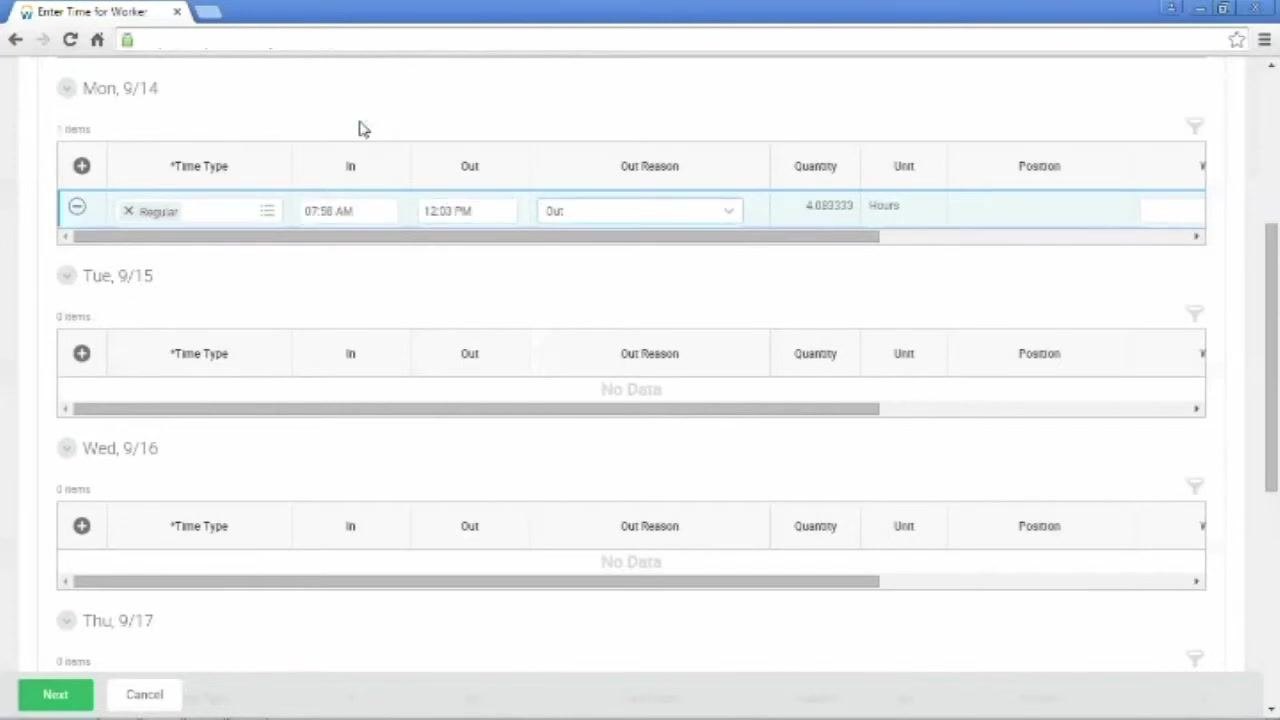
The Time Type field defaults to "Regular." If needed, click the menu to select a different time entry or time off code, then enter the In and Out times for the work period (for example, In: 07:58 AM, Out: 12:03 PM).
Select the Out Reason
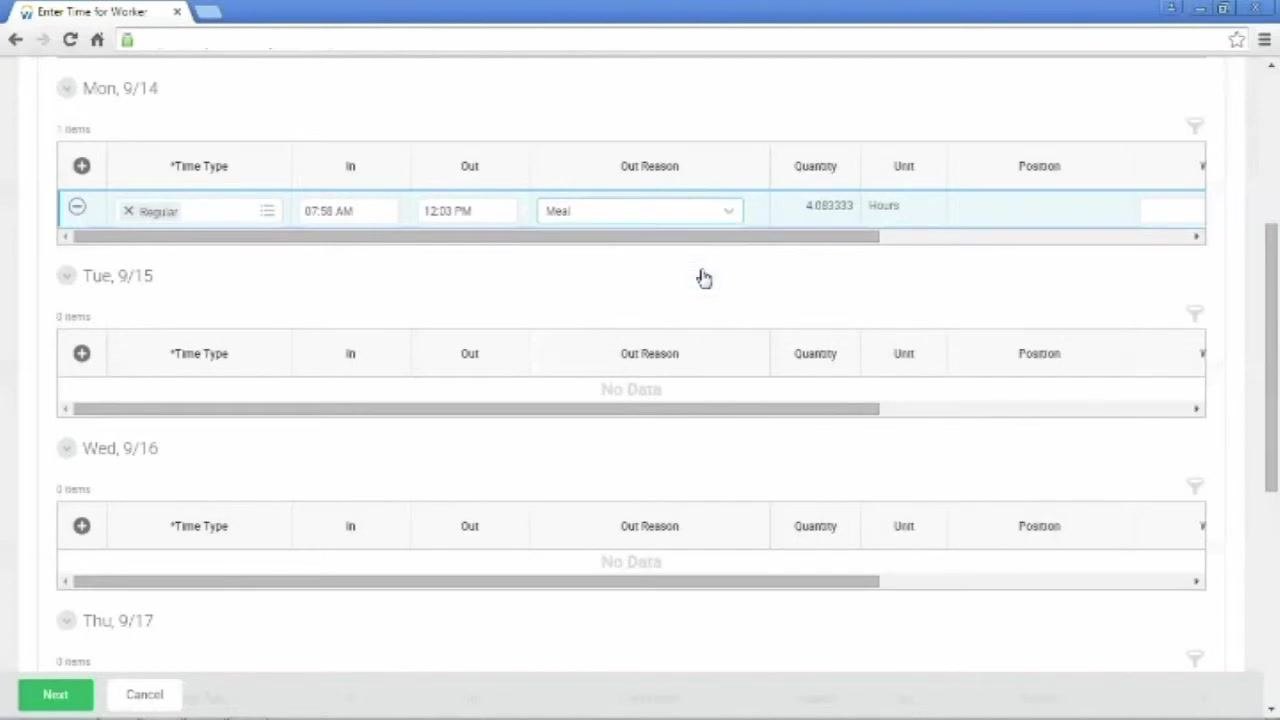
Click the drop-down arrow in the Out Reason field and select the appropriate reason for the end of the work block (for example, "Meal" for a meal break). If the block ends for any reason other than a meal break, select "Out" as the reason.
You can add additional time blocks for the same day by clicking the plus (+) symbol again and filling in the new row as needed.
Remove an incorrect time entry row
To delete a time entry row, click the minus (–) sign to the left of the row you want to remove. This immediately removes the selected time block from the day.
Correct or add a time block
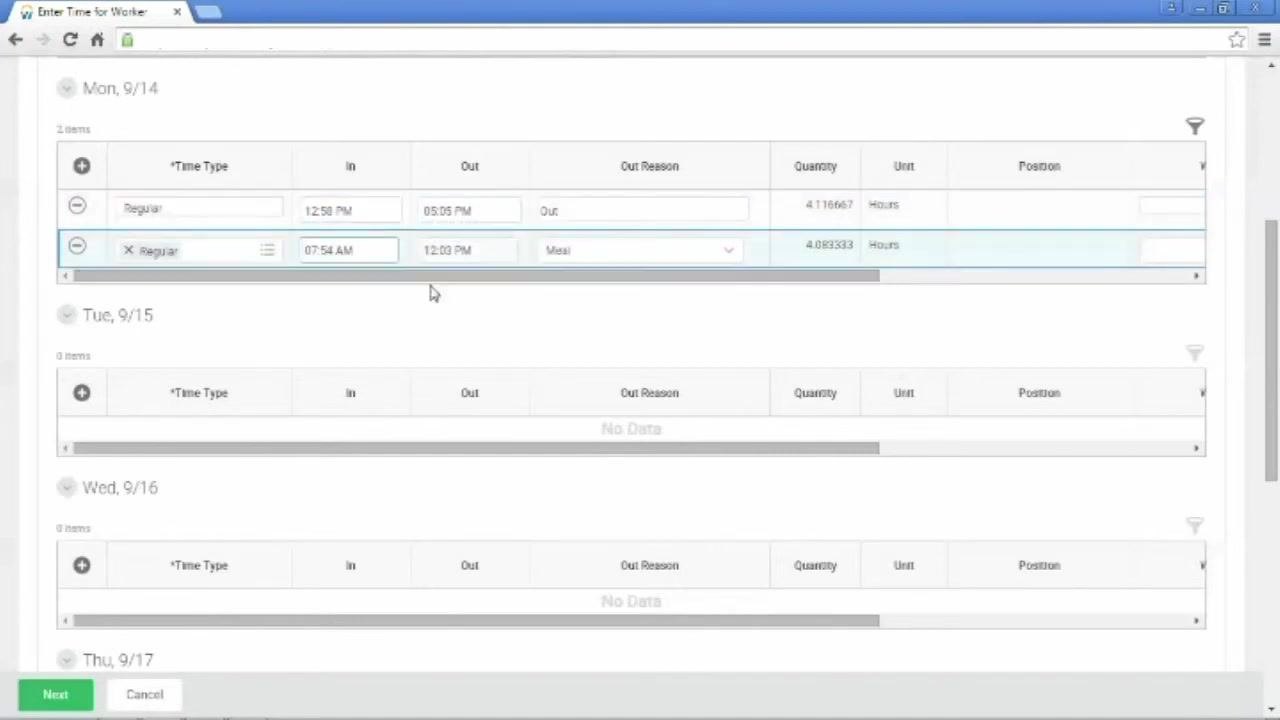
Click in any In or Out column for the appropriate day to add or modify a time block. Enter the start and end times for the work period — for example, In: 12:58 PM and Out: 05:05 PM for an afternoon shift — and select the appropriate Out Reason (for example, "Out" for end of shift). Workday automatically calculates the hours worked. You can correct time entries for the current pay period or the previous pay period, except for approved time off.
Note: Once time off has been approved, it cannot be edited directly on the time card. To adjust approved time off, submit a time adjustment form to HR, available on Pulse.
Enter time off for an associate
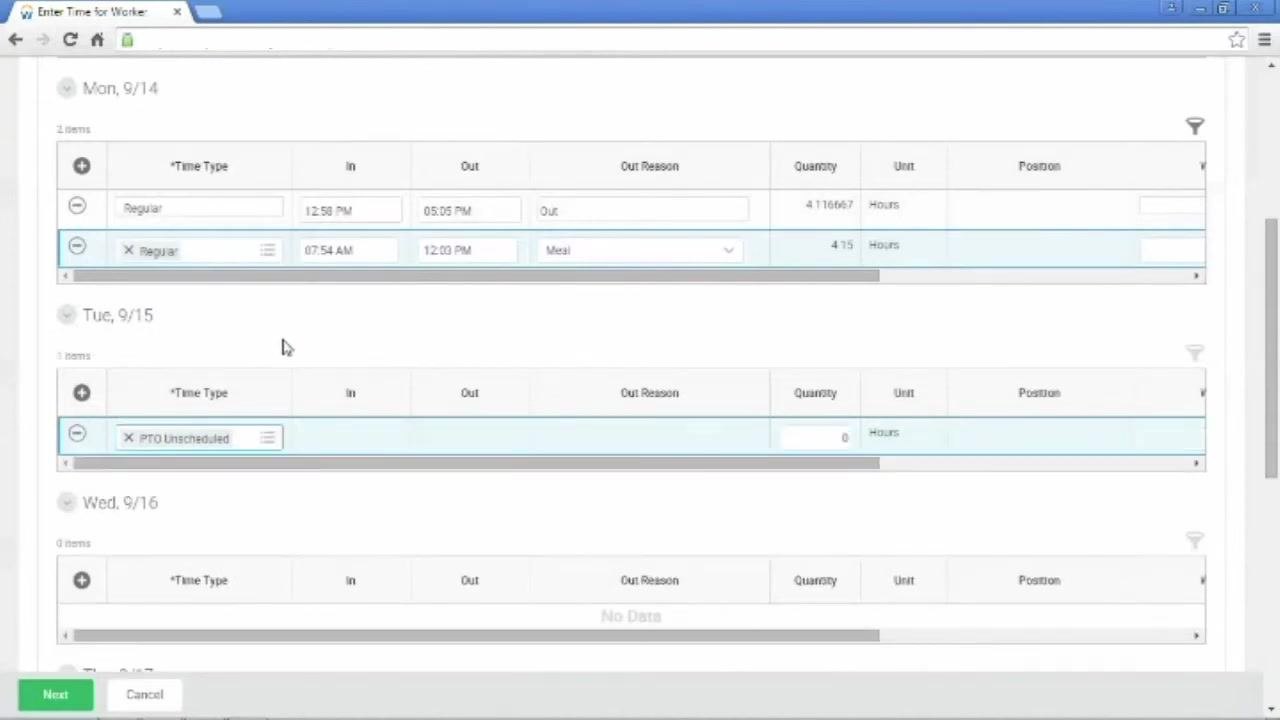
On the same Enter Time screen, click the plus (+) symbol for the day you want to enter time off. In the new row, click the Time Type menu and select the appropriate time off code (for example, "PTO Unscheduled" for a sick day).
Enter the number of hours for time off
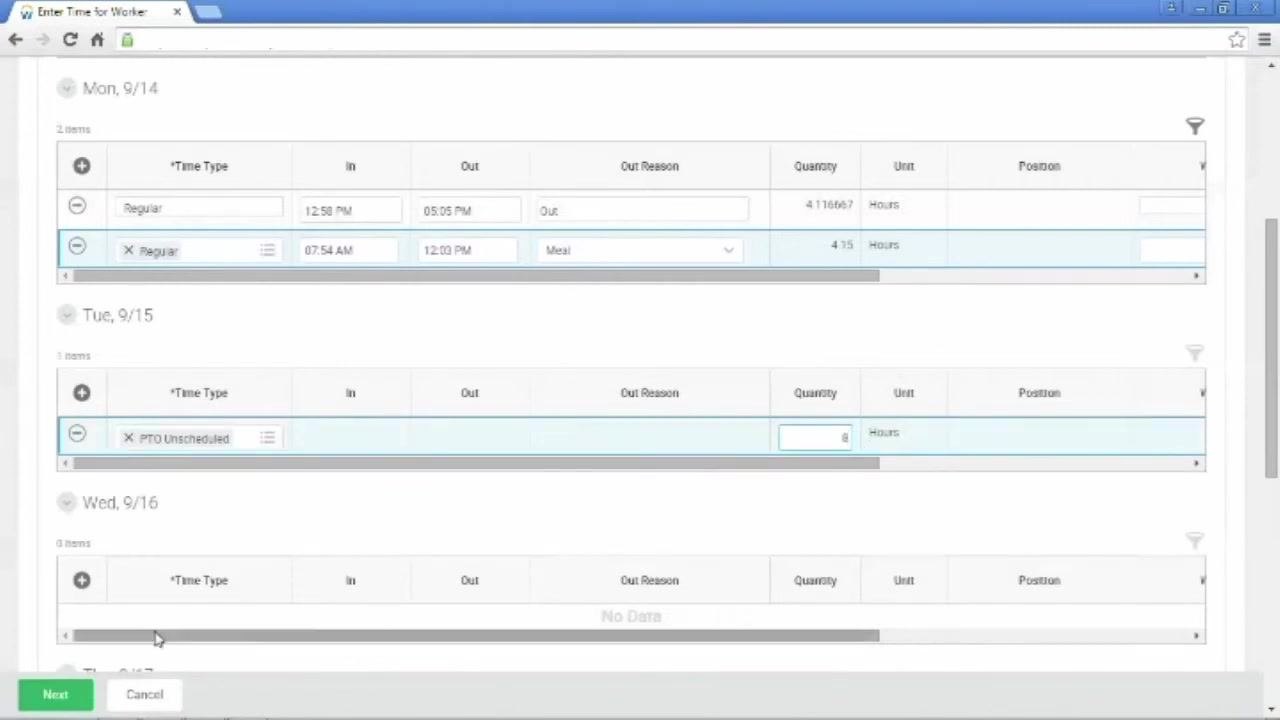
In the Quantity column, enter the number of hours the employee was scheduled to work that day (for example, enter "8" for a full day).
Save your changes
After entering or correcting time, click Next at the bottom left of the screen. Review your entries, then click Save to confirm and store the changes.
Submit the time card for your associate
Once all time entries for the week are complete, submit the time card on behalf of your associate. Return to the Workday homepage, click the My Team worklet, and click the Related Actions icon next to the associate's name. Hover over Time and Leave and select Submit Time from the submenu.
Select the week to submit
On the Submit Time screen, select the week you want to submit for approval, then follow the prompts to complete the submission.
Review weekly totals before submission
Carefully review the totals for the week before submitting. The page displays the date range being submitted (for example, September 13 – September 19, 2015) and total hours for each category:
- Regular Time: 8.266667
- Overtime: 0
- Double Time: 0
- Time Off: 8
- Grand Total: 16.266667
Confirm that all hours worked and time off are accurately recorded, and optionally enter comments in the provided comment box.
Submit and approve the time card
Click the green Submit button at the bottom left of the screen, then press OK if prompted to confirm submission. As a manager, submitting the time card also approves it, so no additional approval step is required.
After submission, you return to the Workday home page, which displays the main worklets, including Dashboards, Inbox, My Team, Time Off, Time, Team Time Off, Pay, Compensation, Performance, Team Performance, Talent, Benefits, Personal Information, and Time Tracking Dashboard.
Summary
You have now completed the process of correcting, entering, and submitting time and time off entries for a direct report in Workday. Each action is accessible from the My Team worklet and the related actions menu, providing a streamlined workflow for time corrections. Remember that approved time off requires a separate adjustment form if changes are needed, and as a manager, your submission serves as the final approval for the time card.
Generation details: cost, quality tiers
Docsie billed 2,000 credits ($1.40) to analyze this 4-minute video at standard quality. The rewrite, template fill and Word/PDF exports were included. The same video at each quality tier:
| Quality | Frames sampled | Credits | Approx. cost |
|---|---|---|---|
| Draft | every 16-30 s | 1,000 | $0.70 |
| Standard (this guide) | every 8-15 s | 2,000 | $1.40 |
| Detailed | every 4-7 s | 4,000 | $2.80 |
| Ultra | every 1-3 s | 8,000 | $5.60 |
Credits priced at $0.70 per 1,000; plans include a monthly allowance. Enterprise customers on on-premise or bring-your-own-model deployments run this on their own inference and pay no per-video credits.
Generated by Docsie Video-to-Docs on 2026-10-02 from a 3-minute video. Screenshots are frames from the source video and belong to their creator, C1 Workday, whose original is embedded above. If you own this video and want the guide removed or credited differently, contact us and we will act within one business day.