
How to Change Your Availability in Workday
This guide shows you how to change your availability in Workday by correcting an absence request through the SUNY Erie Workday Training Tools. Whether your absence has been submitted but not yet approved, or already approved by your supervisor, you can update or cancel it directly from your Absence Calendar. The steps below walk you through both scenarios.
Video: SUNY Erie Absence Change Time in Workday by ECC Distance Learning (2018). All credit for the demonstration goes to the creator; watch the original on YouTube. The written guide below was generated from this video by Docsie. Creator? Request a change or removal.
This guide shows you how to change your availability in Workday by correcting an absence request through the SUNY Erie Workday Training Tools. Whether your absence has been submitted but not yet approved, or already approved by your supervisor, you can update or cancel it directly from your Absence Calendar. The steps below walk you through both scenarios.
Prerequisites
- Access to the SUNY Erie Workday Training Tools portal.
- Valid login credentials for your Workday dashboard.
- An existing absence request (submitted or approved) that you need to correct.
Accessing the absence worklet
- Open the Workday Training Tools portal. Begin at the SUNY Erie Workday Training Tools welcome screen and confirm you are on the correct training portal for the State University of New York at Erie.

-
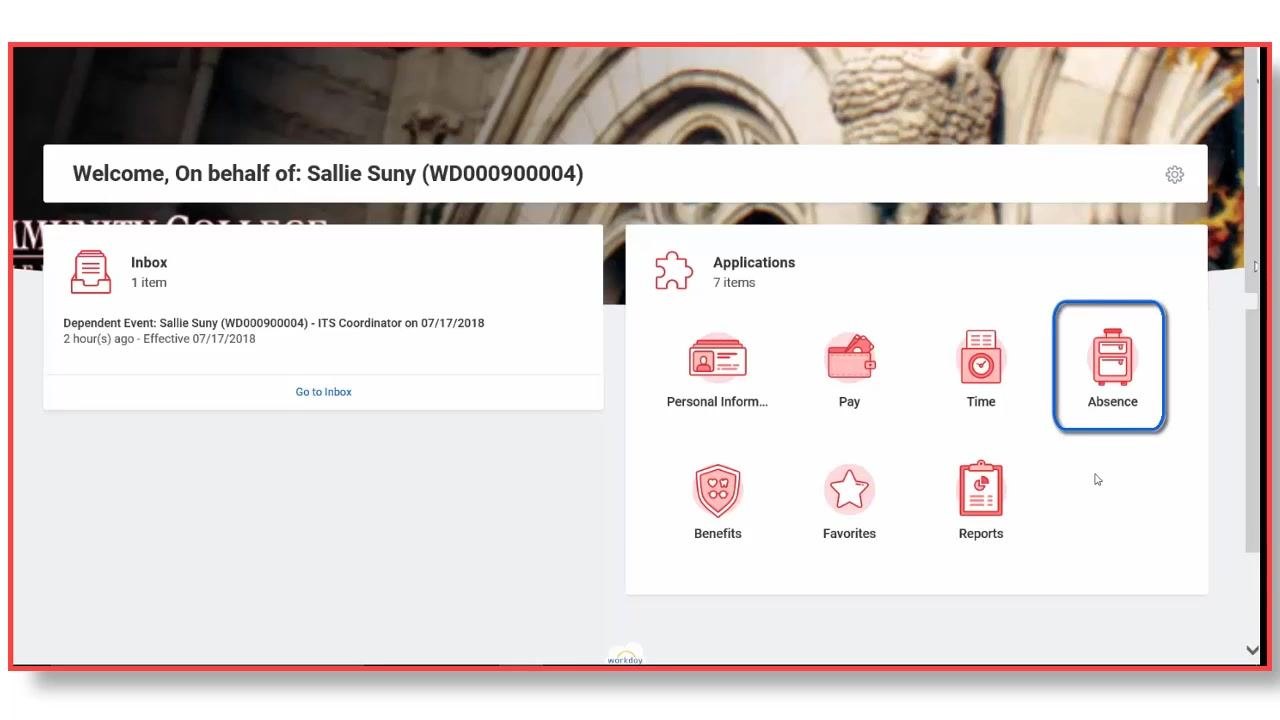
Go to your main Workday dashboard. Log in to Workday and confirm you are on your main dashboard, where you'll see a greeting such as "Welcome, On behalf of: Sallie Suny (WD0009000004)." Locate the Applications section, which includes icons for Personal Information, Pay, Time, Absence, Benefits, Favorites, and Reports.
-
Open the Absence worklet. In the Applications section, click the Absence icon, shown as a suitcase or briefcase, to open the Absence management area.
Correcting a submitted but unapproved absence
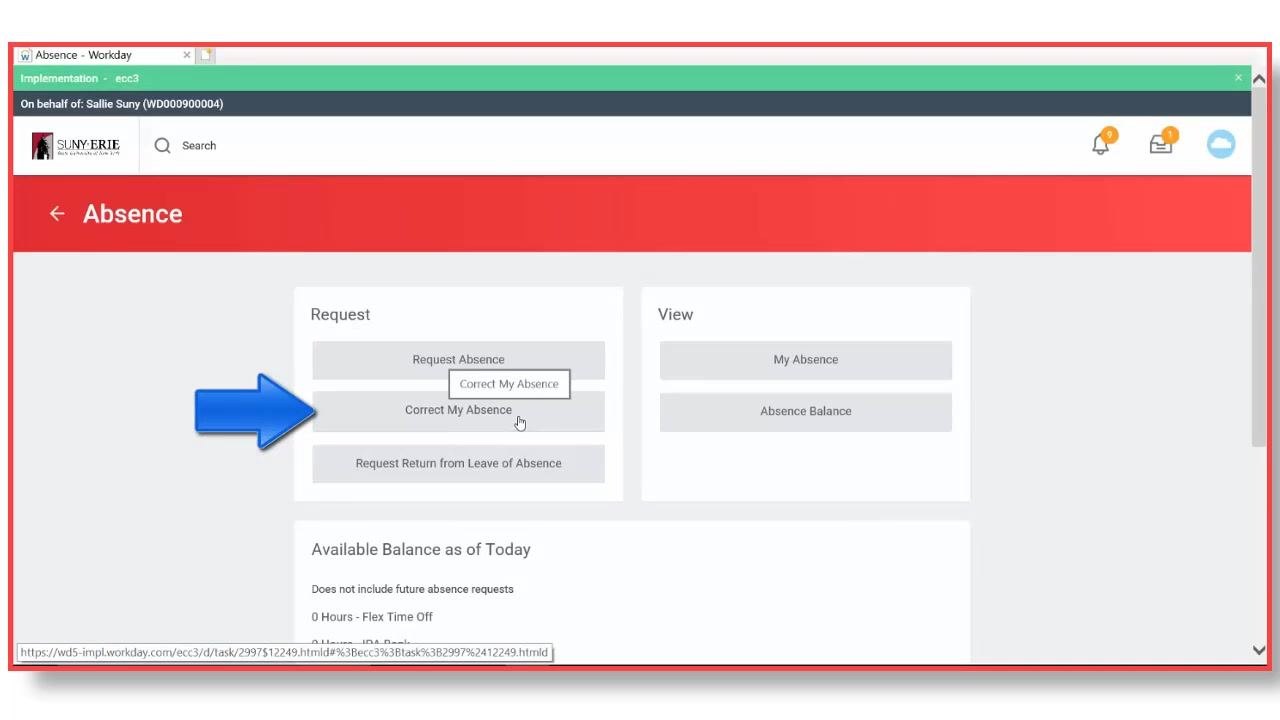
- Select Correct My Absence. In the Absence worklet, find the Request section and click Correct My Absence. This lets you view and modify previously submitted absence requests.
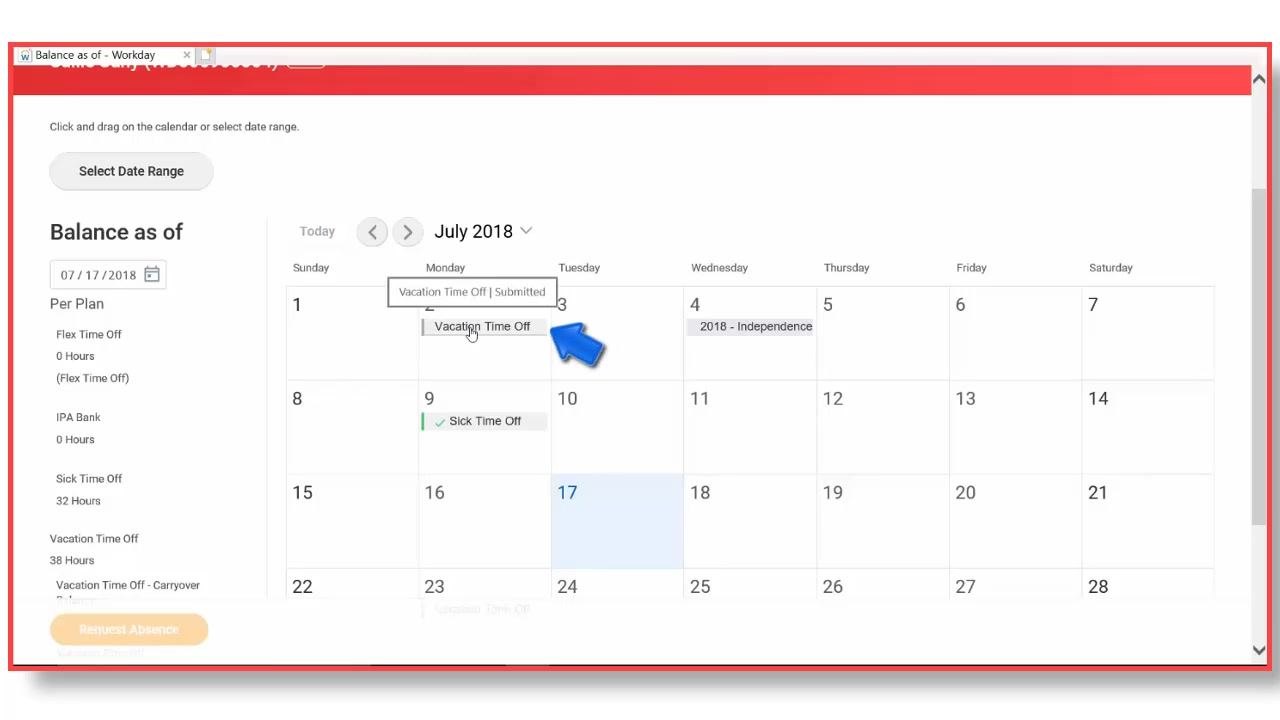
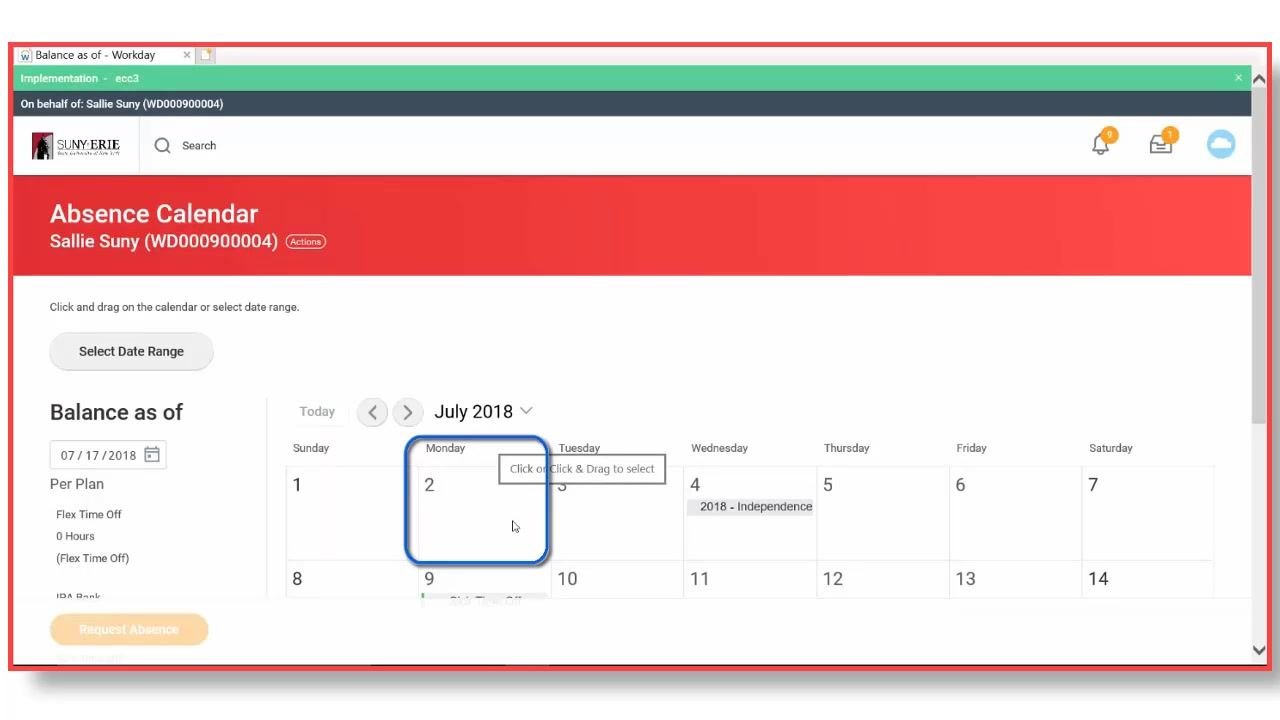
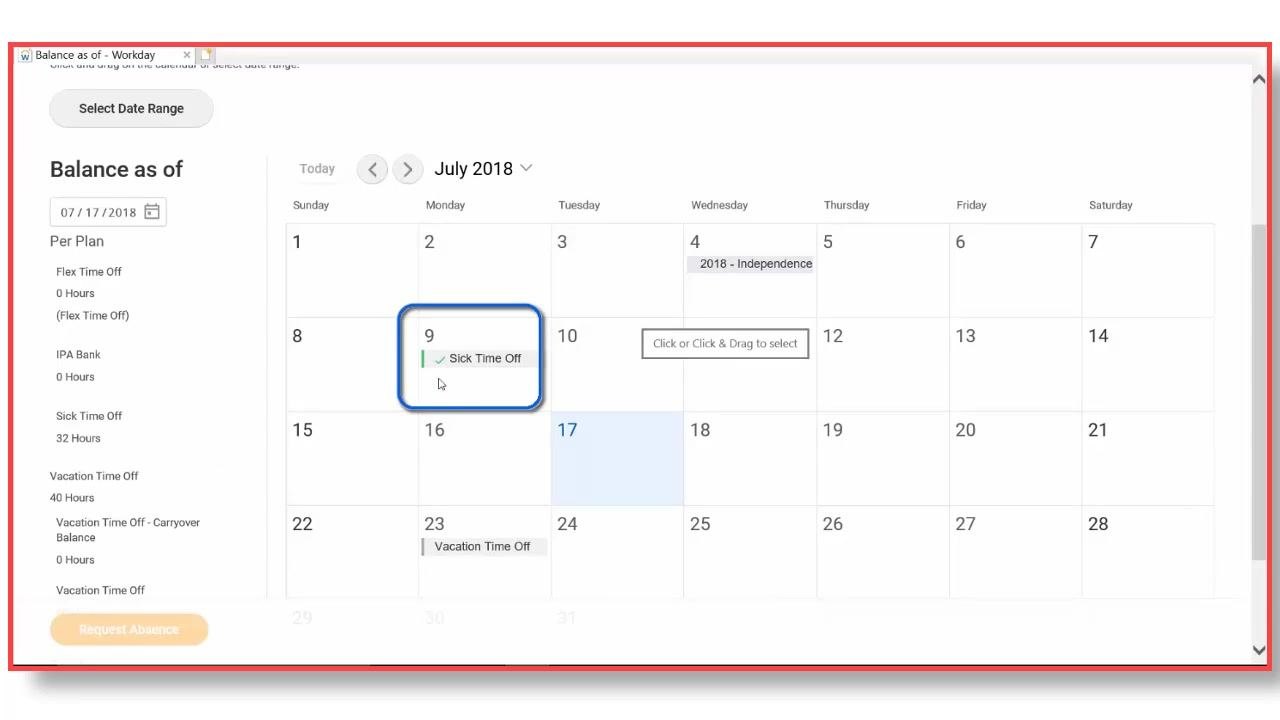
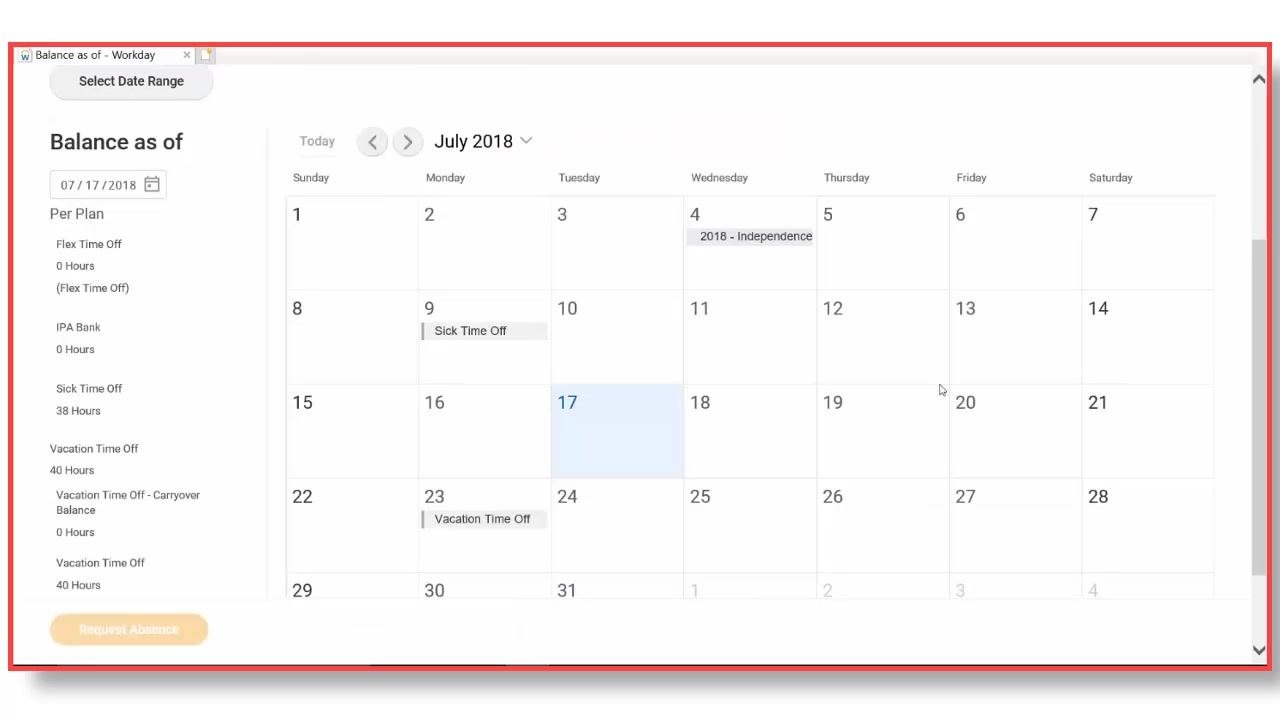
- Review your Absence Calendar. The Absence Calendar displays all your submitted absences. For example, "Vacation Time Off" on July 2nd appears with a gray bar, indicating it has been submitted but not yet approved by your supervisor. Approved absences, such as "Sick Time Off" on July 9th, display with a green bar and a check mark.
Keep these status indicators in mind as you review your calendar: - A gray bar means the absence is submitted but not approved. - A green bar with a check mark means the absence is submitted and approved.
The correction process differs depending on which status applies.
- Select the absence you want to correct. Click the absence entry you need to change, such as "Vacation Time Off" on July 2nd. A tooltip may appear confirming its status, for example "Vacation Time Off | Submitted."
-
Cancel the absence request. After selecting the absence, choose the option to cancel the request, then click Submit to proceed with the cancellation.
-
Enter a required comment. When prompted, type a comment explaining the cancellation, for example "do not need," then submit the comment to finalize the cancellation.
-
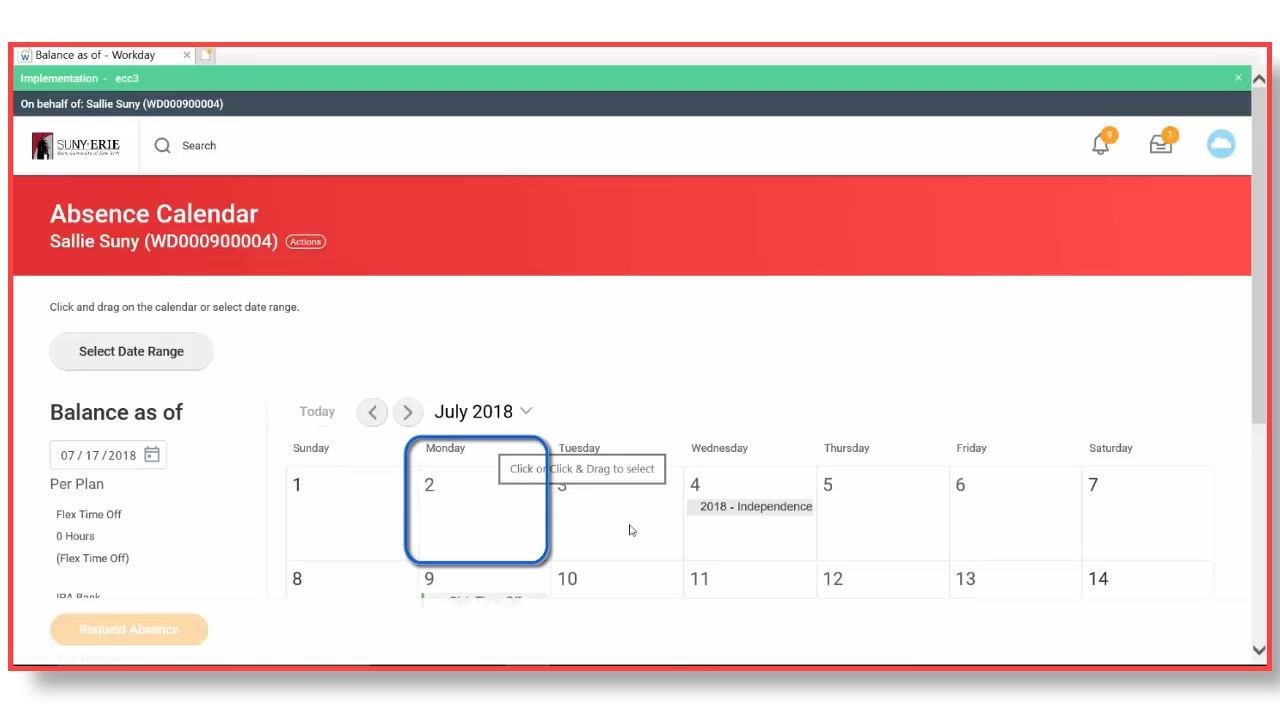
Verify the absence is removed. Check your calendar to confirm the absence, such as the July 2nd entry, no longer appears. The date should now be empty, confirming the absence has been successfully canceled.
Correcting an approved absence
- Identify the approved absence. On your Absence Calendar, locate the entry with a green bar and check mark, such as "Sick Time Off" on July 9th. This green bar confirms the absence has already been approved by your supervisor.
-
Select the approved absence to correct. Click the approved entry, for example "Sick Time Off" on July 9th, to open the Correct Absence window, where you can make changes or cancel the request.
-
Choose your correction action. At the bottom of the Correct Absence window, you have two options:
- Cancel the absence if you no longer need it.
- Edit the absence details if you need to change the hours or other information.
-
Edit the absence details. To change the number of hours, update the Quantity per Day field. For example, change the value from 8 to 2 to reflect taking only 2 hours of sick leave instead of 8.
- Enter the required comments. In the Comment field, enter the specific hours or reason for the change, for example "8 a.m. to 10 a.m." to indicate the new time range. If you have supporting documents, use the attachment section to upload files, and add any additional comments as needed.
-
Submit the correction. Once all changes and comments are entered, click Submit to finalize your correction.
-
Verify the correction status. Return to your Absence Calendar. The corrected absence, such as the July 9th entry, now displays with a gray bar, indicating it is pending supervisor approval again.

- Confirm completion. You have successfully submitted a correction for an approved absence. The request is now routed back to your supervisor for review and approval.
Summary
You now know how to change your availability in Workday by correcting an absence request. For an absence that is submitted but not yet approved, select it on your calendar, cancel it, and provide a comment. For an absence that has already been approved, select it, edit the hours or cancel it, add a required comment, and submit the correction. Always check the status of your absence before proceeding, since corrections to approved absences will revert to a pending state and require supervisor approval again.
What's next
Once your correction is submitted, monitor your Absence Calendar to confirm your supervisor has reviewed and approved the updated request.
Generation details: cost, quality tiers
Docsie billed 1,500 credits ($1.05) to analyze this 3-minute video at standard quality. The rewrite, template fill and Word/PDF exports were included. The same video at each quality tier:
| Quality | Frames sampled | Credits | Approx. cost |
|---|---|---|---|
| Draft | every 16-30 s | 750 | $0.52 |
| Standard (this guide) | every 8-15 s | 1,500 | $1.05 |
| Detailed | every 4-7 s | 3,000 | $2.10 |
| Ultra | every 1-3 s | 6,000 | $4.20 |
Credits priced at $0.70 per 1,000; plans include a monthly allowance. Enterprise customers on on-premise or bring-your-own-model deployments run this on their own inference and pay no per-video credits.
Generated by Docsie Video-to-Docs on 2026-10-02 from a 2-minute video. Screenshots are frames from the source video and belong to their creator, ECC Distance Learning, whose original is embedded above. If you own this video and want the guide removed or credited differently, contact us and we will act within one business day.