
How to Move Files in SharePoint
This guide explains how to move files in SharePoint, whether within the same library, between libraries on the same site, or across different sites. It also covers how to copy files between sites and how to manage sharing permissions during these operations.
Video: Microsoft SharePoint | How to Move and Copy Files by Collaboration Coach (2022). All credit for the demonstration goes to the creator; watch the original on YouTube. The written guide below was generated from this video by Docsie. Creator? Request a change or removal.
This guide explains how to move files in SharePoint, whether within the same library, between libraries on the same site, or across different sites. It also covers how to copy files between sites and how to manage sharing permissions during these operations.
Prerequisites
- Access to a SharePoint site with at least one document library (e.g., Documents).
- Permission to move, copy, and manage sharing for files within the relevant libraries and sites.
Overview
You can move or copy a file in SharePoint in three ways:
- Within a library
- Within a site
- To another site
Always check for the progress indicator or confirmation message after each action to ensure it has completed successfully.
Moving a file within the same library
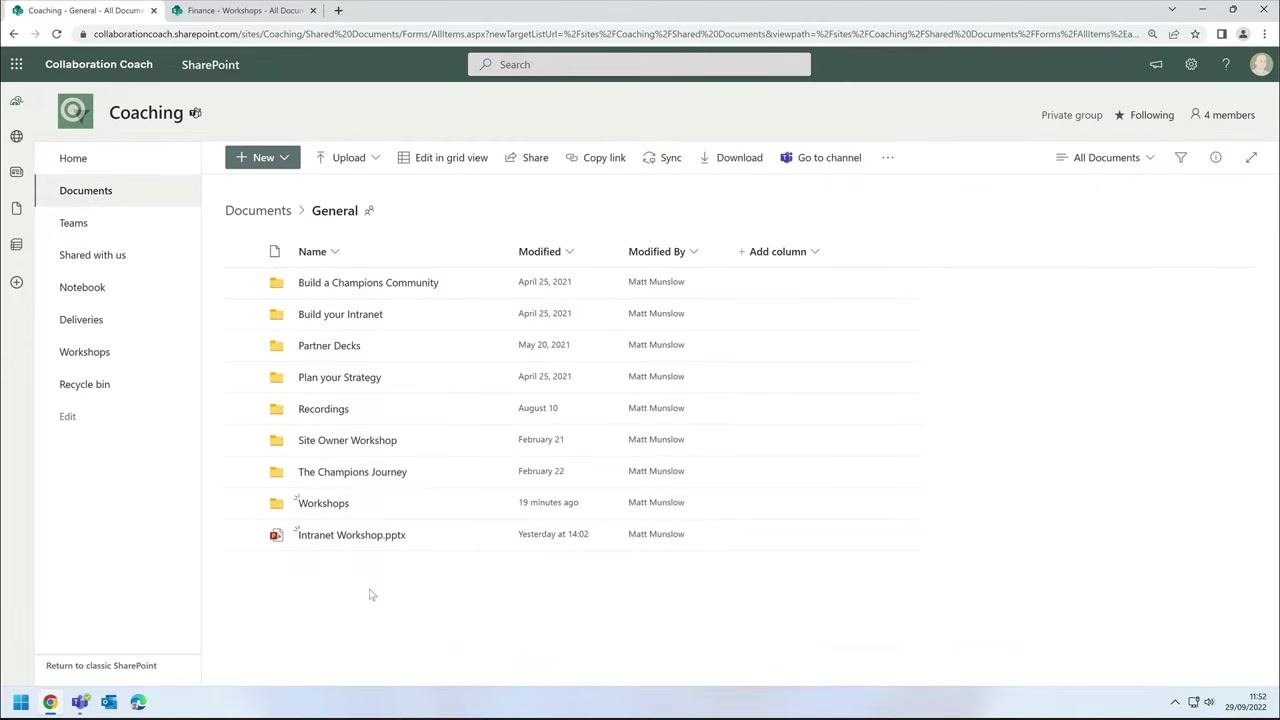
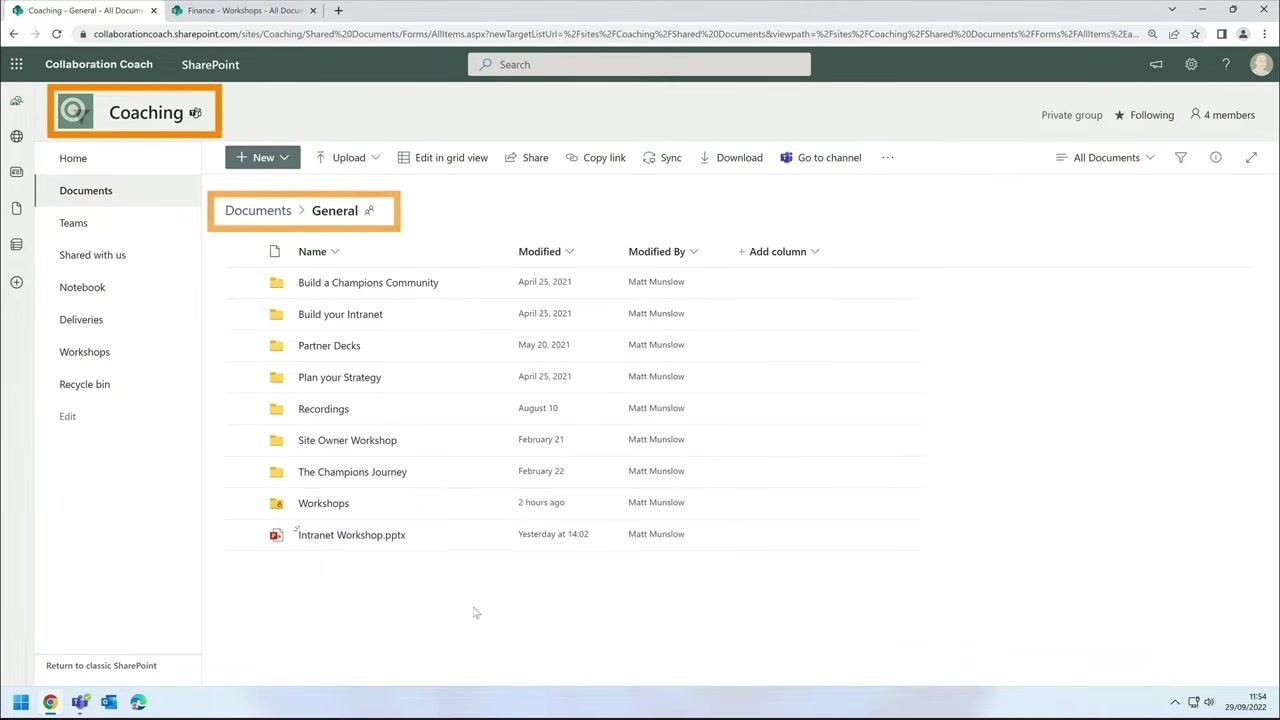
- Navigate to your SharePoint site. In this example, go to the Coaching site.
-
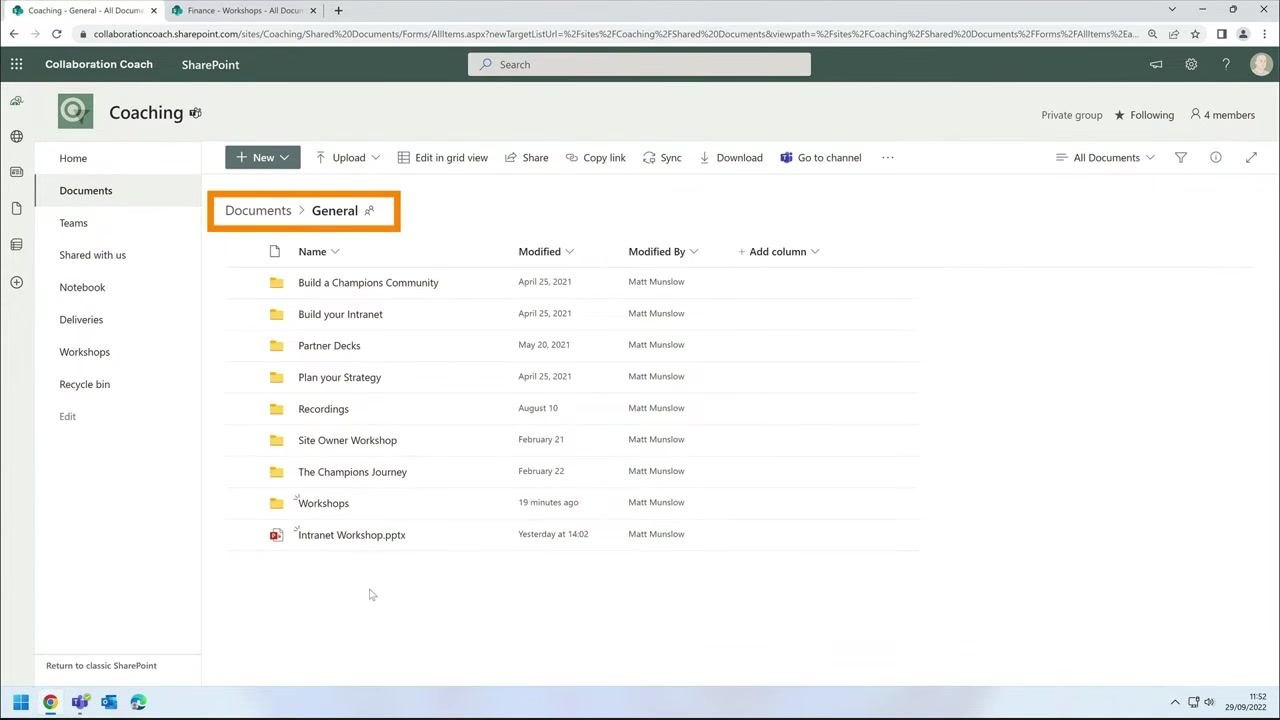
Open the Documents library and select the General folder.
-
Identify the file you want to move. In this example, select Intranet Workshop.pptx.
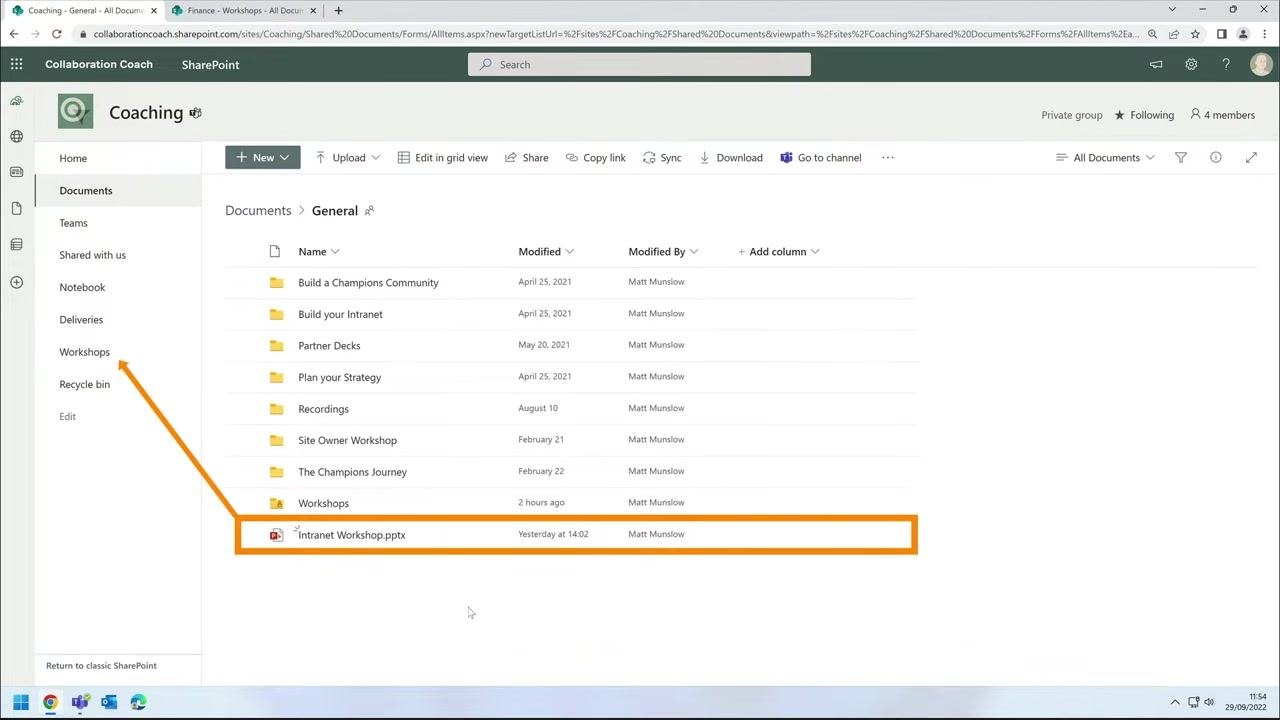
- Decide on the destination folder within the same library. Here, the destination is the Workshops folder.
- Click and drag Intranet Workshop.pptx and drop it onto the Workshops folder.
- Wait for the progress indicator to appear in the top right corner, confirming the move is in progress.
- Open the Workshops folder to verify that Intranet Workshop.pptx is now inside.
Moving a file to another library on the same site
- Return to the General folder in the Documents library of the Coaching site.
- Locate the file to move, Intranet Workshop.pptx.
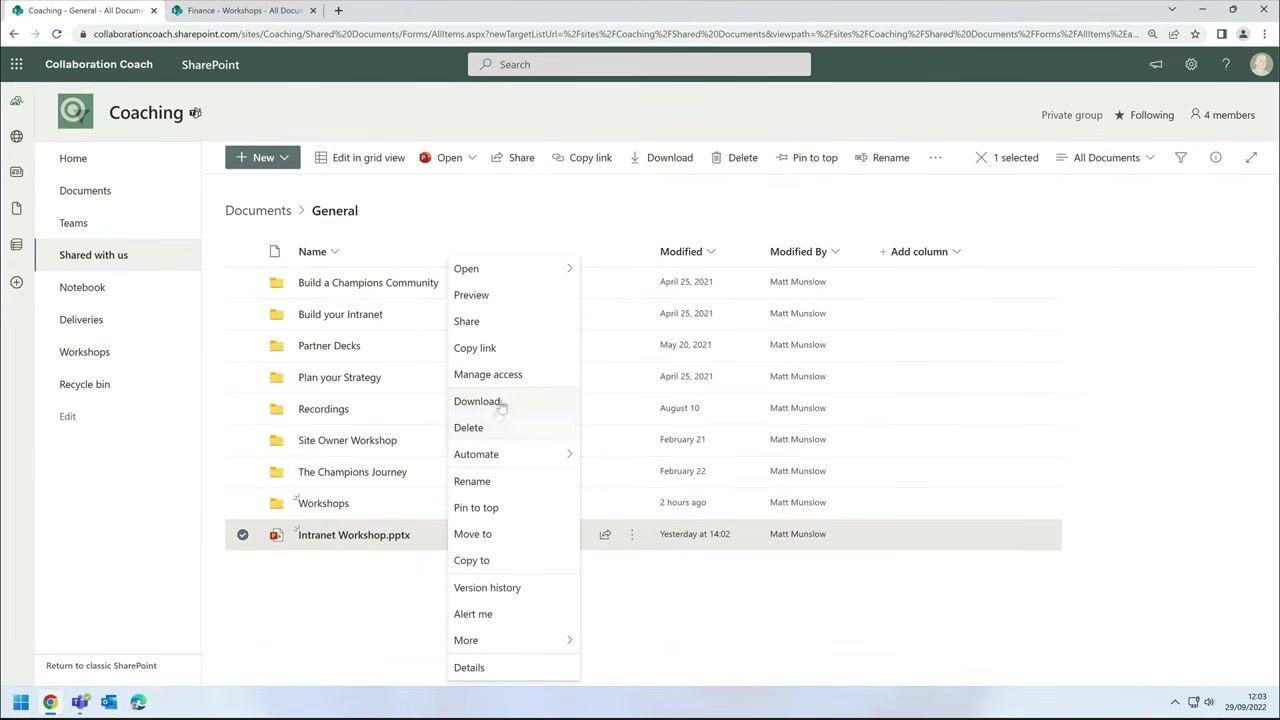
- Right-click Intranet Workshop.pptx to open the context menu.
-
Select Move to from the menu.
-
In the Move dialog, check your current location in the breadcrumb at the top. It should show Coaching > Documents > General.
- Click Coaching in the breadcrumb to navigate up.
- Select the Workshops library as the destination.
- Click Move here to complete the move.
- Wait for the confirmation message in the top right corner indicating the file has been moved.
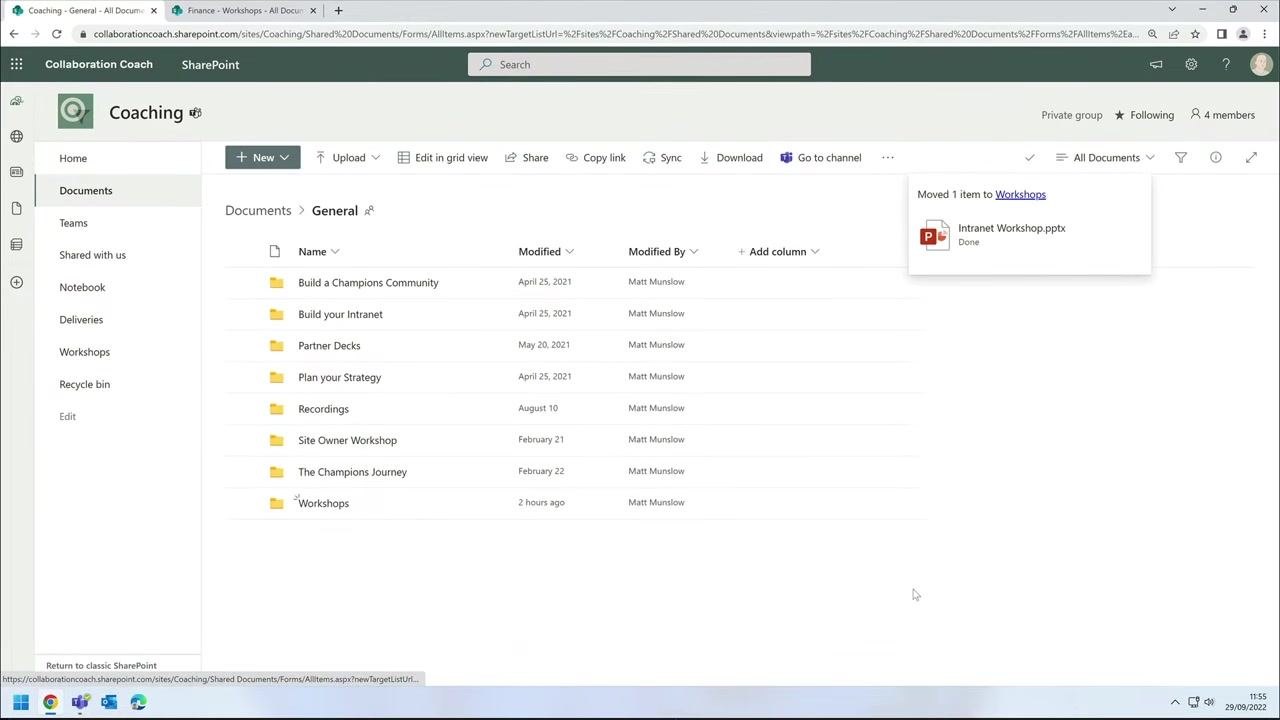
- Optionally, open the Workshops library to verify the file is present.
Moving a file to another site
This scenario shows how to move a file from one SharePoint site to another—for example, from the Coaching site to the Finance site—while optionally preserving sharing permissions.
- Locate the file you want to move in your current site. In this example, select Intranet Workshop.pptx in the General folder of the Coaching site.
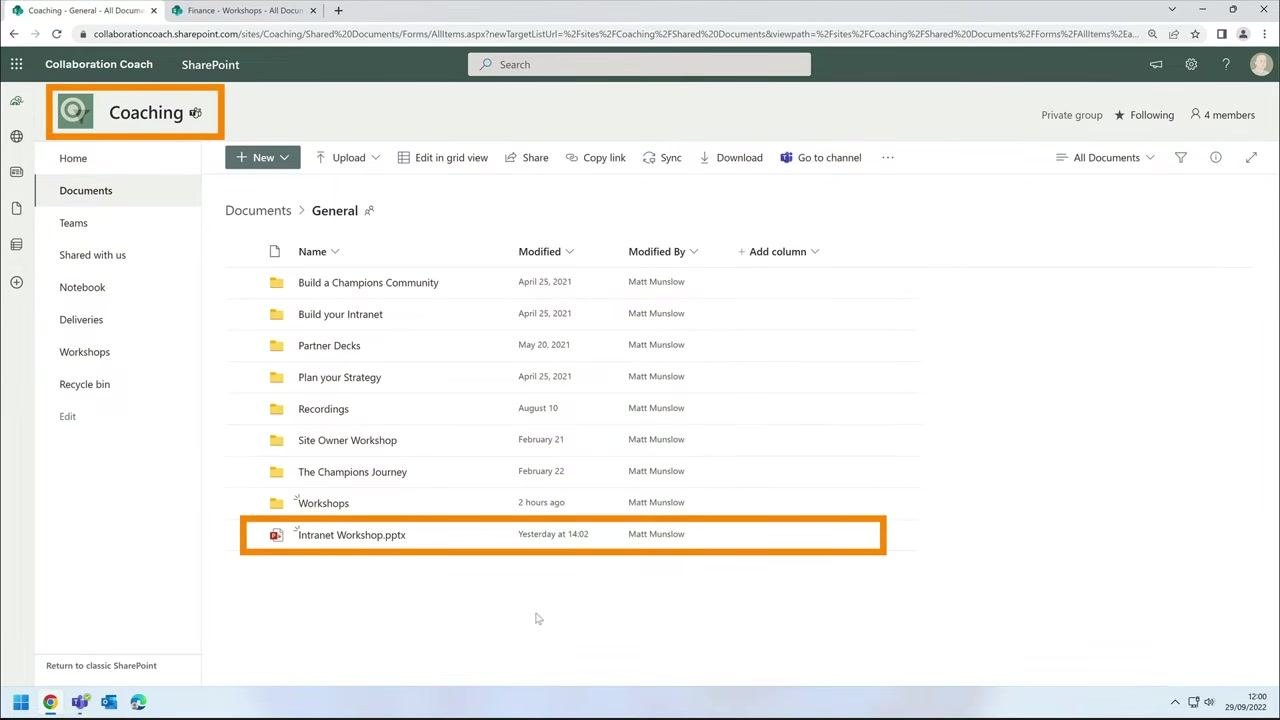
- Right-click Intranet Workshop.pptx to open the context menu.
- Select Move to from the context menu.
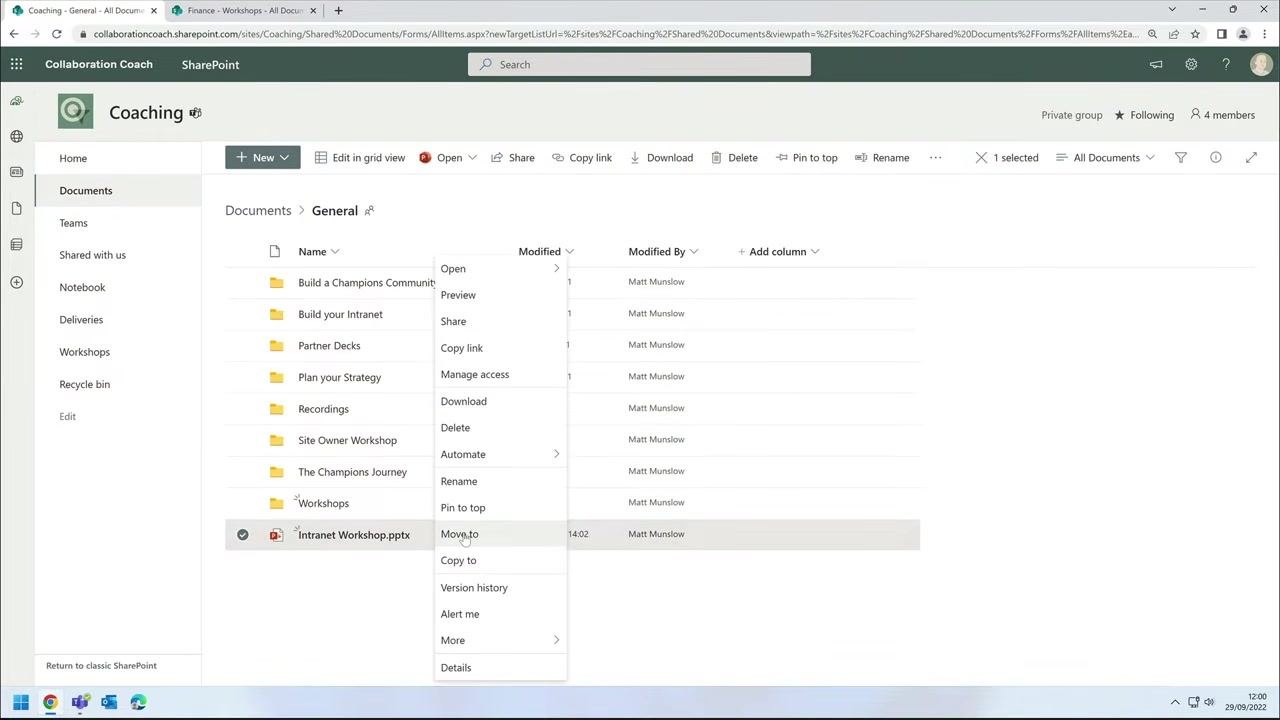
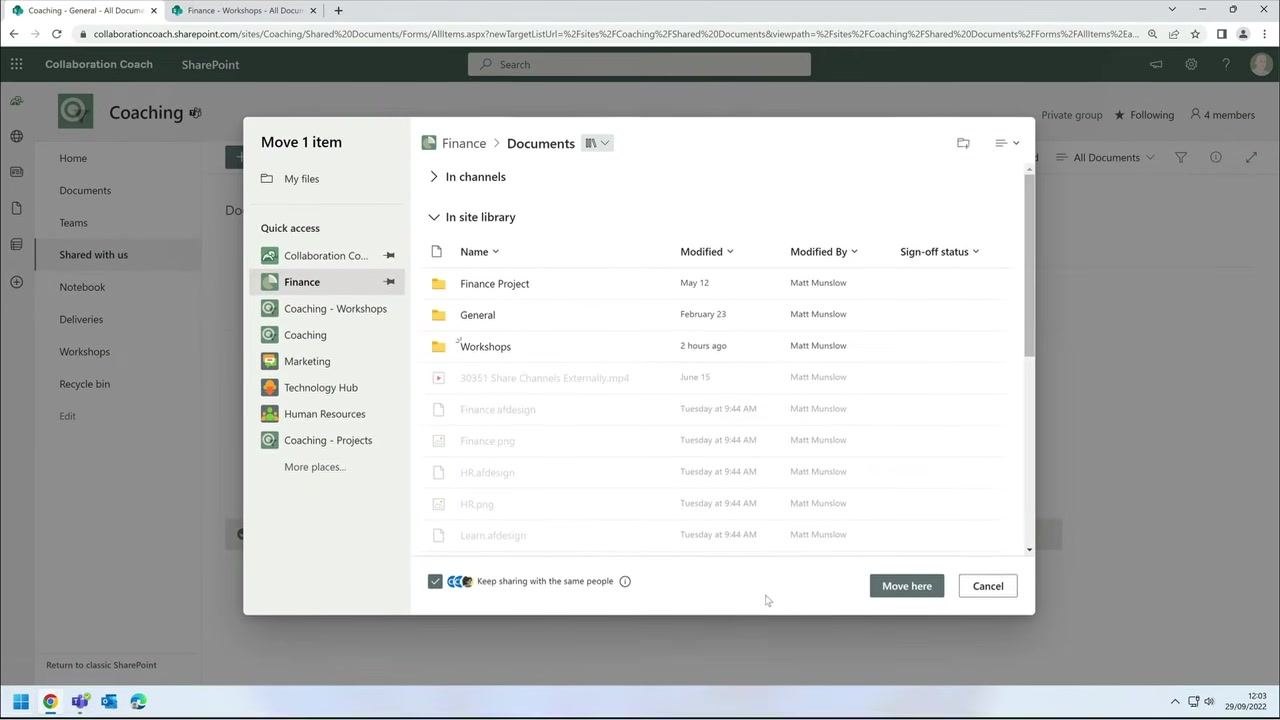
- In the Move Item dialog, use the Quick access panel on the left to select the destination site. In this example, click Finance.
You can pin your favorite sites to this panel for quick access, as shown here with the Finance site.
- In the destination site (Finance), navigate to the desired folder, such as Workshops, where you want to move the file.
- Click Move here to initiate the move.
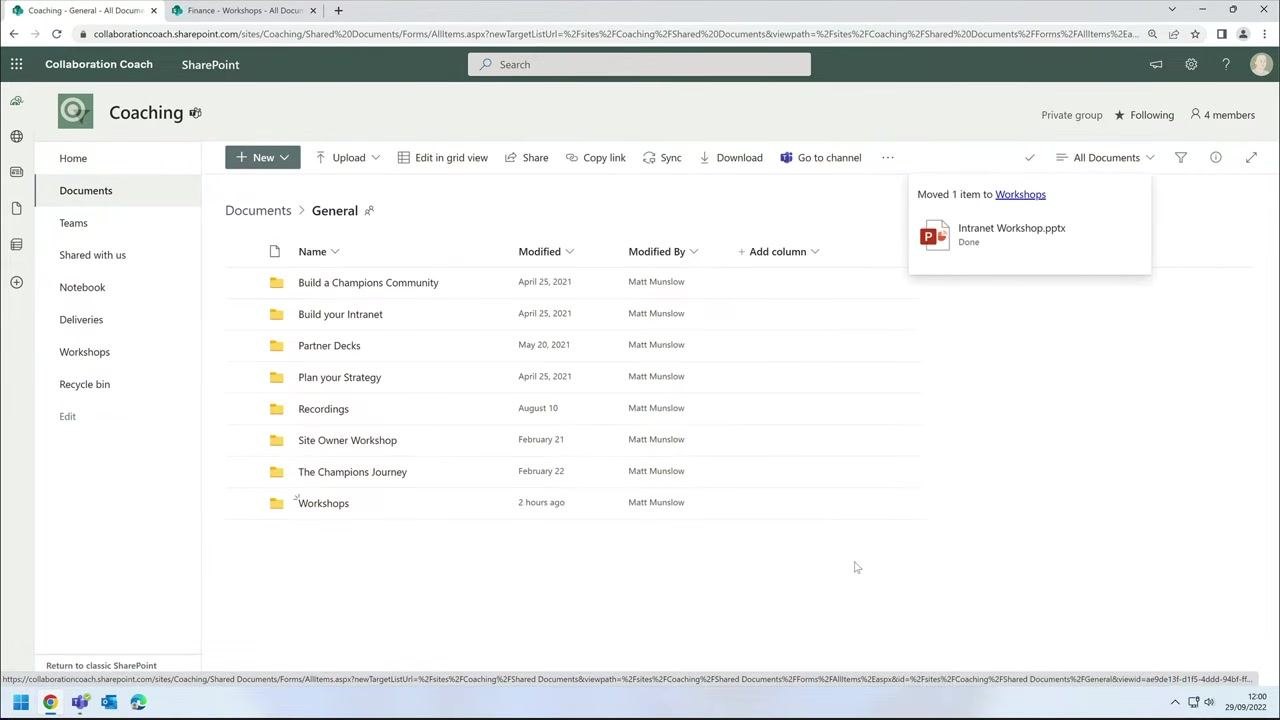
- Wait for the progress indicator or confirmation message in the top right corner, confirming the move is complete.
Checking sharing permissions after a move
When you move a file between sites, existing sharing permissions are not retained by default. For example, if the file was shared with a user named Sarah, she will lose access after the move.
To check current sharing, right-click the file, select Manage access, and review the list of people with access.
Keeping the same sharing permissions during a move
When using the Move to dialog to move a file between sites, look for a checkbox at the bottom labeled Keep sharing with the same people. Select this checkbox before completing the move to ensure all existing sharing permissions are preserved.
Copying a file to another site
Copying a file between sites uses the same interface and options as moving a file. This example copies Intranet Workshop.pptx from the Coaching site to the Finance site.
- Locate the file you want to copy in your current site. In this example, select Intranet Workshop.pptx in the General folder of the Coaching site.
- Right-click Intranet Workshop.pptx to open the context menu.
- Select Copy to from the context menu.
- In the Copy Item dialog, use the Quick access panel on the left to select the destination site. For example, click Finance.
- In the destination site (Finance), navigate to the desired folder, such as Workshops, where you want to copy the file.
- At the bottom of the dialog, select the Keep sharing with the same people checkbox if you want to preserve existing sharing permissions. For example, if the file was shared with Sarah, she will retain access after the copy.
- Click Copy here to initiate the copy.
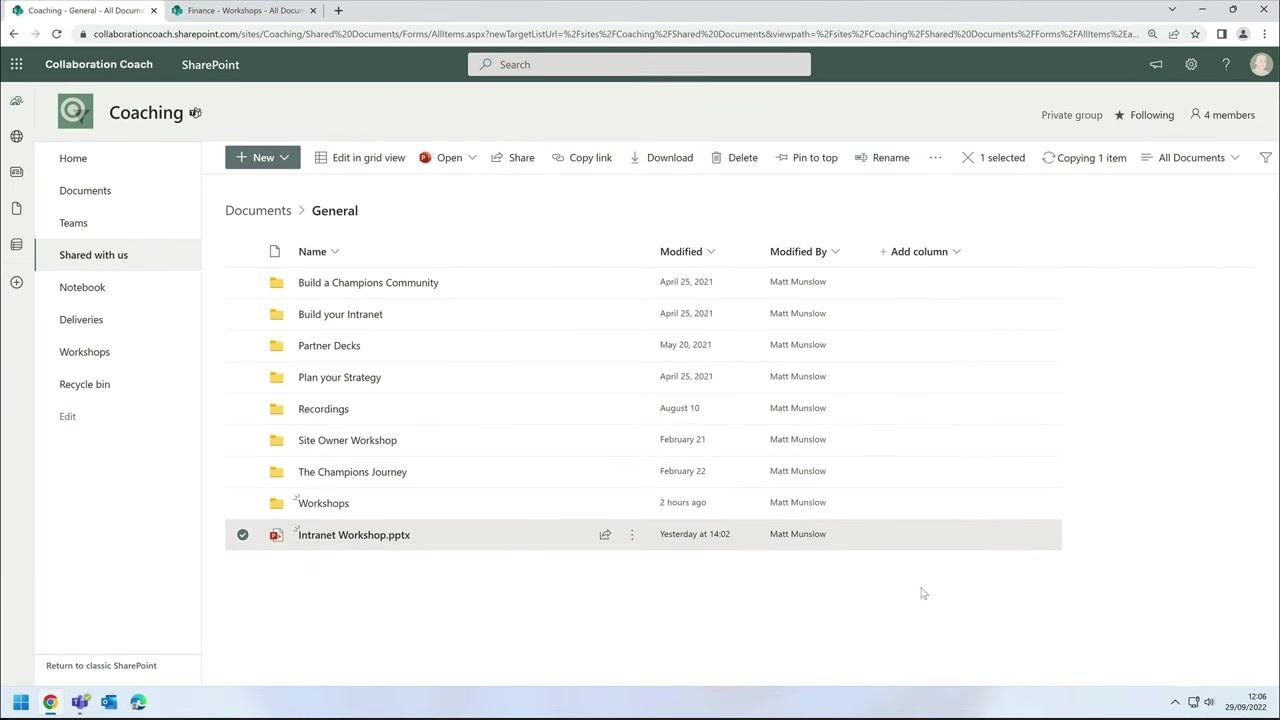
- Wait for the progress indicator or confirmation message confirming the copy is complete.
- Verify the file appears in the destination folder (for example, Workshops in the Finance site) and that sharing permissions are retained.
Summary
You now know several ways to move files in SharePoint: within a library, between libraries on the same site, and across different sites. You've also seen how to copy files between sites using the same Quick access panel and breadcrumb navigation.
Key points to remember:
- Always check the progress indicator or confirmation message to confirm an action is complete.
- Moving a file between sites does not retain existing sharing permissions by default.
- Select Keep sharing with the same people during a move or copy if you want collaborators to retain access.
- The steps for copying a file are nearly identical to those for moving a file.
Generation details: cost, quality tiers
Docsie billed 2,500 credits ($1.75) to analyze this 5-minute video at standard quality. The rewrite, template fill and Word/PDF exports were included. The same video at each quality tier:
| Quality | Frames sampled | Credits | Approx. cost |
|---|---|---|---|
| Draft | every 16-30 s | 1,250 | $0.88 |
| Standard (this guide) | every 8-15 s | 2,500 | $1.75 |
| Detailed | every 4-7 s | 5,000 | $3.50 |
| Ultra | every 1-3 s | 10,000 | $7.00 |
Credits priced at $0.70 per 1,000; plans include a monthly allowance. Enterprise customers on on-premise or bring-your-own-model deployments run this on their own inference and pay no per-video credits.
Generated by Docsie Video-to-Docs on 2026-09-28 from a 4-minute video. Screenshots are frames from the source video and belong to their creator, Collaboration Coach, whose original is embedded above. If you own this video and want the guide removed or credited differently, contact us and we will act within one business day.