
How to Add SharePoint to File Explorer
SharePoint Online is commonly used for document sharing, but managing files directly in a browser can be tedious and often requires many clicks. This guide shows you how to add SharePoint to File Explorer so you can manage your SharePoint Online files directly from your desktop instead of navigating through the browser every time.
Video: Adding Sharepoint Online to Windows 10 File Explorer by StormWind Studios (2020). All credit for the demonstration goes to the creator; watch the original on YouTube. The written guide below was generated from this video by Docsie. Creator? Request a change or removal.
SharePoint Online is commonly used for document sharing, but managing files directly in a browser can be tedious and often requires many clicks. This guide shows you how to add SharePoint to File Explorer so you can manage your SharePoint Online files directly from your desktop instead of navigating through the browser every time.
Prerequisites
- Internet Explorer 11 (or any available version of Internet Explorer)
- The URL for your SharePoint Online site
- Access to your computer's File Explorer
Open your SharePoint site in Internet Explorer
Open Internet Explorer 11 (or any available version of Internet Explorer) and navigate to your SharePoint Online site by copying and pasting the SharePoint link into the browser's address bar.
If a pop-up appears asking whether you want to trust the site, click Yes to trust it. If you've already trusted the site, or if the pop-up doesn't appear, you can check the trust status manually in a later step.
Check the trust settings manually
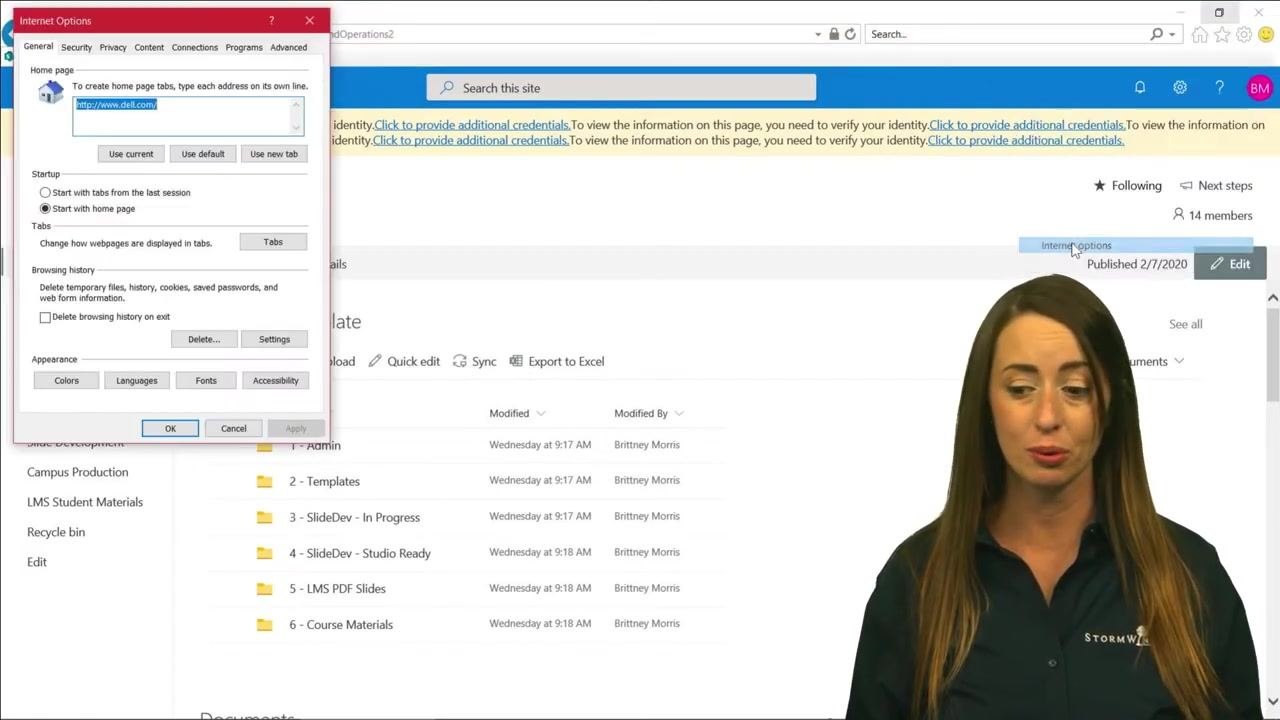
To manually check or adjust trust settings, go to the toolbar in the top right-hand corner of Internet Explorer and click Internet Options.
Open the security settings
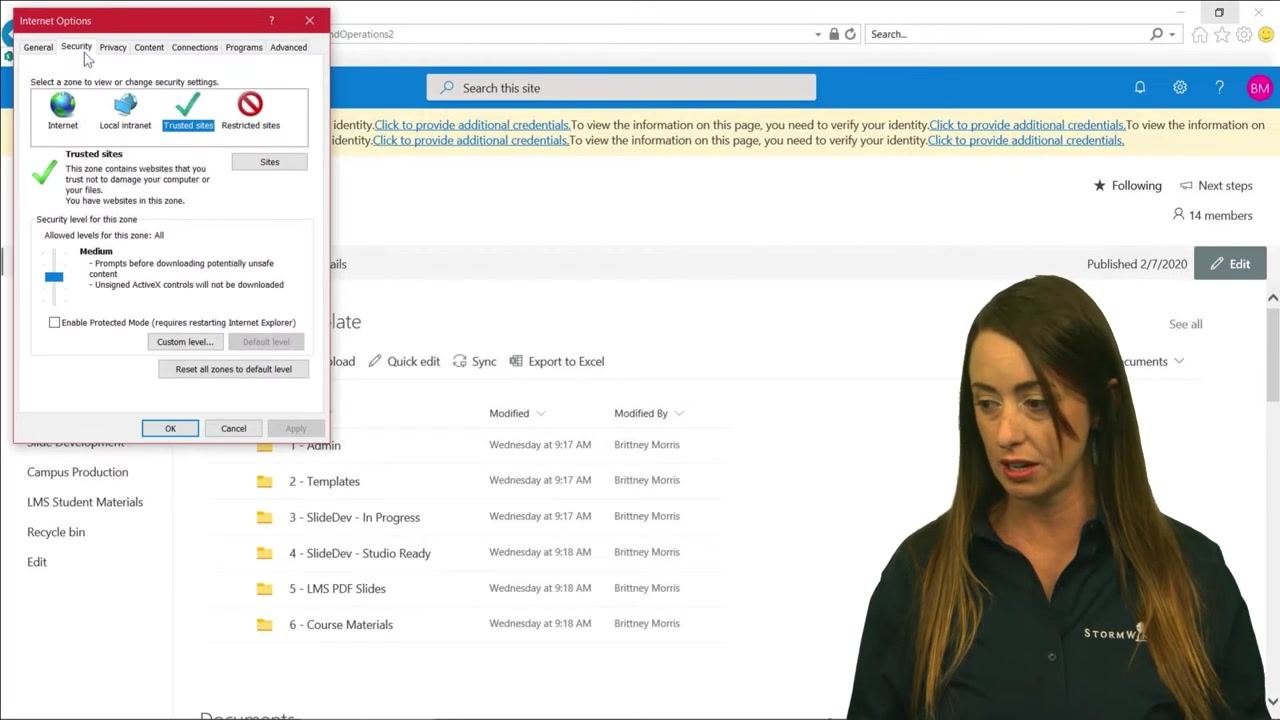
In the Internet Options dialog, go to the Security tab. Ensure Trusted sites is selected — it should be highlighted automatically — then click the Sites button to open the Trusted sites window.
Add your SharePoint site as a trusted site
In the Trusted sites window, paste your SharePoint site URL into the field labeled Add this website to the zone and click Add to include it in the trusted sites list. Confirm that your SharePoint site now appears in the list of trusted websites.
Uncheck the box labeled Require server verification (https:) for all sites in this zone. This step is required for the SharePoint site to appear in File Explorer.
Click Close to exit the Trusted sites window, then click OK to close the Internet Options dialog.
Open File Explorer
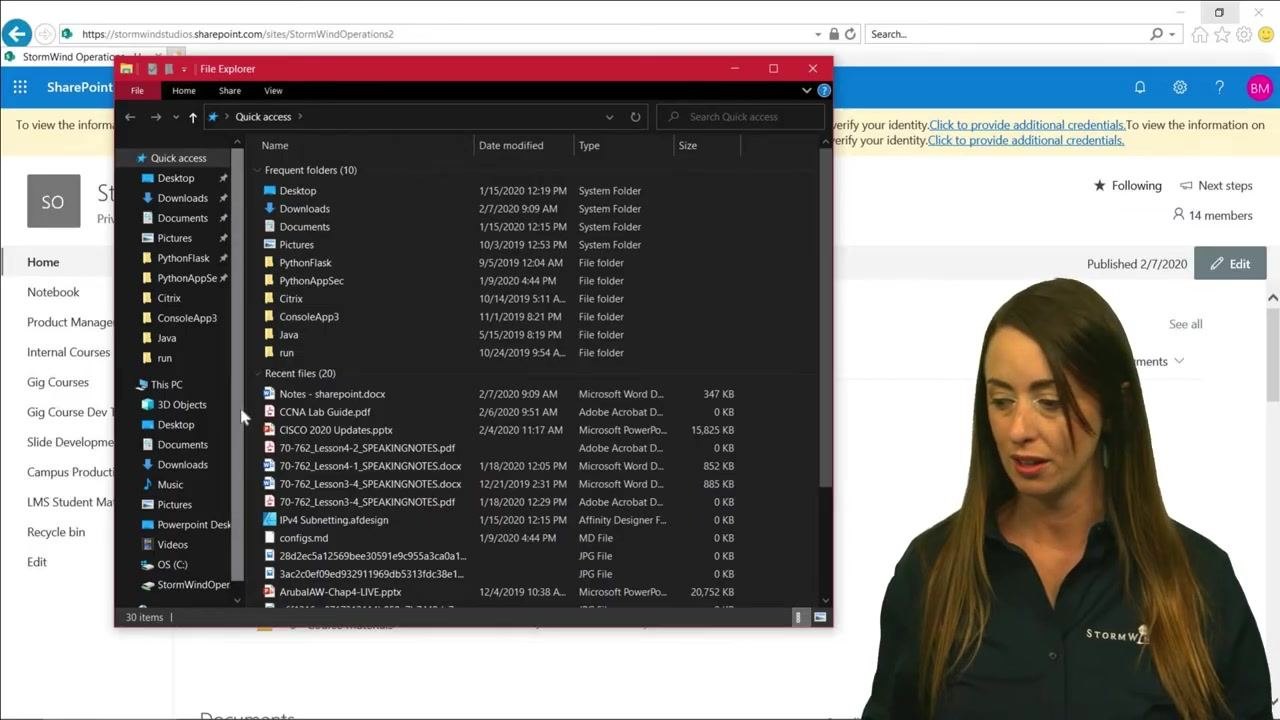
Open File Explorer on your computer.
In File Explorer, click on This PC in the left navigation pane, then click the Computer tab at the top and select Map network drive.
Map your SharePoint site as a network drive
In the Map Network Drive dialog:
- Choose a drive letter where you want your SharePoint link to appear (for example, Y:).
- Paste your SharePoint site link into the Folder field.
- Optionally, check Reconnect at sign-in if you want the drive to reconnect automatically.
- Click Finish to complete the mapping.
Access your SharePoint drive in File Explorer
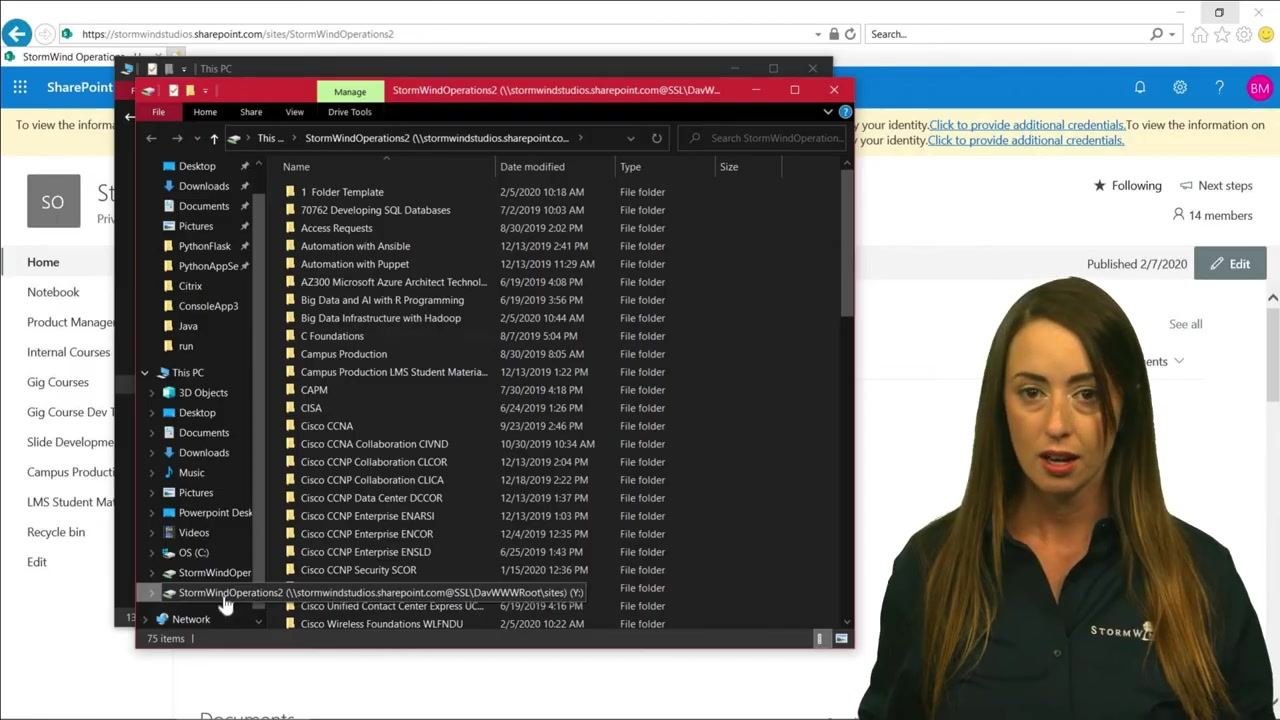
Once the mapping is finished, your SharePoint site appears as a network location under This PC in File Explorer. Click on the mapped SharePoint drive to view all document libraries and folders available in your SharePoint site.
Interact with your SharePoint files
You can now interact with your SharePoint files and folders directly from File Explorer. Click on any folder to open it, and save, edit, or manage multiple versions of documents as needed.
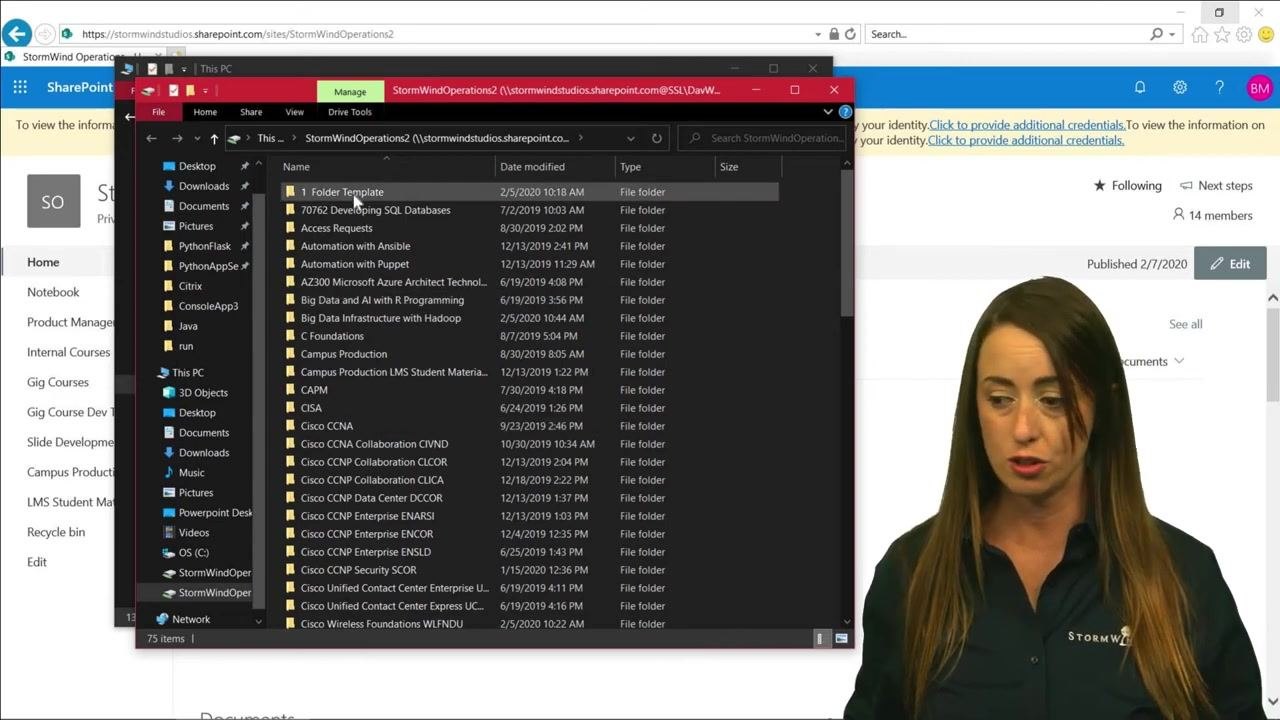
Syncing and collaborating on SharePoint files
Any changes you make within the mapped SharePoint folder — such as creating, renaming, moving, or deleting files and folders — automatically sync to your SharePoint Online site. All team members with access to the SharePoint site can see and collaborate on these files in real time.
For example, a folder named "1 - Admin" in the mapped drive might contain a file called "Document.docx," a Microsoft Word Document. The SharePoint site visible in the background confirms the connection between File Explorer and SharePoint Online.
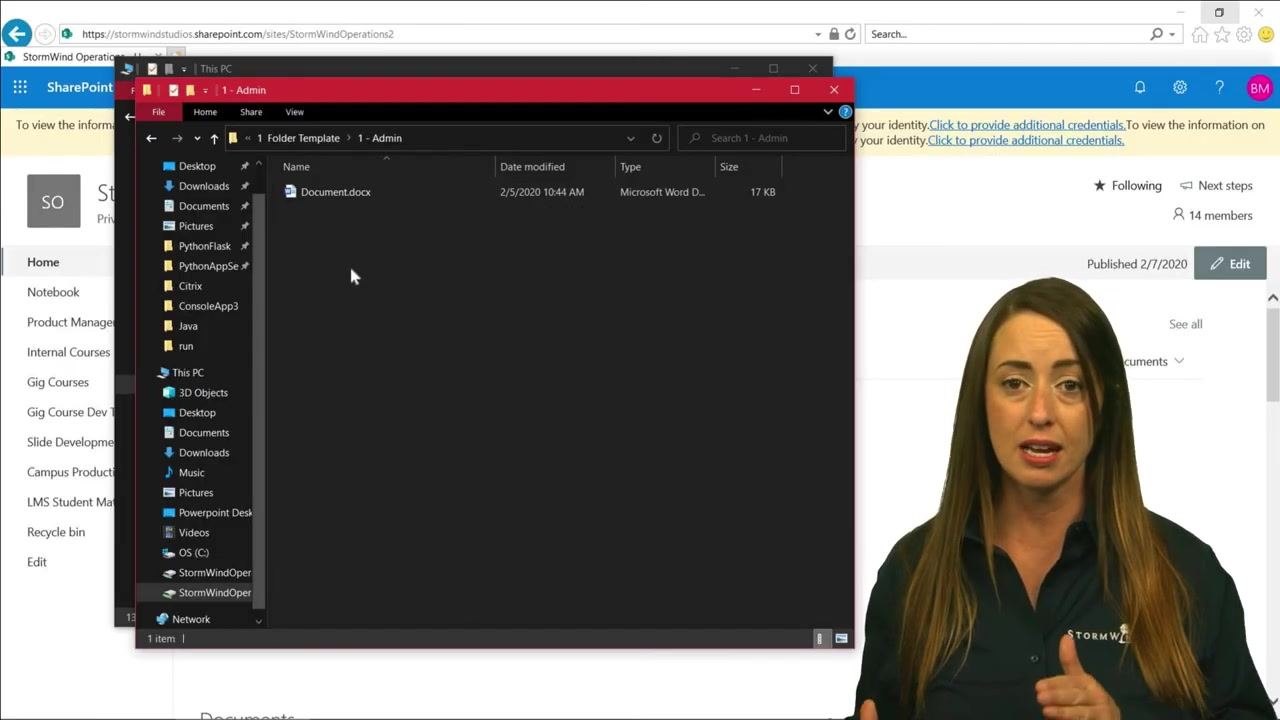
Using File Explorer this way lets you quickly organize, move, or manage files without opening the browser, saving time and improving collaboration since all changes are reflected for your team.
Troubleshooting sync or visibility issues
If you encounter any issues with syncing or file visibility, check the following:
- The SharePoint site remains in your Trusted Sites list in Internet Options.
- The Require server verification (https:) box remains unchecked for the SharePoint URL.
- You are connected to the internet and logged into your SharePoint account.
Summary
By adding SharePoint to File Explorer, you can manage your SharePoint Online files directly from your desktop instead of repeatedly navigating the browser. Once mapped, any files you add, remove, or edit sync automatically and remain accessible to all authorized users on the SharePoint site, keeping your entire team up to date with the latest documents and changes.
Generation details: cost, quality tiers
Docsie billed 2,000 credits ($1.40) to analyze this 4-minute video at standard quality. The rewrite, template fill and Word/PDF exports were included. The same video at each quality tier:
| Quality | Frames sampled | Credits | Approx. cost |
|---|---|---|---|
| Draft | every 16-30 s | 1,000 | $0.70 |
| Standard (this guide) | every 8-15 s | 2,000 | $1.40 |
| Detailed | every 4-7 s | 4,000 | $2.80 |
| Ultra | every 1-3 s | 8,000 | $5.60 |
Credits priced at $0.70 per 1,000; plans include a monthly allowance. Enterprise customers on on-premise or bring-your-own-model deployments run this on their own inference and pay no per-video credits.
Generated by Docsie Video-to-Docs on 2026-09-08 from a 3-minute video. Screenshots are frames from the source video and belong to their creator, StormWind Studios, whose original is embedded above. If you own this video and want the guide removed or credited differently, contact us and we will act within one business day.