
How to Create a Document Library in SharePoint
Every new SharePoint site—including those created through Microsoft Teams—comes with a single default document library. As your content grows or your organizational needs become more complex, you may need to create additional document libraries to keep files organized and manageable. This guide walks you through understanding the default SharePoint layout, creating a new document library, and following best practices for managing multiple libraries.
Video: How to create additional document libraries in SharePoint by SharePoint Maven (2021). All credit for the demonstration goes to the creator; watch the original on YouTube. The written guide below was generated from this video by Docsie. Creator? Request a change or removal.
Every new SharePoint site—including those created through Microsoft Teams—comes with a single default document library. As your content grows or your organizational needs become more complex, you may need to create additional document libraries to keep files organized and manageable. This guide walks you through understanding the default SharePoint layout, creating a new document library, and following best practices for managing multiple libraries.
Prerequisites
- Access to a SharePoint site (for example, a Teams-connected site such as "Team ABC").
- Permissions to create and manage document libraries on that site.
Why you might need additional document libraries
Consider creating additional document libraries in the following scenarios:
- You have a large volume of documents and want to split them into separate "file cabinets."
- You require unique metadata or settings for different sets of documents.
- You want to separate content by department, project, or function.
- You need to apply different metadata, permissions, or workflows to different sets of documents.
If your SharePoint site is connected to Microsoft Teams, note that folders are automatically created for each standard channel within the default document library.
Understanding the default SharePoint site layout
When a new SharePoint site is created, it is typically associated with a Microsoft 365 group and may include Teams integration. The default document library will already contain folders that correspond to Teams channels, rather than folders you created manually.
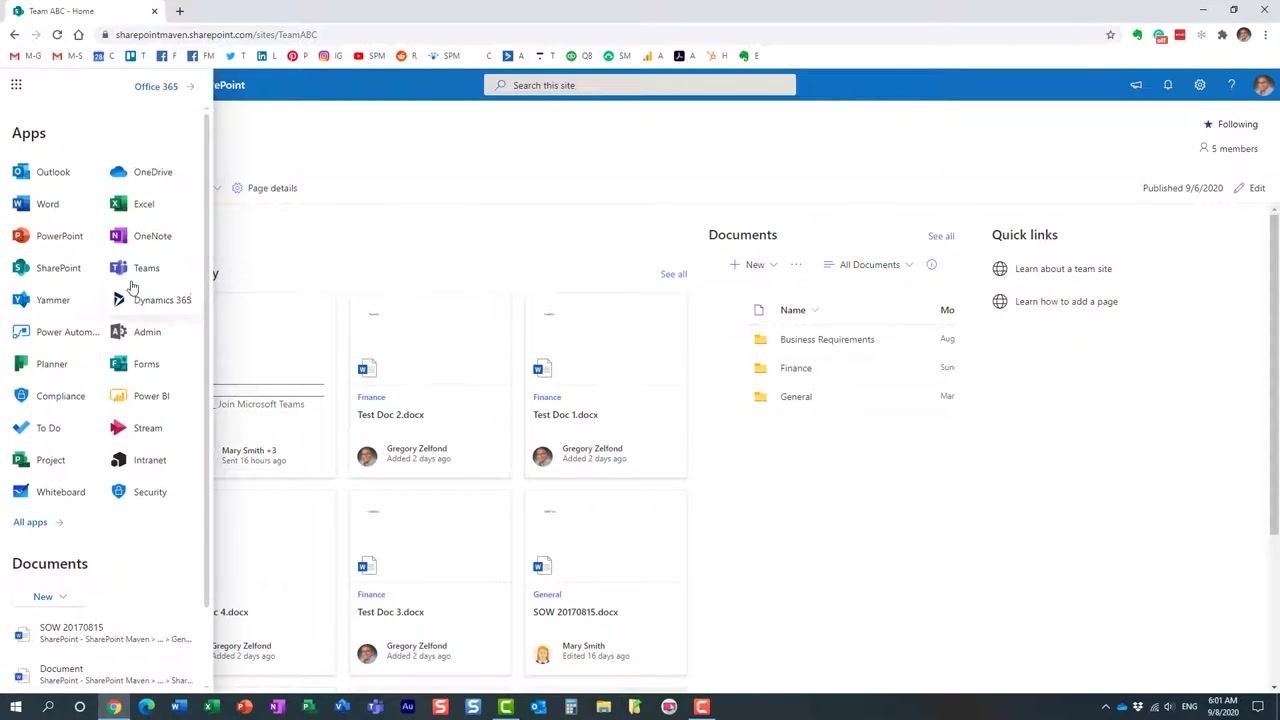
- Navigate to your SharePoint site (for example, "Team ABC").
-
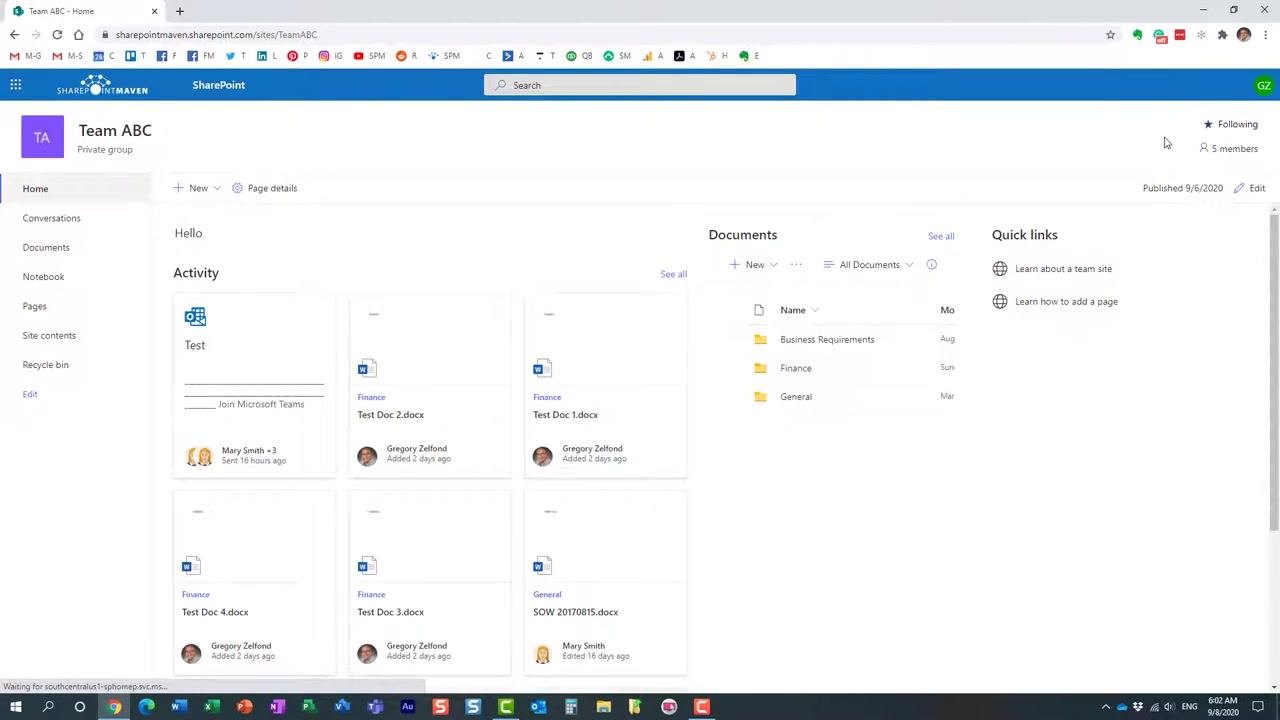
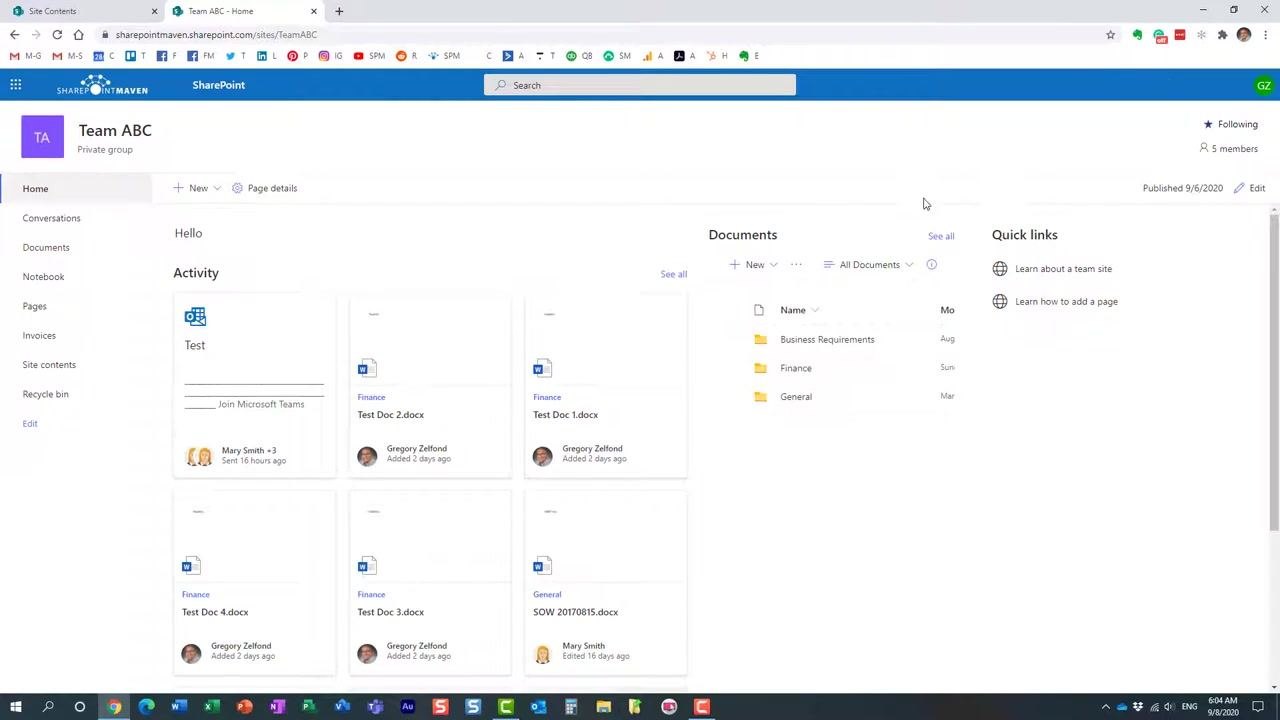
On the homepage, locate the Documents section, which displays folders such as "Business Requirements," "Finance," and "General." These folders may have been created automatically by Teams channels.
-
Alternatively, use the Office 365 app launcher (grid icon) to access SharePoint and other Microsoft 365 apps. Confirm you are on the correct SharePoint site by checking the site name and URL.
-
Confirm that the Documents library is present—this is the default library on all SharePoint sites, and its folders may be automatically generated by Teams channels.
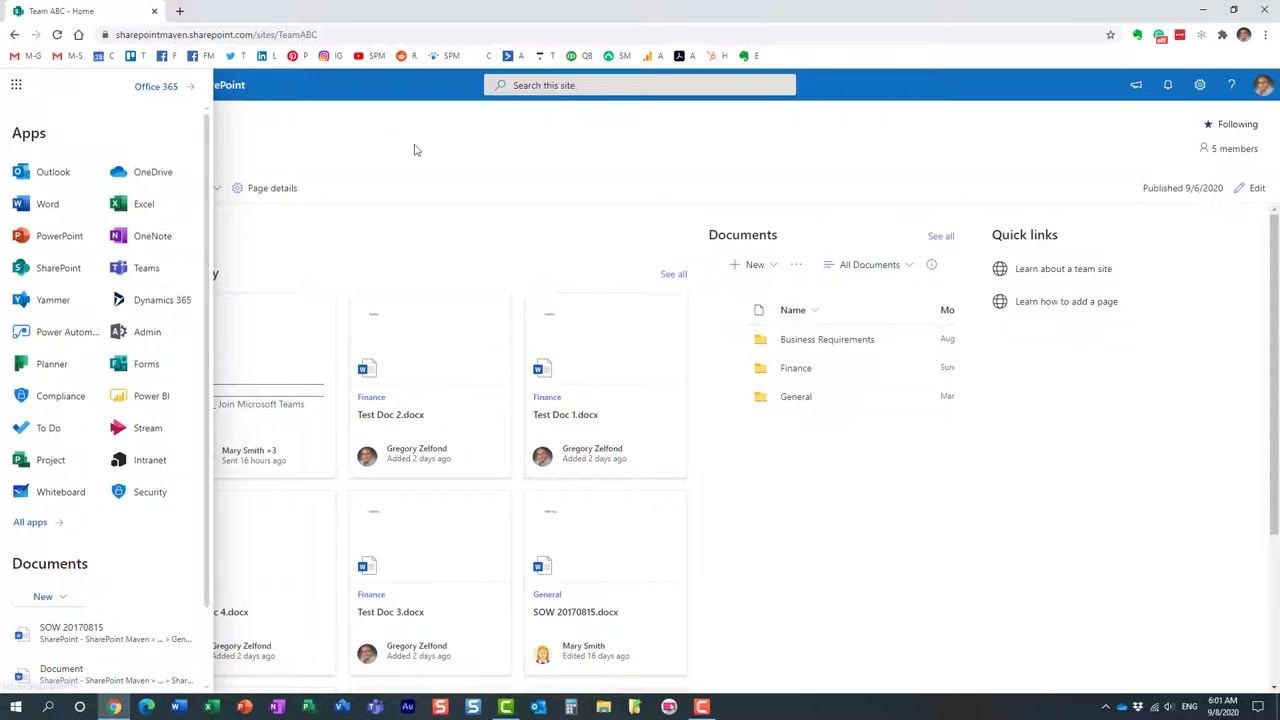
A single document library may be sufficient for small teams or limited content, but larger organizations or more complex needs benefit from additional libraries for better organization and management.
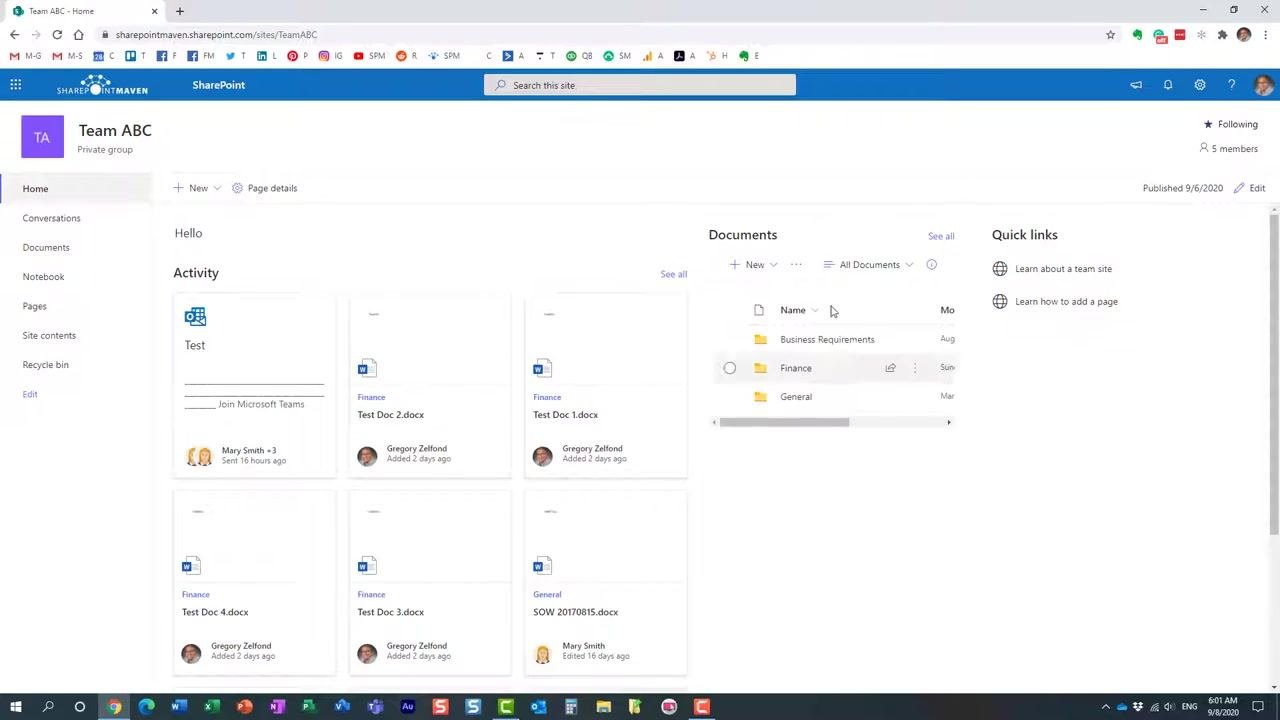
- Click the New button in the Documents section to begin adding new content or libraries.
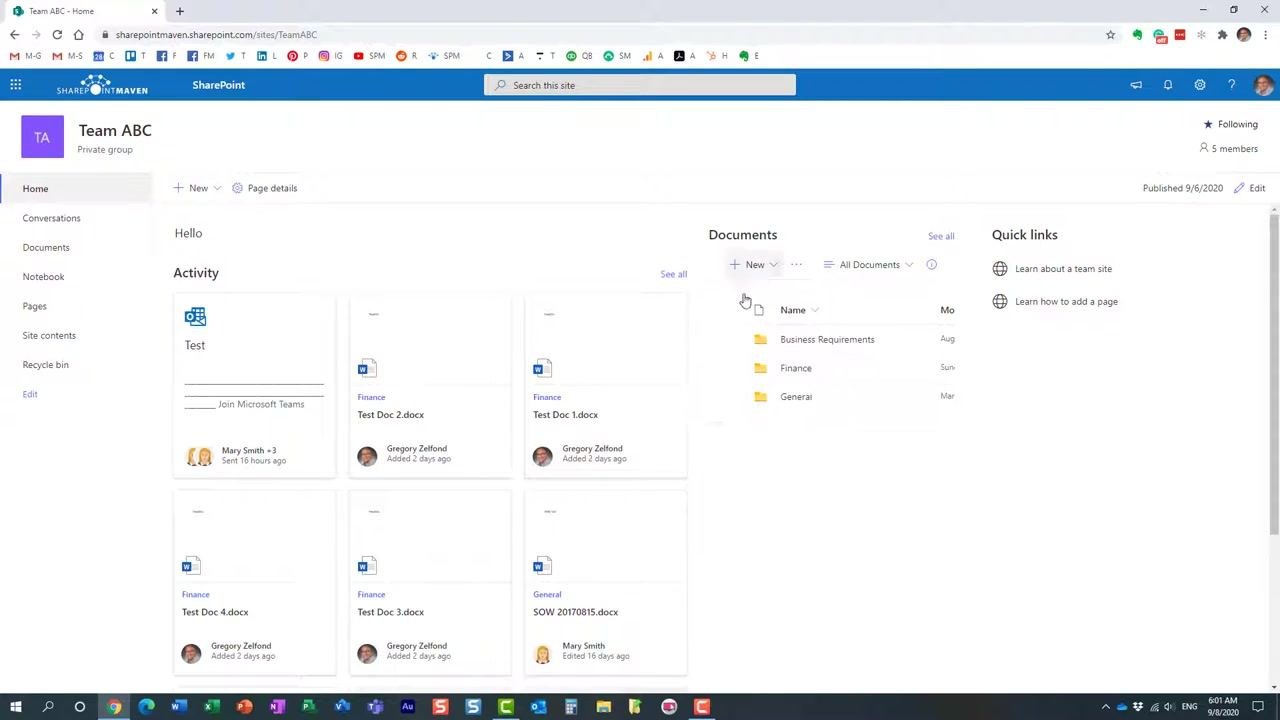
Folders in the default document library are created automatically when new standard channels are added in Microsoft Teams—they are not created manually, but are linked to the Teams channel structure.
Step-by-step: Creating an additional document library
If you want to organize documents independently of the Teams channel structure, follow these steps to create a new document library.
- Recognize that folders such as "Business Requirements," "Finance," and "General" are automatically created by Teams channels. If you want to organize documents in your own way, consider creating an additional document library.
-
Navigate to your SharePoint site (for example, "Team ABC"). Confirm the left navigation menu displays options such as Home, Conversations, and Documents.
-
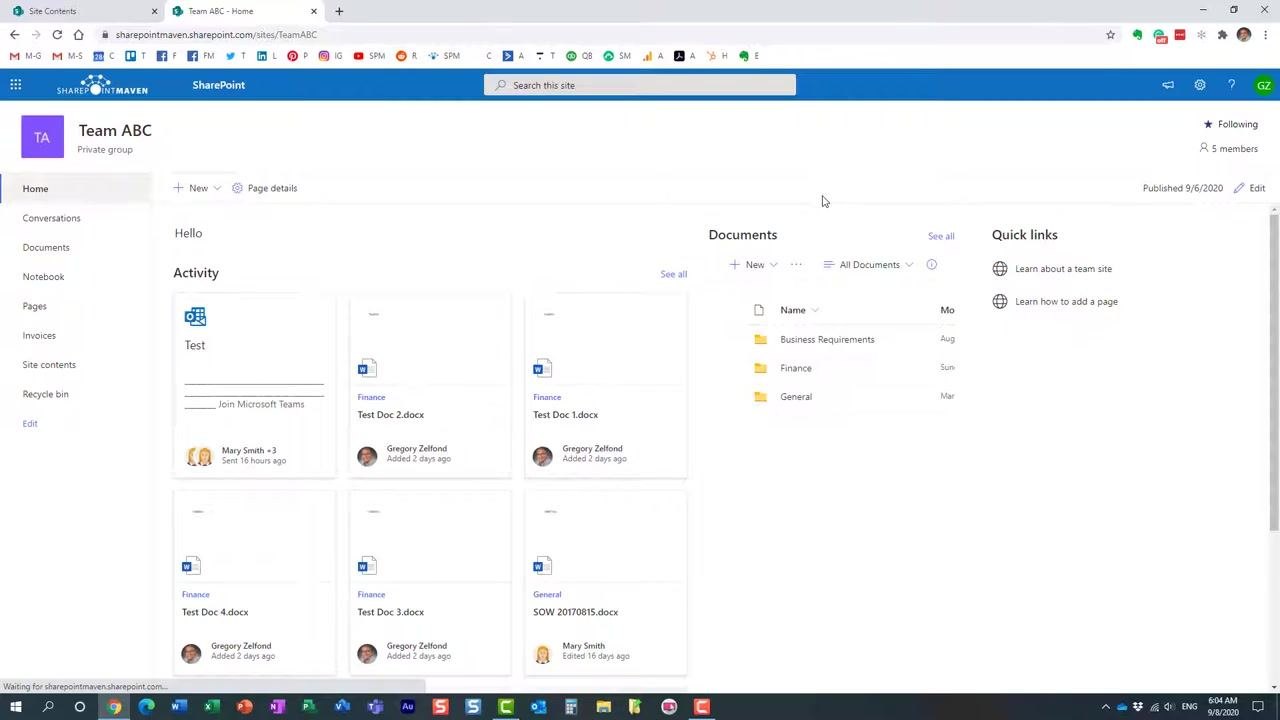
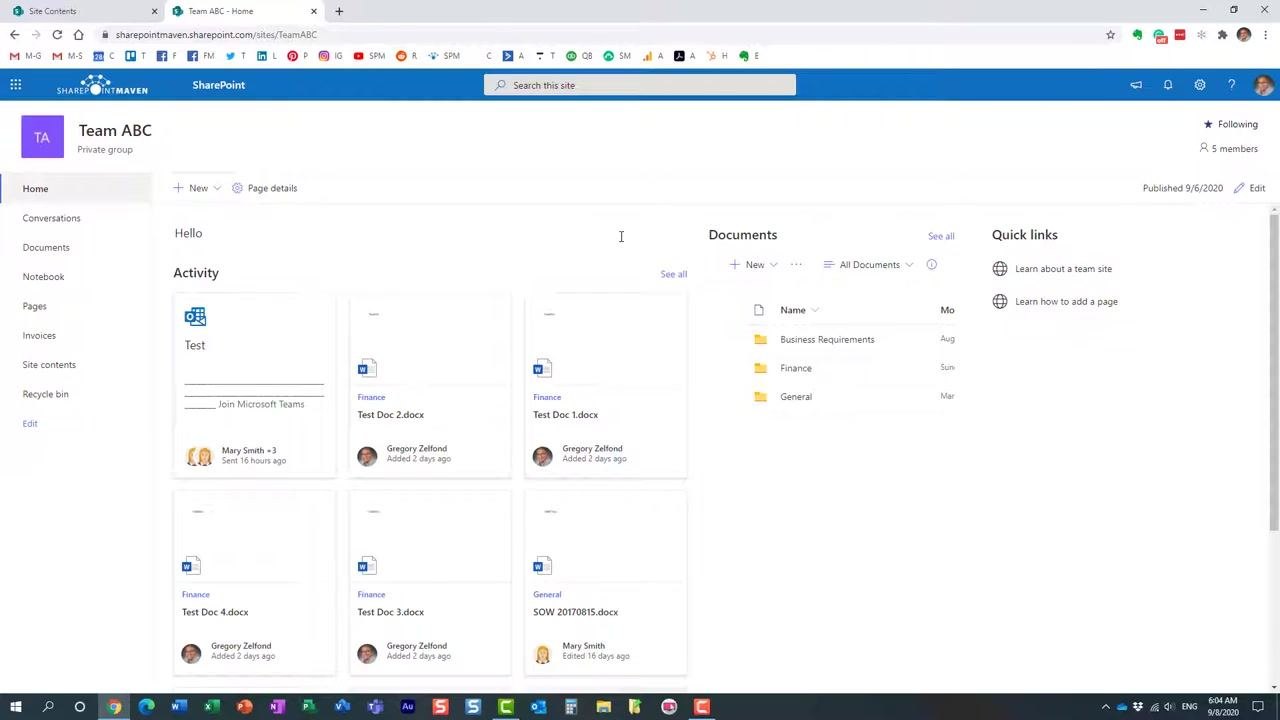
Click Home in the left navigation to return to the main site page. Confirm you see the Activity feed, Documents section, and Quick links.
-
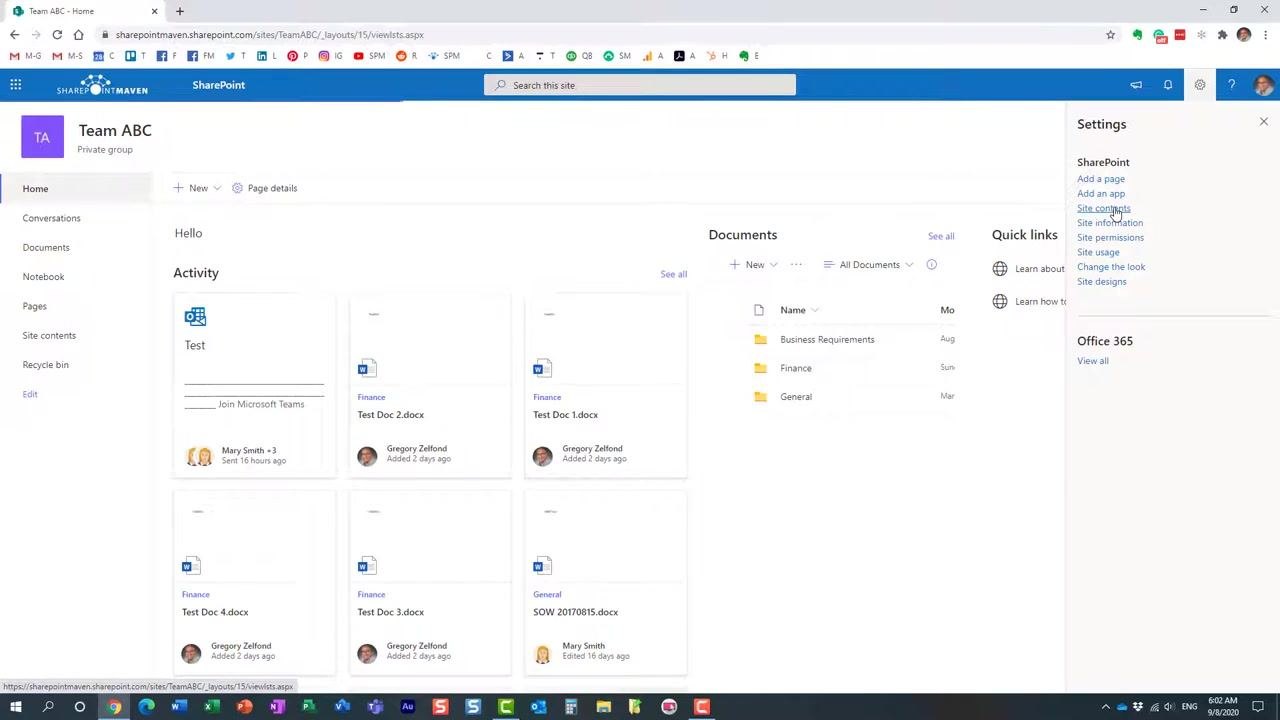
Click the gear icon (Settings) in the top right corner. In the Settings panel, select Site contents from the list of options (Add a page, Add an app, Site contents, Site information, etc.).
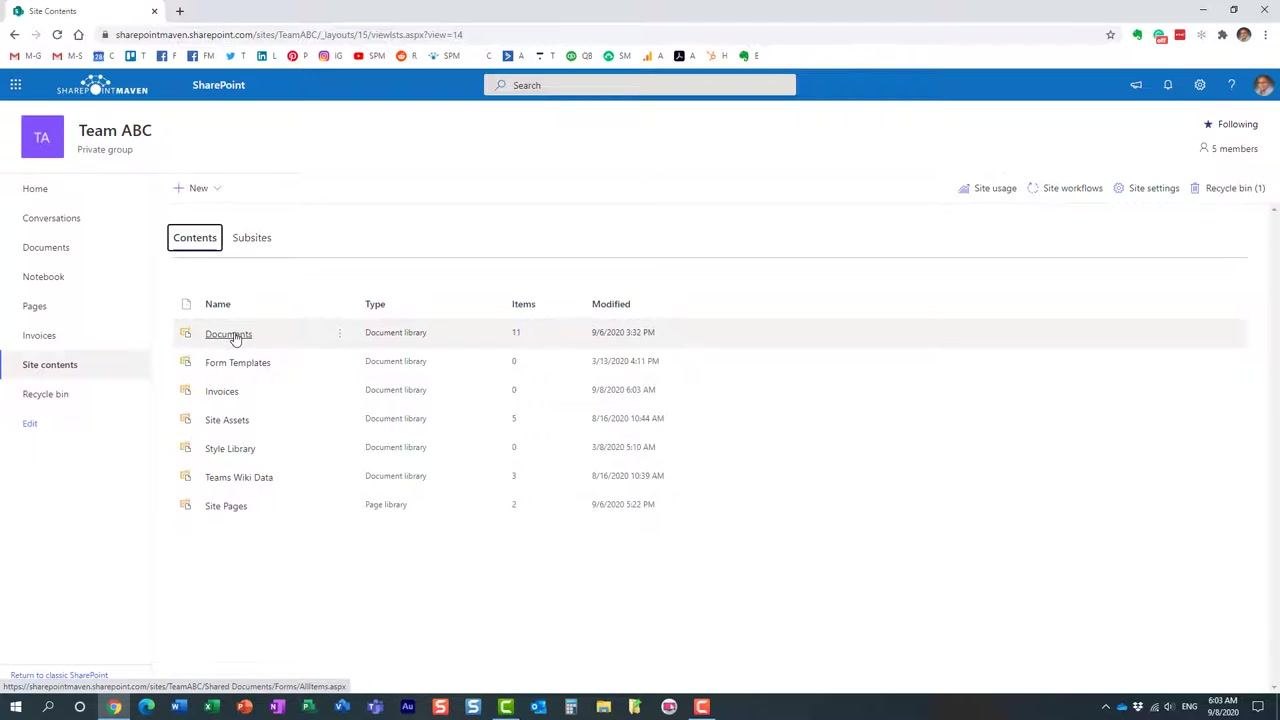
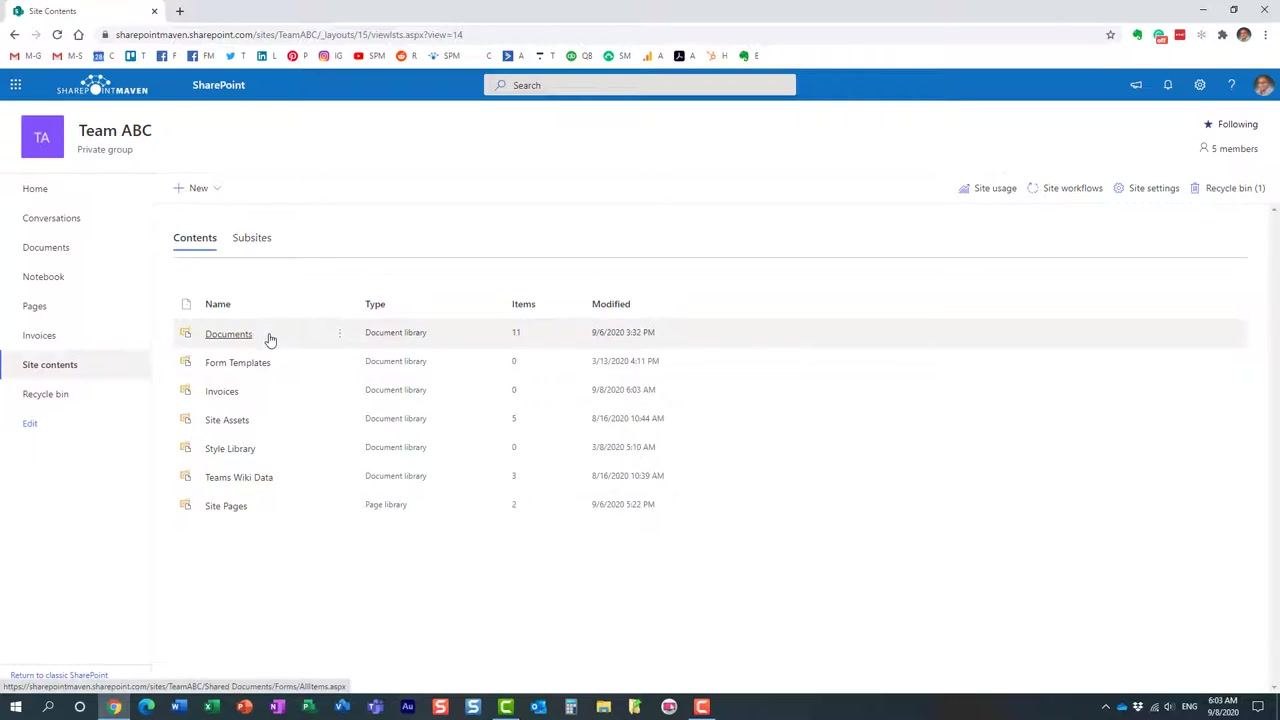
- Review the Site Contents page, which lists all libraries and apps on the site. By default, you will see the Documents library (type: Document library), along with others such as Form Templates, Site Assets, Style Library, Teams Wiki Data, and Site Pages.
The default Documents library cannot be removed, as it is required for SharePoint and Teams functionality.
The Documents library is where Teams channel folders are stored, while other libraries (such as Site Assets and Style Library) serve different purposes and are created by SharePoint for site functionality.
- Click the + New button at the top of the Site Contents page. In the dropdown menu, select Document library (other options include List, Page, App, and Subsite).
-
Enter a name for your new library (for example, "Invoices"). Choose to add the library to the site navigation for easy access, then confirm and create the library.
-
Verify the new library. It will open showing an empty state with the prompt "Drag files here." The library will also appear in the left navigation and in Site Contents.
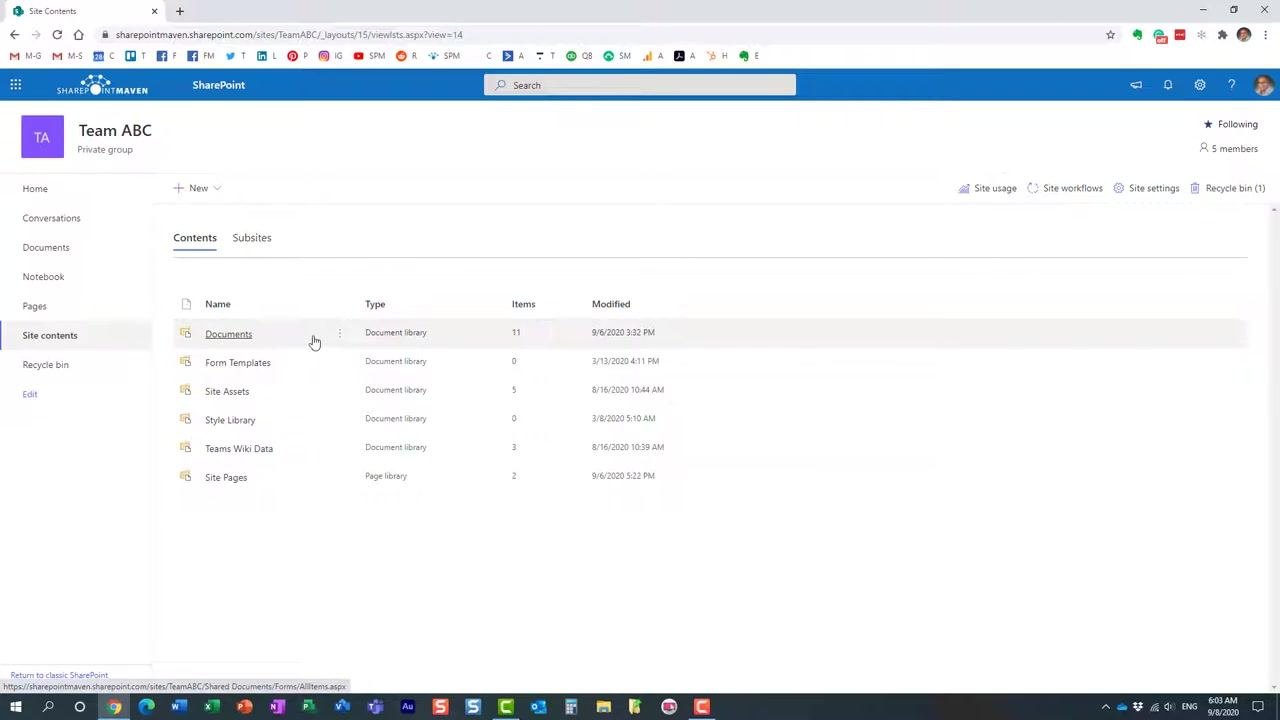
- Return to Site Contents and verify that both the default Documents library and your new library (for example, "Invoices") are listed.
You can create as many document libraries as needed—there is no practical limit. It is best practice to split large volumes of content across multiple libraries to avoid technical limitations and improve organization.
Best practices for managing multiple document libraries
- Create multiple document libraries for better organization. Split content logically—by department, project, or document type—to avoid technical limitations and improve manageability.
- Synchronize each library as needed. Each document library can be synchronized individually to your device using OneDrive sync. Choose which libraries to sync based on your workflow and storage needs.
- Verify all libraries in Site Contents regularly. Navigate to Site contents from the left navigation menu and confirm that all your document libraries (for example, "Documents" and "Invoices") are listed alongside default libraries like Form Templates, Site Assets, Style Library, Teams Wiki Data, and Site Pages. Check the Items and Modified columns to monitor usage and recent changes.
For example, the "Invoices" library may show 0 items with a last modified date of 9/8/2020 6:03 AM.
- Return to the SharePoint site homepage regularly. Click Home in the left navigation to review the Activity feed for recent document changes and the Documents section for quick access to channel folders (such as "Business Requirements," "Finance," and "General"). Use Quick links for helpful resources such as "Learn about a team site" and "Learn how to add a page."
Additional document libraries are a powerful way to split content apart and keep your SharePoint site organized, which is especially useful for large teams or sites with diverse document management needs.
What's next
For more tips and tutorials, visit the SharePoint Maven blog (SharePointMaven.com) or the SharePoint Maven YouTube channel to stay updated with best practices and maximize your SharePoint experience.
Summary
By creating multiple document libraries and organizing your content thoughtfully, you can avoid technical limitations, improve collaboration, and keep your SharePoint site efficient and easy to navigate. Synchronize only the libraries you need, and revisit the Site Contents page regularly to manage your libraries effectively.
Generation details: cost, quality tiers
Docsie billed 2,000 credits ($1.40) to analyze this 4-minute video at standard quality. The rewrite, template fill and Word/PDF exports were included. The same video at each quality tier:
| Quality | Frames sampled | Credits | Approx. cost |
|---|---|---|---|
| Draft | every 16-30 s | 1,000 | $0.70 |
| Standard (this guide) | every 8-15 s | 2,000 | $1.40 |
| Detailed | every 4-7 s | 4,000 | $2.80 |
| Ultra | every 1-3 s | 8,000 | $5.60 |
Credits priced at $0.70 per 1,000; plans include a monthly allowance. Enterprise customers on on-premise or bring-your-own-model deployments run this on their own inference and pay no per-video credits.
Generated by Docsie Video-to-Docs on 2026-09-08 from a 3-minute video. Screenshots are frames from the source video and belong to their creator, SharePoint Maven, whose original is embedded above. If you own this video and want the guide removed or credited differently, contact us and we will act within one business day.