
How to Call a Subscreen in SAP
This guide shows you how to call a subscreen in SAP ABAP by building a small module pool program, ZSCREEN02. The program has a main screen (dynpro 100) with two buttons, and each button displays a different subscreen (101 or 102) inside a subscreen area. You create the program, design the screens in Screen Painter, add the process logic, and test the result through a transaction.
Video: call subscreen by Roberto Mejia Andrade (2015). All credit for the demonstration goes to the creator; watch the original on YouTube. The written guide below was generated from this video by Docsie. Creator? Request a change or removal.
This guide shows you how to call a subscreen in SAP ABAP by building a small module pool program, ZSCREEN02. The program has a main screen (dynpro 100) with two buttons, and each button displays a different subscreen (101 or 102) inside a subscreen area. You create the program, design the screens in Screen Painter, add the process logic, and test the result through a transaction.
Prerequisites
Before you start, make sure you have:
- Access to SAP GUI with the ABAP Editor and Screen Painter.
- Permission to create programs, dynpros, and transactions in your package (this guide uses package
$Y99). - A text editor such as Notepad if you want to keep notes while you work.
Open the ABAP Editor and review the reference program
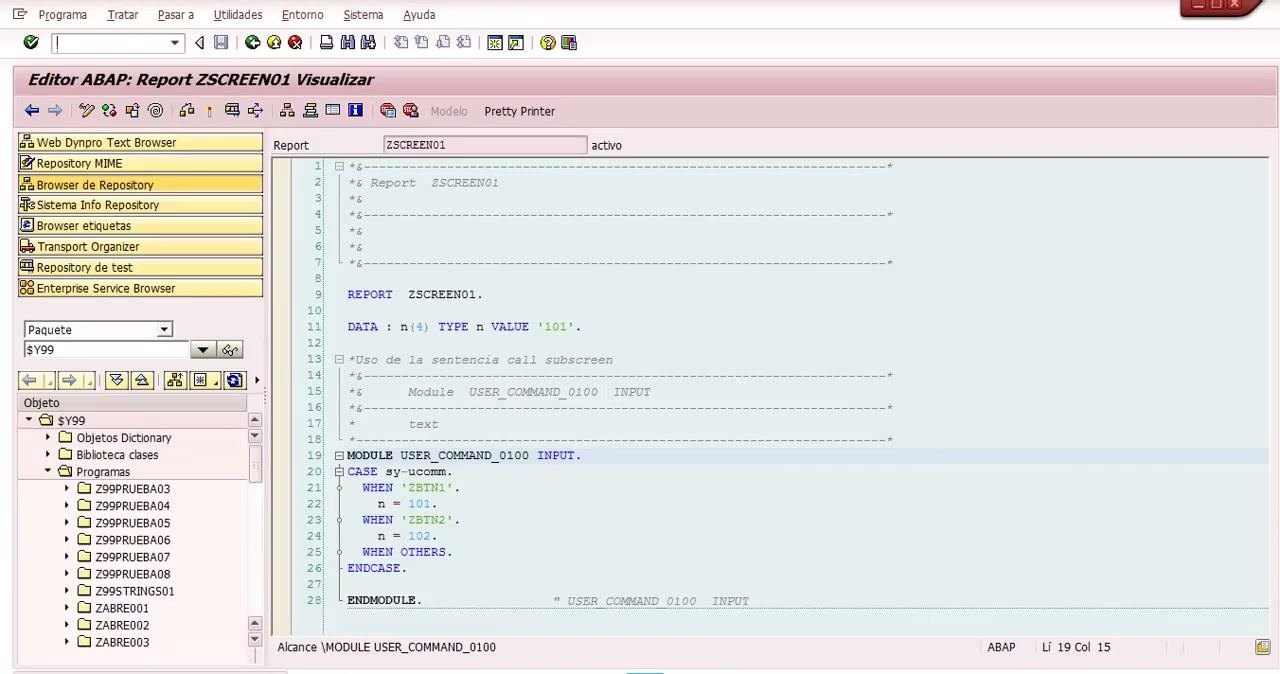
Open SAP GUI and go to the ABAP Editor. Locate or create a report such as ZSCREEN01. The editor shows the program code, including comments about the CALL SUBSCREEN statement.
The reference code looks like this:
REPORT ZSCREEN01.
DATA: n(4) TYPE n VALUE '101'.
*Uso de la sentencia call subscreen
MODULE USER_COMMAND_0100 INPUT.
  CASE sy-ucomm.
    WHEN 'ZBTN1'.
      n = 101.
    WHEN 'ZBTN2'.
      n = 102.
    WHEN OTHERS.
  ENDCASE.
ENDMODULE.
Set the program properties for ZSCREEN02
Open the properties dialog for the new program, ZSCREEN02, and set these attributes:
- Title: Programa ZSCREEN02
- Language: ES (Español)
- Type: Programa ejecutable
- Status: Nuevo (revisado)
- Application: Select the value that fits your program from the dropdown menu.
Use the dropdown menus to choose the correct type and application, then click Grabar to save.
Enter the initial program code
In the ABAP Editor, open ZSCREEN02 and start the program with these lines:
PROGRAM ZSCREEN02.
*Uso de la sentencia call subscreen
The program is still inactive (Inactivo) at this point.
Create additional program elements
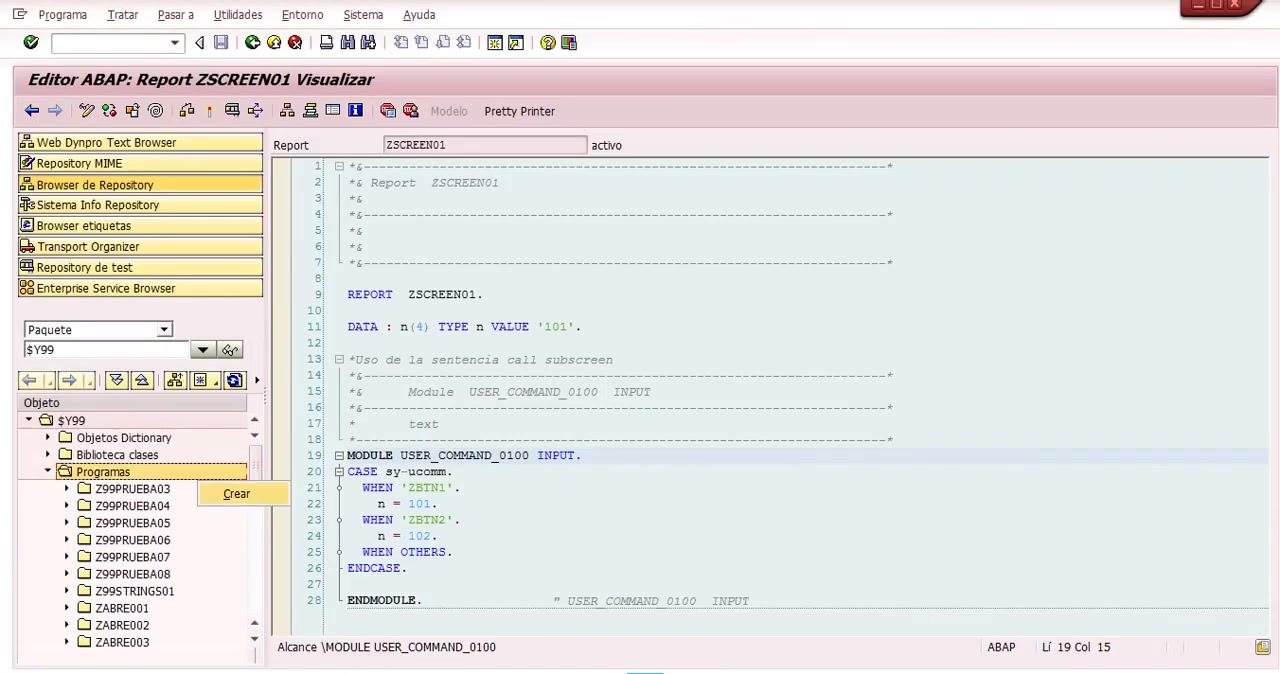
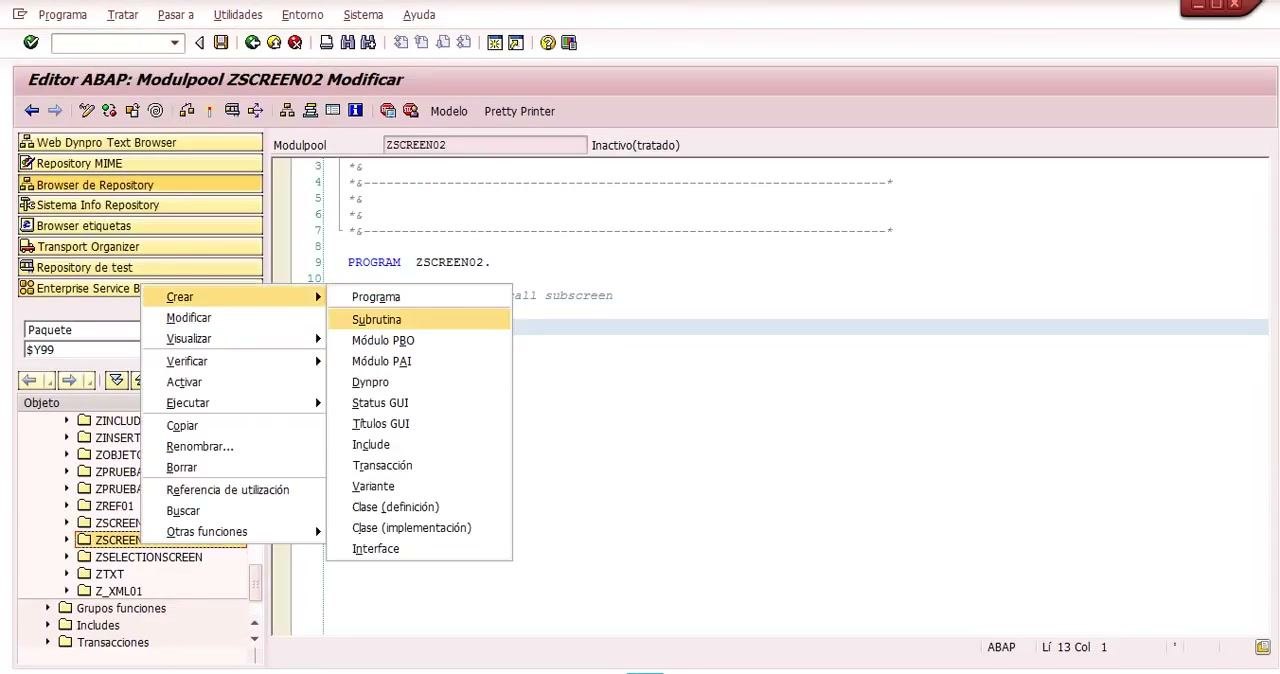
Right-click the program in the object tree and select Crear. From the context menu, choose the element you want to add, such as Subrutina, Módulo PBO, or Módulo PAI. This lets you structure the program with the modules and routines it needs.
Save your changes before leaving the editor
When you close the editor, SAP asks: "Programa ZSCREEN02 modificado. ¿Grabar antes de finalizar editor?" Choose one of these options:
- Sí saves your changes.
- No discards them.
- Cancelar returns you to editing.
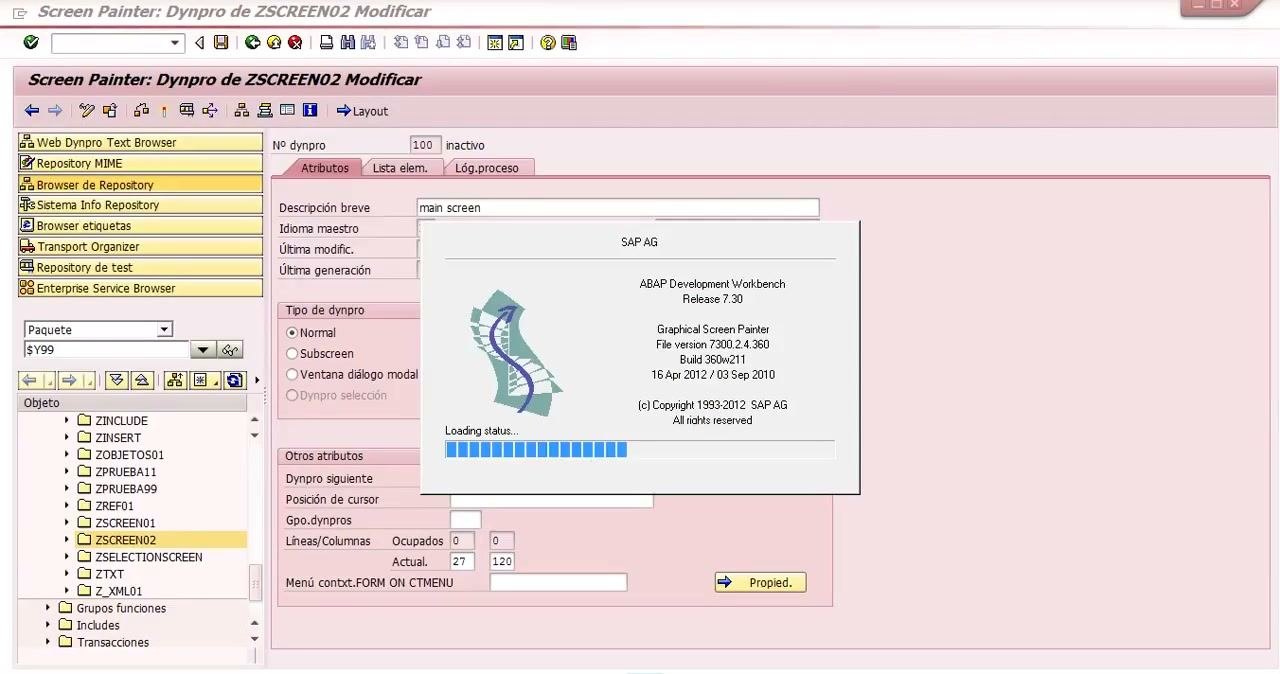
Set the attributes of the main screen (dynpro 100)
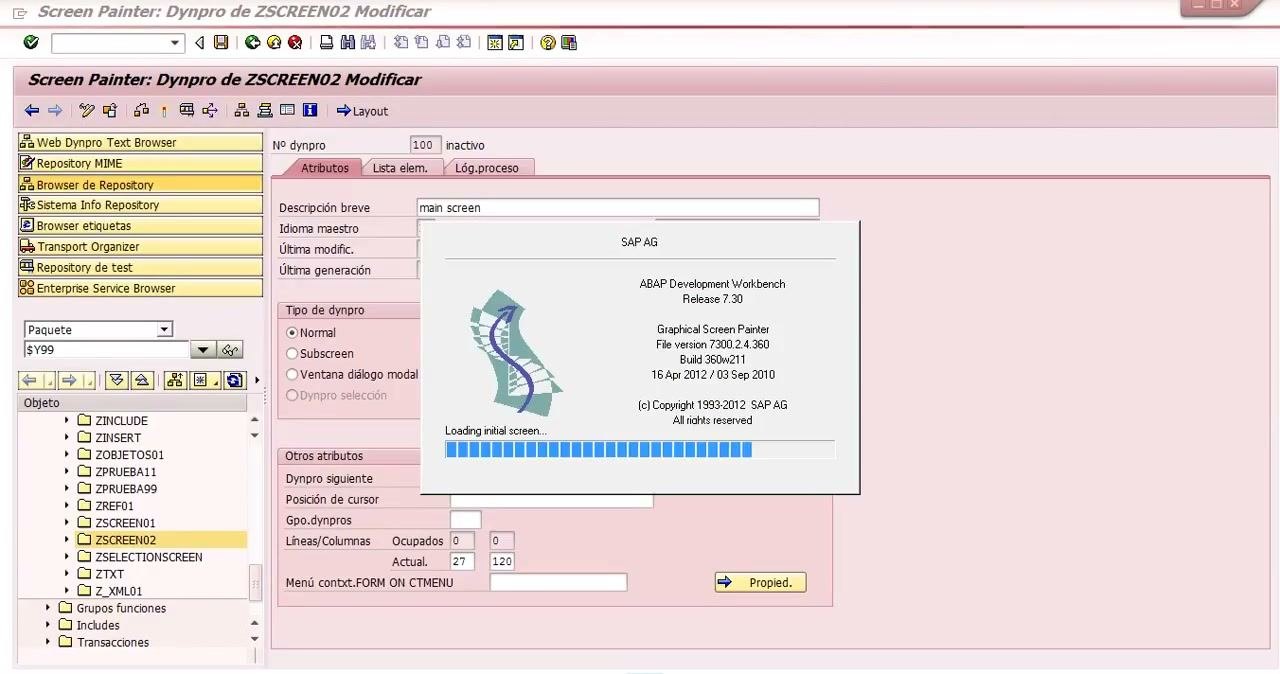
Open Screen Painter for program ZSCREEN02 and modify dynpro 100. The attributes and the object tree appear on the left. Set these attributes:
- Descripción breve: main screen
- Idioma maestro: ES (Español)
- Tipo de dynpro: Normal
- Dynpro siguiente: 100
Leave the other fields at their defaults. The object tree should list ZSCREEN01 and ZSCREEN02.
Review the subscreen area in the layout editor
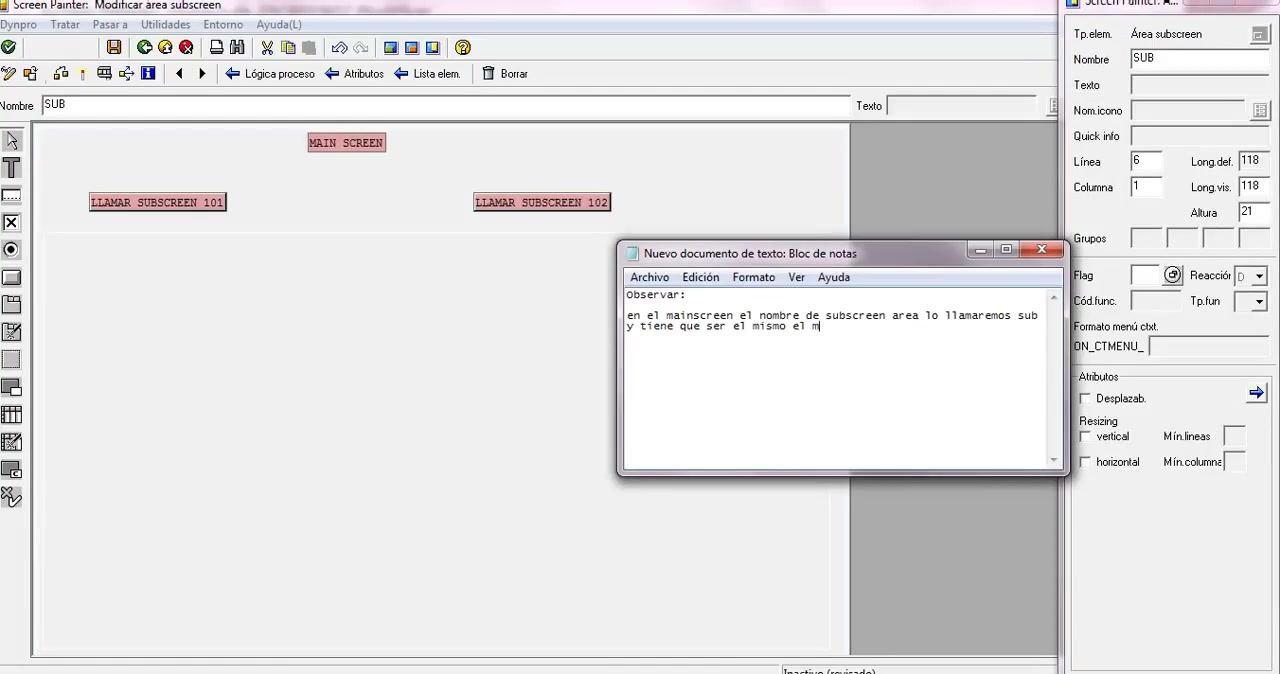
Open the graphical layout editor. A large pink rectangle represents the subscreen area. When you select it, the right panel shows its properties:
- Tp.elem.: Área subscreen
- Línea: 6, Columna: 1, Long.def.: 118, Altura: 21
- Flag: Reacción D
- Formato menú ctxt.: ON_CTMENU_
Use the toolbar on the left to select and modify screen elements.
Name the subscreen area and match it in the subscreens
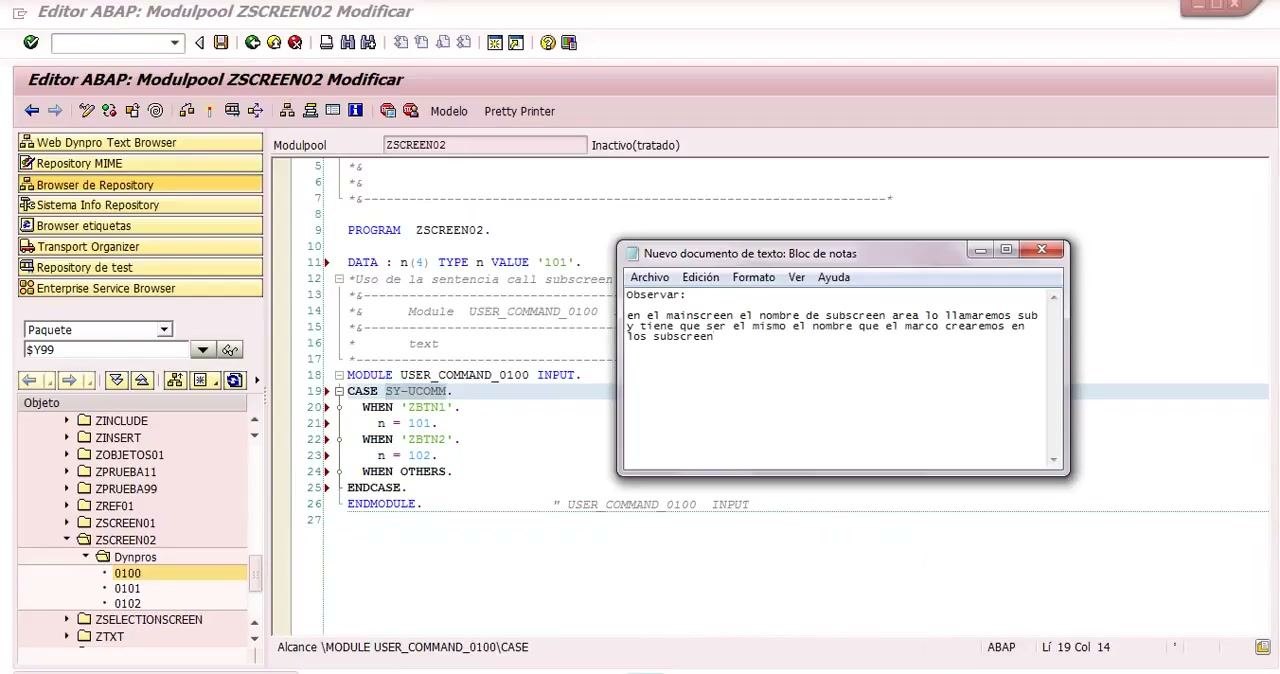
In the main screen, name the subscreen area SUB. Each subscreen must contain a frame with exactly the same name. This match is required for the subscreens to display correctly in the main screen.
If you keep notes, record it like this: "en el mainscreen el nombre de subscreen area lo llamaremos sub y tiene que ser el mismo el nombre que el marco crearemos en los subscreen".
Label the main screen
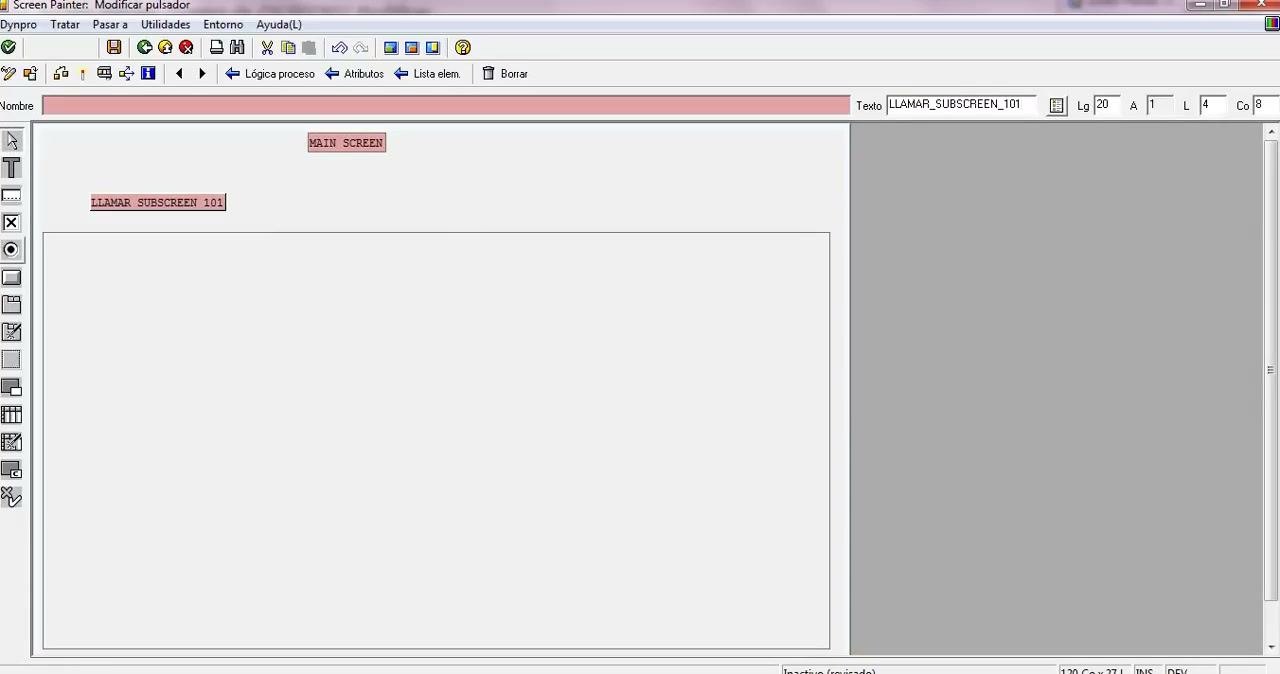
In the graphical editor, add a text label to the main screen area that reads MAIN SCREEN. The label appears at the top of the area, highlighted in pink. The text field at the top right shows Texto MAIN_SCREEN.
Add the button that calls subscreen 101
Insert a button labeled LLAMAR SUBSCREEN 101 on the left side of the main screen area. The right panel shows the text value LLAMAR_SUBSCREEN_101. This button triggers the display of subscreen 101.
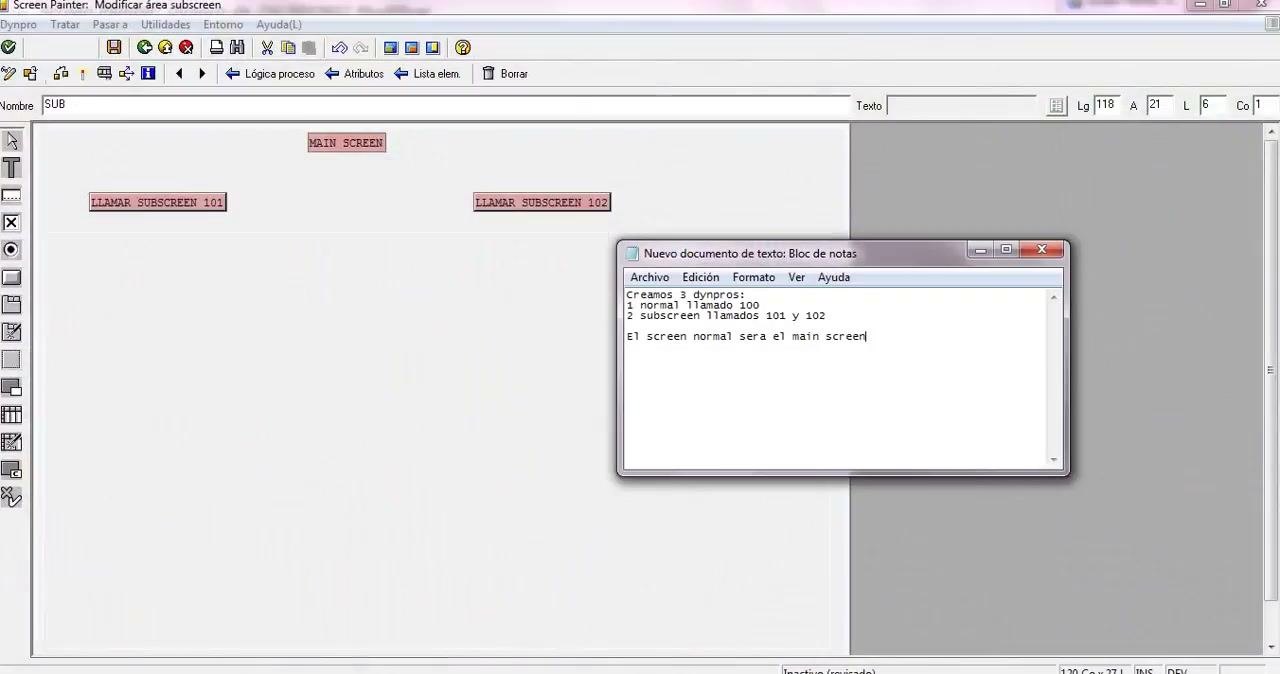
Add the button that calls subscreen 102
Insert a second button labeled LLAMAR SUBSCREEN 102 on the right side of the main screen area. Both buttons are now visible, spaced apart horizontally, and the main screen label stays at the top center.
Check the attributes of subscreen 101
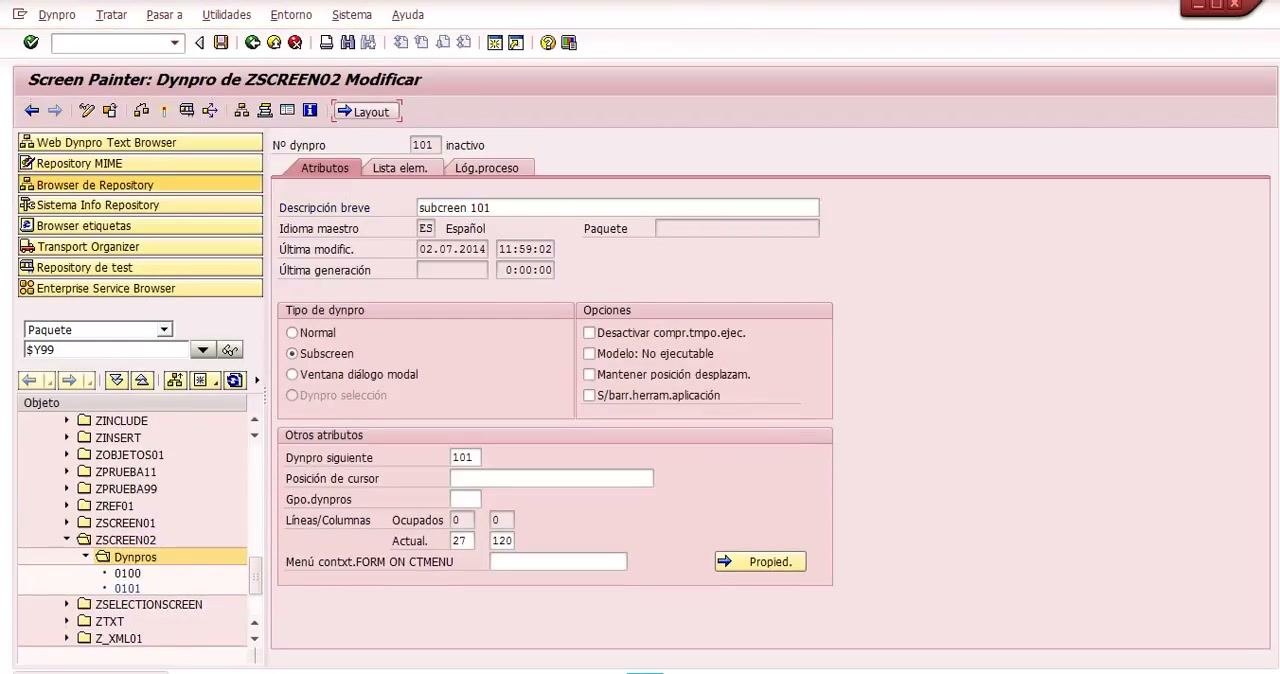
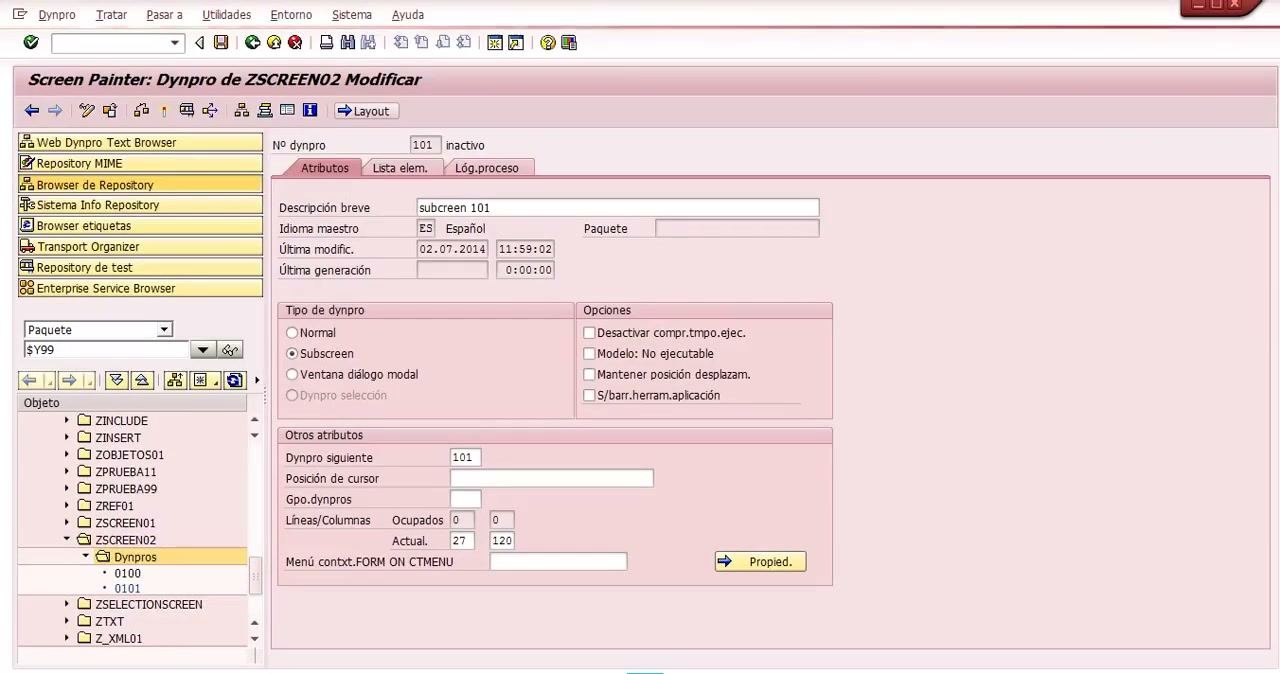
In the left navigation pane, expand the Dynpros folder under ZSCREEN02 and select 0101. The attributes tab shows:
- Dynpro number: 101 (inactive)
- Brief description: "subcreen 101"
- Master language: ES (Español)
- Last modified: 02.07.2014, 11:59:02
- Dynpro type: Subscreen (selected)
- Next dynpro: 101
- Lines/Columns: Occupied 0/0, Actual 27/120
- Context menu: FORM ON CTMENU
Enter the text for subscreen 101
Switch to the layout editor for subscreen 101. A single text field, highlighted in pink, spans the upper part of the layout. Enter HOLS SOY SUBSCREEN 101 as its value. The right panel shows the text property as HOLS_SOY_SUBSCREEN_101.
Expand the text field in subscreen 101
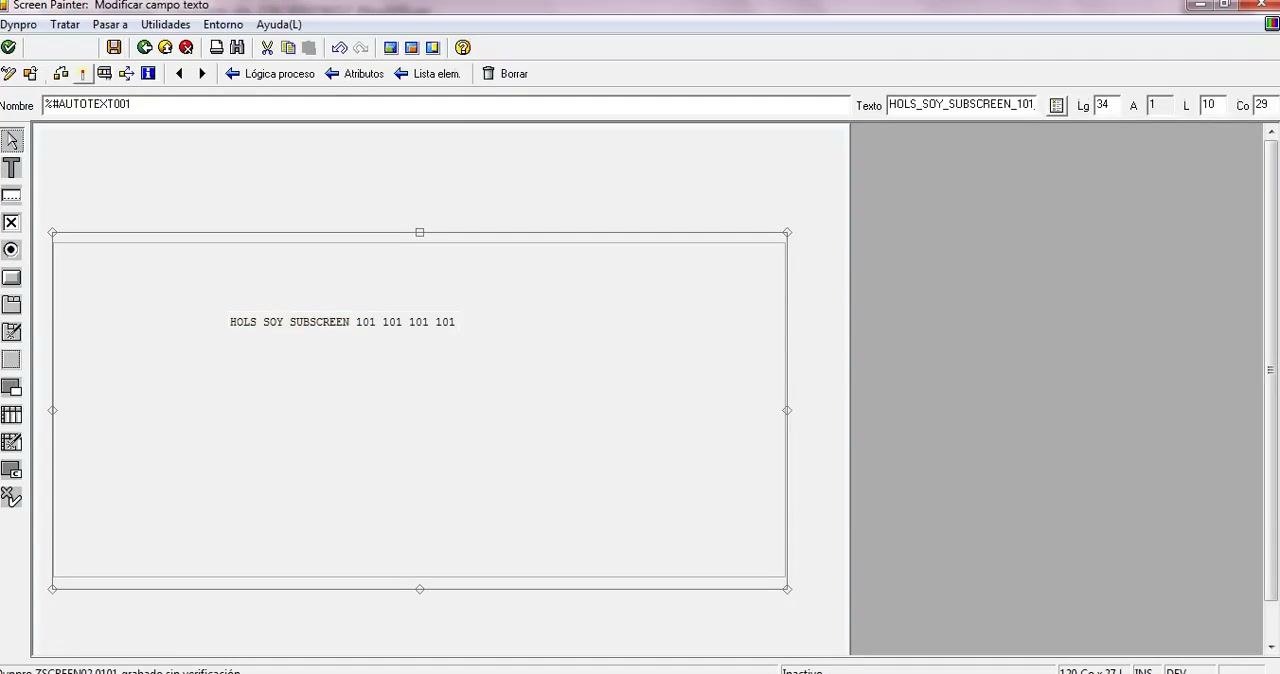
Expand the text field horizontally and update the text to HOLS SOY SUBSCREEN 101 101 101 101 101. The field now displays the repeated value, centered in the layout area, and the right panel shows the updated text property.
Create subscreen 102
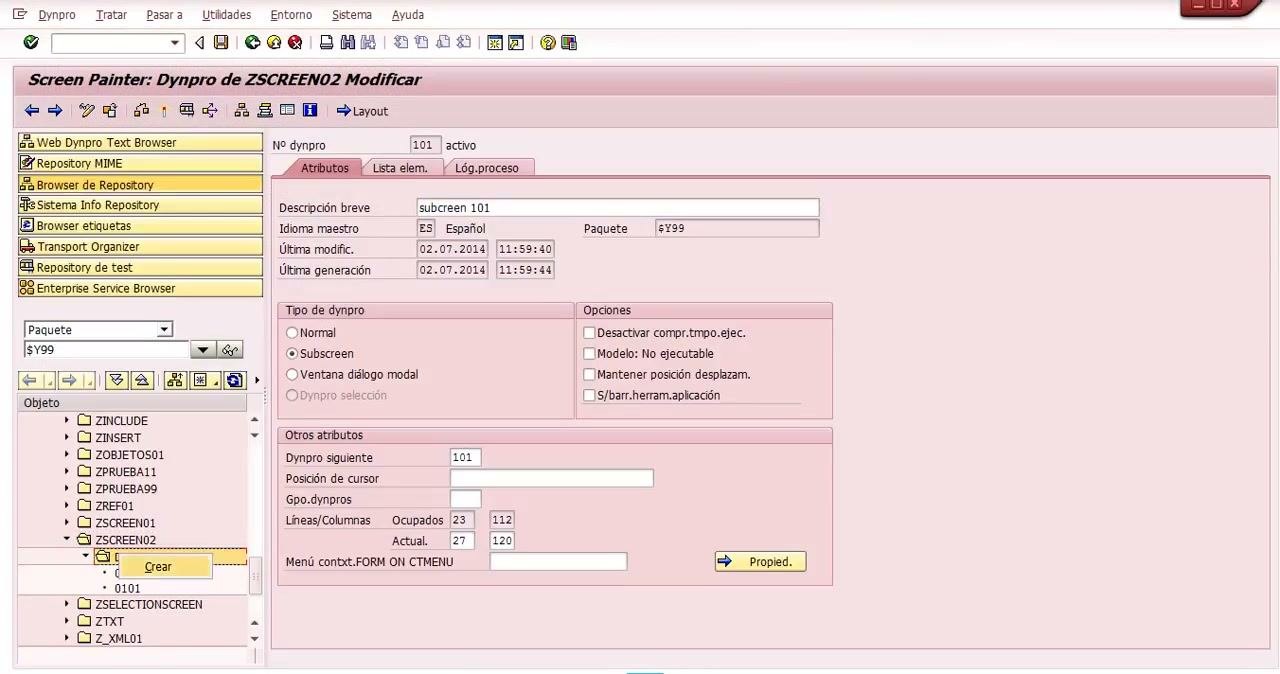
In the left navigation pane, right-click ZSCREEN02 > Dynpros and select Crear to start creating a new dynpro. No dialog appears yet; this starts the creation process.
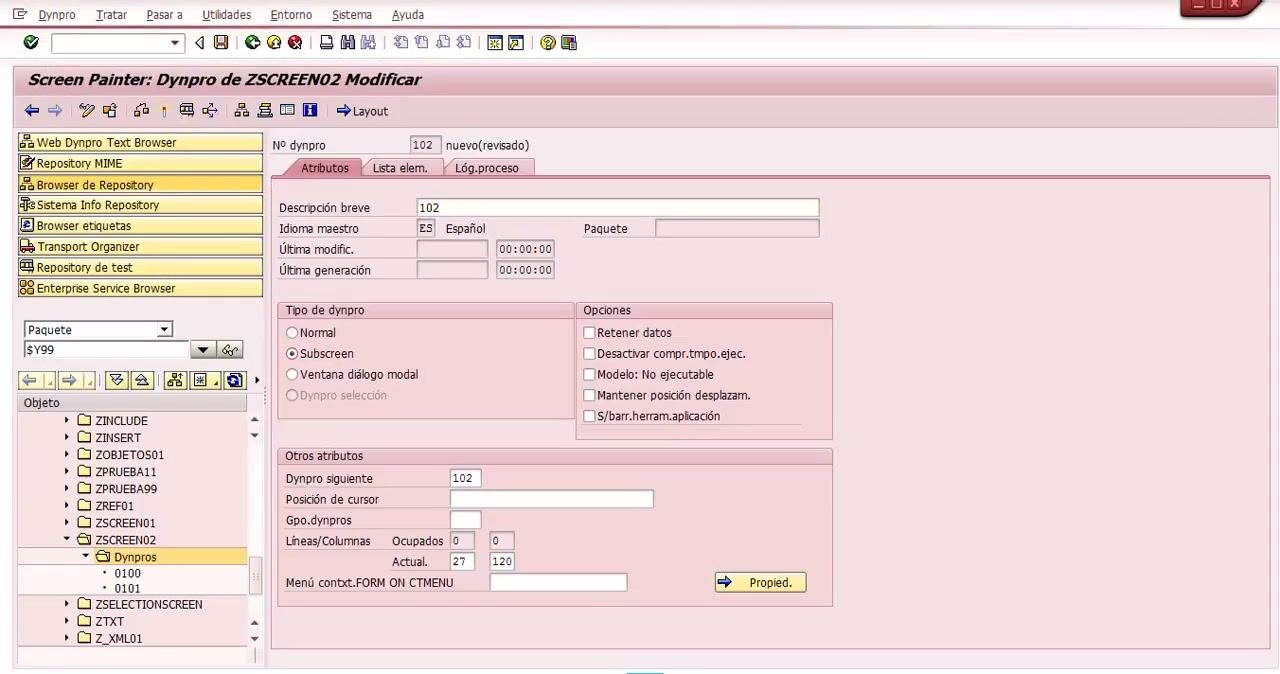
Configure the attributes of subscreen 102
The attributes panel for the new dynpro 102 appears. Set or confirm these values:
- Brief description:
102 - Master language:
ES Español - Dynpro type:
Subscreen(selected) - Next dynpro:
102 - Lines/Columns: Occupied
0/0, Actual27/120 - Context menu:
FORM ON CTMENU
The last modified and last generated fields are empty because the screen is new.
Then open the layout editor for subscreen 102. The layout area is blank, the name field at the top shows [SUB, and the right panel is empty.
Add a text field to subscreen 102
Insert a text field into the layout area and enter HOLA SOY SUBSCREEN. The field appears in the upper left, highlighted in pink, and the right panel shows the text property as HOLA_SOY_SUBSCREEN.
Expand the text field in subscreen 102
Expand the text field horizontally and update the text to HOLA SOY SUBSCREEN 102 102 102 102 102. The right panel shows the text property as HOLA_SOY_SUBSCREEN_102.
Review the attributes and confirm subscreen 102 is active
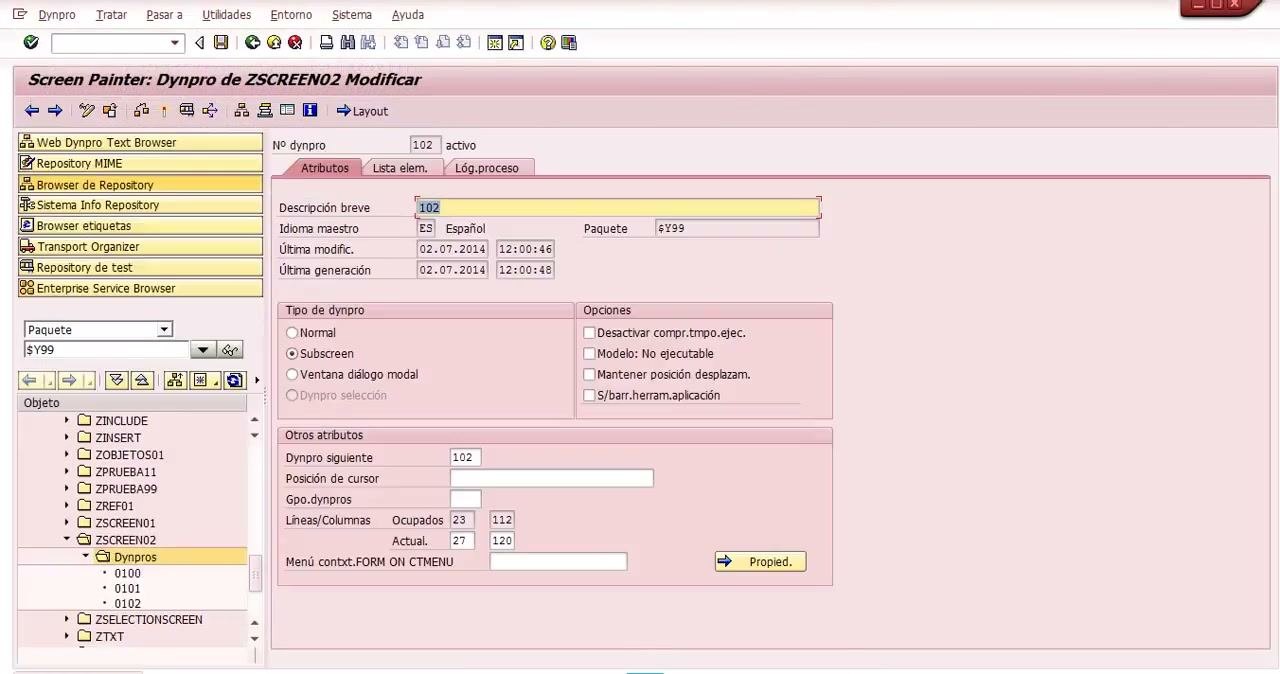
Return to the attributes panel for subscreen 102. It now shows:
- Brief description:
102 - Master language:
ES Español - Package:
$Y99 - Last modified:
02.07.2014, 12:00:46 - Last generated:
02.07.2014, 12:00:48 - Dynpro type:
Subscreen(selected) - Next dynpro:
102 - Lines/Columns: Occupied
23/112, Actual27/120 - Context menu:
FORM ON CTMENU
The dynpro is now marked as active.
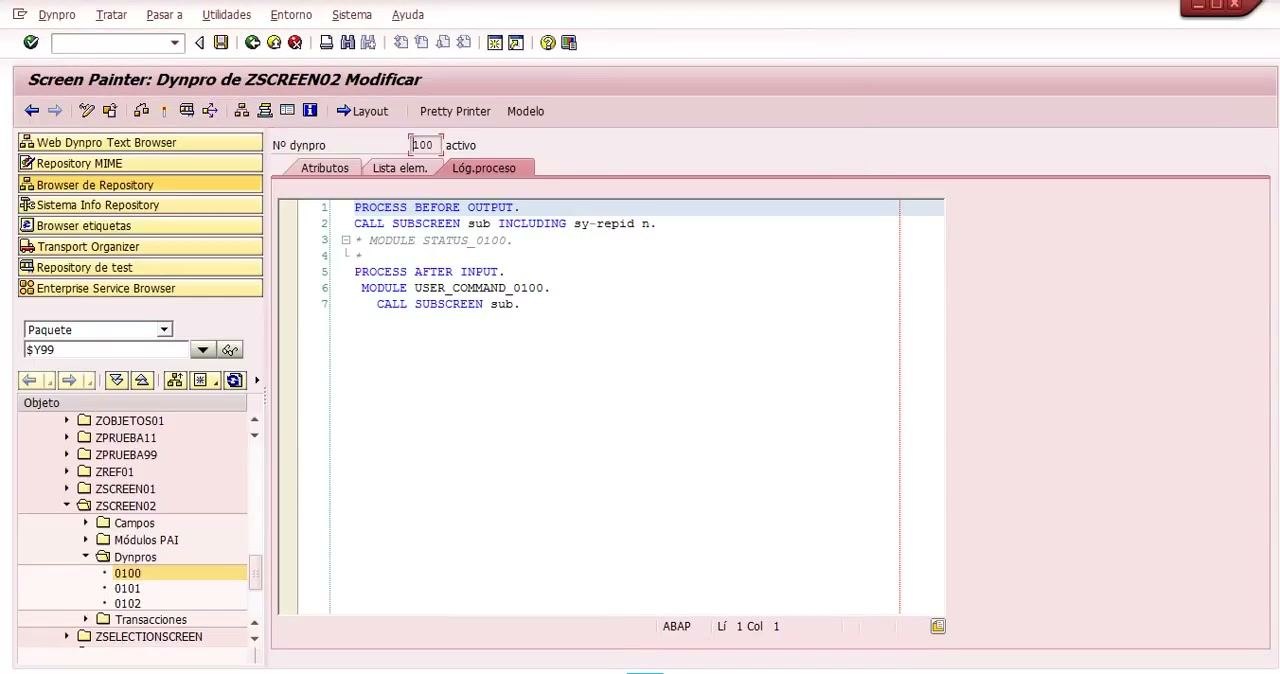
Call the subscreen in the process logic
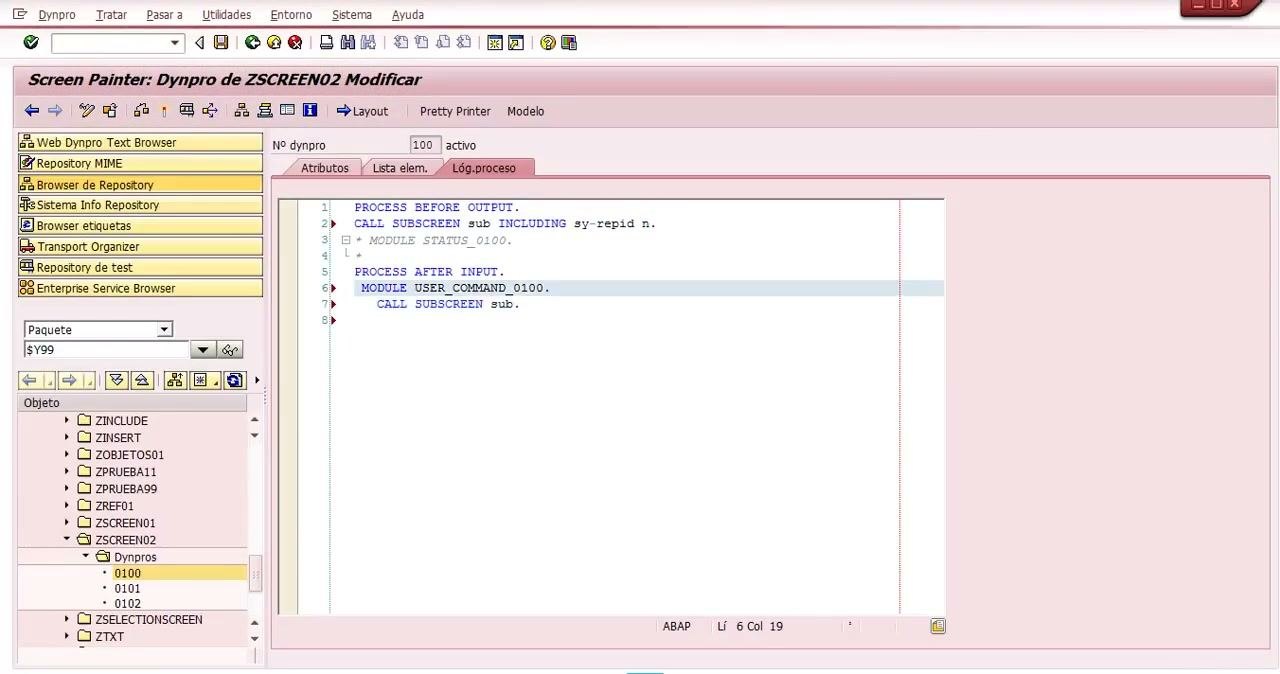
In the "Screen Painter: Dynpro de ZSCREEN02 Modificar" window, open the Lóg.proceso tab for dynpro 100. The logic reads:
PROCESS BEFORE OUTPUT.
CALL SUBSCREEN sub INCLUDING sy-repid n.
* MODULE STATUS_0100.
PROCESS AFTER INPUT.
MODULE USER_COMMAND_0100.
CALL SUBSCREEN sub.
The variable sub is the subscreen area, and n is the subscreen number. Because the call uses n, the program decides which subscreen to display from the value of n.
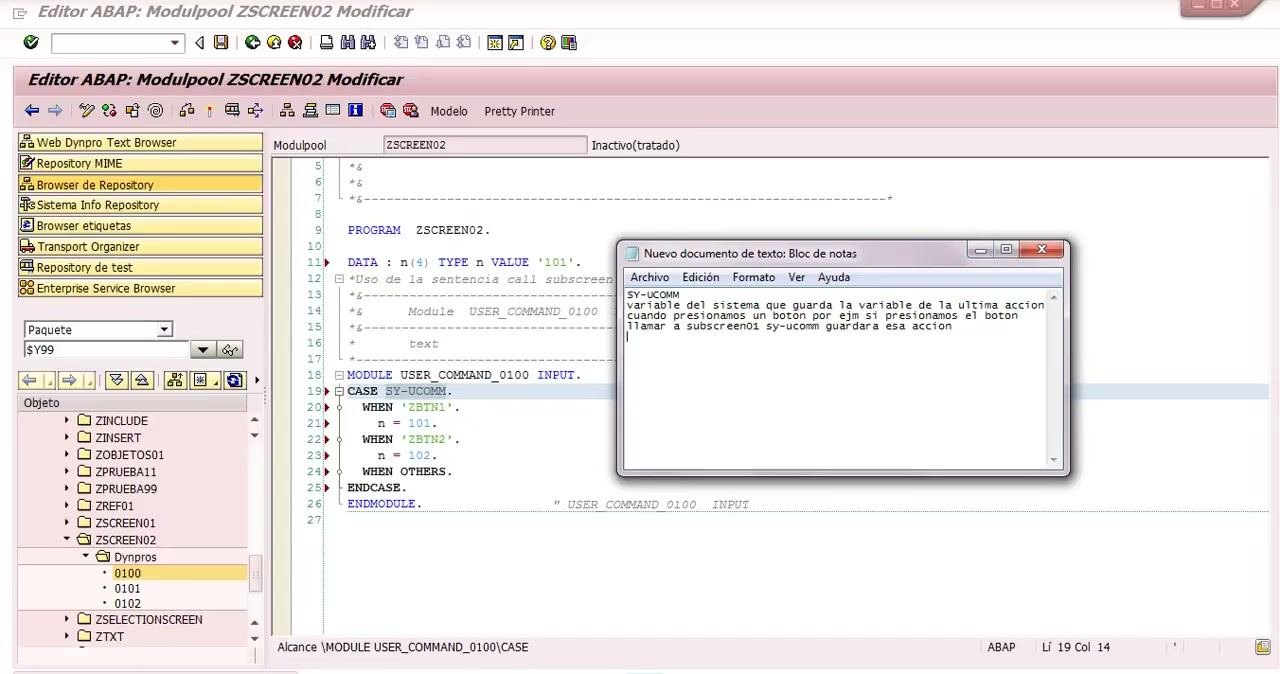
Understand SY-UCOMM
SY-UCOMM is a system variable that stores the last action the user performed. For example, when the user presses the button that calls a subscreen, sy-ucomm stores that action. You use this value in the next steps to set n.
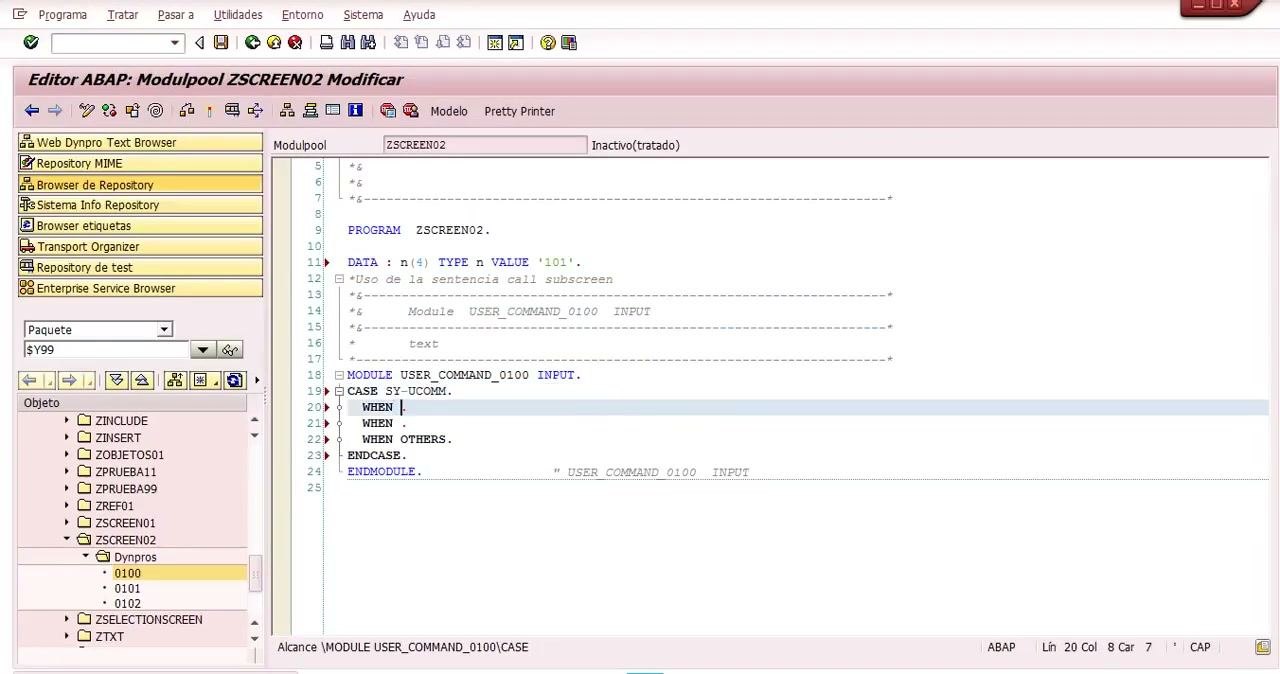
Open the USER_COMMAND_0100 module
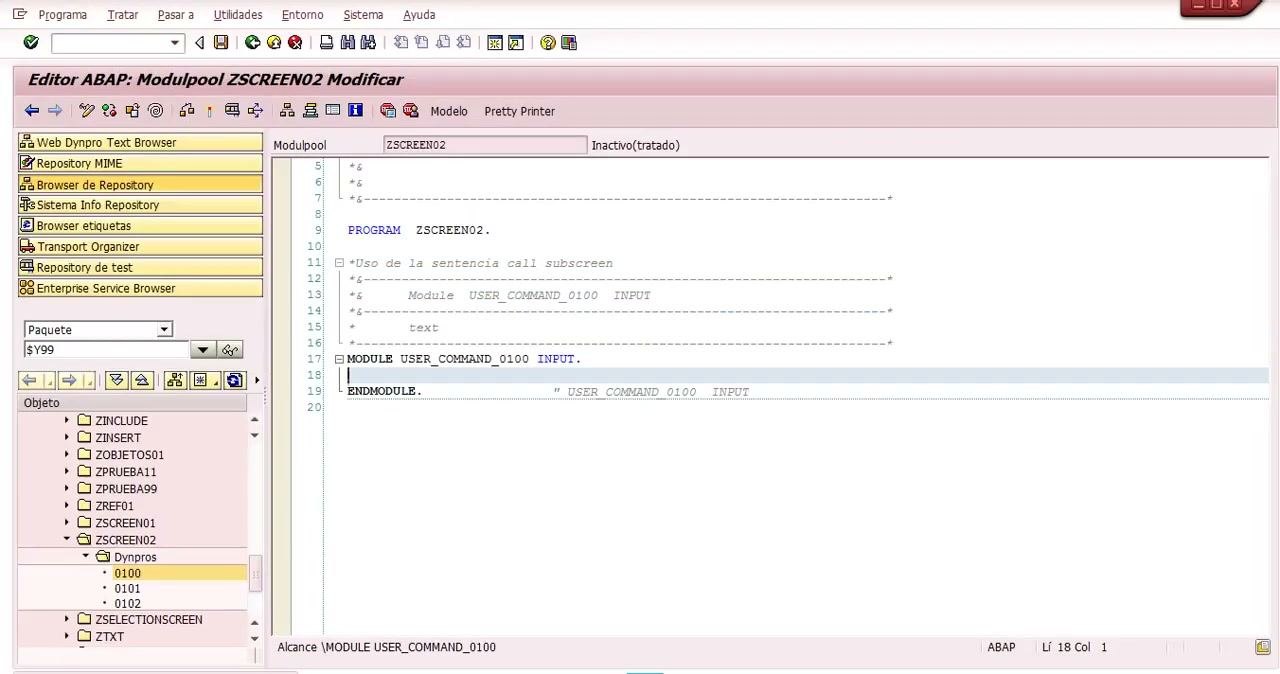
Go to the ABAP module editor for ZSCREEN02. The editor shows the module USER_COMMAND_0100 INPUT., which is empty and waits for the logic that handles user commands.
Add the CASE statement
In the USER_COMMAND_0100 module, add a CASE SY-UCOMM. statement. Add placeholders for the WHEN branches and a WHEN OTHERS. branch. This structure lets the program react differently to each user command.
Define the branches that select the subscreen
Fill in the CASE statement with these branches:
WHEN 'ZBTN1'.setsn = 101.WHEN 'ZBTN2'.setsn = 102.WHEN OTHERS.handles any other command.
With this logic, the button the user presses decides whether subscreen 101 or 102 appears.
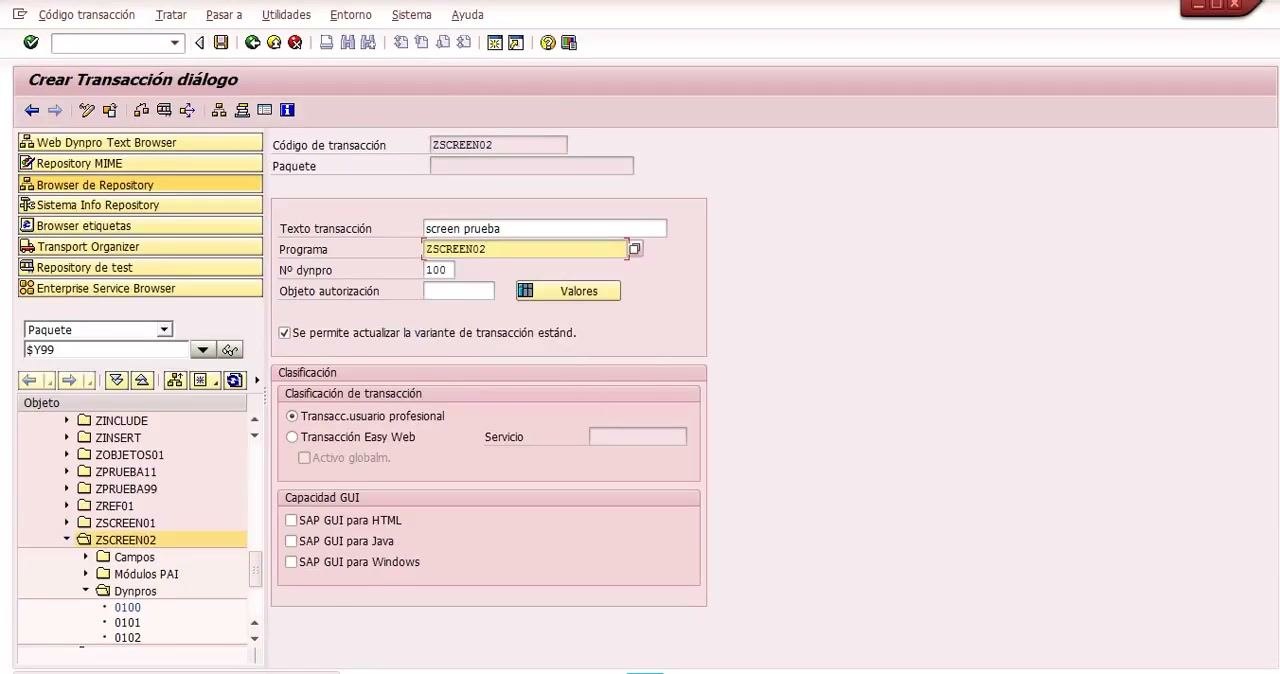
Start creating a transaction
Right-click the program or object in the left panel and choose Crear → Transacción. This creates a transaction code for the program.
Fill in the transaction dialog
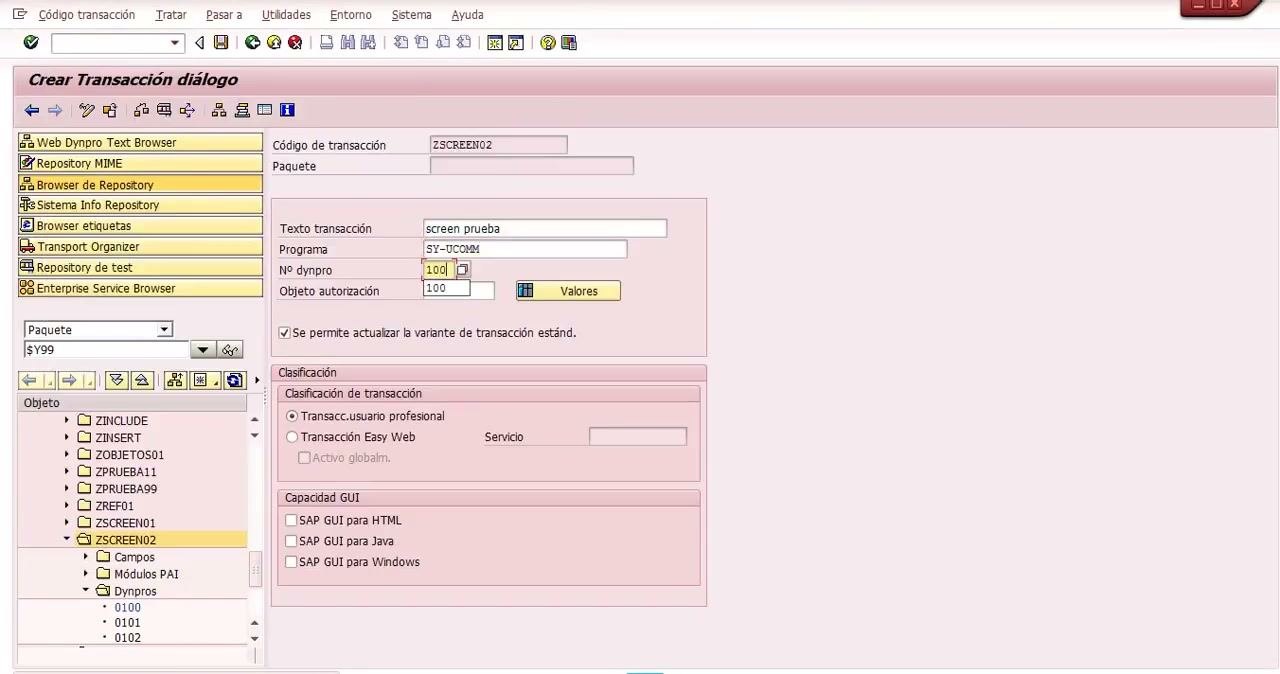
In the Crear Transacción diálogo screen, enter these values:
- Código de transacción:
ZSCREEN02 - Texto transacción:
screen prueba - Programa:
SY-UCOMMat first. You correct it in the next step. - Nº dynpro:
100 - Objeto autorización:
100
Check Se permite actualizar la variante de transacción estándar. Under Clasificación de transacción, select Transacc.usuario profesional. Under Capacidad GUI, make sure SAP GUI para Windows is checked.
Correct the program name
Change the Programa field from SY-UCOMM to ZSCREEN02. Leave the other fields unchanged. This links the transaction to the correct ABAP program.
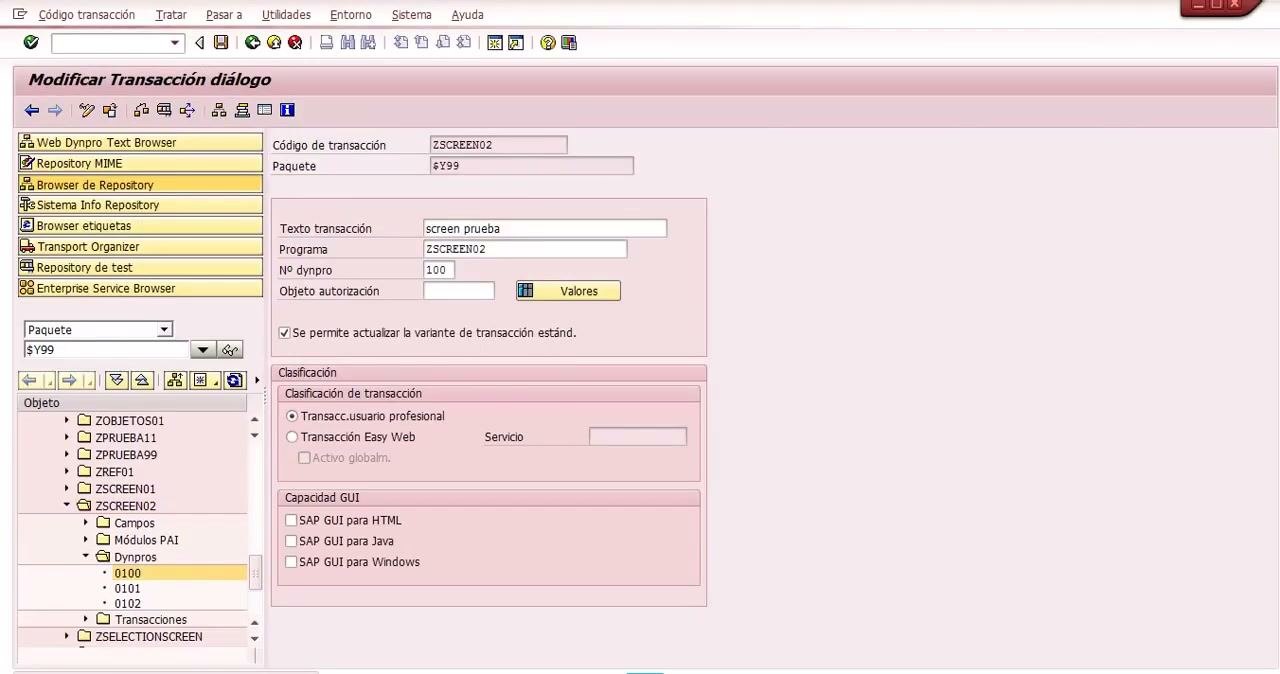
Save and review the transaction
After you save, the dialog title changes to Modificar Transacción diálogo, which confirms the transaction exists. The Paquete field shows $Y99, and all the values you entered are visible. The transaction is ready for testing.
Test the transaction
Run the transaction. The main screen shows two buttons, LLAMAR SUBSCREEN 101 and LLAMAR SUBSCREEN 102. The main area displays the subscreen text HOLA SOY SUBSCREEN 102 102 102 102 102.
Summary
You now know how to call a subscreen in SAP ABAP. The main screen has a subscreen area named SUB, and each subscreen has a frame with the same name. CALL SUBSCREEN sub INCLUDING sy-repid n displays the subscreen whose number is in n. The USER_COMMAND_0100 module changes n based on sy-ucomm.
Remember the key rule: the subscreen area name in the main screen must match the frame name in each subscreen.
What's next
- Add further subscreens by creating more dynpros of type Subscreen and adding matching
WHENbranches to theCASEstatement. - Continue configuring and implementing the dynpro logic for your program.
Generation details: cost, quality tiers
Docsie billed 7,000 credits ($4.90) to analyze this 14-minute video at standard quality. The rewrite, template fill and Word/PDF exports were included. The same video at each quality tier:
| Quality | Frames sampled | Credits | Approx. cost |
|---|---|---|---|
| Draft | every 16-30 s | 3,500 | $2.45 |
| Standard (this guide) | every 8-15 s | 7,000 | $4.90 |
| Detailed | every 4-7 s | 14,000 | $9.80 |
| Ultra | every 1-3 s | 28,000 | $19.60 |
Credits priced at $0.70 per 1,000; plans include a monthly allowance. Enterprise customers on on-premise or bring-your-own-model deployments run this on their own inference and pay no per-video credits.
Generated by Docsie Video-to-Docs on 2026-11-15 from a 13-minute video. Screenshots are frames from the source video and belong to their creator, Roberto Mejia Andrade, whose original is embedded above. If you own this video and want the guide removed or credited differently, contact us and we will act within one business day.