
How to Clean Up a Blood Spill
This protocol explains how to clean up a blood spill and other biohazard spills using the GV Health MJZ003 Biohazard Spill Kit. It sets out the compliance basis for the kit, the fluids it is designed to treat, the correct personal protective equipment (PPE), and the step-by-step cleanup and disposal procedure. Following this protocol ensures blood and biohazard spills are contained, disinfected, and disposed of safely and consistently.
Video: How to clean up a Blood or Biohazard Spill - Procedure Training | GV Health - Life.Protected. by GV Health (2021). All credit for the demonstration goes to the creator; watch the original on YouTube. The written guide below was generated from this video by Docsie. Creator? Request a change or removal.
This protocol explains how to clean up a blood spill and other biohazard spills using the GV Health MJZ003 Biohazard Spill Kit. It sets out the compliance basis for the kit, the fluids it is designed to treat, the correct personal protective equipment (PPE), and the step-by-step cleanup and disposal procedure. Following this protocol ensures blood and biohazard spills are contained, disinfected, and disposed of safely and consistently.
Purpose & Scope
The GV Health Biohazard Spill Pack (MJZ003) is developed in accordance with the Health and Safety Executive, the UK Department of Health, and World Health Organisation guidelines. It is intended to support best practice and safety when responding to a blood or biohazard spill.
This protocol applies to any staff member responsible for managing a biohazard spill in their workplace using the MJZ003 kit. Use this kit only for the biohazard spill types it is designed for, as detailed below.
Pathogen Overview
The MJZ003 kit is designed for spills involving the following body fluids and tissues:
- Blood
- Breast milk
- Amniotic fluid
- Vaginal secretions
- Semen
- Unfixed tissues/organs
- Cerebrospinal fluid (CSF)
- Pericardial fluid
- Pleural fluid
- Peritoneal fluid
- Synovial fluid
- Saliva
Screening & Identification
Before beginning cleanup, confirm the spill type to ensure you are using the correct kit. The MJZ003 kit is not suitable for acidic spills.
For acidic spills such as vomit, urine, faeces, sputum, and saliva, use the MJZ004 Spill Pack or the MJZ020 Spill Kit instead of the MJZ003 kit.
This protocol does not specify a formal notification or reporting workflow for spill incidents; confirm your organization's incident reporting requirements separately.
Isolation Precautions
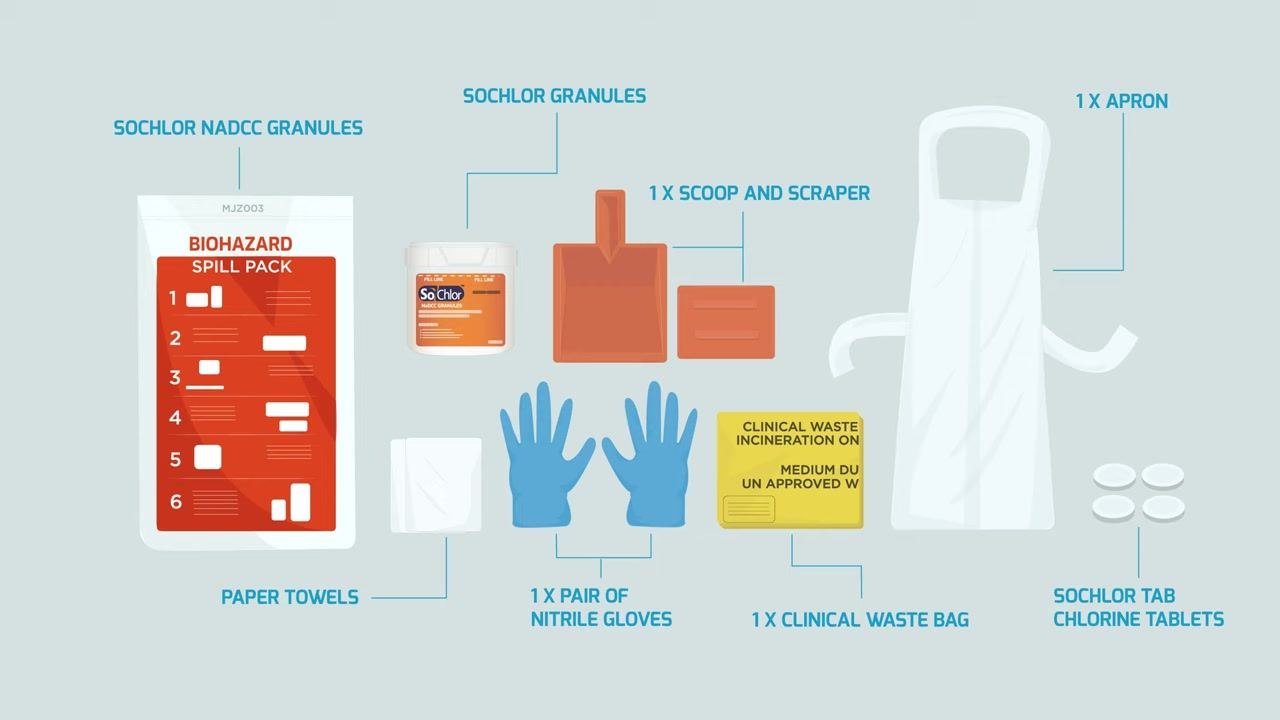
The kit contains all the items needed to contain the spill and protect the person carrying out the cleanup:
| Item | Purpose |
|---|---|
| SoChlor NaDCC granules | Absorb and begin disinfecting the spill |
| SoChlor granules container | Used later to mix the disinfectant solution |
| Scoop and scraper | Remove absorbed spill material |
| Apron | Protects clothing from contamination |
| Nitrile gloves (1 pair) | Protects hands from contact with the spill |
| Paper towels | Used to wipe down the spill area |
| Clinical waste bag | Holds all contaminated materials for disposal |
| SoChlor tab chlorine tablets | Used to prepare the disinfectant solution |
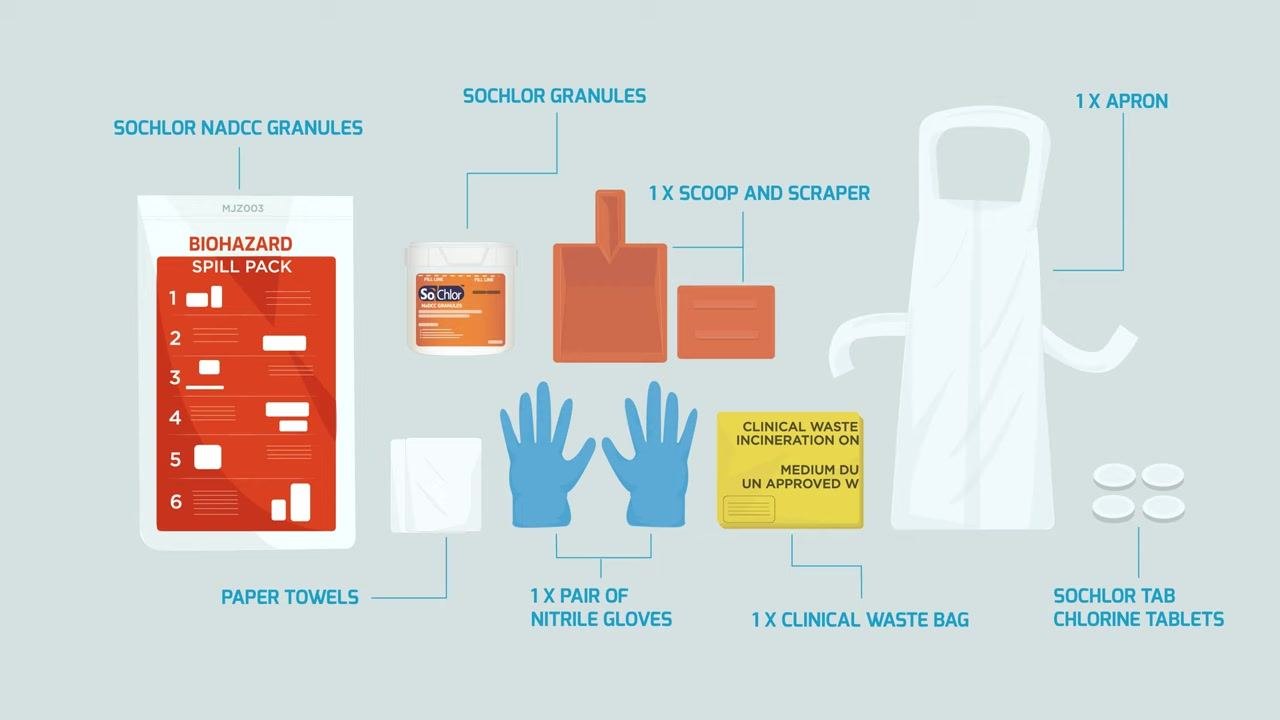
Put on the apron and gloves provided in the kit before starting cleanup. Use face protection if there is a risk of splashing.
PPE removal (doffing) procedure
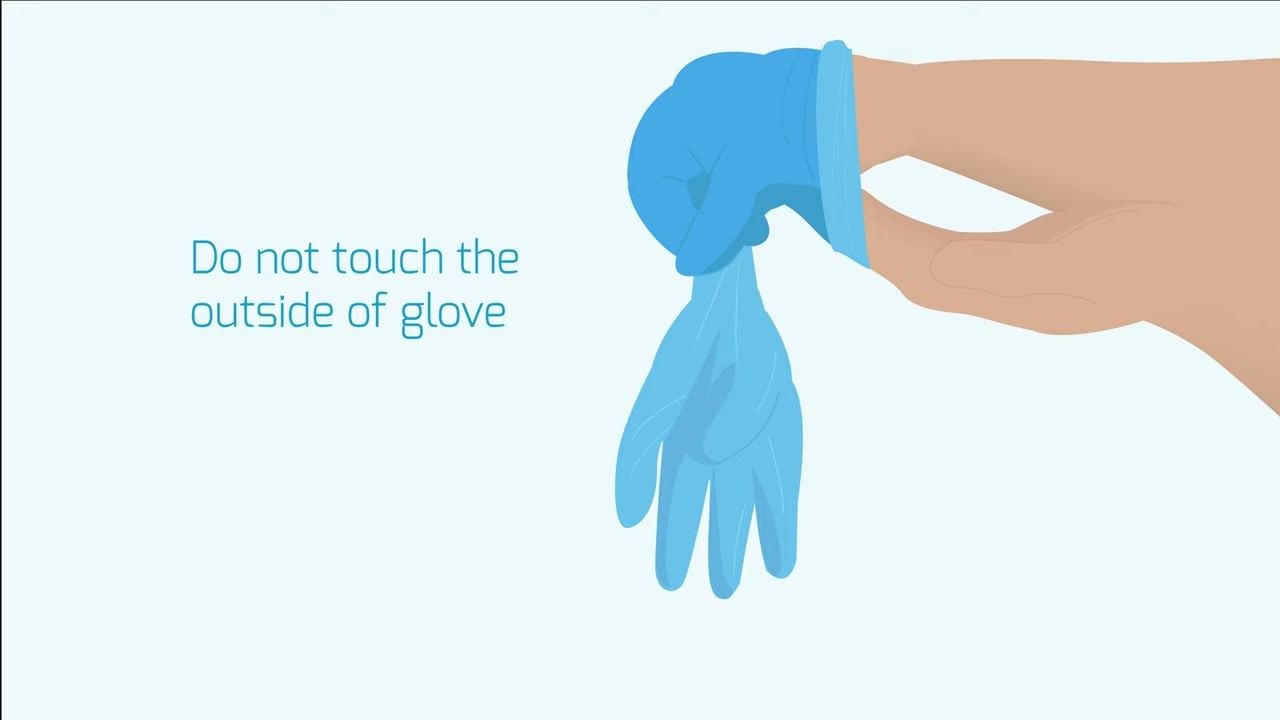
Remove gloves carefully to avoid skin contact with the contaminated outer surface:
- Pinch one glove at the wrist without touching your skin and peel it away, turning it inside out.
- Hold the removed glove in your still-gloved hand.
- Hook the index and middle finger of your bare hand under the remaining glove at the wrist and peel it off over the first glove.
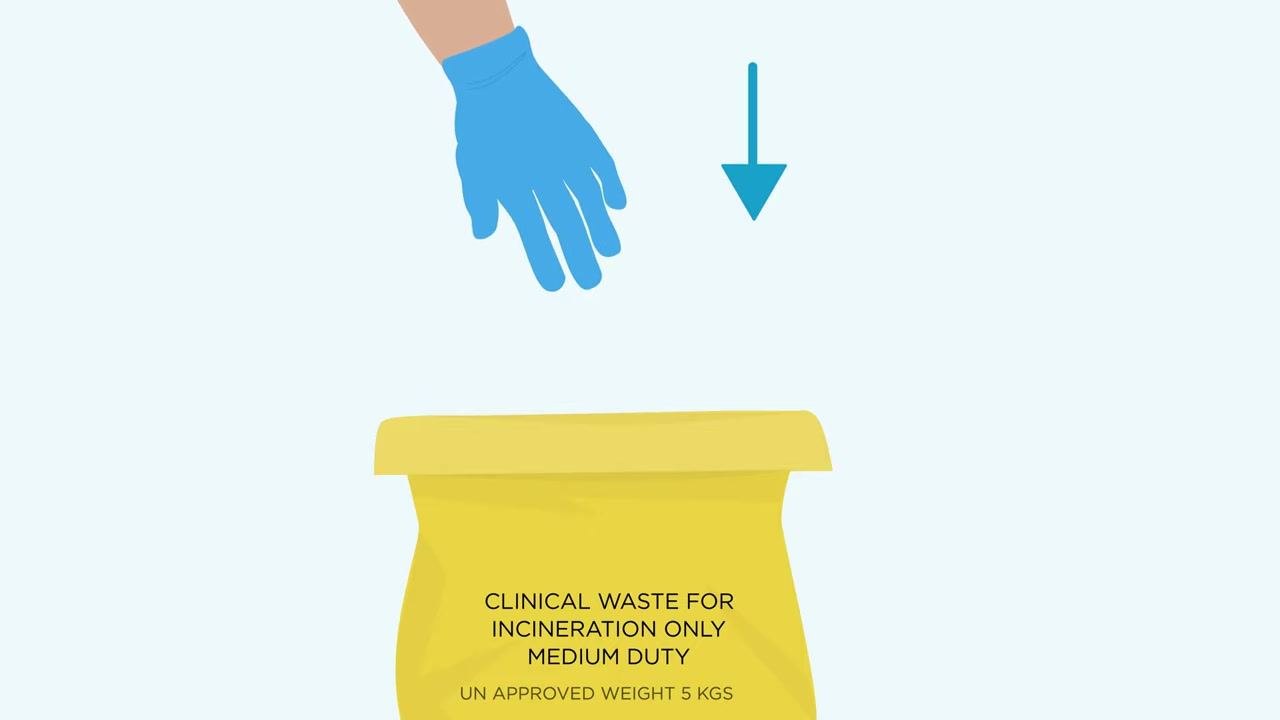
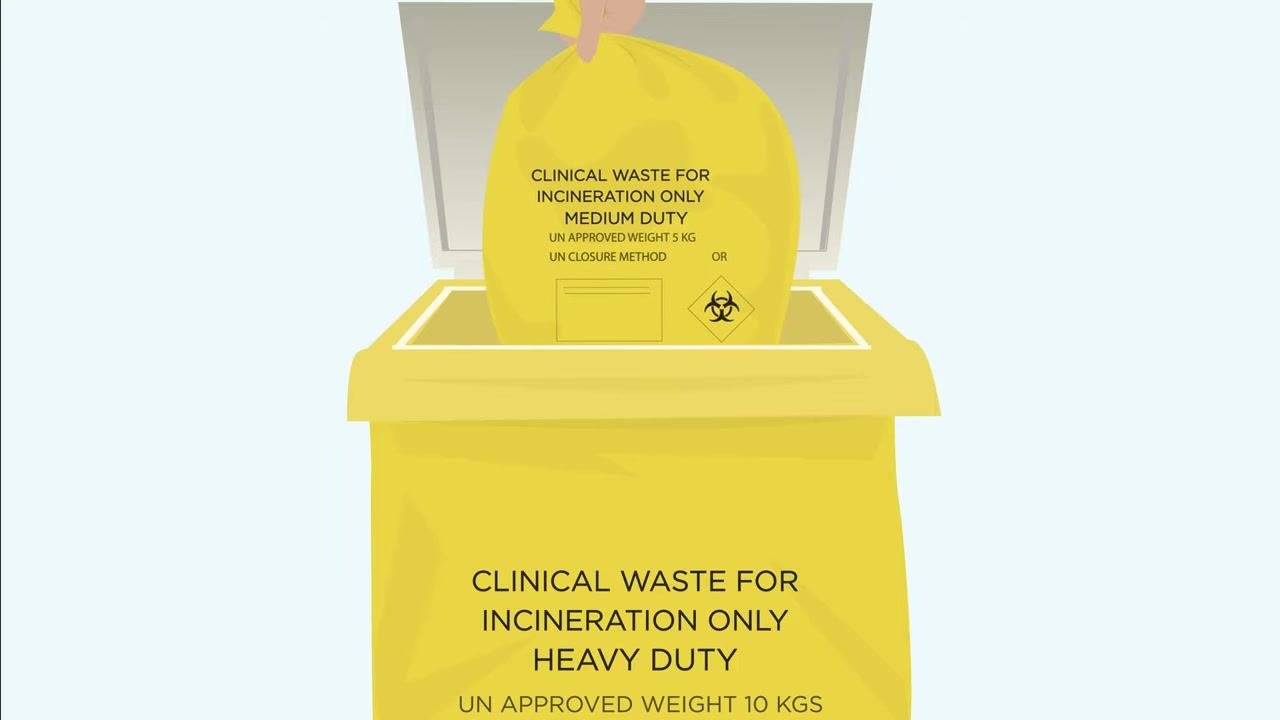
Insert your bare fingers inside the cuff of the remaining glove, taking care not to touch its outside surface. Pull it off, turning it inside out so the first glove is contained within the second. Dispose of both gloves in the yellow clinical waste bag.
Break the neck loop and waist straps of the apron. Avoid touching its outer (contaminated) surface with your hands. Roll the apron downwards from your chest, folding the contaminated surface inwards, and dispose of it in the yellow clinical waste bag.
Hand Hygiene Protocol
After removing all personal protective equipment, wash your hands thoroughly with soap and water. This protocol does not describe a formal five-moments hand hygiene framework or compliance monitoring method; apply your organization's standard hand hygiene program alongside this step.
Environmental Cleaning
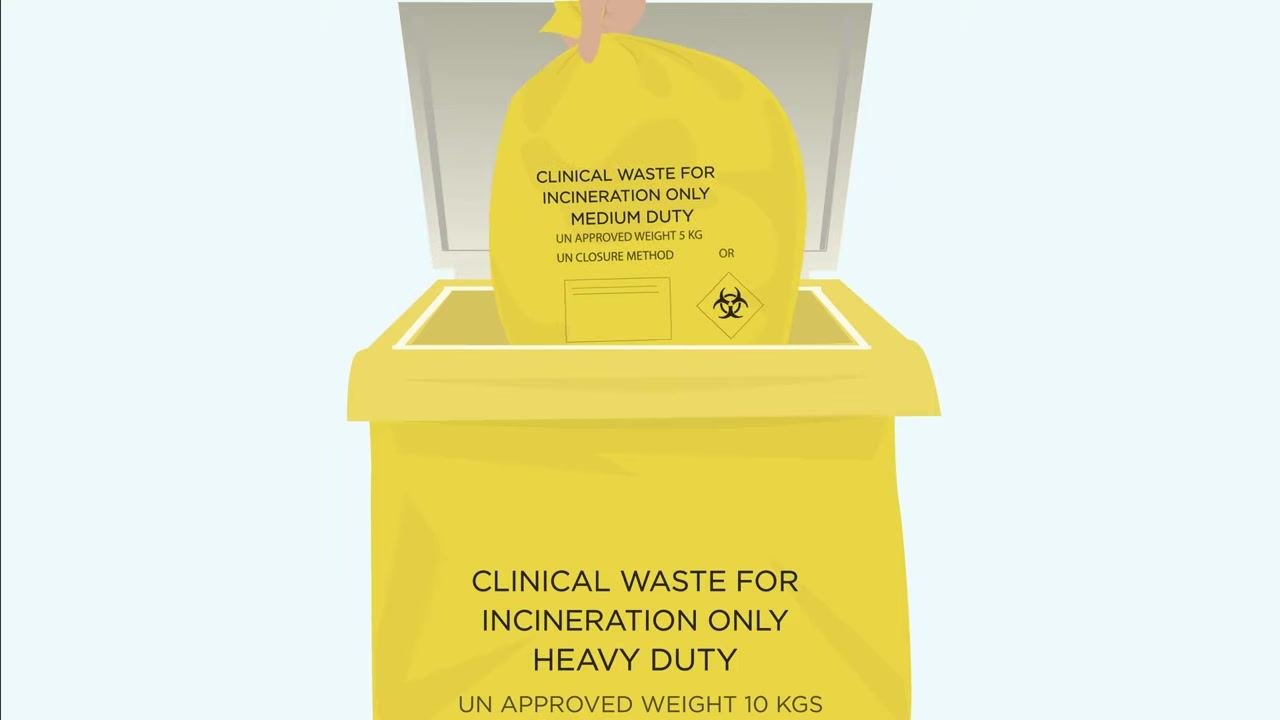
Unfold the yellow clinical waste bag labeled "Clinical Waste for Incineration Only" and set it up as close to the spill as possible so it is accessible throughout the cleanup.
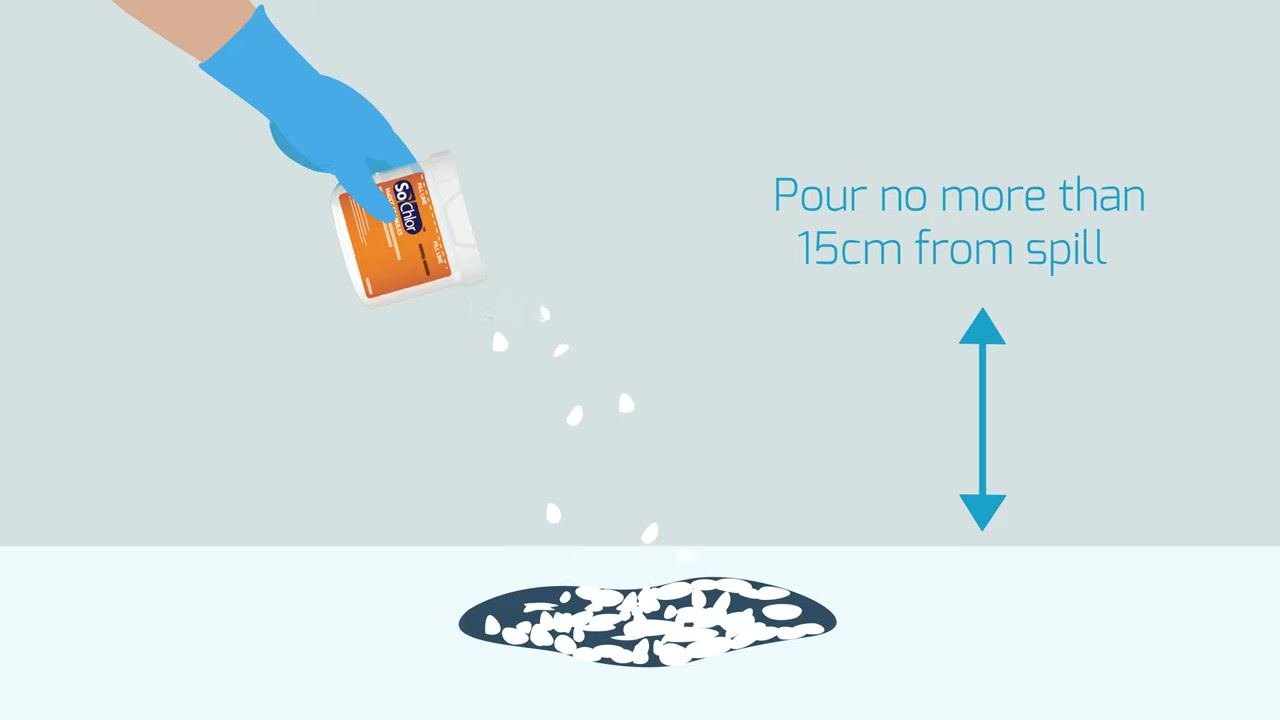
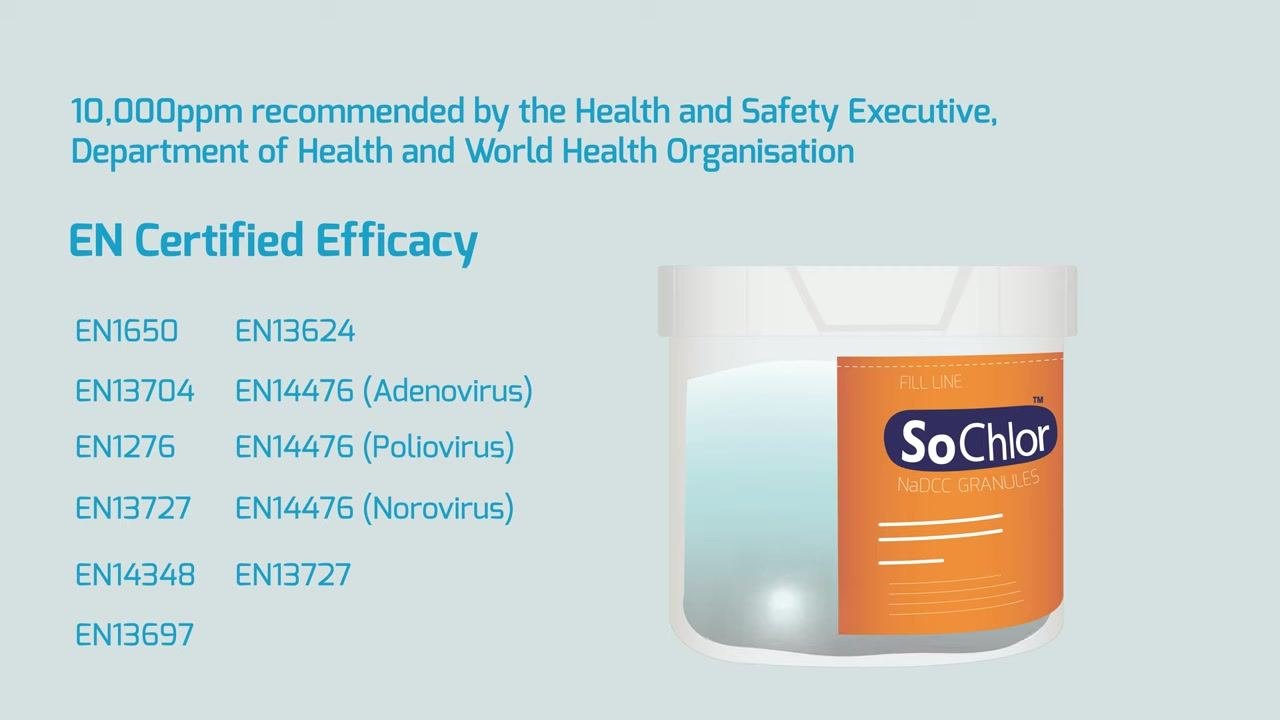
Pour the SoChlor NaDCC granules directly onto the spill, holding the container no more than 15 cm above it, until the spill is completely covered. The granules absorb the liquid and begin disinfecting it, reducing the risk of cross-contamination.
Wait 3 minutes to allow the granules to fully absorb and disinfect the spill, confirming that the spill remains completely covered during this time.
Preparing the disinfectant solution
| Step | Detail |
|---|---|
| Fill container | Cold water up to the marked fill line |
| Add tablets | All SoChlor tablets provided in the kit |
| Dilution | Leave until tablets are fully dissolved |
| Resulting concentration | 10,000 ppm chlorine solution |
This concentration is recommended by the Health and Safety Executive, Department of Health, and World Health Organisation, and is fully effective against bacteria, spores, mycobacteria, fungi, and viruses.
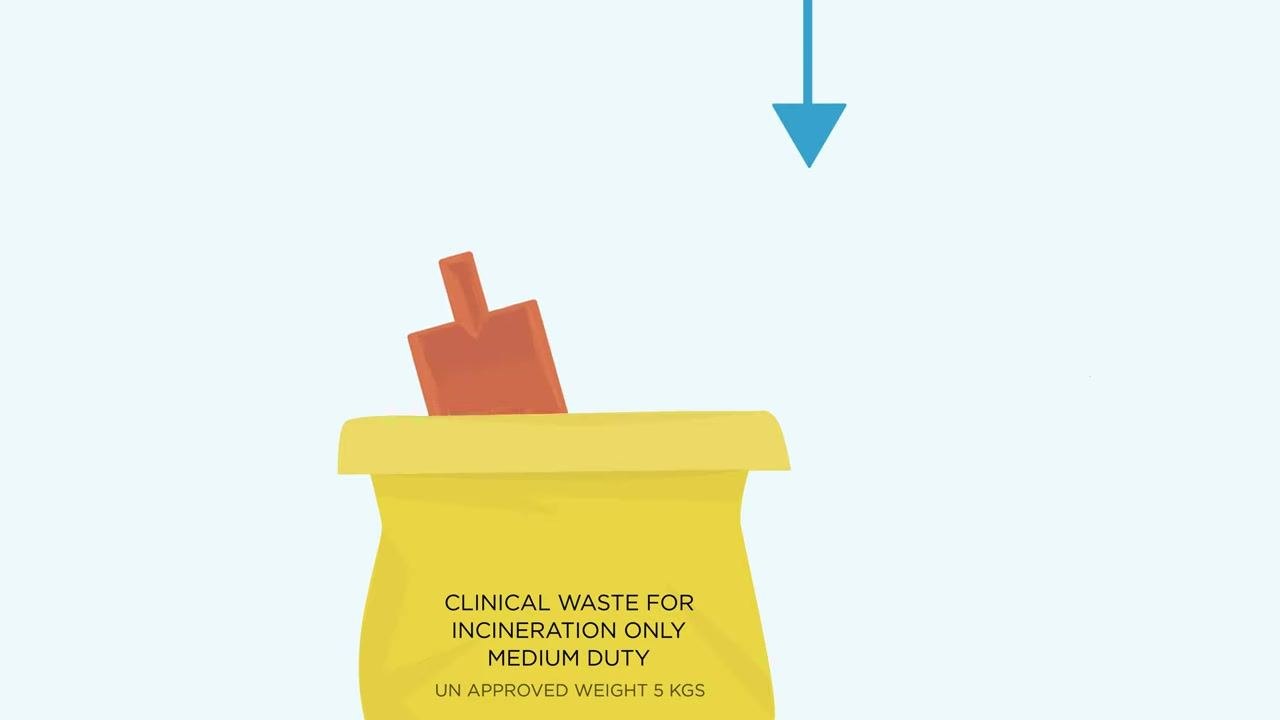
Use the scoop and scraper to remove the absorbed spill and excess granules from the site. Dispose of the absorbed material along with the scoop and scraper into the yellow clinical waste bag labeled "Clinical Waste for Incineration Only."
Wet the paper towels with the prepared 10,000 ppm SoChlor solution and wipe the spill area and any splashes using an S-shape motion to avoid spreading contamination. Dispose of used paper towels in the yellow clinical waste bag.
Pour any remaining SoChlor solution down a sluice or sink with running water, avoiding contamination of handles or surfaces with your gloves. Place the empty SoChlor container into the yellow clinical waste bag.
Close the yellow clinical waste bag without touching its inside surface, and tie a knot to seal it securely. Place the sealed bag into the appropriate waste stream, such as a clinical waste bin, in accordance with local regulations.
Surveillance & Reporting
Continue to follow any additional local protocols for biohazard waste disposal and hand hygiene after completing this procedure. This document does not define outbreak thresholds, mandatory reporting timelines, or a line-listing template; confirm these details with your organization's own biohazard reporting procedures.
Staff Education
Staff using the MJZ003 kit should be familiar with its contents, the fluids it is designed for, and the step-by-step cleanup procedure described above before responding to a spill. This document does not specify a formal training schedule or competency assessment; establish these according to your organization's training program.
For more information on the kit and related products, visit the GV Health website.
What's Next
After completing this cleanup procedure, confirm that all contaminated items are sealed within the clinical waste bag and placed in the correct waste stream. Review your local biohazard protocols to ensure any additional site-specific steps are followed, and keep the MJZ003 kit restocked for future use.
Generation details: cost, quality tiers, downloads
Docsie billed 2,500 credits ($1.75) to analyze this 5-minute video at standard quality. The rewrite, template fill and Word/PDF exports were included. The same video at each quality tier:
| Quality | Frames sampled | Credits | Approx. cost |
|---|---|---|---|
| Draft | every 16-30 s | 1,250 | $0.88 |
| Standard (this guide) | every 8-15 s | 2,500 | $1.75 |
| Detailed | every 4-7 s | 5,000 | $3.50 |
| Ultra | every 1-3 s | 10,000 | $7.00 |
Credits priced at $0.70 per 1,000; plans include a monthly allowance. Enterprise customers on on-premise or bring-your-own-model deployments run this on their own inference and pay no per-video credits.
Generated by Docsie Video-to-Docs on 2026-09-28 from a 4-minute video. It was generated straight into Docsie's Infection Control Protocol template, so every section of that template is filled from the video. Screenshots are frames from the source video and belong to their creator, GV Health, whose original is embedded above. If you own this video and want the guide removed or credited differently, contact us and we will act within one business day.