
How to Close a Period in NetSuite
Closing a period in NetSuite involves locking transactions, resolving outstanding issues, and completing a series of checklist tasks to ensure your financial records are accurate for the period. This guide walks you through how to close a period in NetSuite, from locating the Manage Accounting Periods page to verifying that all checklist tasks are complete.
Video: NetSuite Tutorial | How To Close an Accounting Period in NetSuite by Kolleno (2024). All credit for the demonstration goes to the creator; watch the original on YouTube. The written guide below was generated from this video by Docsie. Creator? Request a change or removal.
Closing a period in NetSuite involves locking transactions, resolving outstanding issues, and completing a series of checklist tasks to ensure your financial records are accurate for the period. This guide walks you through how to close a period in NetSuite, from locating the Manage Accounting Periods page to verifying that all checklist tasks are complete.
Prerequisites
- Access to the Setup menu with permissions to manage accounting periods.
- Familiarity with the accounting period you intend to close (for example, Jan 2010 or Feb 2010).
Navigate to Manage Accounting Periods
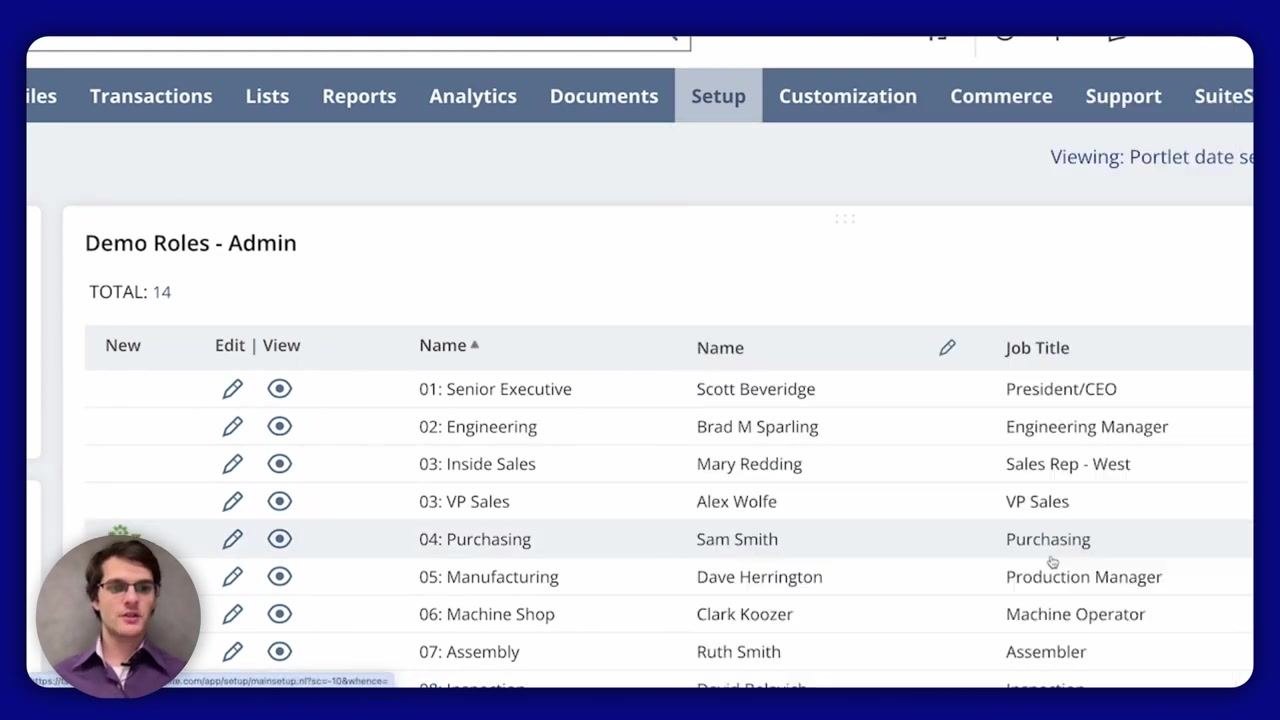
Go to the top navigation bar and click Setup. In the dropdown menu, hover over Accounting and select Manage Accounting Periods.
View available accounting periods
On the Manage Accounting Periods page, review the full list of accounting periods displayed. Locate the specific period you want to manage, such as FY 2010, Jan 2010, or Feb 2010.
Select the period to close
Click the checklist icon next to the period you want to manage, such as Jan 2010. This opens the Period Close Checklist for that period.
Review the period close checklist
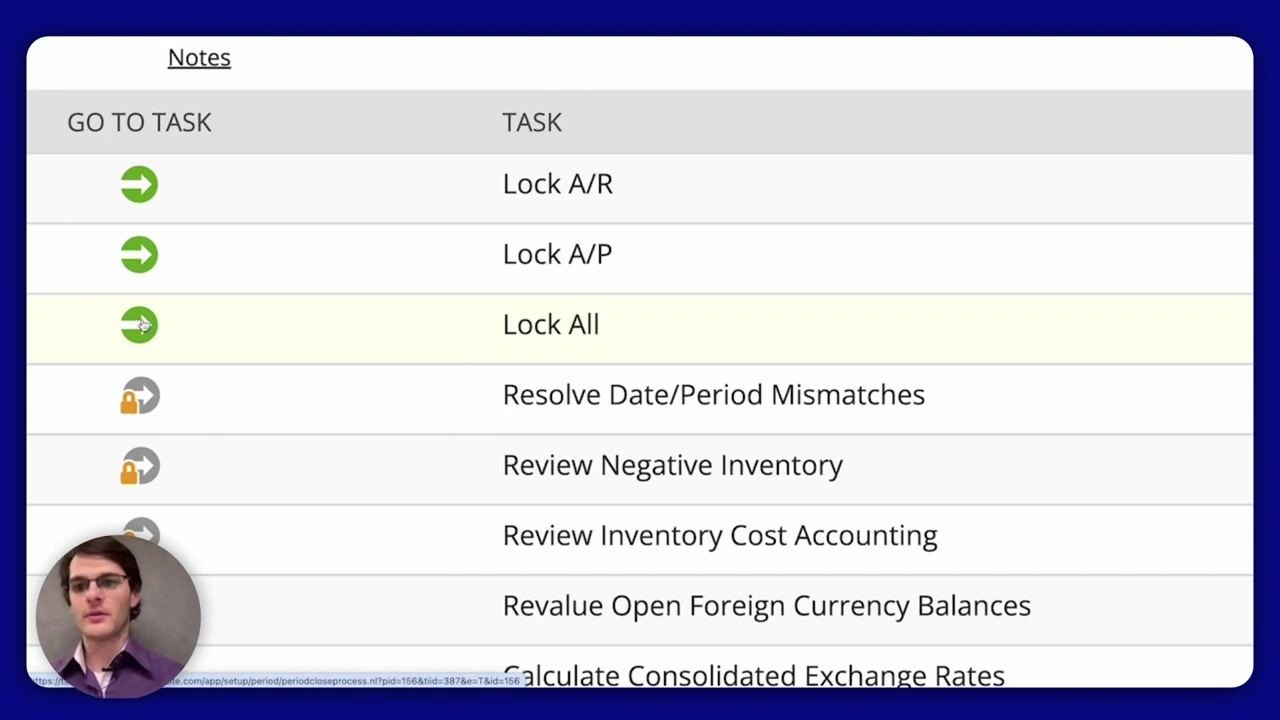
Examine the checklist for the selected period. The checklist includes the following tasks:
- Lock A/R
- Lock A/P
- Lock All
- Resolve Date/Period Mismatches
- Review Negative Inventory
- Review Inventory Cost Accounting
- Revalue Open Foreign Currency Balances
- Calculate Consolidated Exchange Rates
- Close
The checklist also displays the status of each task and the user who last modified it.
Lock transactions for the period
Click the green arrow icon next to Lock All to lock all transactions for the period. A dialog appears allowing you to select the subsidiaries to include. Select all relevant subsidiaries, then click Submit to lock all transactions for the period.
Resolve date/period mismatches
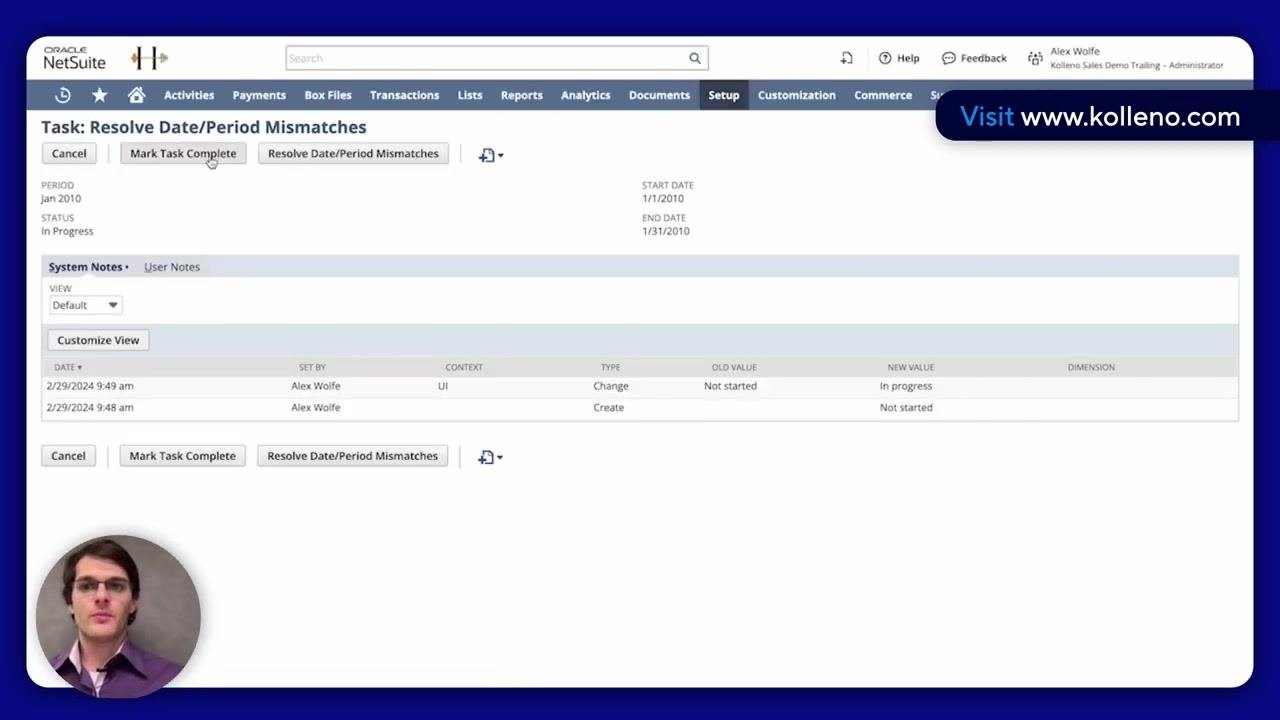
Click the green arrow icon next to Resolve Date/Period Mismatches. In the task window, review any system notes or flagged mismatches. Once the mismatches are resolved, click Mark Task Complete.
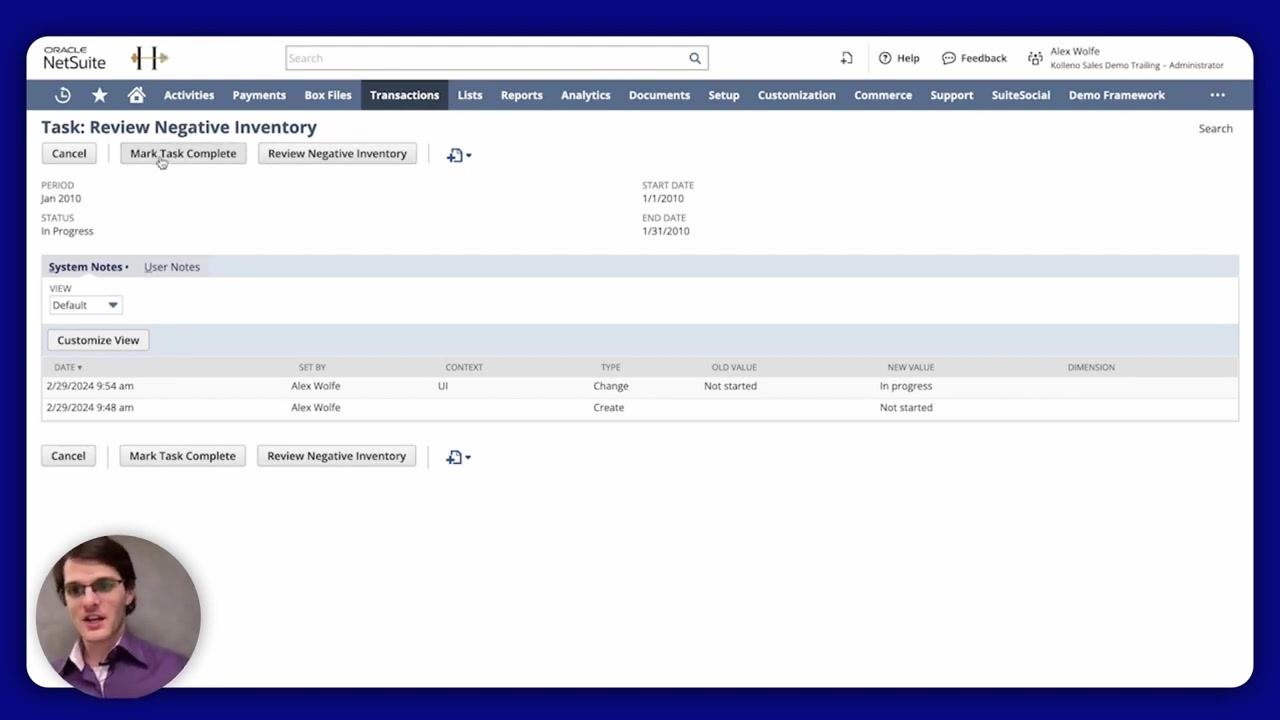
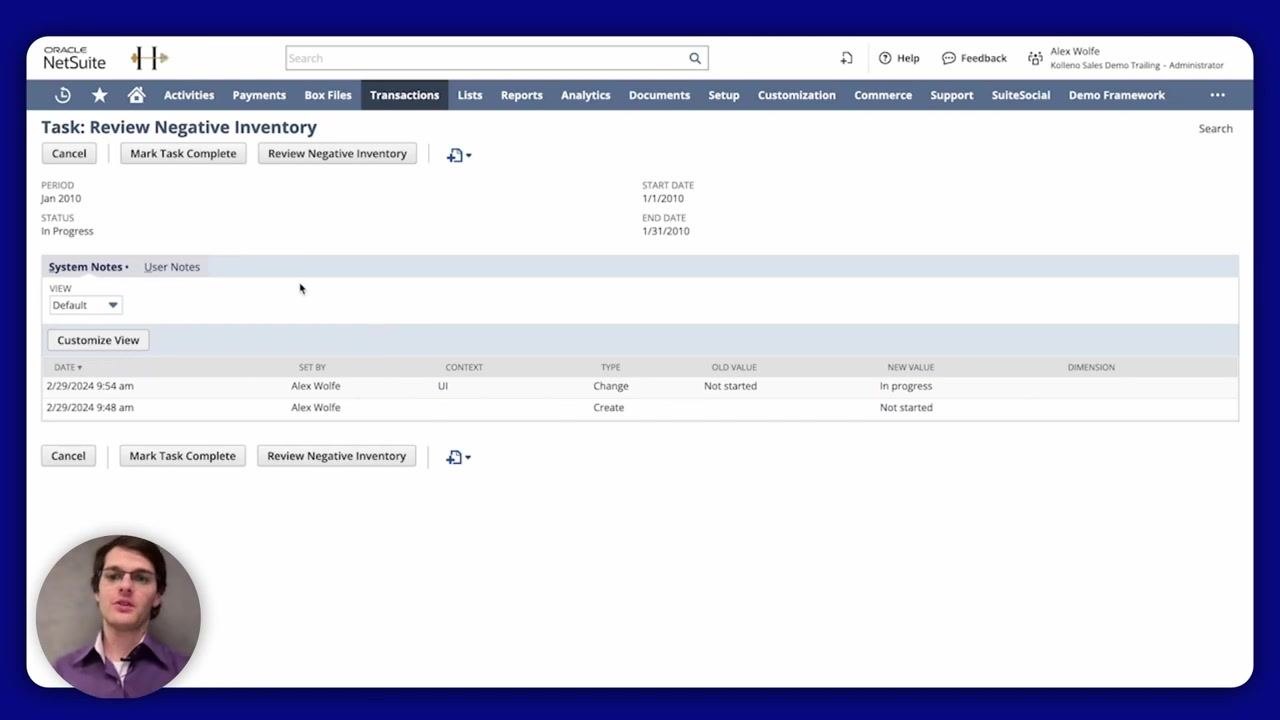
Review negative inventory
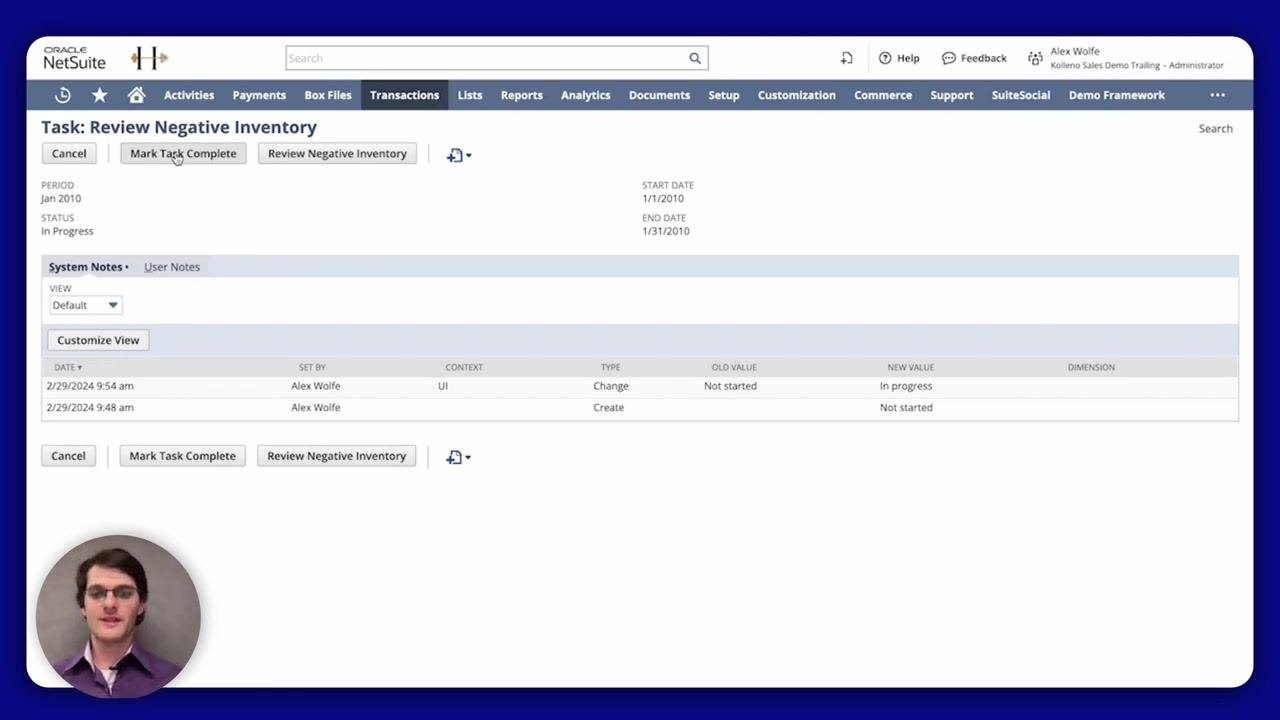
Click the green arrow icon next to Review Negative Inventory. In the task window, review any negative inventory issues listed. Once the review is complete, click Mark Task Complete.
Verify task completion in the checklist
After completing each task, return to the Period Close Checklist to confirm the status updates. Completed tasks display a green checkmark in the status column.
Why review tasks matter
Tasks such as Review Negative Inventory and Resolve Date/Period Mismatches exist to ensure that every transaction within the period being closed is correctly dated and recorded in the right fiscal year. These steps are essential for maintaining accurate financial records and staying compliant with accounting principles.
Do not click Mark Task Complete without first thoroughly reviewing the data presented in the task window. Carefully check all system notes and any flagged mismatches or negative inventory issues, and ensure every discrepancy is resolved before marking a task complete. Skipping this verification can result in closing a period with unresolved issues.
Mark a task complete after verification
Once you have verified and resolved all issues for a task, click Mark Task Complete in the task window for that checklist item, such as Review Negative Inventory. Confirm that the task status updates accordingly in the checklist.
Confirm status in the checklist
After completing each review task, return to the Period Close Checklist for the period, such as Jan 2010. Verify that completed tasks now show a green checkmark in the status column, confirming successful completion.
Complete remaining checklist tasks
Continue working through any remaining period close checklist tasks, applying the same careful review and completion process to each one.
Summary
By completing these steps, you can efficiently manage and close an accounting period in NetSuite, ensuring all checklist tasks are finished and transactions are properly locked. Careful verification at each stage supports reliable financial reporting and accounting compliance.
What's next
If you need to reopen an accounting period after closing it, refer to the dedicated guide covering that process for detailed instructions.
Generation details: cost, quality tiers
Docsie billed 1,500 credits ($1.05) to analyze this 3-minute video at standard quality. The rewrite, template fill and Word/PDF exports were included. The same video at each quality tier:
| Quality | Frames sampled | Credits | Approx. cost |
|---|---|---|---|
| Draft | every 16-30 s | 750 | $0.52 |
| Standard (this guide) | every 8-15 s | 1,500 | $1.05 |
| Detailed | every 4-7 s | 3,000 | $2.10 |
| Ultra | every 1-3 s | 6,000 | $4.20 |
Credits priced at $0.70 per 1,000; plans include a monthly allowance. Enterprise customers on on-premise or bring-your-own-model deployments run this on their own inference and pay no per-video credits.
Generated by Docsie Video-to-Docs on 2026-10-02 from a 2-minute video. Screenshots are frames from the source video and belong to their creator, Kolleno, whose original is embedded above. If you own this video and want the guide removed or credited differently, contact us and we will act within one business day.