
How to Add a User in NetSuite
Adding a new user in NetSuite involves two main tasks: confirming you have an available user license and creating a new employee record with the appropriate access and role settings. This guide walks you through the complete process, from checking license availability to finalizing login credentials for the new user.
Video: Short & Suite: How to add users in NetSuite by Concentrus. All credit for the demonstration goes to the creator; watch the original on YouTube. The written guide below was generated from this video by Docsie. Creator? Request a change or removal.
Adding a new user in NetSuite involves two main tasks: confirming you have an available user license and creating a new employee record with the appropriate access and role settings. This guide walks you through the complete process, from checking license availability to finalizing login credentials for the new user.
Prerequisites
- You must have an administrator role in NetSuite to create a new employee record and assign roles to a new user.
- Confirm that all required fields (marked with an asterisk *) are ready to be completed before you begin.
Check user license availability
Log in to your NetSuite account using an administrator role. On the Home dashboard, locate the main navigation bar at the top of the screen.
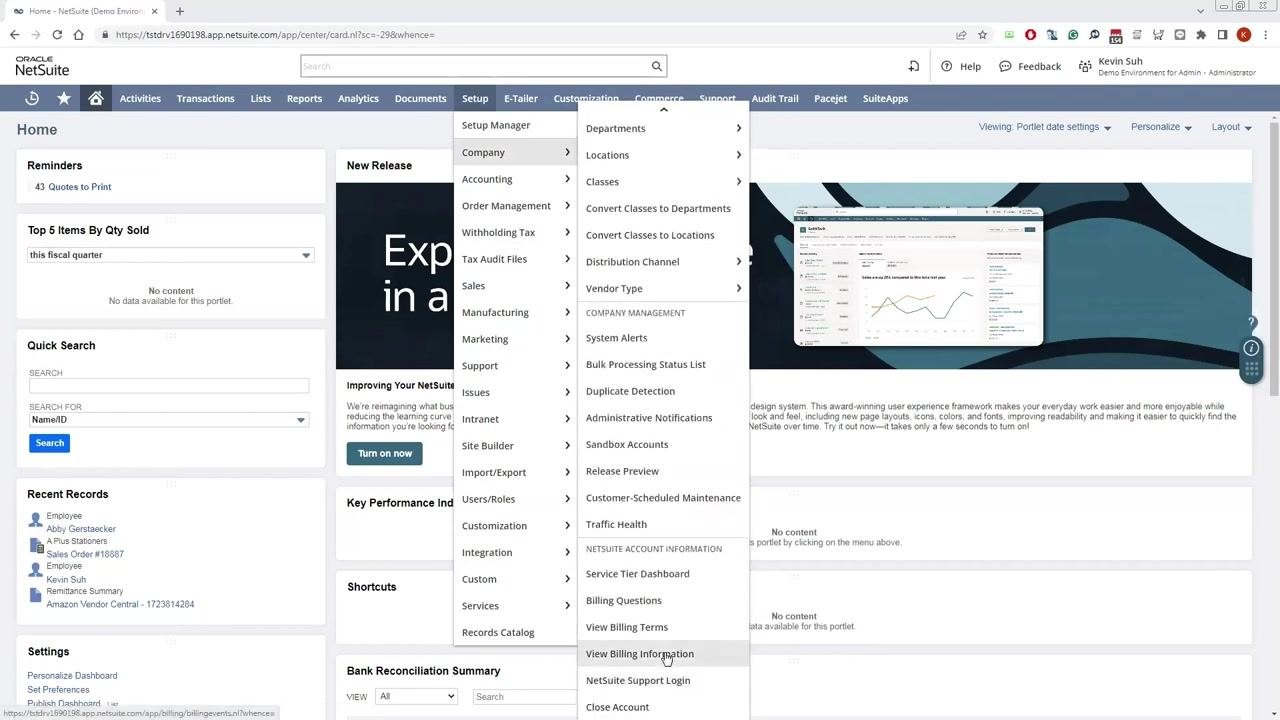
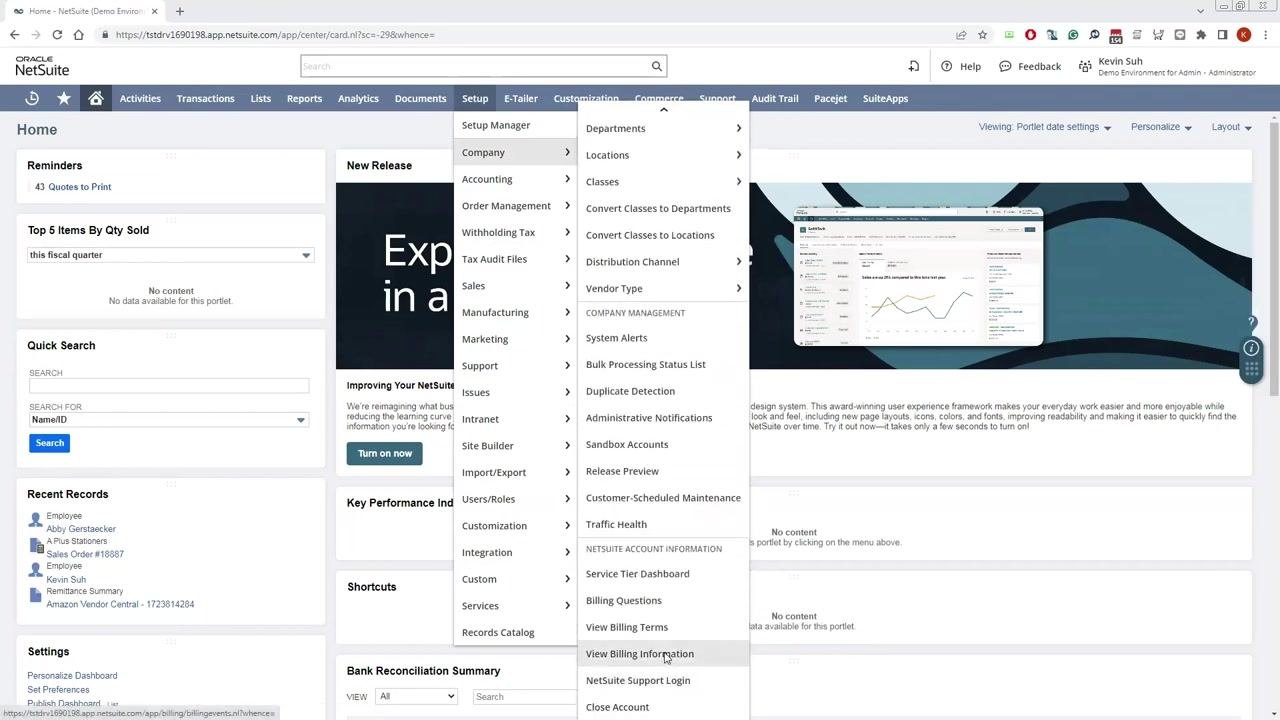
Hover over the Setup menu in the top navigation bar, then hover over Company to expand the submenu.
Scroll down in the Company submenu and click View Billing Information.
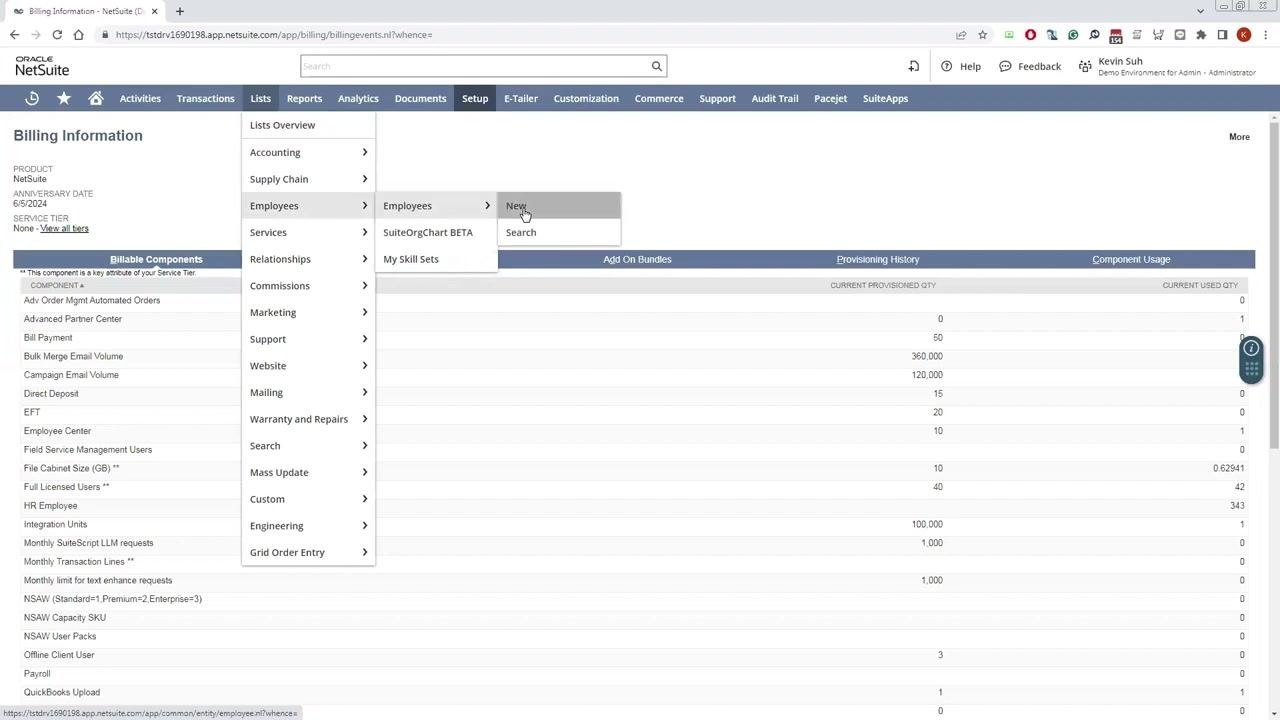
On the Billing Information page, locate the row labeled Full Licensed Users. Check the Current Provisioned Qty (for example, 40) against the Current Used Qty (for example, 42) to confirm you have enough licenses available before adding a new user.
Open a new employee record
Once you've confirmed sufficient licenses are available, return to the navigation bar. Hover over Lists, then Employees, then select New to open a blank employee record.
The Employee creation form opens. You need administrator access to perform this action.
Enter primary employee information
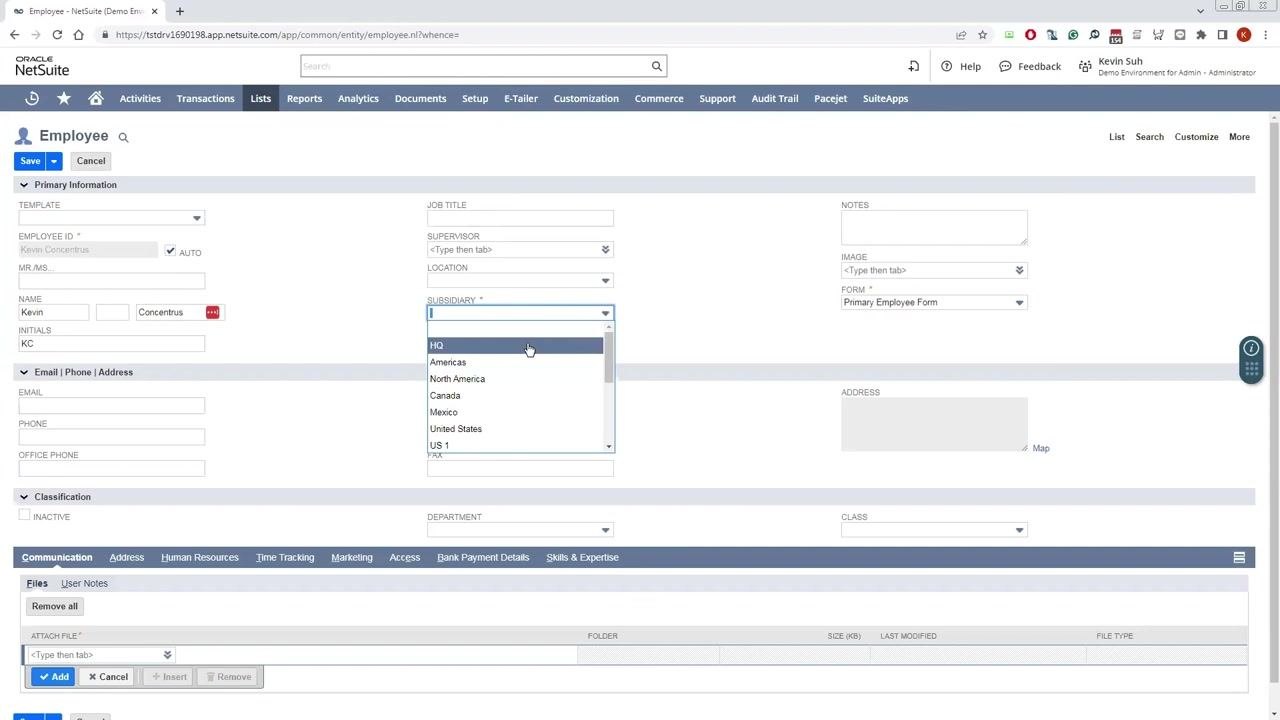
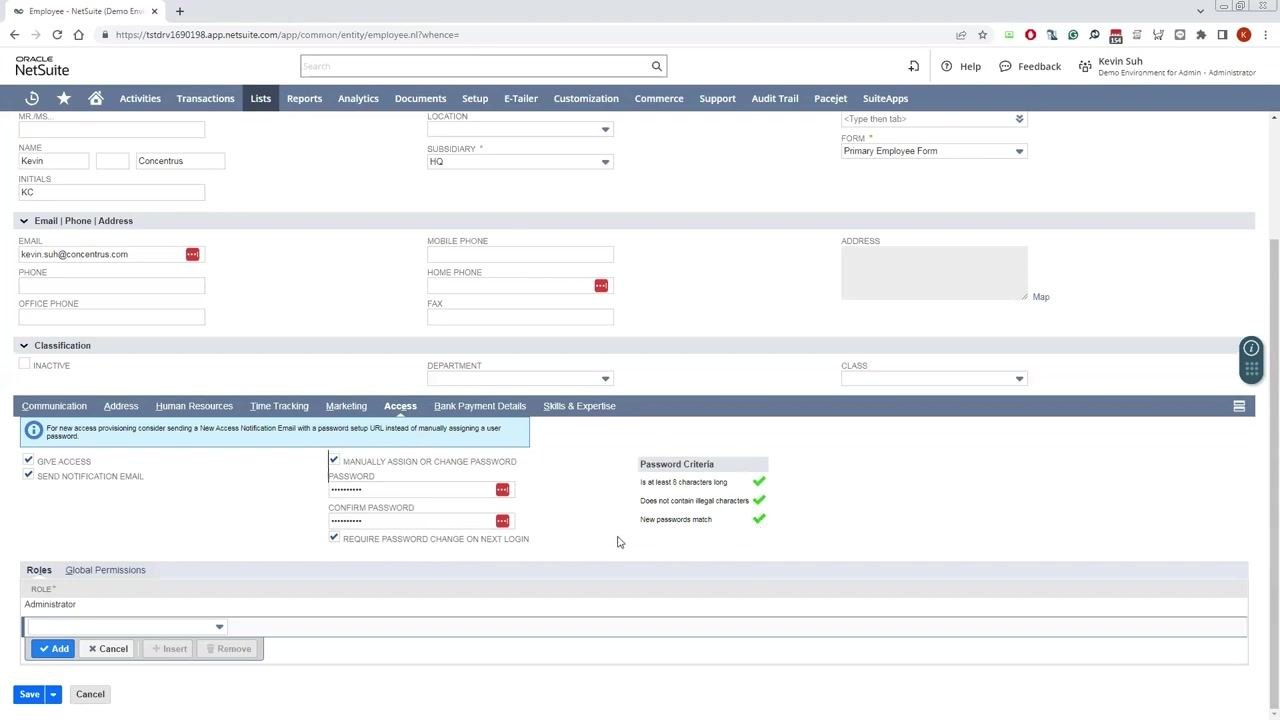
In the Primary Information section, enter the employee's name (for example, Kevin Concentrius). The Employee ID auto-populates based on the name you enter, and you can also add the employee's initials (for example, KC).
In the Subsidiary field, marked with an asterisk, select the appropriate subsidiary from the dropdown list, such as HQ, Americas, or North America. This field is required.
In the Email | Phone | Address section, enter the employee's email address. This is required because it will be used for login. Fill in any other contact details you need, such as mobile phone, office phone, and address.
Complete mandatory and required fields
Fill in all remaining required fields in the Employee form; mandatory fields are marked with an asterisk (). Review additional sections such as Human Resources* for other required information, including Social Security Number, Birth Date, Hire Date, and Employee Status.
The specific required fields may vary depending on how your organization's employee record form is configured.
Assign system access and a role
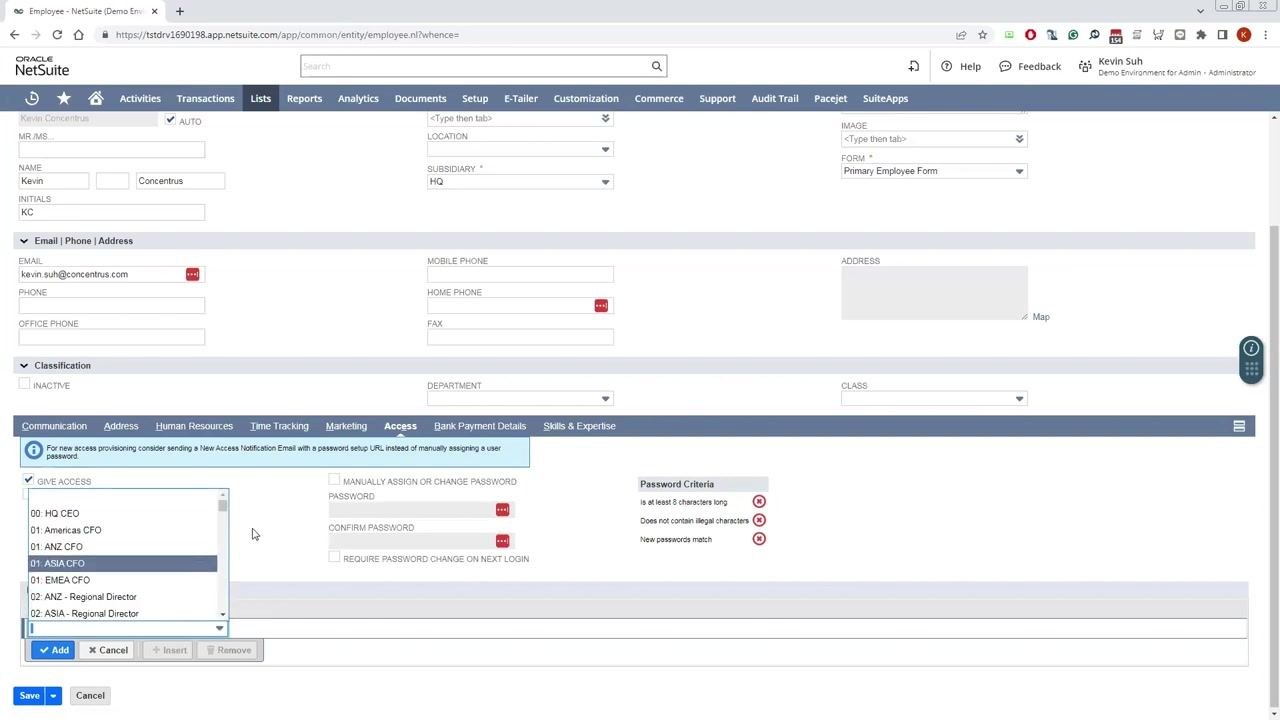
Click the Access tab in the employee record form. Check the Give Access box to enable system login for the new employee.
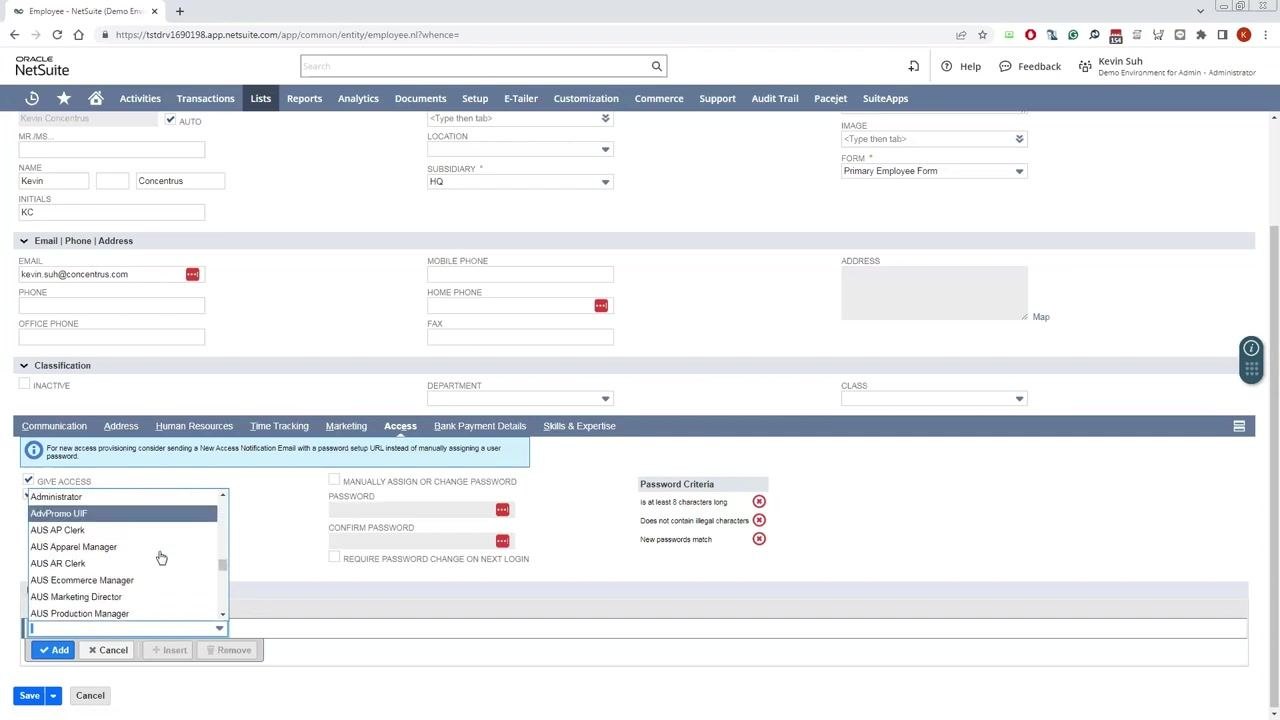
Optionally, check Send Notification Email if you want NetSuite to send a setup email to the new user. In the Role dropdown, select the appropriate role, either a custom role already configured in your account or a default NetSuite role. In this example, Administrator is selected.
Set a login password (optional)
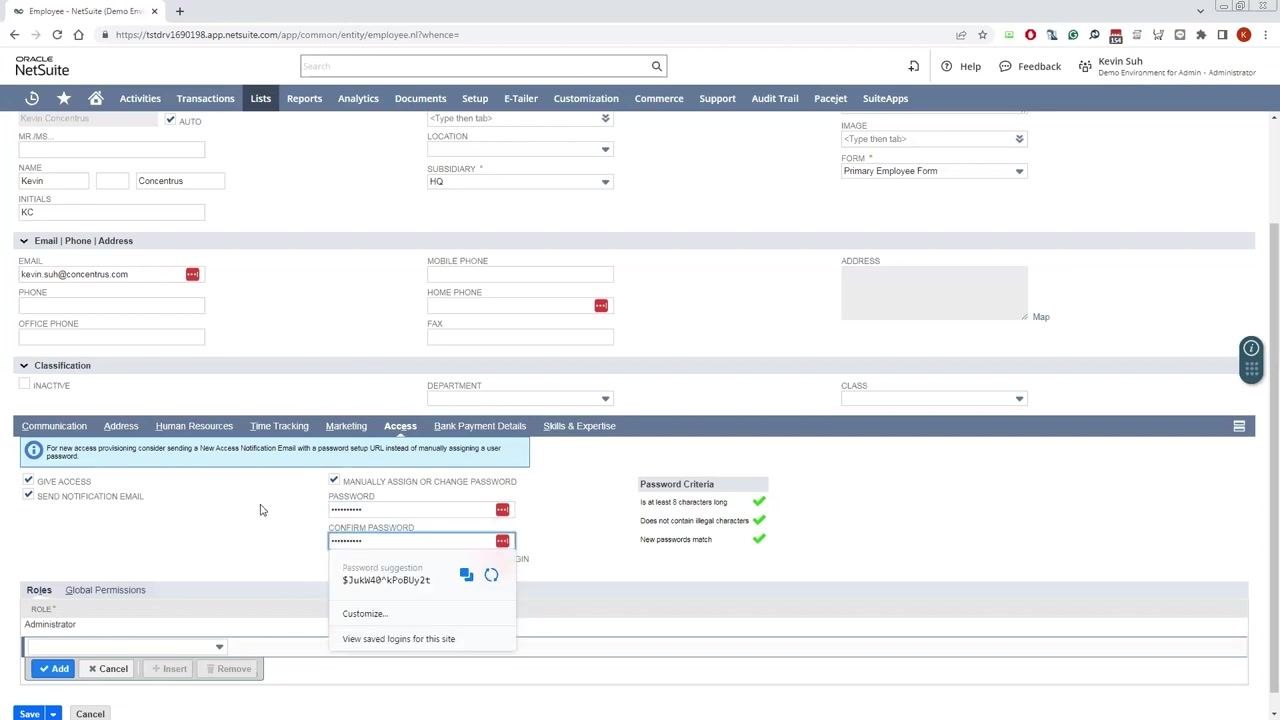
To manually assign a password, check Manually Assign or Change Password, then enter the desired password in the Password and Confirm Password fields. The password must be at least 8 characters long, contain no illegal characters, and both entries must match.
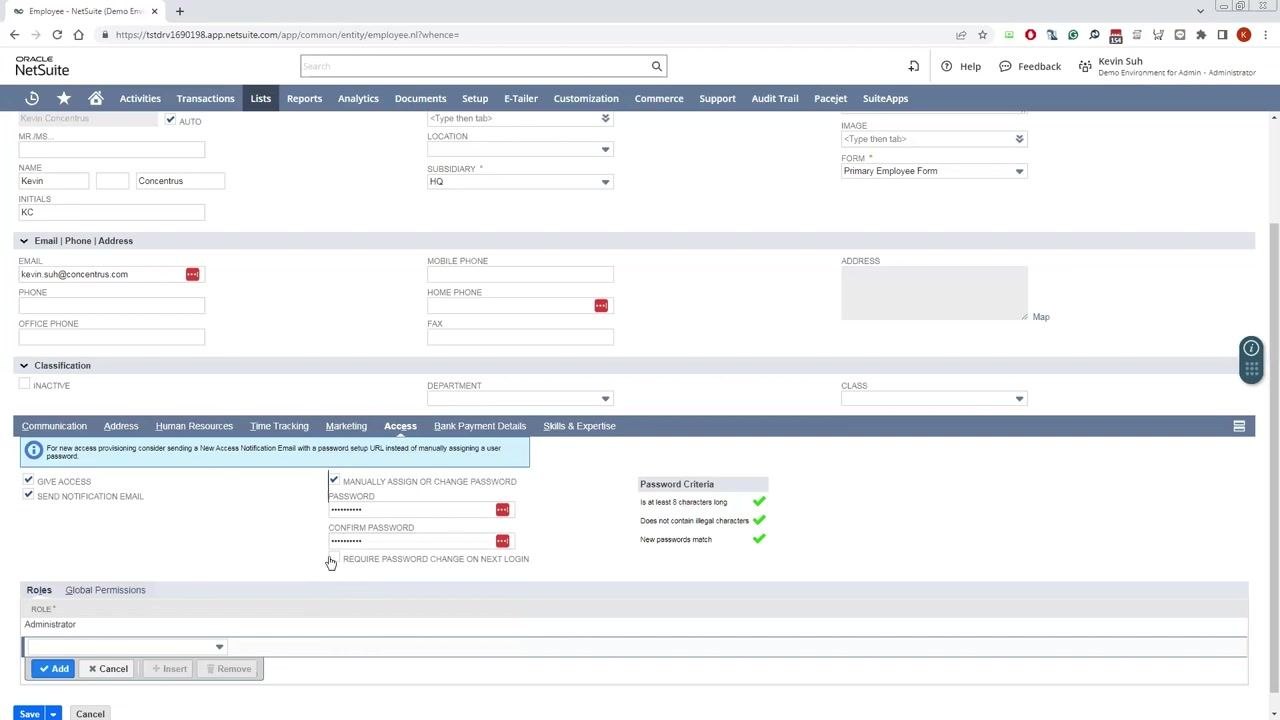
If you manually assign a password, be sure to inform the new user of their temporary password. Optionally, check Require Password Change on Next Login if you want the user to set a new password the first time they sign in.
Save the new employee record
Once all required fields are completed and the password criteria show green check marks, you're ready to save. Before saving, confirm the following settings as needed:
- Give Access is checked.
- Send Notification Email is checked, if desired (recommended).
- Manually Assign or Change Password is checked if you're setting a password directly.
- Require Password Change on Next Login is checked if you want the user to set a new password at first login.
- Role is set to the appropriate value, such as Administrator.
- Password fields meet all criteria: at least 8 characters, no illegal characters, and matching entries.
The Save button appears at both the top left and bottom left of the Employee form.
Click Save to create the new user.
Respond to a duplicate access warning, if it appears
If a pop-up message states that an employee already has access to this account using a different entity name, this means the email address is already associated with another NetSuite account. Decide whether to override and proceed:
- Click Yes to override and create the user in this account.
- Click No to cancel and review the entered information.
Finalize and communicate login details
After saving, NetSuite creates the new user with the specified access and role. If you manually assigned a password, securely communicate the temporary password to the user. If you selected Send Notification Email, the user receives an email with setup instructions. If Require Password Change on Next Login was checked, the user is prompted to set a new password at first login.
Summary
You've now checked your license availability and created a new user in NetSuite, complete with system access, an assigned role, and login credentials. Always verify that all mandatory fields are filled before saving, and use the notification email and password setup options for secure access provisioning whenever possible. For further questions, contact your NetSuite administrator or support team.
Generation details: cost, quality tiers
Docsie billed 2,500 credits ($1.75) to analyze this 5-minute video at standard quality. The rewrite, template fill and Word/PDF exports were included. The same video at each quality tier:
| Quality | Frames sampled | Credits | Approx. cost |
|---|---|---|---|
| Draft | every 16-30 s | 1,250 | $0.88 |
| Standard (this guide) | every 8-15 s | 2,500 | $1.75 |
| Detailed | every 4-7 s | 5,000 | $3.50 |
| Ultra | every 1-3 s | 10,000 | $7.00 |
Credits priced at $0.70 per 1,000; plans include a monthly allowance. Enterprise customers on on-premise or bring-your-own-model deployments run this on their own inference and pay no per-video credits.
Generated by Docsie Video-to-Docs on 2026-10-01 from a 4-minute video. Screenshots are frames from the source video and belong to their creator, Concentrus, whose original is embedded above. If you own this video and want the guide removed or credited differently, contact us and we will act within one business day.