
How to Use a Thread Gauge
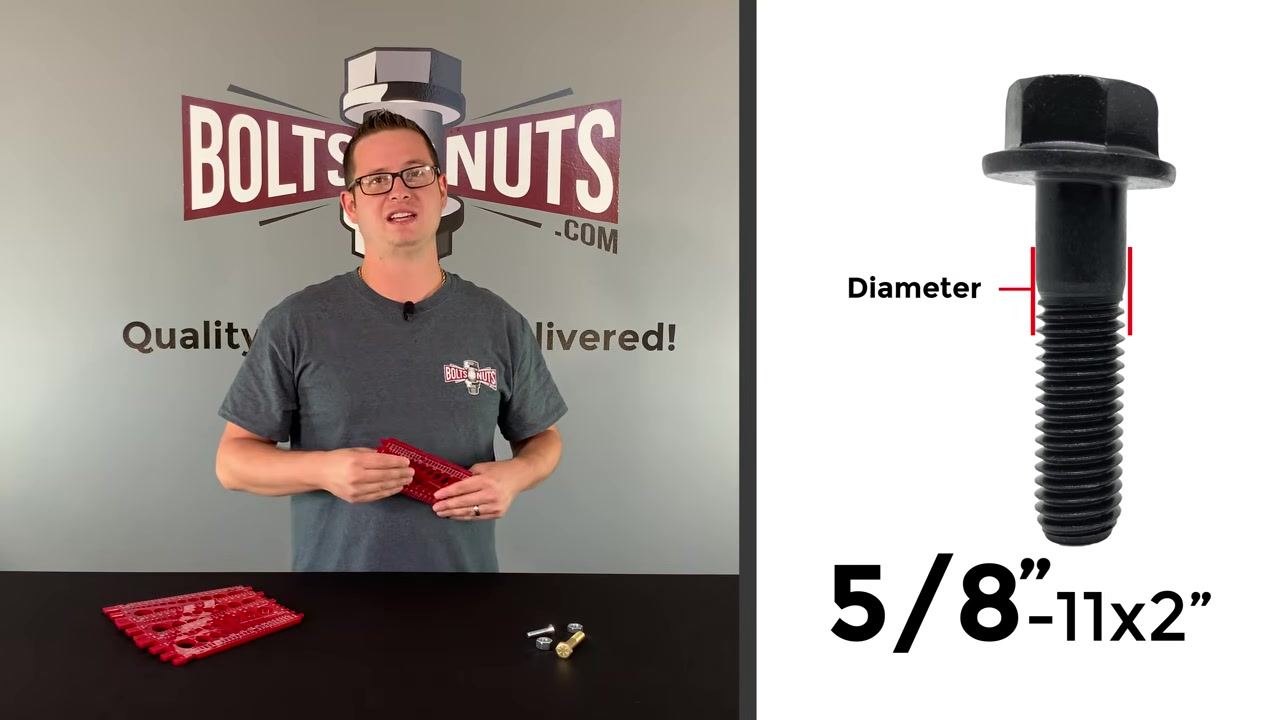
Knowing how to use a thread gauge lets you quickly and accurately identify the diameter, thread pitch, and length of any bolt, nut, or screw. This SOP walks you through a combination thread gauge that measures both inch and metric fasteners and features raised thread grooves for pitch identification. For example, a bolt labeled "5/8"-11x2"" has a 5/8" diameter, 11 threads per inch, and a 2" length. Diameter is the width of the shank, thread pitch is the number of threads per inch (or the distance between threads for metric fasteners), and length is measured from the bottom of the head to the end of the bolt.
Video: How to Measure Bolts, Nuts and Screws Using a Thread Gauge Size Tool by BoltsandNuts com (2020). All credit for the demonstration goes to the creator; watch the original on YouTube. The written guide below was generated from this video by Docsie. Creator? Request a change or removal.
Knowing how to use a thread gauge lets you quickly and accurately identify the diameter, thread pitch, and length of any bolt, nut, or screw. This SOP walks you through a combination thread gauge that measures both inch and metric fasteners and features raised thread grooves for pitch identification. For example, a bolt labeled "5/8"-11x2"" has a 5/8" diameter, 11 threads per inch, and a 2" length. Diameter is the width of the shank, thread pitch is the number of threads per inch (or the distance between threads for metric fasteners), and length is measured from the bottom of the head to the end of the bolt.
Purpose
This procedure explains how to use a combination thread gauge to determine the diameter, thread pitch, and length of bolts, nuts, and flathead machine screws, ensuring a correct and snug fit for your hardware applications.
Scope
This procedure applies to anyone measuring inch or metric fasteners—bolts, nuts, and screws—using a combination thread gauge such as the BoltsandNuts.com exclusive gauge.
Required equipment
- Miscellaneous fasteners for measurement (bolts, nuts, flathead machine screws)
- A combination thread gauge that measures both inch and metric sizes and includes raised thread grooves on the back for thread pitch identification (available for purchase at BoltsandNuts.com)
- A flat, stable surface to work on
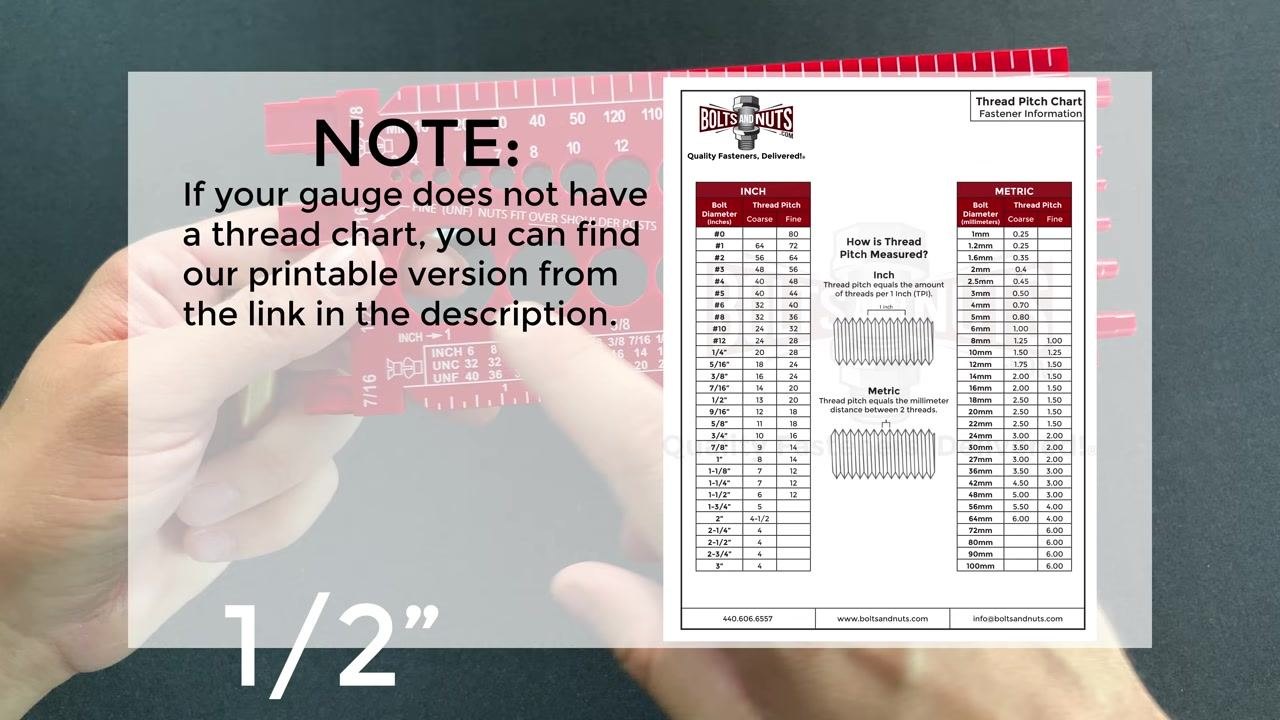
- A printable thread pitch chart, if your gauge does not already include one (available at BoltsandNuts.com)
Procedure
Step 1: Identify the parts of the thread gauge
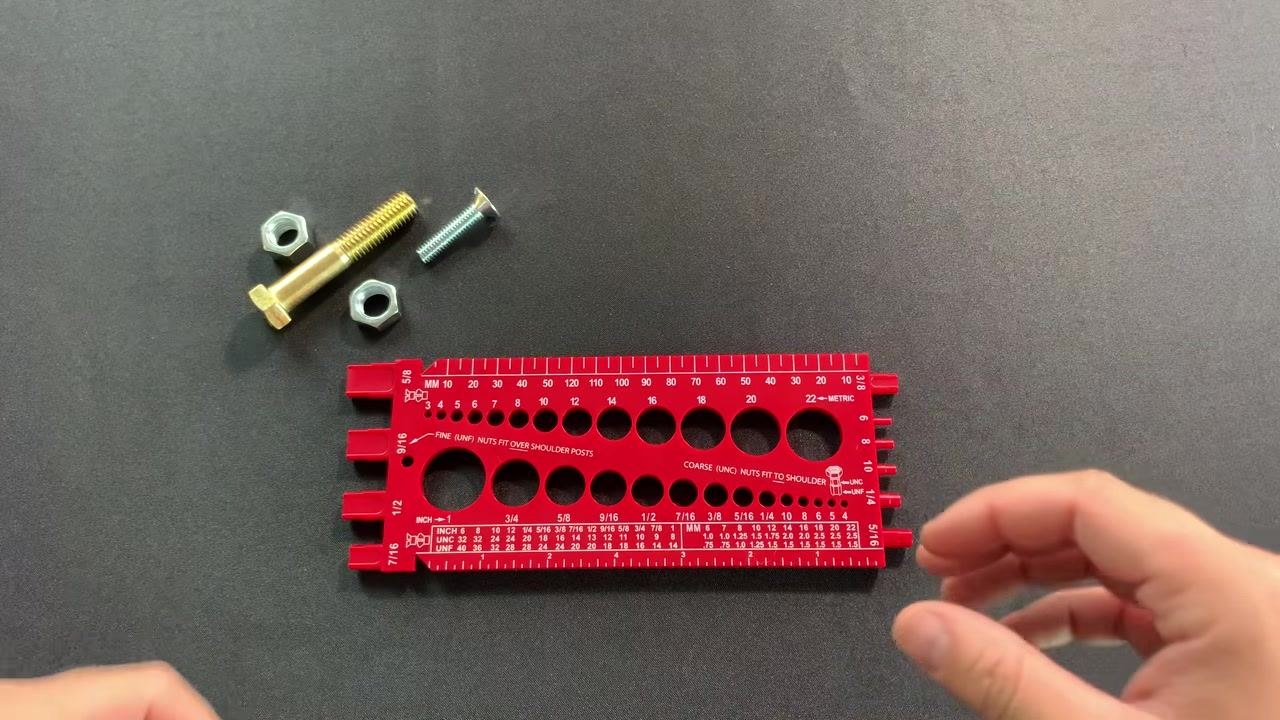
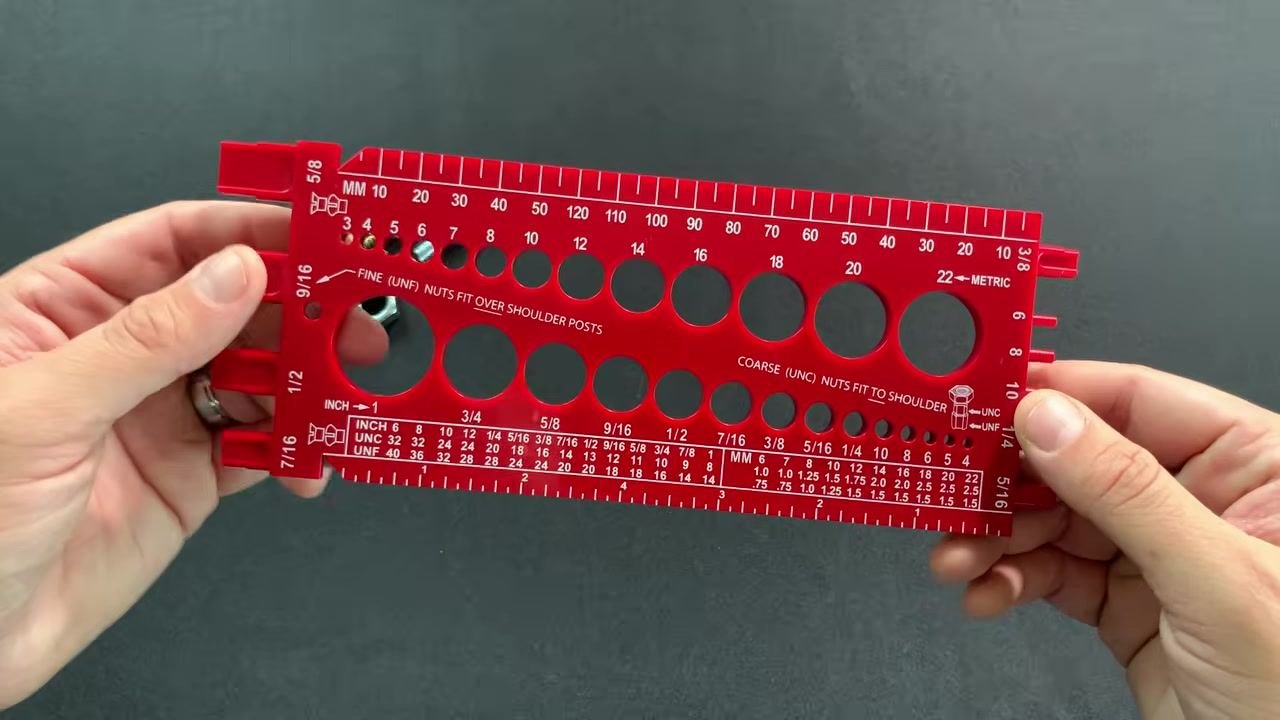
Place the gauge on a flat surface and observe its physical features, including the side posts and holes. The gauge is split into two sections: the top for metric measurements and the bottom for inch measurements.
Step 2: Examine the metric and inch sides of the gauge
The top section contains metric diameter holes (labeled, for example, 4, 5, 6, 8, 10, 12, 14, 16, 18, 20, and 22 mm) along with a millimeter ruler. The bottom section contains inch diameter holes (labeled, for example, 1/4, 5/16, 3/8, 7/16, 1/2, 9/16, 5/8, and 3/4) along with an inch ruler.
Hold the gauge so you can easily access both the metric and inch sides, and familiarize yourself with the labeled holes and rulers before you begin measuring.
Step 3: Examine the back of the gauge
Flip the gauge over to view the indents used for measuring thread pitch. Note the side posts, which are used specifically for measuring inch nuts and will indicate whether a nut is coarse (UNC) or fine (UNF) thread. Hold the gauge in both hands with the back side facing up for clear visibility.
Step 4: Select the bolt to measure
Place the gauge on a flat surface with bolts and nuts nearby, then select the bolt you want to measure. Hold the gauge so you can easily access the diameter holes and reference labels.
Step 5: Test the bolt diameter in the gauge holes
Try to fit the bolt into the various diameter holes on the gauge. Start with the metric holes (for example, 12 mm and 14 mm) and note whether the bolt fits or is loose, then move to the inch holes (for example, 5/8", 9/16", and 1/2") and test for a snug fit.
Step 6: Identify the correct diameter
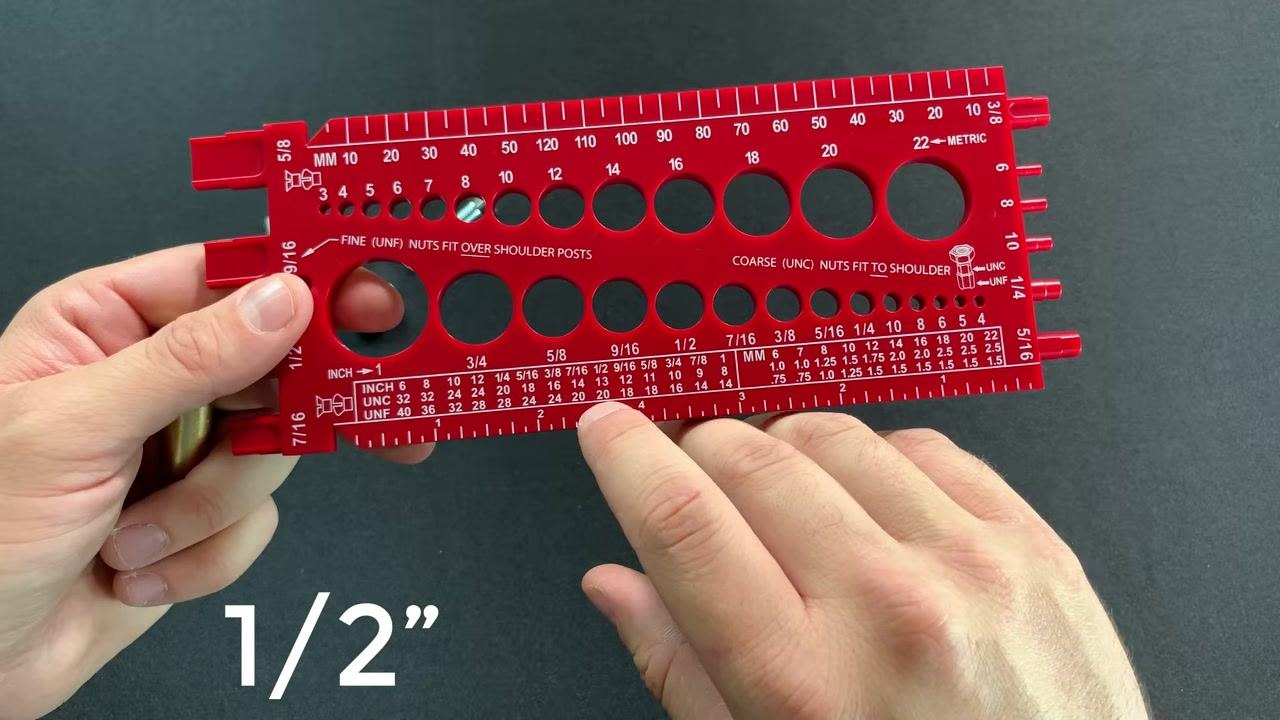
Continue testing holes until you find one where the bolt fits snugly, without excess play or tightness. In this example, the bolt fits perfectly in the 1/2" hole, confirming its diameter is 1/2".
Step 7: Confirm the measured diameter
Once the bolt fits snugly, note the measurement. The gauge display confirms the reading, in this case 1/2".
Step 8: Reference the thread pitch chart
Check the thread chart on the gauge to determine possible thread pitches for the identified diameter. For a 1/2" bolt, the common thread pitches are 13 threads per inch (coarse) and 20 threads per inch (fine). If your gauge does not have a thread chart, refer to a printable version available at BoltsandNuts.com.
Step 9: Locate the thread pitch section on the gauge
Find the area on the gauge labeled for thread pitch, typically marked with UNC (coarse) and UNF (fine) for inch fasteners. For a 1/2" bolt, identify the 13 TPI (UNC) and 20 TPI (UNF) options.
Step 10: Access the raised thread pitch grooves
Turn the gauge over to the back, where raised thread grooves are labeled for both United States (inch) and metric thread pitches. Locate the 13 and 20 TPI grooves under United States Thread Pitch, and prepare to match the bolt threads to these grooves.
Step 11: Match the bolt threads to the gauge grooves
Hold the bolt and align its threads with the raised thread pitch grooves on the back of the gauge. Attempt to fit the bolt into the 20 TPI groove; if it does not fit snugly, try the 13 TPI groove. In this example, the bolt fits perfectly in the 13 TPI groove, indicating it is a 1/2"-13 (coarse thread) bolt.
Step 12: Prepare to measure the bolt length
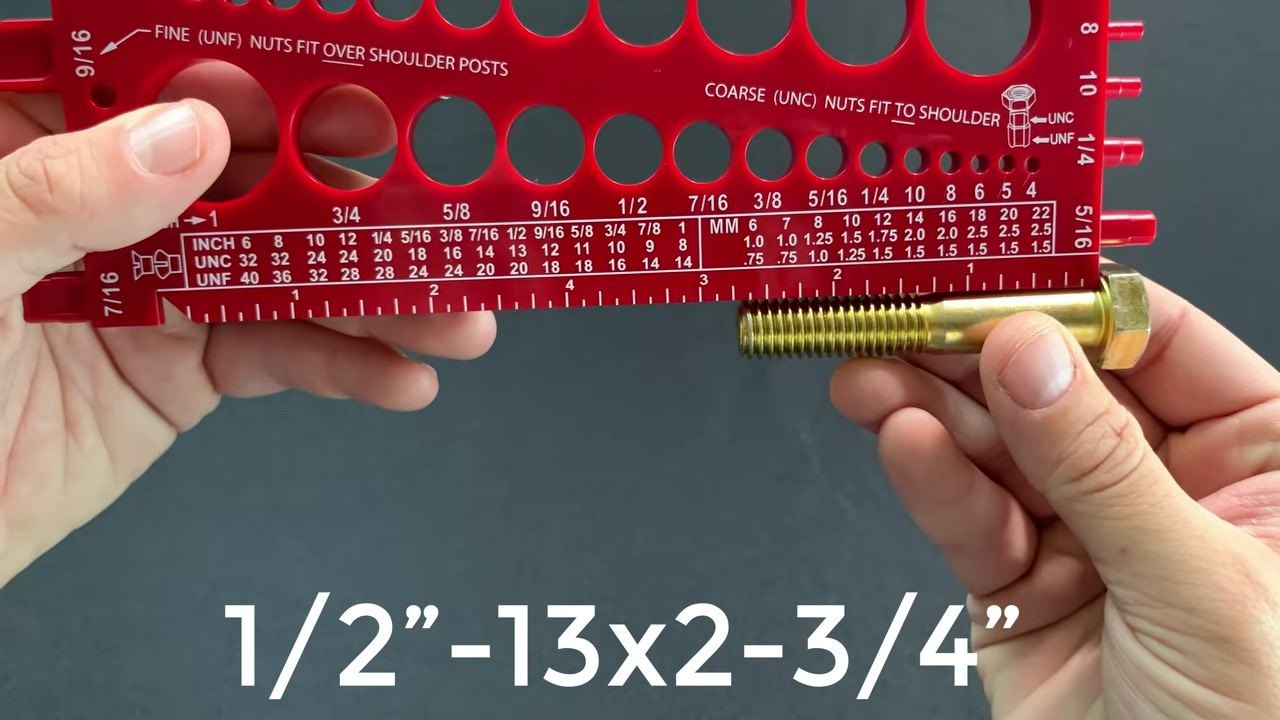
Hold the identified 1/2"-13 bolt and the gauge so the ruler edge is visible. For a hex bolt, only measure the portion that will go inside the hole—from the underside of the head to the end of the threads.
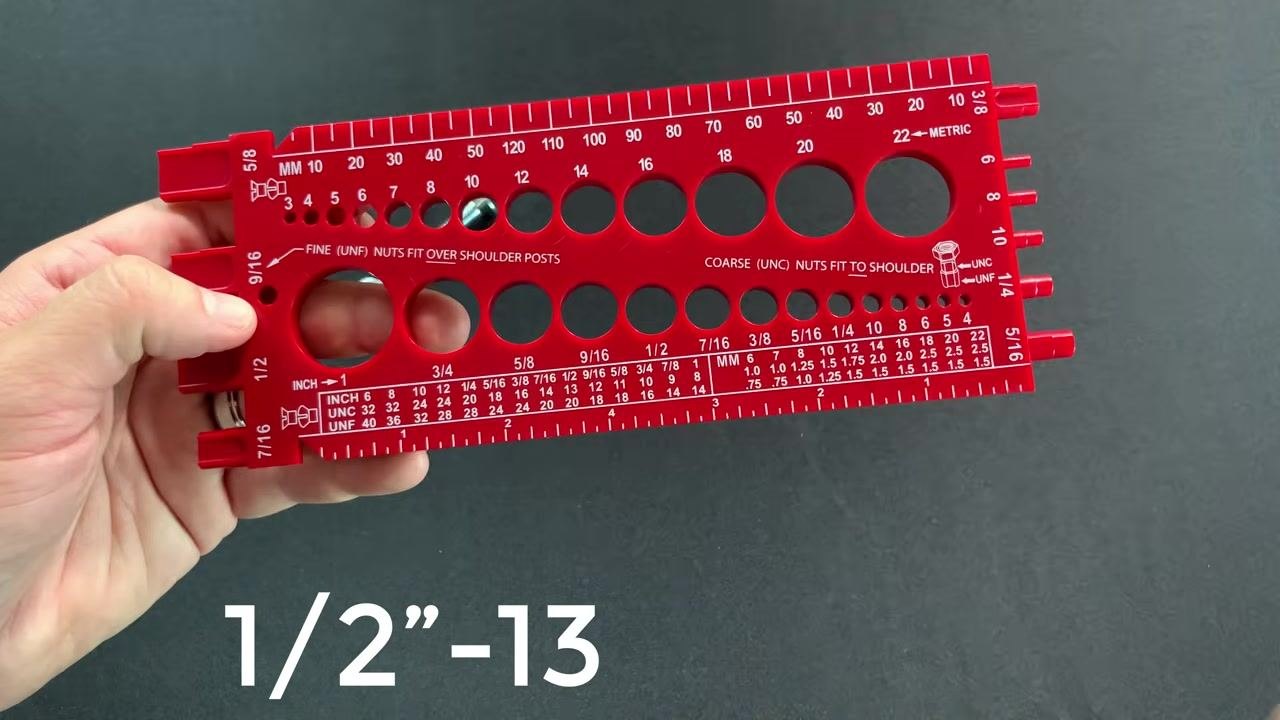
Step 13: Measure the bolt length from the correct starting point
Place the bolt against the ruler on the gauge, aligning the underside of the hex head with the zero mark, then extend the bolt along the ruler. Do not include the hex head in the measurement—measure only from the underside of the head to the tip.
Step 14: Read and record the bolt length
Observe where the end of the bolt aligns on the ruler. In this example, the bolt measures exactly 2-3/4 inches long, giving a full identification of 1/2"-13 x 2-3/4".
Step 15: Identify the flathead screw type
Select a flathead machine screw (slotted). Hold the screw and the gauge in preparation for measuring its length.
Step 16: Understand the measurement rule for flathead screws
Unlike hex bolts, a flathead screw—including its head—is installed flush with the surface. When measuring this type of fastener, include the full length of the screw from the tip to the top of the head.
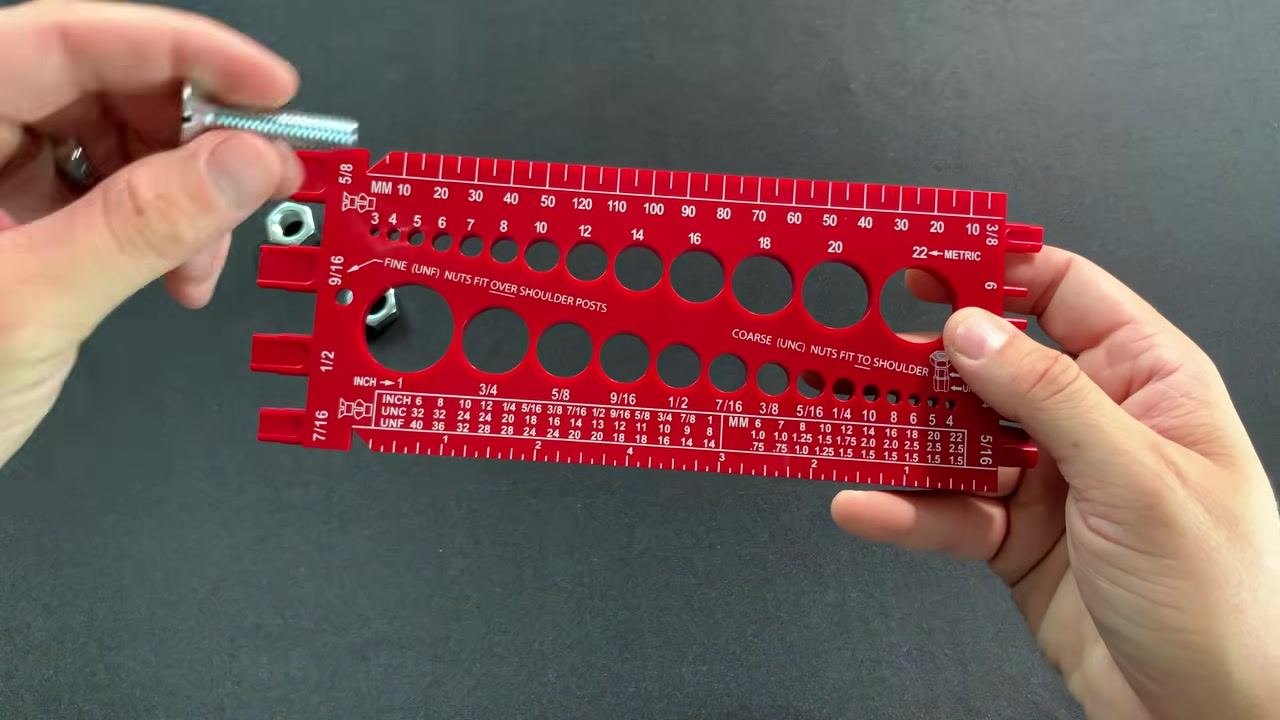
Step 17: Prepare to measure flathead screw diameter
Begin determining the diameter by testing the screw in the metric holes on the gauge. Note whether the screw is loose in holes such as M8 or M10, and continue testing inch holes (for example, 7/16") to find the correct fit.
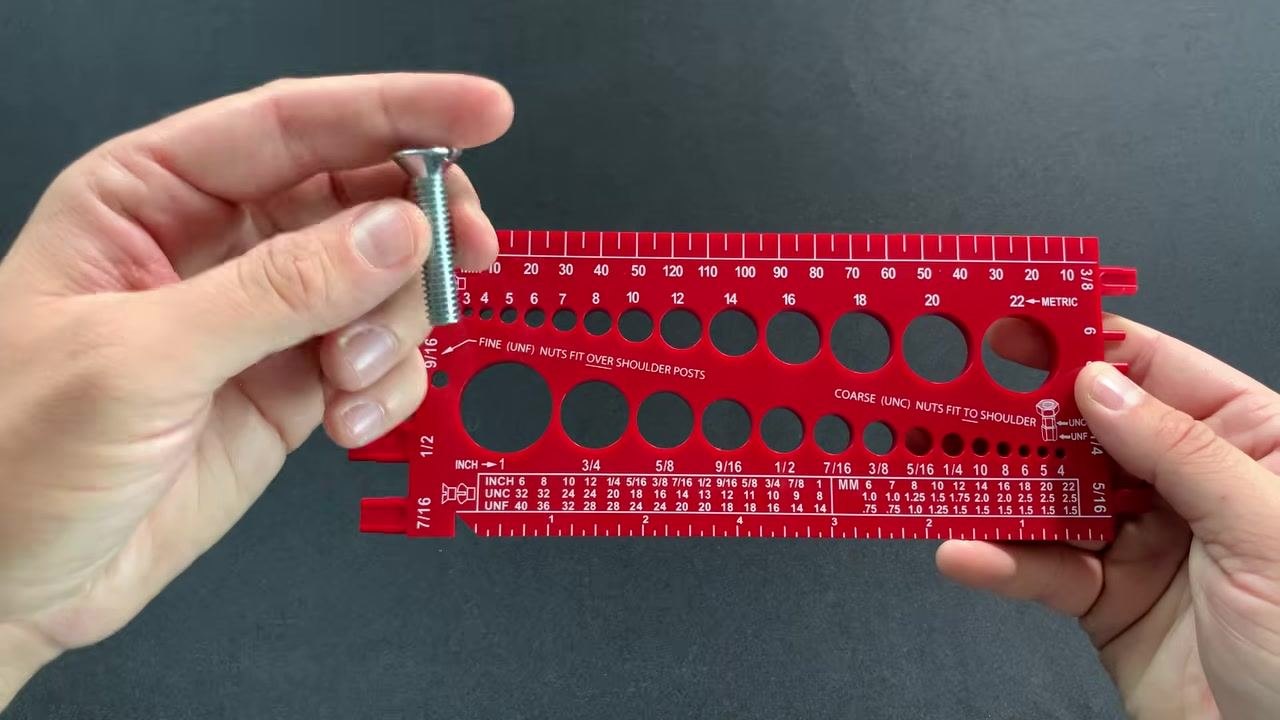
Step 18: Test the flathead machine screw in the metric diameter holes
Hold the gauge in one hand and the screw in the other. Insert the screw into the M8 hole and observe that it is loose, indicating a diameter smaller than 8 mm. Attempt the M10 hole and confirm it is definitely too loose, meaning the screw is much smaller than 10 mm. Continue testing the 7/16" hole, noting that this size is also not a match, and visually inspect the gauge for other possible holes until you find a snug fit.
Key details: - The gauge is clearly labeled with both metric (MM) and inch (INCH) diameter holes. - The gauge also includes thread pitch information, ruler markings, and nut fitment guides. - Test systematically, starting with metric sizes and moving to inch sizes, until you find a snug fit.
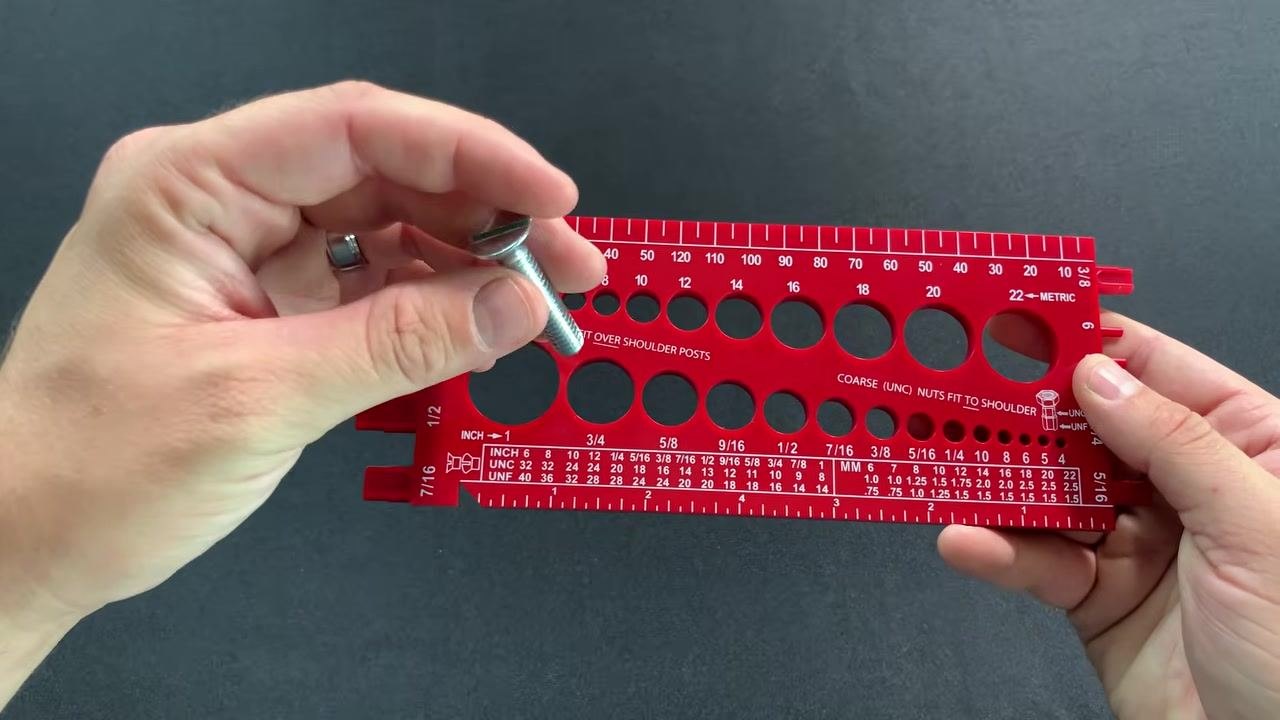
Step 19: Identify a second bolt's diameter
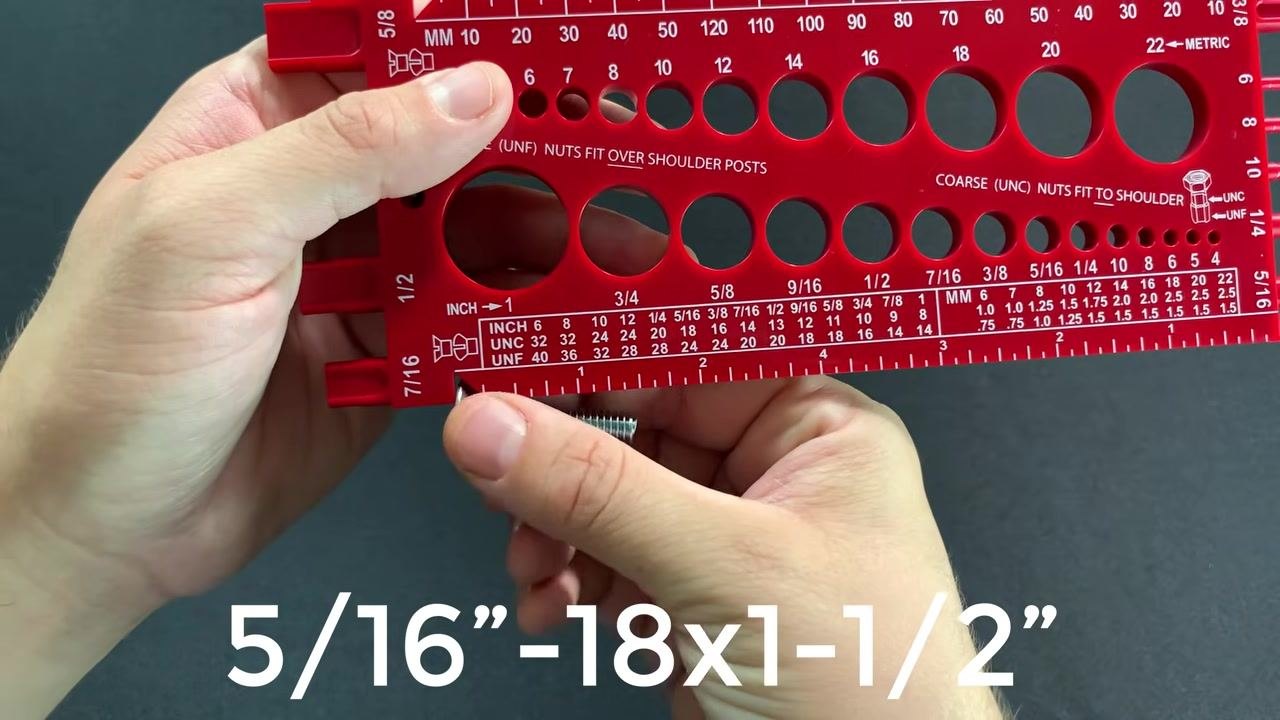
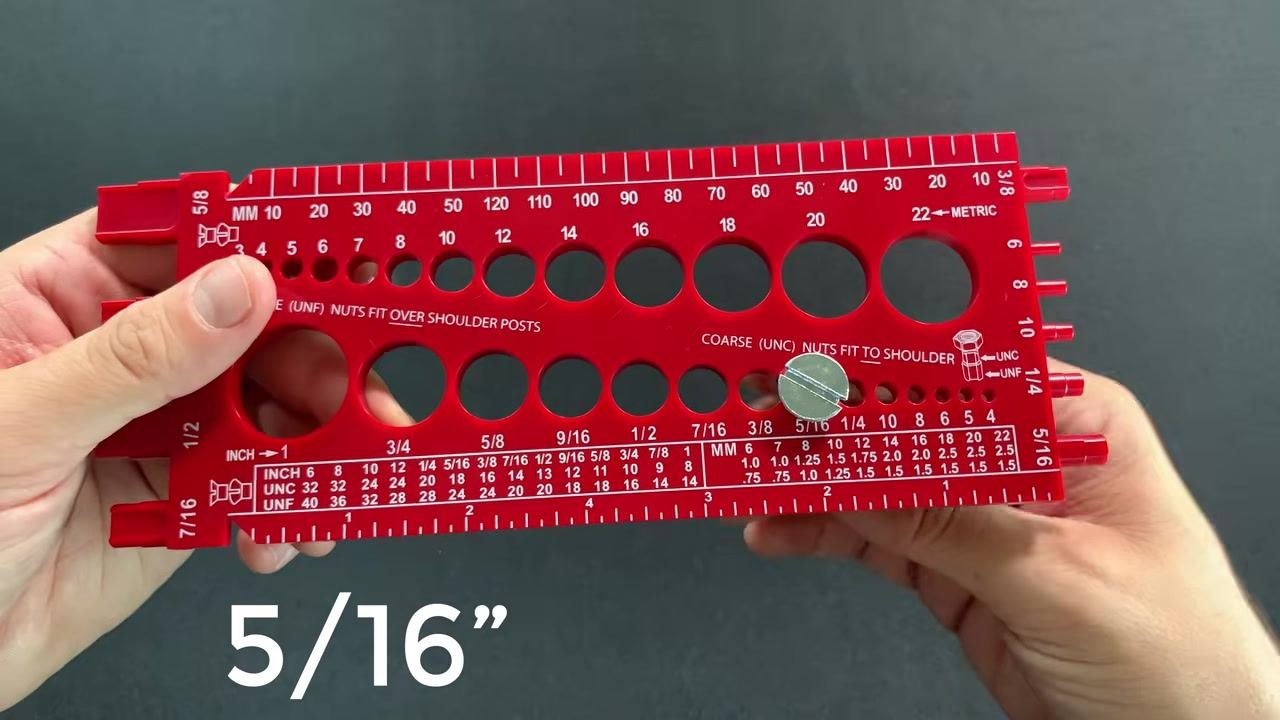
Select another bolt to measure. Insert it into the holes on the gauge labeled with different diameters and find the hole where it fits snugly without excess play. In this example, the bolt fits perfectly in the 5/16" hole.
Step 20: Determine the thread pitch for the second bolt
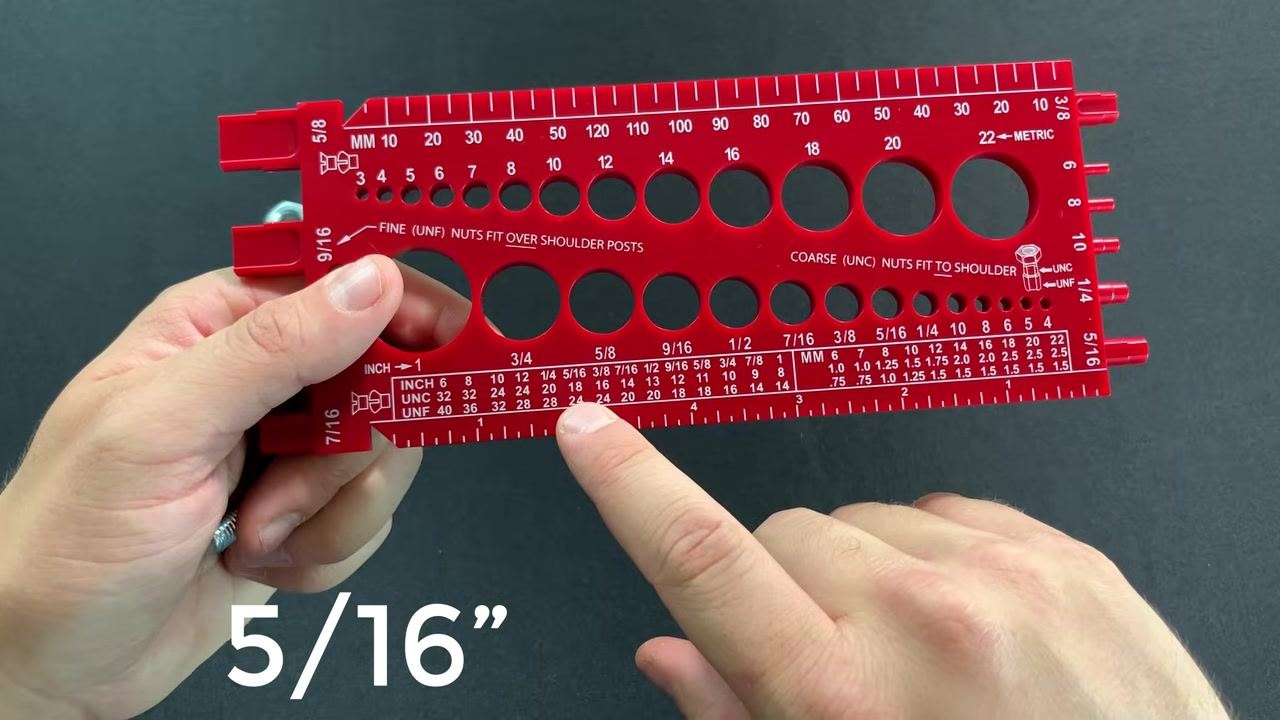
Refer to the gauge's thread pitch chart for the 5/16" bolt size. Note the two common thread pitches for this size: coarse (18 threads per inch, UNC) and fine (24 threads per inch, UNF). Flip the gauge over to access the thread pitch measuring section, locate the 5/16" section, and compare the bolt's threads to the gauge's markings.
Step 21: Test for a snug fit at the coarse thread marking
Align the bolt's threads with the 18 TPI marking for coarse threads and observe if it fits snugly, indicating a match. Confirm that the bolt is a 5/16"-18 (coarse thread) bolt.
Step 22: Check bolt head fit and application
Confirm that the entire head of the bolt fits into the corresponding hole and sits flush, simulating how it will fit in your application. This step ensures the bolt will seat properly once installed.
Step 23: Use the tapered area for additional measurement
Insert the bolt into the tapered area of the gauge to further verify the fit, matching the bolt head up to the top of the tapered section to confirm the bolt's length and fit.
Step 24: Measure the bolt length using the tapered area
With the bolt head at the top of the gauge, read the measurement at the end of the bolt to determine its length. In this example, the bolt measures 1-1/2" in length.
Step 25: Identify nut size and thread type
Insert the nut into the holes labeled for nut sizes. Start with the first hole and continue trying larger sizes until the nut fits snugly.
Step 26: Confirm nut fit and thread type
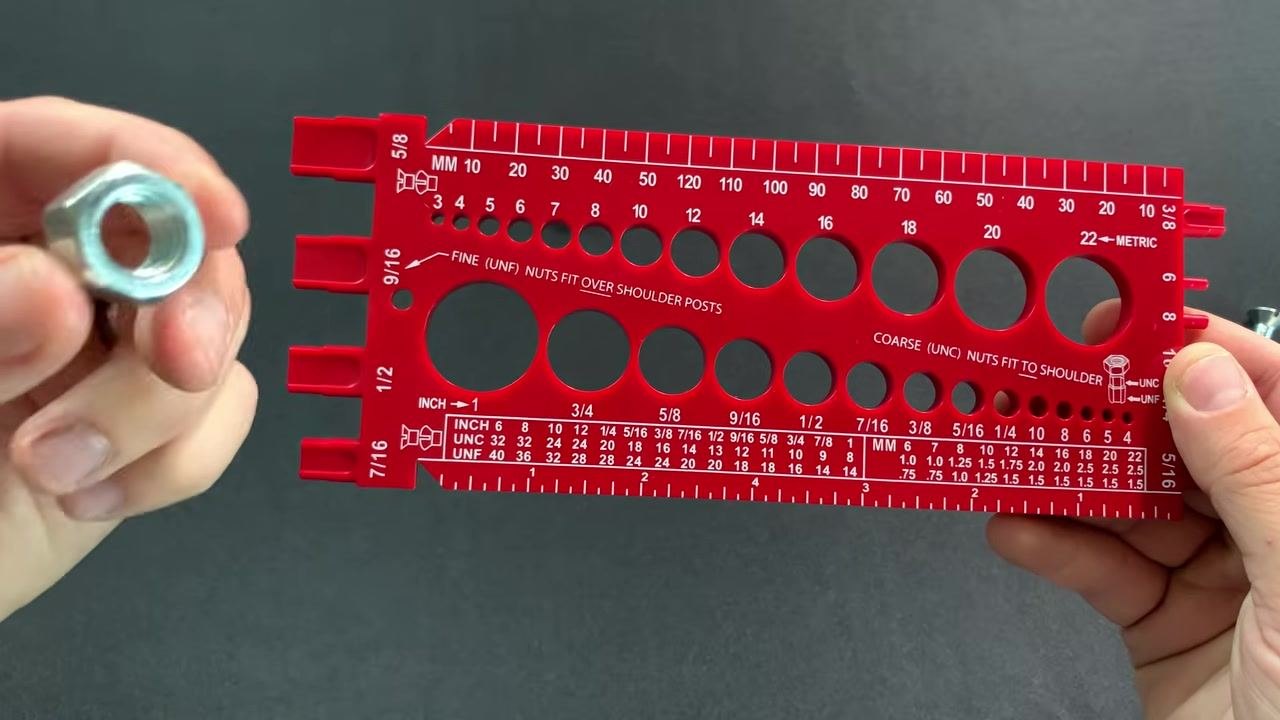
When the nut pushes all the way down into the hole, this indicates a correct fit. The gauge also indicates whether the nut is fine thread (UNF) or coarse thread (UNC). In this example, the nut fits in the 1/2" hole and is identified as fine thread.
Step 27: Verify fine thread nut fit
Insert the nut into the 1/2" hole on the gauge, specifically in the section labeled for fine (UNF) threads. Observe whether the nut goes all the way down over the shoulder post; if it fits completely, it is a fine thread (UNF) nut.
Step 28: Identify a coarse thread nut
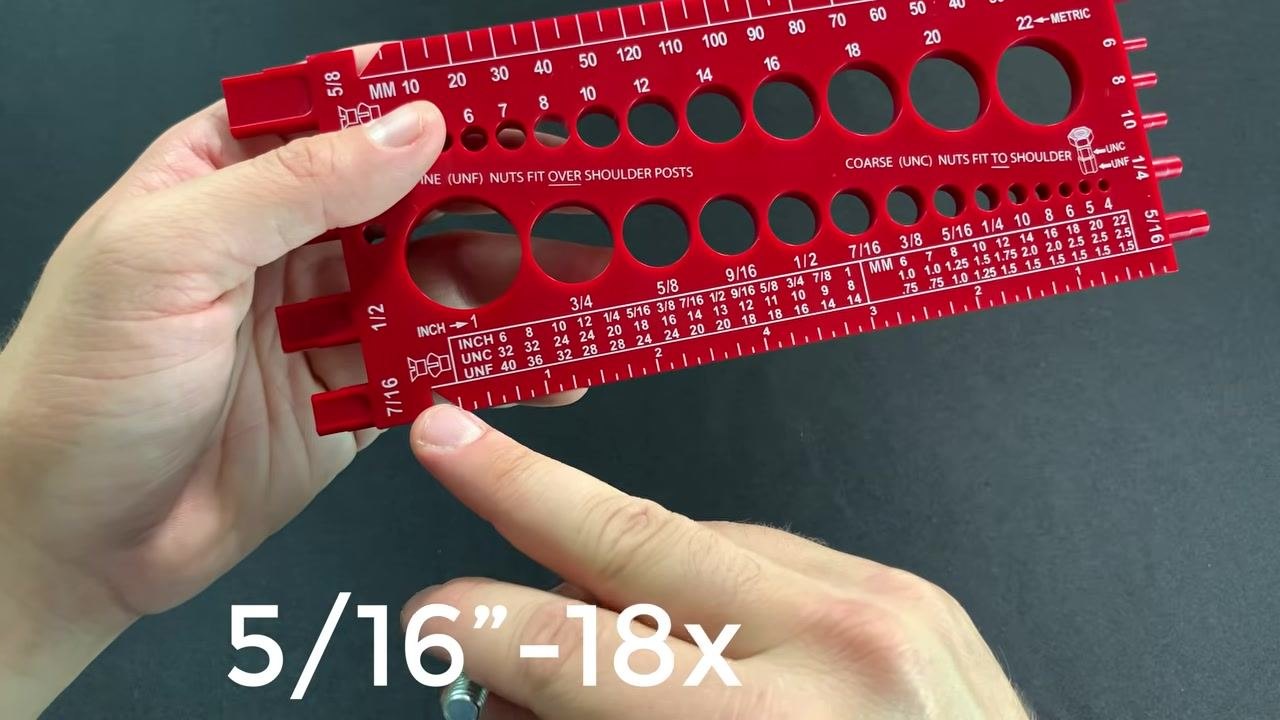
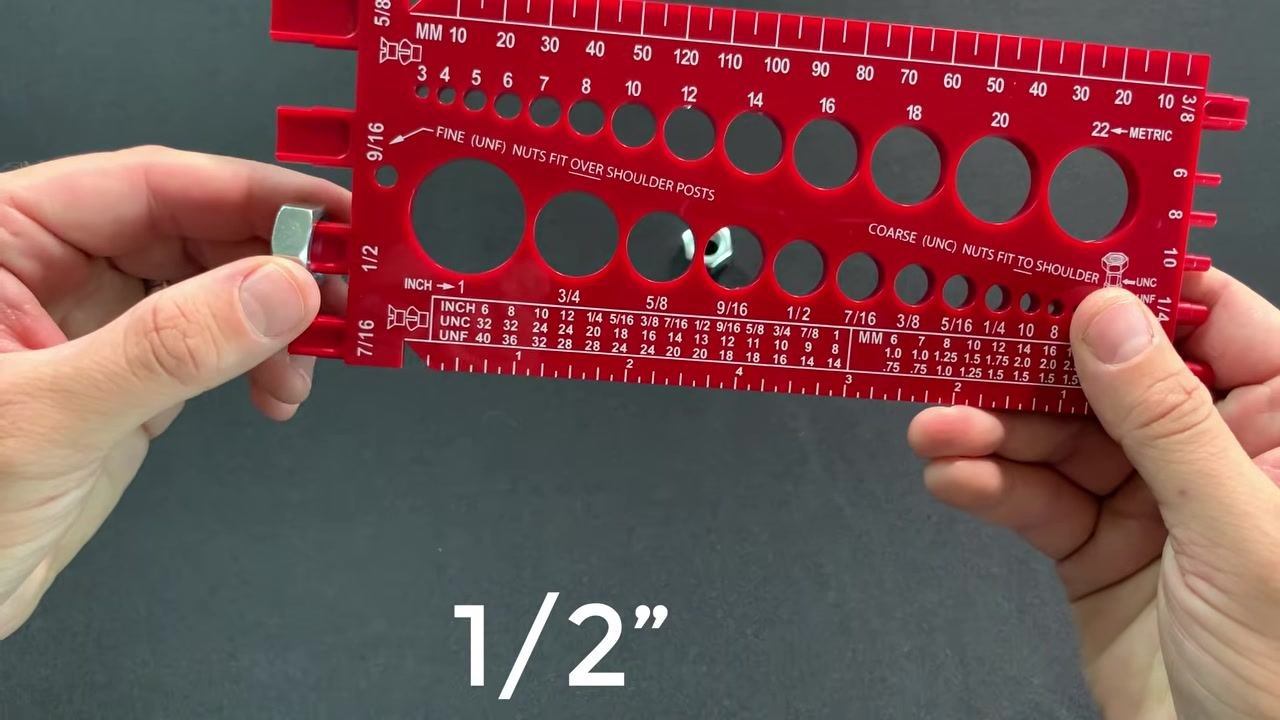
Remove the nut and inspect its fit in the coarse (UNC) section of the 1/2" hole. If the nut does not go all the way down, it is a coarse thread (UNC) nut. Confirm the nut as a 1/2" coarse thread type.
Step 29: Determine thread pitch for the coarse nut
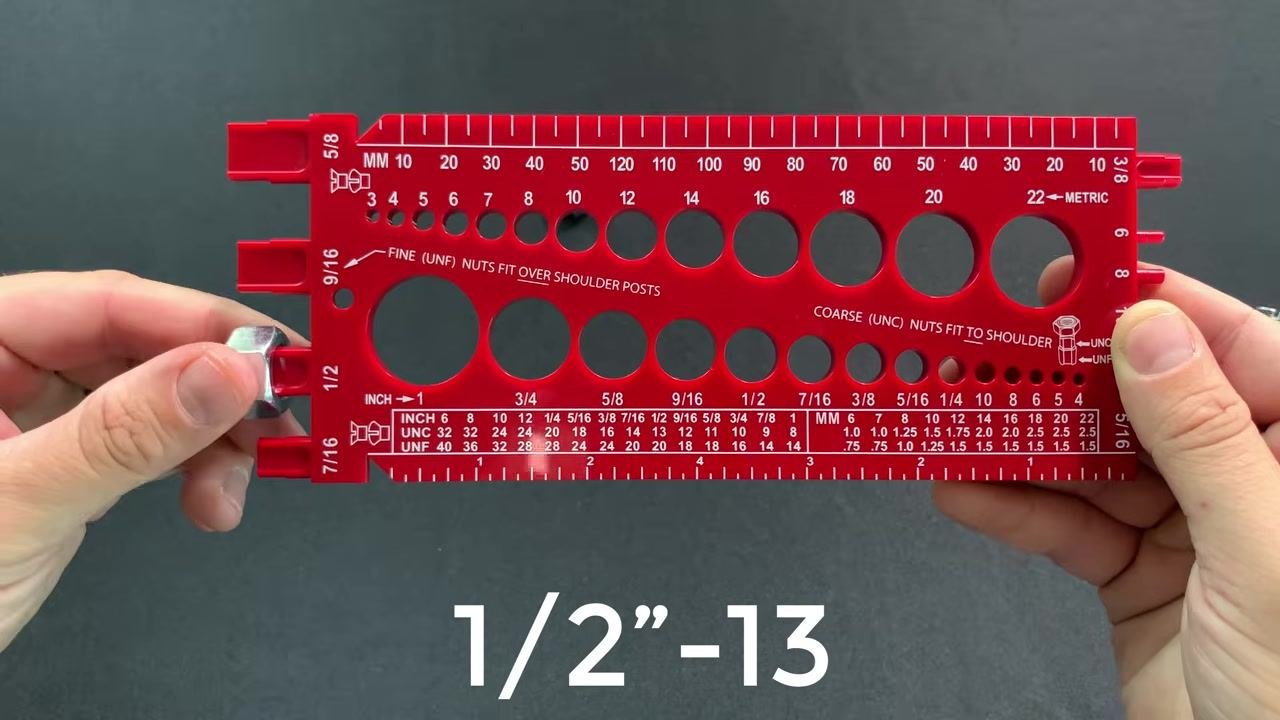
Reference the gauge's chart for the 1/2" coarse thread. Note that a 1/2" coarse thread corresponds to 13 threads per inch, labeled as 1/2"-13. Confirm the nut as a 1/2"-13 (UNC) nut.
Step 30: Compare with a fine thread nut
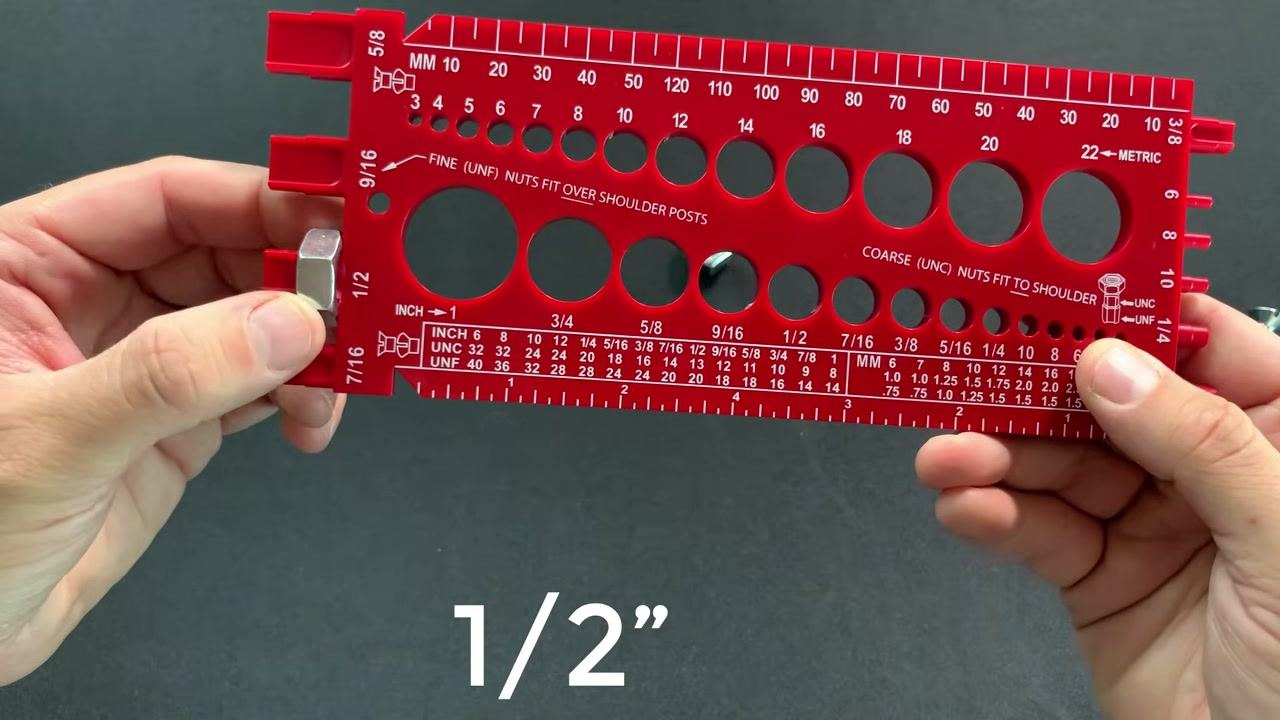
Place the fine thread nut aside for comparison. Note that this nut is a 1/2"-20 (UNF) nut, as it fits over the fine thread shoulder post. This comparison demonstrates the difference between coarse (UNC) and fine (UNF) thread nuts.
Verification
Once you have completed the measurements, hold the gauge up for a final review and confirm that all fastener sizes and thread types have been identified correctly using the gauge's holes, rulers, thread pitch charts, and grooves.

Summary
By following this procedure, you can accurately determine:
- The diameter of a bolt, nut, or screw using the gauge's metric and inch holes
- The thread pitch of a fastener using the thread pitch chart and raised grooves, distinguishing coarse (UNC) from fine (UNF) threads
- The correct length of hex bolts (measured from under the head to the tip) and flathead screws (measured over the full length, including the head)
- The size and thread type of nuts using the gauge's nut-fit holes and shoulder posts
This ensures a perfect, snug fit for your hardware applications every time you use a thread gauge.
What's next
For fasteners not covered by your gauge's built-in chart, refer to the printable thread pitch chart available for both inch and metric fasteners at BoltsandNuts.com. You can also purchase the combination thread gauge itself directly from BoltsandNuts.com.

Generation details: cost, quality tiers
Docsie billed 4,500 credits ($3.15) to analyze this 9-minute video at standard quality. The rewrite, template fill and Word/PDF exports were included. The same video at each quality tier:
| Quality | Frames sampled | Credits | Approx. cost |
|---|---|---|---|
| Draft | every 16-30 s | 2,250 | $1.57 |
| Standard (this guide) | every 8-15 s | 4,500 | $3.15 |
| Detailed | every 4-7 s | 9,000 | $6.30 |
| Ultra | every 1-3 s | 18,000 | $12.60 |
Credits priced at $0.70 per 1,000; plans include a monthly allowance. Enterprise customers on on-premise or bring-your-own-model deployments run this on their own inference and pay no per-video credits.
Generated by Docsie Video-to-Docs on 2026-09-20 from a 8-minute video. Screenshots are frames from the source video and belong to their creator, BoltsandNuts com, whose original is embedded above. If you own this video and want the guide removed or credited differently, contact us and we will act within one business day.