
How to Prepare a Wet Mount Slide
This SOP describes how to prepare a wet mount slide for microscopy using an Elodea (freshwater plant) leaf as the test specimen. Follow this procedure to produce a slide suitable for light microscope observation, such as for a photosynthesis lab.
Video: How To Prepare A Wet Mount Slide by Mr. Fox's Science Classroom (2014). All credit for the demonstration goes to the creator; watch the original on YouTube. The written guide below was generated from this video by Docsie. Creator? Request a change or removal.
This SOP describes how to prepare a wet mount slide for microscopy using an Elodea (freshwater plant) leaf as the test specimen. Follow this procedure to produce a slide suitable for light microscope observation, such as for a photosynthesis lab.
Purpose
This method describes the preparation of a wet mount slide for direct microscopic observation of a plant specimen. The intended analytical use is qualitative visual examination of Elodea leaf structure under a light microscope, as required for photosynthesis lab work.
Scope
This procedure applies to fresh, thin plant specimens such as Elodea leaves mounted in water on a glass slide with a cover slip. It covers materials preparation, mounting, and final slide inspection prior to microscope use.
- Sample type: Elodea (freshwater plant) leaf
- Matrix: Water (used as the mounting medium)
- Instrument: Light microscope (slide is prepared for placement on the microscope stage; observation itself is outside this procedure)
- Analysts: Any individual performing microscopy specimen preparation, such as lab students
- Exclusions: This procedure does not cover dry mounts, permanent (fixed) mounts, or specimens other than thin plant leaf tissue
Principle
A wet mount slide suspends a thin specimen in a drop of water between a glass slide and a cover slip. The water medium keeps the specimen hydrated and allows light to pass through it for observation under a microscope. Minimizing trapped air bubbles is essential, since bubbles can be mistaken for cells or other structures during observation.
Materials and Reagents
| Item | Description | Preparation/Storage Notes |
|---|---|---|
| Glass slide | Clean, rectangular transparent glass piece | Must be clean and free of dust or debris before use |
| Cover slip | Small, square plastic piece | Handle carefully to avoid cracking |
| Dropper bottle with water | Bottle fitted with a dropper, filled with water | Recap after use |
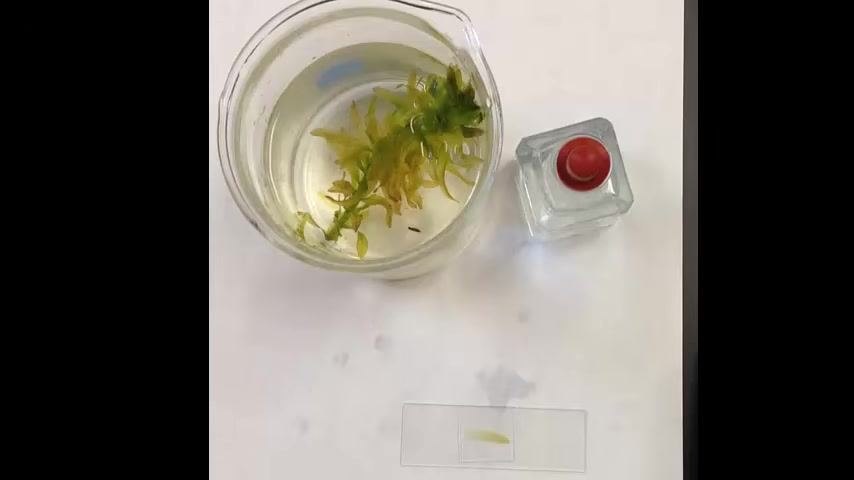
| Elodea specimen | Sample of Elodea (freshwater plant), kept in a bowl of water | Return unused portion to the bowl after use |
| Tweezers | Used to handle the Elodea leaf | Keep clean between uses |
| Pencil or pen | Sharp pencil or pen used as a support tool | Any standard pencil or pen is suitable |
Arrange all materials on a clean, flat surface within easy reach before beginning.
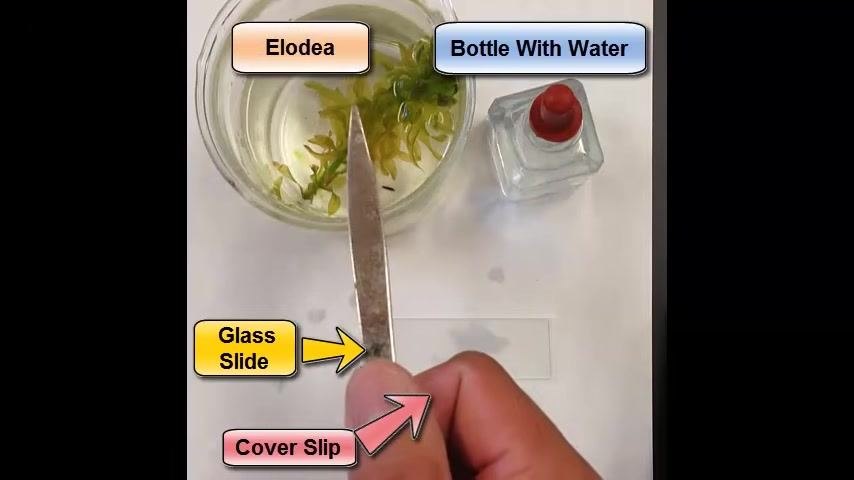
Confirm the identity of each labeled component before starting the procedure:
- Glass Slide: the rectangular transparent piece
- Cover Slip: the small square plastic piece
- Bottle With Water: the dropper bottle
- Elodea: the green plant in the bowl
Procedure
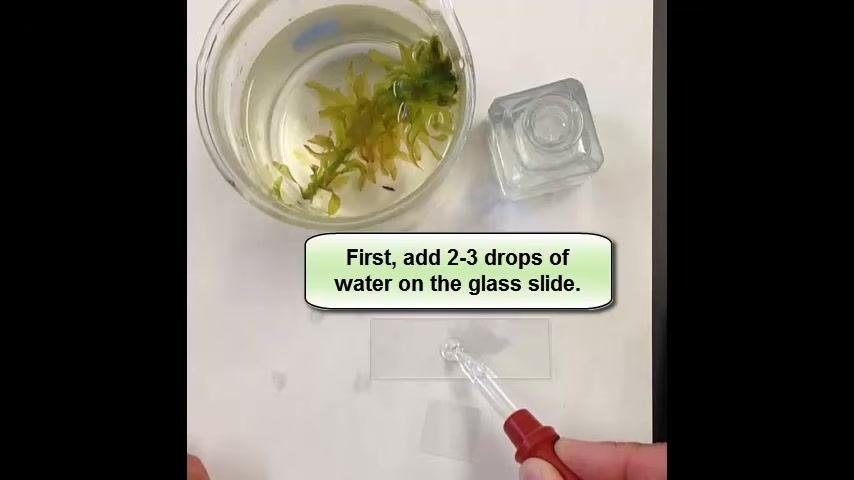
Step 1: Add water to the glass slide
- Use the dropper bottle to place 2–3 drops of water onto the center of the glass slide.
- Add an extra drop if the specimen is thick, such as with Elodea leaves, to ensure adequate coverage.
- Confirm the water forms a neat bead centered on the slide, not off to the sides.
Step 2: Prepare and place the specimen
- Use tweezers to gently pick a single leaf from the Elodea plant.
- Carefully lower the leaf into the water drops on the slide.
Step 3: Position the cover slip
- Hold the cover slip upright so that one edge touches the slide next to the water drop.
- Rest the cover slip on a pencil or pen for control as you lower it onto the specimen.
- Lower the cover slip gradually to avoid trapping air bubbles.
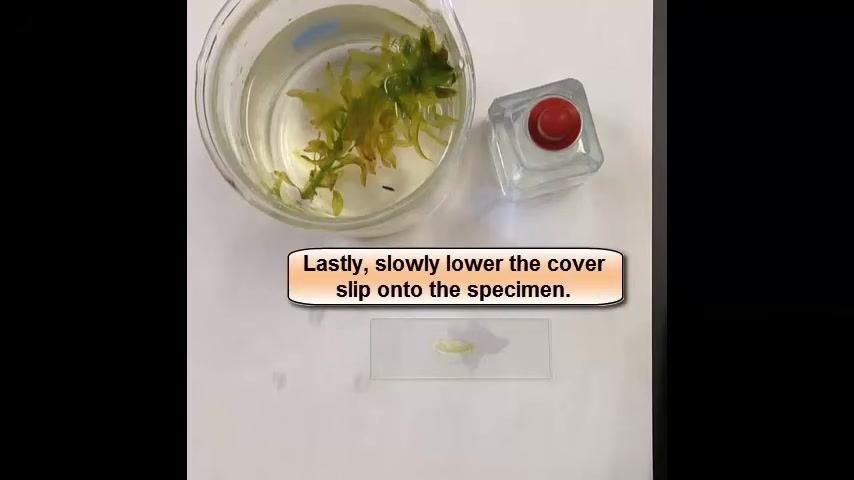
Step 4: Use a pencil or pen to guide placement
- Rest the cover slip on the pencil or pen while lowering it for a gentle, controlled placement.
- This technique helps prevent air bubbles and keeps the specimen in place.
Step 5: Allow the water to spread and remove the support tool
- Observe the water spreading beneath the cover slip as it is lowered; this helps fully immerse the specimen and reduces the chance of air bubbles.
- Once the cover slip is nearly flat against the slide, gently pull the pencil or pen away to let the cover slip settle onto the specimen.
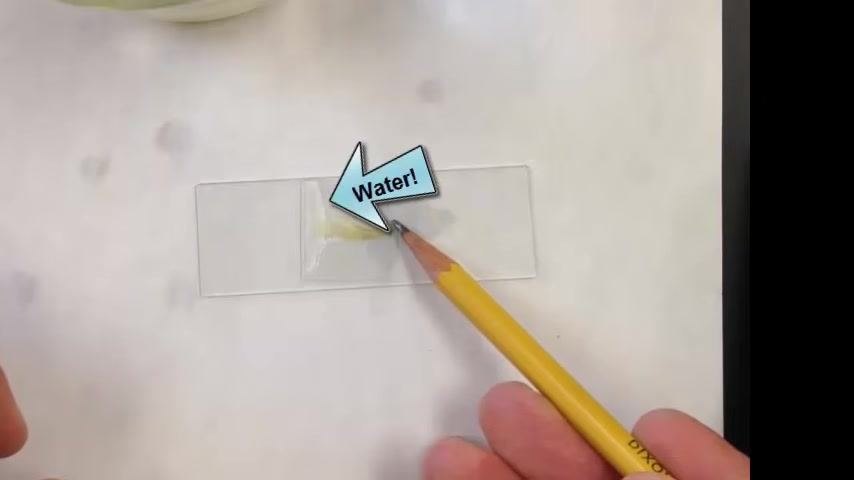
Step 6: Adjust for thick specimens
- If the Elodea leaf is thick and holds the cover slip up slightly, do not force the cover slip down abruptly.
- Use the pencil or pen to softly and gradually press down on the cover slip.
- Apply gentle, even pressure to avoid cracking the cover slip, and let air escape slowly from beneath it as you press.
Step 7: Finalize and clean up
- Inspect the slide to confirm there are no, or very few, air bubbles trapped under the cover slip.
-
Once the cover slip is flat and the specimen is fully immersed, the wet mount slide is ready. Carefully move it to the microscope stage for observation.
-
Return unused Elodea to the bowl, recap the water dropper bottle, dispose of any waste, and wipe down the work area.
Calculations
This procedure is qualitative and does not involve numerical calculations, dilution factors, or reported measurement values; the wet mount slide is prepared for direct visual observation only.
Quality Controls
- Air bubble check: Inspect the finished slide for trapped air bubbles under the cover slip before observation.
- Acceptance criteria: The slide should contain no, or very few, air bubbles, since bubbles can be mistaken for cells or other structures during microscopic examination.
- Failed-preparation handling: If air bubbles are present, gently tap or press the cover slip to release them; if bubbles persist or the specimen is not fully immersed, remove the cover slip and repeat the mounting steps with fresh water drops.
- Always lower the cover slip slowly and use the pencil-or-pen support technique to minimize the risk of trapped air.
Generation details: cost, quality tiers, downloads
Docsie billed 1,500 credits ($1.05) to analyze this 3-minute video at standard quality. The rewrite, template fill and Word/PDF exports were included. The same video at each quality tier:
| Quality | Frames sampled | Credits | Approx. cost |
|---|---|---|---|
| Draft | every 16-30 s | 750 | $0.52 |
| Standard (this guide) | every 8-15 s | 1,500 | $1.05 |
| Detailed | every 4-7 s | 3,000 | $2.10 |
| Ultra | every 1-3 s | 6,000 | $4.20 |
Credits priced at $0.70 per 1,000; plans include a monthly allowance. Enterprise customers on on-premise or bring-your-own-model deployments run this on their own inference and pay no per-video credits.
Generated by Docsie Video-to-Docs on 2026-09-20 from a 2-minute video. It was generated straight into Docsie's Lab Method SOP template, so every section of that template is filled from the video. Screenshots are frames from the source video and belong to their creator, Mr. Fox's Science Classroom, whose original is embedded above. If you own this video and want the guide removed or credited differently, contact us and we will act within one business day.