Skip to content
Made with Docsie · generated from video

How to Calibrate a Pipette

This procedure describes how to prepare for, perform, and document pipette calibration, and how to inspect, clean, and verify the accuracy of a pipette afterward. Following these steps ensures consistent, traceable, and accurate calibration results in accordance with your laboratory's Standard Operating Procedure (SOP).

Laboratory· 9 steps· 30 screenshots· 2759 words· Source video 12:22

Source: Pipette Calibration and Cleaning by Arizona Department of Health Services. The written guide below was generated from this video by Docsie.

Purpose

This procedure describes how to prepare for, perform, and document pipette calibration, and how to inspect, clean, and verify the accuracy of a pipette afterward. Following these steps ensures consistent, traceable, and accurate calibration results in accordance with your laboratory's Standard Operating Procedure (SOP).

Scope

This procedure applies to laboratory personnel responsible for calibrating single-channel pipettes (such as Eppendorf Reference models) with a volume range of 100–1000 µL. It covers setup, calibration measurement, documentation, cleaning, and final accuracy verification.

Required equipment and PPE

  • Pipette calibration SOP (official reference document)
  • Printed documentation form for recording calibration data (to be transferred later to an Excel file for automatic calculations)
  • Externally calibrated analytical balance
  • Volumetric flask (placed inside the balance)
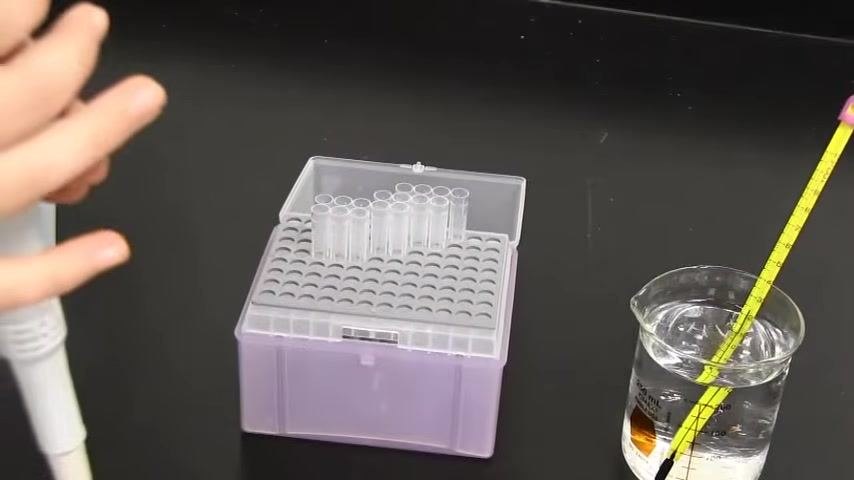
  • Beaker filled with water
  • NIST-calibrated thermometer
  • Pipette to be calibrated (in this example, range of 100–1000 µL)
  • Box of compatible pipette tips
  • Laboratory gloves
  • Kimtech wipes (Kimwipes)
  • 70% ethanol
  • Lubricating oil for O-rings (if needed)

Safety note: Always wear laboratory gloves to maintain cleanliness and safety while handling equipment and samples. Use cool water (1°C–20°C) with a NIST-calibrated thermometer, since the density of water is temperature dependent and affects accuracy.

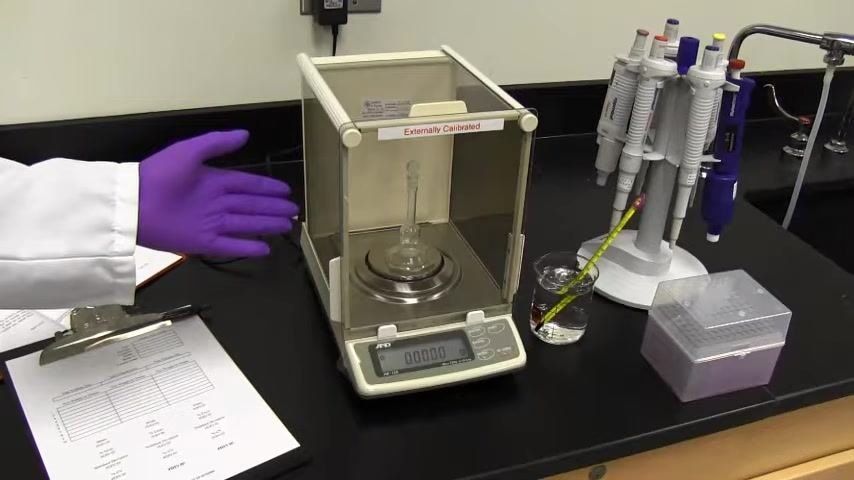
Laboratory setup showing the SOP document, documentation form on a clipboard, analytical balance with volumetric flask, beaker with thermometer, pipette stand with multiple pipettes, box of pipette tips, and a gloved hand indicating readiness.

Procedure

1. Prepare for pipette calibration

  1. Obtain the pipette calibration SOP and keep it as your reference throughout the procedure.
  2. Prepare a printed documentation form to record your calibration data and results.
  3. Gather an externally calibrated analytical balance and place a volumetric flask inside it for use during calibration.
  4. Fill a beaker with cool water (1°C–20°C) and insert a NIST-calibrated thermometer to monitor temperature.
  5. Collect the pipette to be calibrated. In this example, the pipette has a minimum setting of 100 microliters and a maximum of 1000 microliters. Plan to perform measurements at 100 µL, 500 µL, and 1000 µL to assess calibration across the range.
  6. Obtain a box of pipette tips compatible with the pipette model you are calibrating.
  7. Put on laboratory gloves before handling equipment and samples.
  8. Locate and record the serial number on the pipette for traceability and documentation.

2. Set up and prepare the pipette

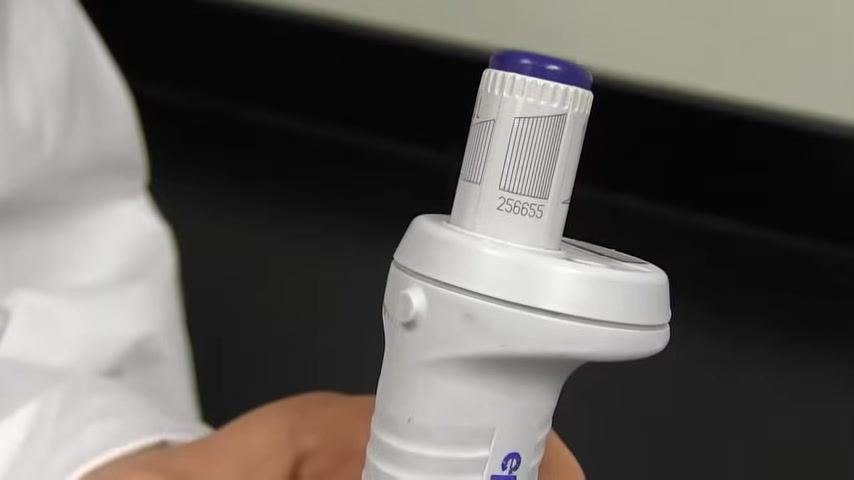
  1. Locate the serial number on the pipette. In this example, the serial number is 256655. Write this number on your documentation form for traceability.
Close-up of the pipette showing serial number "256655" on the adjustment dial.
  1. Identify the volume adjustment mechanism on your pipette. For Eppendorf pipettes, press the side button to unlock the adjustment knob, rotate the knob to set the desired volume, then release the knob to lock it in. In this example, adjust from 963 µL to 1000 µL and confirm the display reads 1000.
Hand adjusting the pipette volume dial; the display shows "1000".
  1. Select a compatible pipette tip from the tip box and firmly press the pipette into the tip to ensure a secure fit. The tip should not fall off when the pipette is lifted.

  2. Hold the pipette with your thumb on the plunger. Gently press to feel the first stop (where resistance increases), then continue pressing to reach the second stop (a further point of resistance). The first stop is used to aspirate liquid, and the second stop is used to fully dispense it. For large volumes, the movement between stops is more visible; for small volumes, it is more of a tactile sensation.

  3. Practice pressing to the first and second stops to become familiar with the feel and movement. This ensures accurate aspiration and dispensing during calibration.

Gloved hand pressing the pipette plunger, showing the correct grip and motion.

Key notes: - Always double-check the set volume before proceeding. - Ensure the pipette tip is firmly attached to prevent leaks or inaccurate measurements. - Familiarize yourself with the plunger stops to avoid errors during sample aspiration and dispensing.

3. Aspirate, dispense, and handle common issues

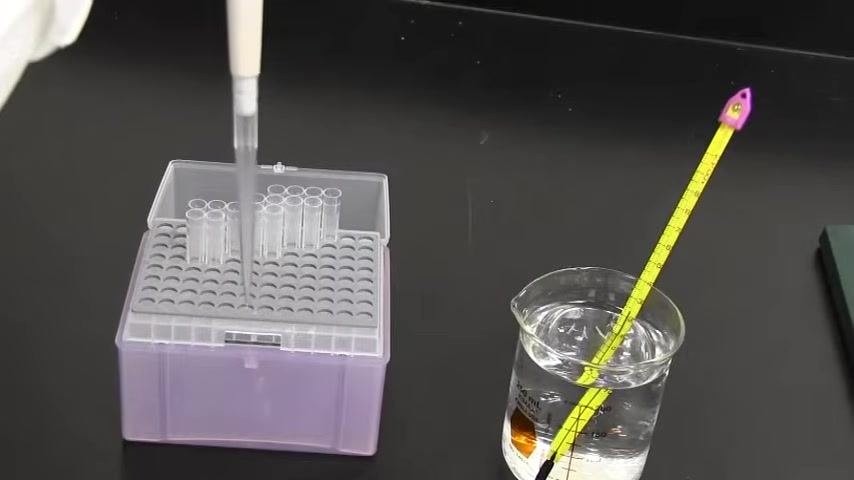
  1. Press the plunger to the first stop before submerging the pipette tip into the water in the beaker. Once submerged, release your thumb slowly to draw the set volume of water into the tip. Keep the tip below the water surface while aspirating.
Gloved hand holding the pipette with the tip submerged in a beaker of water and a thermometer; on-screen text reads: "Once the tip is submerged, release your thumb to draw the water in."
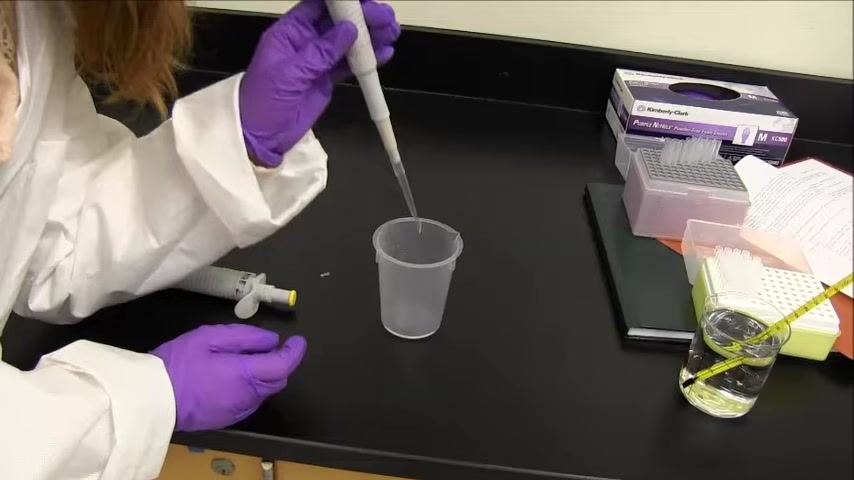
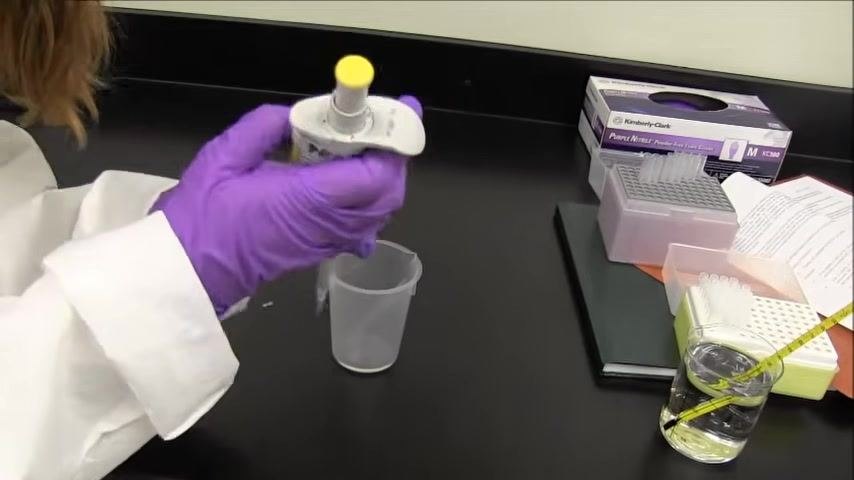
  1. Move the pipette tip to the receiving container (for example, a plastic cup). Press the plunger smoothly to the first stop to begin dispensing, then continue to the second stop to expel any remaining liquid. You may hear a slight click at the second stop. Withdraw the tip from the container before releasing the plunger to avoid drawing liquid back in.
Person in a lab coat and purple gloves dispensing liquid from the pipette into a plastic cup; pipette tip inside the cup, with pipette boxes and a beaker visible on the bench.
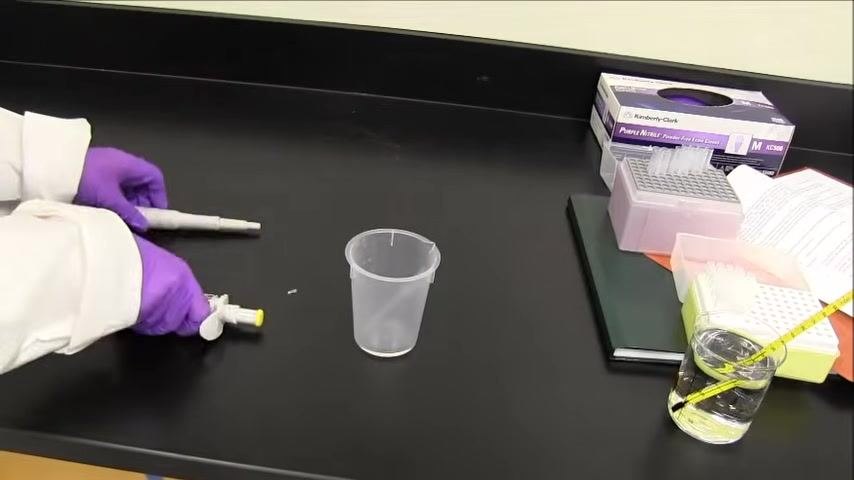
  1. Identify the tip ejection mechanism on your pipette. Some models eject the tip by pressing the plunger past the second stop, while others use a separate knob or button. For this model, use the yellow knob to eject the tip. Place the tip over a waste container and press the knob firmly to release it.

  2. If water is visible on the outside of the pipette tip after aspiration, gently wipe the outside of the tip with a chem wipe before dispensing, as external droplets can affect measurement accuracy.

Close-up of a pipette tip with a visible water droplet on the outside, held by a gloved hand.
  1. Inspect the tip after aspirating water. If you see an air bubble or the water does not reach the end of the tip, the volume will be inaccurate. If a bubble is present, expel all water from the tip and repeat the aspiration process.
Close-up of a pipette tip with a visible air bubble inside, held by a gloved hand.
  1. After dispensing, check whether any water remains inside the tip. If residual water is present, do not reuse the tip for the next measurement — eject it and attach a new one to ensure accuracy.

  2. Before starting actual measurements, fill out the calibration worksheet with the date, operator, location, model, serial number, and volume range, and note the test volumes (0.100, 0.500, and 1.000 mL) to prepare for recording dispensed water weights.

Key notes: - Always check for and remove external droplets and air bubbles before dispensing. - Use a new tip if any water remains after dispensing to avoid carryover. - Complete all required documentation before starting calibration measurements.

4. Prepare the calibration worksheet

  1. Attach a new, clean pipette tip to your pipette before starting measurements to ensure accuracy and prevent contamination.
  2. Place the calibration worksheet on a clipboard for stability. Ensure it is clearly labeled with:
    • Date: 1/12/13
    • Operator: Kira
    • Location: Chemistry
    • Model: Eppendorf Reference
    • Serial #: 256655
    • Volume range: 100–1000 µL
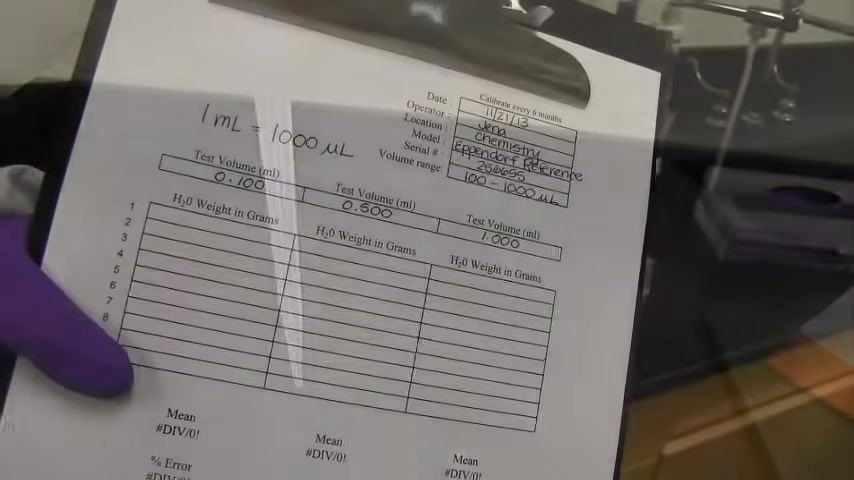
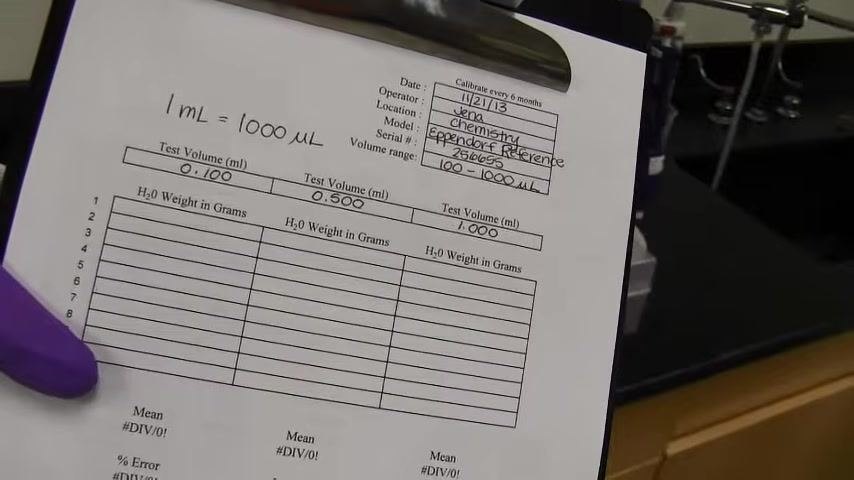
  3. Review the worksheet layout. Note the conversion at the top (1 mL = 1000 µL) and identify the three test volumes to be measured: 0.100 mL, 0.500 mL, and 1.000 mL. Each test volume has columns to record H₂O Weight in Grams for multiple trials (typically six rows per volume), with fields at the bottom for Mean, % Error, and per-trial weights.
  4. Double-check that all identification fields (date, operator, location, model, serial number, and volume range) are completed before proceeding.
  5. Ensure you have a pen or pencil ready to record the weight of water dispensed for each test volume during calibration.
Calibration worksheet on a clipboard, filled with operator, location, model, serial number, and volume range. The worksheet includes columns for three test volumes (0.100, 0.500, 1.000 mL), rows for H₂O weight in grams, and fields for mean and % error. Laboratory bench and equipment are visible in the background.

Key notes: - Always use a new tip before starting measurements. - Complete all worksheet fields before recording any data. - Organize your workspace to keep the worksheet clean and accessible during calibration.

5. Record calibration measurements for the first test volume (100 µL)

  1. Gather the calibration worksheet and confirm it is filled out with the following details: Date: 1/21/13, Operator: Jena, Location: Chemistry, Model: Eppendorf Reference, Serial #: 260695, Volume range: 100–1000 µL. Write the conversion 1 mL = 1000 µL at the top.
Calibration worksheet with all fields filled, conversion written, and test volumes labeled 0.100, 0.500, and 1.000 mL.
  1. Confirm the pipette's volume range by checking the knob or label on the pipette. For this example, use a pipette with a range of 100–1000 µL.

  2. Note the test volumes to be used: 0.100 mL (100 µL), 0.500 mL (500 µL), and 1.000 mL (1000 µL). Ensure these are clearly written in the "Test Volume (ml)" columns on your worksheet.

Worksheet showing test volumes and the conversion, with pipettes and lab equipment visible in the background.
  1. Place a clean, dry flask or vessel on the balance pan. Observe the initial weight displayed, then press the zero or tare button to reset the display to 0.0000 g. This ensures only the weight of the dispensed water is measured, not the vessel.
Analytical balance with a flask inside, display reading 0.0000 g, with the calibration worksheet nearby.
  1. Set the pipette to the first test volume (100 µL or 0.100 mL).

  2. Draw water into the pipette from a beaker or cup, using proper technique (vertical pipetting, smooth plunger action).

  3. Dispense the 100 µL of water into the tared flask on the balance.

  4. Record the weight displayed on the balance (for example, 0.1029 g) in the first column ("H₂O Weight in Grams") of your worksheet under the 0.100 mL test volume.

Balance display showing 0.1029 g, with the flask inside and worksheet visible; a gloved hand points to the reading.

Note: Continue with the next test volumes (0.500 mL and 1.000 mL) by repeating steps 5–8 for each, recording the corresponding weights in the appropriate columns.

6. Repeat measurements and record results for all test volumes

  1. Repeat the weighing process for each test volume according to your SOP, performing either five or ten replicates for each test volume (100 µL, 500 µL, 1000 µL) as specified by your laboratory's SOP. After each dispensing, record the measured weight in the appropriate worksheet column.
A gloved hand records a weight (0.1039 g) on the calibration worksheet. The analytical balance displays 0.1039 g, with the flask on the balance, a thermometer in a beaker, Kimtech wipes, a pipette stand, and other lab items visible.
  1. After each measurement, remove the flask from the balance and press the zero or tare button to return the display to 0.0000 g before the next measurement. Prepare to pipette the next aliquot of water.
Analytical balance display reads 0.0000 g, with the flask on the balance, a pen and worksheet on the bench, and a person in a lab coat and gloves preparing for the next measurement.
  1. Use the pipette to aspirate another 100 µL of water from the beaker, ensuring proper pipetting technique (vertical pipetting, smooth plunger action).

  2. Continue the process until all replicates for the current test volume are complete. For the 100 µL test volume, record each weight in the worksheet, for example: 0.1039 g, 0.1019 g, 0.1015 g, 0.1021 g, 0.1009 g. Ensure all values are entered in the "H₂O Weight in Grams" column under the correct test volume.

  3. Adjust the pipette to 0.500 mL (500 µL) using the volume adjustment knob and confirm the display reads "0500."

Close-up of the pipette set to 0.500 mL (500 µL), held by a gloved hand, with the lab background showing a thermometer, Kimtech wipes, and the worksheet.
  1. Dispense 500 µL of water into the tared flask on the balance and record the weight after each replicate in the "H₂O Weight in Grams" column under 0.500 mL, for example: 0.4970 g, 0.4998 g, 0.5003 g, 0.4976 g, 0.4999 g.
Calibration worksheet with five weights recorded under 0.100 mL and five under 0.500 mL (0.4970, 0.4998, 0.5003, 0.4976, 0.4999); the 1.000 mL column is empty.
  1. Adjust the pipette to 1.000 mL (1000 µL) using the volume adjustment knob and confirm the display reads "1000."

  2. Ensure the balance is tared to 0.0000 g, place the flask on the balance ready to receive the 1000 µL aliquot, and continue the process of dispensing, weighing, and recording for the 1000 µL test volume.

Note: - Always follow your laboratory's SOP for the required number of replicates (five or ten). - Ensure all weights are accurately recorded in the correct columns for each test volume. - Double-check pipette settings before each new test volume. - Maintain clean technique throughout the process to ensure reliable results.
7. Complete calibration measurements and review results

  1. Ensure the analytical balance is clean and tared to 0.0000 g, place the flask inside the balance chamber, and confirm all necessary supplies are present: Kimtech wipes, thermometer in a beaker of water, pipette stand with pipettes, calibration worksheet, and pen.
Analytical balance with a flask inside, labeled "Externally Calibrated." Kimtech wipes, thermometer in a beaker, pipette stand, calibration worksheet, and pen are visible, with a person in a lab coat present.
  1. Dispense 1000 µL of water into the tared flask on the balance and record the measured weight in the "H₂O Weight in Grams" column under the 1.000 mL heading. Continue until all five replicates are completed for the 1000 µL test volume.
Analytical balance with a flask inside, display shows a weight (0.9975 g); a person in a lab coat and purple gloves is recording data, with the calibration worksheet, pen, thermometer, Kimtech wipes, and pipette stand visible.
  1. Hold the pipette and pen, ready to review or adjust settings as needed, and ensure the pipette is set to the correct volume for the highest measurement.
Person in a lab coat and purple gloves holds a pipette and pen, with the analytical balance, calibration worksheet, and pipette stand visible.
  1. Check that the analytical balance display reads 0.0000 g before dispensing each aliquot. If necessary, press the tare or zero button to reset the balance.
Person in a lab coat and gloves uses a pipette above a beaker with a thermometer; the analytical balance with a flask inside, calibration worksheet, pen, Kimtech wipes, and pipette stand are visible.
Person in a lab coat and gloves ensures the balance is tared before pipetting; the analytical balance, flask, worksheet, and other lab supplies are visible.
  1. Examine the calibration worksheet to ensure all five replicate weights are entered for each test volume (0.100, 0.500, and 1.000 mL). Example entries:
    • 0.100 mL: 0.1039, 0.1019, 0.1015, 0.1021, 0.1009
    • 0.500 mL: 0.4970, 0.4998, 0.5003, 0.5016, 0.4989
    • 1.000 mL: 0.9935, 0.9925, 0.9945, 0.9985, 1.0008

Ensure all columns are complete and legible.

Close-up of the calibration worksheet with all five replicate weights recorded for each test volume; operator and pipette details are visible at the top.
  1. Hold the pipette with both hands, ensure it is clean and free of visible residue, inspect the tip and body for contamination or damage, and place the pipette back on the stand or prepare it for further cleaning as required by your SOP.

Note: - Double-check that all weights are accurately recorded for each test volume. - Ensure the balance is tared before every measurement to maintain accuracy. - Review the worksheet for completeness before proceeding to calculations or reporting calibration results. - Follow your laboratory's SOP for cleaning and storing the pipette after calibration.

8. Inspect and clean the pipette

  1. Hold the pipette in your gloved hands and examine both the inside and outside for any visible residue, corrosion, or signs of wear. Check whether there is sufficient lubrication on the internal components.
A person in a lab coat and purple gloves holds a disassembled pipette, inspecting the inside. Several pipettes are on a stand, a thermometer is in a beaker of liquid, and a Kimtech wipes box is visible.
  1. Rotate or move the internal parts gently to confirm smooth movement, which indicates proper lubrication.

  2. Take a clean Kimwipe or laboratory tissue and prepare to clean both the outside and inside surfaces of the pipette before reassembly. Ensure 70% ethanol is available for disinfection.

  3. Pour or spray 70% ethanol onto the Kimwipe to moisten it for cleaning.

A person in a lab coat and purple gloves holds a pipette and a bottle of 70% ethanol, preparing to clean the pipette.
  1. Wipe down both the inside and outside of the pipette thoroughly with the ethanol-moistened Kimwipe, ensuring all surfaces are disinfected and free of debris.
A person in a lab coat and purple gloves uses a Kimwipe with 70% ethanol to clean a pipette, with pipettes and lab equipment visible on the bench.
  1. If your pipette (for example, Eppendorf) came with specific cleaning or maintenance instructions, consult the manufacturer's manual for any additional steps or recommendations.

  2. Carefully reassemble the cleaned and dried components of the pipette, ensuring all parts are securely fitted and the pipette operates smoothly. If the pipette is "sticking" when trying to obtain or dispense liquid, use oil to lubricate the O-rings.

  3. Inspect the pipette again to ensure it is clean and not sticking. If it is still sticking, apply a small amount of oil to the O-rings as needed.

A person in a lab coat and purple gloves inspects and handles a reassembled pipette, with pipettes and lab equipment on the bench.
  1. Wipe down any remaining areas, focusing on both the internal and external surfaces.

  2. Inspect the tip opening to ensure there is adequate lubrication. If insufficient, apply more lubricant before proceeding with use.

Note: Always follow your laboratory's safety and maintenance protocols, and consult the manufacturer's manual for specific instructions related to your pipette model.

9. Calibrate and verify pipette accuracy

  1. Hold the cleaned and reassembled pipette in your gloved hands. Ensure you have access to calibration equipment: a balance (scale), a beaker of water with a thermometer, and a pipette stand with additional pipettes. Have Kimtech wipes available for any necessary cleaning.
A person in a lab coat and purple gloves holds a pipette near a balance, a beaker with a thermometer, a pipette stand, and a box of Kimtech wipes.
  1. Inspect the pipette for a calibration knob or adjustment screw. If adjustment is needed, locate the appropriate mechanism on your pipette model.

  2. If your pipette allows manual calibration, use the knob or screw to fine-tune the volume setting until it matches the required calibration weight.

  3. Refer to your laboratory's spreadsheet or documentation for allowed deviation percentages. Typical allowed deviations are:

    • General use: up to 5%
    • Clean water: 2%
    • Micro methods: 2.5% or 3%
  4. Determine the required accuracy for your specific application based on your laboratory's Quality Framework (QF) program, since the allowed deviation depends on this program.

A person in a lab coat and purple gloves holds a pipette, preparing for calibration, with calibration equipment and pipette stand visible.
  1. For the most stringent applications, target a 1% deviation, which represents the highest level of accuracy.
A person in a lab coat and purple gloves holds a pipette, focusing on calibration accuracy, with calibration equipment and pipette stand visible.

Note: - Always follow your laboratory's calibration protocols and refer to the manufacturer's manual for specific adjustment instructions. - Record all calibration results and deviations in your lab's tracking system or spreadsheet. - Use the tightest accuracy standard required for your application to ensure reliable results.

Verification and summary

Before closing out the calibration record, confirm the following:

  • All identification fields on the worksheet (date, operator, location, model, serial number, volume range) are complete.
  • All replicate weights are recorded for each test volume (0.100 mL, 0.500 mL, 1.000 mL), with the correct number of replicates as specified by your SOP.
  • The balance was tared to 0.0000 g before every measurement.
  • No air bubbles, external droplets, or residual water affected any recorded measurement.
  • The pipette has been inspected, cleaned with a 70% ethanol-moistened Kimwipe, and reassembled with adequate lubrication.
  • Any required calibration adjustment has been made and matches the deviation standard required by your laboratory's QF program (up to 5% for general use, 2% for clean water, 2.5%–3% for micro methods, or 1% for maximum accuracy).

What's next

Once the worksheet is complete and verified, transfer the recorded data to the Excel file for automatic calculation of mean, % error, standard deviation, and % CV for each test volume. Store the completed calibration worksheet according to your laboratory's documentation and traceability requirements, and return the pipette to its stand for future use.

Video to Documentation

Have your own laboratory process videos?

Docsie turned a 12-minute YouTube video into the guide above, screenshots included, with no manual writing. Upload your Zoom, Teams, Loom or screen recordings and get the same for your team.

Steps + screenshots extracted automatically
Export to Markdown, DOCX, PDF or publish to a portal