
How to Operate a Centrifuge
This SOP describes how to operate a centrifuge safely and correctly, covering tube selection, sample balancing, rotor setup, and speed and time settings. Following this procedure minimizes common operator errors, protects laboratory equipment, and ensures reliable, reproducible results when using a centrifuge for sample separation.
Video: How to Use a Centrifuge by labtricks (2010). All credit for the demonstration goes to the creator; watch the original on YouTube. The written guide below was generated from this video by Docsie. Creator? Request a change or removal.
This SOP describes how to operate a centrifuge safely and correctly, covering tube selection, sample balancing, rotor setup, and speed and time settings. Following this procedure minimizes common operator errors, protects laboratory equipment, and ensures reliable, reproducible results when using a centrifuge for sample separation.
Purpose
This method establishes the correct procedure for operating laboratory centrifuges to process liquid samples by centrifugal separation. It is intended to standardize centrifuge use across analysts, reduce equipment damage, and prevent accidents caused by improper tube selection, unbalanced loads, or incorrect speed and time settings.
Scope
This procedure applies to the following centrifuge types:
- Standard tabletop centrifuge, suitable for small tubes and general laboratory use.
- Temperature control tabletop centrifuge, used for larger tubes and temperature-sensitive samples.
- High-speed centrifuge, an industrial-grade instrument intended for specialized applications only.
Sample types covered include liquid samples processed in 1.5 mL and 0.5 mL microfuge tubes. This procedure is intended for laboratory analysts operating any of the centrifuge types listed above. High-speed centrifuges are excluded from casual or general laboratory use and must not be operated outside their intended industrial application.

Principle
Centrifugation separates sample components by spinning tubes at controlled speed within a rotor. Two key settings govern this process: the spin duration (time) and the rotational speed, expressed as RPM or g-force. Speed is the more critical parameter, as it determines the force applied to the sample and must be appropriate for the tube type to prevent breakage. Proper balancing of tubes within the rotor is essential, since unequal mass distribution can damage the instrument or cause dangerous failure during operation.
Materials and reagents
| Category | Item | Notes |
|---|---|---|
| Instrument | Standard tabletop centrifuge | For small tubes and general use |
| Instrument | Temperature control tabletop centrifuge | For larger tubes and temperature-sensitive samples |
| Instrument | High-speed centrifuge | Industrial-grade; not for casual use |
| Consumable | 1.5 mL microfuge tubes | Commonly used; fit most tabletop centrifuges |
| Consumable | 0.5 mL microfuge tubes | Requires an adapter to fit securely |
| Consumable | Tube adapter | Required for smaller tubes to prevent breakage |
| Balancing material | Water | Used to fill a counterweight tube when only one sample is available |
| Component | Rotor lid | Must be secured before starting the run |
Procedure
Identify the correct centrifuge and tube type
Confirm which centrifuge you are using and select the tube size appropriate for it. Standard tabletop centrifuges are suited for small tubes and general lab use, while temperature control models accommodate larger tubes and temperature-sensitive samples. High-speed centrifuges are industrial-grade instruments and should not be mistaken for general lab equipment.
Select and prepare the tubes
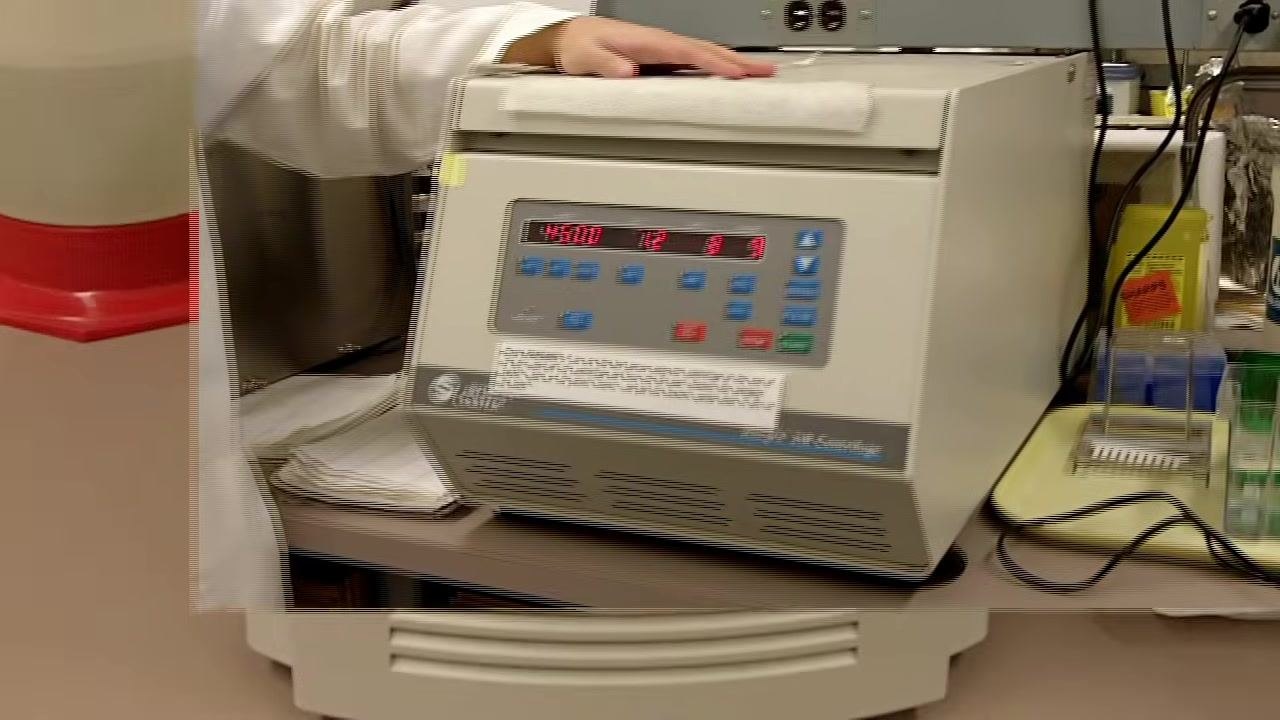
Choose 1.5 mL microfuge tubes for most tabletop centrifuge applications. If using 0.5 mL microfuge tubes, place them into the appropriate adapter before inserting them into the centrifuge. Skipping the adapter for smaller tubes may result in tube breakage.
Balance the tubes
Check that the liquid levels in both tubes are visually equal before starting a run. For small volumes, weighing is not required, but a clear visual mismatch—for example, one tube with 1 mL and another with 0.5 mL—indicates the tubes are not balanced and must be adjusted.

Prepare and load balanced samples
Prepare two tubes, each containing 1 mL of solution. If only one sample tube is available, fill a second tube with 1 mL of water to match the sample volume. Place the two tubes directly opposite each other in the centrifuge rotor to ensure proper balance during the run.

Secure the rotor lid
Fit the rotor lid onto the rotor and ensure it is tightly fastened before closing the centrifuge. A properly secured lid is required to prevent accidents during operation.
Set the run parameters
Before starting the instrument, set the following:
- Time: the duration of the spin; generally less critical for most applications.
- Speed: the RPM or g-force setting; the most important parameter, as it must match the tube type to avoid tube failure.
Confirm both settings are appropriate for the tube type and sample before initiating the run.
Start the run and monitor completion
Close the centrifuge and start the run once tubes are balanced, the rotor lid is secured, and speed and time settings are confirmed. Allow the run to complete before opening the instrument.

Calculations
The source procedure does not specify numerical formulas, dilution factors, or reporting units for this method; this section would normally document any RPM-to-g-force conversion, dilution calculations for sample preparation, and the reporting format and significant figures used for recorded results.
Quality controls
| Control point | Requirement | Failure handling |
|---|---|---|
| Tube selection | Correct tube size and adapter used for centrifuge type | Do not run; replace with correct tube/adapter |
| Sample balance | Equal liquid volume in opposing tubes, verified visually | Adjust volumes with water or sample until balanced before running |
| Rotor lid | Lid securely fastened onto rotor | Do not start run until lid is confirmed tight |
| Speed and time settings | Speed appropriate for tube type; time set per application | Adjust settings before starting; verify prior to every run |
Failure to follow these controls can result in equipment damage or dangerous accidents, including centrifuge failure during operation. Analysts must complete all four checks—correct tubes, balanced tubes, secured lid, and verified settings—before every run.
What's next
For additional laboratory tips or to share your own techniques, contact:
- Website: labtricks.com
- Email: info@labtricks.com
- Twitter: twitter.com/labtricks
- YouTube: youtube.com/labtricks
Generation details: cost, quality tiers, downloads
Docsie billed 2,000 credits ($1.40) to analyze this 4-minute video at standard quality. The rewrite, template fill and Word/PDF exports were included. The same video at each quality tier:
| Quality | Frames sampled | Credits | Approx. cost |
|---|---|---|---|
| Draft | every 16-30 s | 1,000 | $0.70 |
| Standard (this guide) | every 8-15 s | 2,000 | $1.40 |
| Detailed | every 4-7 s | 4,000 | $2.80 |
| Ultra | every 1-3 s | 8,000 | $5.60 |
Credits priced at $0.70 per 1,000; plans include a monthly allowance. Enterprise customers on on-premise or bring-your-own-model deployments run this on their own inference and pay no per-video credits.
Generated by Docsie Video-to-Docs on 2026-09-20 from a 3-minute video. It was generated straight into Docsie's Lab Method SOP template, so every section of that template is filled from the video. Screenshots are frames from the source video and belong to their creator, labtricks, whose original is embedded above. If you own this video and want the guide removed or credited differently, contact us and we will act within one business day.