
How to Create an Email Template in HubSpot
HubSpot's templates tool lets you standardize your communication and save time by avoiding repetitive email writing. This guide walks you through how to create an email template in HubSpot, from opening the templates tool for the first time to building, personalizing, organizing, and sending your own templates — including how to use them directly from Gmail.
Video: Create a HubSpot Email Template - A quick tutorial by HubSpot Hacks. All credit for the demonstration goes to the creator; watch the original on YouTube. The written guide below was generated from this video by Docsie. Creator? Request a change or removal.
HubSpot's templates tool lets you standardize your communication and save time by avoiding repetitive email writing. This guide walks you through how to create an email template in HubSpot, from opening the templates tool for the first time to building, personalizing, organizing, and sending your own templates — including how to use them directly from Gmail.
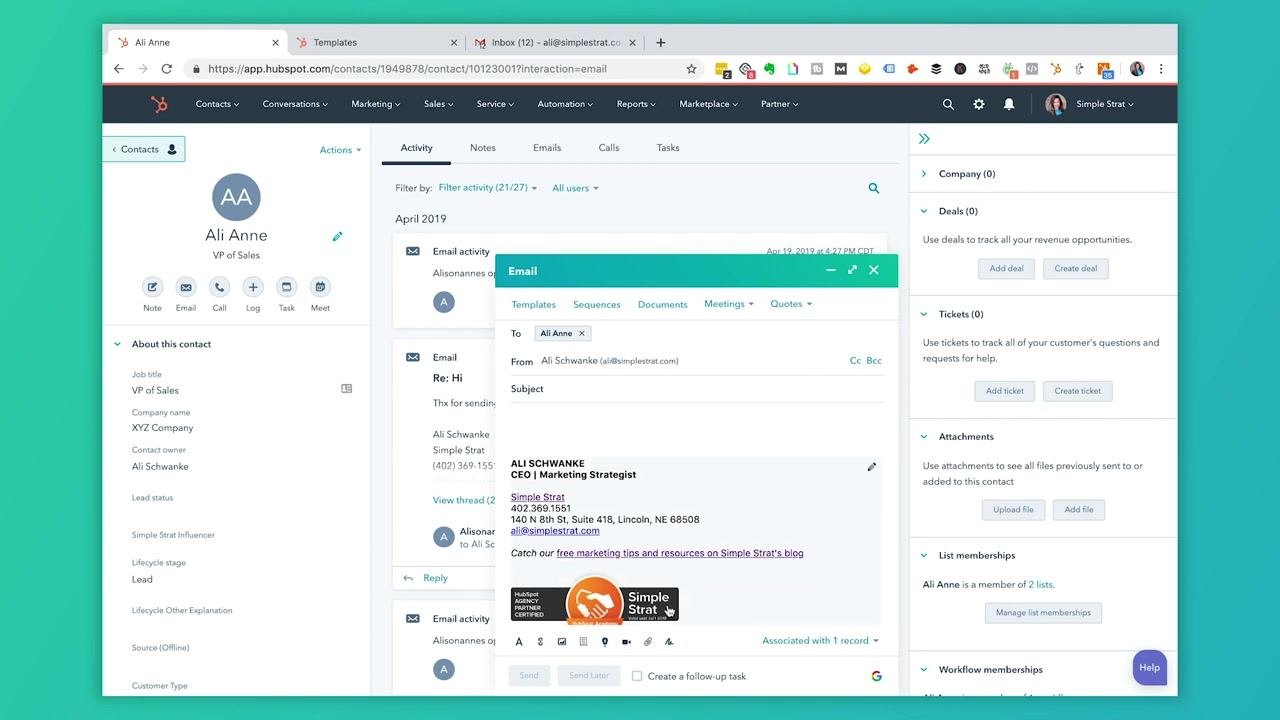
Prerequisites
- A HubSpot account with access to a contact record and the email compose interface.
- Access to the Conversations menu, where the Templates option lives.
- Awareness that the free version of HubSpot limits your team to five templates; reaching the limit prompts an upgrade for additional templates.
- For the Gmail section later in this guide, you'll need the HubSpot integration connected to your Gmail inbox.
Opening the templates tool
-
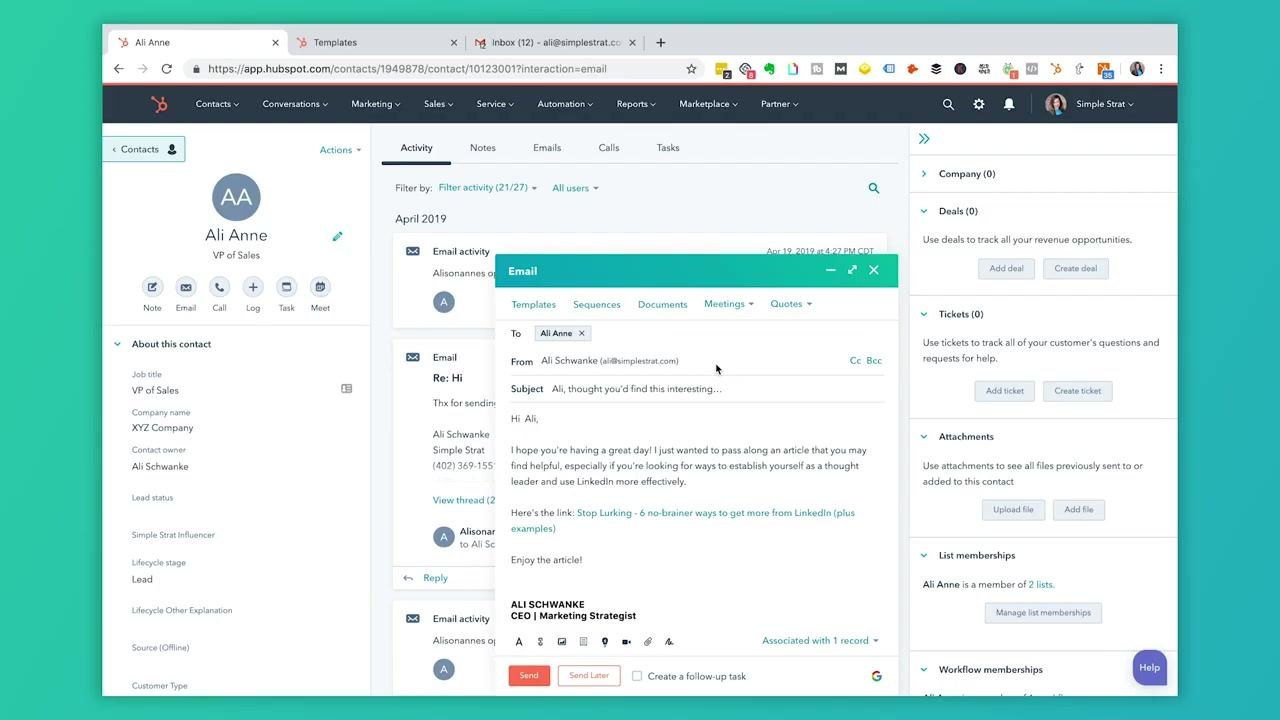
Locate the templates tab in an email Open a contact record in HubSpot and find the email interface within it. At the top of the email window, you'll see a Templates tab.
-
Browse your existing templates Click the Templates tab to view any templates that have already been set up. Use the search bar to find a template by keyword or name, and review the list of available options and their details.
-
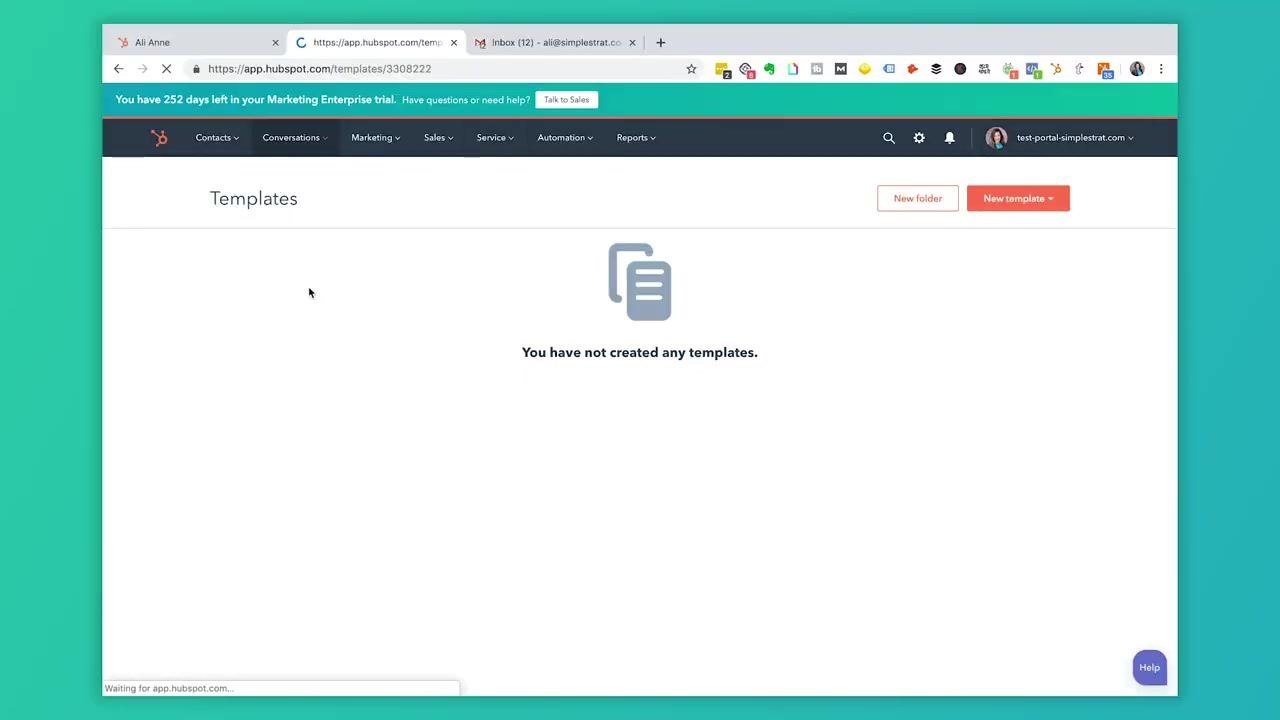
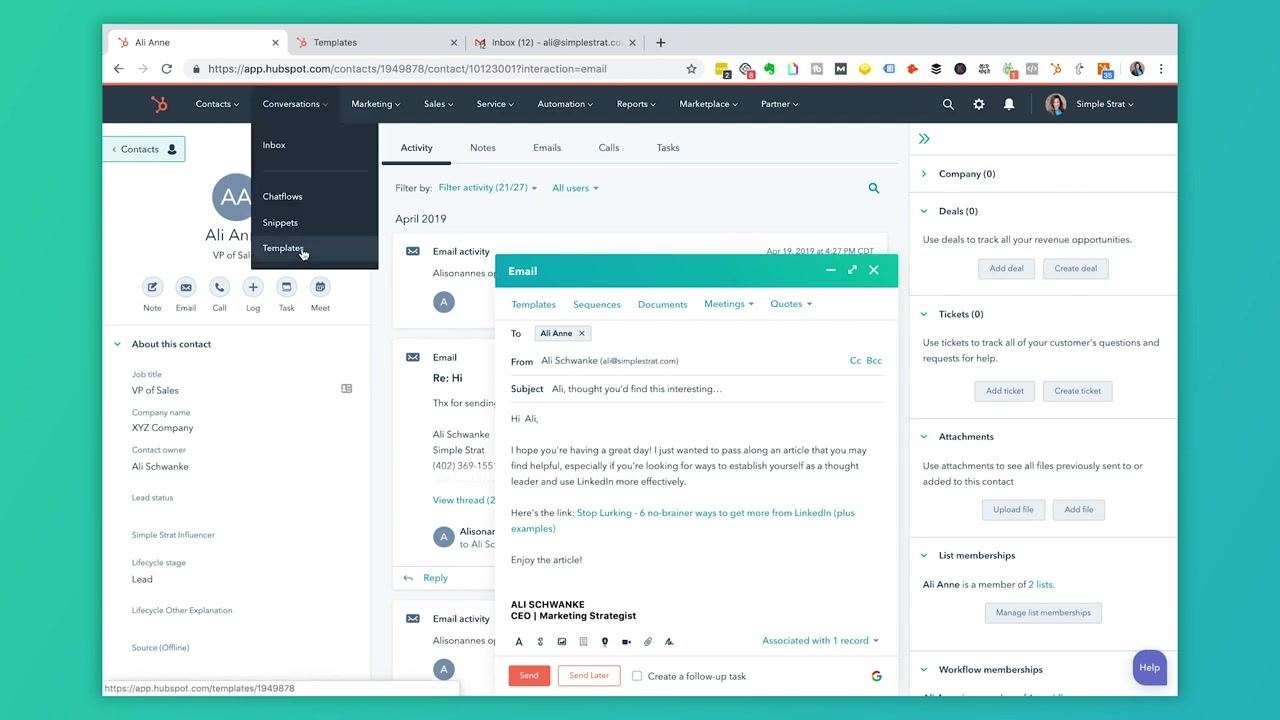
Navigate to templates from the main menu You can also reach your templates from the top navigation bar. Click Conversations, then select Templates from the dropdown menu.
-
Recognize a blank templates screen If you've never created a template before, the Templates screen displays the message "You have not created any templates." This is your starting point for building your first one.
Once a template is selected from the list, its content automatically populates the email window. Note that the free version of HubSpot limits you to five templates per team; once you reach that limit, you're prompted to upgrade for additional templates.
Creating a new email template
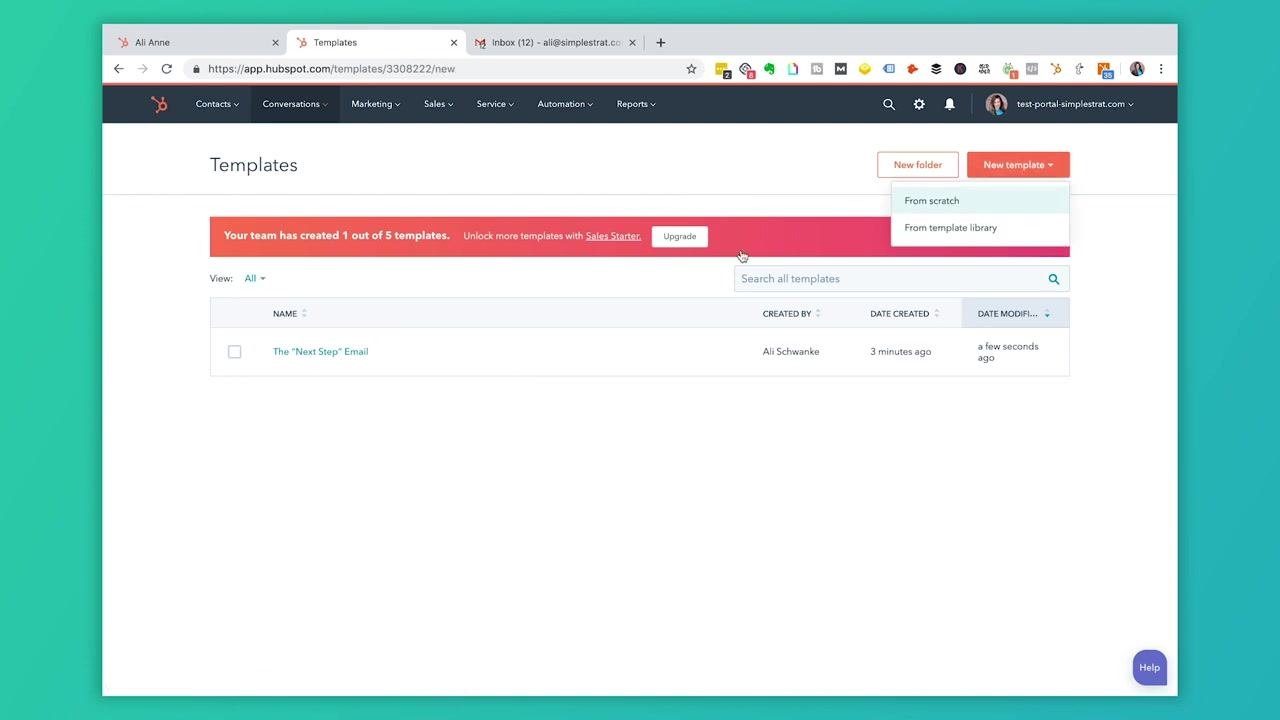
- Choose how to build your template On the Templates screen, click the orange New template button in the upper right, then select either From scratch or From template library. Choose From scratch if you already have email content written elsewhere (such as in a Word document) that you want to copy and paste in. Choose From template library to browse HubSpot's pre-built templates, organized into categories such as "Share Helpful Resource" and "Inbound Lead from Content."
- Browse the template library
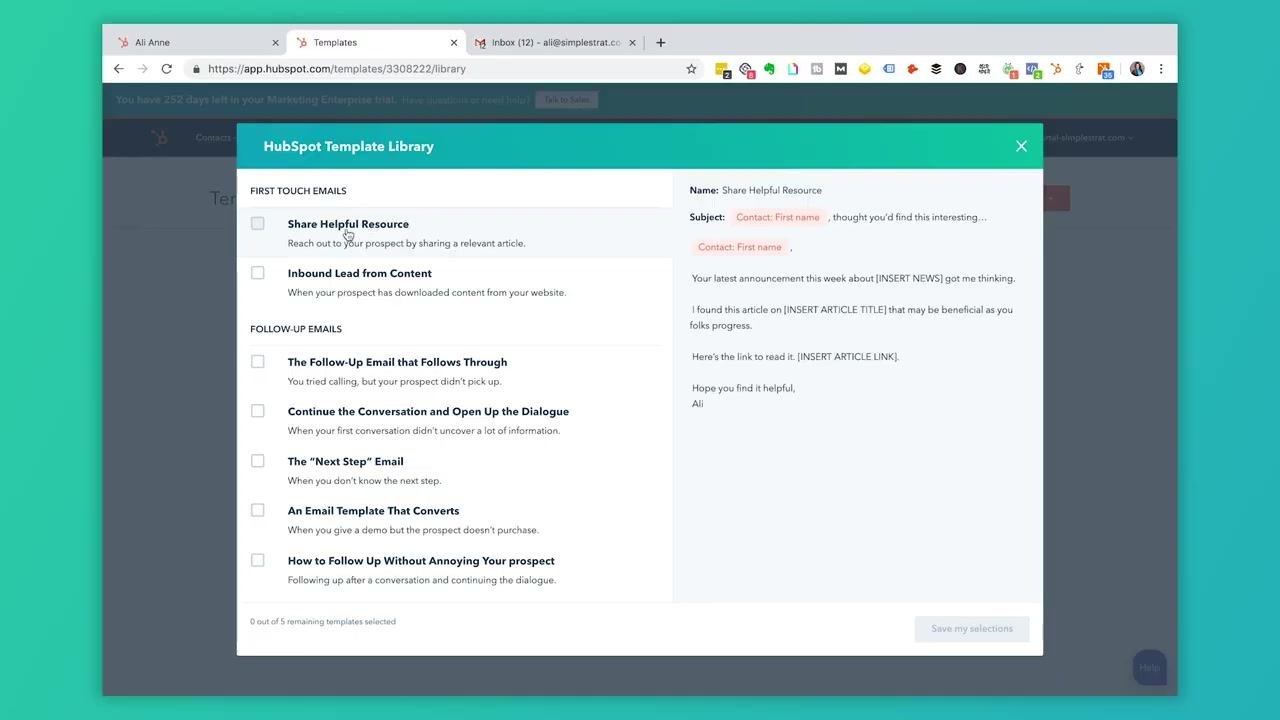
If you select From template library, the "HubSpot Template Library" window opens. Browse categories like "First Touch Emails" and "Follow-Up Emails," and click a template name — for example, "Share Helpful Resource" or "Inbound Lead from Content" — to preview its subject line and body content on the right, including personalization tokens such as
Contact: First name.
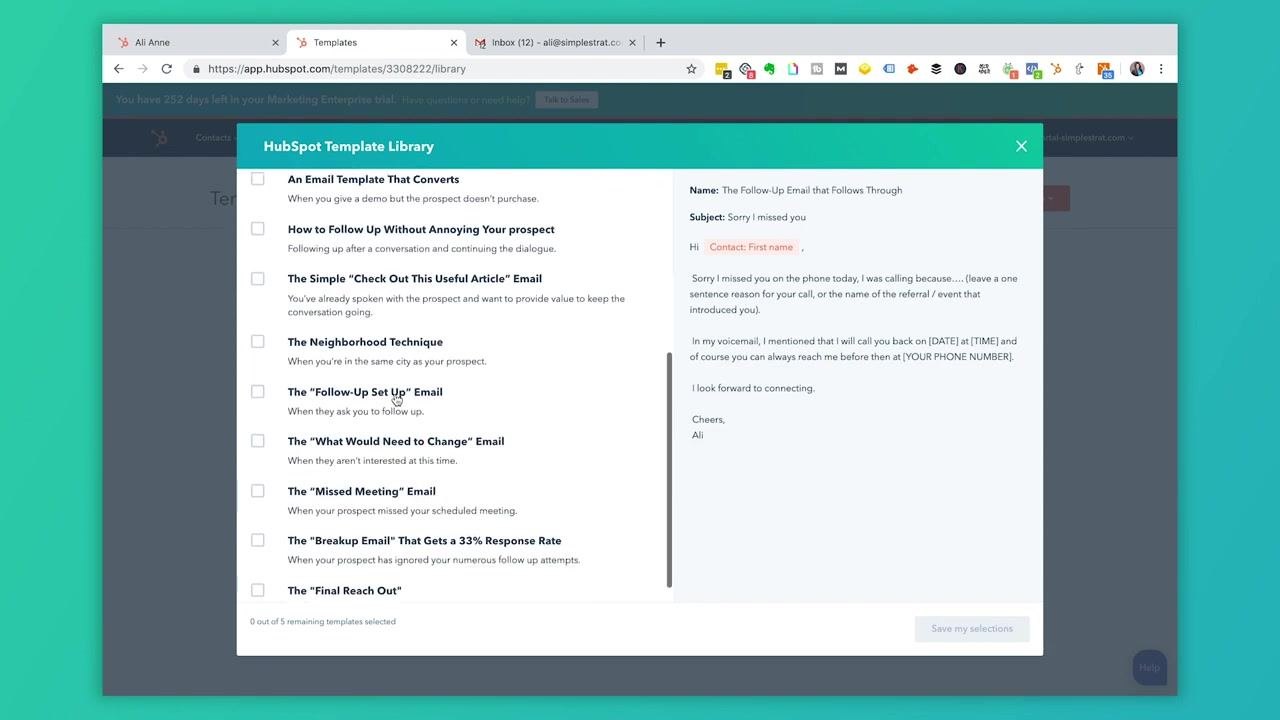
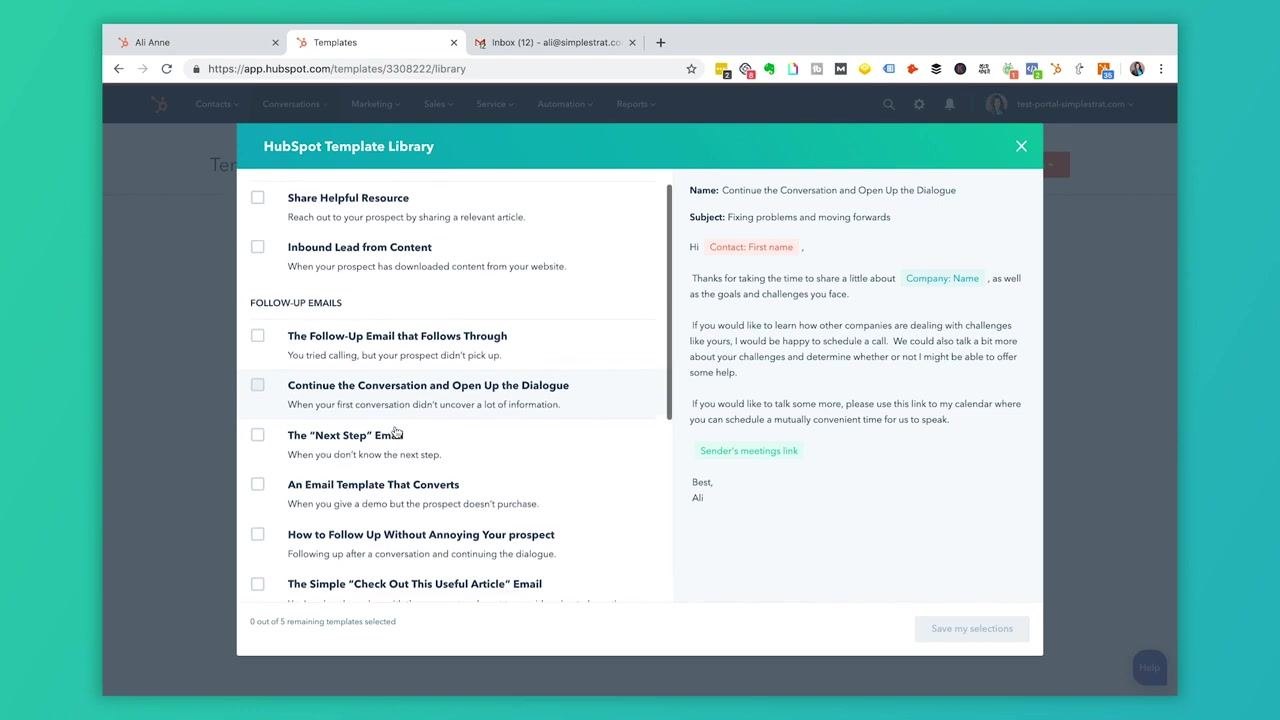
- Review additional follow-up templates Scroll through the list to see more follow-up options, such as "The Follow-Up Email that Follows Through," "Continue the Conversation and Open Up the Dialogue," "The 'Next Step' Email," "An Email Template That Converts," and "How to Follow Up Without Annoying Your Prospect." Click any template to preview its subject and body content, which often include personalization tokens for dynamic content.
-
Select and save your template Choose the template that fits your needs — for example, "The 'Next Step' Email" — and click Save my selections at the bottom of the library window. The template is added to your Templates dashboard under the name HubSpot gave it, and a "Templates successfully created" confirmation appears at the top. This internal name is for your team's reference only; recipients never see it.
-
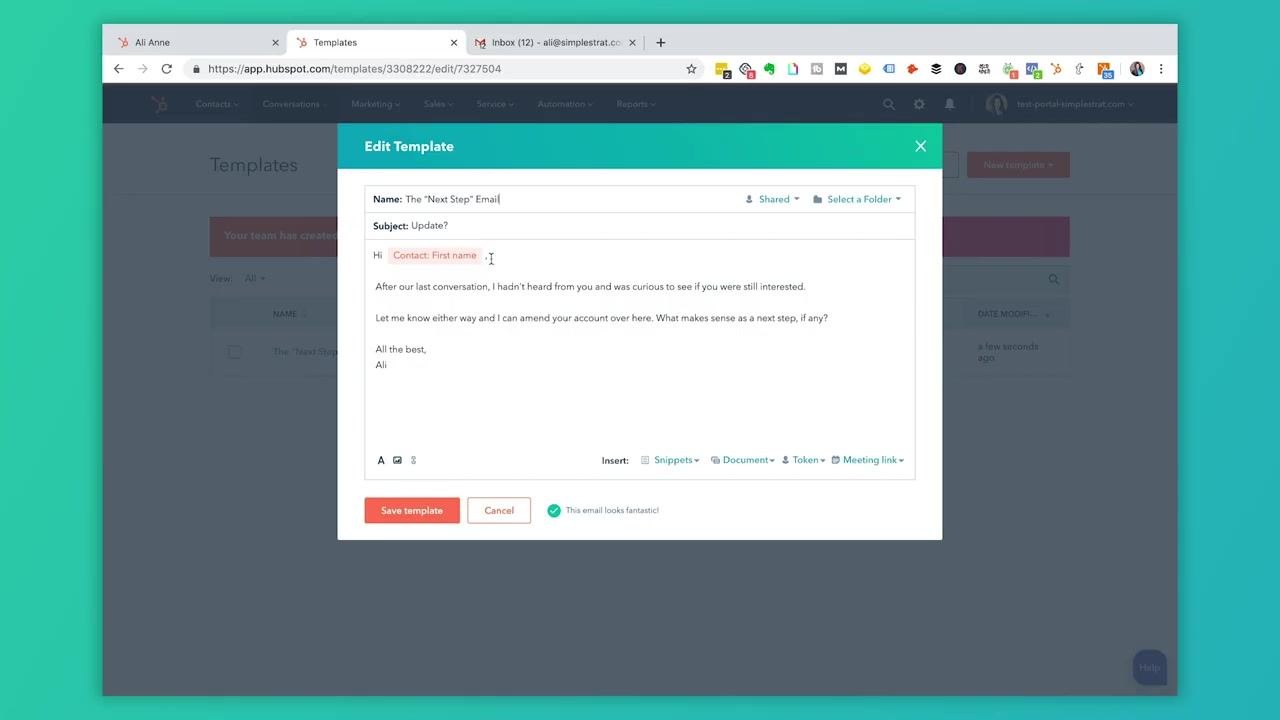
Open the template editor Click the template name in your Templates list to open the editor. Here you can see and edit the Name (your internal label), the Subject line (for example, "Update?"), and the Body, which may already include personalization tokens such as
Contact: First name. -
Understand personalization tokens Personalization tokens such as
Contact: First nameorCompany: Nameautomatically pull information from the recipient's contact record into your email. These tokens are available because you're sending from a CRM, and you can add or edit them directly in the template editor.
Personalizing and saving your template
- Insert a different personalization token
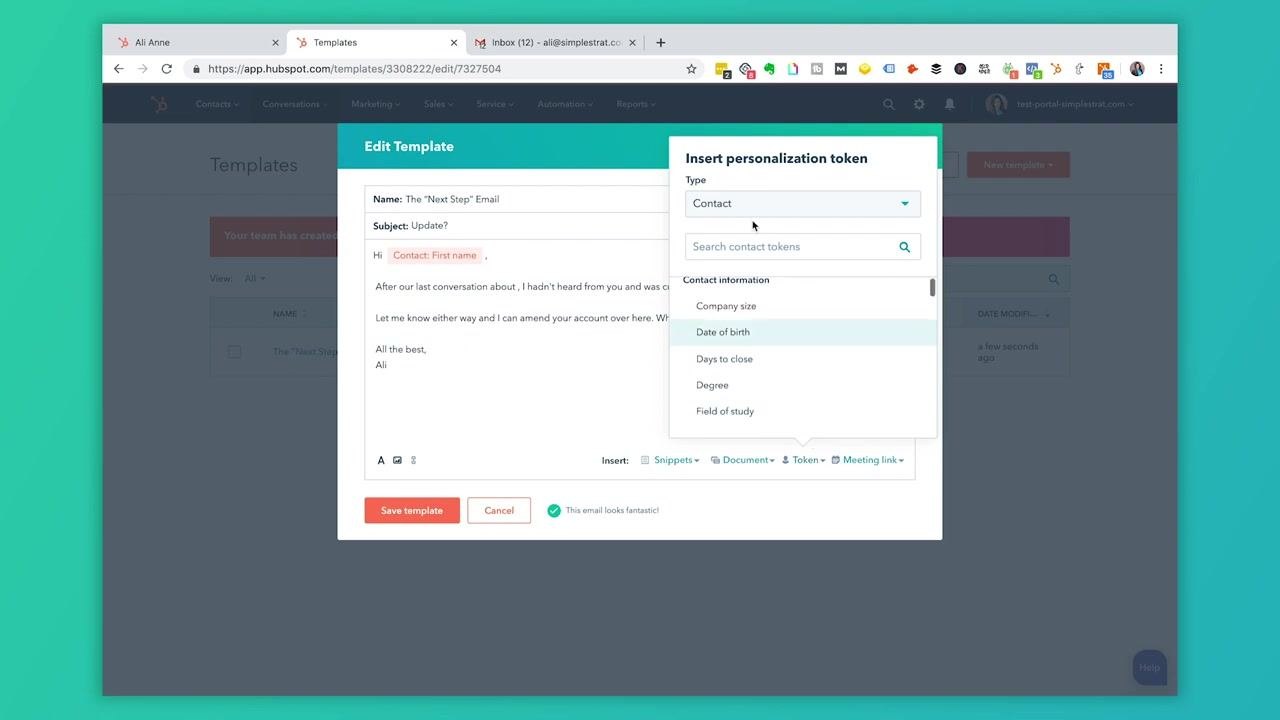
To personalize beyond the recipient's first name — for example, with their company name — place your cursor where you want the token to appear, then click Token in the Insert menu. In the "Insert personalization token" dialog, select the type (for example, "Contact"), then search for and select "Company name." The token, such as
Contact: Company name, appears highlighted in orange in the email body to show it's a dynamic field pulled from the contact record.
-
Save your customized template Once you've inserted the tokens you need and made any other edits, click the orange Save template button at the bottom of the editor. The template saves under its current name.
-
Rename the template for clarity Return to the Templates dashboard and click the template name to edit it. Give it a descriptive name so anyone on your team can quickly identify its purpose — for example, "Follow-Up After Demo – Company Name" instead of a generic label like "Hello."
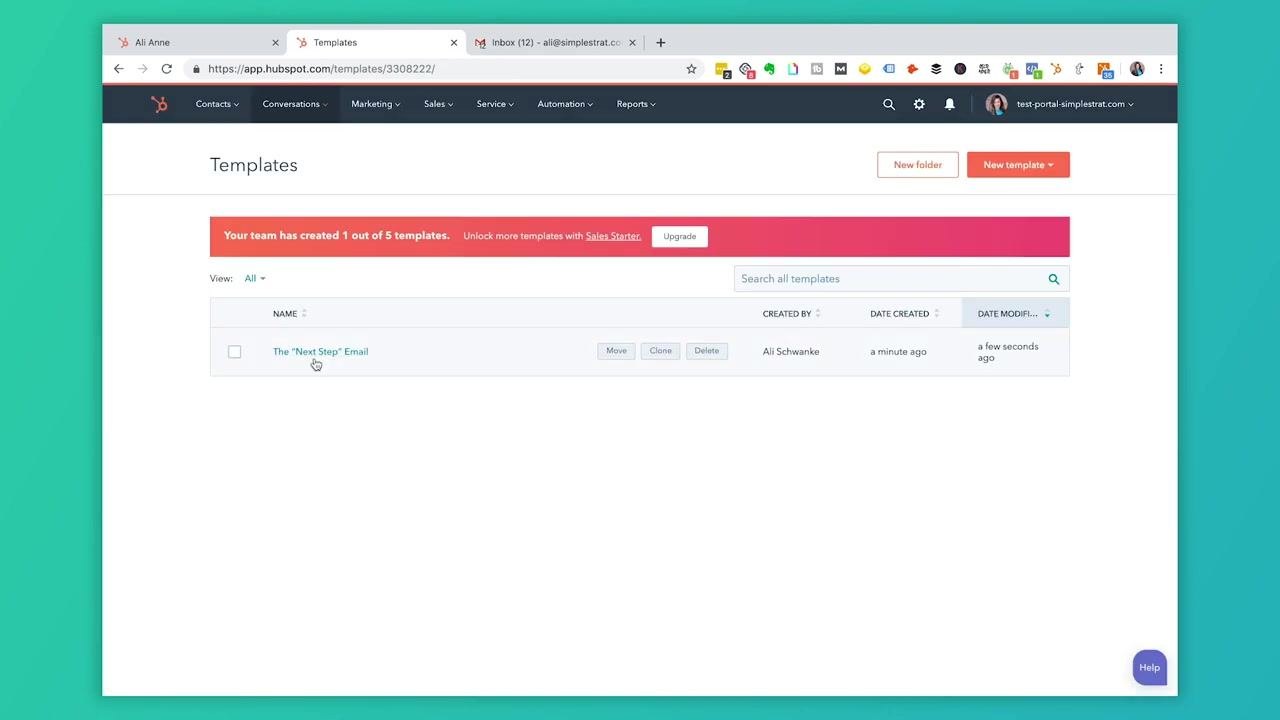
- Establish a naming convention
For teams, agree on a consistent naming pattern so everyone understands each template's purpose at a glance. For example:
- [Purpose] – [Trigger/Event] – [Personalization]
- "Follow-Up – Missed Call – First Name"
- "Welcome – New Customer – Company Name"
This prevents confusion and streamlines template management across your team.
- Set sharing permissions In the template editor, click the Shared dropdown at the top and choose Not Shared if only you should use the template, or Shared if your team should have access to it.
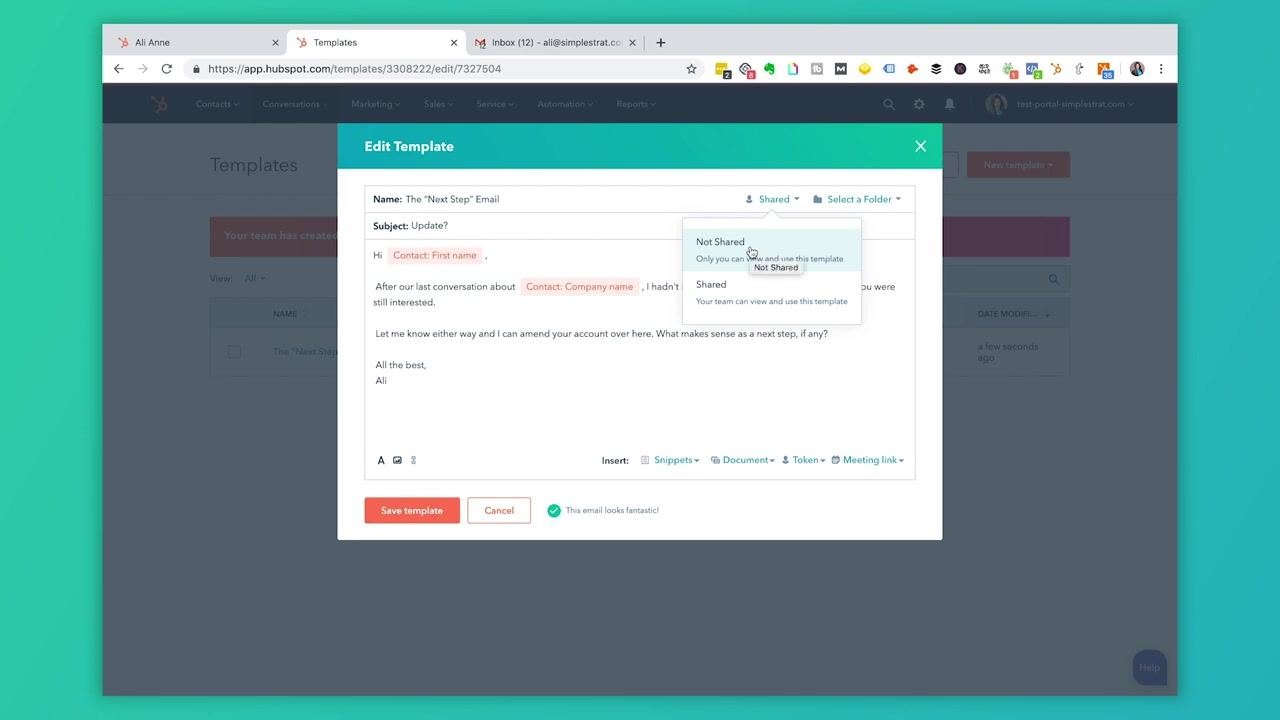
Organizing templates into folders
As your template library grows, folders help you and your team find what you need quickly.
- Plan your folder structure around the main categories your team uses — for example, "Sales," "Customer Service," or "Event Specific" — and add more folders for specific campaigns, product lines, or departments as needed.
- In the Templates dashboard, create a new folder and name it according to its purpose, such as "Sales Outreach" or "Customer Onboarding." Repeat for each category you've identified.
- Select the templates you want to organize and move them into the appropriate folders.
- Review your folders regularly to keep templates up to date and correctly categorized, archiving or deleting outdated ones to keep your workspace clean.
- Share your folder structure and naming conventions with your team, and encourage everyone to use them when creating or saving new templates.
A simple example folder structure might include: Sales, Customer Service, Event Specific, Product Launches, and Internal Communications.
Creating a folder while editing a template
-
Create a new folder from the template editor Open the Edit Template dialog and click the Select a Folder dropdown. Use the search bar to find an existing folder, or, if none exists yet, you'll see "No folder" listed — enter a new folder name, such as "Meeting Folders," as prompted.
-
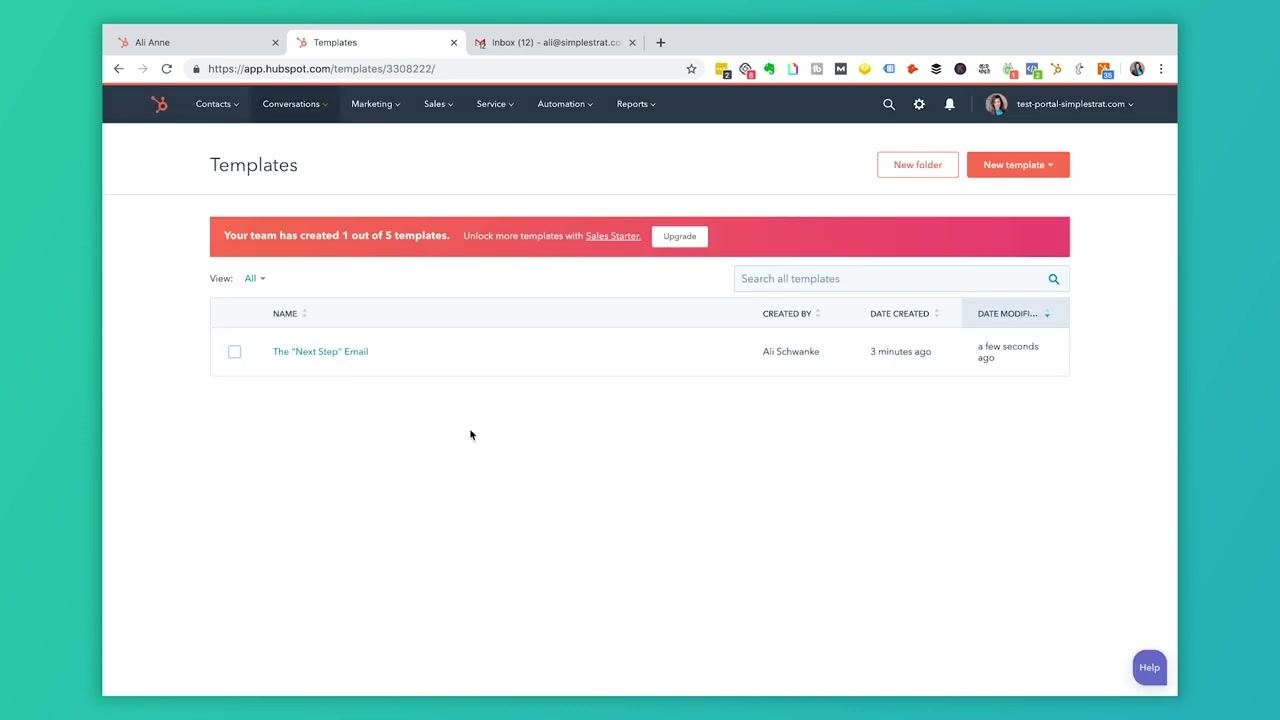
Save the template to its folder After assigning a folder, click Save template at the bottom of the dialog. If you're on the free version, you may see a notification such as "Your team has created 1 out of 5 templates. Unlock more templates with Sales Starter."
Using templates in a contact email
-
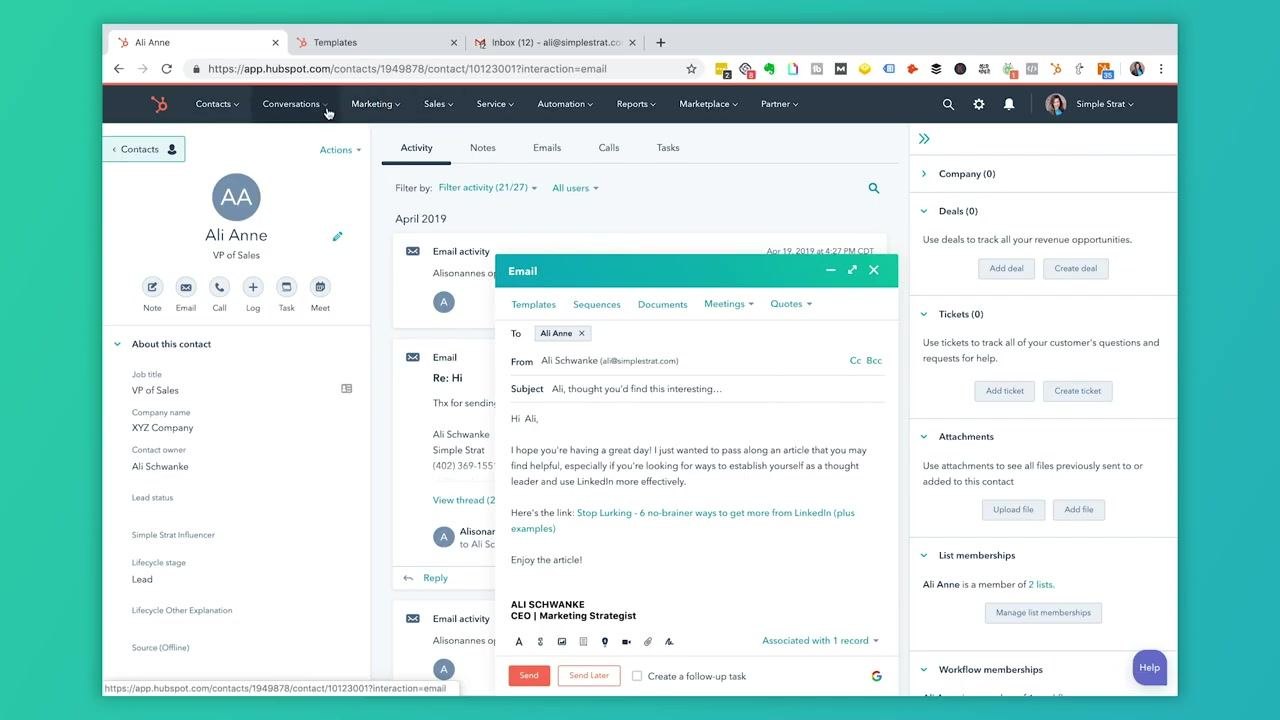
Access all templates from the Conversations menu From the main HubSpot dashboard, click Conversations in the top navigation bar, then select Templates to view every template available to your account.
-
Browse templates by folder In the Templates section, view the list of folders and templates — for example, "Account Management" or "Ali Sales Templates." Click a folder to see the templates inside it, listed with Created By, Date Created, and Date Modified columns.
-
Page through additional folders Use the pagination controls at the bottom of the Templates page to browse further folders, such as "Blueprint Emails," "Article Resource Templates - Schools," and "B2B Software Templates."
-
Find process-specific templates Locate folders like "Blueprint Emails" for client onboarding and process-specific templates, used by team members for consistent communication during onboarding.
-
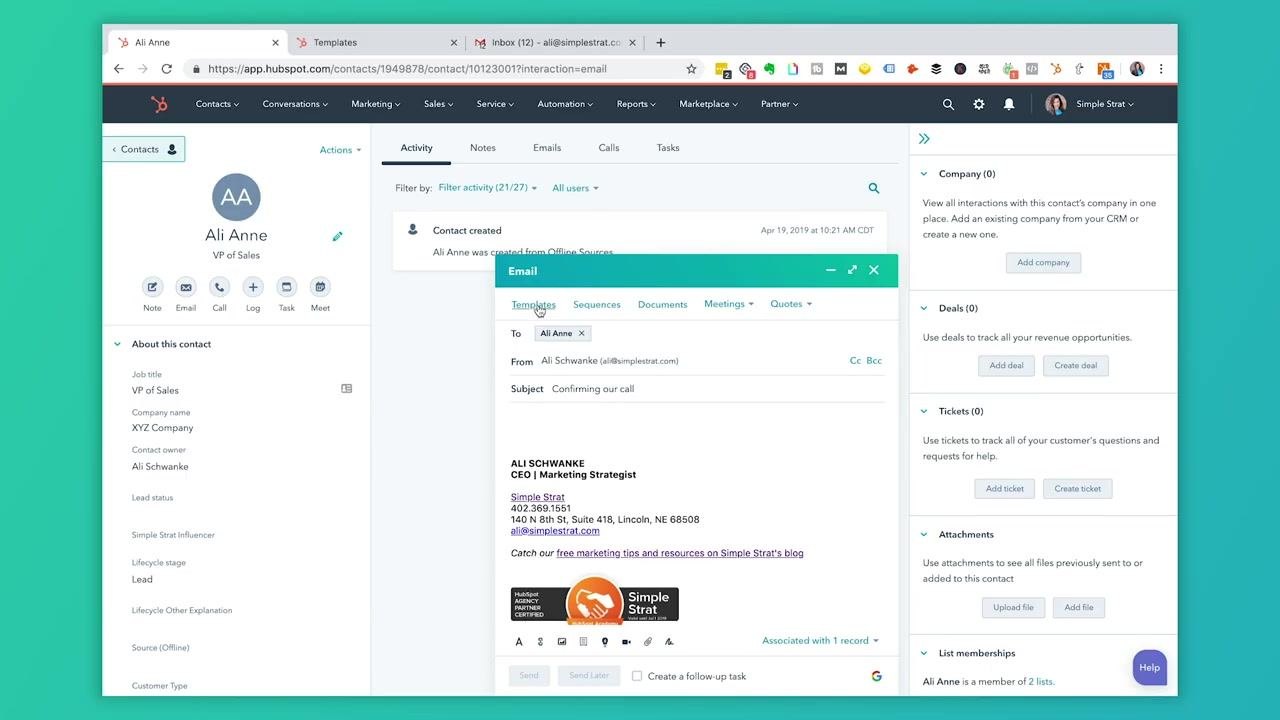
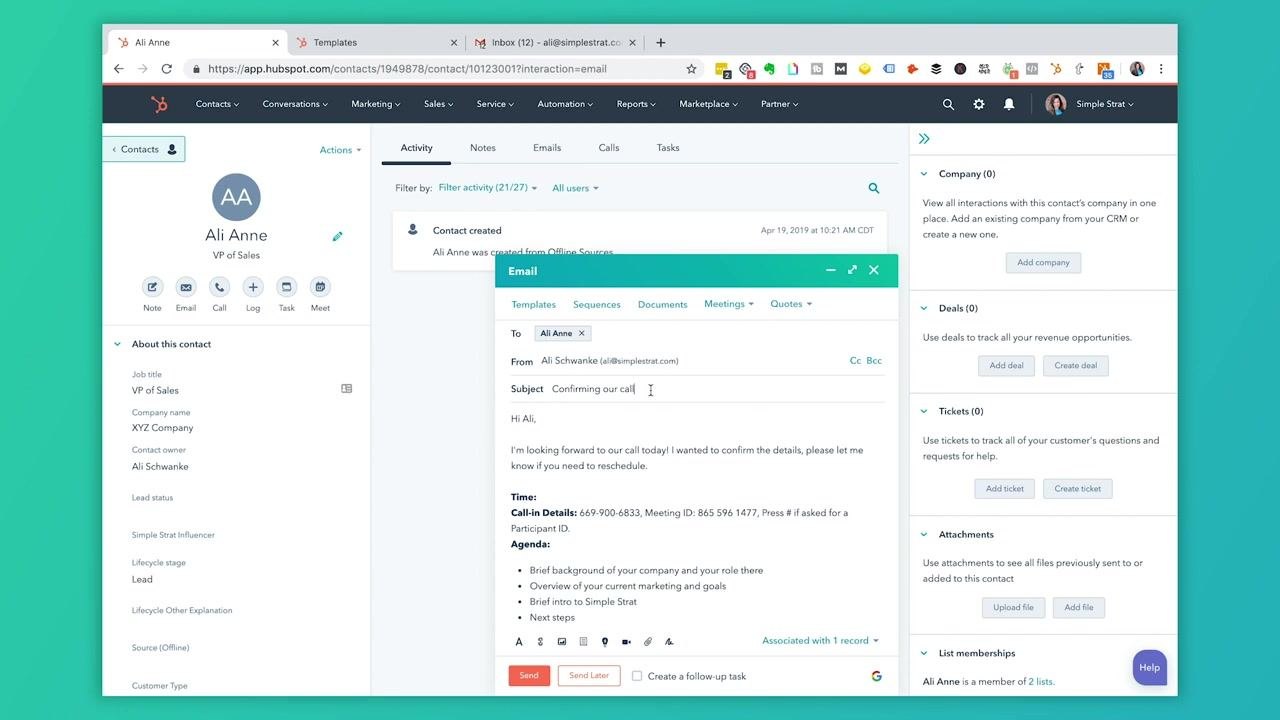
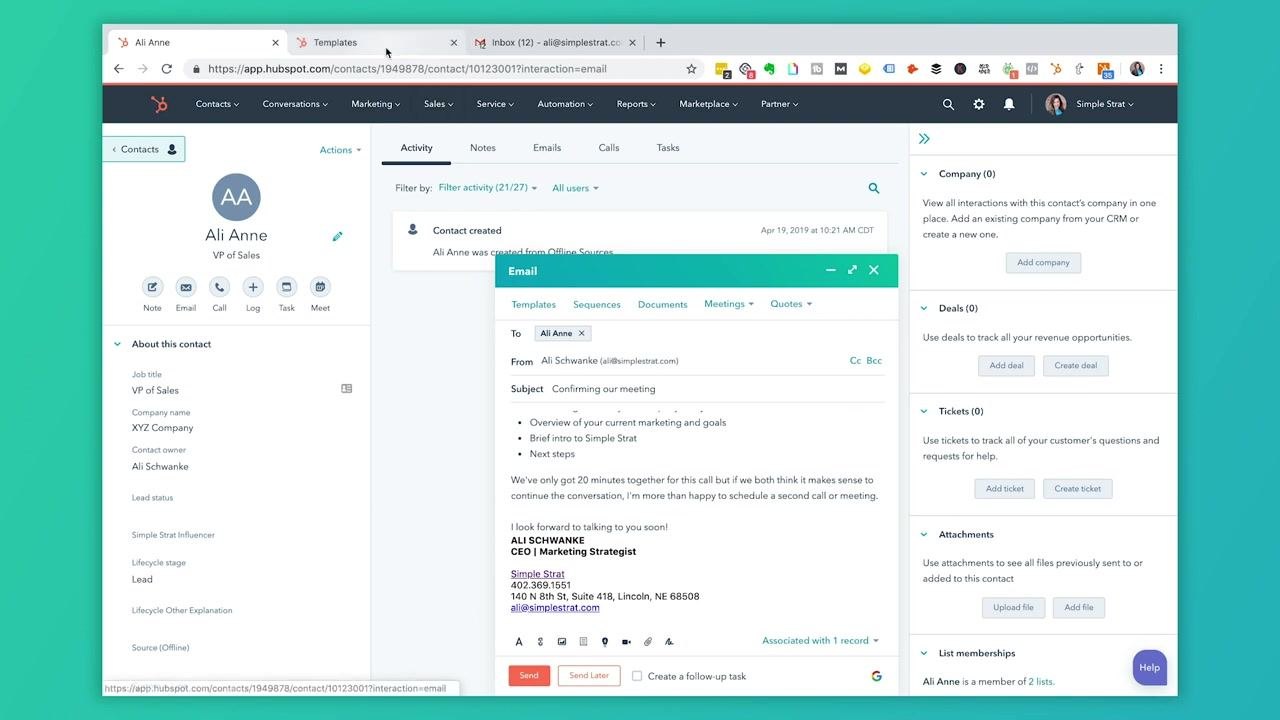
Insert a template into your email In a contact record, open the email compose window and click the Templates tab. Select a template from the list — for example, "Connect Call Confirmation (day of call)" — and click Select next to it to load it into your email.
-
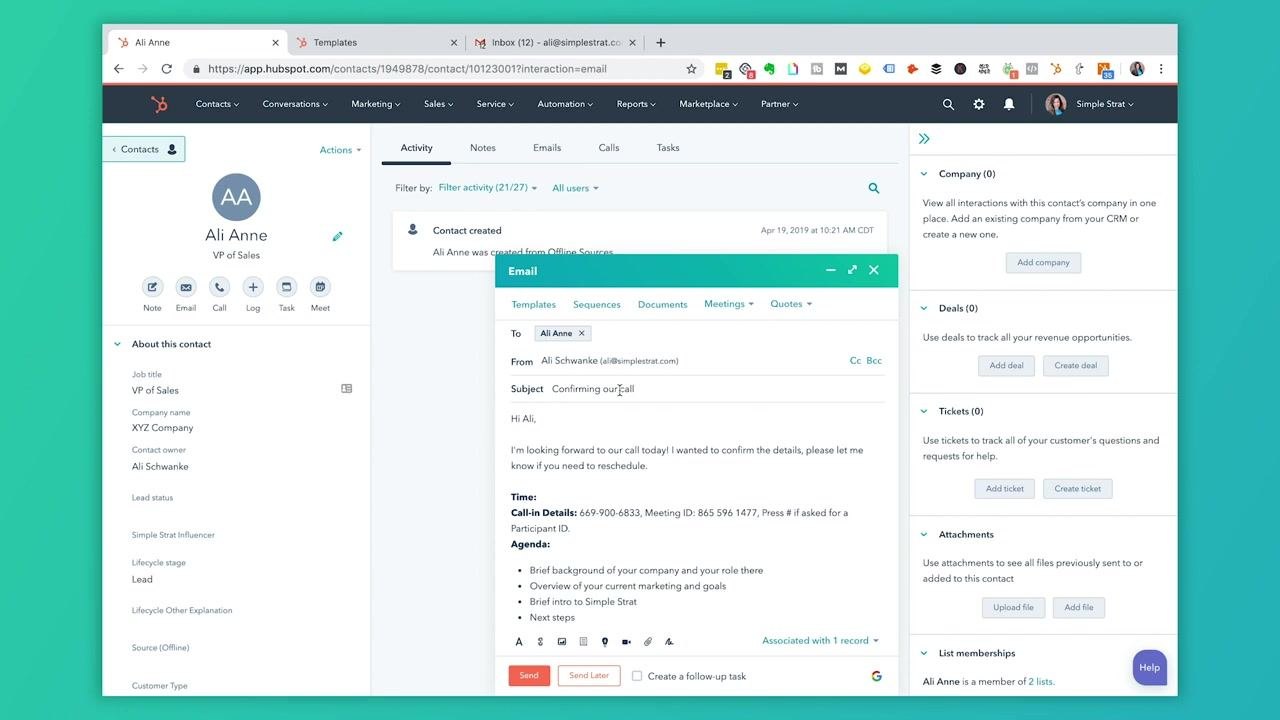
Edit the subject and content After loading the template, modify the subject line and body as needed — for example, changing "Confirming our call" to a custom subject — then review details like call-in information and agenda before sending.
Customizing and sending a meeting confirmation email
- Edit the subject line Click into the Subject field of your loaded template and change it as needed — for example, from "Confirming our call" to "Confirming our meeting." The subject line is fully editable for last-minute adjustments or personalization.
- Review and personalize the content Check that personalization tokens, such as the recipient's first name, have been inserted automatically. Review the body for open fields or placeholders, such as the meeting time, and update them as needed.
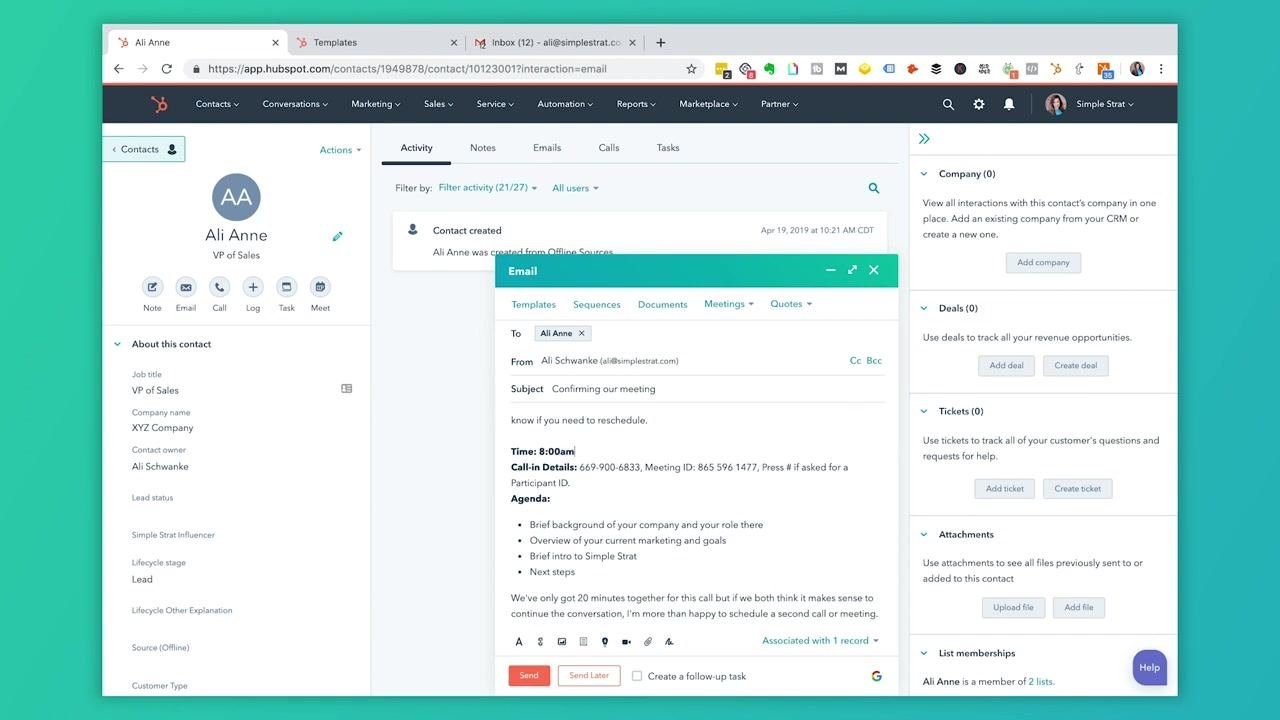
- Fill in meeting details Locate the "Time:" field in the email body and enter the specific meeting time — for example, "Time: 8:00am" — and confirm that call-in information and agenda details are accurate and complete.
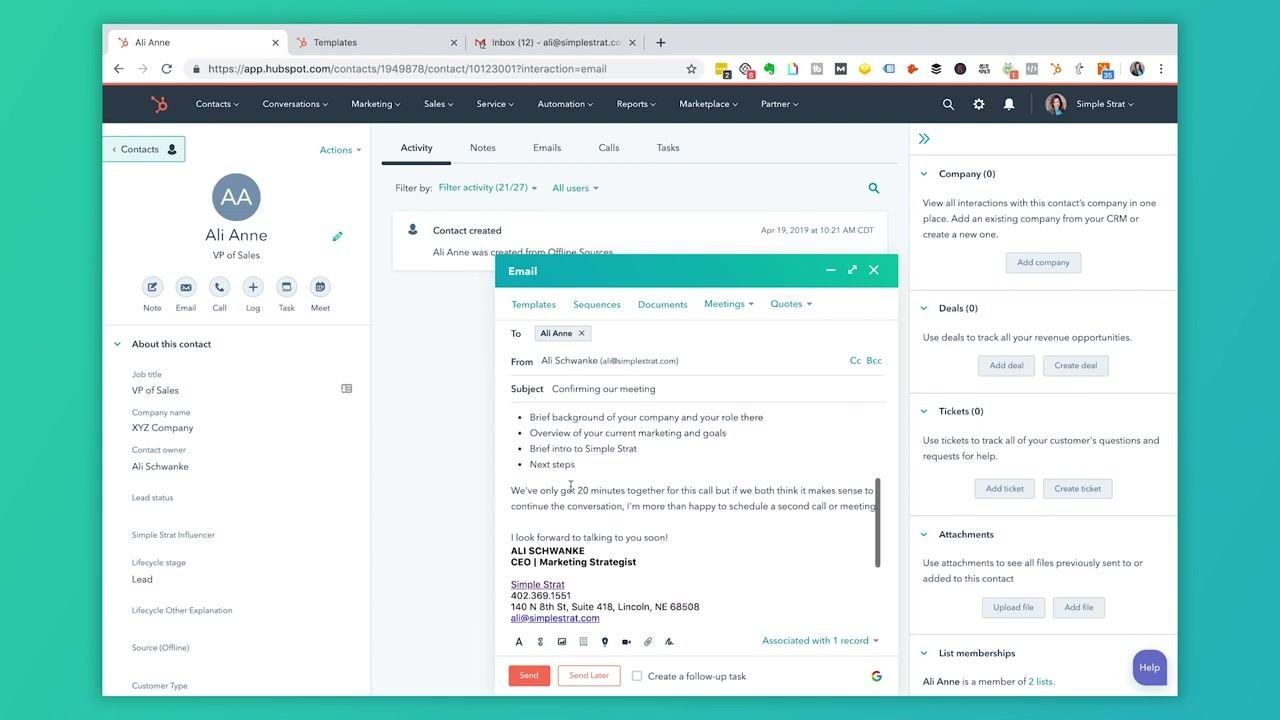
- Send or schedule the email Once your email is reviewed and personalized, click Send to send it immediately, or Send Later to schedule it for a future time. You can also check Create a follow-up task to set a reminder for further action.
Maximizing template usage
-
Keep template limits in mind The free version of HubSpot allows up to five templates per team, so plan your templates around the most common scenarios you encounter, such as meeting confirmations and follow-ups.
-
Identify your highest-value use cases Consider which types of emails you send repeatedly — such as confirming meetings or reaching out to prospects — and prioritize creating templates for these high-frequency scenarios to maximize efficiency.
-
Create another template as needed In the Templates dashboard, click New template and choose From scratch to build a custom template, or From template library to start from a pre-made option.
-
Add more personalization tokens In the template editor, use Insert personalization token to add dynamic fields such as contact name, company size, or meeting link. Select the appropriate token from the list — for example, "Days to close," "Degree," or "Field of study" — so each email automatically includes relevant contact-specific information.
- Know that your templates travel with you HubSpot templates are also available directly within your Gmail inbox when you have the HubSpot extension installed, so you can use and insert templates without leaving your email client.
Using HubSpot templates in Gmail
-
Connect Gmail to HubSpot Ensure your Gmail and HubSpot accounts are linked so you can access HubSpot features directly from your Gmail interface. This integration lets you use templates, log emails, and track engagement without leaving Gmail.
-
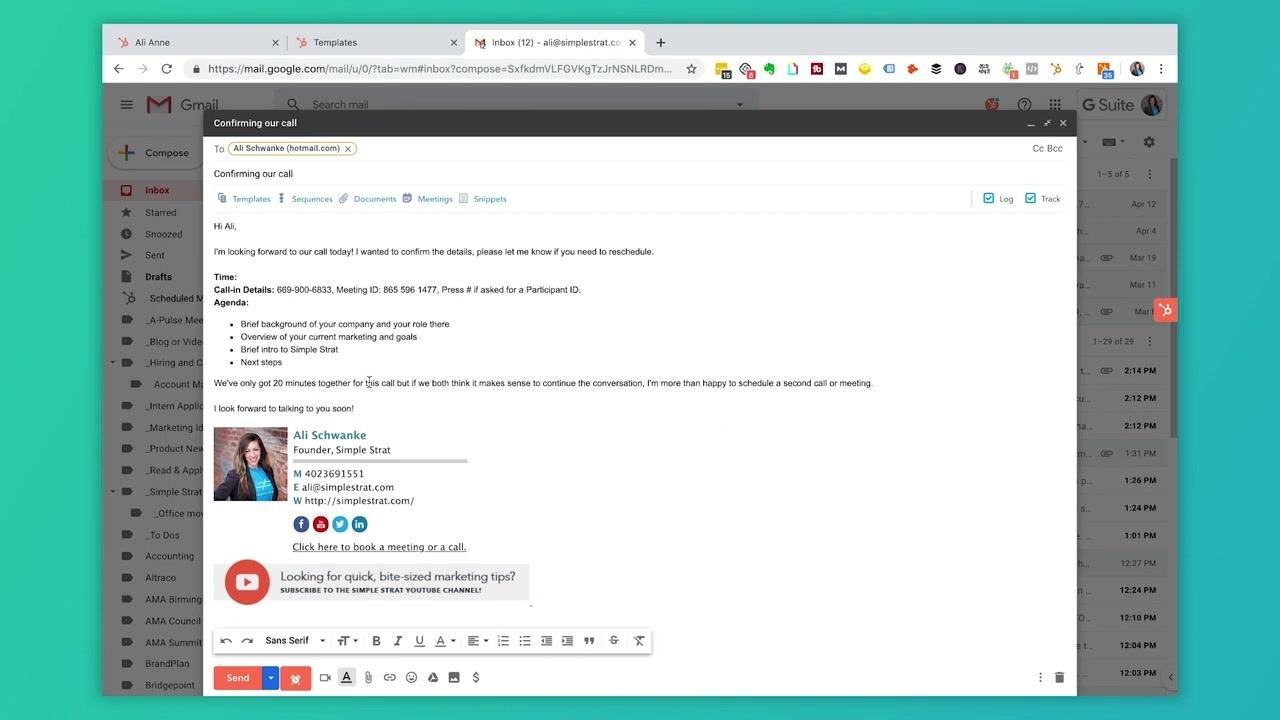
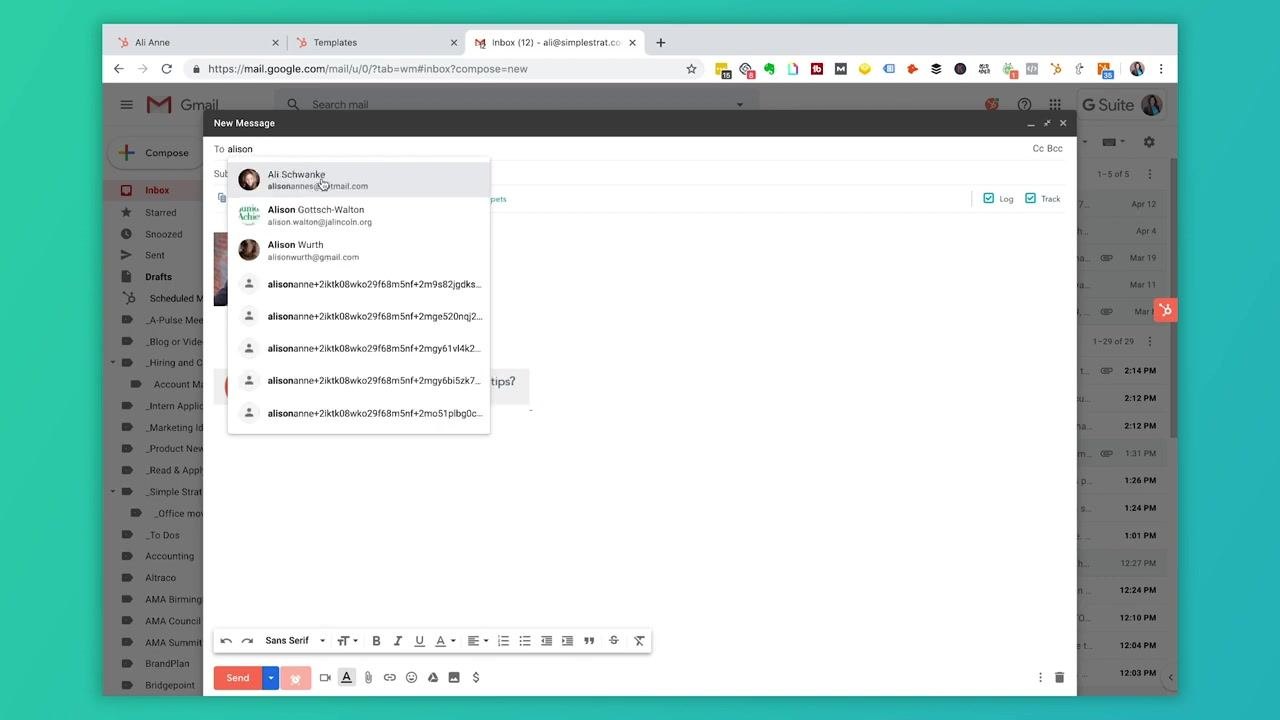
Verify the integration in Gmail Open your Gmail inbox in a web browser and click Compose. Confirm that HubSpot features — Templates, Sequences, Documents, Meetings, and Snippets — appear above the email body, along with Log and Track checkboxes, indicating the integration is active.
-
Address your email In the To field, begin typing the recipient's name or email address and select the correct contact from the dropdown that appears, ensuring the email reaches the intended recipient and can be logged in HubSpot.
-
Insert and personalize your template Click Templates above the email body to access your saved HubSpot templates, then select the one you need. The content populates the email body automatically, including personalization tokens such as recipient name or meeting details. Review and update any fields as needed, and make sure Log and Track are checked if you want HubSpot to record and monitor the email.
-
Send and let HubSpot log the activity Once your email is complete and personalized, click Send. HubSpot automatically logs the activity to the associated contact record, so you never need to switch to the HubSpot platform to track or log the email — everything is managed within Gmail.
What's next
With your templates created, personalized, and organized into folders, you can continue to refine your library as your needs grow: add new personalization tokens, update names for clarity, adjust sharing permissions, and keep your folder structure current as your team's workflows evolve. Using the Gmail integration alongside your HubSpot templates lets you send consistent, personalized, and automatically logged communications without leaving your inbox.
Generation details: cost, quality tiers
Docsie billed 5,000 credits ($3.50) to analyze this 10-minute video at standard quality. The rewrite, template fill and Word/PDF exports were included. The same video at each quality tier:
| Quality | Frames sampled | Credits | Approx. cost |
|---|---|---|---|
| Draft | every 16-30 s | 2,500 | $1.75 |
| Standard (this guide) | every 8-15 s | 5,000 | $3.50 |
| Detailed | every 4-7 s | 10,000 | $7.00 |
| Ultra | every 1-3 s | 20,000 | $14.00 |
Credits priced at $0.70 per 1,000; plans include a monthly allowance. Enterprise customers on on-premise or bring-your-own-model deployments run this on their own inference and pay no per-video credits.
Generated by Docsie Video-to-Docs on 2026-10-01 from a 9-minute video. Screenshots are frames from the source video and belong to their creator, HubSpot Hacks, whose original is embedded above. If you own this video and want the guide removed or credited differently, contact us and we will act within one business day.