
How to Add Users to HubSpot
Managing your team's access in HubSpot starts with knowing how to add users to HubSpot and configure their permissions correctly. This guide walks you through logging into your HubSpot account, creating new users, and reviewing or adjusting their access so each team member has exactly the permissions their role requires.
Video: How to Add Users and Set Permissions in HubSpot [2026 Full Guide] by BM Tech Tutorials. All credit for the demonstration goes to the creator; watch the original on YouTube. The written guide below was generated from this video by Docsie. Creator? Request a change or removal.
Managing your team's access in HubSpot starts with knowing how to add users to HubSpot and configure their permissions correctly. This guide walks you through logging into your HubSpot account, creating new users, and reviewing or adjusting their access so each team member has exactly the permissions their role requires.
Prerequisites
- A web browser with internet access.
- Your HubSpot login credentials (email and password).
- Administrator-level access to your HubSpot account to manage users and permissions.
Access the HubSpot website
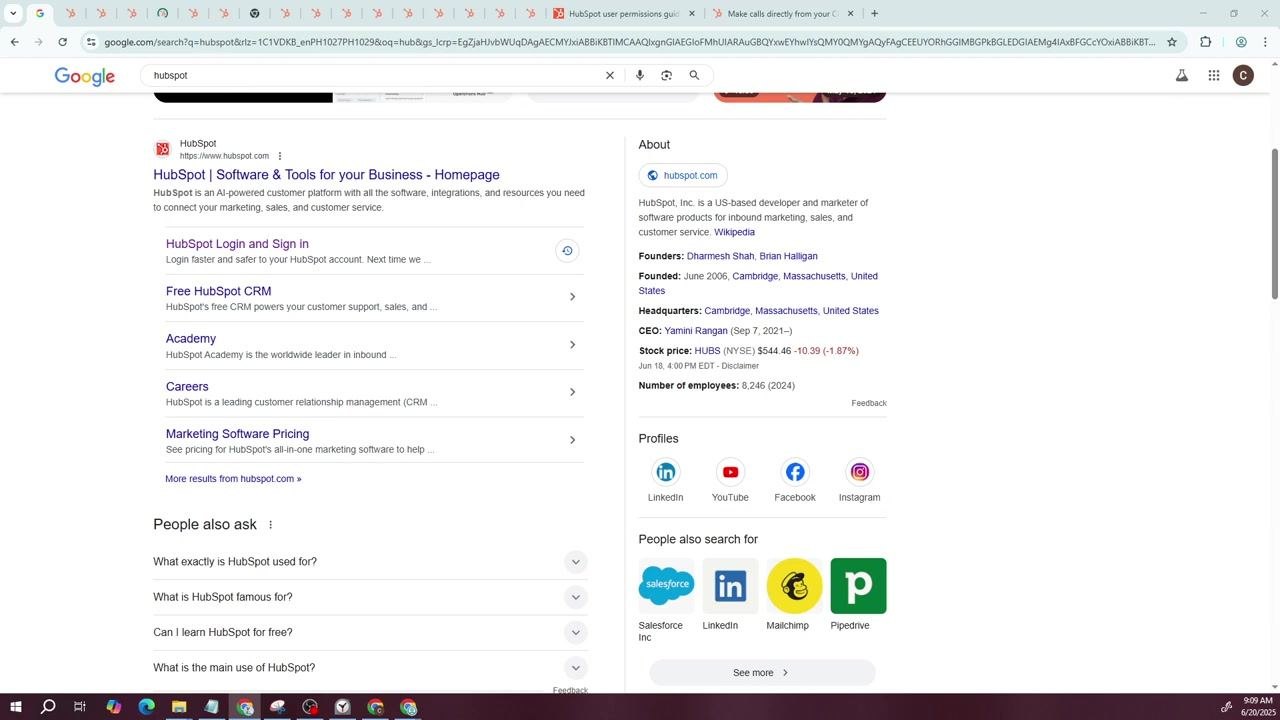
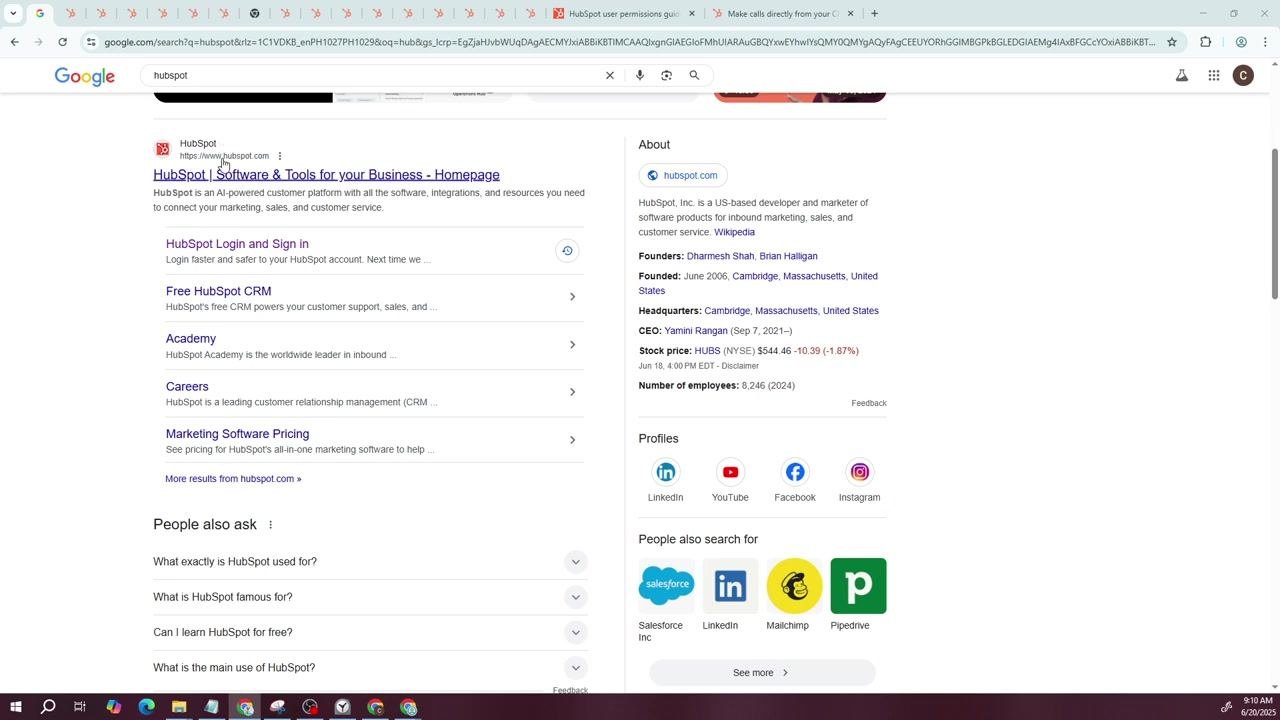
Open your preferred web browser and navigate to the Google search page. Type "HubSpot" in the search bar, and the official HubSpot website will appear at the top of the results, alongside options such as HubSpot Login and Sign in, Free HubSpot CRM, Academy, Careers, and Marketing Software Pricing.
Click the link titled HubSpot | Software & Tools for your Business - Homepage, or go directly to https://www.hubspot.com.
Log into your HubSpot account
Enter your email and password on the login page to access your dashboard. If you're new to HubSpot, make sure you have your login credentials ready before starting.
Open the settings menu
Once logged in, locate the gear icon in the upper right corner of the HubSpot dashboard. This icon opens the Settings menu. Click on it to continue.
Navigate to Users & Teams
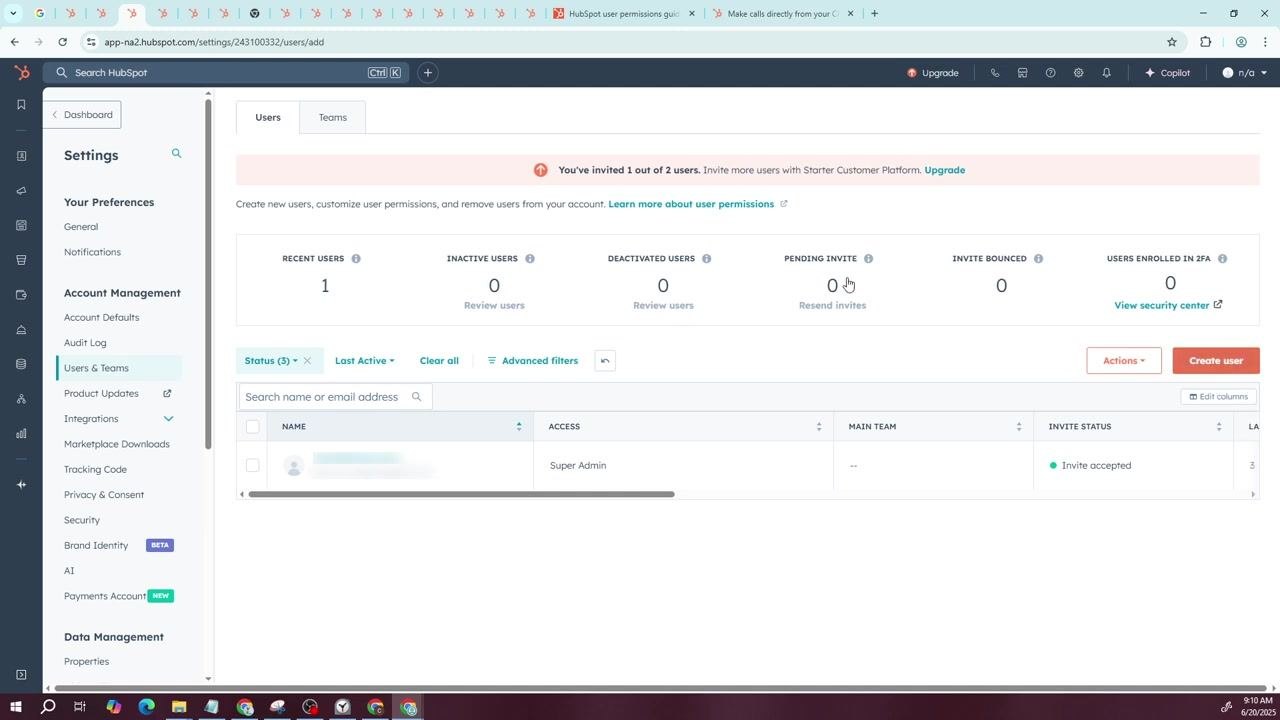
In the settings menu, look at the left sidebar for the Account Management section. Under Account Management, select Users & Teams to manage user access and permissions.
If you see a message stating "All is not lost. There was a problem loading your settings," try refreshing the page or logging in again.
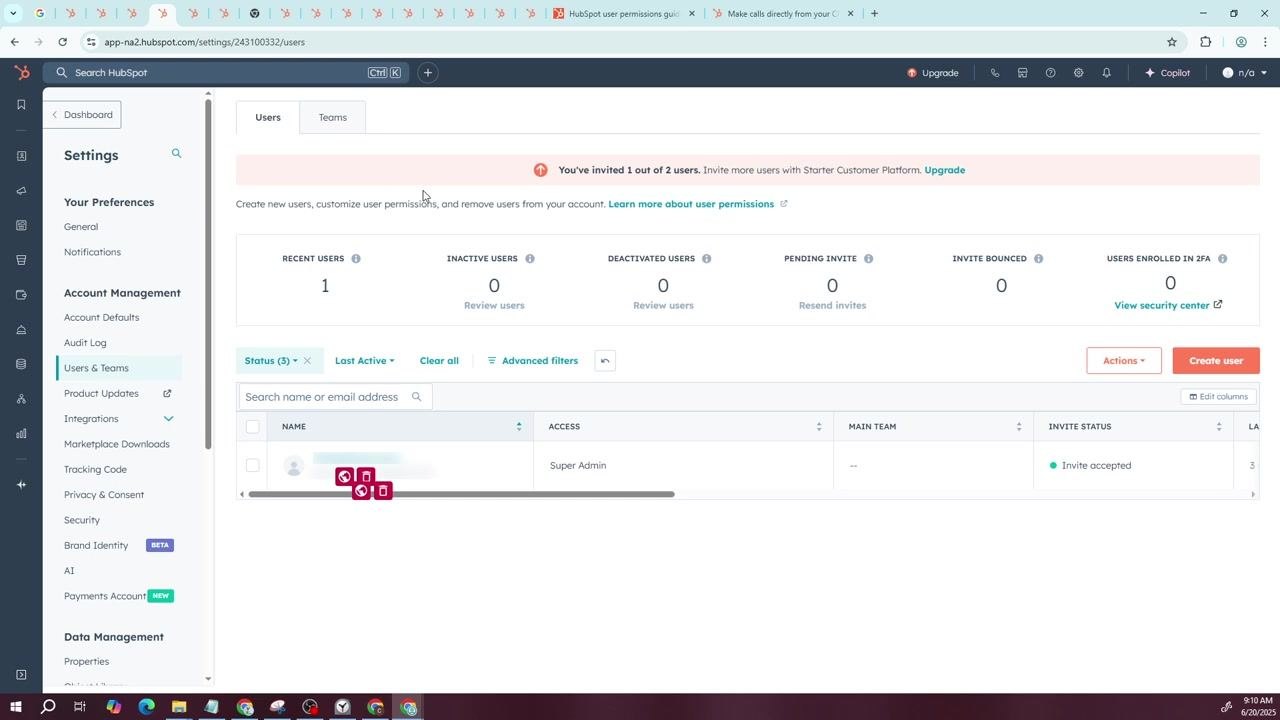
In the Users & Teams section, you can review the list of current users and their statuses, including recent users, inactive users, deactivated users, and pending invites.
Create a new user
To add a new user, click the orange Create user button in the upper right area of the user management panel.
In the Quickly create new users dialog box, enter the email address of the person you wish to add in the Email address field. Decide whether to grant the new user Super Admin access by checking or unchecking the Make super admin box.
If you need more control over permissions, click Set custom access permissions to customize the user's access.
Carefully consider the seat type and permissions for each new user. The seat type determines the extent of access a user will have, so only grant the permissions necessary for the user to perform their job effectively. Avoiding unnecessary access helps protect your account's security.
Review existing users and account limits
Remain in the Users & Teams section to see a list of existing users, with columns for Name, Access, Main Team, Invite Status, and Last Active. The top of the panel displays statistics such as Recent Users, Inactive Users, Deactivated Users, Pending Invites, Invite Bounced, and Users Enrolled in 2FA.
If you've reached your user limit, a notification will appear at the top of the panel (for example, "You've invited 1 out of 2 users").
Edit a user's permissions
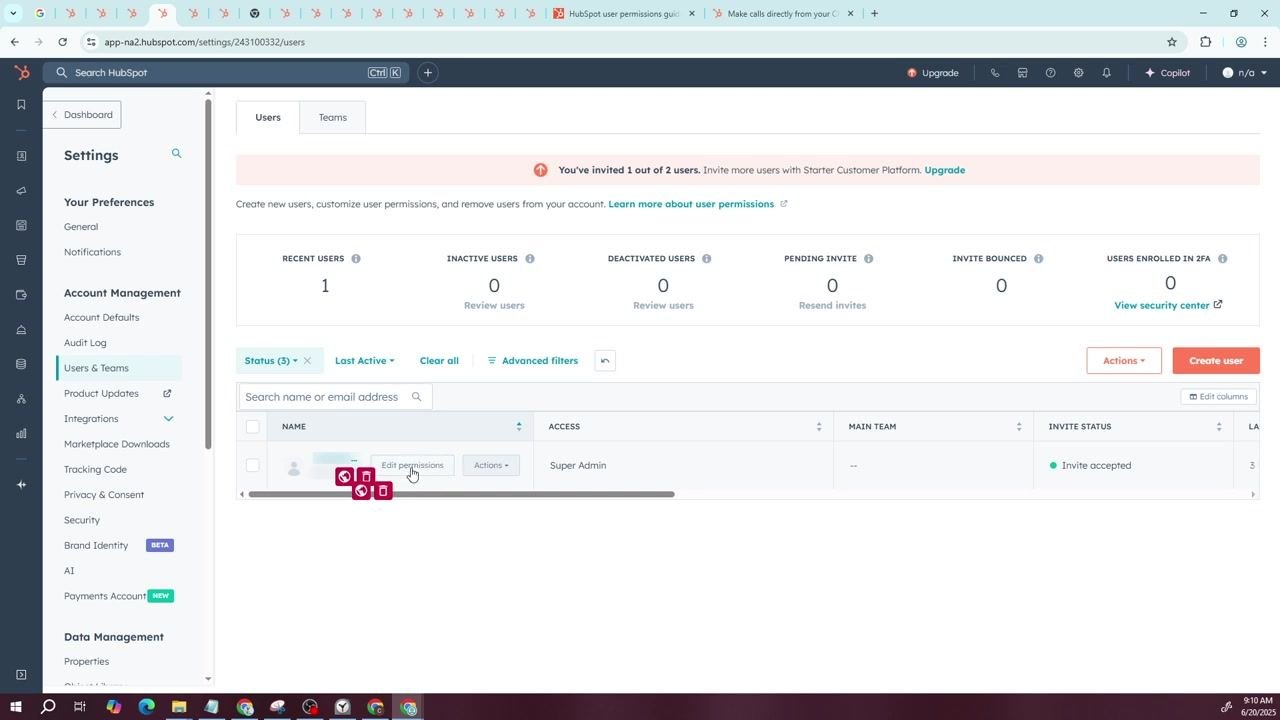
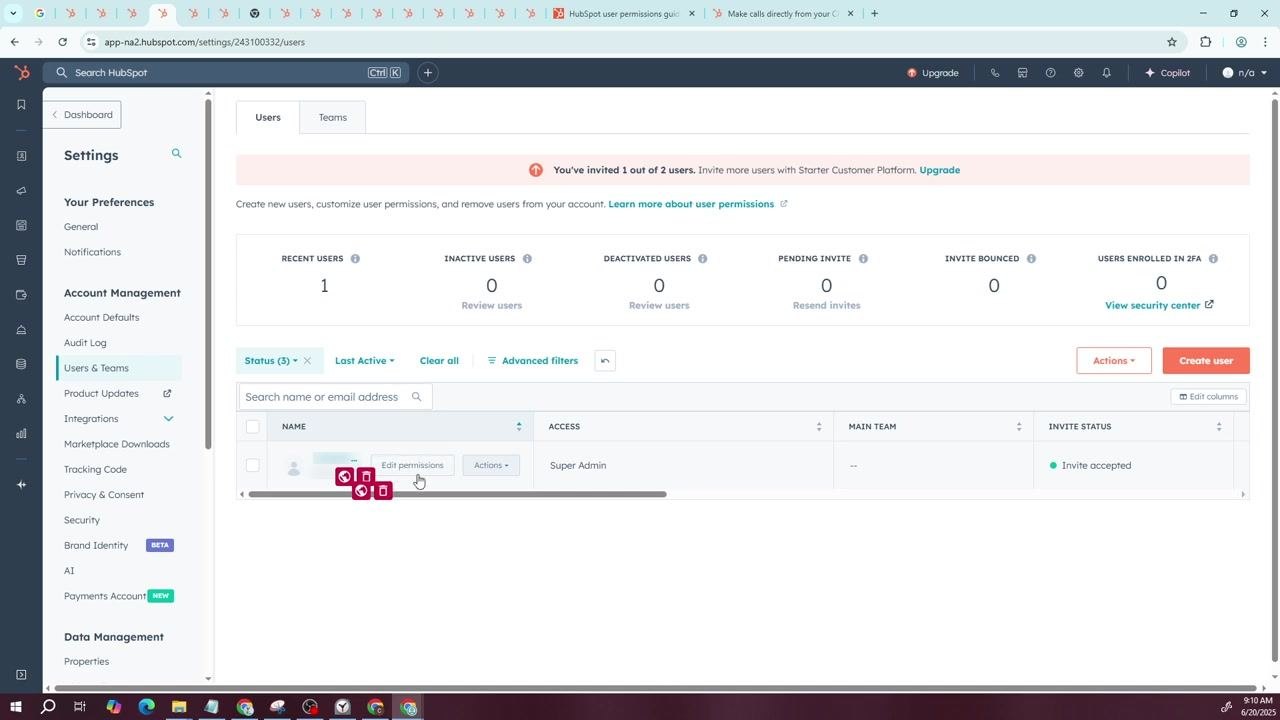
Locate the user whose permissions you want to manage by scrolling through the list or using the search bar to enter their name or email address. Click on the user's name or the Edit permissions button next to their entry to open their profile and access management options.
In the user's profile, navigate to the Access tab to review and modify their permissions.
Configure seat type and access
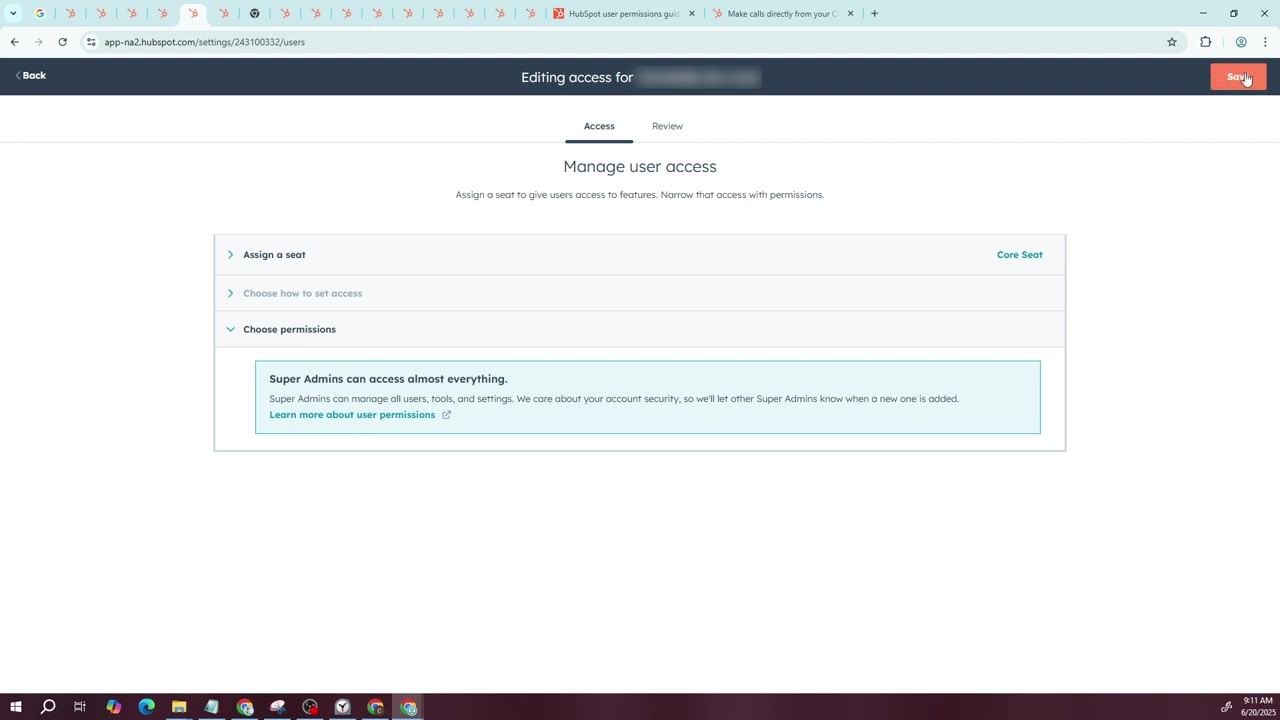
On the Manage user access screen, you'll see three main sections: Assign a seat, Choose how to set access, and Choose permissions. The user's current seat type (for example, "Core Seat") appears on the right.
If the user is a Super Admin, a message will indicate that "Super Admins can access almost everything."
Expand Choose how to set access to select whether to use default or custom permissions. In Choose permissions, specify which tools and datasets the user can access—for example, granting sales team members access to Contacts while restricting access to Reports if it isn't needed.
Review each permission carefully and tailor it to the user's role and responsibilities.
Save the permission changes
After configuring the permissions, click the orange Save button in the upper right corner to apply your changes. Double-check all selections before saving to avoid granting unnecessary access.
Once saved, the system updates the user's access immediately, confirming that they now have the appropriate permissions for their role.
Summary
You've now learned how to add users to HubSpot, create new user accounts, and review or adjust their permissions. By assigning the right seat type and access level to each team member, you keep your HubSpot account both productive and secure.
Generation details: cost, quality tiers
Docsie billed 2,000 credits ($1.40) to analyze this 4-minute video at standard quality. The rewrite, template fill and Word/PDF exports were included. The same video at each quality tier:
| Quality | Frames sampled | Credits | Approx. cost |
|---|---|---|---|
| Draft | every 16-30 s | 1,000 | $0.70 |
| Standard (this guide) | every 8-15 s | 2,000 | $1.40 |
| Detailed | every 4-7 s | 4,000 | $2.80 |
| Ultra | every 1-3 s | 8,000 | $5.60 |
Credits priced at $0.70 per 1,000; plans include a monthly allowance. Enterprise customers on on-premise or bring-your-own-model deployments run this on their own inference and pay no per-video credits.
Generated by Docsie Video-to-Docs on 2026-10-01 from a 3-minute video. Screenshots are frames from the source video and belong to their creator, BM Tech Tutorials, whose original is embedded above. If you own this video and want the guide removed or credited differently, contact us and we will act within one business day.