
How to Remove Sutures
This procedure describes how to remove sutures safely and correctly in a clinical setting. It is written for nurses and allied health staff who perform suture removal after wounds from surgery or injury have healed sufficiently. The guide covers patient assessment, sterile technique, the suture removal method itself, wound closure with Steri-Strips, and the education patients need before they leave your care.
Video: Suture Removal Nursing Skill | How to Remove Surgical Sutures (Stitches) by RegisteredNurseRN (2018). All credit for the demonstration goes to the creator; watch the original on YouTube. The written guide below was generated from this video by Docsie. Creator? Request a change or removal.
This procedure describes how to remove sutures safely and correctly in a clinical setting. It is written for nurses and allied health staff who perform suture removal after wounds from surgery or injury have healed sufficiently. The guide covers patient assessment, sterile technique, the suture removal method itself, wound closure with Steri-Strips, and the education patients need before they leave your care.
Purpose & scope
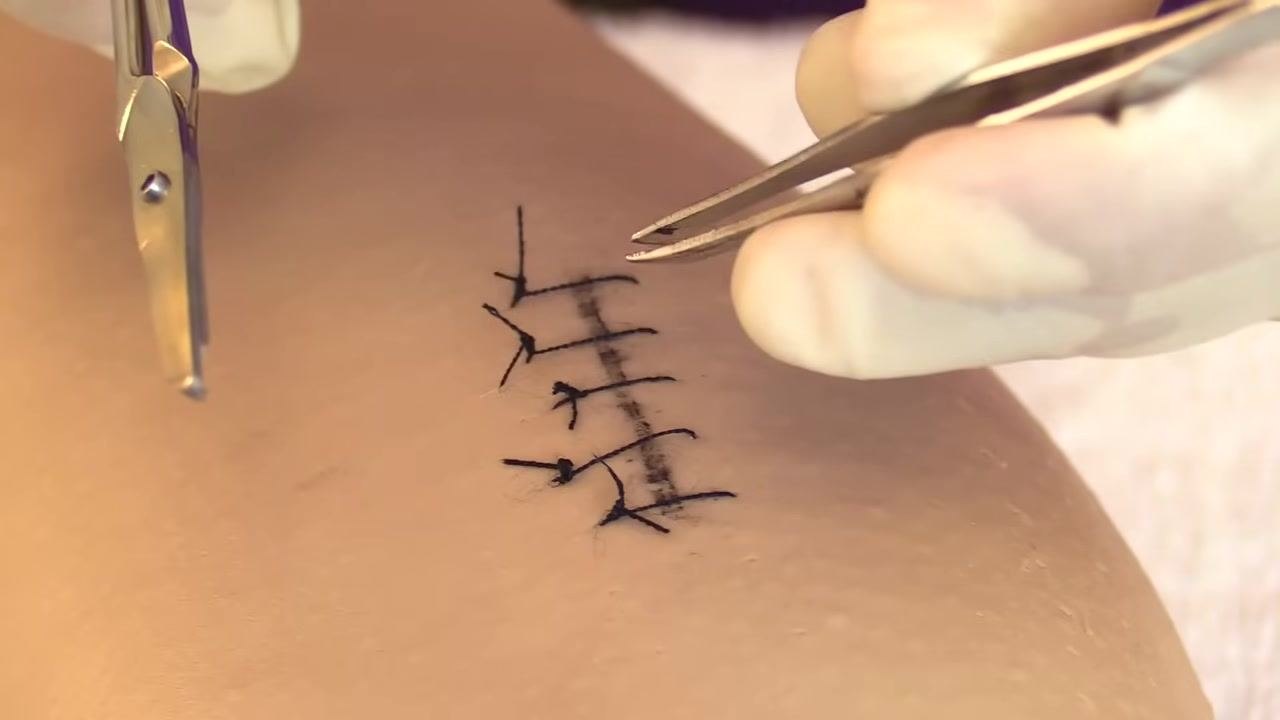
Sutures, also called stitches, close wounds resulting from injuries or surgical procedures. Several suture patterns exist, including the simple interrupted suture (the most common), simple continuous suture, vertical mattress suture, horizontal mattress suture, continuous blanket (Ford interlocking) suture, and interrupted cruciate suture.
Not all sutures require removal. Some are made from dissolvable material that breaks down in the body over time. Others must be manually removed, which is the focus of this procedure. How long sutures stay in place depends on their location and the depth of the wound — they may remain for as little as 5 days or up to 2 weeks.
This procedure applies to patients whose sutures are due for removal per physician order. The specific care setting (inpatient ward, outpatient clinic, or wound care follow-up) should be confirmed against your facility's protocols, as the source material does not specify a single setting.
Patient assessment
Before removing sutures, complete the following checks.
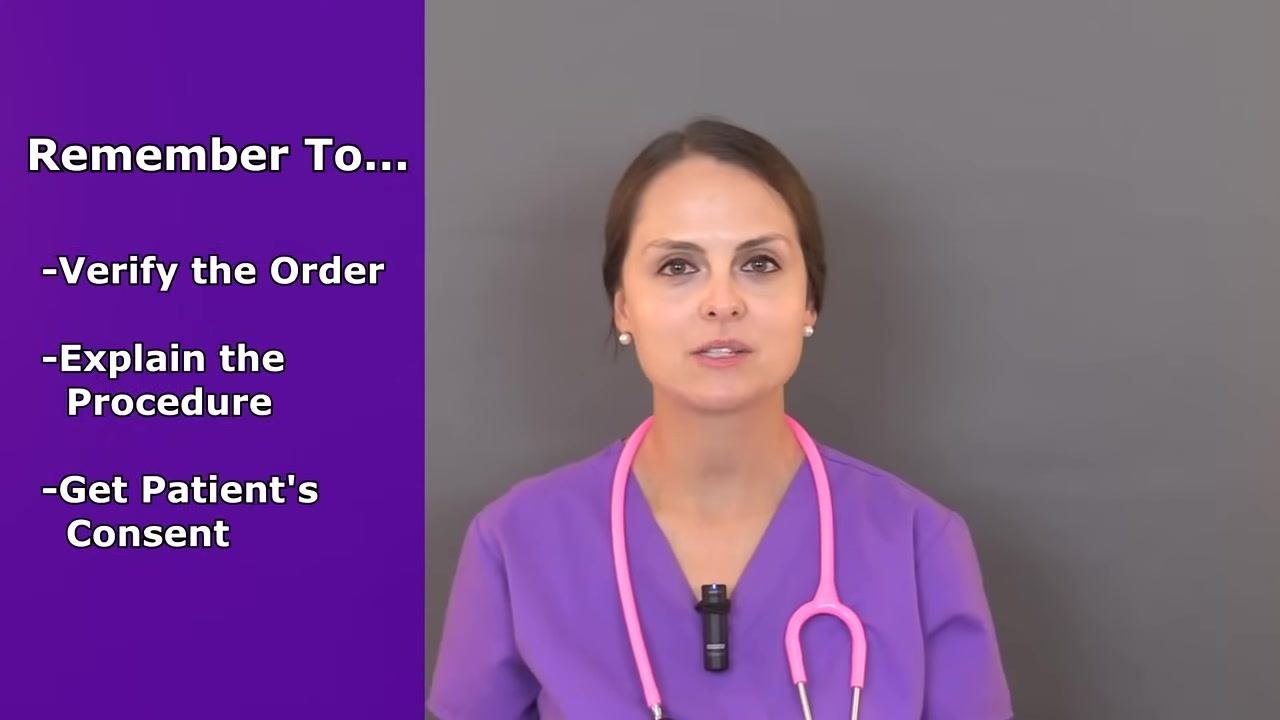
- Verify that a physician's order authorizes suture removal.
- Explain the procedure to the patient, including what to expect and whether it may cause discomfort.
- Obtain the patient's verbal consent before proceeding.
Inspect the wound before beginning removal. Remove any old dressing and check for signs of infection.
- Is the site red?
- Is it warm to the touch?
- Are there any hard (indurated) areas?
- Is there any foul-smelling or unusual drainage?
Only proceed if the wound appears healthy and free of infection.
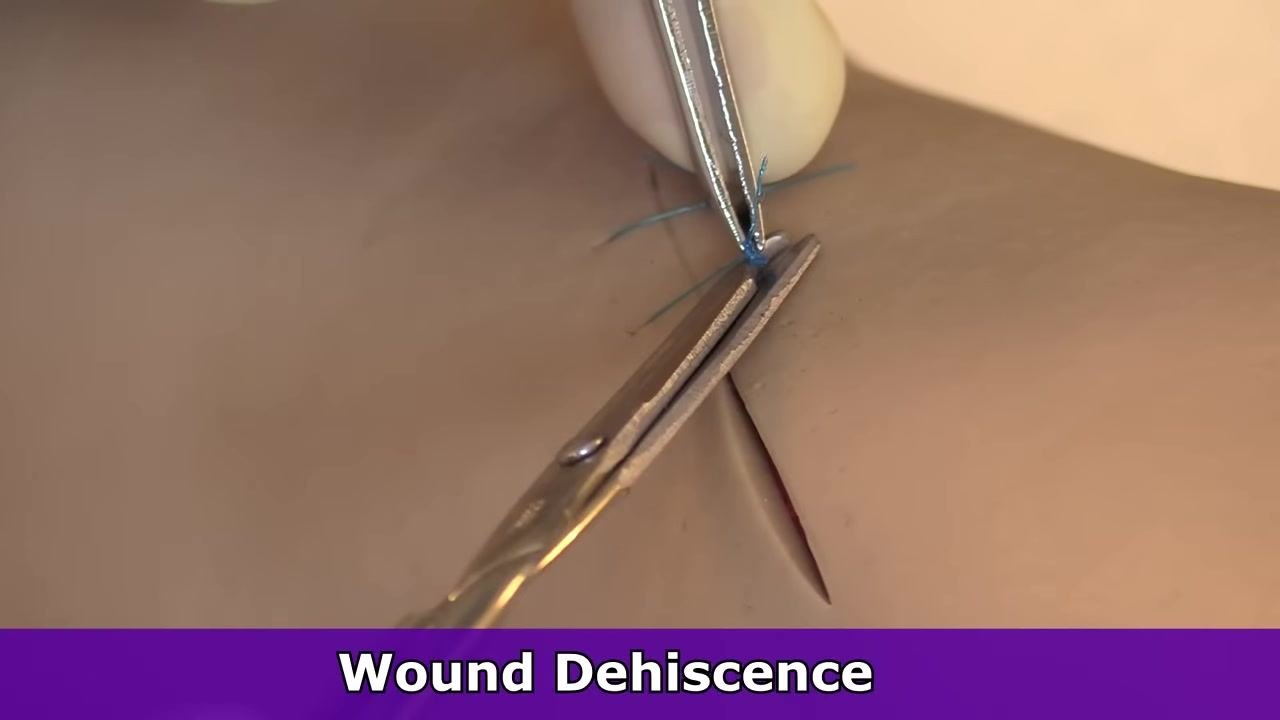
Also assess the integrity of the suture line itself. Examine whether the skin edges are well-approximated and fused together, and look for any sign that the wound is weak or at risk of opening if a suture is removed. If you suspect the wound may dehisce, notify the physician before proceeding and do not remove sutures until the concern is resolved.
Vital sign monitoring frequency and a formal pain assessment scale are not specified in this material; follow your facility's standard assessment protocol for wound care visits.
Care protocol
Suture removal proceeds through five phases: supply gathering and sterile field preparation, wound cleaning, the removal technique itself, wound reinforcement with Steri-Strips, and completion of the procedure.
Phase 1: Gather supplies and prepare the sterile field
Collect the following items before starting:
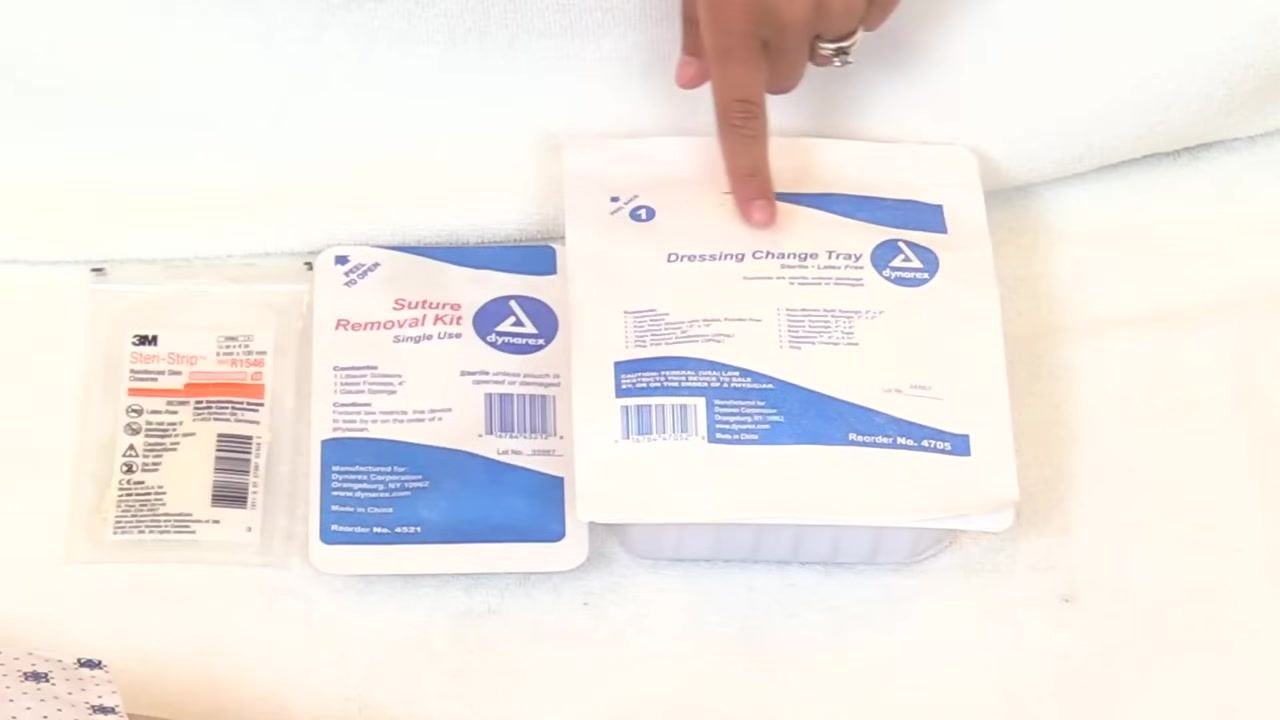
- Dressing change tray (sterile, latex-free)
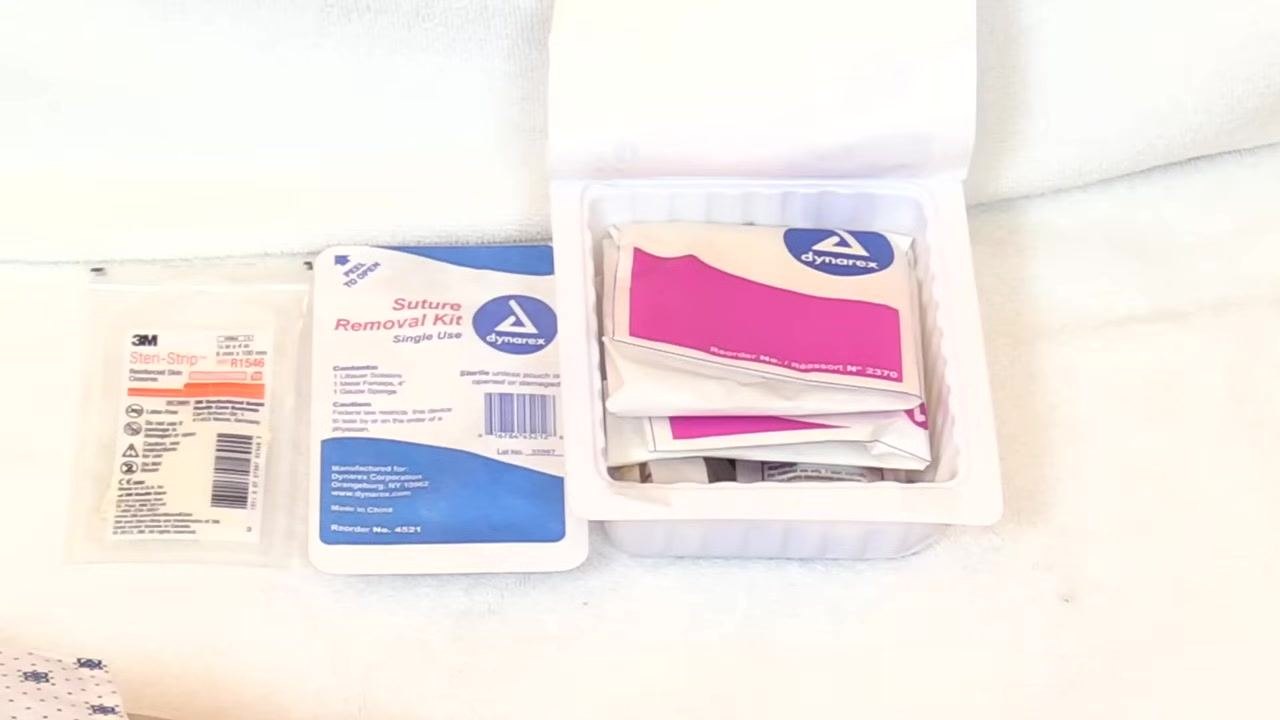
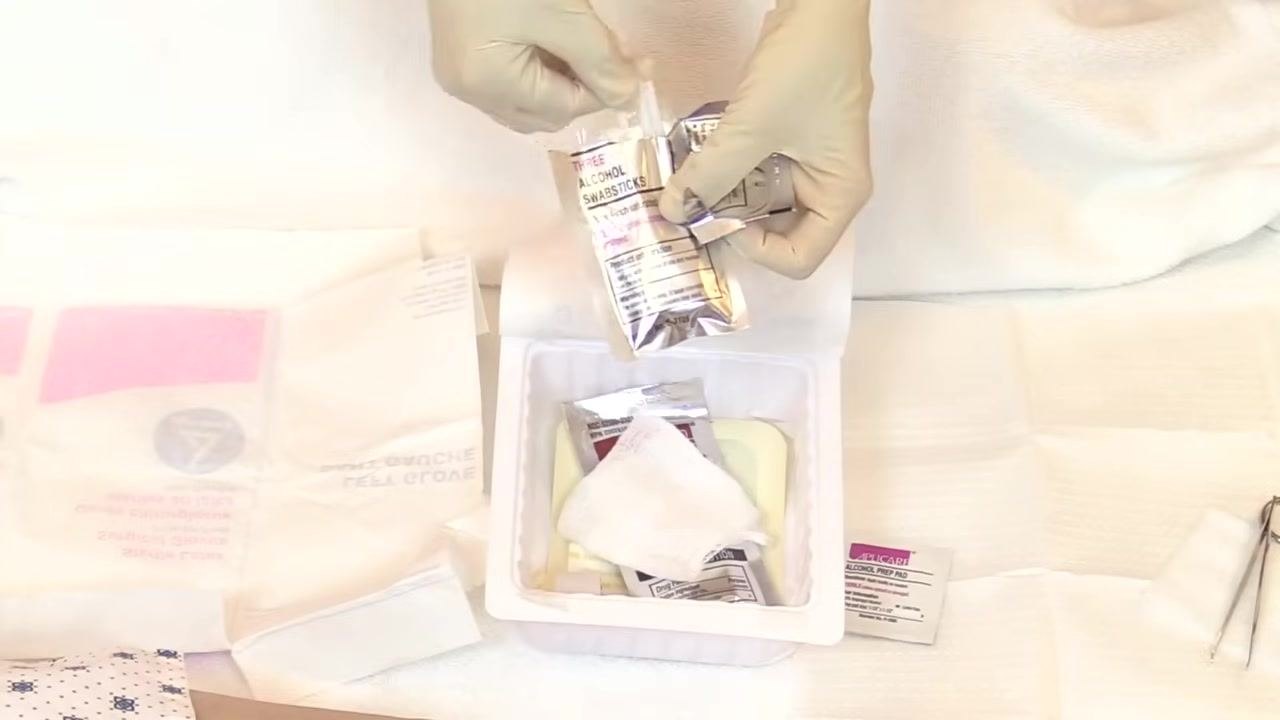
- Suture removal kit (single use, including Littauer scissors, 4-inch metal forceps, and a gauze sponge)
- Steri-Strips (reinforced skin closures)
- Sterile gloves, or clean gloves per hospital protocol
- Sterile drape
- Gauze
- Antiseptic solution for cleaning the suture line before and after removal
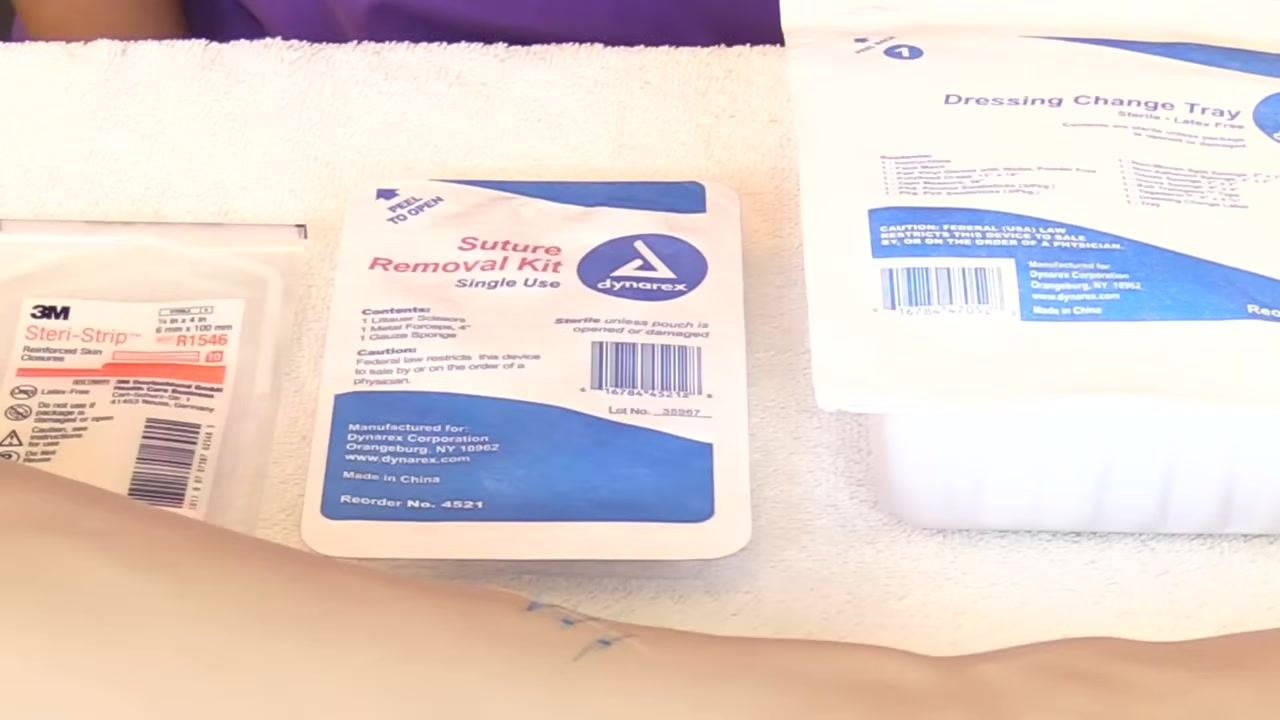
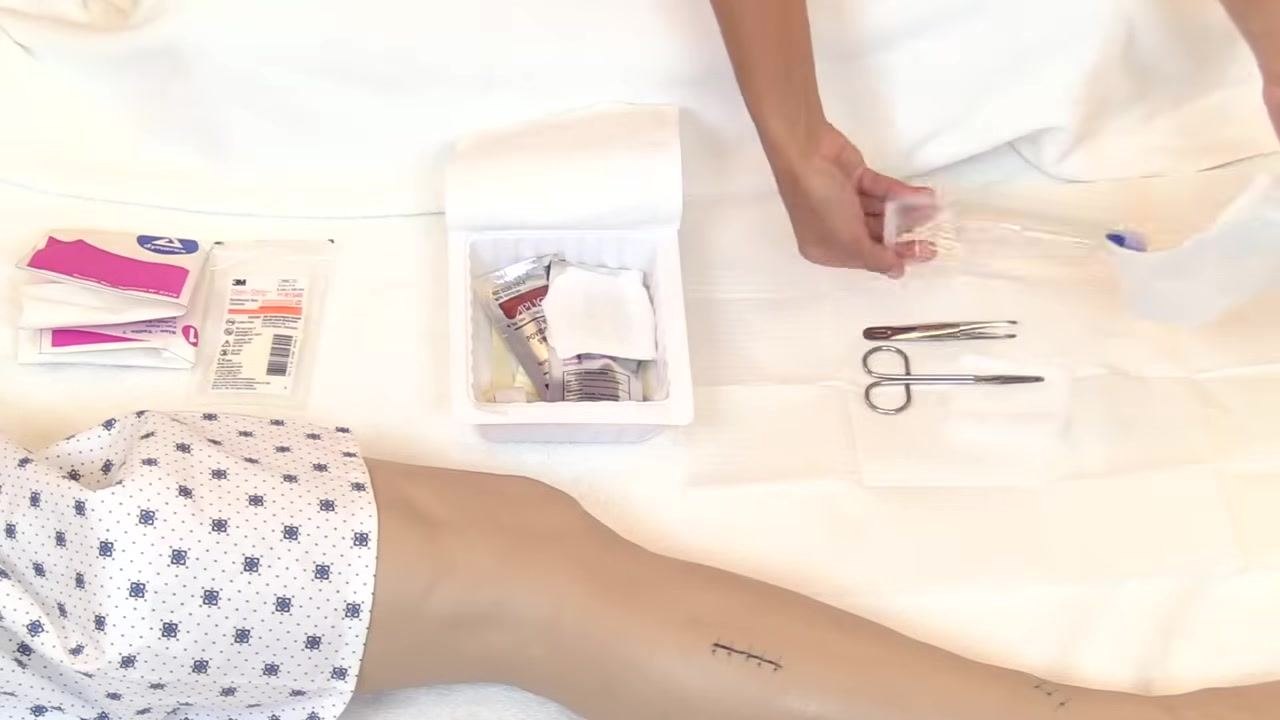
Understand the purpose of each supply. The suture removal kit contains Littauer scissors for cutting sutures, metal forceps for grasping and removing them, and gauze for blotting and holding removed material. Steri-Strips reinforce the wound after removal to help prevent wound dehiscence.
Check your facility's policy on glove use for suture removal — some hospitals require sterile gloves, while others permit clean gloves.
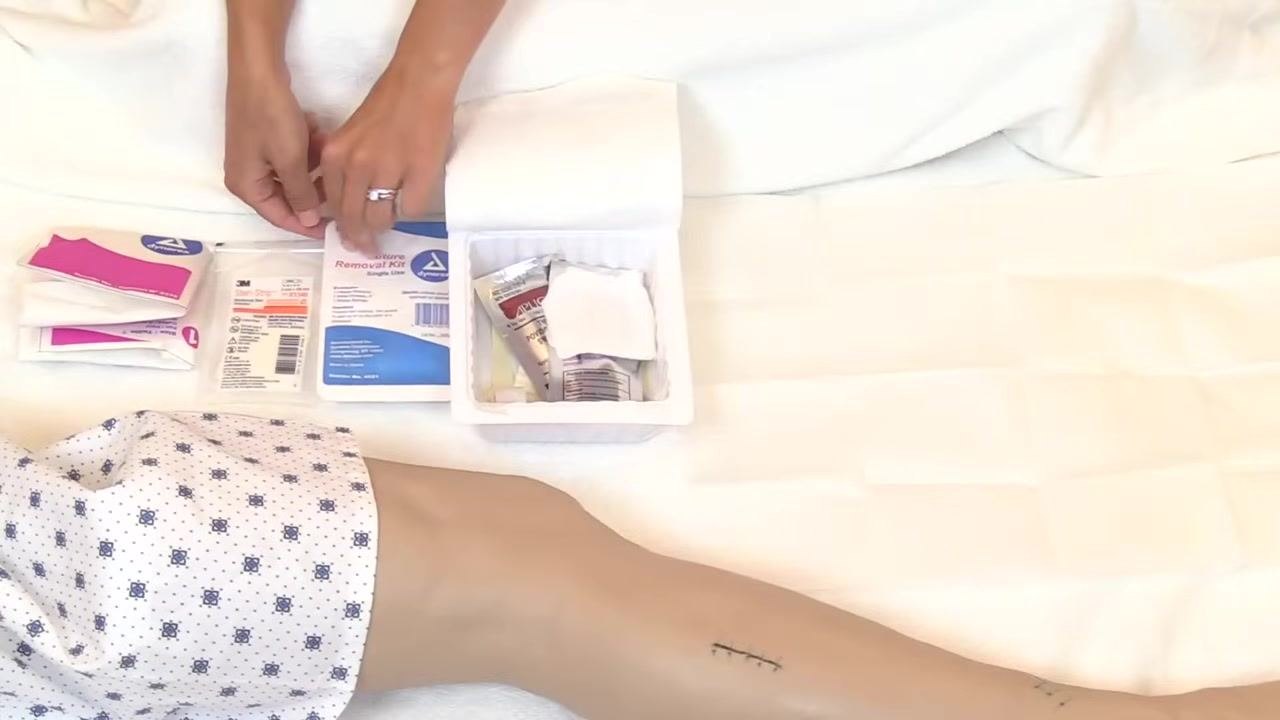
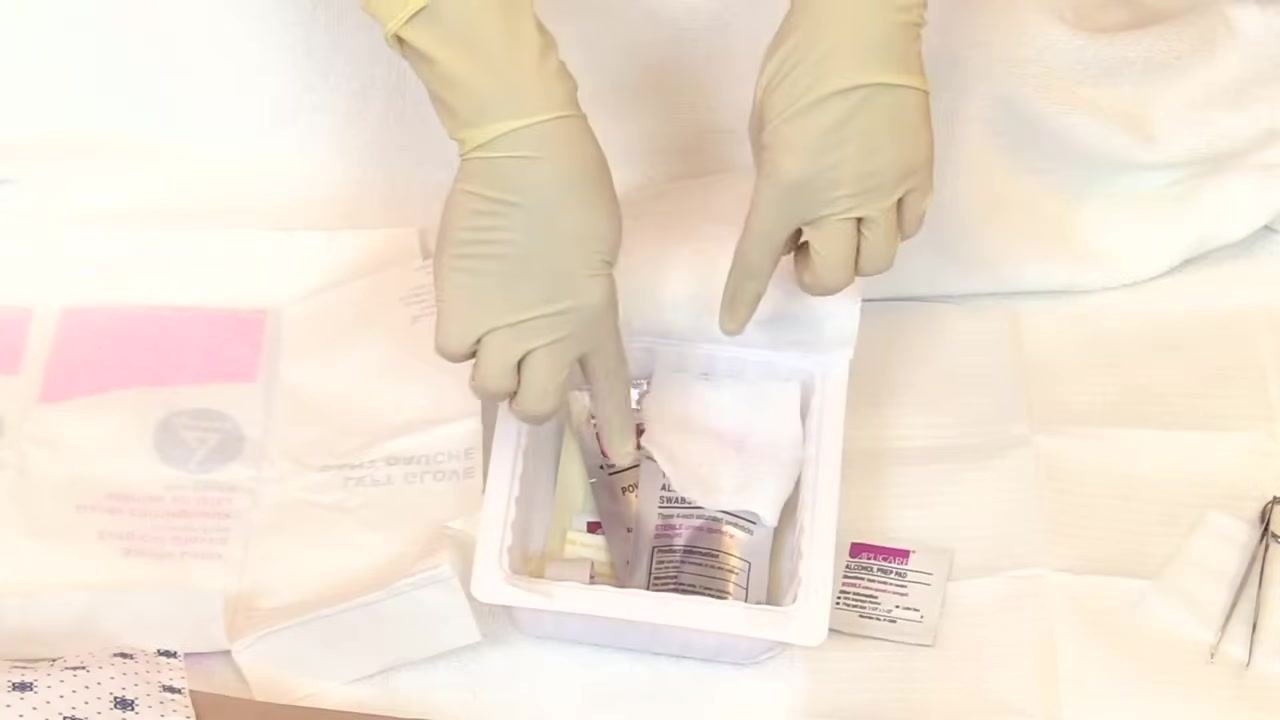
Open the dressing change tray on a clean, flat surface. Remove the sterile drape from the top of the tray and lay it out to create a sterile field, and set the sterile glove package aside for later.
Open the sterile drape gently, touching only the outer edges to avoid contamination, and lay it flat with roughly two inches of usable space inside the border.
Open the suture removal kit and drop its contents onto the sterile drape without touching the inside of the kit or the sterile items. Discard the outer packaging. Open the Steri-Strip package and drop the strips onto the sterile field in the same manner.
Arrange all items — Steri-Strips, instruments, and gauze — within easy reach on the sterile drape, keeping the field sterile at all times.
Wash your hands thoroughly, then open the sterile glove package by pulling the tabs apart and laying the wrapper flat. Put on sterile gloves using proper aseptic technique.
If you are right-handed, glove your right hand first. Pick up the first glove by the inside cuff with your non-dominant hand, avoiding contact with the outside surface, then slide your dominant hand in. Avoid touching your gloved hand with your bare hand.
Phase 2: Clean the wound area
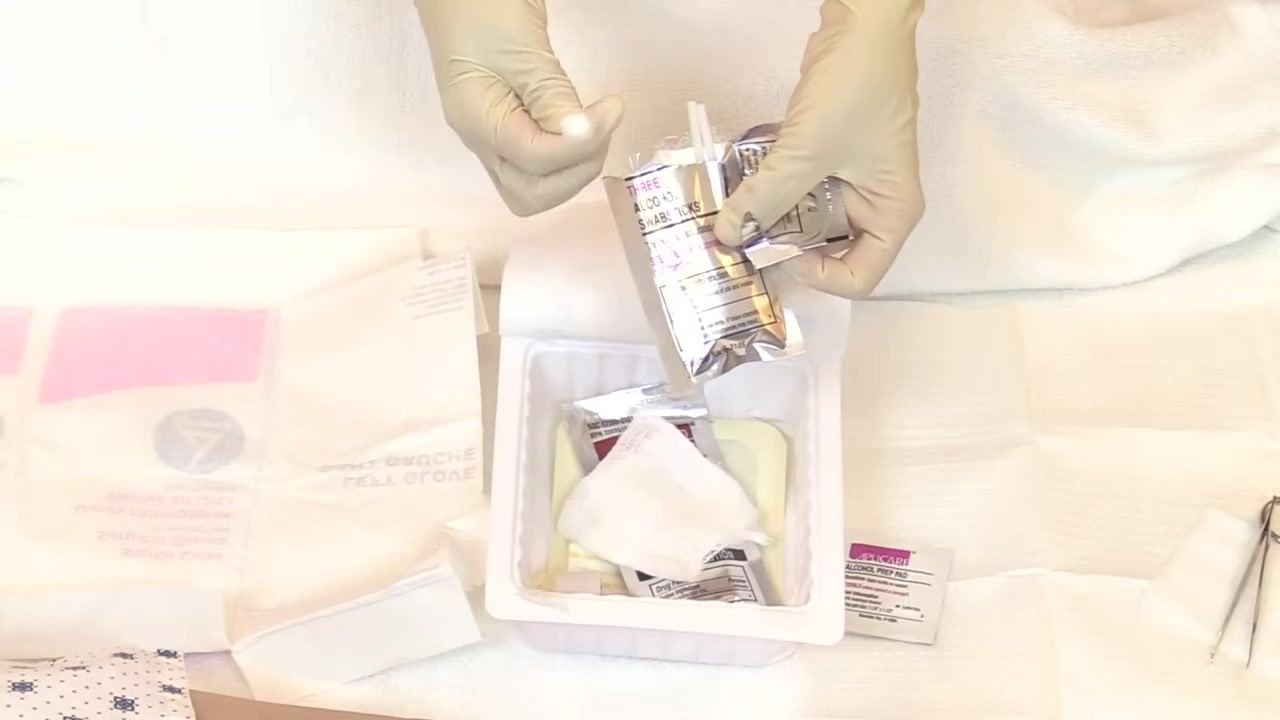
Open the antiseptic swab package and locate the swabsticks in your supply tray.
Remove one swabstick from the package while maintaining sterility.
Use the antiseptic swab to thoroughly clean around the sutured wound, discard the used swab in a proper waste container, and allow the area to air-dry completely before proceeding.
Place a sterile gauze pad beside your work area — you will use it to collect and dispose of removed sutures.
Inspect the sutures to confirm they are intact and the wound is clean and dry before you begin removal.
Position your instruments: hold the forceps in your non-dominant hand and the suture scissors in your dominant hand, both close to the wound.
Phase 3: Remove sutures using proper technique
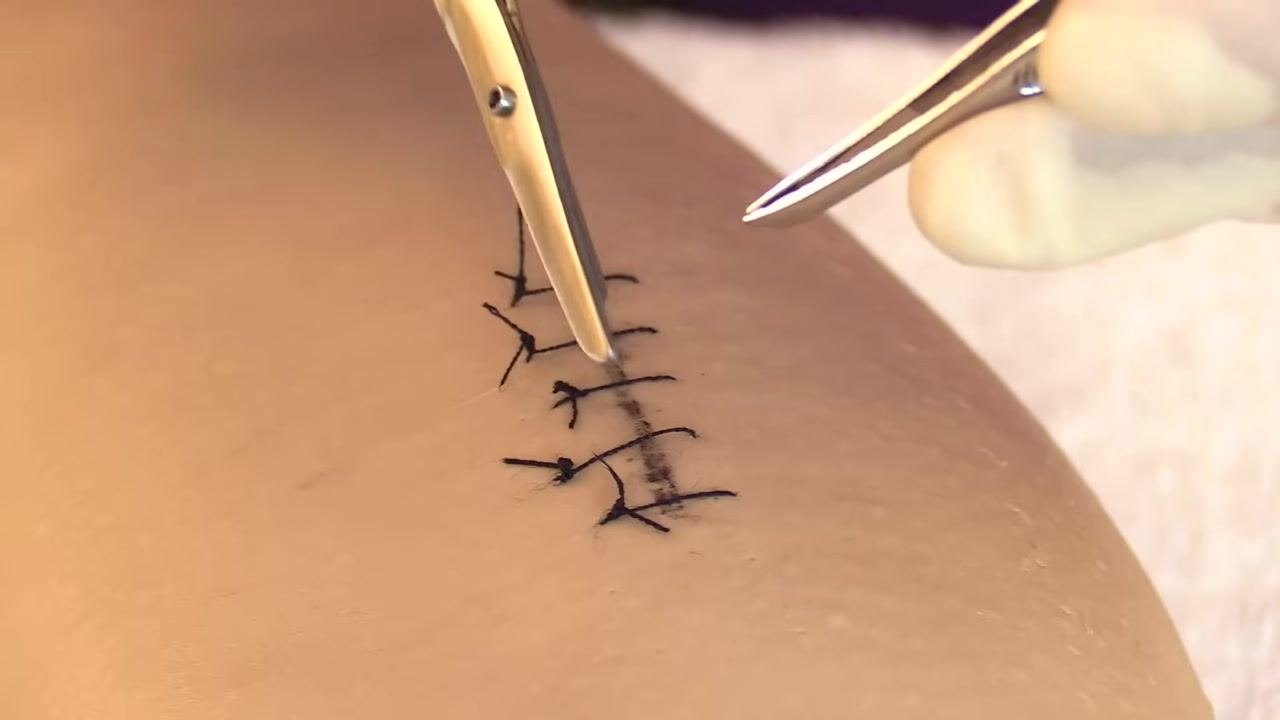
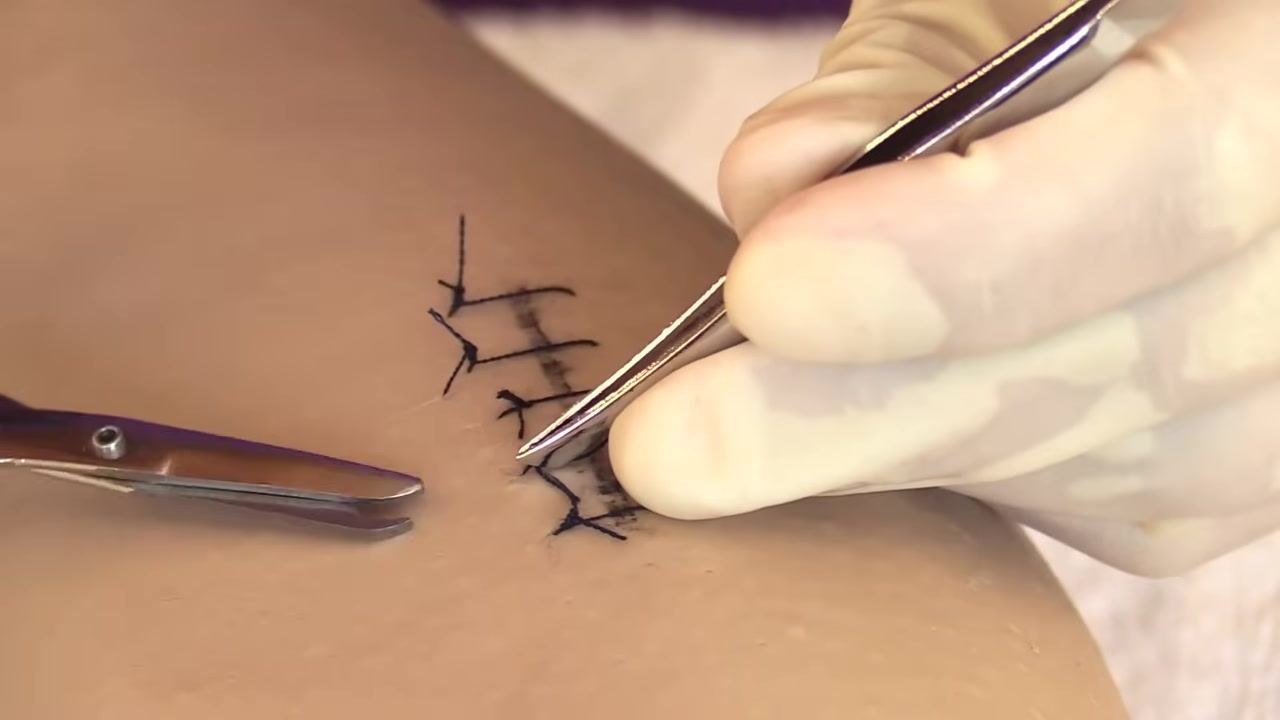
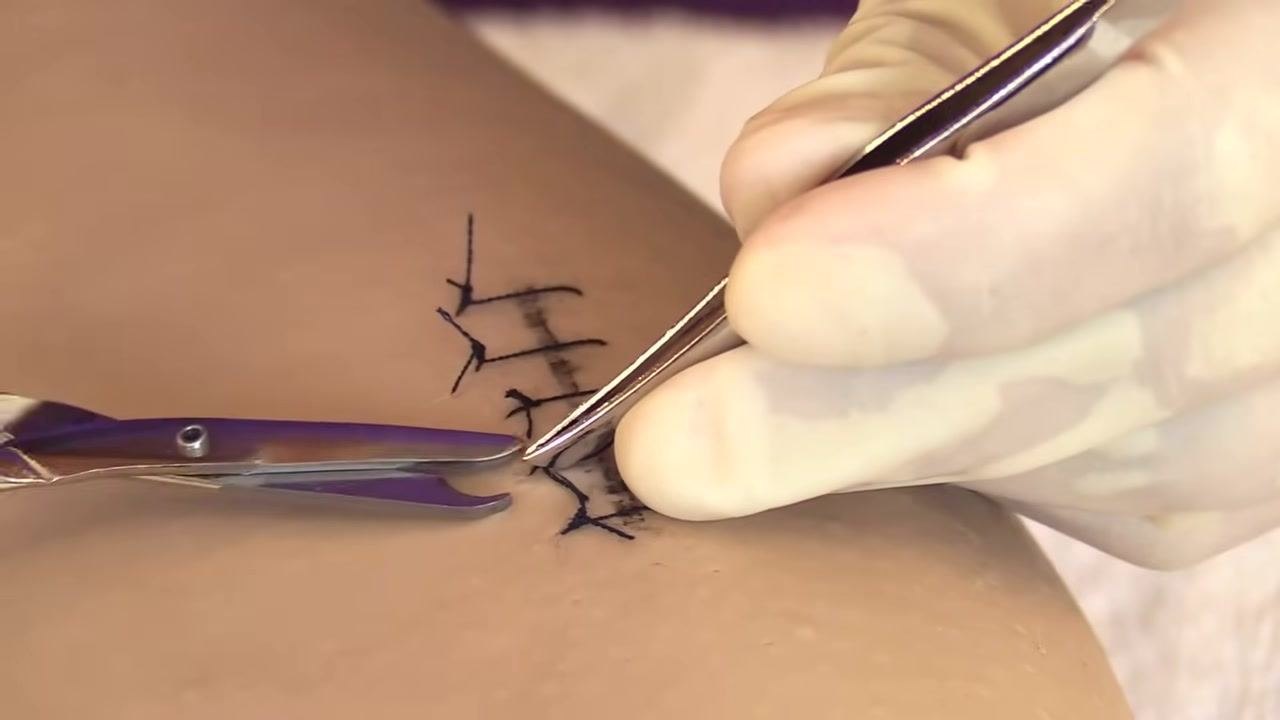
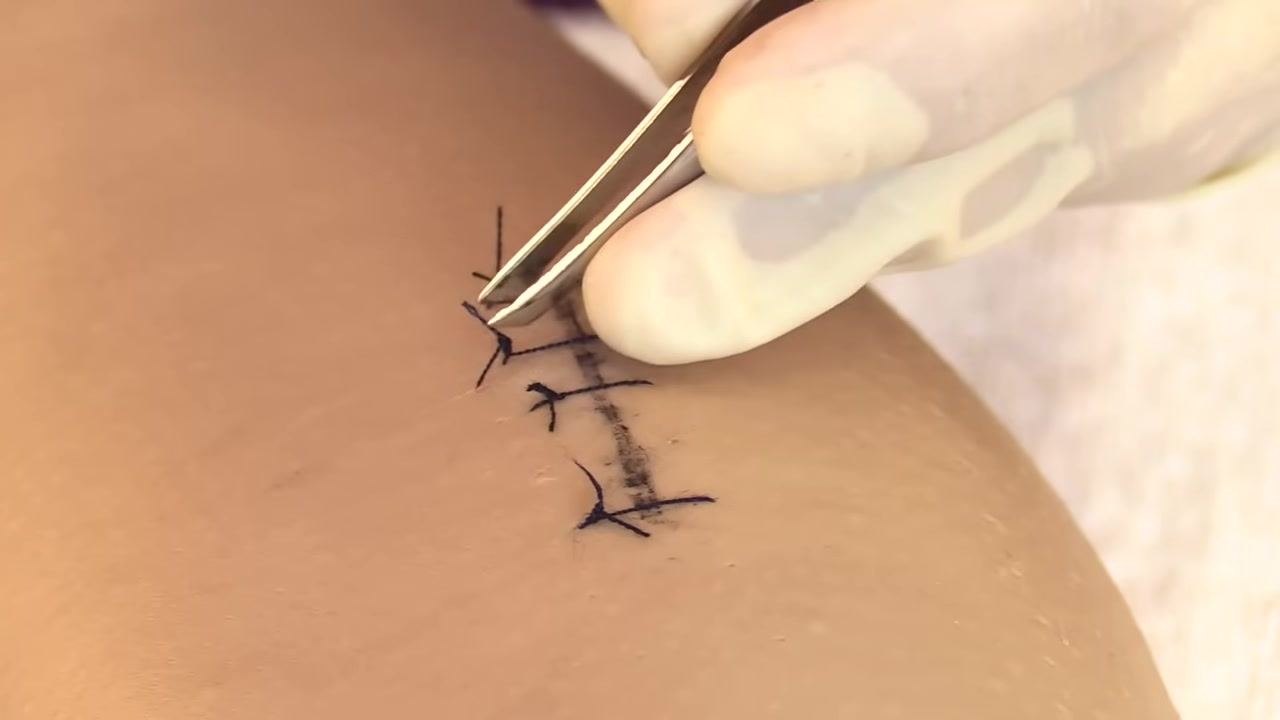
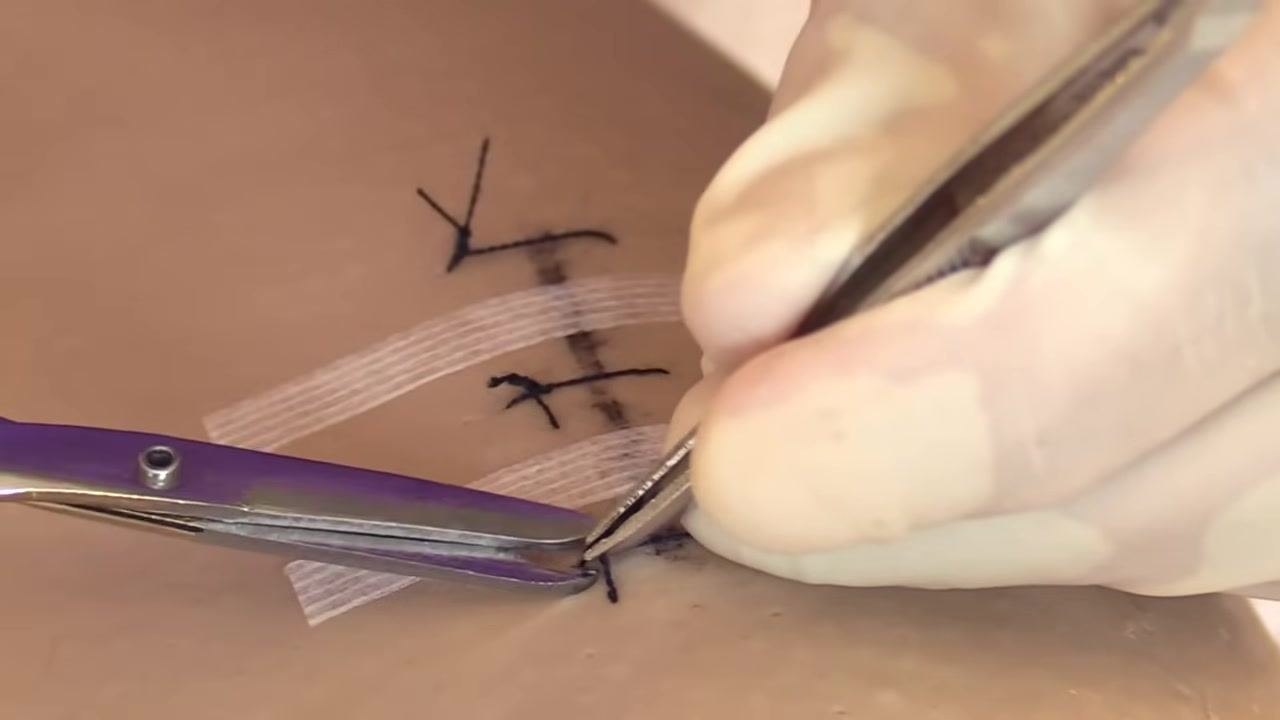
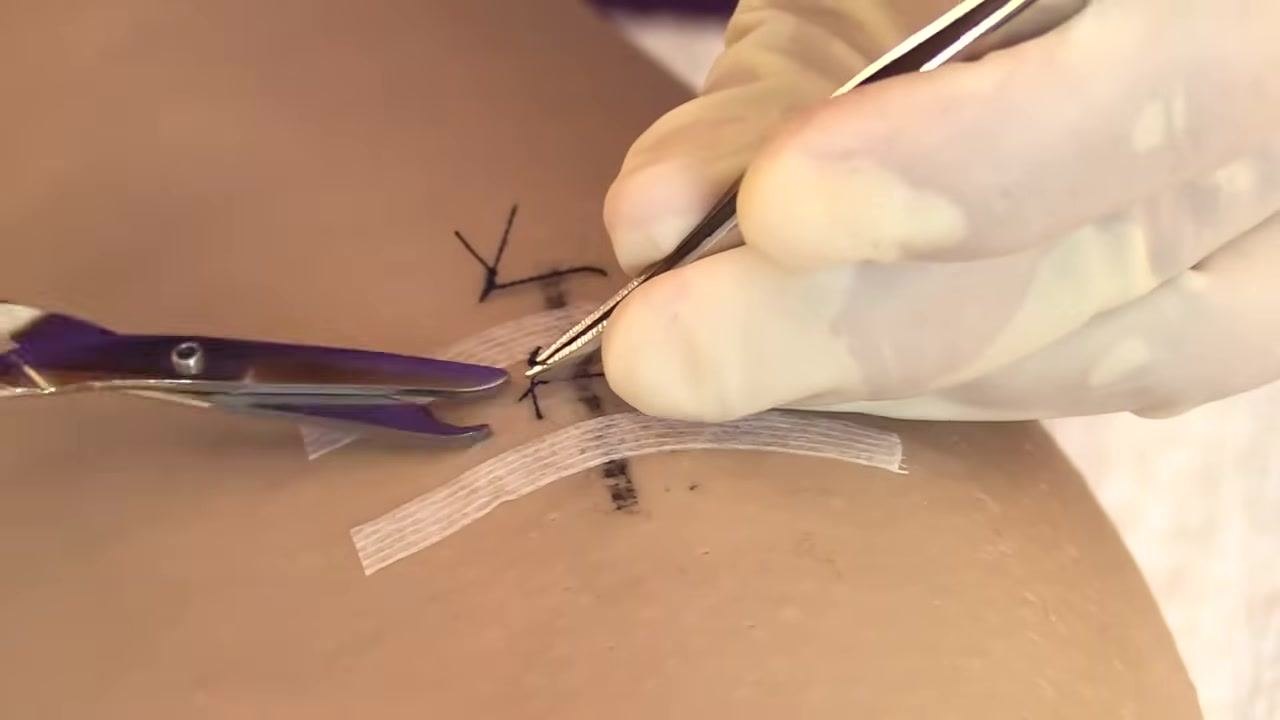
Start by removing every other suture along the wound line. Use the forceps to gently lift the knot of the first suture, slide the tip of the scissors underneath, and cut it as close to the skin as possible. Gently pull the suture out with the forceps, minimizing trauma to the skin.
Repeat this process for every other suture along the wound. Removing alternating sutures first helps prevent wound dehiscence.
Two points are critical to safe suture removal: where you cut the thread, and avoiding contamination of the wound. Do not cut the suture on the portion of the thread that has been exposed to the outside environment — that portion may carry germs, and cutting the wrong section can drag contaminated thread through the wound and raise infection risk.
When removing a suture, use the forceps to gently lift the knot. Do not pull the knot and thread away from the wound in a way that drags the external, contaminated portion through the tissue.
Lift the knot with the forceps and pull the suture over the wound, not away from it, to minimize trauma and contamination.
Use the scissors to cut the suture as close to the skin as possible, ideally on the side that was under the skin — the sterile side. This ensures only the clean, internal portion of the suture is pulled through the wound.
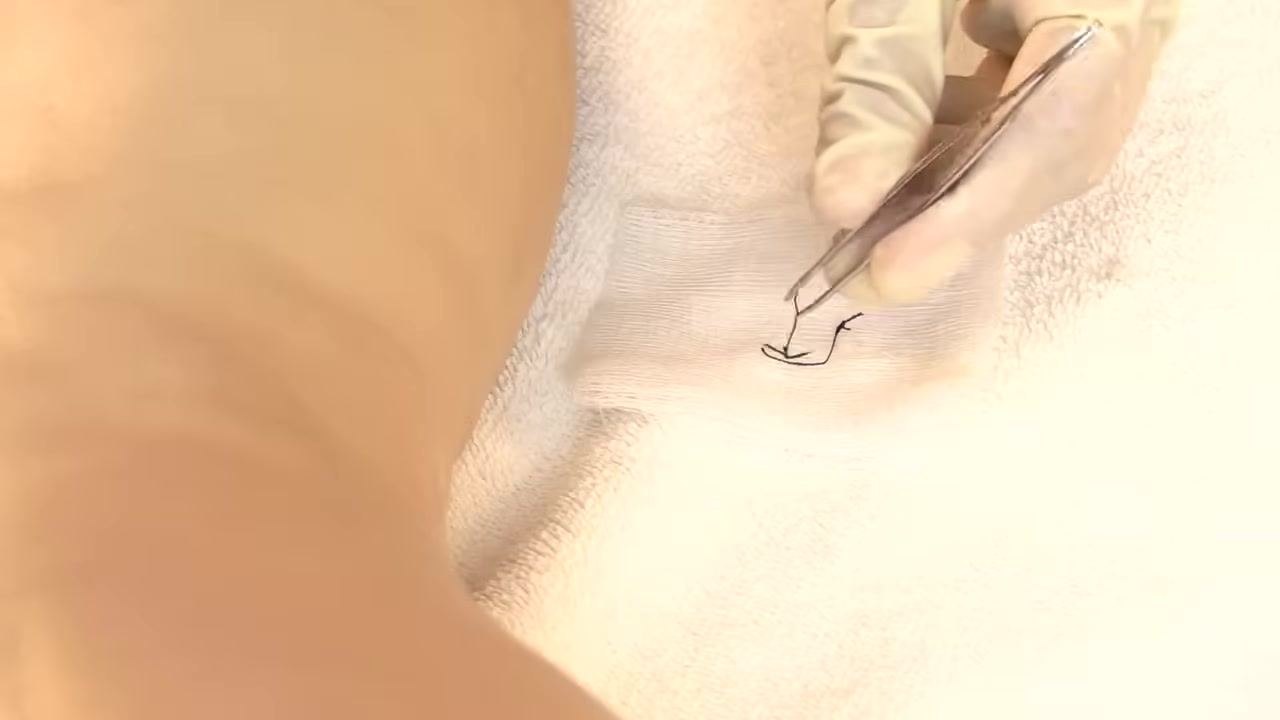
After cutting, gently lift and pull the suture over the wound with the forceps, and immediately drop the removed suture onto the prepared gauze pad for disposal.
Grasp the knot of the next suture with the forceps, snip the suture underneath the knot close to the skin, and again lift and pull the suture over the wound rather than away from it.
Place the removed suture directly onto the sterile gauze pad for proper disposal.
Phase 4: Clean the wound and apply Steri-Strips
Take a new antiseptic swab and thoroughly clean the area where sutures were removed, covering at least three-quarters of an inch on each side of the incision. Make sure the area is clean and dry before proceeding.
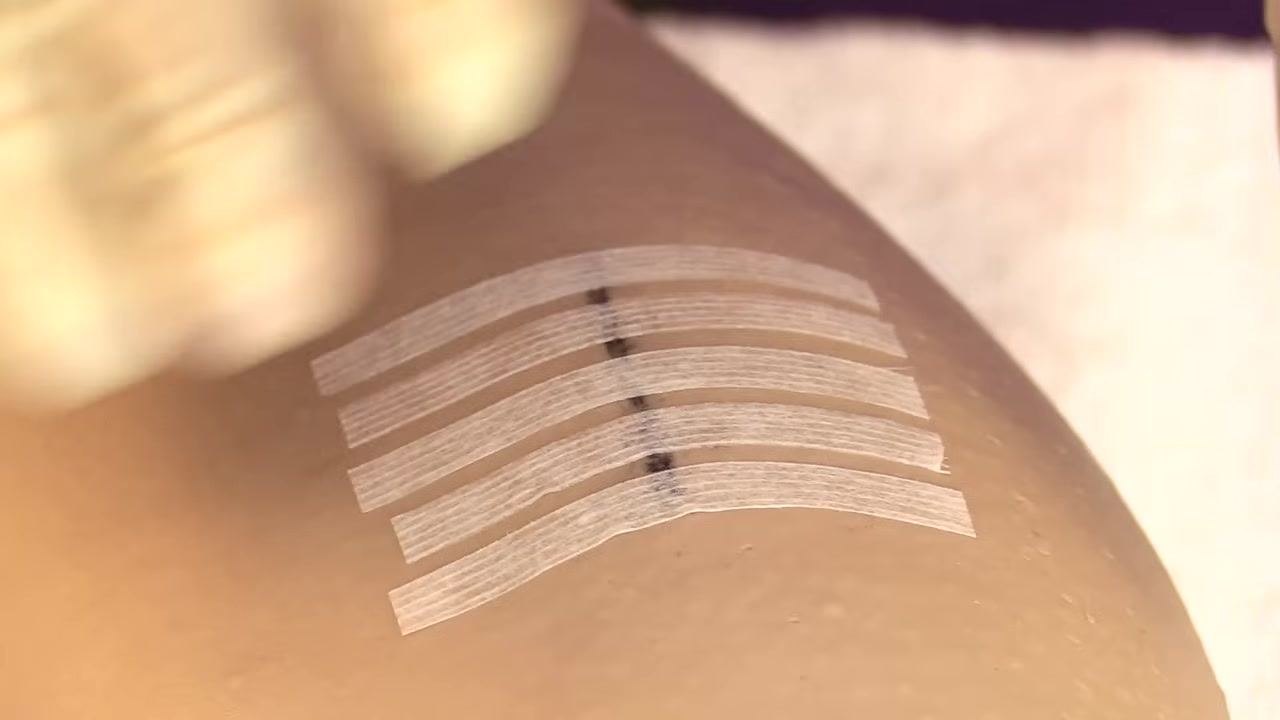
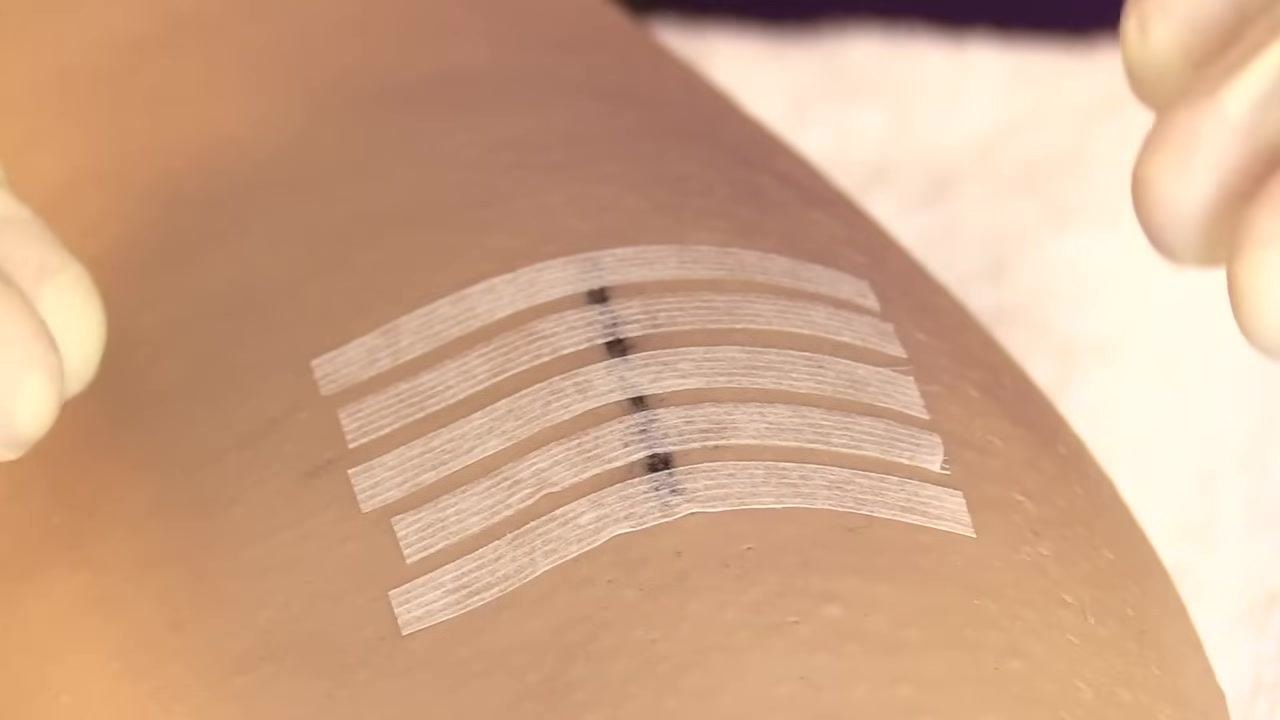
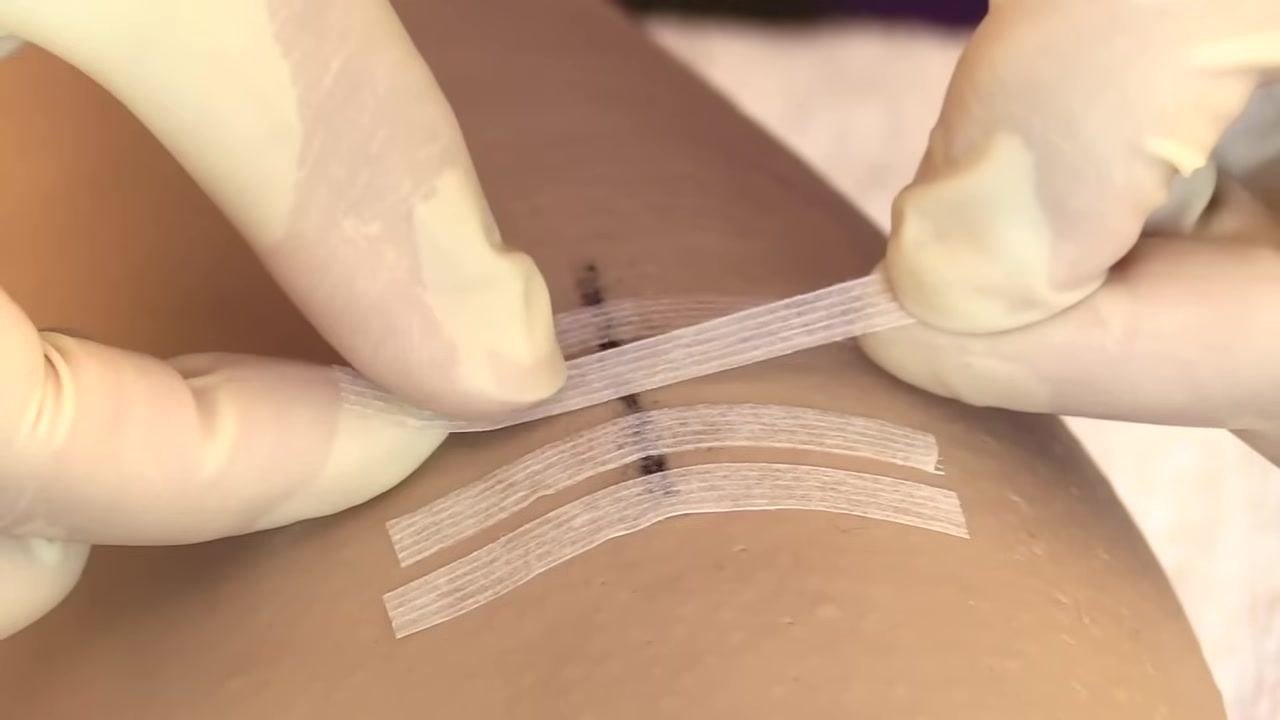
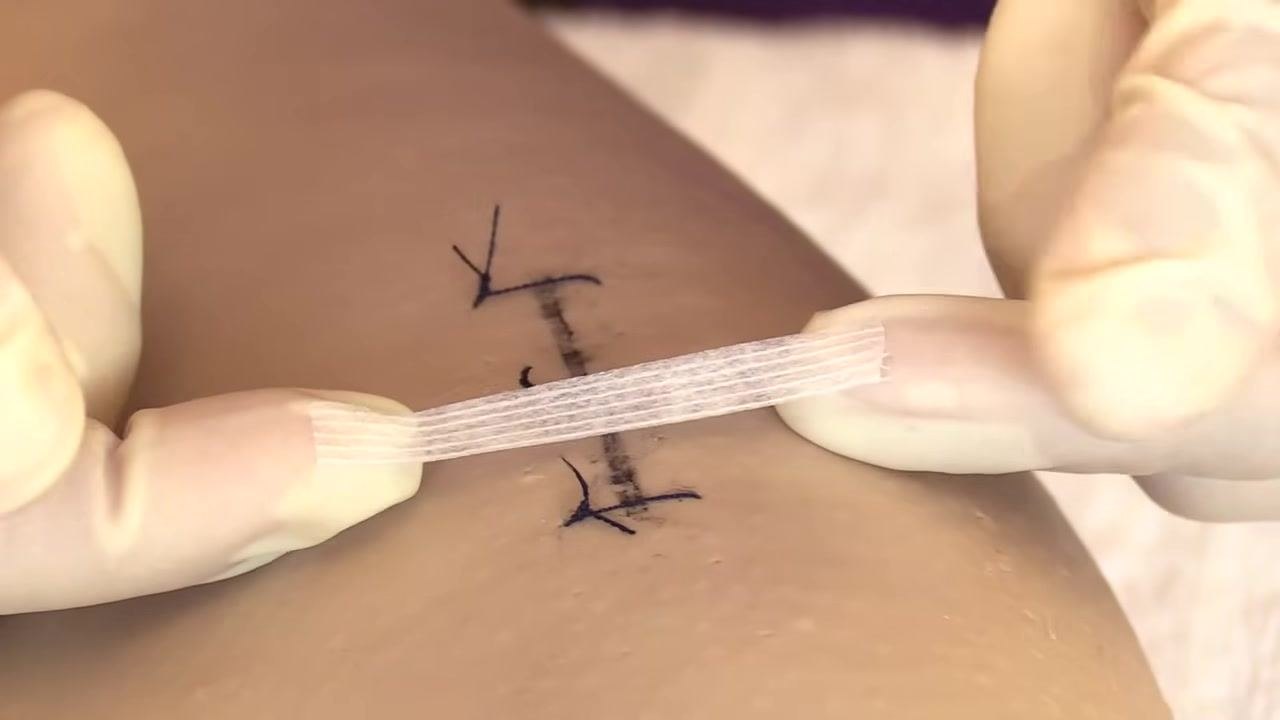
Remove a Steri-Strip from its packaging and line it up so that it extends about three-quarters of an inch on each side of the incision, spacing subsequent strips about one-eighth of an inch apart for optimal support.
Gently lay down one end of the Steri-Strip on one side of the incision and smooth it down, then lay down the other end on the opposite side without pulling or creating tension. Avoid tugging or stretching the strip, as tension can impede healing.
Continue applying additional Steri-Strips, spacing them about one-eighth of an inch apart, until the entire incision is supported.
For any remaining sutures, repeat the removal process: grasp the knot with forceps, cut underneath the knot close to the skin, and lift the knot to pull the suture over the wound.
Inspect each removed thread to confirm it is intact with no retained fragments, and place it onto the gauze pad. Continue this cycle — grasp, cut underneath, lift, and pull over — for all remaining sutures.
Phase 5: Complete suture removal and finalize wound closure
Use forceps to remove each remaining suture and drop it onto the gauze while wearing gloves, holding the removed suture securely before placing it for disposal.
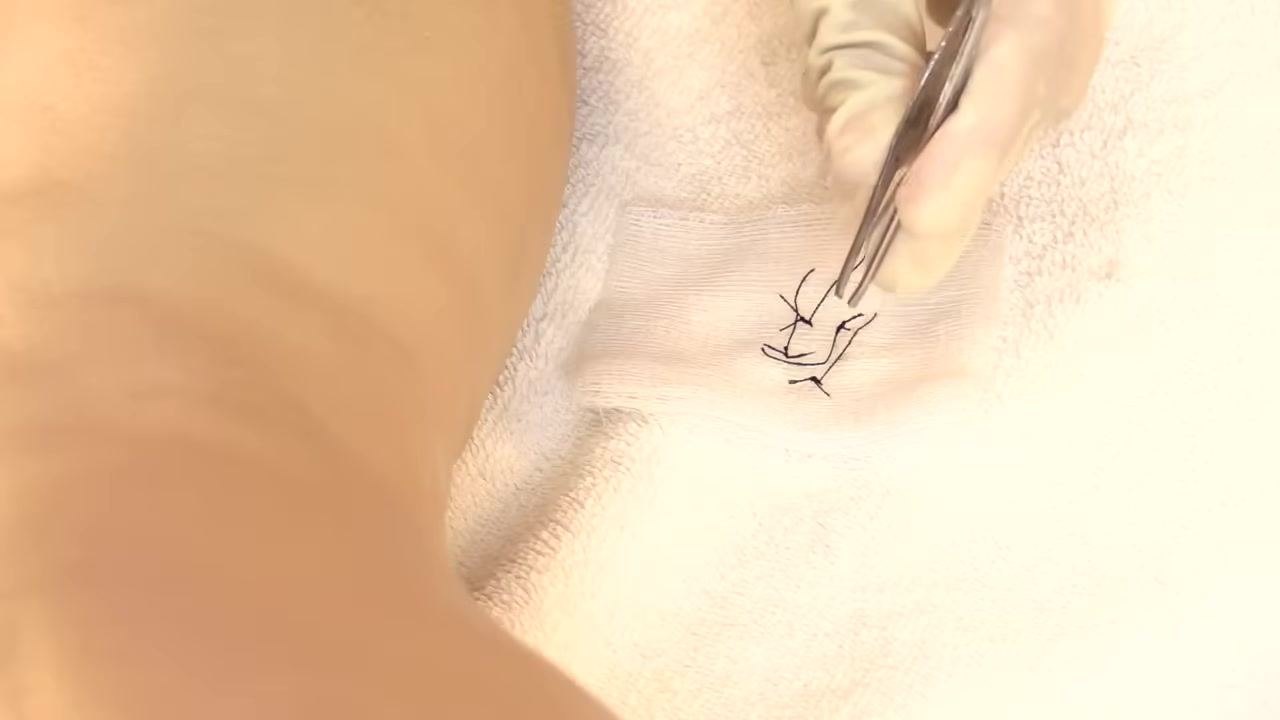
Visually inspect the wound area to confirm all sutures have been removed and the site looks healthy. Check for any remaining suture material and assess for signs of infection or complications. If there are any concerns — such as retained suture or abnormal wound appearance — notify the physician immediately.
Take a new antiseptic swab and clean the wound area again, then allow the antiseptic to dry completely before proceeding.
Apply Steri-Strips to the wound in the same manner demonstrated earlier — remove a strip from its packaging and place it centered and secure across the wound.
Apply the next Steri-Strip parallel to the previous ones, aligning it carefully for even coverage.
Continue applying additional strips as needed, lining each one up evenly and spacing them for optimal wound support.
Apply the final Steri-Strip in the same manner, confirming the wound has full, secure coverage.
If the wound is in an area that may rub against clothing or be exposed to moisture, consider applying an additional protective dressing.
To finish, doff your gloves carefully: grasp the outside of one glove at the wrist, peel it away from your hand, and hold it in the gloved hand. Slide your ungloved finger under the wrist of the remaining glove, peel it off over the first glove, and dispose of both properly without touching their outer surface with bare skin.
Perform hand hygiene immediately after removing gloves, using soap and water for at least 20 seconds or an alcohol-based sanitizer until dry. Dispose of all used materials — gloves, gauze, swabs, and packaging — in the appropriate biohazard or waste container.
Pain management
Inform the patient that suture removal is usually not painful, though a tugging or pulling sensation may be felt. If the patient is concerned about pain, administer pain medication if it has been ordered by the physician prior to removal.
| Medication | Dose | Route | Frequency |
|---|---|---|---|
| Per physician order | Per physician order | Per physician order | Prior to suture removal, as ordered |
This material does not specify a target pain score, escalation pathway, or a named analgesic; follow your facility's standard multimodal pain management protocol and the treating physician's orders for any patient reporting discomfort during or after the procedure.
Mobility milestones
This source material addresses an outpatient or bedside suture removal procedure and does not include a progressive mobility plan; a mobility milestone table (such as bed exercises, chair transfer, and ambulation with a walker) would apply to a broader post-surgical recovery pathway and is not covered here.

Complication monitoring
Watch for wound dehiscence — premature opening of the wound — which is a known complication of suture removal. Applying Steri-Strips after removal helps prevent this from occurring.
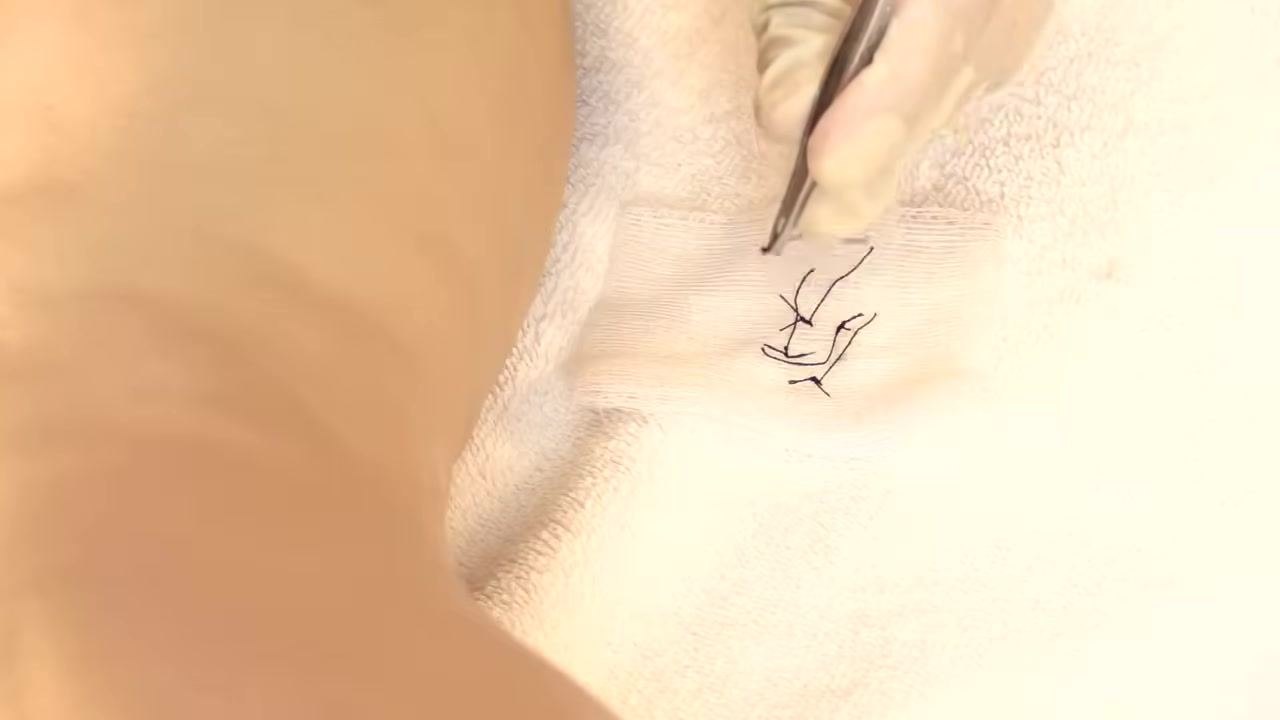
Monitor for signs of infection at any point in the process, including redness, warmth to the touch, induration (hard areas), and foul-smelling or unusual drainage. If the wound appears weak or you suspect a suture removal may cause dehiscence, notify the physician before proceeding. If any suture material is retained or the wound looks abnormal after removal, notify the physician immediately.
Discharge criteria
Before ending the encounter, confirm the following:
- All sutures have been visually accounted for and removed, with no retained fragments.
- The wound is clean, dry, and shows no signs of infection.
- Steri-Strips are applied evenly, spaced about one-eighth of an inch apart, with no gaps or visible complications.
- An additional protective dressing has been applied if the wound site is prone to rubbing or moisture exposure.
Patient education
Before the patient leaves, cover the following points:
- Steri-Strips typically fall off naturally within about 10 days — instruct the patient not to pull them off.
- Keep the wound area clean and dry.
- Monitor for signs of infection, including redness, swelling, discharge, or increased pain, and seek care if these occur.
- If the wound site may rub against clothing or get wet, an additional protective dressing may be used.
Document the procedure in the patient's medical record, including the date and time of suture removal, the condition of the wound, the number of Steri-Strips applied, any patient instructions given, and any complications observed.
Generation details: cost, quality tiers, downloads
Docsie billed 6,000 credits ($4.20) to analyze this 13-minute video at standard quality. The rewrite, template fill and Word/PDF exports were included. The same video at each quality tier:
| Quality | Frames sampled | Credits | Approx. cost |
|---|---|---|---|
| Draft | every 16-30 s | 3,250 | $2.27 |
| Standard (this guide) | every 8-15 s | 6,500 | $4.55 |
| Detailed | every 4-7 s | 13,000 | $9.10 |
| Ultra | every 1-3 s | 26,000 | $18.20 |
Credits priced at $0.70 per 1,000; plans include a monthly allowance. Enterprise customers on on-premise or bring-your-own-model deployments run this on their own inference and pay no per-video credits.
Generated by Docsie Video-to-Docs on 2026-09-28 from a 12-minute video. It was generated straight into Docsie's Patient Care Procedure template, so every section of that template is filled from the video. Screenshots are frames from the source video and belong to their creator, RegisteredNurseRN, whose original is embedded above. If you own this video and want the guide removed or credited differently, contact us and we will act within one business day.