
How to Operate a Portable Oxygen Tank
This guide explains how to operate a portable oxygen tank for home use, including identifying its components, setting the prescribed flow, attaching the nasal cannula, replacing an empty tank, transporting the tank safely, and following essential oxygen safety precautions. Always follow your healthcare provider's prescription and your oxygen company's guidance alongside these instructions.
Video: How to Use Your Home Oxygen Tank by Children's Hospital Colorado (2019). All credit for the demonstration goes to the creator; watch the original on YouTube. The written guide below was generated from this video by Docsie. Creator? Request a change or removal.
This guide explains how to operate a portable oxygen tank for home use, including identifying its components, setting the prescribed flow, attaching the nasal cannula, replacing an empty tank, transporting the tank safely, and following essential oxygen safety precautions. Always follow your healthcare provider's prescription and your oxygen company's guidance alongside these instructions.
Device Overview
A home oxygen tank system delivers a prescribed flow of oxygen to the user through a nasal cannula. The system consists of the following components:
- On-off valve: located at the top of the tank, used to open or close the oxygen supply.
- Regulator: attaches to the tank and controls oxygen flow.
- Gauge: mounted on the regulator; shows how much oxygen remains in the tank. Green indicates the tank is full, and red indicates it is empty.
- Flow control knob: adjusts the oxygen flow to the prescribed liters per minute.
- Oxygen outlet: the connection point where the nasal cannula attaches.
- Cylinder wrench: used to open or close the valve and to tighten the regulator.

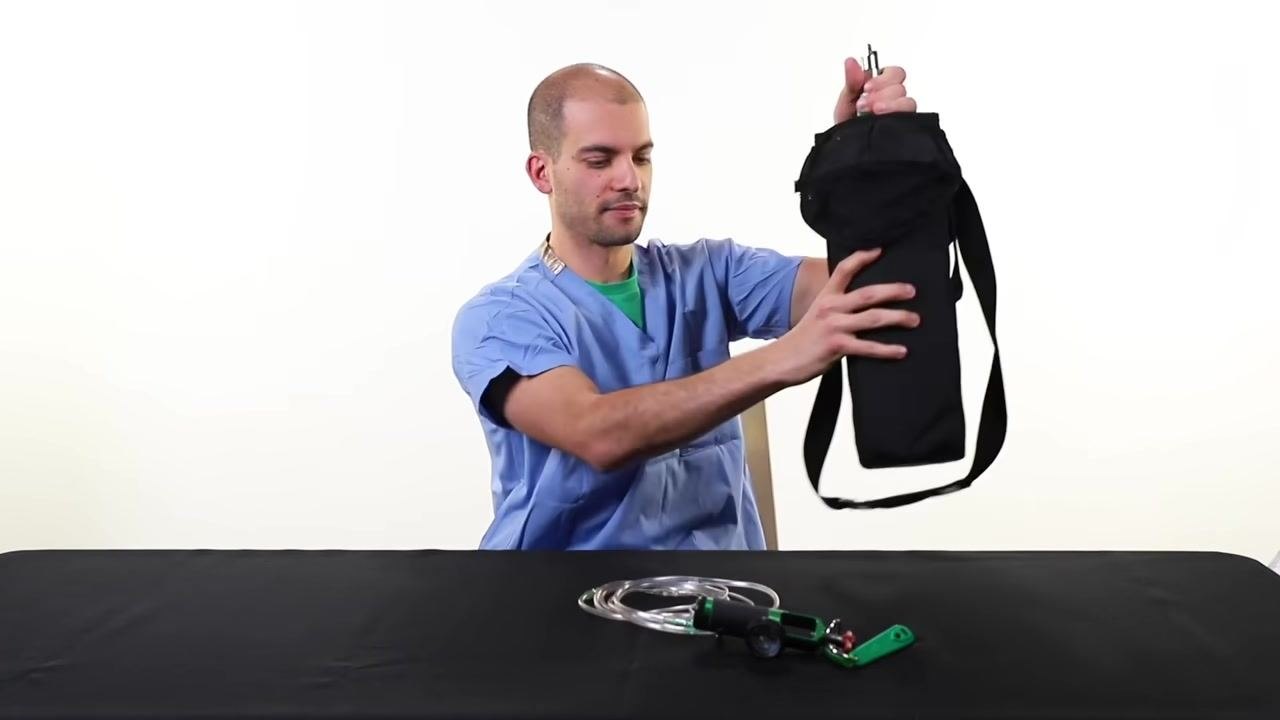
The tank must always be kept in its provided carrier to hold it in a stable, secure position.
Caution: Do not leave the tank standing upright on its own. An unsecured tank can tip over and cause injury or damage to the regulator.
Indications & Contraindications
The source material does not specify formal clinical indications or contraindications; oxygen flow rate and duration of use must be set exactly as prescribed by your healthcare provider, and any deviation should be discussed with them before use.
Setup & Installation
Follow these steps to prepare a new oxygen tank for use.
- Attach the regulator to the oxygen tank.
- Place the regulator onto the top of the tank, lying horizontally, and ensure it is securely fastened.
- Use the cylinder wrench to tighten the regulator if necessary.
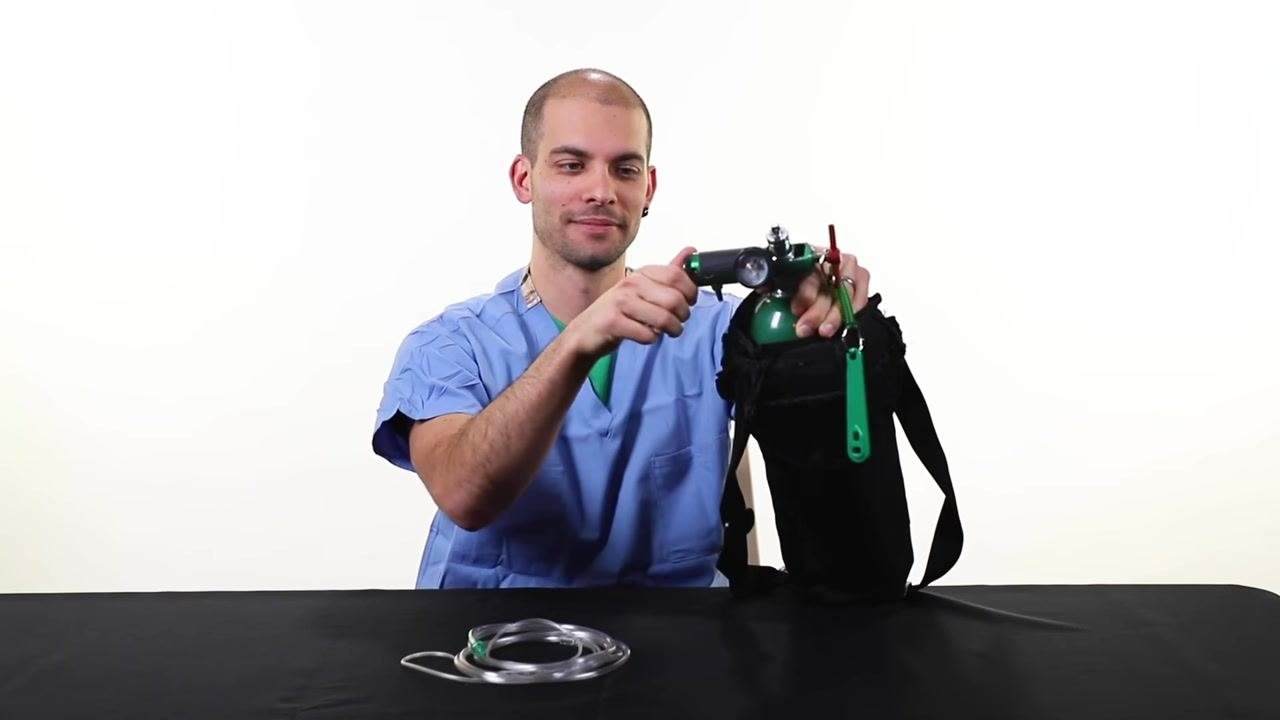
- Turn on the oxygen tank.
- Use the cylinder wrench to turn the valve on top of the tank to the left (counterclockwise) to open it.
- Watch the gauge to confirm the dial moves up, indicating the tank is open and pressurized.
Pre-use check: Before connecting the nasal cannula, confirm the gauge shows adequate pressure and that oxygen flow is audible and can be felt at the outlet.
Programming & Operation
Use these steps to set the prescribed flow and deliver oxygen to the user.
- Set the prescribed oxygen flow.
- Turn the flow control knob to the prescribed liters per minute as directed by your healthcare provider.
- Listen and feel for oxygen flow at the outlet before attaching the nasal cannula.
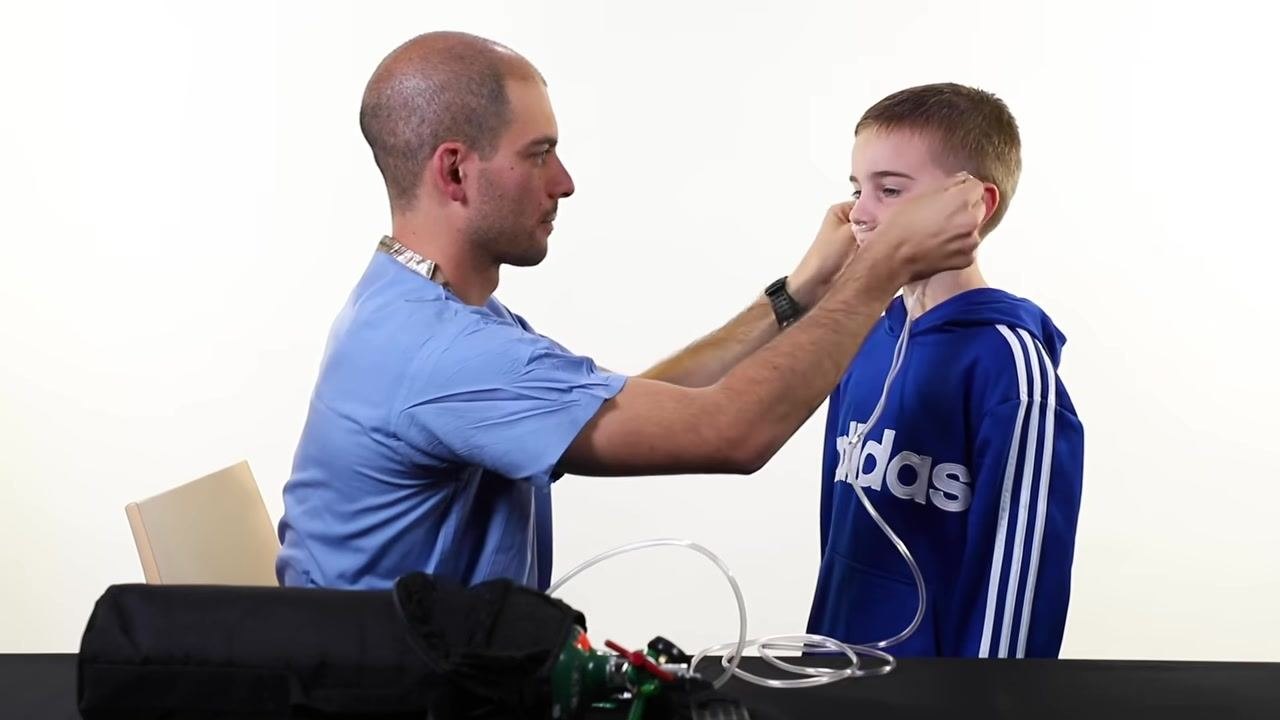
- Attach and position the nasal cannula.
- Ensure the two prongs of the nasal cannula point downwards, not upwards.
- Never cut the prongs of the nasal cannula.
- Place the cannula behind the ears and tighten it under the chin or behind the head, whichever is more comfortable.
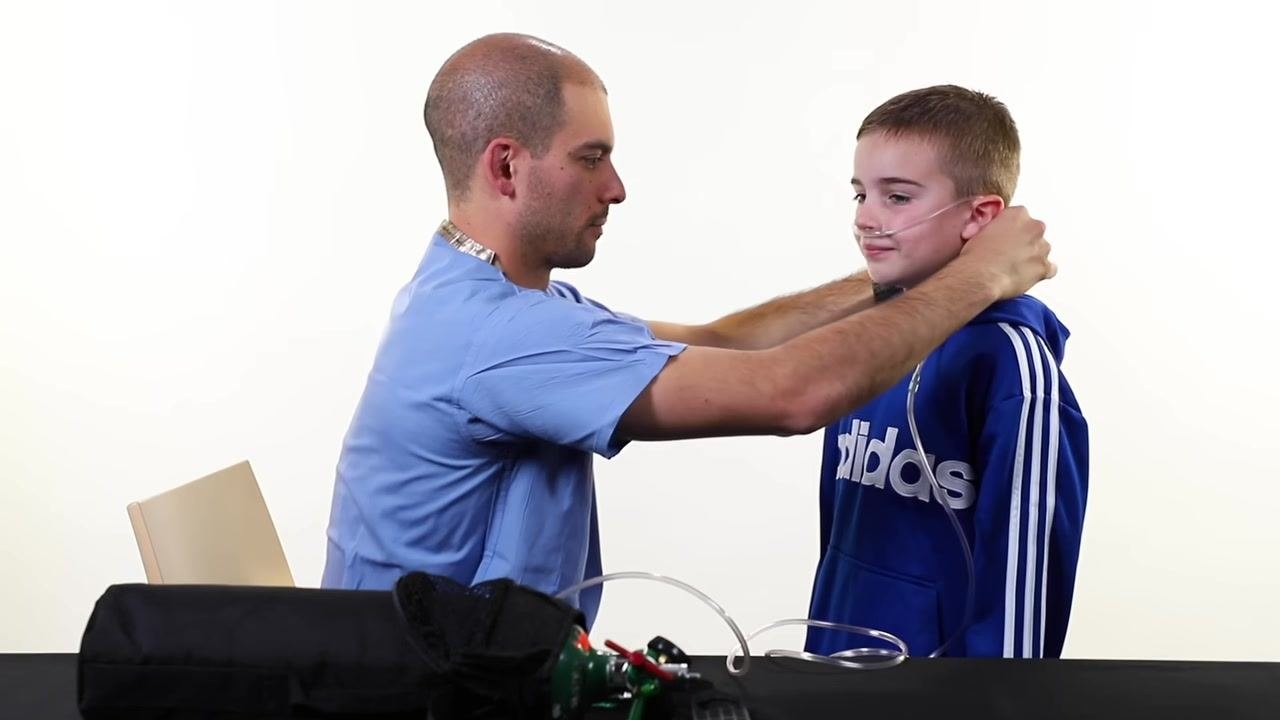
-
Secure the nasal cannula if needed.
- Use pieces of tape, if provided, to help secure the cannula to the child's face for additional comfort and stability.
-
Turn off the oxygen tank when not in use.
- Turn off the oxygen flow using the flow control knob.
- Use the cylinder wrench to turn the valve on top of the tank to the right (clockwise) to close it completely.
Note: Always follow your healthcare provider's instructions for prescribed oxygen flow and usage.
Alarms & Alerts
The oxygen tank system does not have electronic alarms, but the following hazard alerts apply whenever the device is in use.
| Alert | Description | Probable cause | Corrective action |
|---|---|---|---|
| Fire hazard from leaking oxygen | Oxygen itself is not flammable, but it causes any burning material to burn hotter and faster. | Oxygen leaking from the tank or regulator. | Keep the tank away from open flame and heat sources; check regulator fit regularly. |
| No smoking near equipment | Smoking near oxygen equipment creates a serious fire risk. | Cigarettes or open flame near the tank or tubing. | Never smoke in the same room or car as the oxygen equipment; display the "No Smoking" sign provided by your home care company on your door. |
| Oil-based products on skin | Oil-based creams and lotions, such as petroleum jelly, are flammable near oxygen. | Applying oil-based creams, lotions, or lip moisturizer containing oil-based ingredients. | Use only water-based creams and lotions; check ingredient lists on lip moisturizers. |
| Proximity to heat sources | Heat sources near oxygen equipment increase fire risk. | Tank or tubing placed near a stove, oven, or heater. | Keep oxygen tanks and tubing at least 10 feet away from any heat source. |
| Proximity to flammable materials | Grease, oil, aerosols, paints, gasoline, and solvents increase fire risk near oxygen. | Storing or using oxygen equipment near these materials. | Keep oxygen equipment away from grease, oil, aerosols, paints, gasoline, or solvents. |


Cleaning & Maintenance
Maintenance of the oxygen tank system centers on replacing an empty tank correctly.
- Empty the oxygen tank completely before replacing it.
- Turn on the flow control knob and allow the oxygen to run until the gauge dial returns to zero.
- This ensures the tank is fully empty before removal.
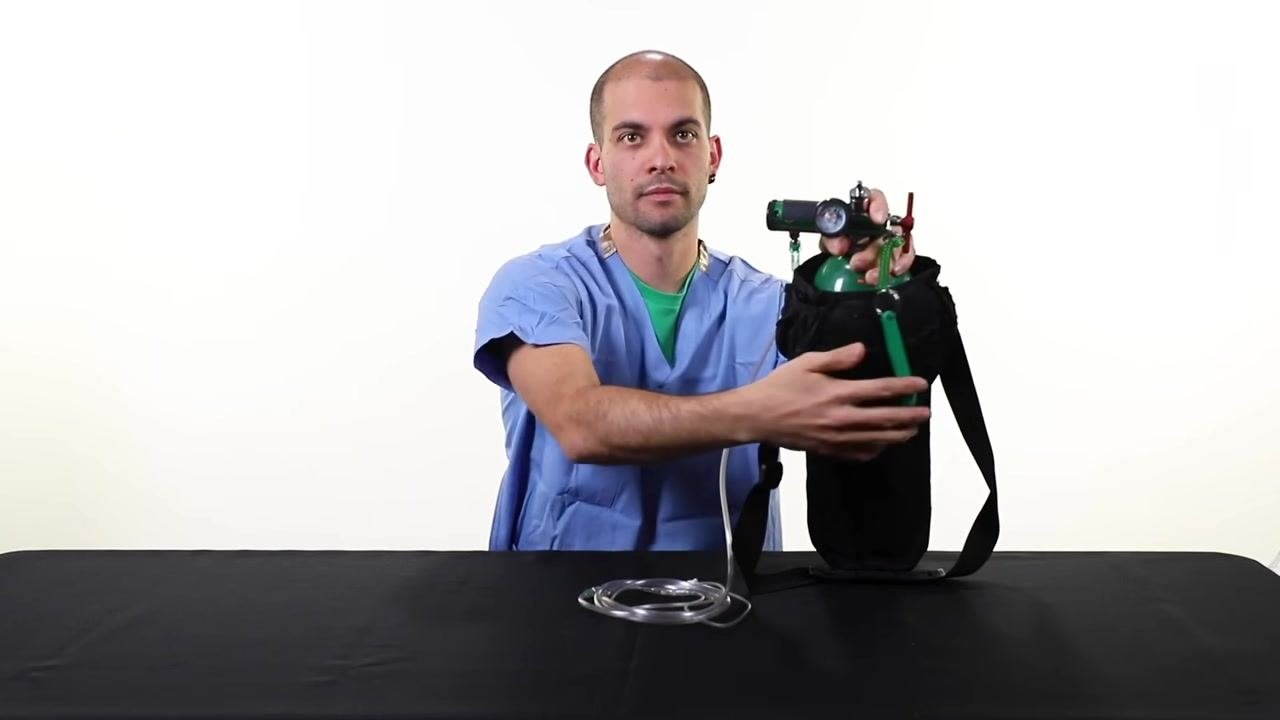
- Remove the regulator from the empty tank.
- Turn the T-handle on the regulator counterclockwise to loosen and remove it from the tank.
- Set the regulator aside for use with the new tank.
-
Prepare the new oxygen tank.
- Inspect the top of the new tank for two holes where the regulator pins will fit.
- Ensure a washer is placed in the middle of the regulator pins; use a new washer if needed, as your oxygen company will provide extras.
-
Attach the regulator to the new tank.
- Align the two pins on the regulator with the holes on the top of the oxygen tank.
- Place the regulator onto the tank so the pins fit securely into the holes.
- Tighten the regulator using the T-handle until it is firmly attached.
- Turn on the new tank and check for leaks.
- Use the cylinder wrench to turn the valve on top of the tank to the left (counterclockwise) to open it.
- Listen and feel for any leaks around the regulator.
- If you hear or feel a leak, turn off the tank, retighten the regulator, or replace the washer as needed.
Transporting your oxygen tank in a vehicle:
- Do not smoke in the car while transporting oxygen.
- Keep at least one window partially open for ventilation.
- Lay the oxygen tank on its side on the floor behind the seats to prevent it from rolling.
- Use a restraining device, such as a seat belt, soft clothing, blankets, or towels, to secure the tank and prevent movement.
Storage reminders:
- Always keep oxygen tanks secure in their provided carriers.
- Do not leave tanks in areas where they can be easily knocked over.
- Never store oxygen tanks in small, enclosed spaces such as closets or the trunk of a car.

Note: Proper handling during replacement and transport prevents accidents and ensures a continuous supply of oxygen.
Troubleshooting
| Issue | Possible cause | Solution |
|---|---|---|
| Regulator leaks after attachment | Regulator not tightened fully, or washer is worn or missing. | Turn off the tank, retighten the regulator with the T-handle, or replace the washer with one provided by your oxygen company. |
| Regulator will not secure properly or appears broken | Damaged regulator or misaligned pins. | Call your oxygen company immediately for a replacement. |
| Tank running low or empty | Normal consumption during use. | Call your oxygen company right away so they can deliver more oxygen tanks. |
| Tank knocked over or stored unsafely | Tank left outside its carrier or in an enclosed space. | Always keep the tank secured in its carrier and away from areas where it can be knocked over; never store it in closets or a car trunk. |
| Uncertainty about safety or equipment condition | Any doubt about safe handling of the oxygen equipment. | Contact your oxygen supply company for guidance. |

Technical Specifications
The source material does not provide physical dimensions, electrical specifications, environmental requirements, or regulatory classifications for the oxygen tank system; refer to the documentation provided by your oxygen supply company for these details.
What's Next
After completing setup, always confirm the flow rate matches your healthcare provider's prescription before each use. Keep your oxygen company's contact information accessible for tank replacement, leak concerns, or any equipment questions.
Generation details: cost, quality tiers, downloads
Docsie billed 2,500 credits ($1.75) to analyze this 5-minute video at standard quality. The rewrite, template fill and Word/PDF exports were included. The same video at each quality tier:
| Quality | Frames sampled | Credits | Approx. cost |
|---|---|---|---|
| Draft | every 16-30 s | 1,250 | $0.88 |
| Standard (this guide) | every 8-15 s | 2,500 | $1.75 |
| Detailed | every 4-7 s | 5,000 | $3.50 |
| Ultra | every 1-3 s | 10,000 | $7.00 |
Credits priced at $0.70 per 1,000; plans include a monthly allowance. Enterprise customers on on-premise or bring-your-own-model deployments run this on their own inference and pay no per-video credits.
Generated by Docsie Video-to-Docs on 2026-09-20 from a 4-minute video. It was generated straight into Docsie's Medical Device IFU template, so every section of that template is filled from the video. Screenshots are frames from the source video and belong to their creator, Children's Hospital Colorado, whose original is embedded above. If you own this video and want the guide removed or credited differently, contact us and we will act within one business day.