
How to Boil Out a Deep Fryer
This SOP describes how to boil out a deep fryer basin to remove built-up grease and residue safely and effectively. Following these steps ensures the fryer is properly sanitized, extends equipment life, and supports food safety compliance.
Video: How to Boil Out a Deep Fryer | eTundra by Tundra Restaurant Supply (2014). All credit for the demonstration goes to the creator; watch the original on YouTube. The written guide below was generated from this video by Docsie. Creator? Request a change or removal.
This SOP describes how to boil out a deep fryer basin to remove built-up grease and residue safely and effectively. Following these steps ensures the fryer is properly sanitized, extends equipment life, and supports food safety compliance.
Purpose
The objective of this procedure is to remove accumulated grease, carbon, and food residue from the interior of a commercial deep fryer basin through a controlled boil-out process. This procedure controls the risk of grease buildup that can affect oil quality, food safety, and equipment performance, while also managing the hazards associated with hot equipment and cleaning chemicals.
Scope
This procedure applies to commercial deep fryer basins and their interior heating flumes. It covers the draining, boiling, scrubbing, rinsing, drying, and refilling stages of the fryer cleaning cycle. It does not cover cleaning of surrounding kitchen surfaces, ventilation hoods, or other kitchen equipment; those items should be addressed under separate facility cleaning procedures.
Supplies
- Fryer boil out chemical (e.g., fryer boil out puck) — use one puck per 40-pound vat, following the manufacturer's directions for dilution and quantity
- Clean water for filling and rinsing the fryer basin
- Personal protective equipment: gloves, apron, and face shield
- Clean, dry rags for wiping down interior surfaces
- A poker or similar narrow tool for cleaning between heating flumes
- A suitable container for collecting drained oil and cleaning solution
Store boil out chemicals according to the manufacturer's storage instructions and keep them separate from food products.
Safety precautions
- Wear gloves, apron, and face shield at all times while handling hot equipment and cleaning chemicals.
- Confirm the fryer is turned off and fully cooled before beginning the cleaning process.
- Keep protective gear on even during later wipe-down steps, as the basin will still be hot.
- Follow the manufacturer's directions for the specific boil out chemical and fryer model in use.
- Dispose of used cleaning materials and chemical residue according to local regulations.
- Note: this procedure does not specify lockout/tagout steps, wet-floor signage, or ventilation requirements; follow your facility's standard safety protocols for these controls in addition to the steps below.
Cleaning steps
1. Prepare for cleaning - Ensure you are wearing gloves, apron, and face shield before starting. - Confirm the fryer is turned off and has cooled down. - Drain the fryer basin completely of all oil. - Filter the oil and remove any sediment from the basin.

2. Fill the fryer basin with water - Confirm the drain valve is closed to prevent water from spilling out. - Fill the fryer basin with water up to the bottom fill line.
3. Add the boil out chemical - Select the appropriate boil out chemical for your fryer, such as a fryer boil out puck. - Follow the manufacturer's directions for the chemical you are using. - Use one boil out puck for a 40-pound vat.
4. Start the boil out process - Set the fryer temperature to 220°F (104°C). - Allow the solution to boil for 15 to 20 minutes. - Monitor the fryer to confirm it reaches a rolling boil.
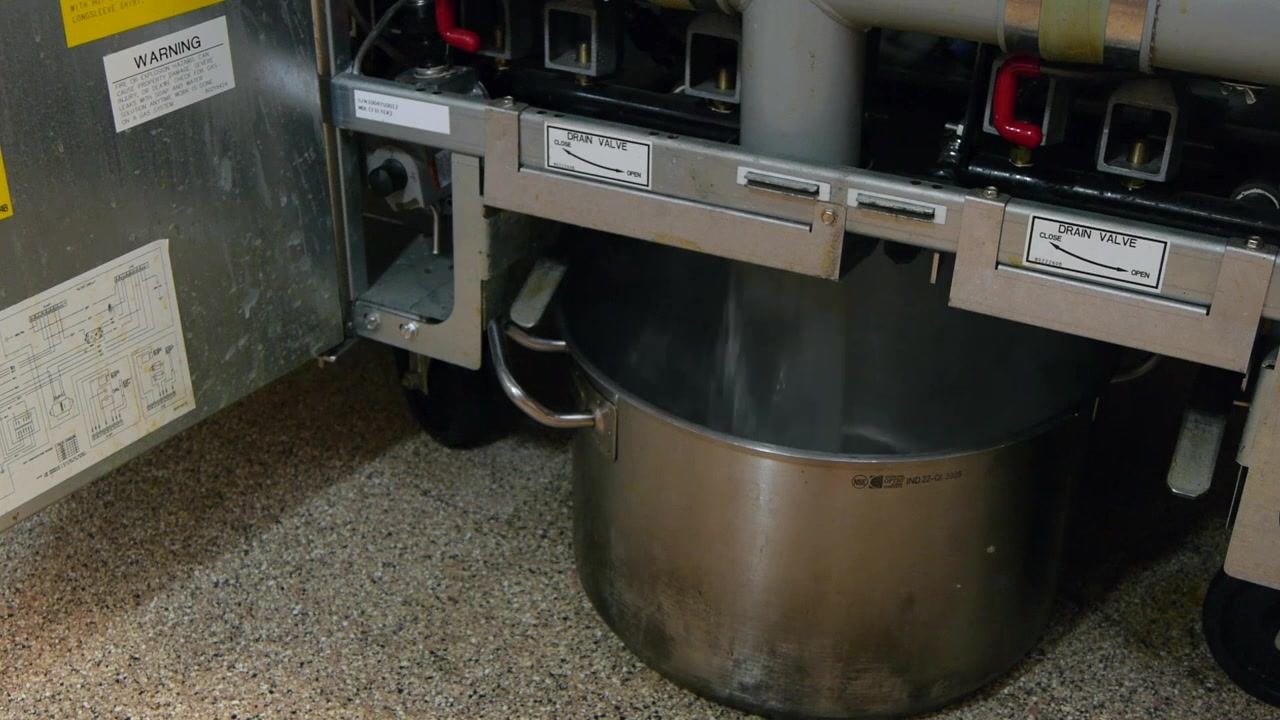
5. Scrub the basin - After the solution has boiled for 15–20 minutes, use the hot water to loosen grease. - Scrub the inside of the fryer basin thoroughly to remove any remaining residue.
6. Drain and rinse - Open the drain valve and completely drain the water and cleaning solution into a suitable container.
- Keep the drain valve open and rinse the basin with clean water to remove leftover chemical or debris.
- Close the drain valve and fill the basin again with clean water for a final rinse.
- Drain the rinse water completely.
7. Inspect the basin after rinsing - Inspect the fryer basin to confirm it is clean and free of residue. - Wipe down any remaining moisture in preparation for reassembly.
8. Thoroughly wipe down the fryer basin - Ensure all chemical residue is removed from the basin before adding new oil. - Keep protective gear on, as the basin will still be hot. - Use a clean, dry rag to wipe down all interior surfaces, including the heating flumes and hard-to-reach areas. - Use a poker or similar tool to push the rag between the flumes to clean tight spaces if needed.
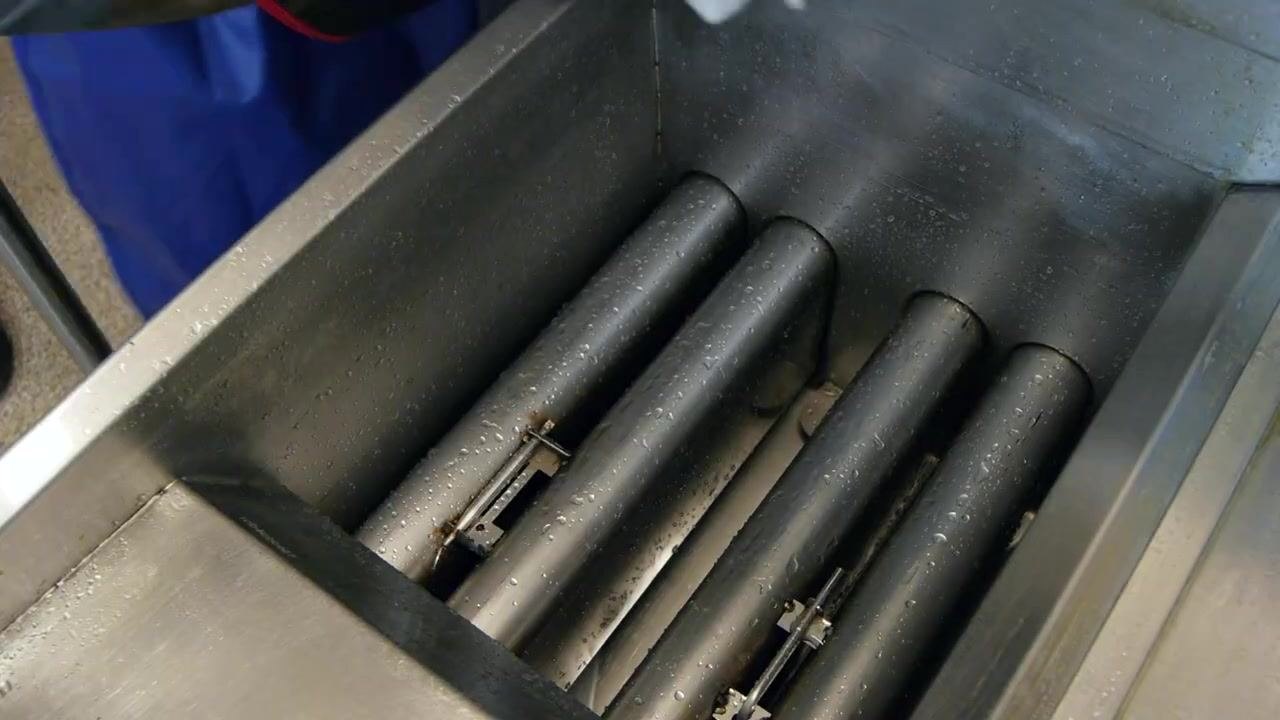
9. Dry the basin completely - Allow the fryer basin to air dry or use a clean, dry towel to remove remaining moisture. - Confirm the basin is completely dry before refilling with oil.
10. Refill the fryer with oil - Once the basin is clean and dry, refill it with either recycled oil or brand new oil, depending on the oil's condition and remaining life.
11. Final steps - Double-check that all cleaning tools and rags are removed from the fryer basin before adding oil. - Reassemble any fryer components that were removed during cleaning. - Dispose of used cleaning materials and chemical residue according to local regulations.
Inspection
- Visually inspect the fryer basin after wipe-down to confirm that all chemical residue and moisture have been removed.
- The basin should appear significantly cleaner than it did before the boil-out process began.
- Confirm the basin is completely dry before oil is added.
- Note: this procedure does not specify a formal supervisor sign-off checklist or a defined response for failed inspections; assign a supervisor check and a re-clean requirement per your facility's standard practice if the basin does not meet the above criteria.
Frequency
The source material does not specify a fixed schedule for how often to boil out a deep fryer. Establish a boil-out frequency (such as daily, weekly, or as needed based on oil condition) according to your fryer manufacturer's recommendations and your facility's operating volume.
Note: Always follow the specific instructions provided by the manufacturer of your fryer and cleaning chemicals for best results and safety. Proper cleaning and maintenance will extend the life of your fryer and support food safety.
What's next
For further questions or assistance with this procedure, contact your equipment supplier's sales or support team. Additional product information related to fryer cleaning supplies can be found at www.etundra.com.
Generation details: cost, quality tiers, downloads
Docsie billed 2,000 credits ($1.40) to analyze this 4-minute video at standard quality. The rewrite, template fill and Word/PDF exports were included. The same video at each quality tier:
| Quality | Frames sampled | Credits | Approx. cost |
|---|---|---|---|
| Draft | every 16-30 s | 1,000 | $0.70 |
| Standard (this guide) | every 8-15 s | 2,000 | $1.40 |
| Detailed | every 4-7 s | 4,000 | $2.80 |
| Ultra | every 1-3 s | 8,000 | $5.60 |
Credits priced at $0.70 per 1,000; plans include a monthly allowance. Enterprise customers on on-premise or bring-your-own-model deployments run this on their own inference and pay no per-video credits.
Generated by Docsie Video-to-Docs on 2026-09-28 from a 3-minute video. It was generated straight into Docsie's Facility Cleaning SOP template, so every section of that template is filled from the video. Screenshots are frames from the source video and belong to their creator, Tundra Restaurant Supply, whose original is embedded above. If you own this video and want the guide removed or credited differently, contact us and we will act within one business day.