
How to Calibrate a Thermometer
This standard operating procedure describes how to calibrate a dial probe thermometer using the ice water method. Proper calibration ensures the thermometer provides accurate temperature readings, which is essential for food safety and quality control in a commercial kitchen setting.
Video: How to Calibrate Dial Probe Thermometers | eTundra by Tundra Restaurant Supply (2014). All credit for the demonstration goes to the creator; watch the original on YouTube. The written guide below was generated from this video by Docsie. Creator? Request a change or removal.
Purpose
This standard operating procedure describes how to calibrate a dial probe thermometer using the ice water method. Proper calibration ensures the thermometer provides accurate temperature readings, which is essential for food safety and quality control in a commercial kitchen setting.
Scope
This procedure applies to any staff member responsible for verifying and adjusting the accuracy of dial probe thermometers before use in food handling, storage, or preparation activities.
Required Equipment
- Dial probe thermometer with protective sheath
- A glass or container
- Ice cubes
- Cold water
Procedure
Step 1: Prepare the ice water bath
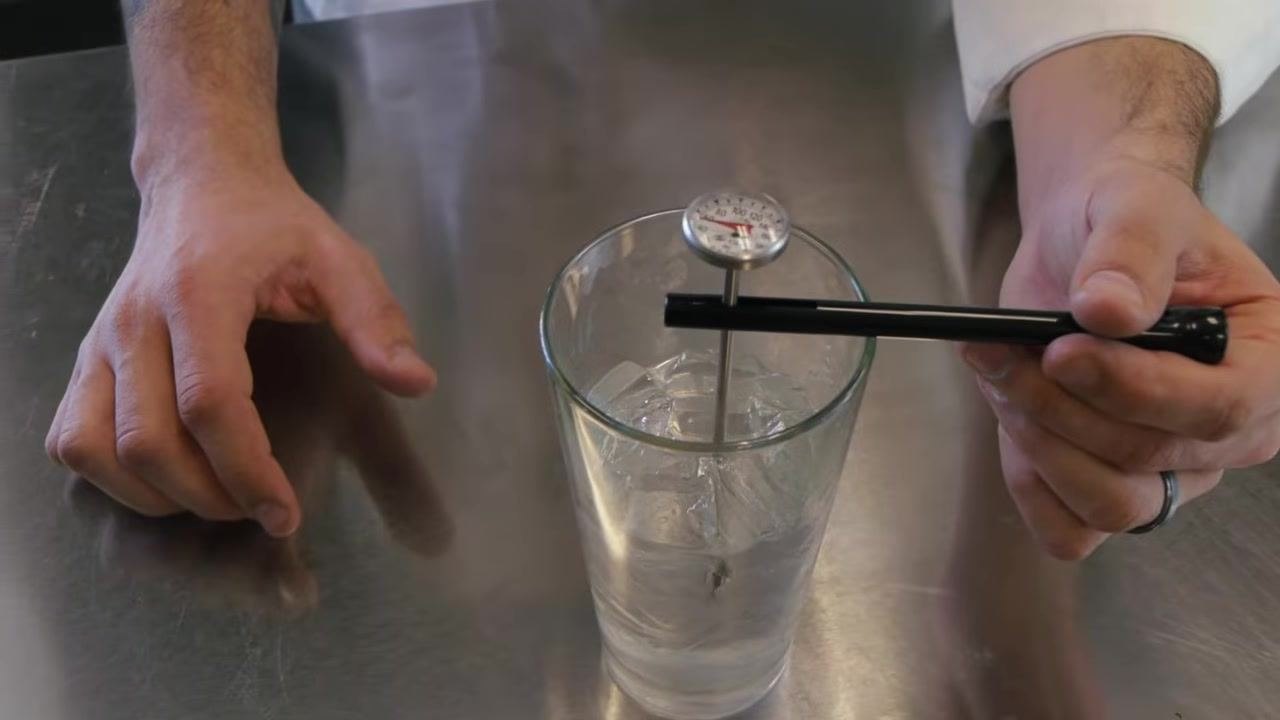
Fill a glass with ice cubes. Pour cold water into the glass, allowing the water to fill the gaps between the ice cubes. Ensure the ice is not floating — the glass should be packed with ice with just enough water to fill the cracks.
Step 2: Remove the thermometer from its sheath
Take the dial probe thermometer out of its protective sheath.
Note: The sheath may include a holding hole for convenience during later steps.
Step 3: Insert the thermometer into the ice water
Place the thermometer probe into the center of the glass, making sure it does not touch the sides or bottom of the container. Lower the probe near the bottom, then raise it slightly so it is suspended in the middle of the ice water. If available, use the sheath's holding hole to hang the thermometer on the rim of the glass.
Step 4: Read the initial temperature
Wait for the thermometer needle to stabilize, then observe the temperature reading. In the example shown, the thermometer reads 40°F.
Reference point: Properly prepared ice water should read 32°F.
Step 5: Identify the calibration nut
Remove the thermometer from the ice water and locate the small hex nut at the bottom of the thermometer dial.
Note: The top of the thermometer sheath is designed to fit this nut and acts as a wrench for adjustment.
Step 6: Adjust the thermometer
Insert the thermometer into the sheath so the sheath can be used as a wrench. Hold the thermometer securely and use the sheath to turn the calibration nut. Adjust the needle downward by approximately 8 degrees (for example, from 40°F to 32°F).
Step 7: Check the calibration
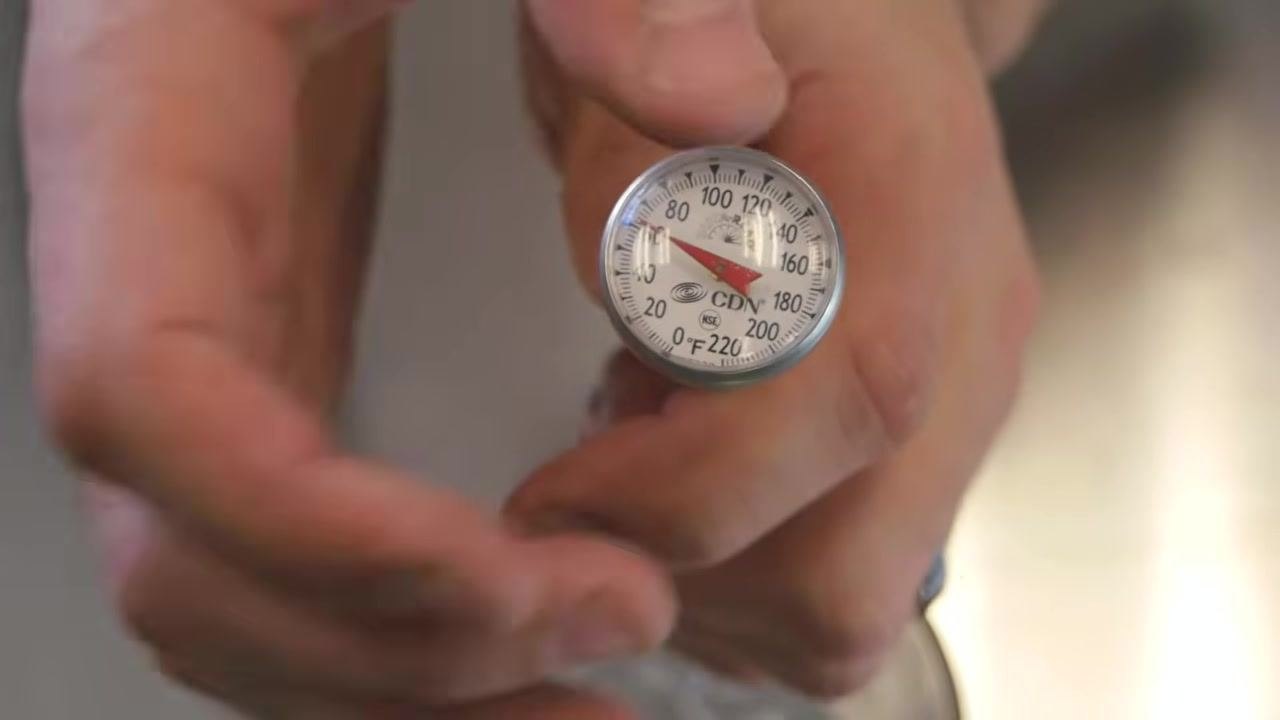
Remove the thermometer from the sheath and reinsert it into the ice water. Wait for the needle to stabilize. The needle should now point to approximately 32°F (one tick above the 30°F mark).
Step 8: Ensure the adjustment is secure
Confirm that the calibration nut is tight after adjustment. The thermometer should now be properly calibrated for accurate readings.
Verification
Once the calibration nut is secure and the needle reads approximately 32°F in the ice water bath, the dial probe thermometer is properly calibrated and ready for accurate use in food safety and quality control tasks.
Additional Resources
For more information on the products shown in this procedure, visit www.etundra.com. This site provides further details, purchasing options, and support for restaurant supply products.
Legal Notice
Tundra Restaurant Supply makes no representations or warranties about the accuracy, reliability, completeness, currentness, or timeliness of the content, services, text, videos, graphics, links, or communications provided in or through the use of this material. No representations are made as to whether the information is lawful in your jurisdiction or complies with general industry construction standards. For more information, review the privacy policy at bit.ly/tundra-privacy-policy.
Generation details: cost, quality tiers
Docsie billed 1,500 credits ($1.05) to analyze this 3-minute video at standard quality. The rewrite, template fill and Word/PDF exports were included. The same video at each quality tier:
| Quality | Frames sampled | Credits | Approx. cost |
|---|---|---|---|
| Draft | every 16-30 s | 750 | $0.52 |
| Standard (this guide) | every 8-15 s | 1,500 | $1.05 |
| Detailed | every 4-7 s | 3,000 | $2.10 |
| Ultra | every 1-3 s | 6,000 | $4.20 |
Credits priced at $0.70 per 1,000; plans include a monthly allowance. Enterprise customers on on-premise or bring-your-own-model deployments run this on their own inference and pay no per-video credits.
Generated by Docsie Video-to-Docs on 2026-09-08 from a 2-minute video. Screenshots are frames from the source video and belong to their creator, Tundra Restaurant Supply, whose original is embedded above. If you own this video and want the guide removed or credited differently, contact us and we will act within one business day.