
How to Request Time Off in ADP
This guide shows you how to request time off in ADP using the mobile application. You'll learn how to check your time off balances, submit a new request, review your request history, and cancel a pending request if your plans change.
Video: ADP Mobile App - How To Request Time Off by Payroll Department (2023). All credit for the demonstration goes to the creator; watch the original on YouTube. The written guide below was generated from this video by Docsie. Creator? Request a change or removal.
This guide shows you how to request time off in ADP using the mobile application. You'll learn how to check your time off balances, submit a new request, review your request history, and cancel a pending request if your plans change.
Prerequisites
- The ADP mobile app installed on your device
- An active ADP account with access to the "Time Off" feature
Steps to request time off in ADP
Access the ADP home screen
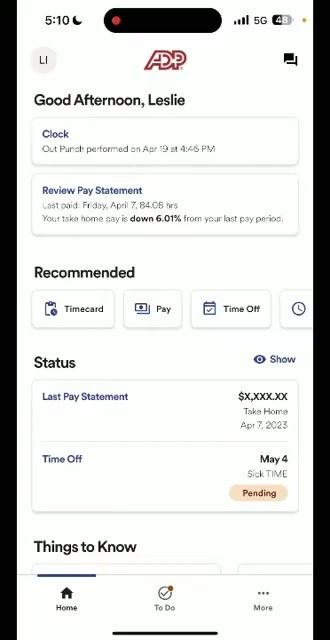
Open the ADP mobile app to view your dashboard. The home screen displays your name, clock status, pay statement, and recommended actions such as "Timecard," "Pay," and "Time Off." Locate the Time Off button in the Recommended section.
View your time off balances
Tap Time Off to review your current balances as of the displayed date (for example, April 19, 2023). You'll see your available hours for Sick Time (for example, 20 hours) and Vacation (for example, 17.83 hours). Note that pending requests are not included in these balances. Tap Request time off to begin a new request.
Start a new time off request
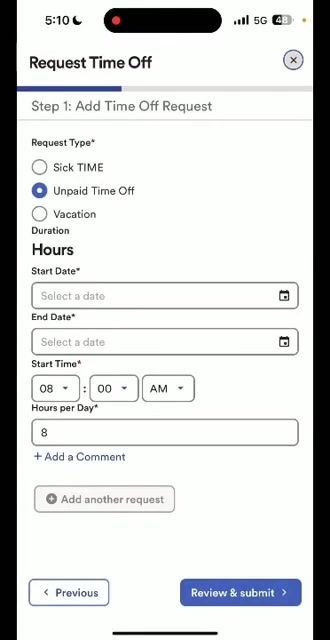
On the Request Time Off screen, under Step 1: Add Time Off Request, select the type of request:
- Sick Time
- Unpaid Time Off
- Vacation
For this example, select Vacation.
Enter the time off details
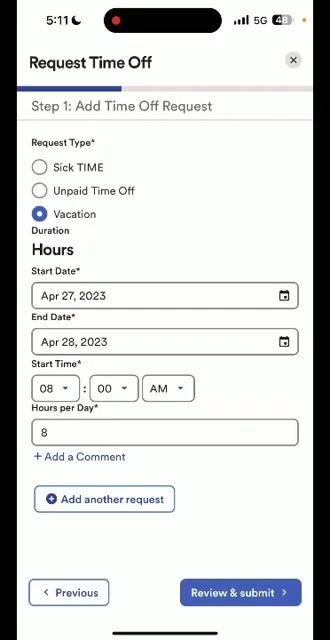
Set the Start Date by selecting the calendar icon and choosing your desired date (for example, April 27, 2023). The End Date automatically matches the start date; if you need multiple days, update the end date (for example, April 28, 2023). Set the Start Time (the default is 08:00 AM; adjust if needed) and enter the Hours per Day (for example, 8).
Add a comment (optional)
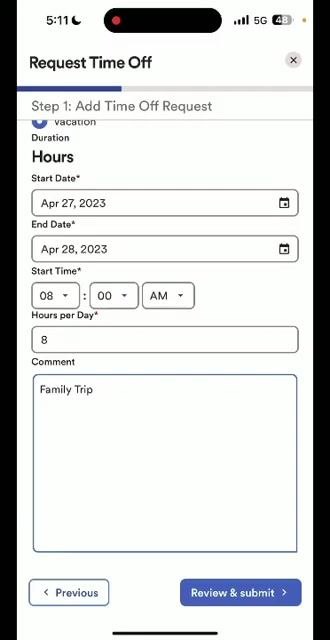
Tap + Add a Comment to provide additional information for your supervisor, such as "Family Trip."
Add another request (optional)
If you need to submit multiple requests at once, tap Add another request and fill out the additional request details.
Review and submit your request
Once all details are entered, tap Review & submit to proceed.
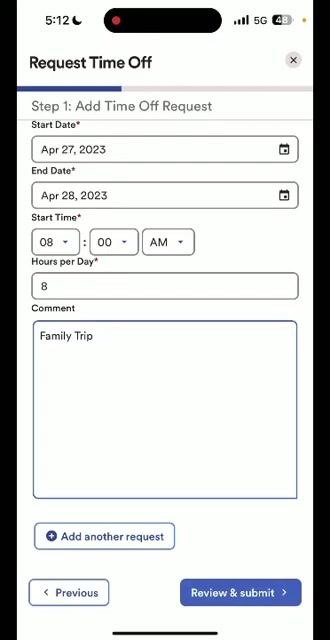
Review your time off request
Carefully review all entered information on the Request Time Off form:
- Start Date: April 27, 2023
- End Date: April 28, 2023
- Start Time: 08:00 AM
- Hours per Day: 8
- Comment: Family Trip
Confirm all details are correct, then tap Review & submit at the bottom right.
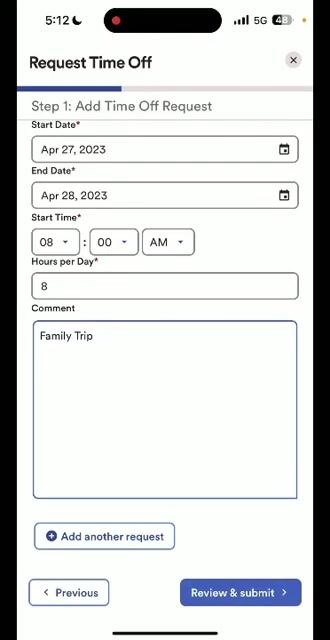
Submit your time off request
On the Step 2: Review & submit screen, verify your request summary: Vacation (Hours), April 27, 2023 – April 28, 2023, 8 hours/day, starting at 8:00 AM, with the comment "Family Trip." If changes are needed, tap Edit or Delete. To add another request, tap Add another request. When ready, tap Submit request.
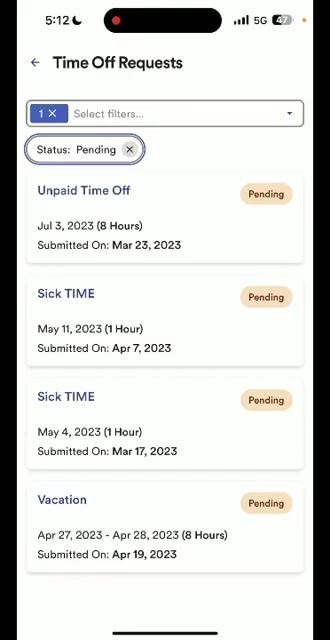
Return to the Time Off screen
After submitting, you're returned to the Time Off screen, where your updated balances are displayed (for example, Sick Time: 20 Hours, Vacation: 17.83 Hours). Tap View time off requests to see your request history.
View pending time off requests
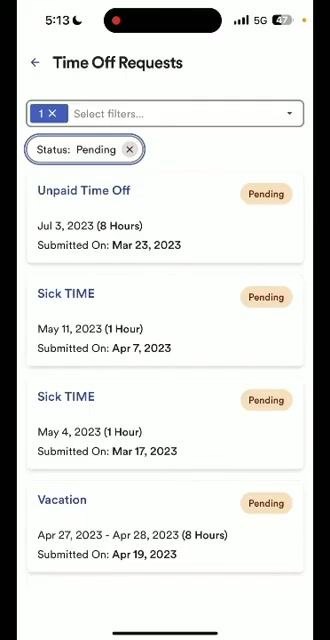
On the Time Off Requests screen, view all pending requests. Each request displays its type (for example, Unpaid Time Off, Sick Time, Vacation), the dates and hours requested, the submission date, and the status (for example, Pending). Your recently submitted vacation request appears at the bottom of the list.
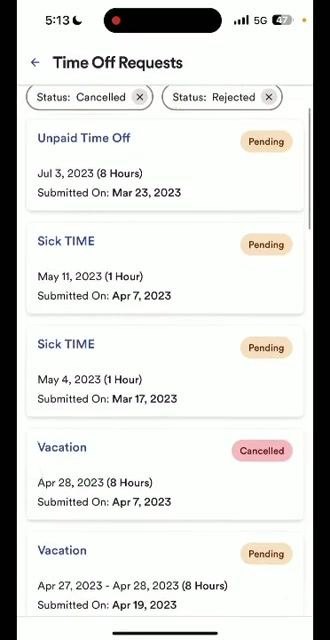
Filter and review request history
Use the filter dropdown at the top to view requests by status:
- Pending
- Approved
- Cancelled
- Rejected
Select the desired status to filter your request history and review the status of all your requests.
Return to the home screen
Tap the back arrow or use the navigation bar to return to the home screen. Your most recent time off request and its status (for example, Pending) appear in the Status section.
How to cancel a time off request in ADP
Once a time off request is submitted, it cannot be edited. If you need to make a change, you must cancel the request and submit a new one.
Open the request you want to cancel
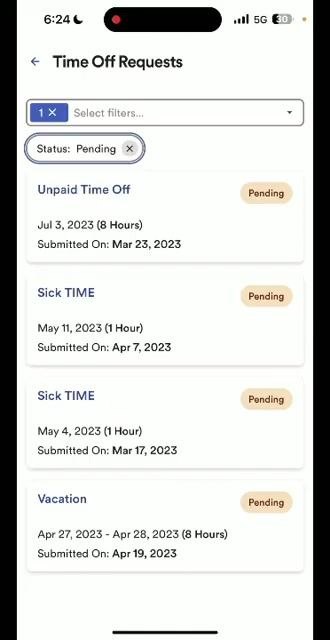
Go to the Time Off section and tap View time off requests. On the Time Off Requests screen, locate the request you wish to cancel. Each request displays its type (for example, Unpaid Time Off, Sick Time, Vacation), the dates and hours requested, the submission date, and the status (for example, Pending). Tap the specific request you want to cancel — for example, the Vacation request for April 27, 2023 – April 28, 2023.
Initiate the cancellation
On the request details screen, review the dates, hours, status, and any comments you previously added (for example, "Family Trip"). Tap Cancel time off. A confirmation dialog titled "Cancel time off" appears at the bottom of the screen. Optionally, tap Add a Comment to provide a reason for canceling. Tap Yes, cancel to proceed, or tap No, go back if you change your mind.
Verify the cancellation
After confirming, you're returned to the Time Off Requests screen. The canceled request no longer appears under the Pending status filter, and only your active pending requests are displayed.
What's next
If you need to submit a corrected request, return to the Time Off section and follow the steps above to create a new request with the correct information. The previously canceled request will not appear under your Pending requests. Always double-check your entries before submitting, since edits aren't possible once a request is submitted.
Generation details: cost, quality tiers
Docsie billed 2,000 credits ($1.40) to analyze this 4-minute video at standard quality. The rewrite, template fill and Word/PDF exports were included. The same video at each quality tier:
| Quality | Frames sampled | Credits | Approx. cost |
|---|---|---|---|
| Draft | every 16-30 s | 1,000 | $0.70 |
| Standard (this guide) | every 8-15 s | 2,000 | $1.40 |
| Detailed | every 4-7 s | 4,000 | $2.80 |
| Ultra | every 1-3 s | 8,000 | $5.60 |
Credits priced at $0.70 per 1,000; plans include a monthly allowance. Enterprise customers on on-premise or bring-your-own-model deployments run this on their own inference and pay no per-video credits.
Generated by Docsie Video-to-Docs on 2026-10-02 from a 3-minute video. Screenshots are frames from the source video and belong to their creator, Payroll Department, whose original is embedded above. If you own this video and want the guide removed or credited differently, contact us and we will act within one business day.