
How to Register for an Account in ADP
This guide walks you through how to register for an account in ADP Workforce Now, from entering your registration code to signing in for the first time. Follow each step in order to create your login credentials and access your employee dashboard.
Video: ADP Employee Registration Tutorial by Northville Tech (2023). All credit for the demonstration goes to the creator; watch the original on YouTube. The written guide below was generated from this video by Docsie. Creator? Request a change or removal.
This guide walks you through how to register for an account in ADP Workforce Now, from entering your registration code to signing in for the first time. Follow each step in order to create your login credentials and access your employee dashboard.
Prerequisites
Before you begin, make sure you have the following:
- A registration code obtained from your company's payroll or HR department
- Your First Name and Last Name as they appear in company records
- One identity verification item: the last 4 digits of your SSN, EIN, or ITIN; your Associate ID; or your birth month and day
- A valid email address and phone number for account security
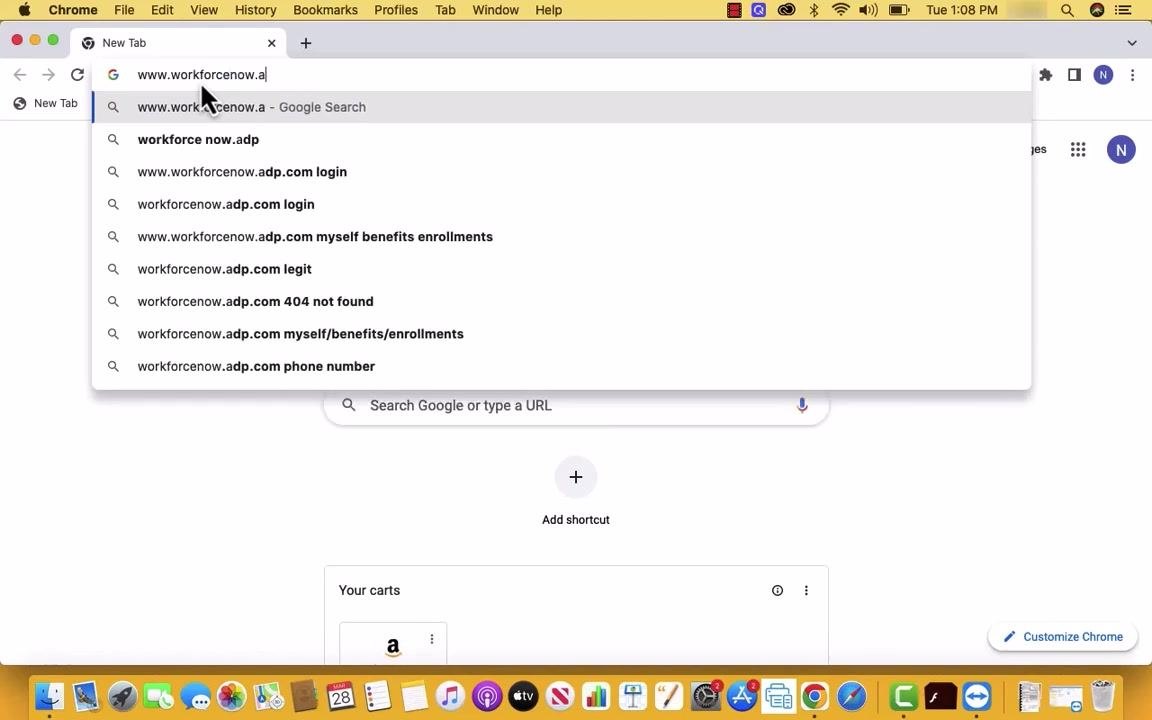
Go to the ADP Workforce Now website
Open your web browser and navigate to www.workforcenow.adp.com. Alternatively, you can use the registration link provided by your organization, if available.
The site will direct you to the Create Your Account page.
Select the registration option
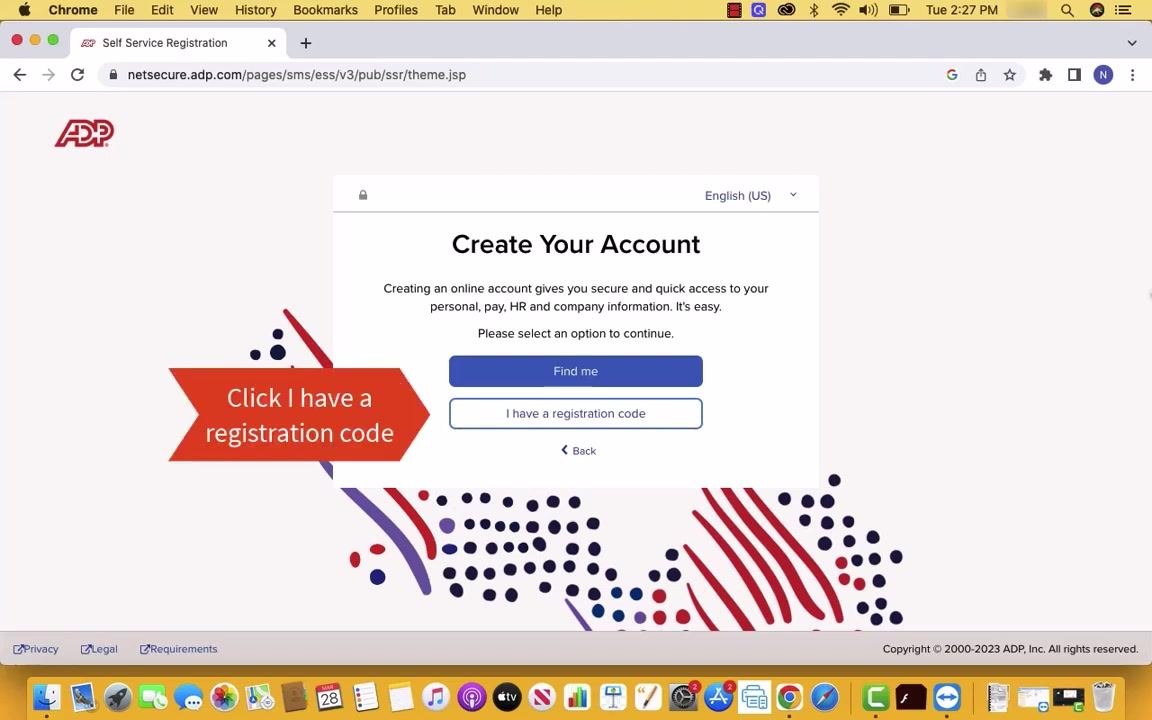
On the Create Your Account page, you will see two options: Find me and I have a registration code. Select I have a registration code to continue, since you will need the code provided by your payroll or HR department.
Enter your registration code and personal details
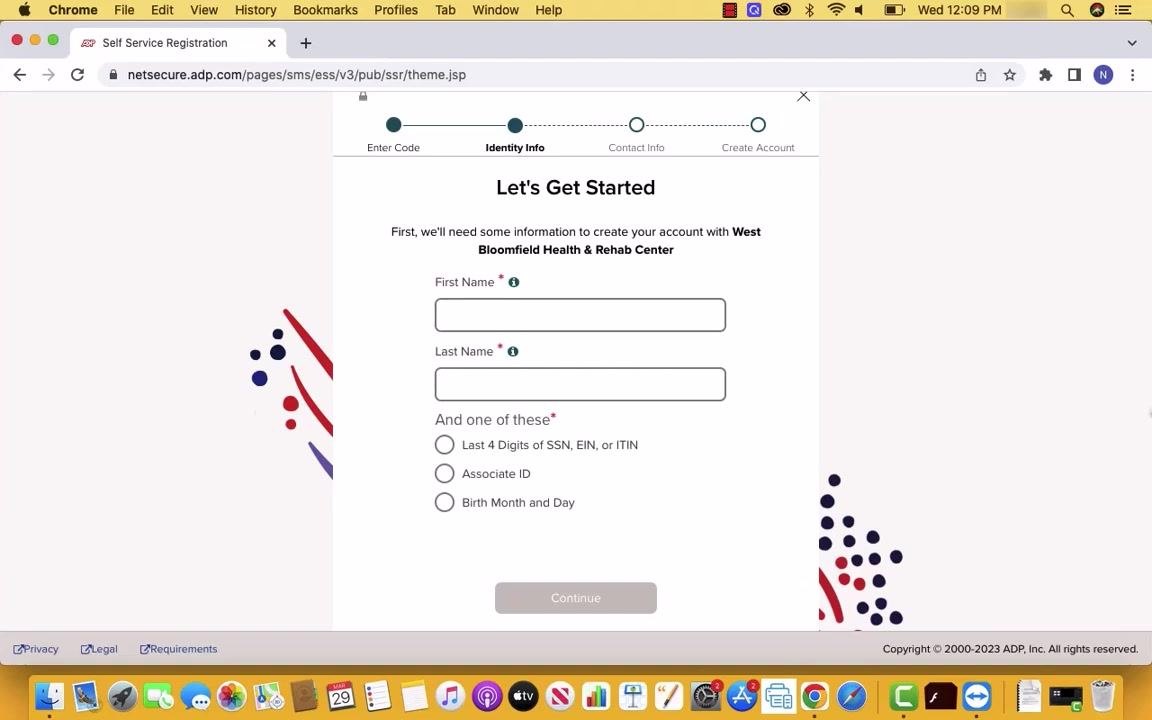
Click I have a registration code, then enter the code in the field provided. Next, enter your First Name and Last Name in the respective fields.
Verify your identity
Provide one of the following to verify your identity:
- Last 4 digits of your SSN, EIN, or ITIN
- Associate ID
- Birth Month and Day
Select the appropriate option, enter the required information, and click Continue.
Add your contact information
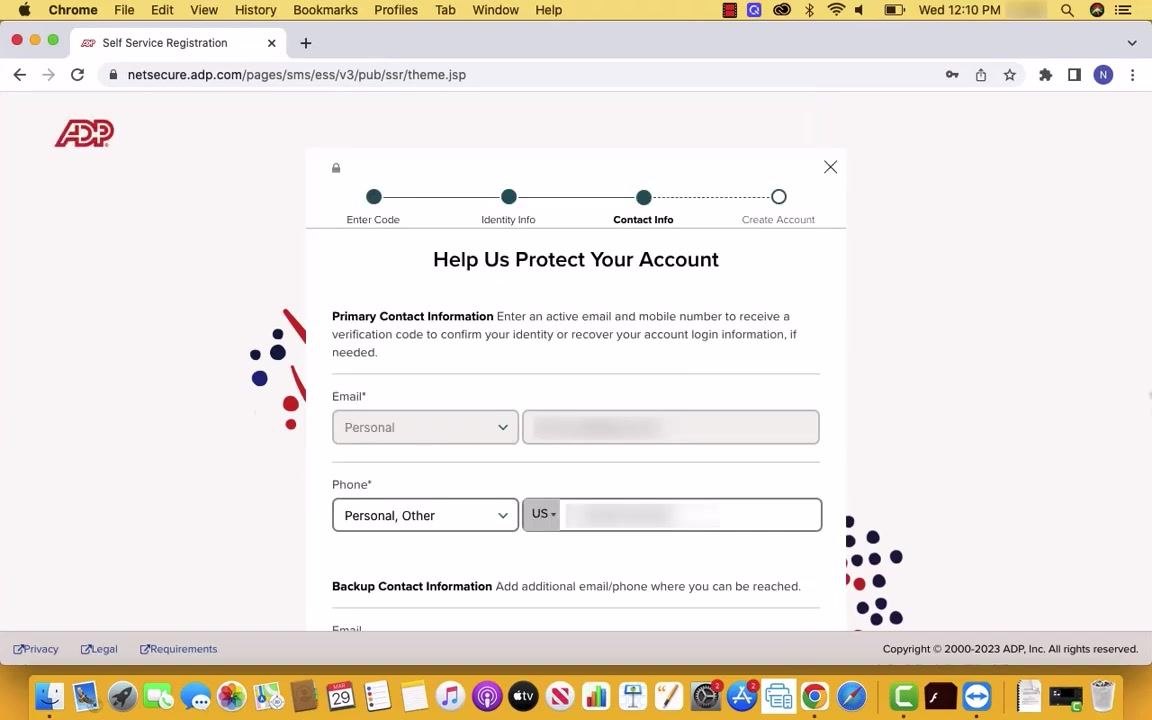
On the Help Us Protect Your Account page, enter your primary contact details:
- Your email address, with the type selected (for example, Personal)
- Your phone number, with the type and country code selected (for example, Personal or Other)
You can also add backup contact information, such as an additional email or phone number, if you wish. Click Continue when finished.
Create your login credentials
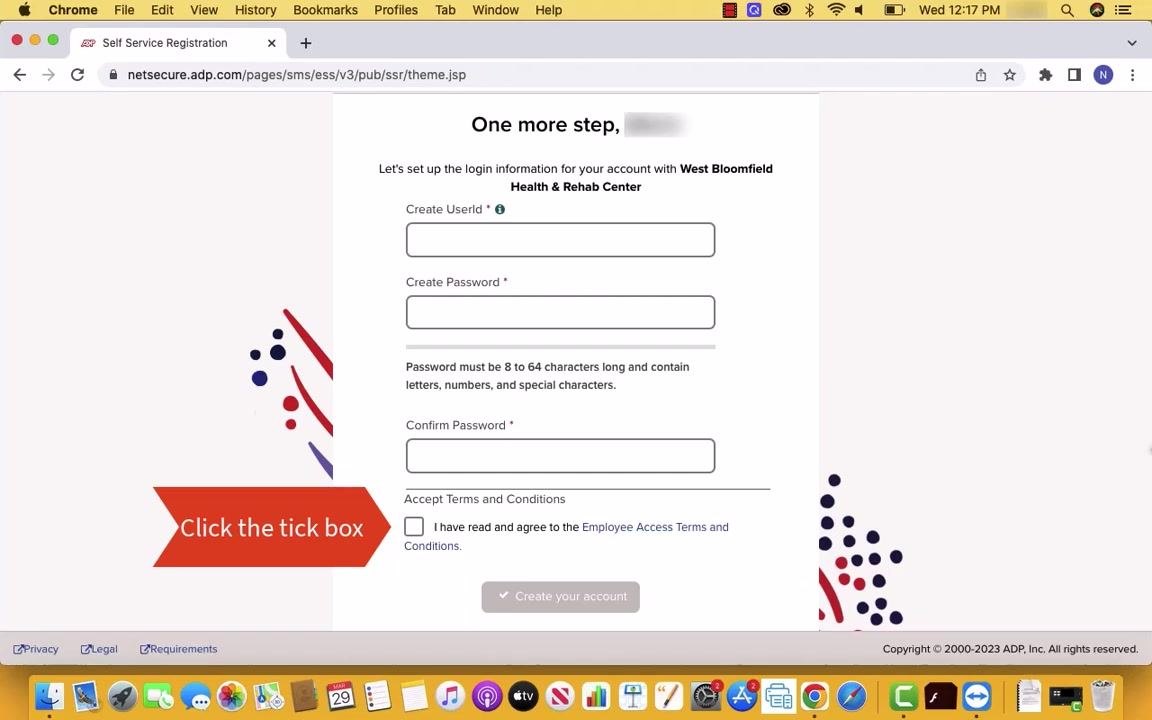
On the One more step page, set up your login information:
- Enter your desired User ID in the Create UserId field.
- Enter your desired password in the Create Password field. Your password must be 8 to 64 characters and include letters, numbers, and special characters.
- Re-enter your password in the Confirm Password field.
- Check the box to confirm you have read and agree to the Employee Access Terms and Conditions.
Submit your registration
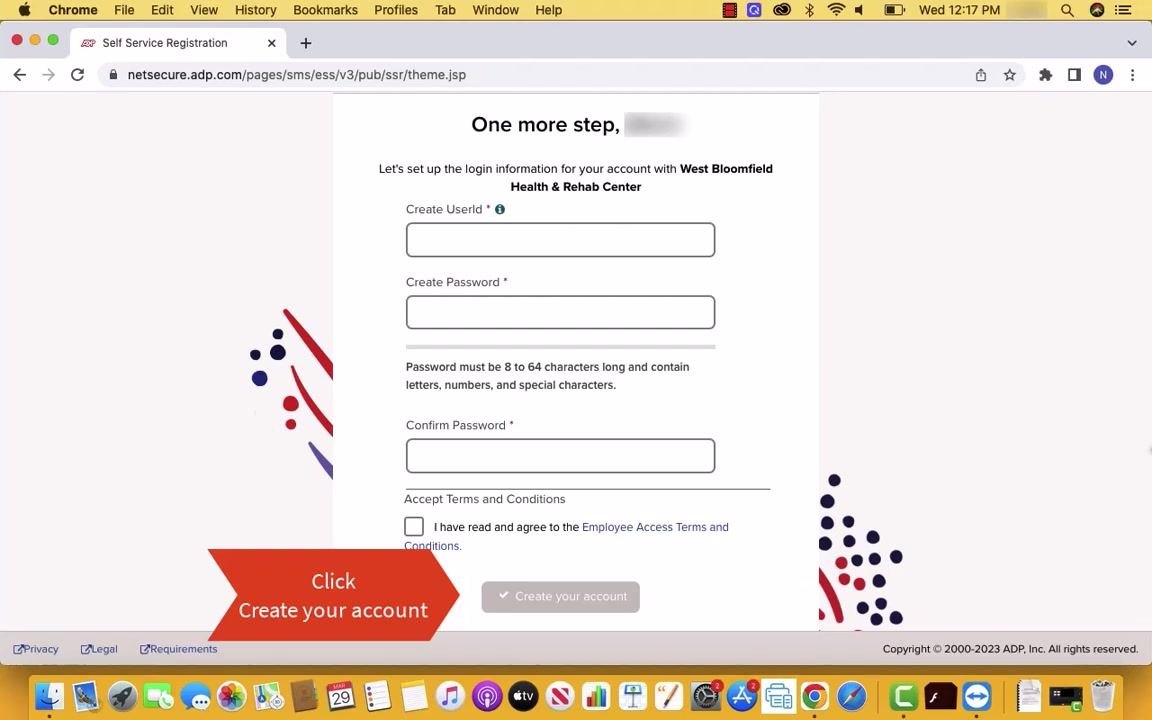
Once you have entered your User ID, password, confirmed your password, and accepted the Employee Access Terms and Conditions, click Create your account to submit your details and complete the registration process.
Confirm your account creation
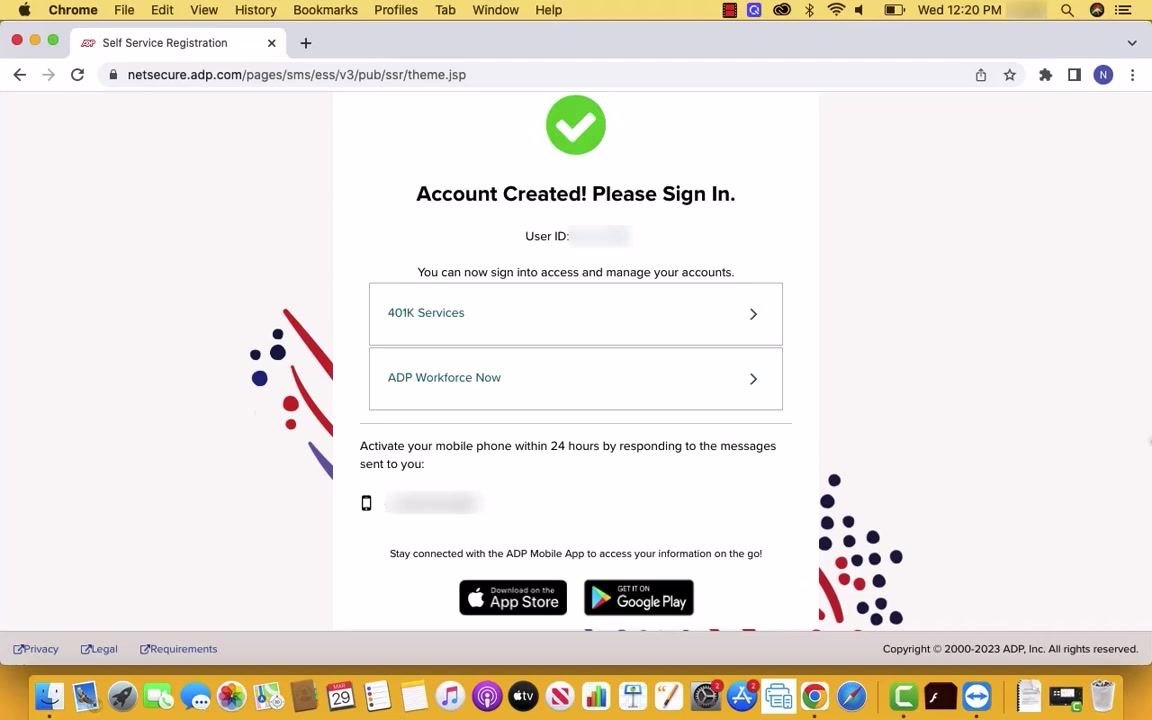
After submitting, a confirmation screen appears with the message "Account Created! Please Sign In." This screen displays:
- Your User ID
- Options to access 401K Services and ADP Workforce Now
- Instructions to activate your mobile phone within 24 hours by responding to messages sent to your registered number
- Download links for the ADP Mobile App on the App Store and Google Play
Step 9 (optional): Activate your mobile phone
Respond to the verification message sent to your registered phone number within 24 hours to complete mobile phone activation.
Step 10 (optional): Download the ADP Mobile App
Click the App Store or Google Play button on the confirmation screen to install the ADP Mobile App for on-the-go access to your account.
Sign in to your dashboard
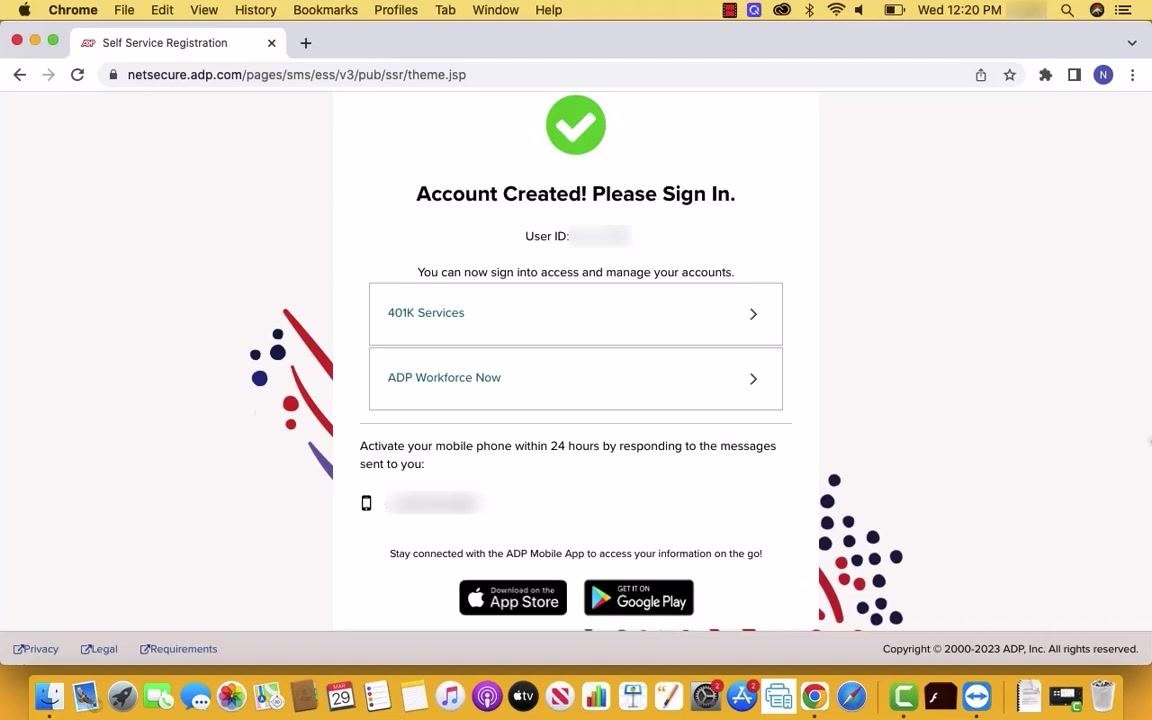
Click ADP Workforce Now on the confirmation screen to proceed to your employee dashboard and begin using your new account.
Summary
You have now successfully registered for an account in ADP Workforce Now. Your account is active, and you can sign in to manage your payroll, benefits, and other employment information.
Generation details: cost, quality tiers
Docsie billed 1,500 credits ($1.05) to analyze this 3-minute video at standard quality. The rewrite, template fill and Word/PDF exports were included. The same video at each quality tier:
| Quality | Frames sampled | Credits | Approx. cost |
|---|---|---|---|
| Draft | every 16-30 s | 750 | $0.52 |
| Standard (this guide) | every 8-15 s | 1,500 | $1.05 |
| Detailed | every 4-7 s | 3,000 | $2.10 |
| Ultra | every 1-3 s | 6,000 | $4.20 |
Credits priced at $0.70 per 1,000; plans include a monthly allowance. Enterprise customers on on-premise or bring-your-own-model deployments run this on their own inference and pay no per-video credits.
Generated by Docsie Video-to-Docs on 2026-10-02 from a 2-minute video. Screenshots are frames from the source video and belong to their creator, Northville Tech, whose original is embedded above. If you own this video and want the guide removed or credited differently, contact us and we will act within one business day.