
How to View Your Hours Worked in Workday
This guide walks you through how to view your hours worked in Workday using the HR On-Demand system. You'll learn how to log in, review your timesheet, edit clocked time, add entries such as on-call, callback, and mileage, record absences, and submit your time for approval.
Video: Using the Workday Timesheet Hourly Employee by Lauren Fagan. All credit for the demonstration goes to the creator; watch the original on YouTube. The written guide below was generated from this video by Docsie. Creator? Request a change or removal.
This guide walks you through how to view your hours worked in Workday using the HR On-Demand system. You'll learn how to log in, review your timesheet, edit clocked time, add entries such as on-call, callback, and mileage, record absences, and submit your time for approval.
Prerequisites
Before you begin, make sure you have:
- Access to a workstation with the HR On-Demand system installed.
- Valid login credentials for HR On-Demand (Workday).
- Knowledge of your position, cost center, and shift details for the week you are reviewing.
Logging in and confirming your shift
Step 1: Log in to HR On-Demand
Access the HR On-Demand system on your workstation. Confirm you are on the correct application by checking for the HR On-Demand: Powered by Workday splash screen.

Step 2: Confirm end of shift (if prompted)
If an SSM Health Time screen appears, review your current shift details, including date/time, action, activity, cost center, shift number, and position. Select the appropriate meal option (Yes, 30 minute meal break, No meal break, or Specify meal break), then click Confirm End Shift if everything is correct.
Viewing your hours worked in Workday
Step 3: Open the Time app
From your Workday home page, locate the Time app in the Applications section and click its icon to proceed.
Step 4: Select the week to review
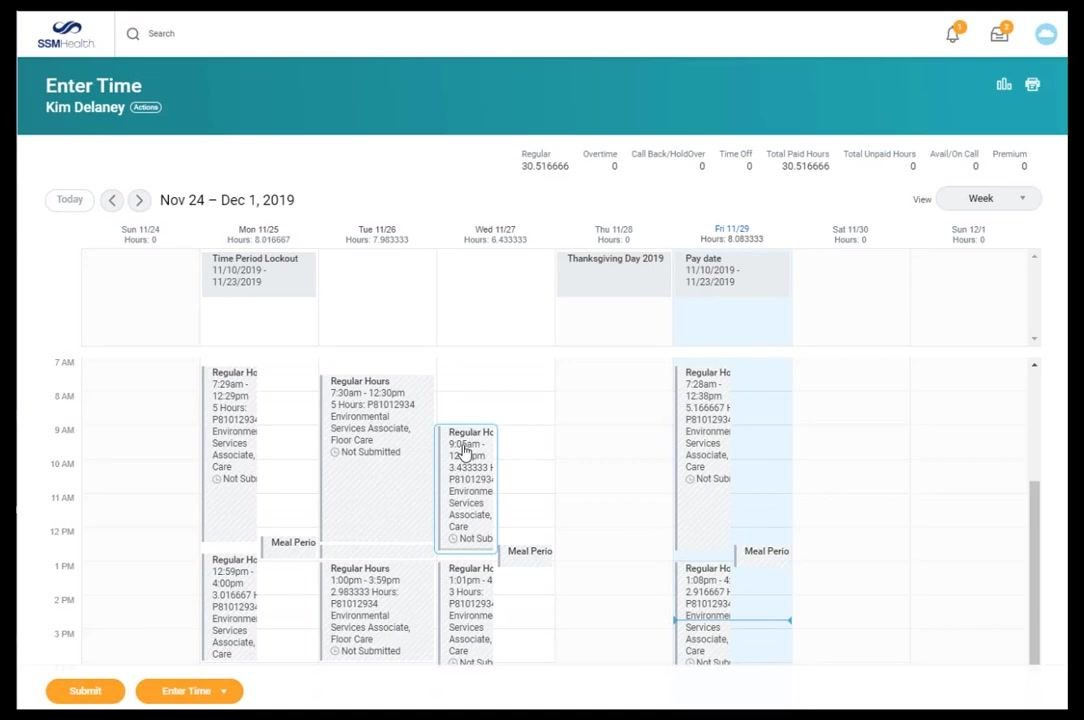
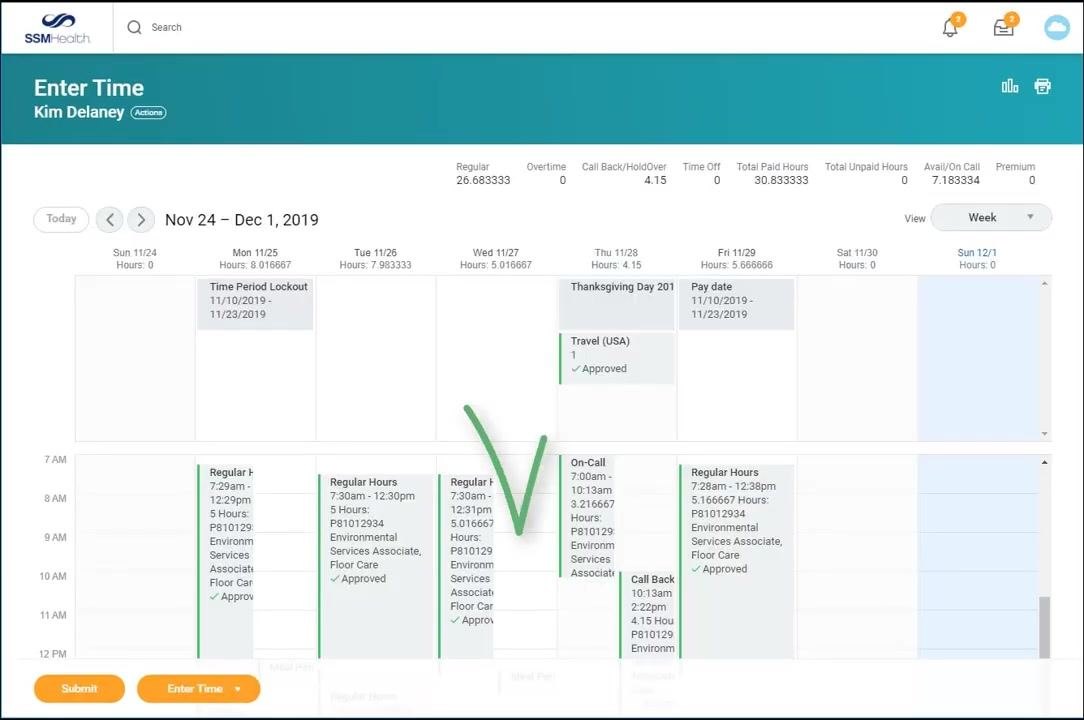
In the Enter Time section, select the week you want to view your hours worked for (for example, Nov 24 – Dec 1, 2019). Review all time entries for accuracy, including regular hours, meal periods, and any special entries.
Editing and adding time entries
Step 5: Edit a clocked time entry
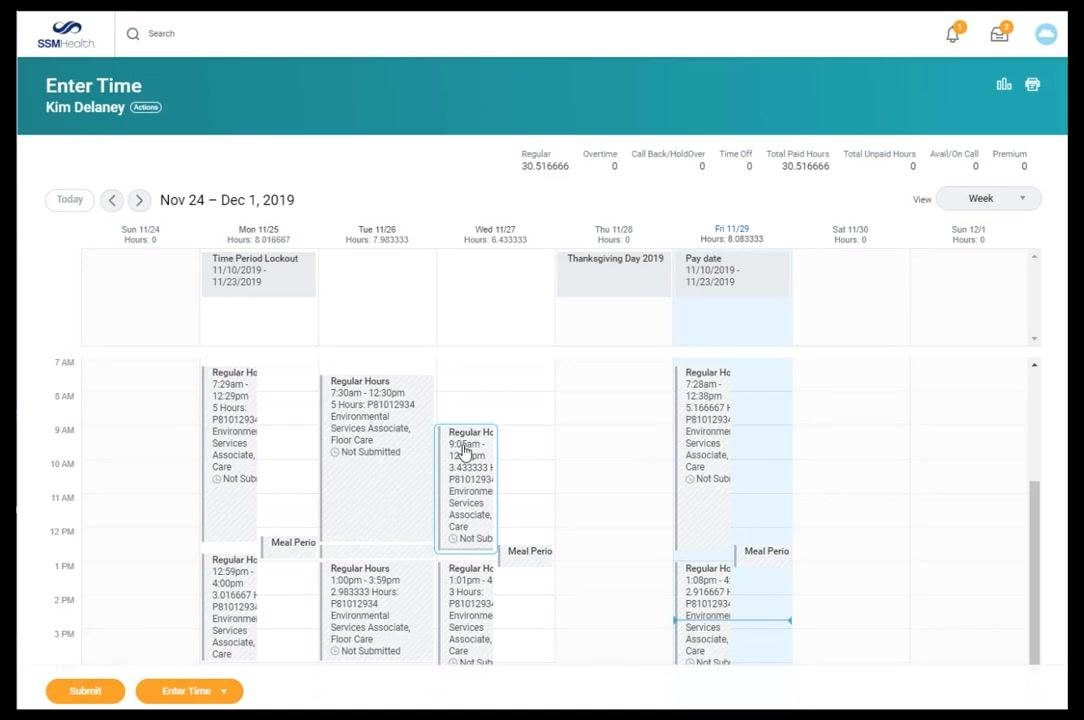
Click on the specific time block you want to change. A pop-up will appear where you can adjust clock-in/out times, change the time type, or add comments. Click OK to save your changes.
Step 6: Add new time entries
To add time such as on-call, mileage, or an unscheduled absence, click the appropriate day and time slot in the calendar view. In the pop-up, select the correct time type, enter your clock-in and clock-out times, choose a position if you hold more than one, and fill in any required details such as cost center or comments. Click OK to save the new entry.
Step 7: Submit your timesheet
Once your timesheet accurately reflects all time worked, click Submit at the bottom of the screen to send it to your manager for approval.
Tips: - Always double-check your entries for accuracy before submitting. - Use the Enter Time and Submit buttons as needed to ensure all changes are saved and submitted. - Contact your HR representative if you encounter any issues.
Charging time to a secondary position or alternate cost center
Step 8: Select a secondary position (if applicable)
In the Enter Time pop-up, click the Position dropdown and select your secondary position if you worked under a different role.
Step 9: Charge time to a different cost center
In the Cost Center field, click the search icon or type the name or number of the cost center, then select the correct one from the search results. Click OK to save your entry.
Step 10: Verify the entry was saved
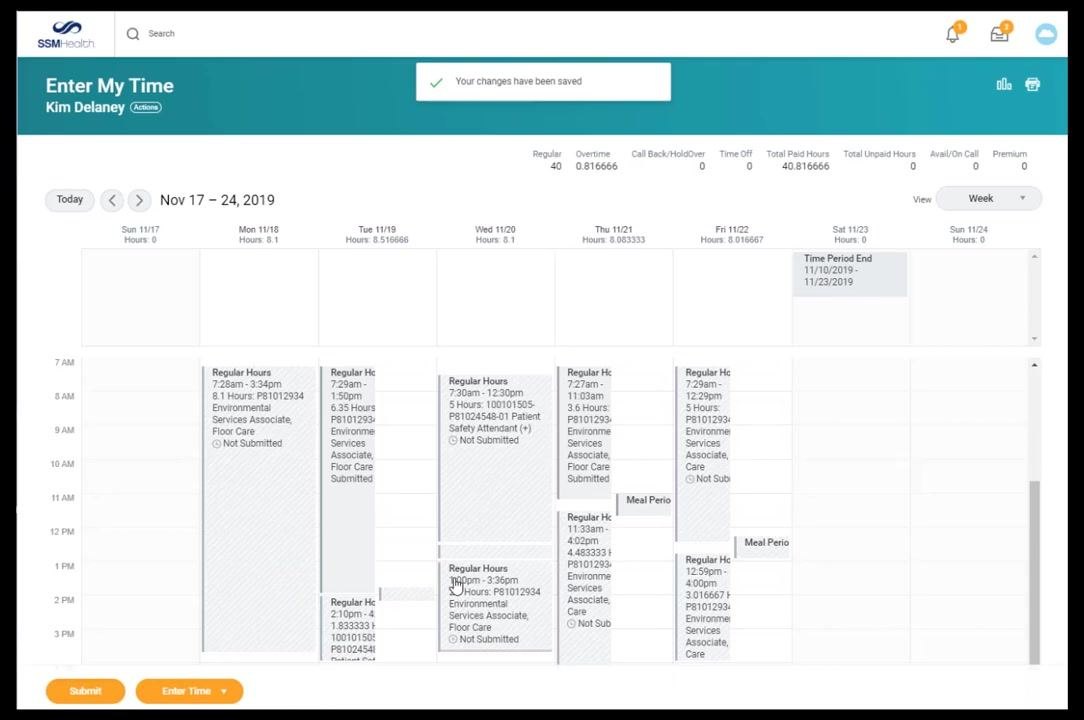
After clicking OK, confirm your time was added to your timesheet by checking for the Your changes have been saved message at the top of the screen.
Entering on-call and callback time
Step 11: Enter on-call time after your shift ends
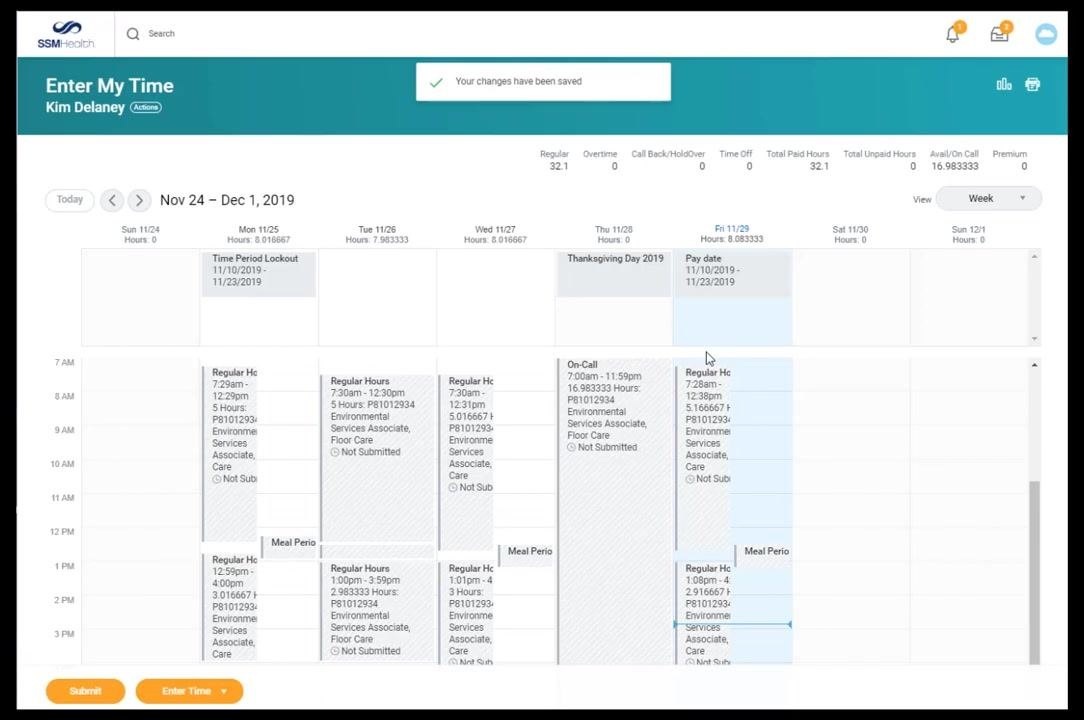
Only enter on-call time after your on-call shift has ended, since on-call and callback entries cannot overlap. If you were on-call and not called back, enter the full on-call period in one block: click the day, select the On-Call time type, enter the start and end times, and click OK.
Step 12: Split on-call shifts that cross midnight
If your on-call shift crosses midnight, split it into two entries: one from the start time to 11:59 PM on the first day, and a second from 12:00 AM to the end time on the next day. Click OK after each entry.
Step 13: Enter callback time without overlap
If you were called back during your on-call shift, make one on-call entry from the start of your shift to the exact time your callback began, a separate entry for the callback period itself, and another on-call entry from the end of callback to the end of your on-call shift. Make sure no entries overlap.
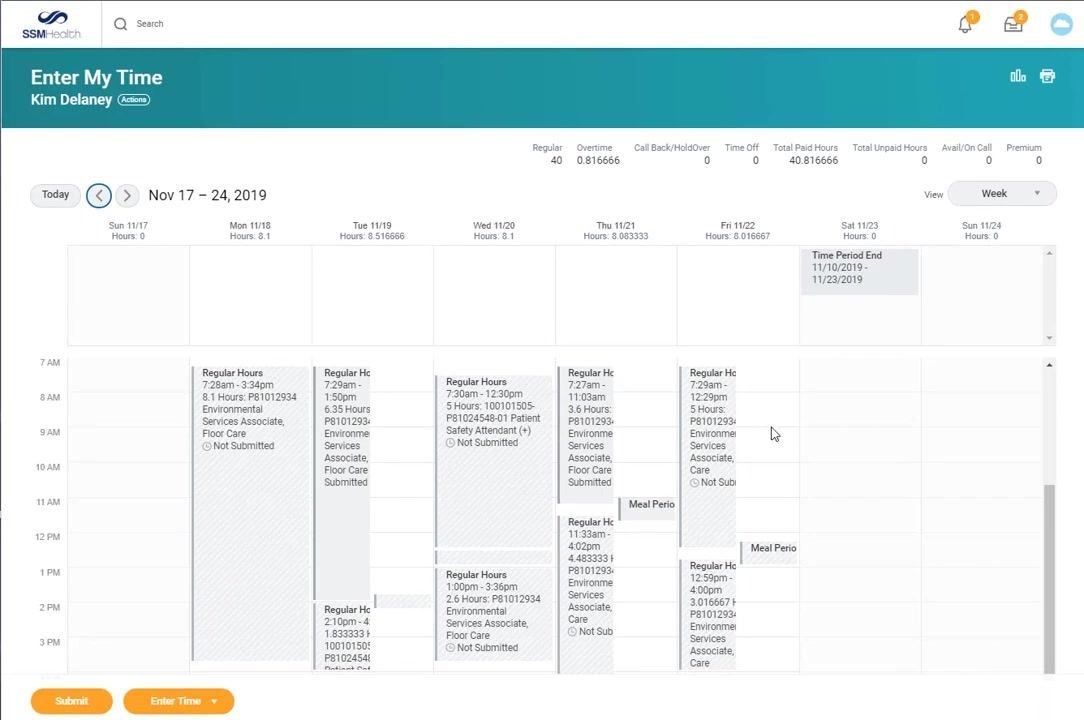
Step 14: Record mileage
Click the day when the mileage occurred, select the Mileage time type in the pop-up, enter the number of miles, and click OK to save the entry.
Entering mileage with a note
Step 15: Select the Mileage time type
Click the day when the mileage occurred in your timesheet calendar. In the Enter Time pop-up, click the Time Type field and select Mileage from the list of available codes.
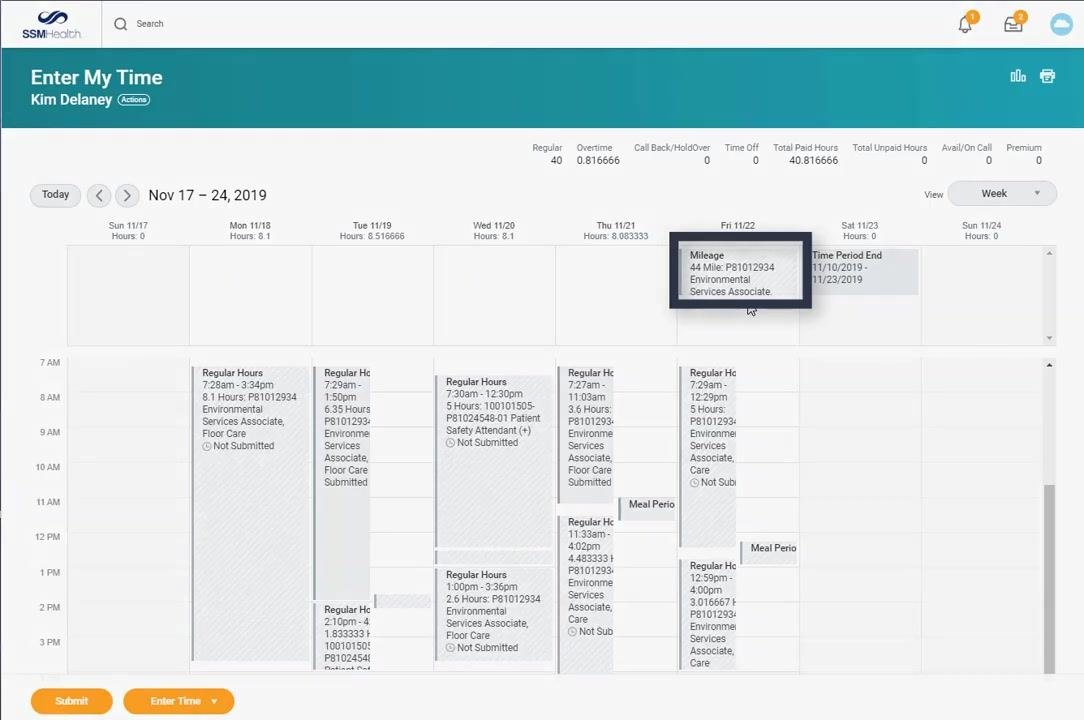
Step 16: Enter mileage details and a comment
Confirm the correct position is selected, enter the number of miles in the Mile field (for example, 44), and add a note in the Comment field describing the trip, such as "Round trip from St. Anthony Hospital to St. Anthony South for CPR training." Click OK to save.
Step 17: Verify the mileage entry
Confirm the mileage entry appears at the top of your timesheet for the selected day, showing the number of miles, position, and any comments you entered.
Entering an unscheduled absence
Step 18: Start an unscheduled absence entry
Click the day the unscheduled absence occurred in your timesheet calendar. In the pop-up, click the Time Type field and select the appropriate absence type, such as Paid Time Off, Bereavement, or Jury Duty.
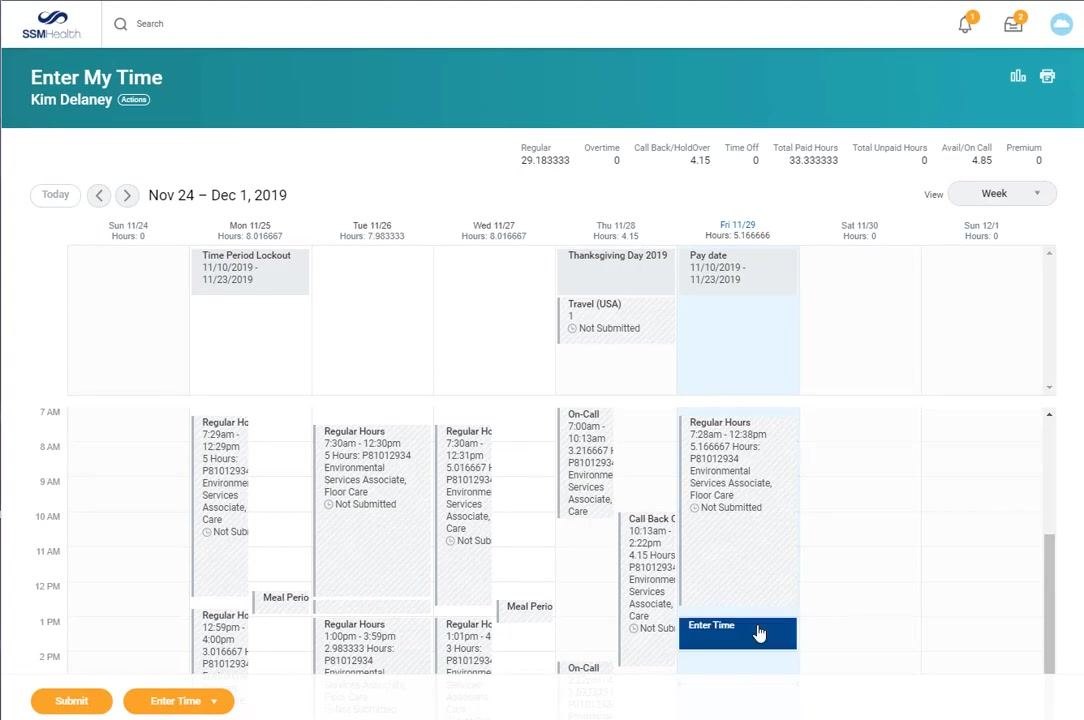
Step 19: Complete the absence details
Select the absence type from the list (for example, Paid Time Off), enter the number of hours in the Hours field (for example, 4), and click OK to save the entry.
Step 20: Verify the absence entry
Check that the absence appears at the top of your timesheet for the selected day, along with a Your changes have been saved confirmation. The entry will display the type and number of hours, such as "Paid Time Off, 4 Hours."
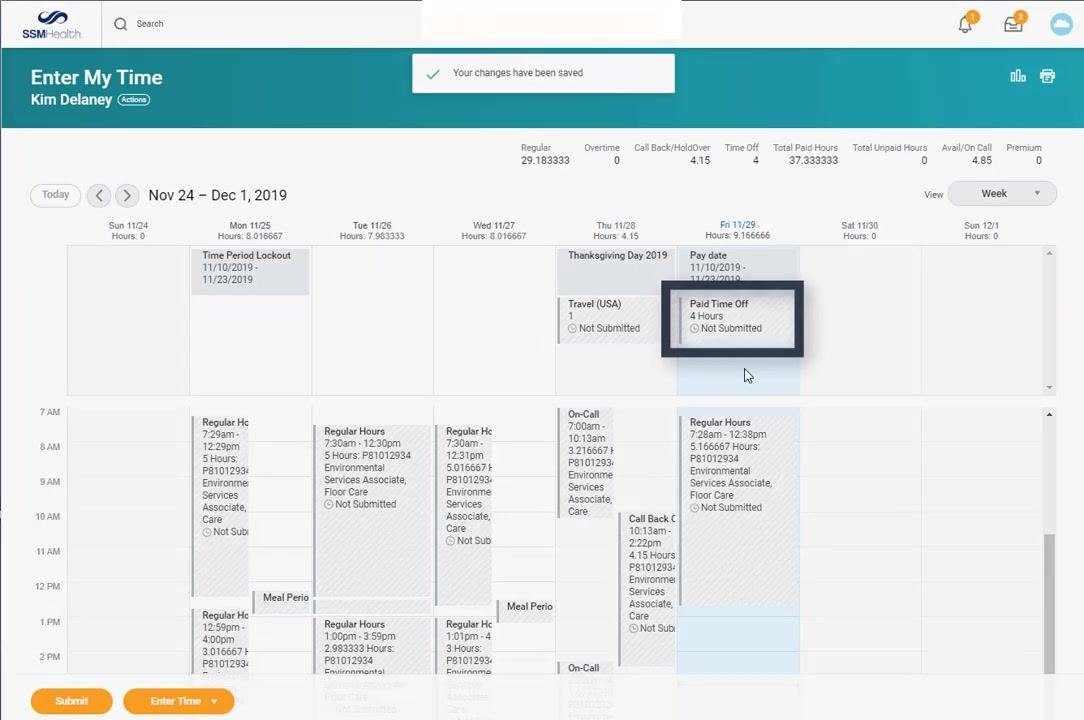
Correcting a pre-scheduled, approved absence
Step 21: Identify approved absences
Approved absences appear on your timesheet calendar with a green checkmark and the label "Approved."
Step 22: Open the Absence app
From your Workday home page, locate the Applications section and click the Absence app icon to open the absence management module.
Step 23: Correct an approved absence
In the Absence app, click Correct My Absence, select the entry you need to change, adjust the hours or dates as needed, and click Submit to save your corrections.
Step 24: Understand absence status indicators
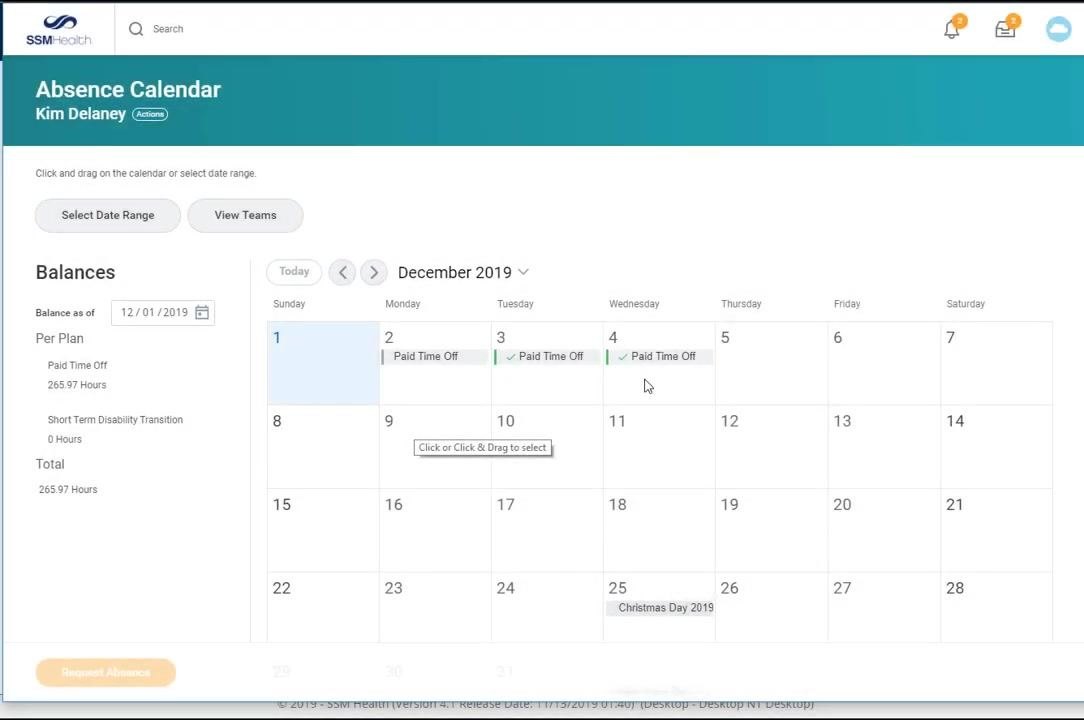
Absences pending approval appear gray on your calendar. Once your manager or timekeeper approves the absence, it displays a green checkmark. SmartSquare users must continue to request absences through SmartSquare, but can edit the absence in Workday once it appears on their timesheet.
Entering multiple days of the same time type with Quick Add
Step 25: Review your Absence Calendar
Navigate to the Absence Calendar screen and review your current balances and existing absences. For example, the calendar may already show "Paid Time Off" entered for December 2, 3, and 4, 2019.
Step 26: Open Quick Add
Click Enter Time at the bottom left of the screen, then select Quick Add from the dropdown to begin entering multiple days at once. The Enter My Time screen will show a weekly view with no hours entered yet.
Step 27: Select the time type for Quick Add
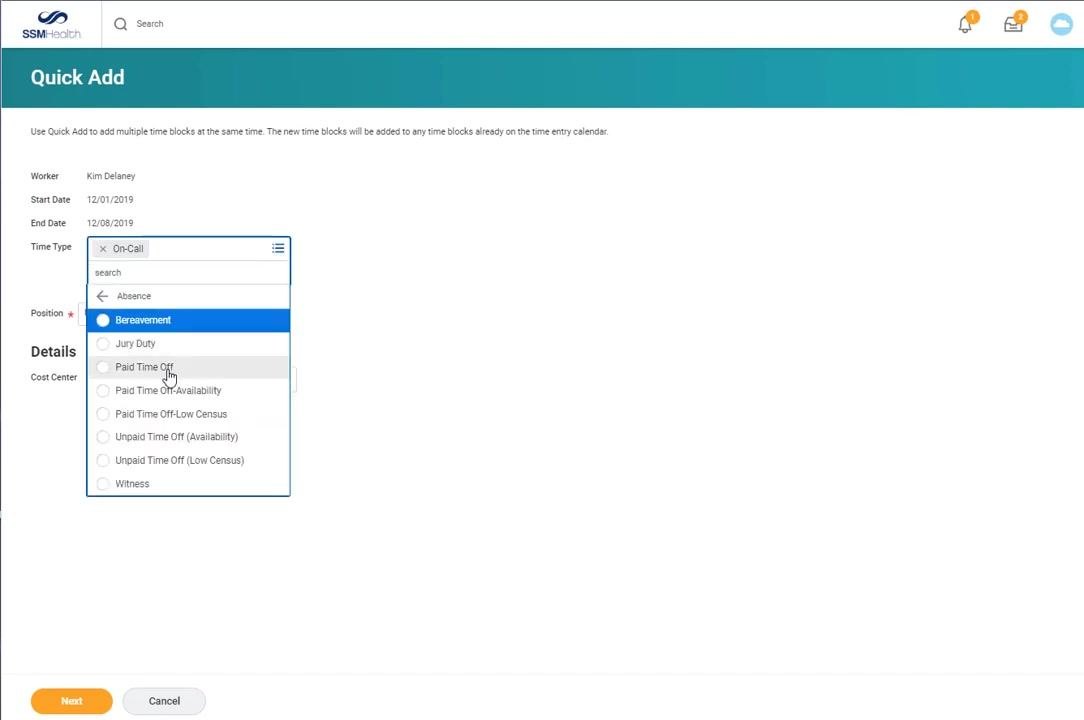
On the Quick Add screen, confirm your name and the date range (for example, 12/01/2019 to 12/08/2019). In the Time Type dropdown, select the appropriate type, such as Paid Time Off, then click Next.
Step 28: Enter hours for each day
A calendar will appear so you can enter the number of hours for each day in the selected date range. Enter the desired hours for each applicable day (for example, 8 hours for December 2, 3, and 4), and review your entries for accuracy.
Step 29: Review the hours on your timesheet
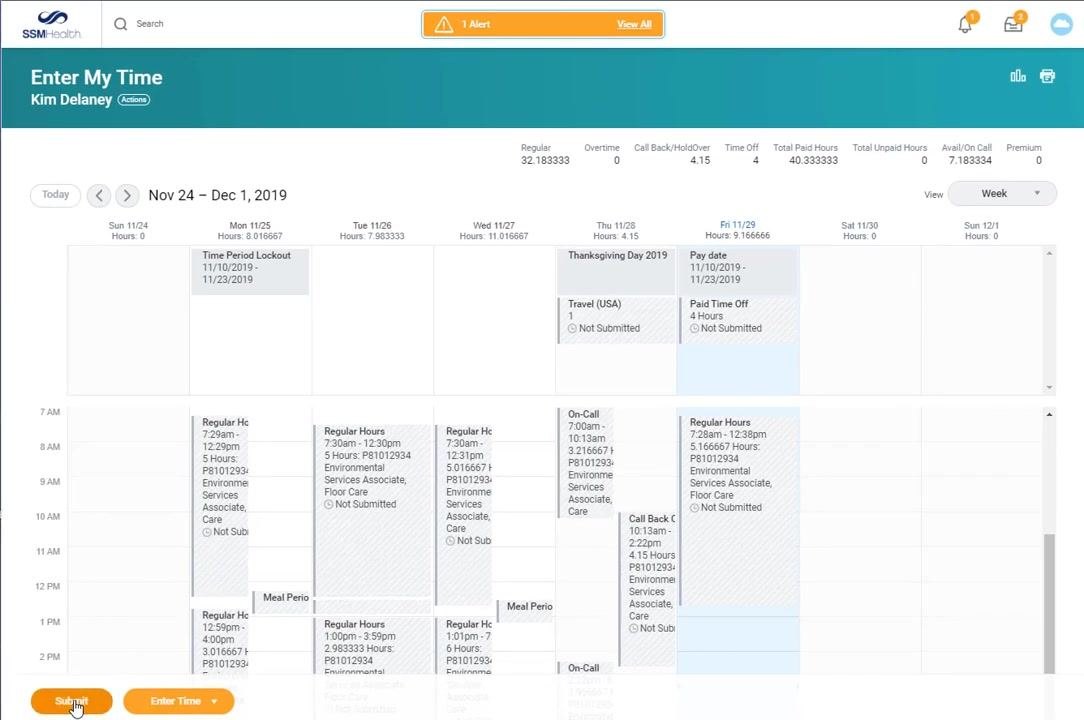
Return to the Enter My Time screen and verify the hours were added for the selected days. For example, "Paid Time Off" will now show for Monday, Tuesday, and Wednesday, each with 8 hours and marked "Not Submitted."
Step 30: Confirm your week is complete
At the end of your work week, confirm that all time entries are complete and accurate, and that the last shift for the week has been entered.
Step 31: Submit your time for approval
Click Submit at the bottom left of the screen to send your time for manager or timekeeper review. The system will prompt you to certify that all reported hours are true and accurate, and display a summary of your hours for the week (for example, Regular: 32.183333, Overtime: 0, Call Back/HoldOver: 4.15, Time Off: 4, Total Paid Hours: 40.333333). You can add a comment if needed, then click Submit to finalize.
Step 32: Check your submission status
After submission, your timesheet will reflect the approved or pending status of your entries. Approved entries are marked with a checkmark and the status "Approved."
Step 33: Confirm completion
The process ends with a confirmation screen displaying "Thank You!" and the HR On-Demand logo, indicating your submission was successful.
What's next
Now that you know how to view your hours worked in Workday, review, and submit your timesheet, make this a regular part of your routine at the end of every work week. Always double-check entries for accuracy, monitor absence approval status using the calendar color indicators, and reach out to your HR representative if you run into any issues with time entry types or submissions.
Generation details: cost, quality tiers
Docsie billed 3,500 credits ($2.45) to analyze this 7-minute video at standard quality. The rewrite, template fill and Word/PDF exports were included. The same video at each quality tier:
| Quality | Frames sampled | Credits | Approx. cost |
|---|---|---|---|
| Draft | every 16-30 s | 1,750 | $1.22 |
| Standard (this guide) | every 8-15 s | 3,500 | $2.45 |
| Detailed | every 4-7 s | 7,000 | $4.90 |
| Ultra | every 1-3 s | 14,000 | $9.80 |
Credits priced at $0.70 per 1,000; plans include a monthly allowance. Enterprise customers on on-premise or bring-your-own-model deployments run this on their own inference and pay no per-video credits.
Generated by Docsie Video-to-Docs on 2026-10-06 from a 6-minute video. Screenshots are frames from the source video and belong to their creator, Lauren Fagan, whose original is embedded above. If you own this video and want the guide removed or credited differently, contact us and we will act within one business day.