
How to Update Your Contact Information in Workday
This guide walks you through how to update your contact information in Workday, including your home address, work address, phone, email, and other contact methods. Workday serves as your digital personnel file, replacing the paper files once stored in HR, and you can access and update your information online at any time. The screenshots below use a sample HR employee account; your own screen may look slightly different depending on your role (manager, employee, etc.), but the core navigation is the same.
Video: =Fast15: Workday Viewing and Changing Your Information by ODE HelpDesk. All credit for the demonstration goes to the creator; watch the original on YouTube. The written guide below was generated from this video by Docsie. Creator? Request a change or removal.
This guide walks you through how to update your contact information in Workday, including your home address, work address, phone, email, and other contact methods. Workday serves as your digital personnel file, replacing the paper files once stored in HR, and you can access and update your information online at any time. The screenshots below use a sample HR employee account; your own screen may look slightly different depending on your role (manager, employee, etc.), but the core navigation is the same.
Prerequisites
- Access to your organization's Workday login page.
- Your Workday username (for example, a format such as or24000032).
- Your Workday password.
- If you have forgotten your password, you can use the Forgot Password? link on the sign-in screen.
Signing in to Workday
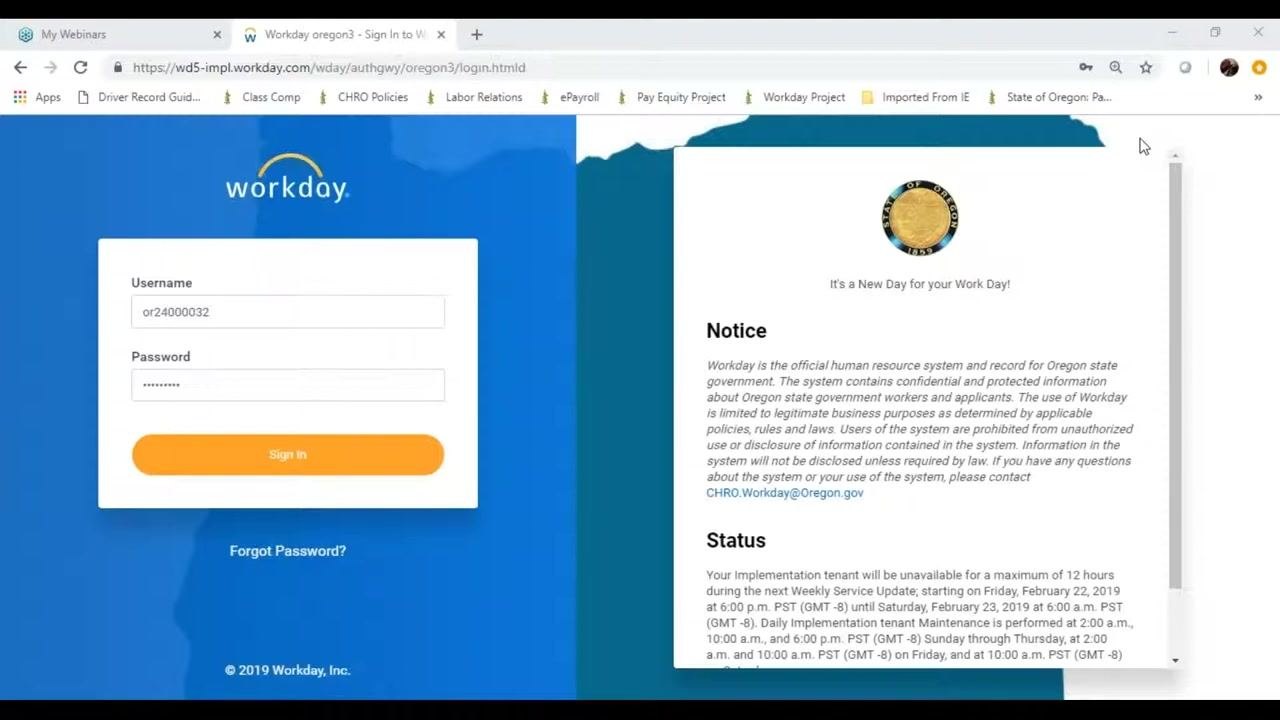
- Open your web browser and navigate to your organization's Workday login page.
- Enter your username and password, then click the orange Sign In button.
- If you've forgotten your password, click Forgot Password? below the sign-in button.
Navigating to your Workday home page
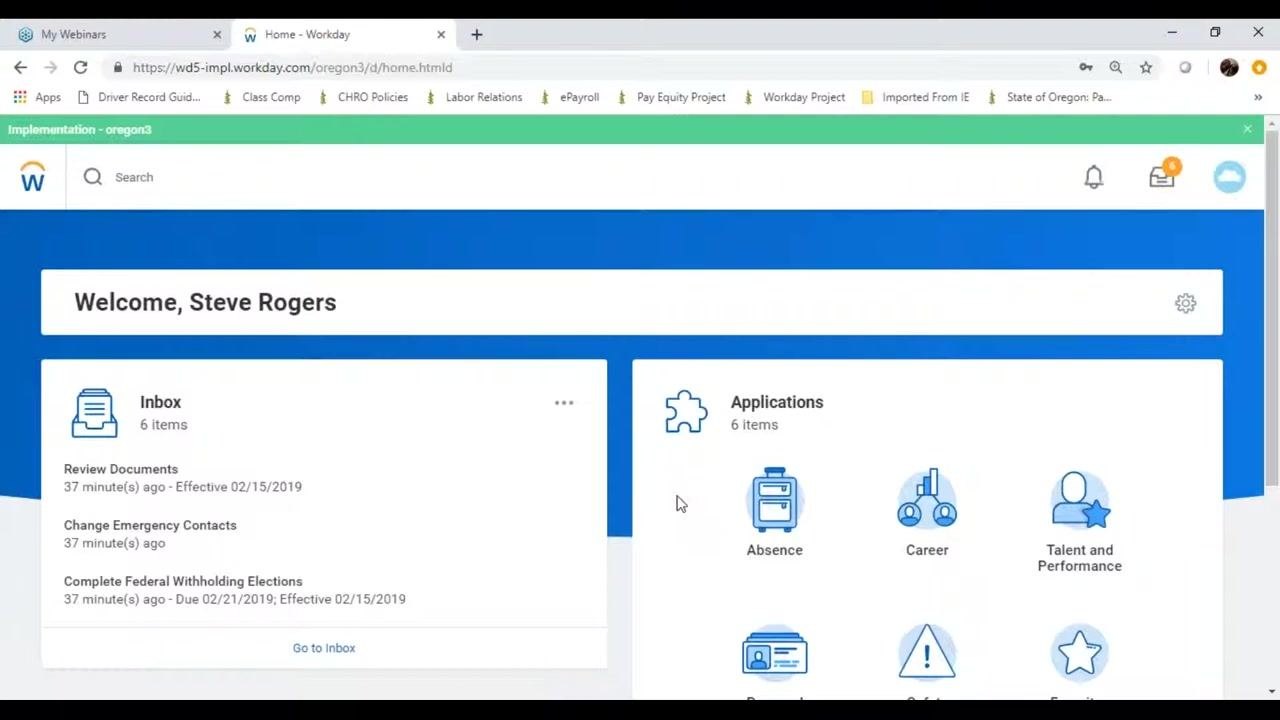
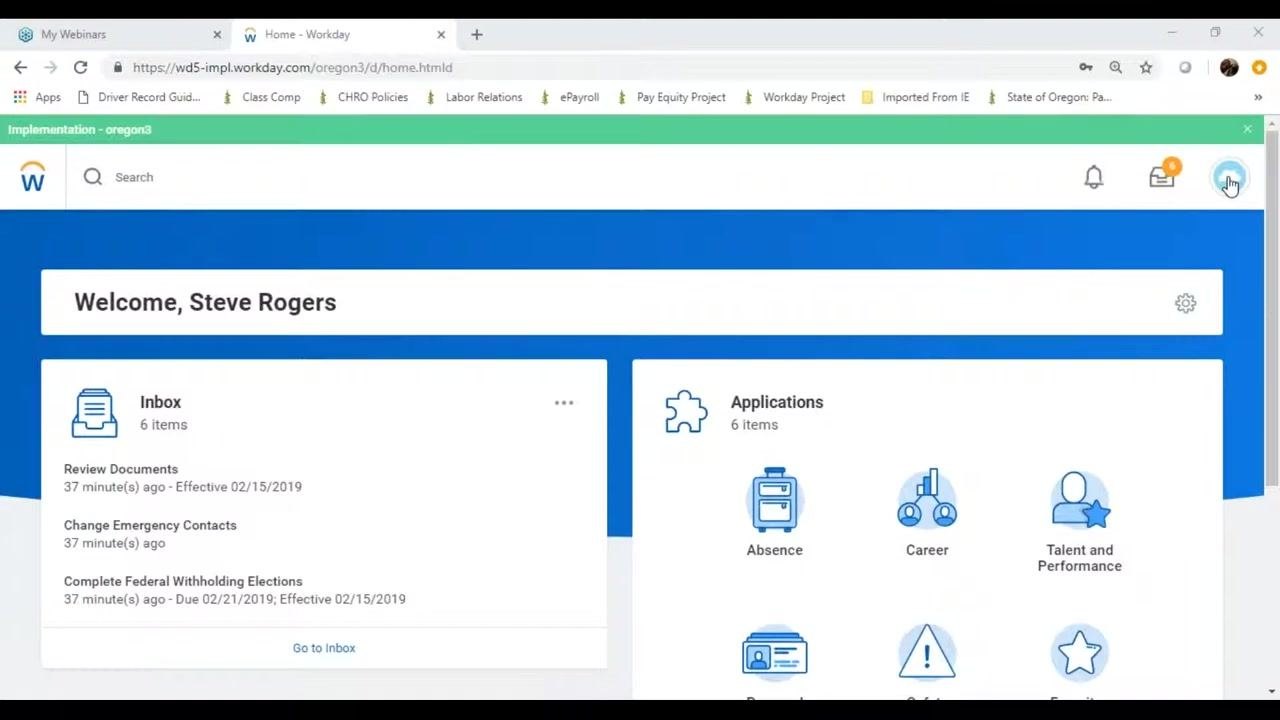
- After you log in, you'll see a personalized welcome message (for example, "Welcome, Steve Rogers"). The Inbox panel shows pending tasks such as Review Documents, Change Emergency Contacts, and Complete Federal Withholding Elections. The Applications panel gives you access to modules like Absence, Career, and Talent and Performance.
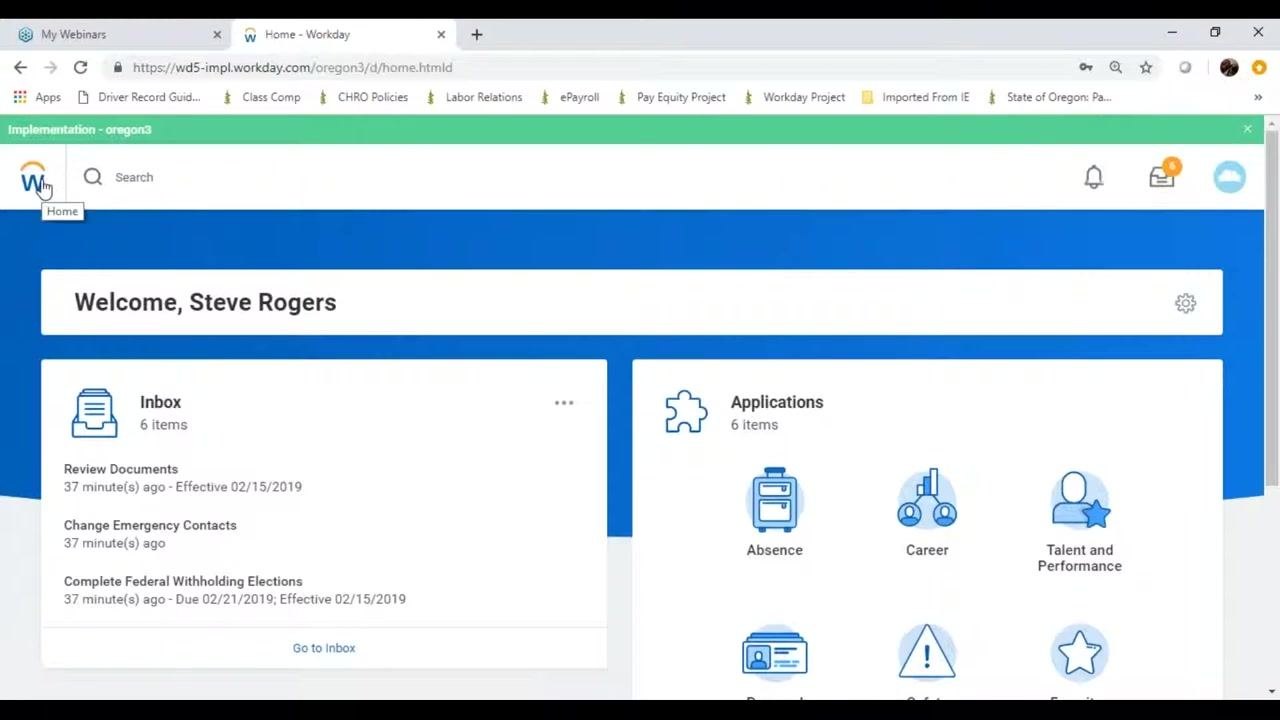
- If you ever get lost in Workday's menus, click the blue W icon in the top left corner of the screen to return to your home page.
Opening your profile and viewing your summary
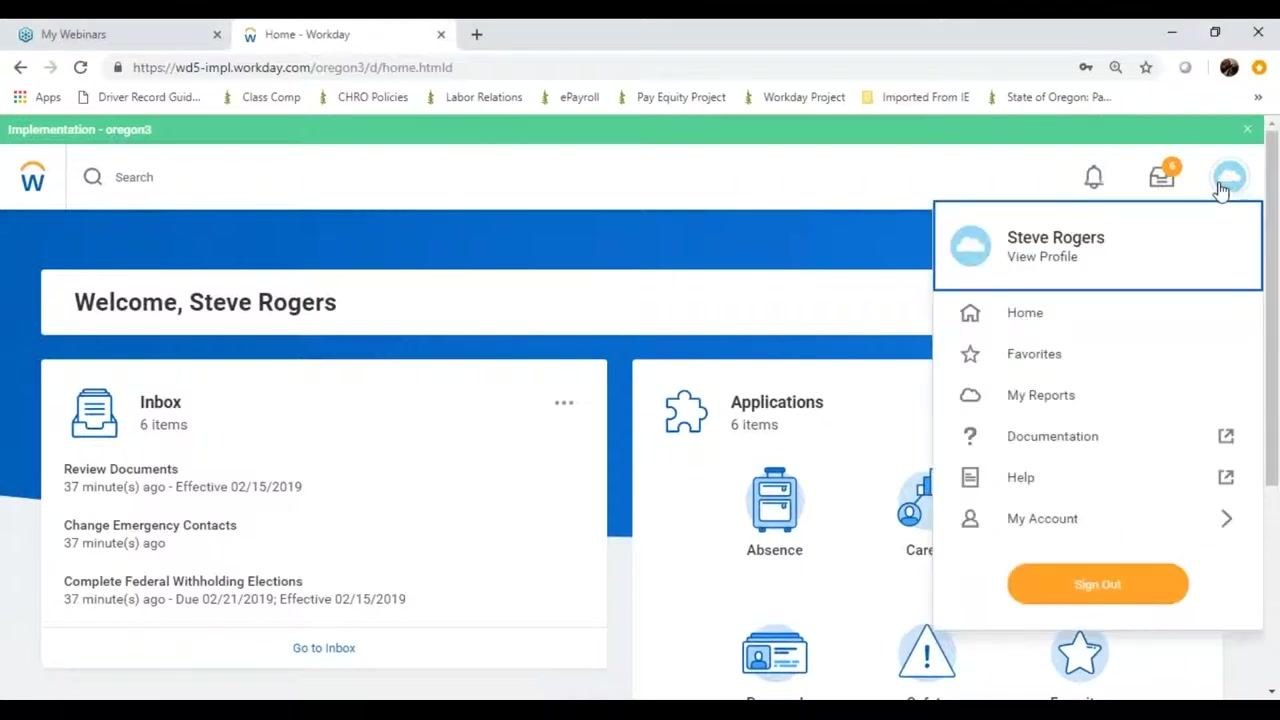
- In the upper right corner, click the cloud icon (or your photo, if you've uploaded one) to open your profile menu. Your name appears at the top along with View Profile and additional options: Home, Favorites, My Reports, Documentation, Help, My Account, and Sign Out.
-
Click View Profile to open your profile summary. This page displays your name, job title, location, company, managers, education, and job details.
-
Review the Job Details section, which lists information such as your Employee ID, Organization, Position, Business Title, Job Profile, Employee Type, Management Level, Time Type, FTE, Location, Hire Date, and Length of Service.
Understanding job details terminology
Workday uses some terms that may be new to you:
- Business Title: your working title.
- Job Profile: your job classification.
- Position: the specific role you hold within your organization.
- Organization: the department or agency you work for.
- Employee Type: whether you're permanent or temporary.
- Management Level: whether you're in a management or non-management role.
- Time Type: whether you're full-time or part-time.
- FTE (Full-Time Equivalent): your work percentage.
- Hire Date, Original Hire Date, Continuous Service Date: dates that track your employment milestones.
- Length of Service, Time in Position, Time in Job Profile: fields that show your tenure in various roles.
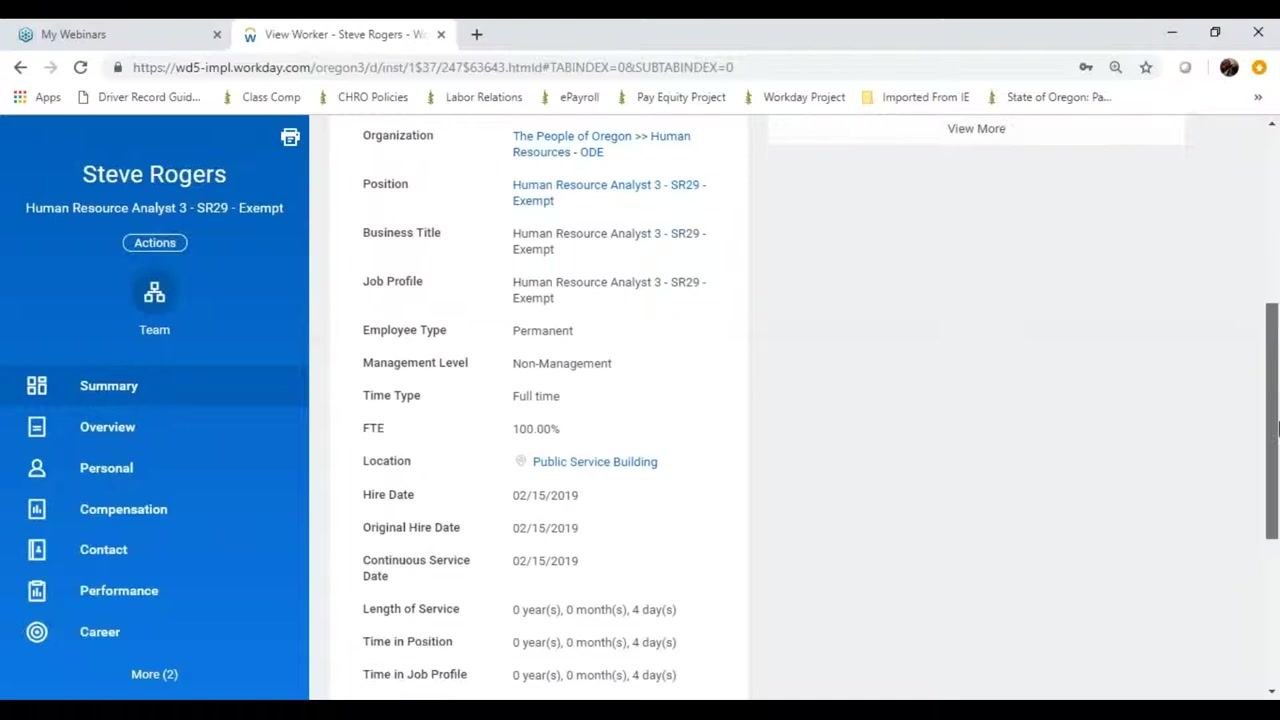
Scrolling further down the summary page also shows your public contact information (work address), education, managers, company, and a feedback section.
Exploring the overview tabs
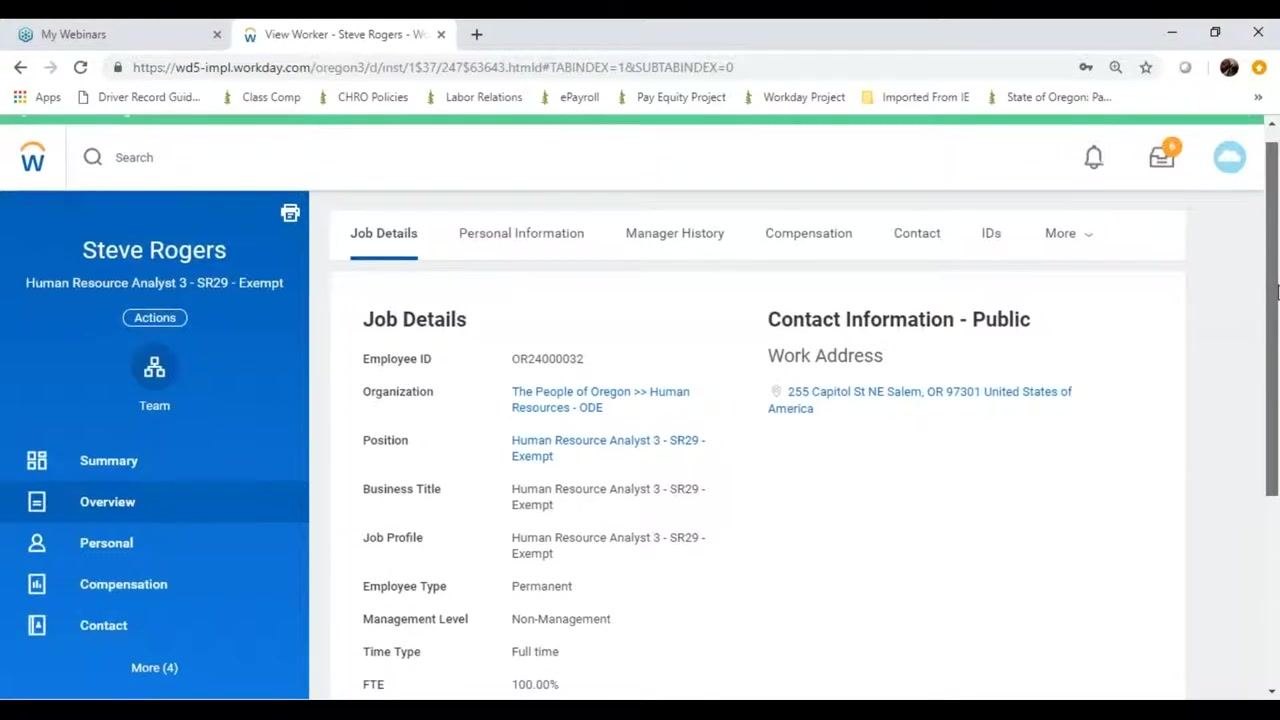
- Click the Overview tab in the left navigation menu to see additional tabs at the top of the screen: Job Details, Personal Information, Manager History, Compensation, Contact, IDs, and More.
-
Click the Personal Information tab to review demographic information such as Gender, Hispanic or Latino status, and Race/Ethnicity (this may be blank if not provided). Click Edit at the top of this section if you need to update it.
-
Click the Manager History tab to view a table of your past and current managers, including Position, Start Date, Manager(s), Managed From, and End Date.
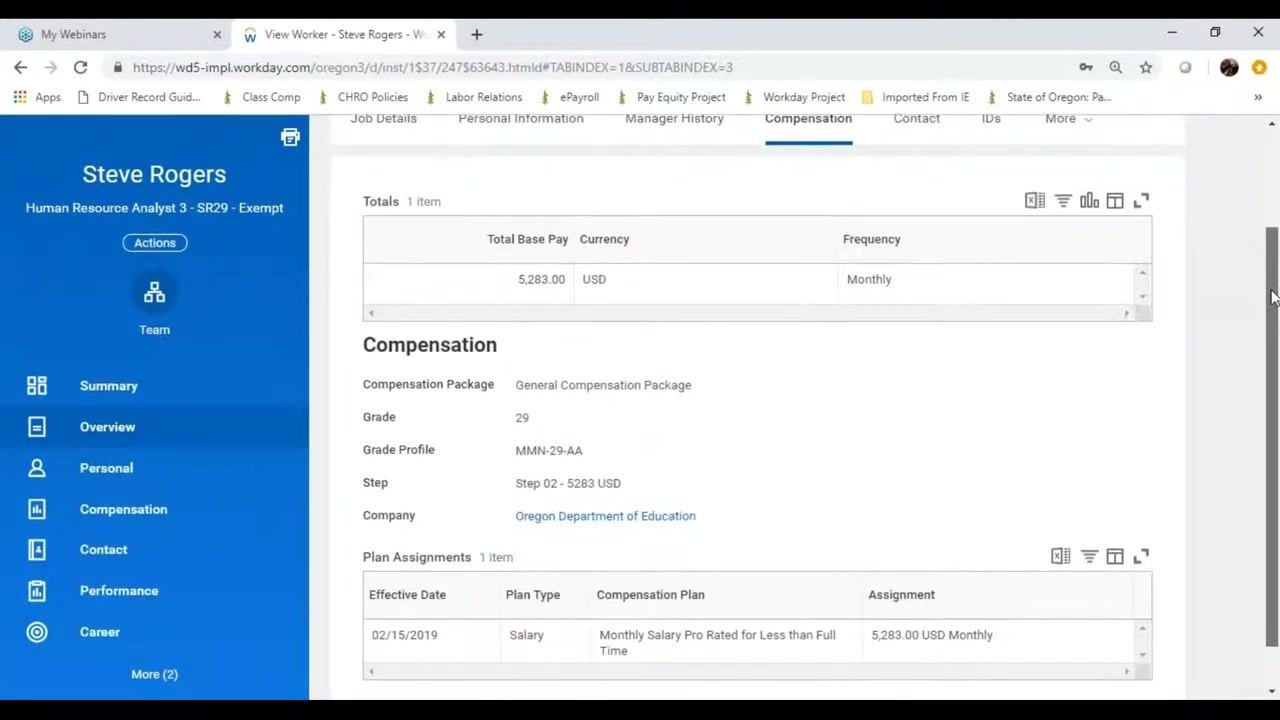
- Click the Compensation tab to review your Total Base Pay, Frequency, Compensation Package, Grade, Step, Company, and Plan Assignments (including effective date and plan type). If you see "Monthly Salary Pro Rated for Less than Full Time," this is the standard designation for permanent full-time employees and does not mean you're paid less than full-time.
Viewing your contact information
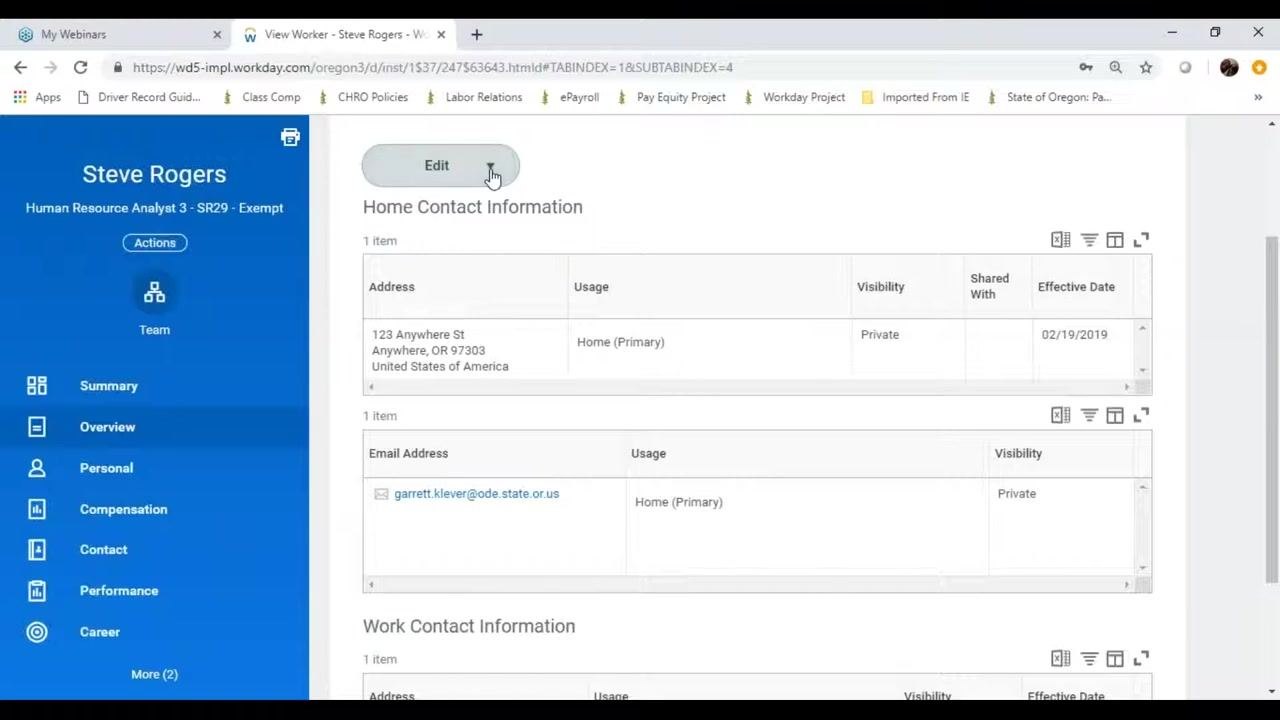
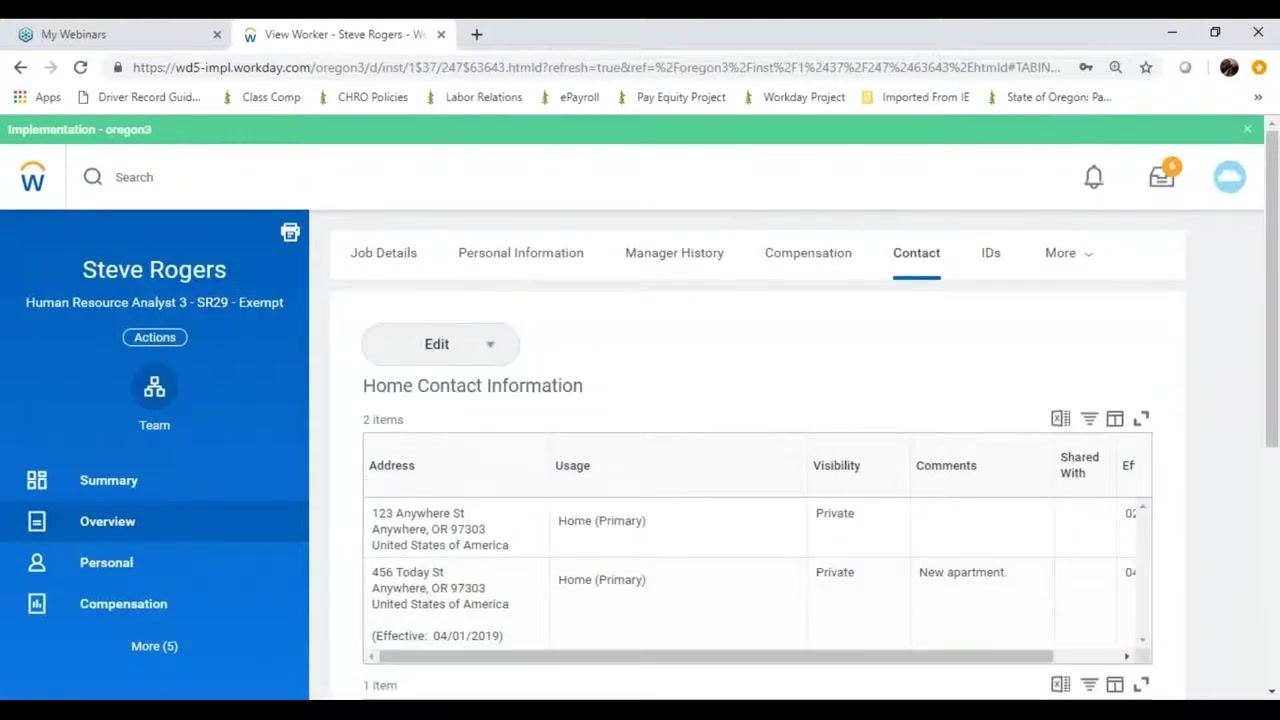
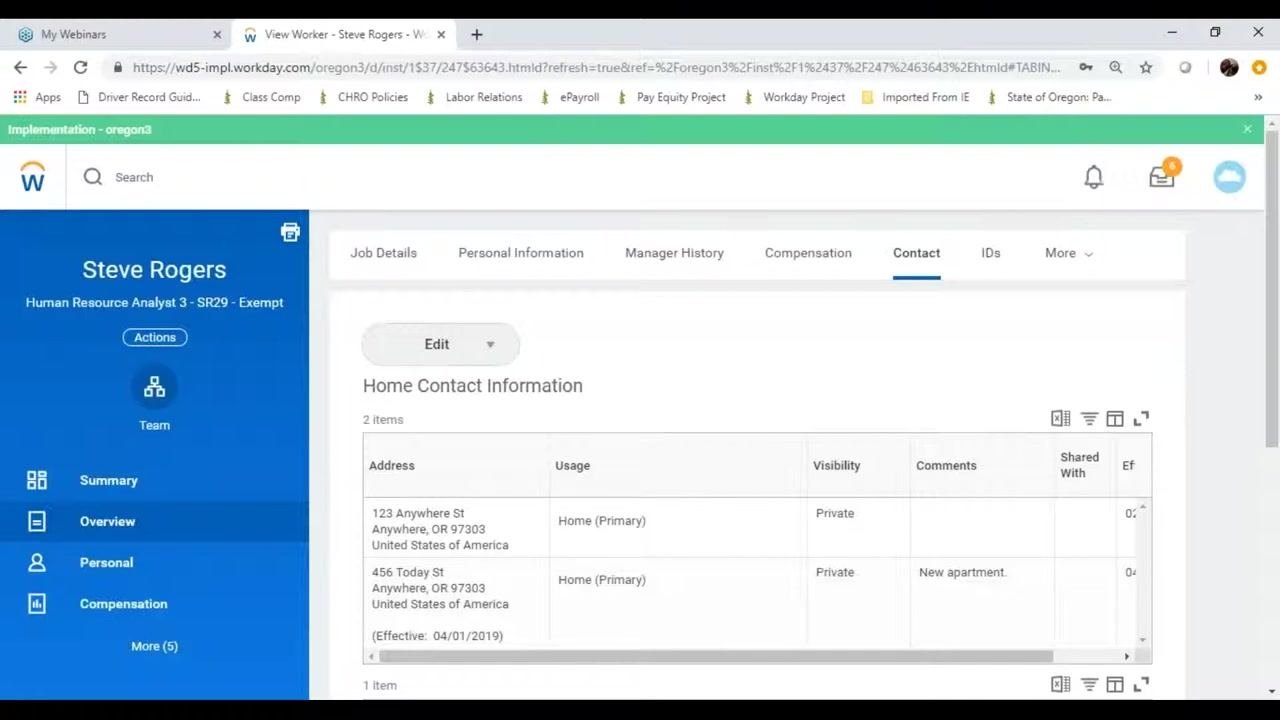
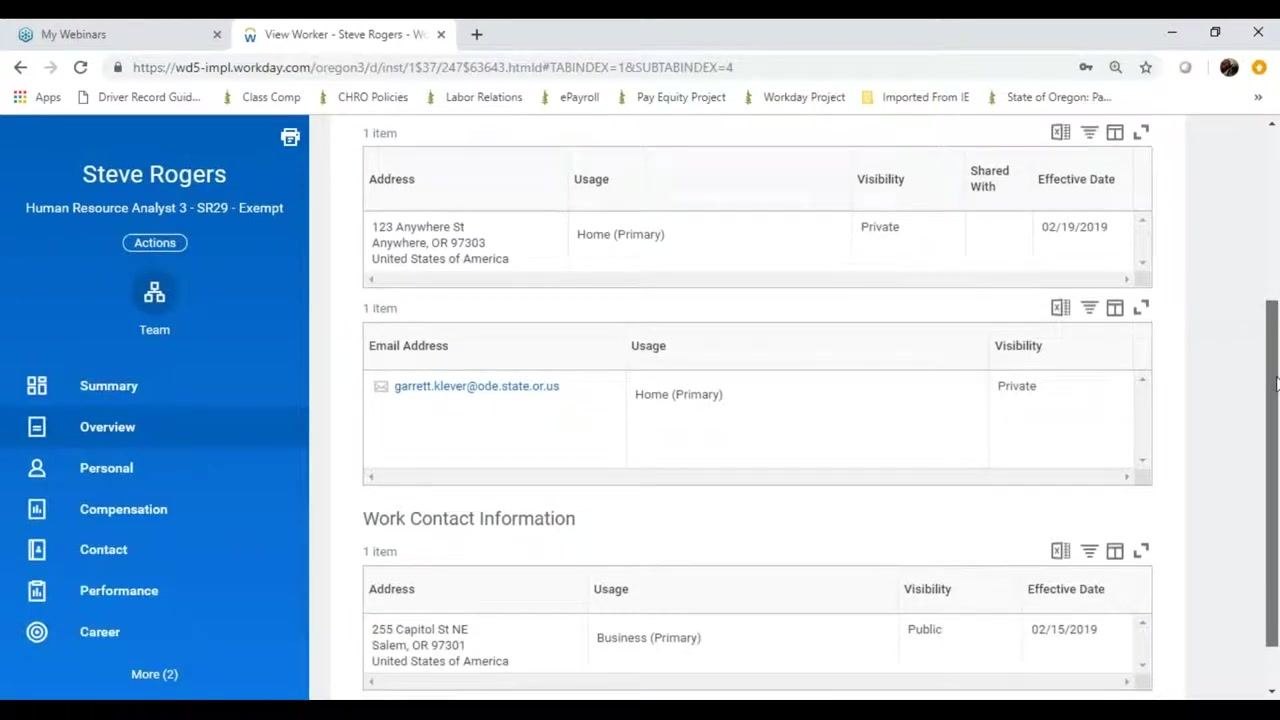
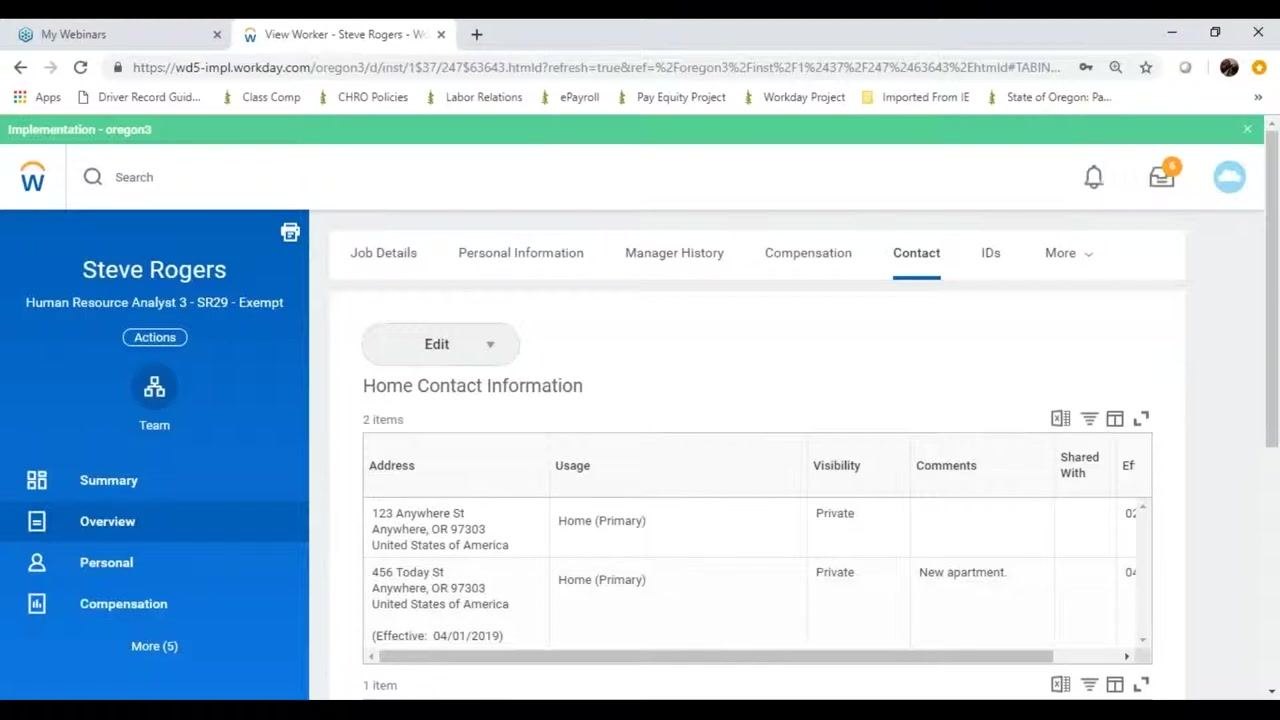
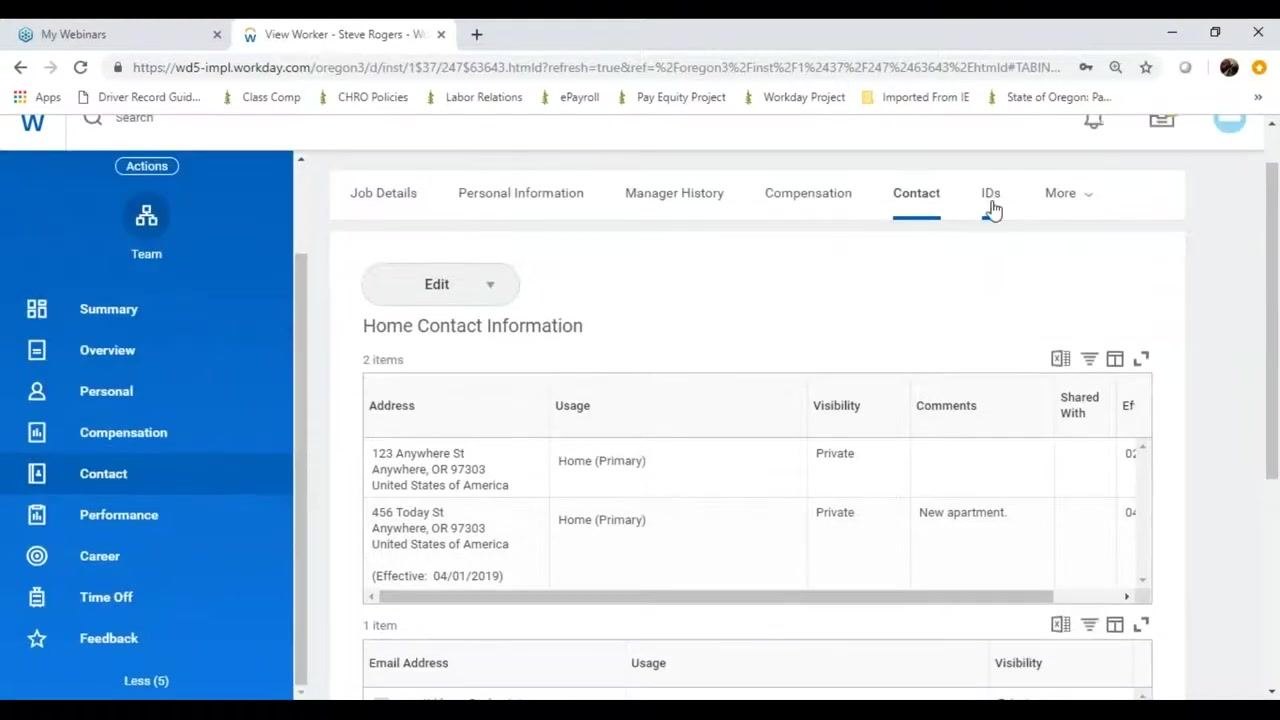
- Click the Contact tab to see two tables: Home Contact Information and Work Contact Information. The left navigation menu also includes Summary, Overview, Personal, Compensation, Contact, Performance, and Career, so you can always return to this section.
Updating your home contact information
-
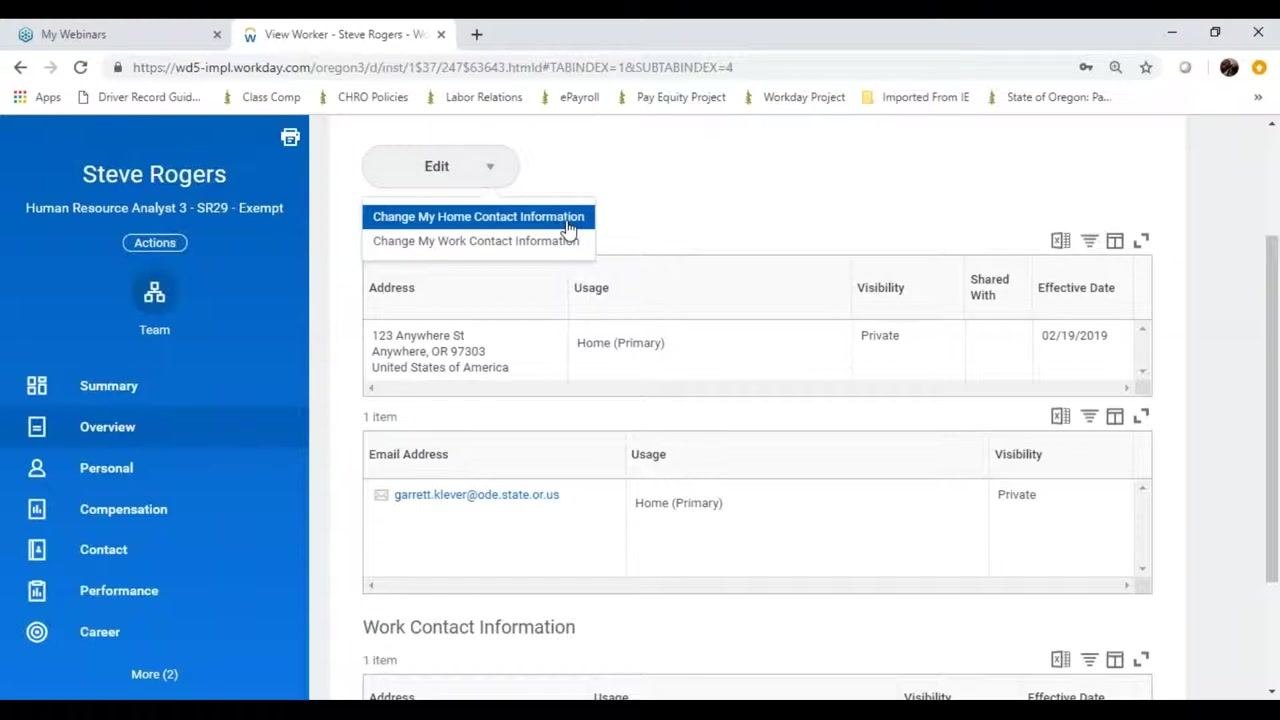
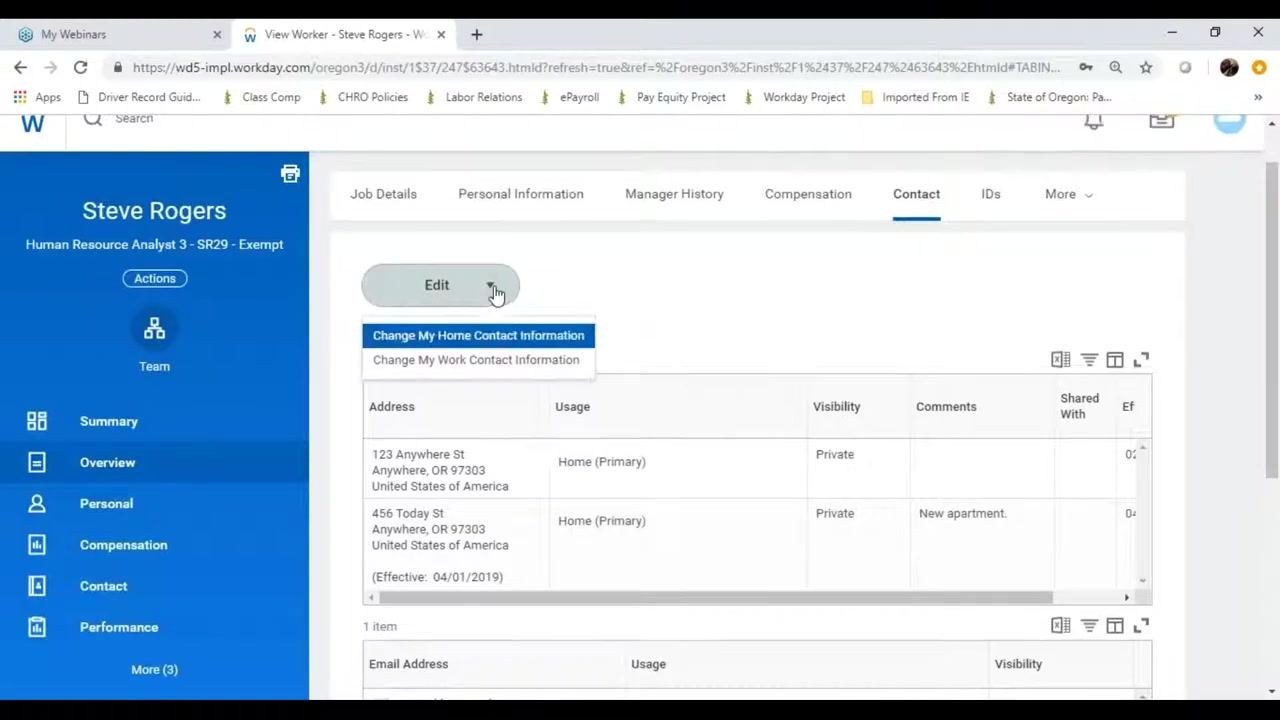
At the top of the Home Contact Information section, click the Edit button to begin making changes.
-
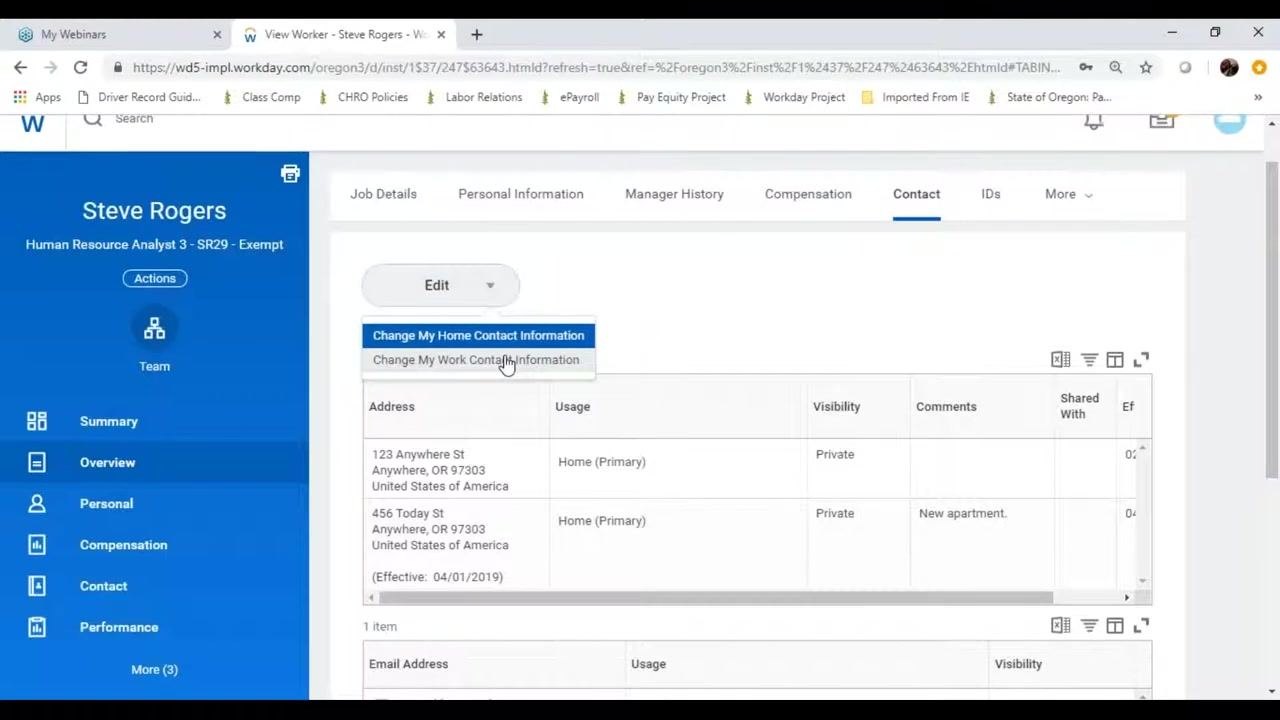
A dropdown menu appears with two options: Change My Home Contact Information and Change My Work Contact Information. Select Change My Home Contact Information.
-
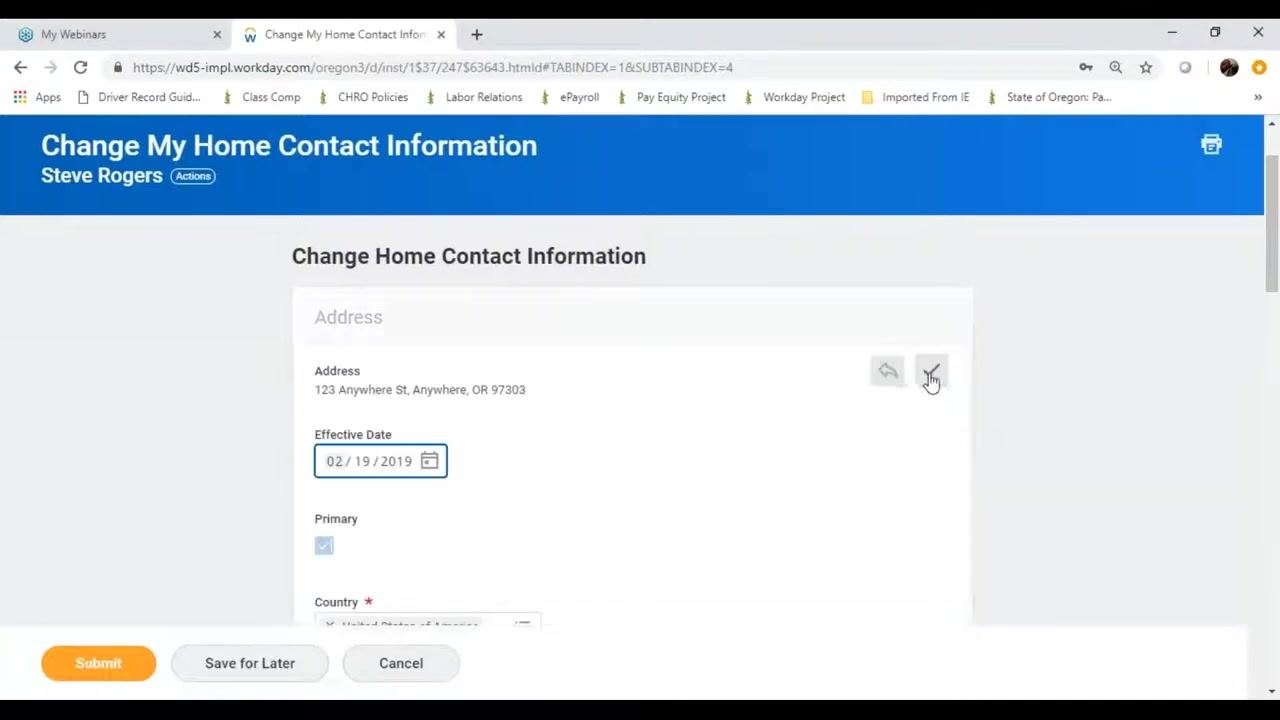
The Change My Home Contact Information screen shows your current primary address. You can edit it with the pencil icon or remove it with the X icon. Submit, Save for Later, and Cancel buttons appear at the bottom of the screen.
-
Click the pencil icon labeled Edit Address to update the address, or the X icon labeled Remove Address to delete it.
-
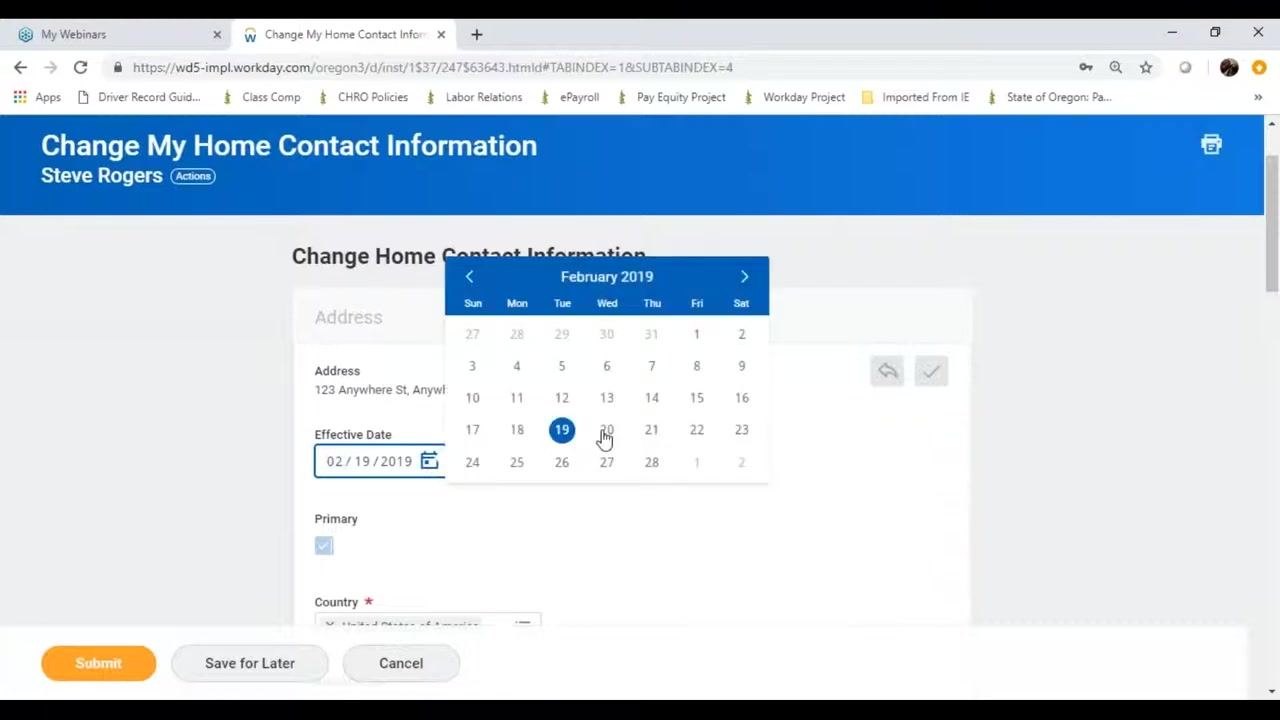
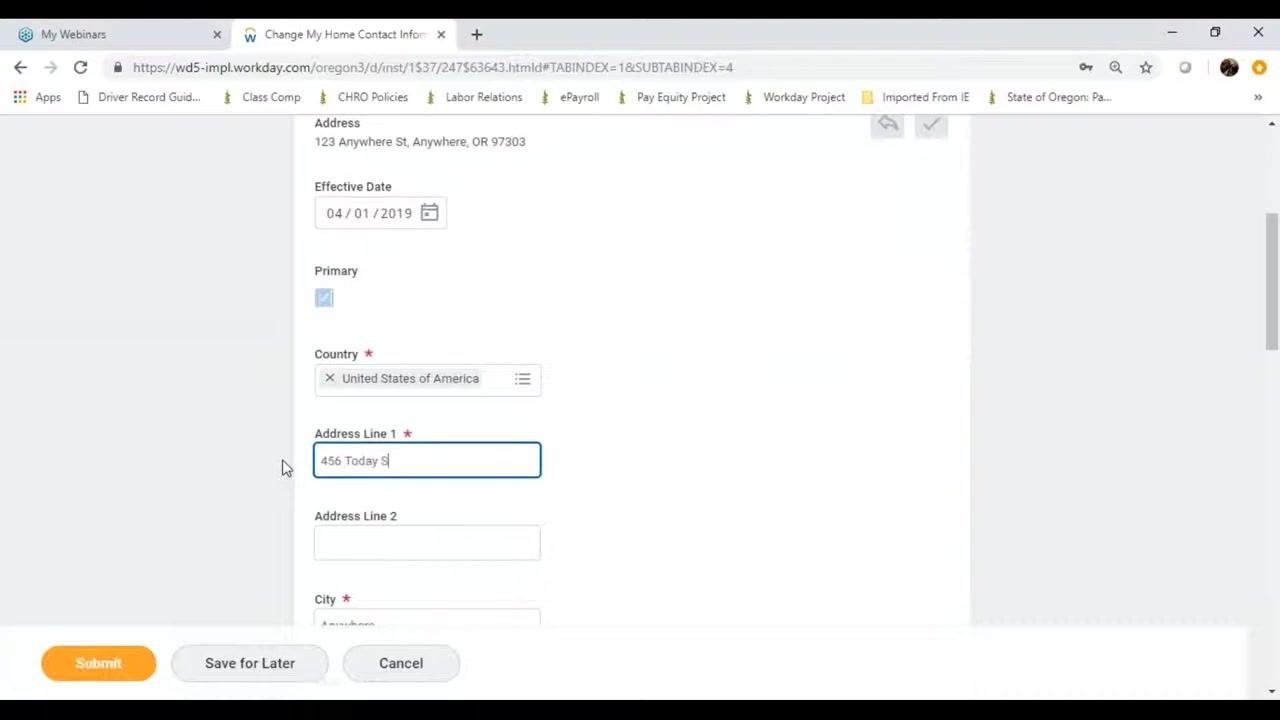
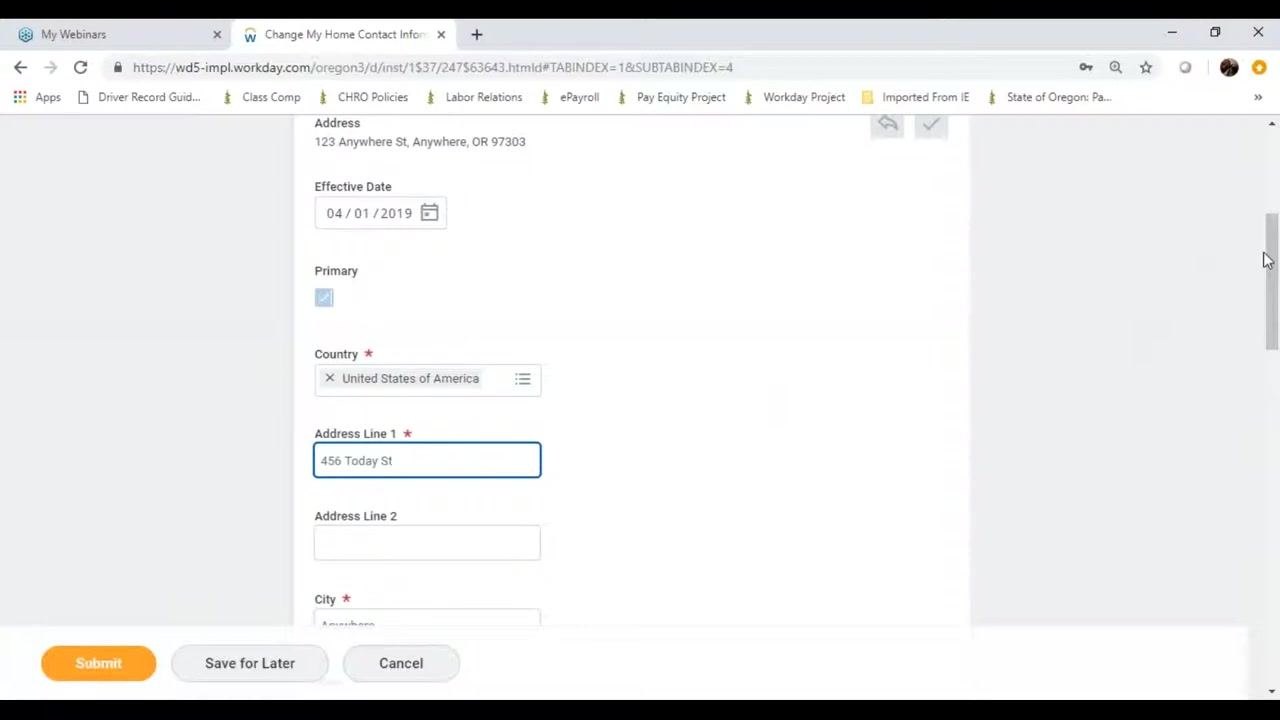
When editing, enter an Effective Date for the change. This matters if the change takes effect in the future, such as when you know you're moving to a new address later.
-
Click the calendar icon to open the date picker and select the desired date. Fields marked with a red asterisk (), such as Country*, are required, and Workday won't let you submit the form until they're completed.
-
Scroll down and fill in the required address fields, such as Country, Address Line 1, and City. Check the Primary checkbox if this is your main address, and confirm the Effective Date is set correctly. Submit, Save for Later, and Cancel buttons appear at the bottom.
-
In the Details section, you can optionally add a note for your own reference, such as "New apartment."
-
Below the Notes section, you can also add or update your phone number, email address, instant messenger, and web address by clicking Add next to each field. A comment field is available at the bottom of the form.
-
Review all the information you entered, then click the orange Submit button to save your changes. You can also click Save for Later to pause without submitting, or Cancel to discard your changes.
-
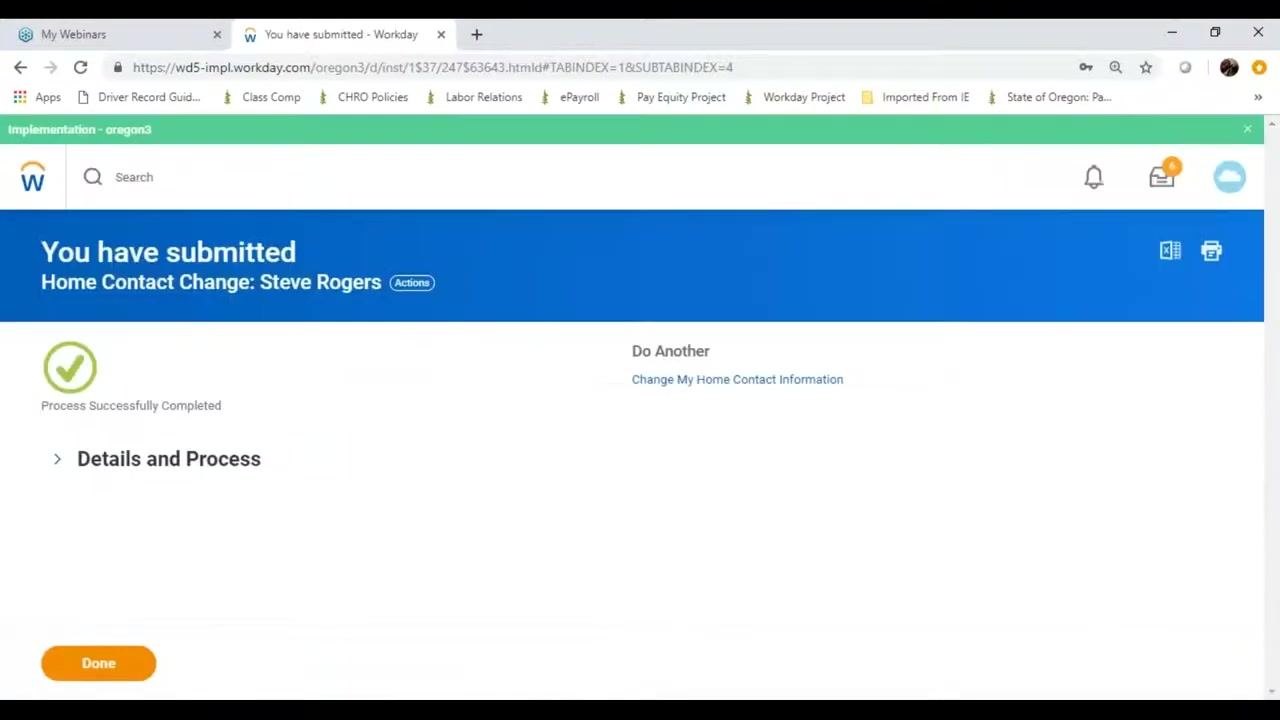
After submitting, a confirmation screen appears with a green checkmark and the message "Process Successfully Completed," along with "You have submitted Home Contact Change." You can choose Do Another change or click Done to finish.
-
Personal contact information changes don't require additional approval — the update is completed immediately upon submission.
-
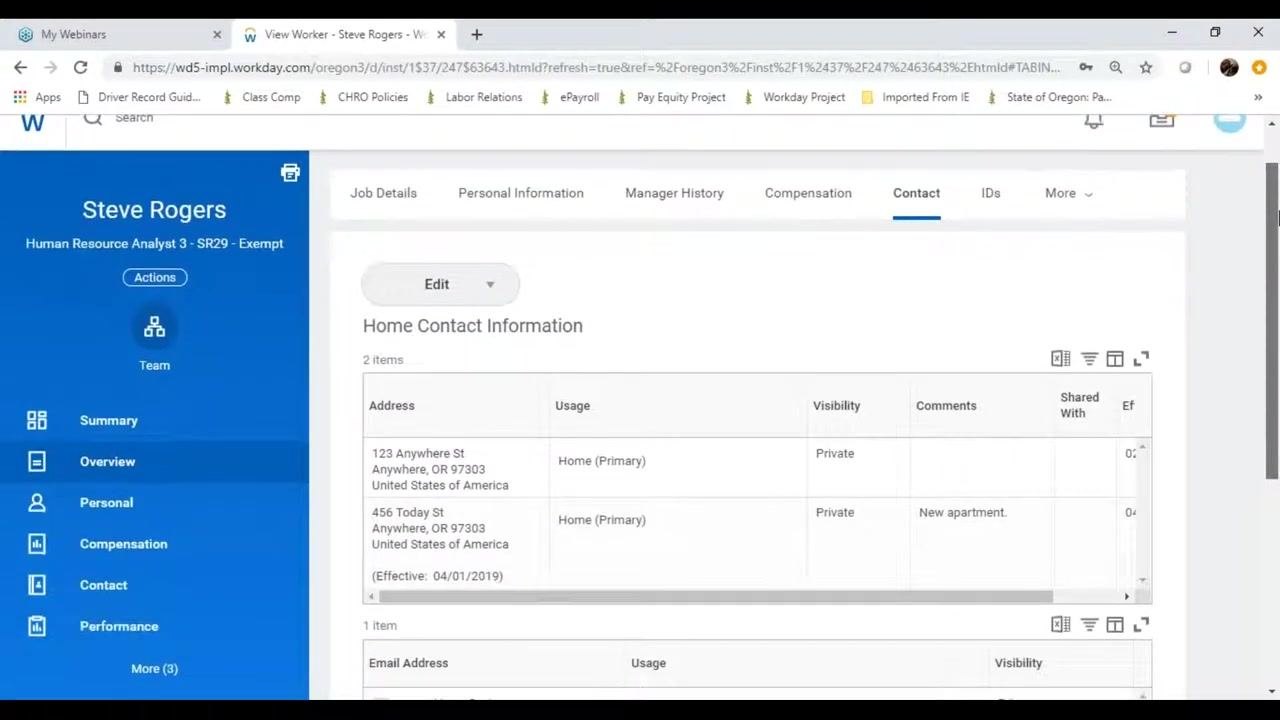
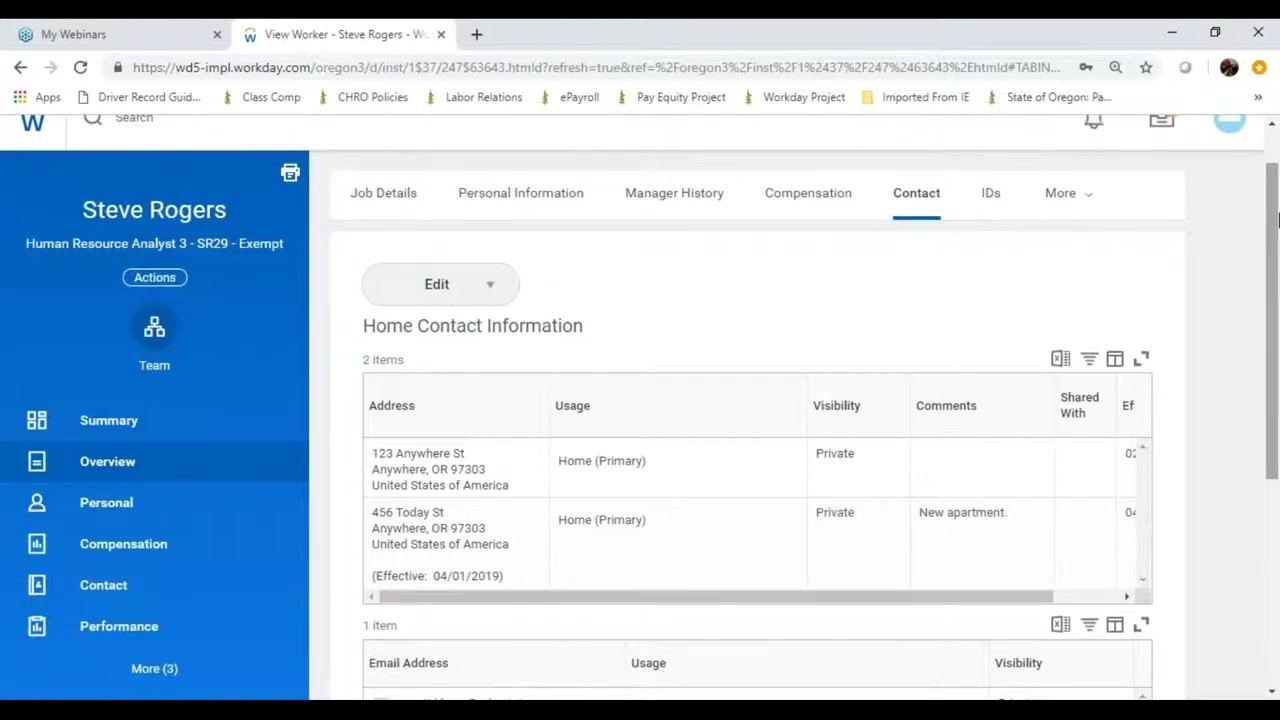
Return to your worker profile to verify the update. The Home Contact Information section now lists both your old and new addresses, with the new one marked Home (Primary) along with any comments you added.
Confirming your updated home address
- Back on the Contact tab, the Home Contact Information section displays both your previous and new addresses, along with their usage (Home Primary), visibility (for example, Private), comments, and effective date.
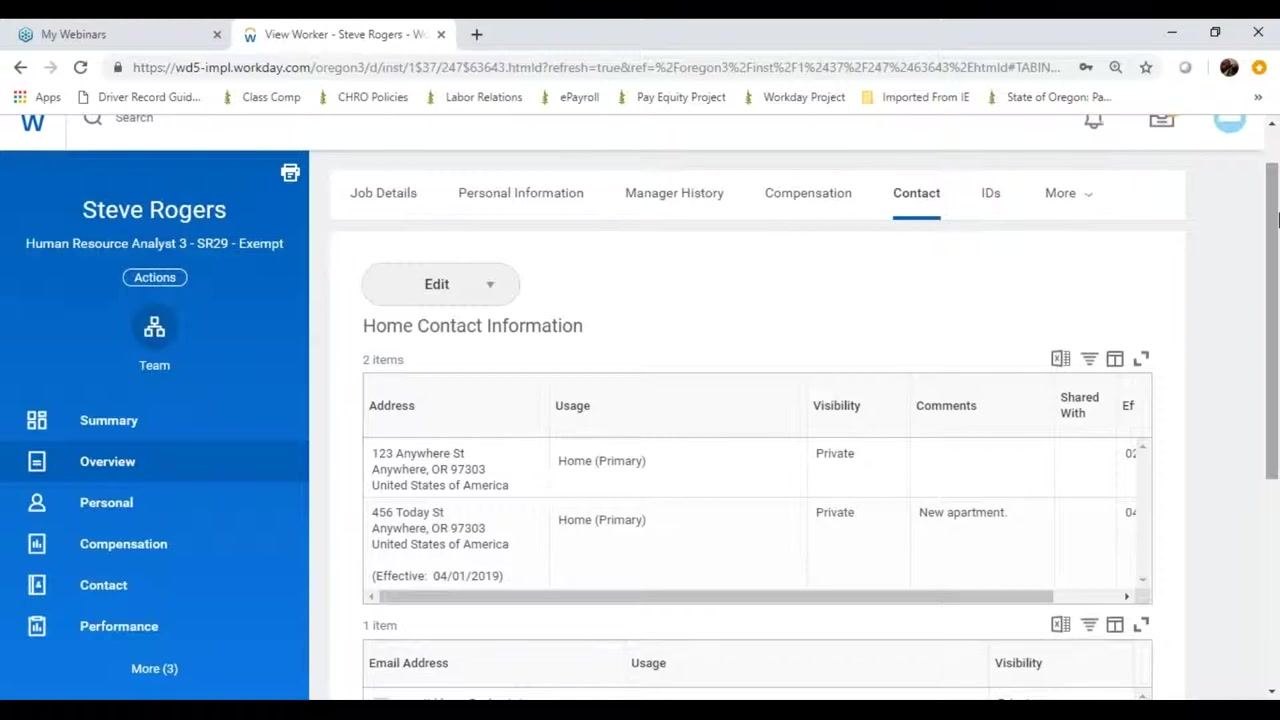
- Workday indicates the date on which your new address becomes effective. Double-check this date next to your new address to confirm it's accurate.
Updating your work contact information
-
Click the Edit button at the top of the Contact tab, then select Change My Work Contact Information from the dropdown menu.
-
The Change My Work Contact Information form opens, showing your Business Location, Primary Work Location, Alternate Work Location, and Address (if different from your business location). Submit, Save for Later, and Cancel buttons appear at the bottom.
-
Scroll down to add or update your work email, instant messenger, and web address by clicking Add next to each field. A comment field is available at the bottom. Click Submit to save your changes, or Save for Later to pause without submitting.
-
Keep in mind that work contact information is generally viewable across the organization. Other employees can search for your name in Workday and see your work location, email address, and work phone number.
-
If you need your work contact information kept private, contact your HR department. HR can initiate the process to restrict visibility of your work contact details in Workday.
Quick reference: editing contact details
The Edit button at the top of the Contact tab always opens the same dropdown, with options for Change My Home Contact Information and Change My Work Contact Information. Use the pencil icon to edit an entry or the X icon to remove it — this pattern is consistent across most Workday screens. Always set an effective date, especially for changes that take place in the future, and complete every field marked with a red asterisk before submitting.
Exploring additional profile tabs
-
Open the Contact tab to review your Home Contact Information, including address, usage (such as Home Primary), visibility (such as Private), and any comments you've added.
-
Click the IDs tab to view your Employee ID.
-
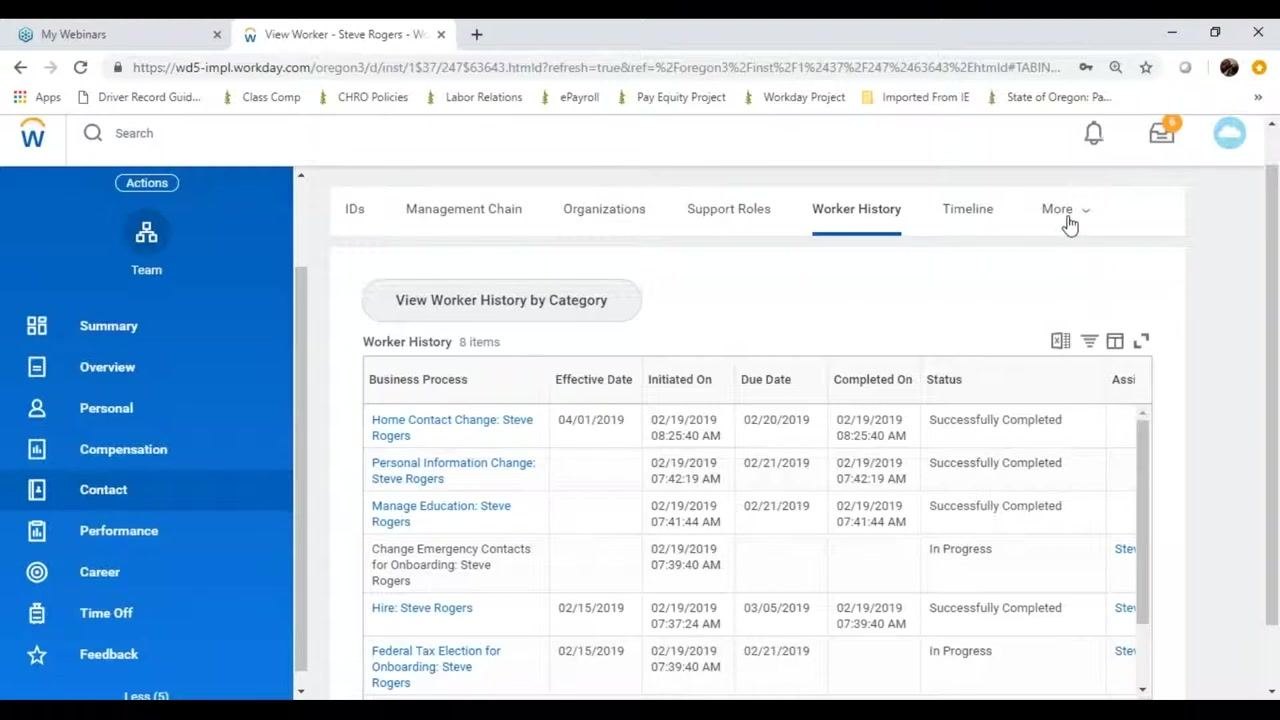
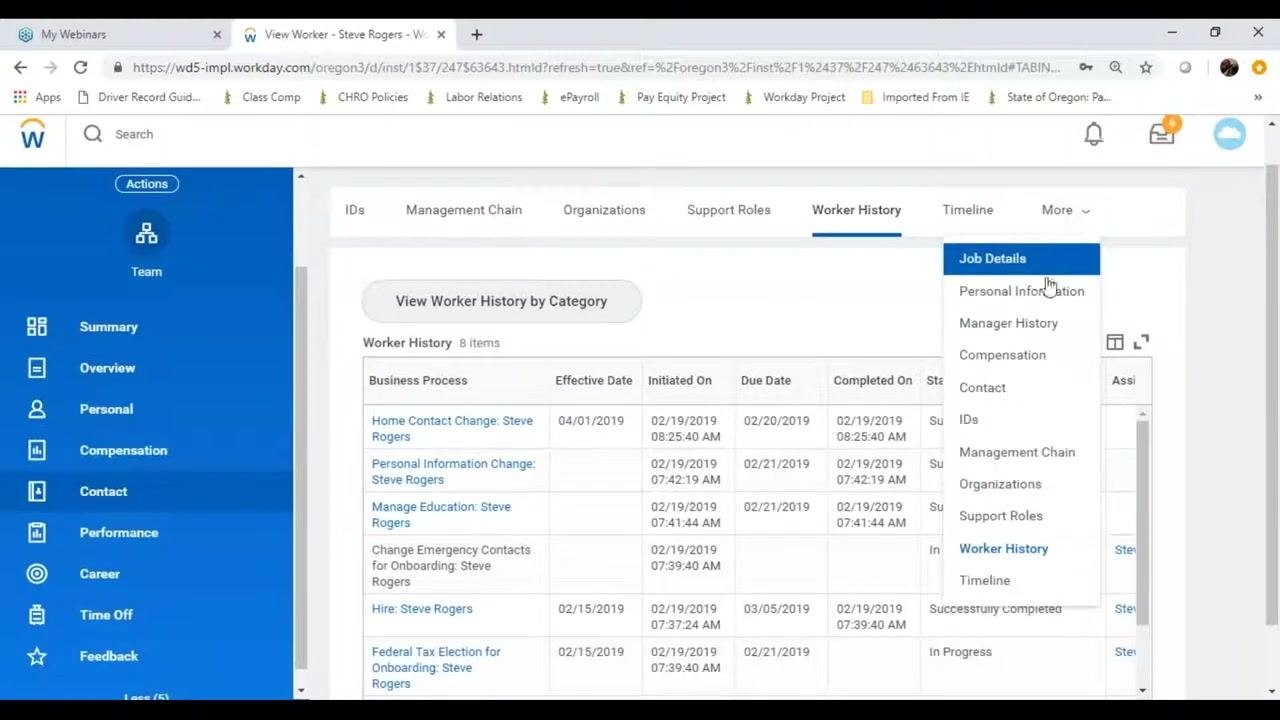
Click the More dropdown menu to access additional sections: Job Details, Personal Information, Manager History, Compensation, Contact, IDs, Management Chain, Organizations, Support Roles, Worker History, and Timeline.
-
Select Support Roles to view a table listing each Assignable Role, the Worker assigned to it, and where the Role is Enabled.
-
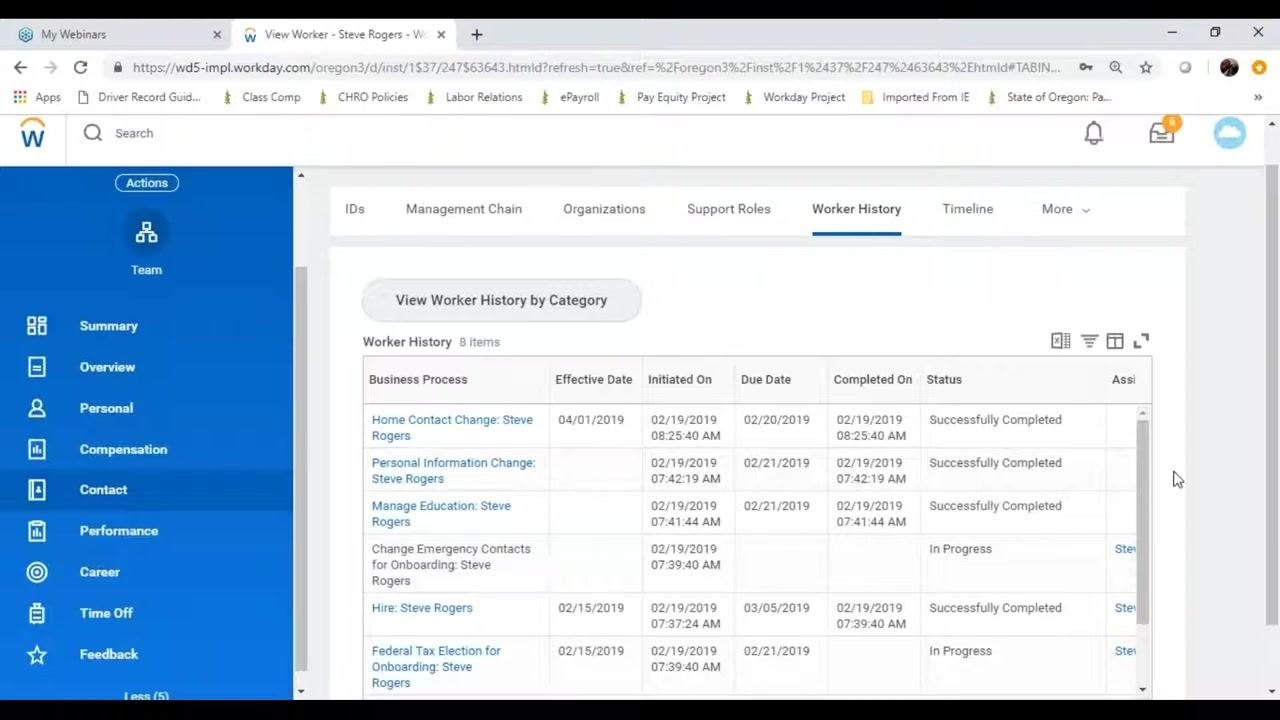
Select Worker History to view a detailed record of business processes, including Effective Date, Initiated On, Due Date, Completed On, Status, and Assignee.
-
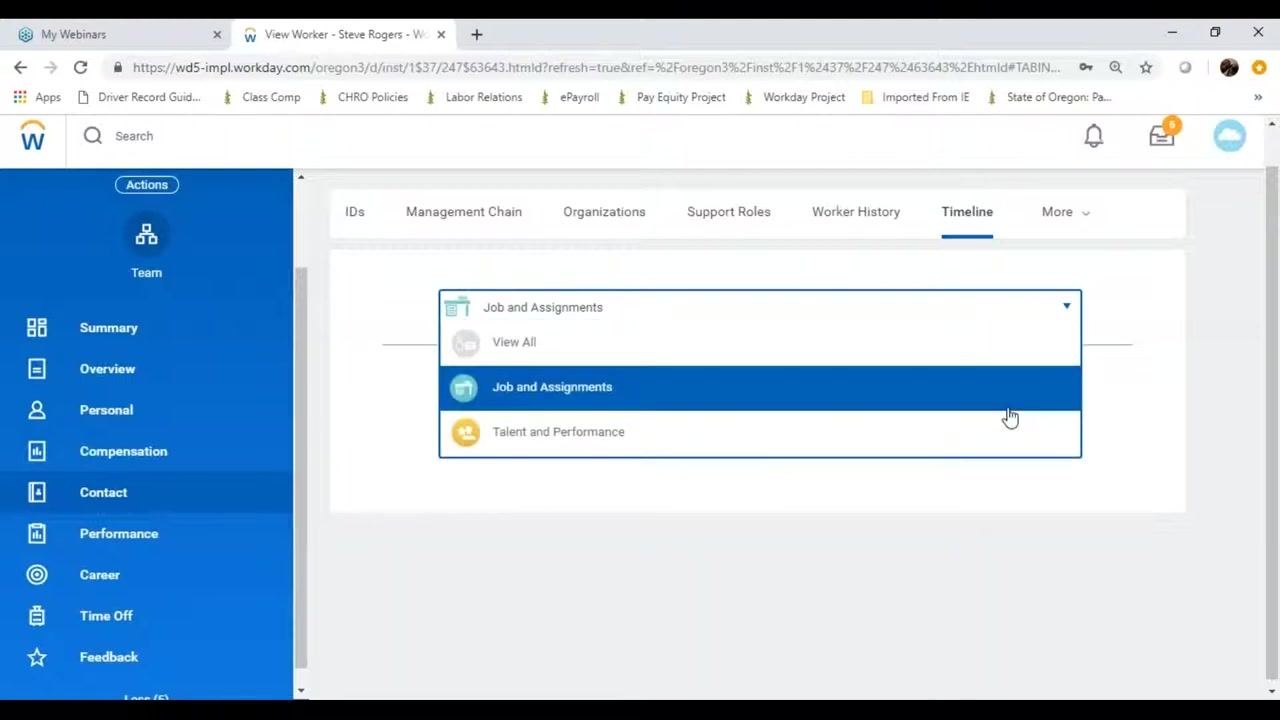
Select the Timeline tab for a chronological summary of major events, such as your hire date and education history.
-
Use the View All dropdown in the Timeline tab to filter events by category, such as Job and Assignments or Talent and Performance.
Navigating the left-hand profile tabs
- On the left side of the screen, you'll find additional tabs: Summary, Overview, Personal, Compensation, Contact, Performance, Career, Time Off, Feedback, and Team. These give you access to other sections of your employee profile.
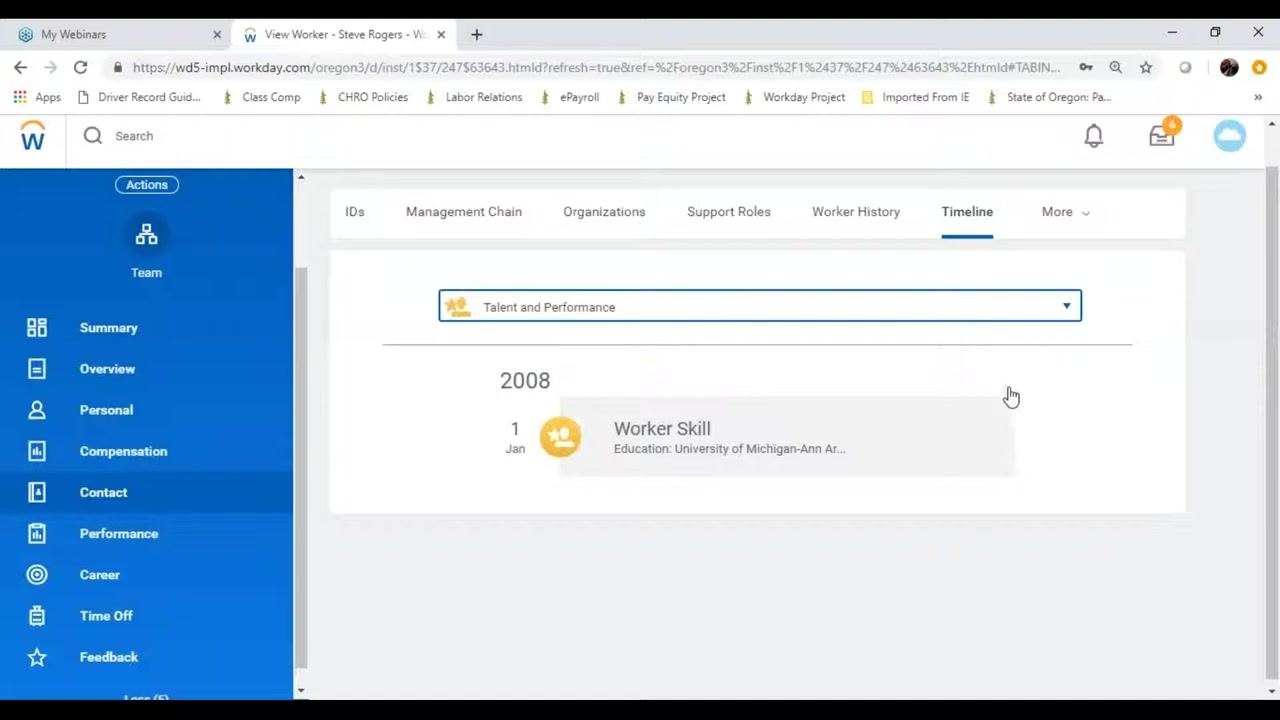
- In the Timeline tab, use the dropdown to select Talent and Performance and view related entries, such as a Worker Skill entry for your education.
- Switch the filter back to View All to see the complete list of major employment events, such as your hire date and education milestones.
Reviewing your profile ownership
-
Click the profile icon in the upper right corner to open the dropdown menu, which displays your name along with View Profile, Home, Favorites, My Reports, Documentation, Help, My Account, and Sign Out.
-
Your profile summary page displays your Location, Managers, Company, Education (with an Edit option), Job Details, and Feedback. You own your personal and work contact information and can update it online at any time.
What's next
If you have questions about updating your information, contact your HR department for assistance. You can also check your Inbox panel for related pending tasks, such as Change Emergency Contacts or Complete Federal Withholding Elections, and visit your organization's Workday training resources for further guidance on managing your profile.
Generation details: cost, quality tiers
Docsie billed 6,500 credits ($4.55) to analyze this 13-minute video at standard quality. The rewrite, template fill and Word/PDF exports were included. The same video at each quality tier:
| Quality | Frames sampled | Credits | Approx. cost |
|---|---|---|---|
| Draft | every 16-30 s | 3,250 | $2.27 |
| Standard (this guide) | every 8-15 s | 6,500 | $4.55 |
| Detailed | every 4-7 s | 13,000 | $9.10 |
| Ultra | every 1-3 s | 26,000 | $18.20 |
Credits priced at $0.70 per 1,000; plans include a monthly allowance. Enterprise customers on on-premise or bring-your-own-model deployments run this on their own inference and pay no per-video credits.
Generated by Docsie Video-to-Docs on 2026-10-06 from a 12-minute video. Screenshots are frames from the source video and belong to their creator, ODE HelpDesk, whose original is embedded above. If you own this video and want the guide removed or credited differently, contact us and we will act within one business day.