
How to Submit a Time Off Request in Workday
This guide walks you through how to submit a time off request in Workday, check your available absence balances, and confirm that your request was received. It also covers how to view your own and your team's scheduled absences from the Absence Calendar, and how to track the status of past and current requests.
Video: Workday Time Off and Leave of Absence by Information Technology Services. All credit for the demonstration goes to the creator; watch the original on YouTube. The written guide below was generated from this video by Docsie. Creator? Request a change or removal.
This guide walks you through how to submit a time off request in Workday, check your available absence balances, and confirm that your request was received. It also covers how to view your own and your team's scheduled absences from the Absence Calendar, and how to track the status of past and current requests.
Prerequisites
- You are logged in to your Workday account.
- You have access to the Absence section of Workday.
Viewing your dashboard and absence balances
-
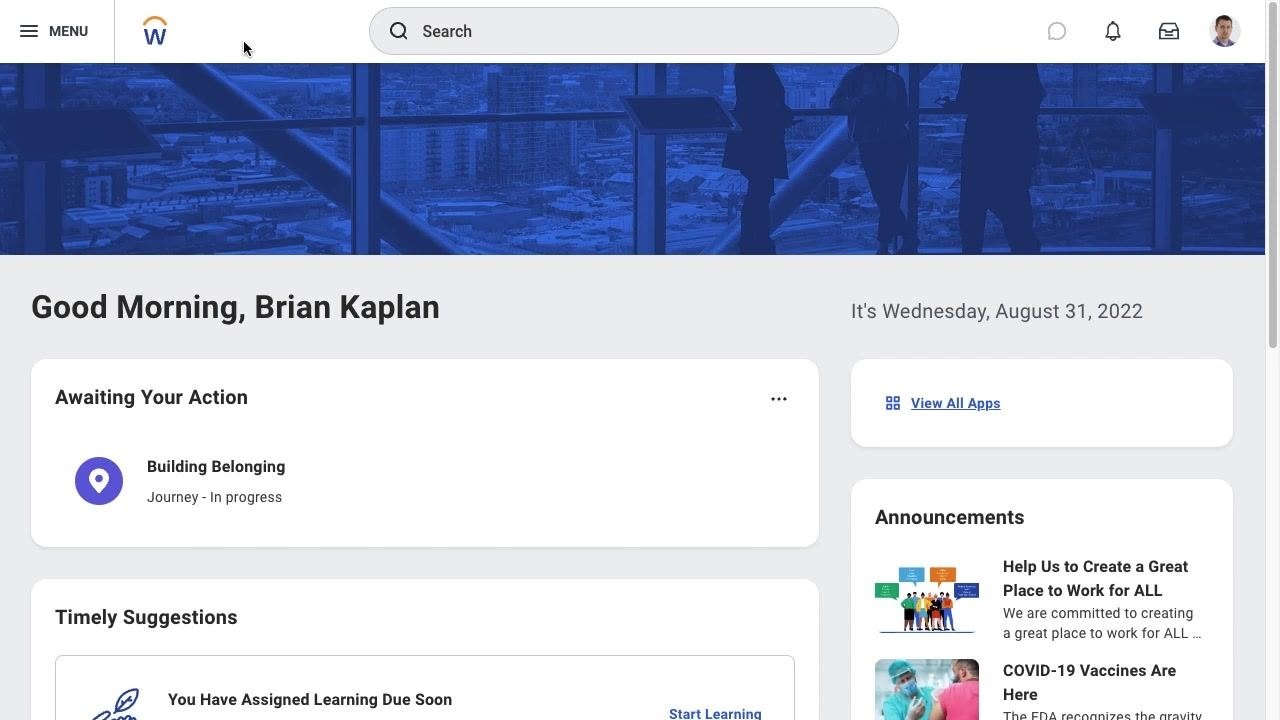
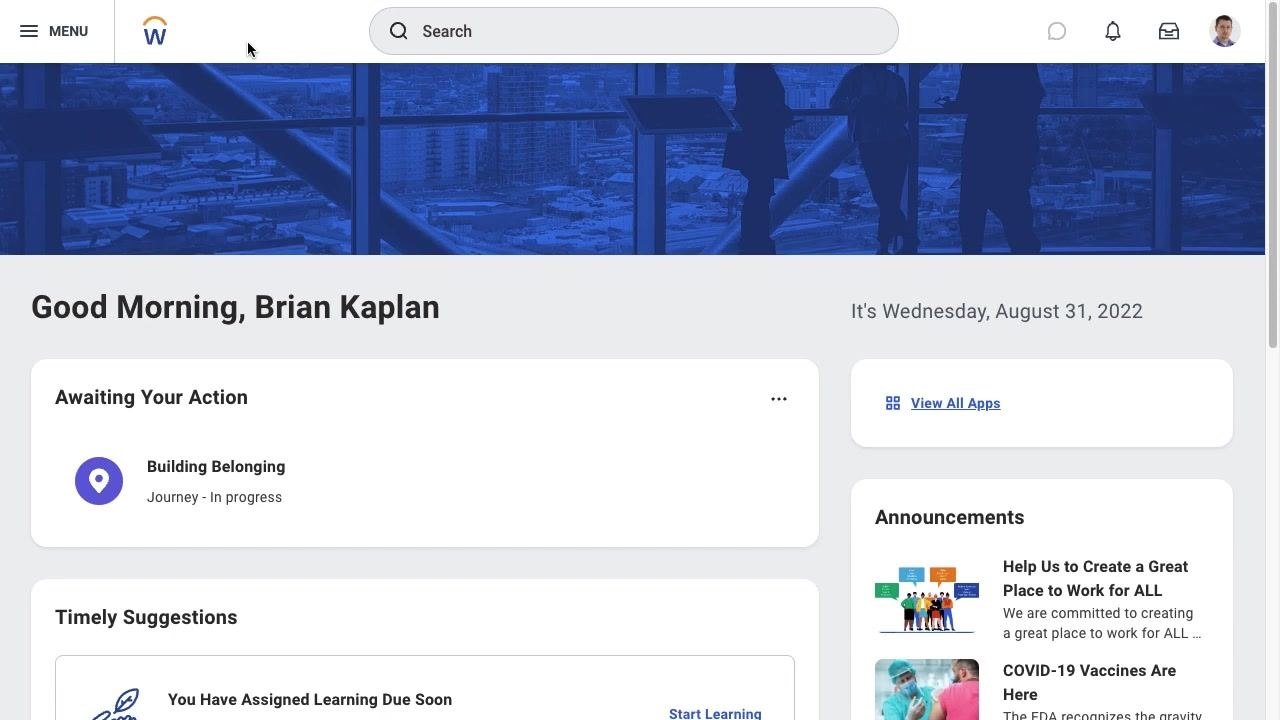
Open the Workday home dashboard After logging in, you land on the Workday home dashboard. The top bar shows a menu button, the Workday logo, a search bar, notification icons, and your profile picture. The main section greets you by name and displays the current date, along with Awaiting Your Action, Timely Suggestions, and Announcements panels.
-
Navigate to the Absence section From the dashboard, go to the Absence section. The page is split into two panels: Request, with options for Request Absence, Correct My Absence, and Request Return from Leave of Absence; and View, with options for My Absence, Absence Balance, and View Teams. At the bottom, an Available Balance as of Today box lists your current hours for Floating Holiday and Paid Time Off.
-
Select Absence Balance for details Click Absence Balance in the View panel to open a detailed calendar view of your absences and balances. The available balance summary stays visible at the bottom of the screen.
-
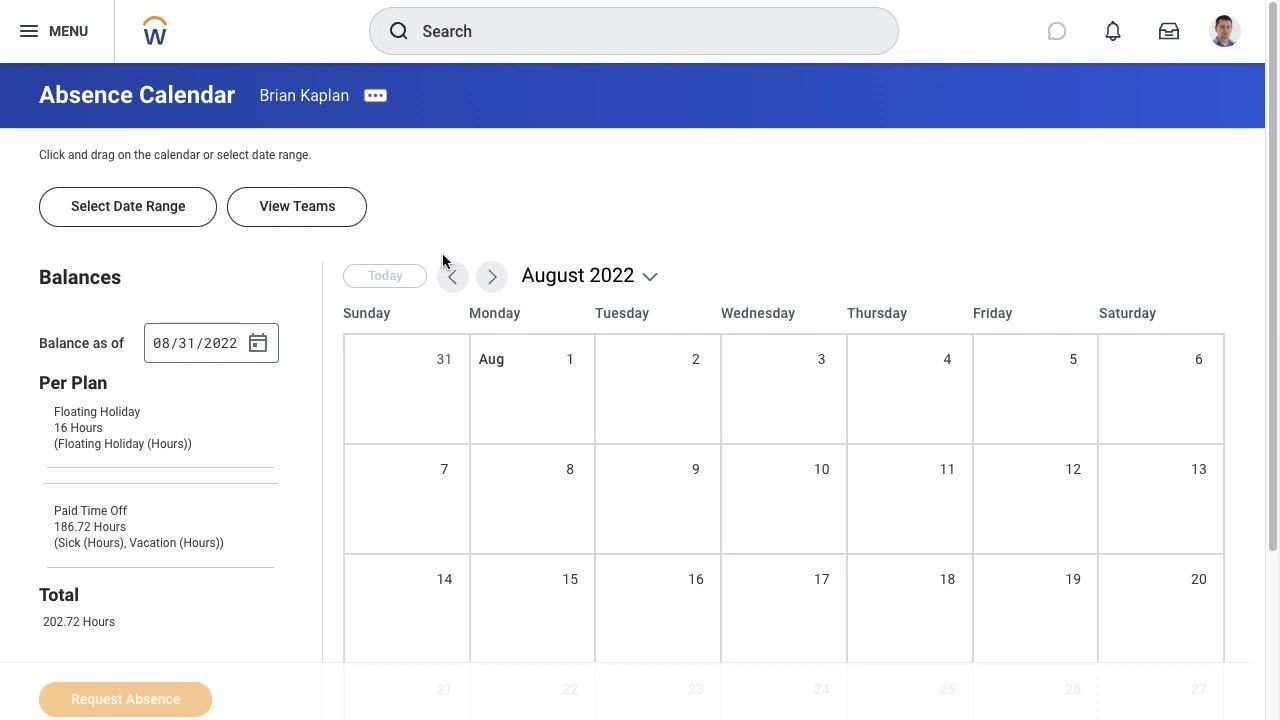
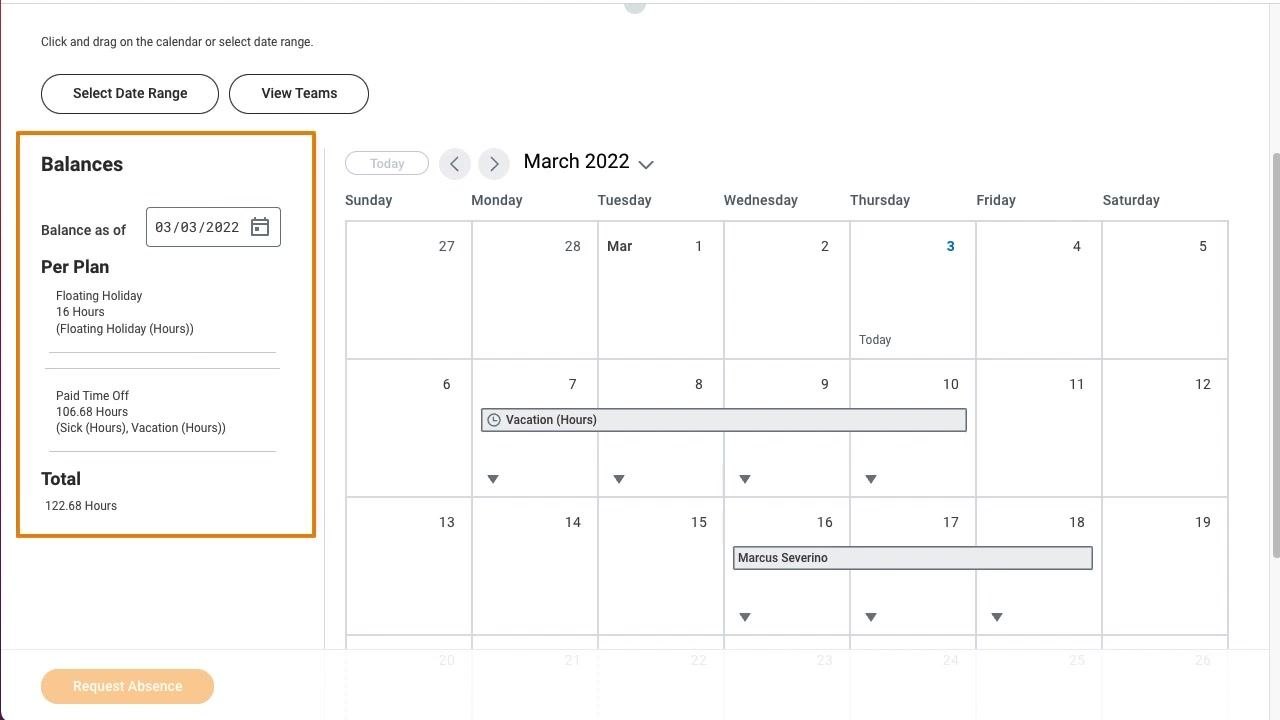
Review the Absence Calendar The Absence Calendar opens, titled with your name. At the top you'll find Select Date Range and View Teams buttons, along with a monthly calendar that includes navigation arrows and a Today button. The left panel shows your Balances as of the current date, including hours for Floating Holiday, Paid Time Off, and the total. You can click and drag on the calendar, or use the Select Date Range button, to choose the dates for a new request. A Request Absence button appears at the bottom left once dates are selected.

-
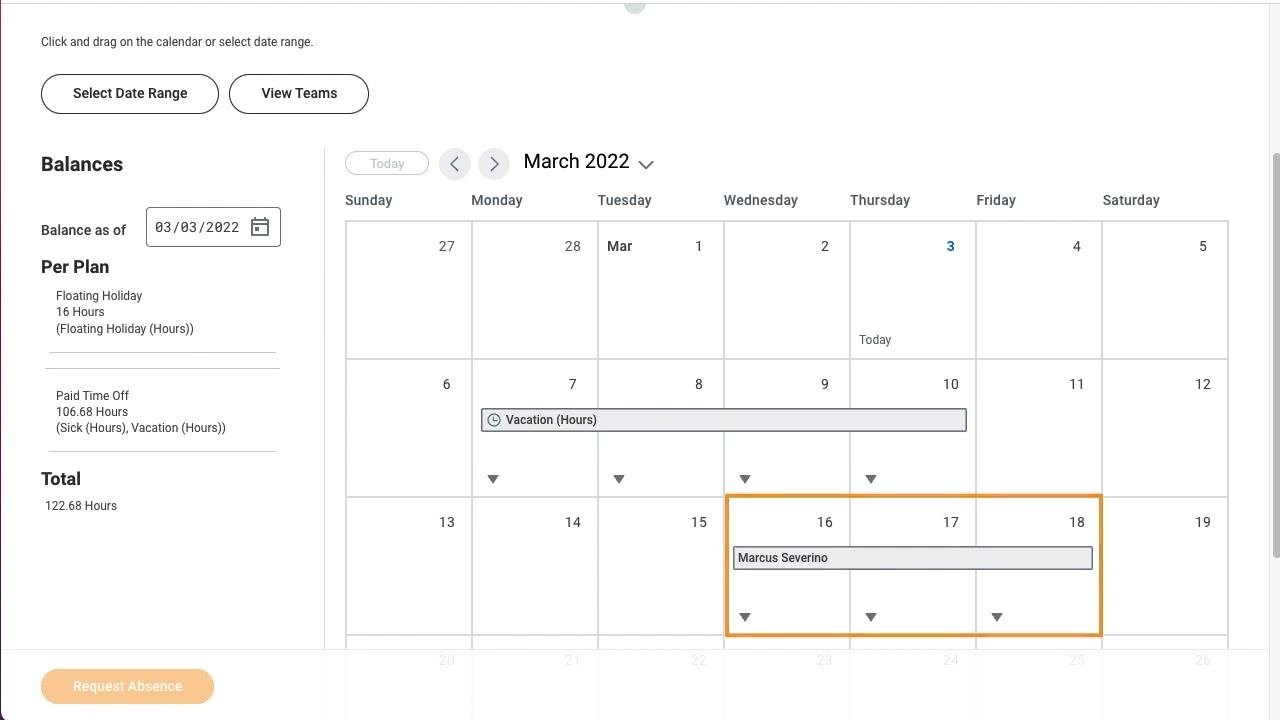
Review past absences and team schedules Navigating to a prior month (for example, March 2022) updates the Balances panel to reflect the totals for that date. The calendar also displays entries such as a personal vacation period and a teammate's scheduled absence, marked with a different label and color so you can distinguish your own time off from your team's.
-
Check the Balances panel The Balances panel on the left summarizes your balance as of the selected date, including Floating Holiday hours, Paid Time Off hours, and the combined total. Use this panel as a quick reference before requesting new time off.
Selecting a date range and absence type
-
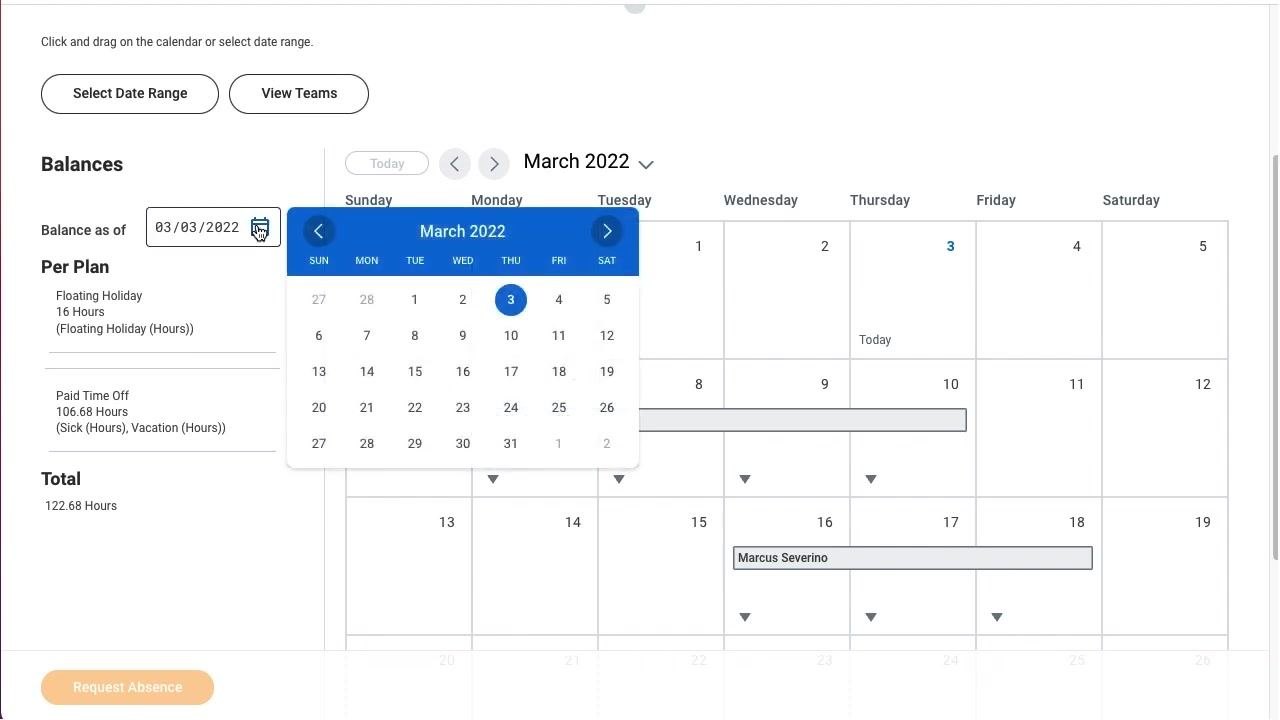
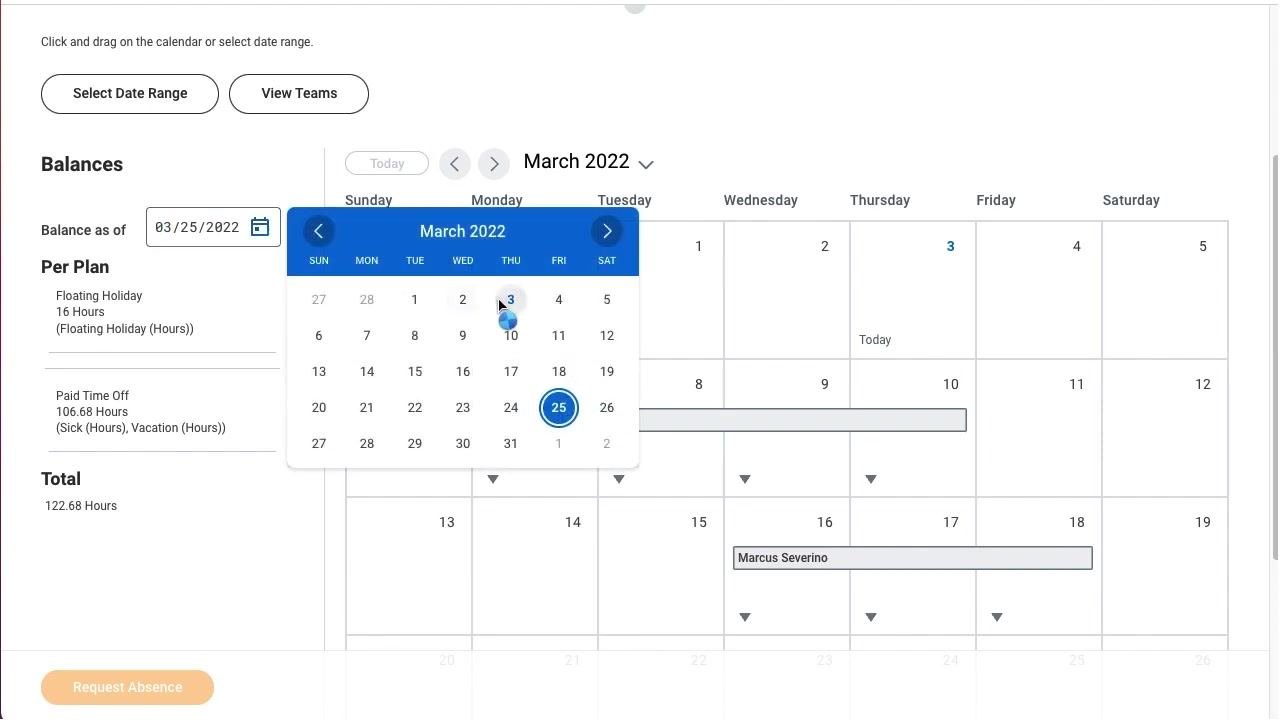
Open the date picker On the Absence Calendar, click the calendar icon next to the Balance as of field in the Balances panel to open the date picker. The main calendar continues to display the selected month, along with existing personal and team absences.
-
Adjust the date range In the date picker, select an additional date to update the range. Both dates are then highlighted in the picker while the main calendar continues to show the existing absences for that month.
-
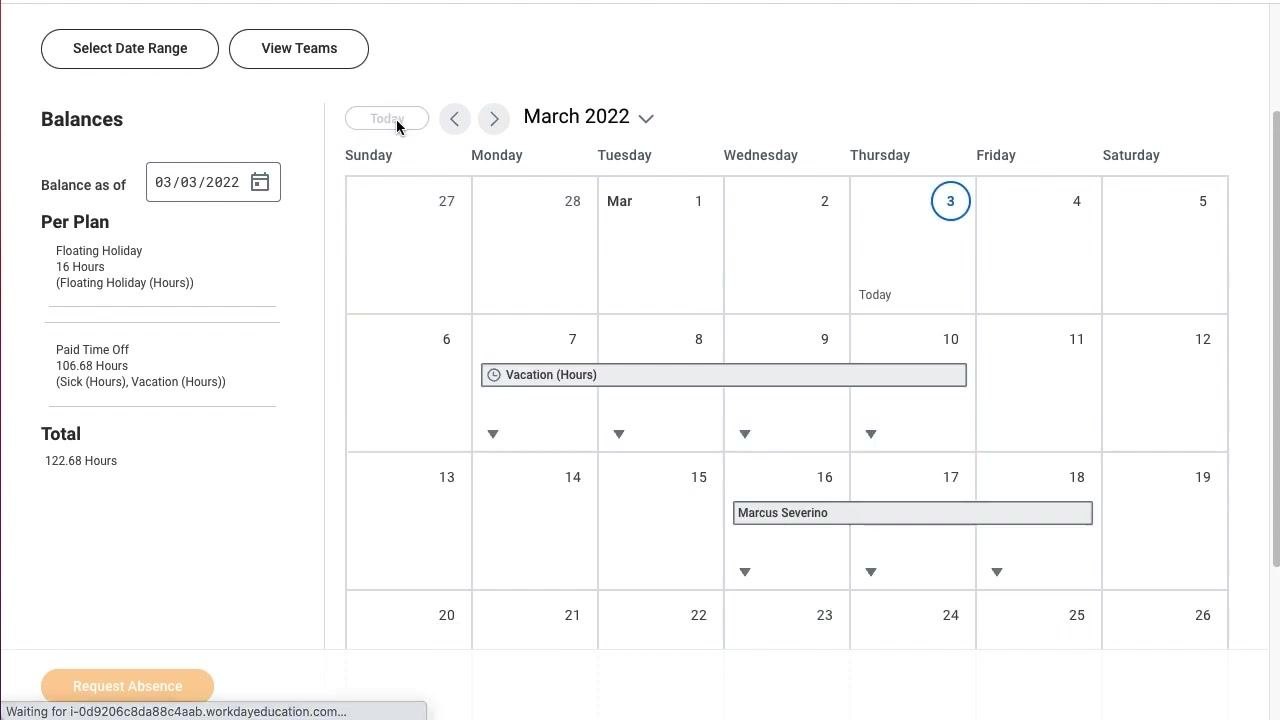
Return to the calendar view Closing the date picker returns you to the full calendar view. The Balances panel remains unchanged, and previously marked absences — such as a vacation period and a teammate's time off — are still visible.
-
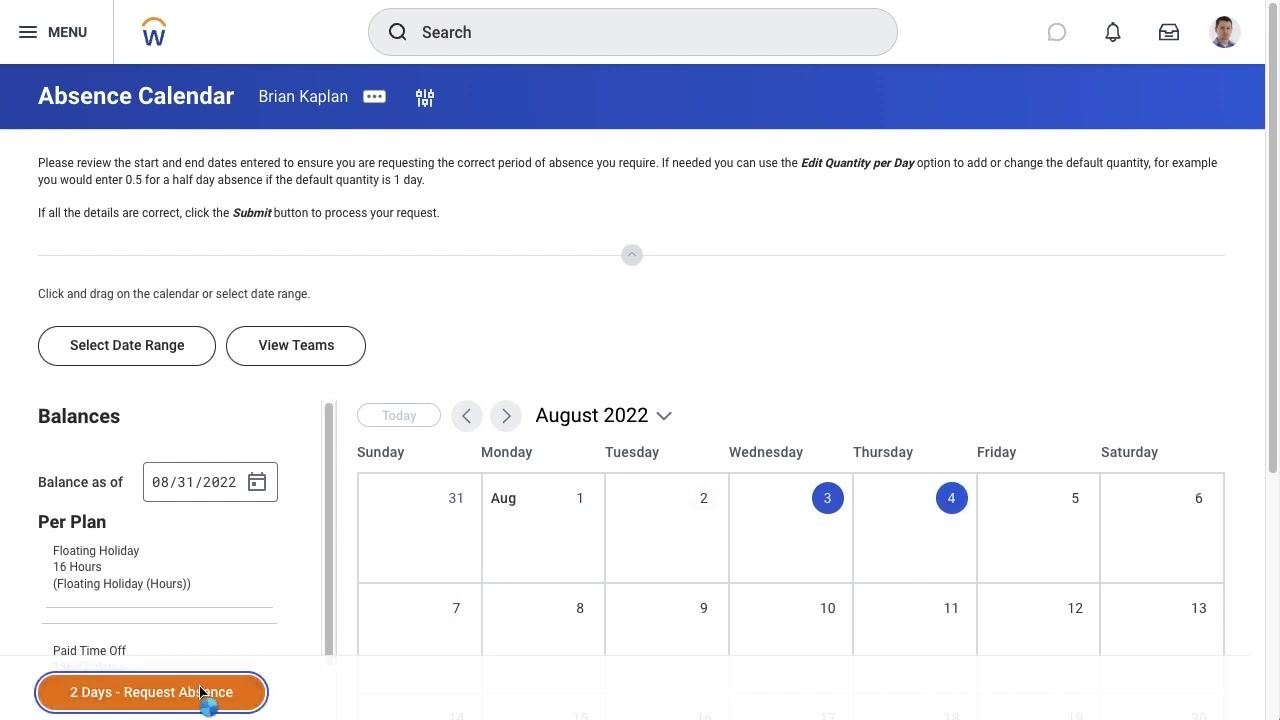
Select multiple days for a new request Click directly on the calendar to select the days you want to request off. As you select days, they're highlighted in blue, and the button at the bottom left updates to show the number of days selected along with the Request Absence label.
-
Adjust your selection if needed Click a selected day again to deselect it. The Request Absence button at the bottom left updates automatically to reflect the new number of days selected.
-
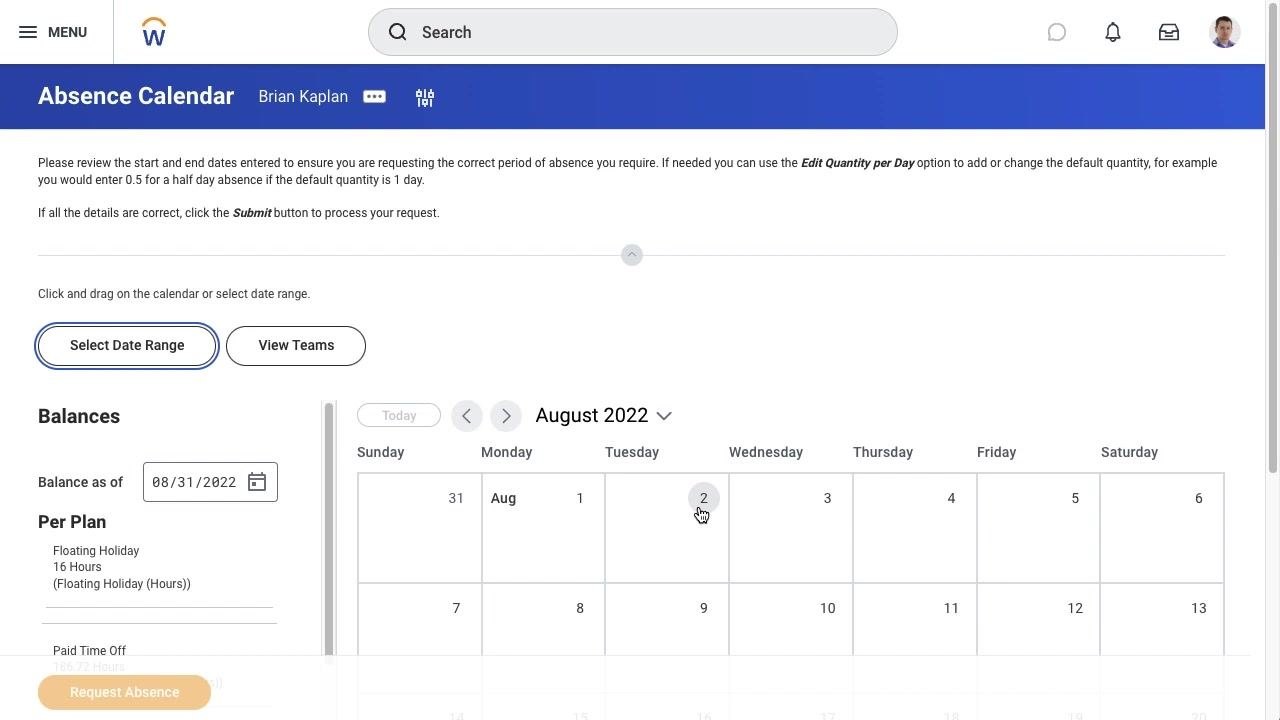
Open the Select Date Range dialog Click Select Date Range above the Balances panel to open a modal dialog. The dialog includes From and To fields for entering start and end dates, a Type field, and Next and Cancel buttons.
-
Choose the absence type In the dialog, open the Type dropdown to see the available options, such as Short Term Unavailability, Time Off, Leave of Absence, and other absence types. A search bar lets you find additional types if needed.
-
Confirm the absence type and dates After selecting a type, the dialog updates to display the chosen date range under When and the selected type, such as Vacation (Hours). Click Next to proceed, or Cancel to discard the selection.
Editing the quantity and submitting your request
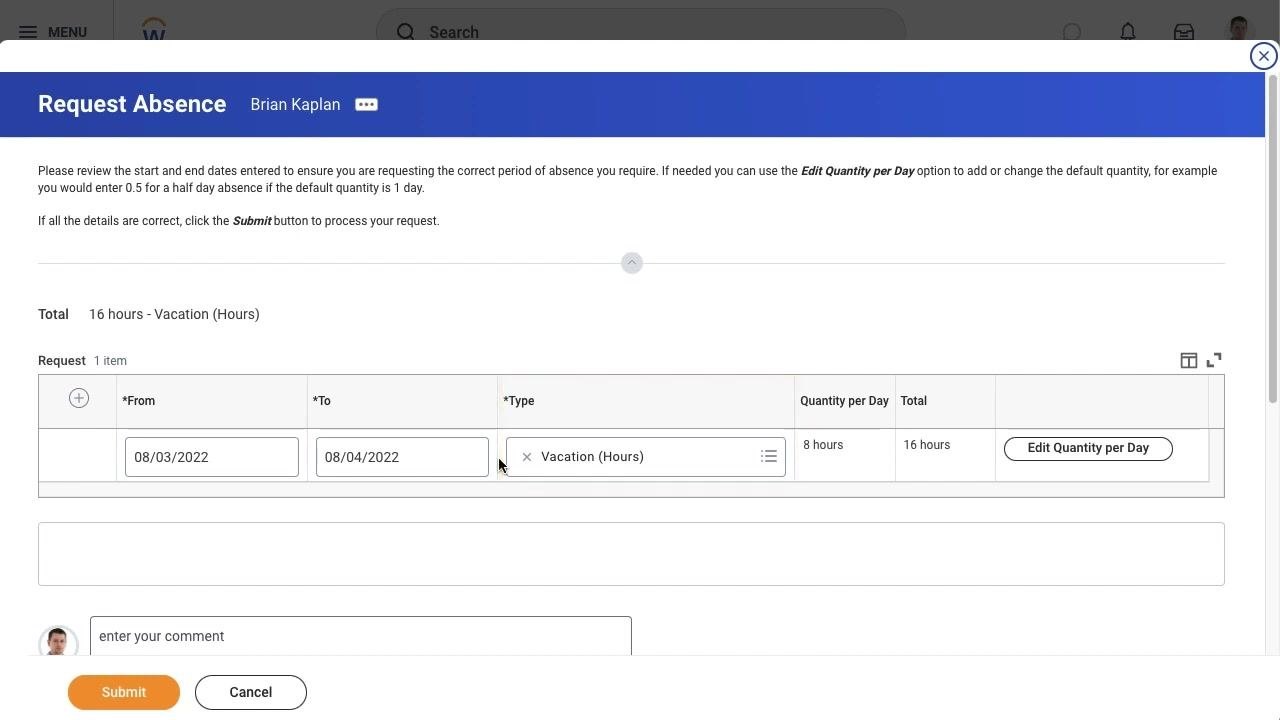
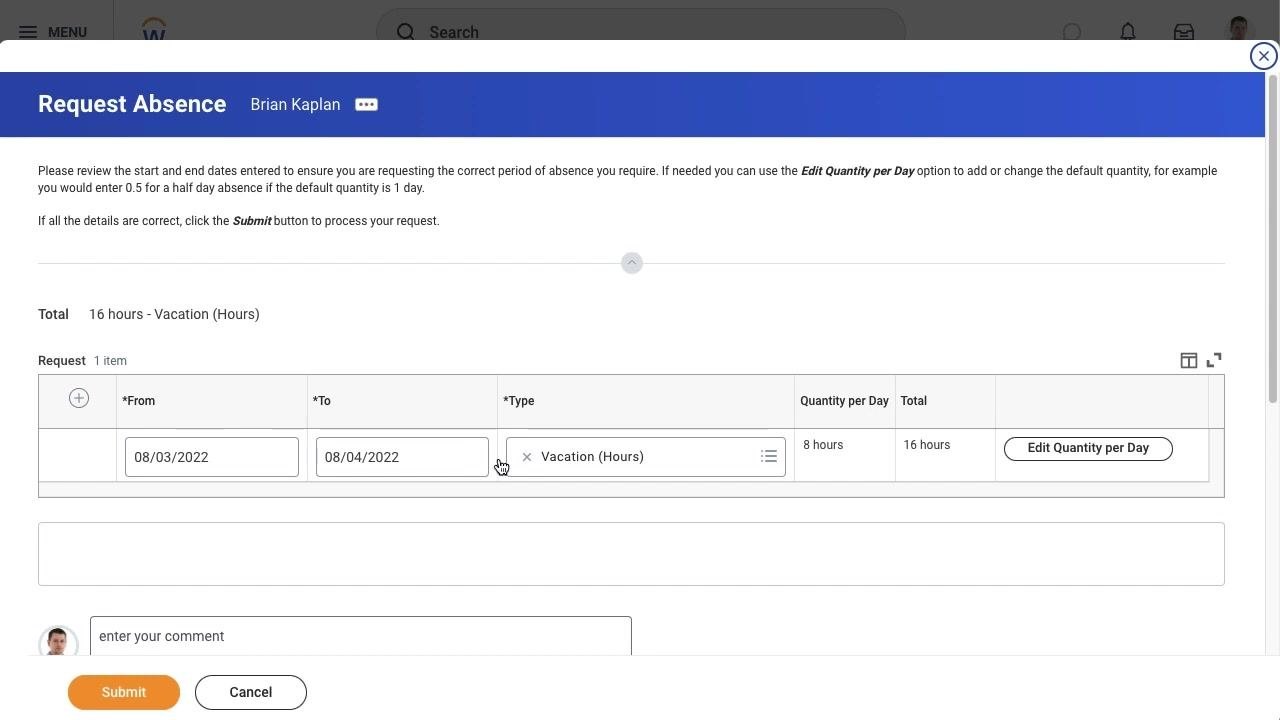
- Review the absence request details On the Request Absence screen, confirm your name, the absence type, and the selected date range. The default quantity is shown per day along with the total hours requested. An Edit Quantity per Day button lets you adjust the hours, and a comment box is available for additional notes. Submit and Cancel buttons appear at the bottom.
- Open the Edit Quantity per Day dialog Click Edit Quantity per Day to open a dialog listing each date in your request. An Update All Quantities field lets you change the hours for every date at once, or you can adjust each date individually using its own Quantity per Day field. A Comments field is available for each date as well.
-
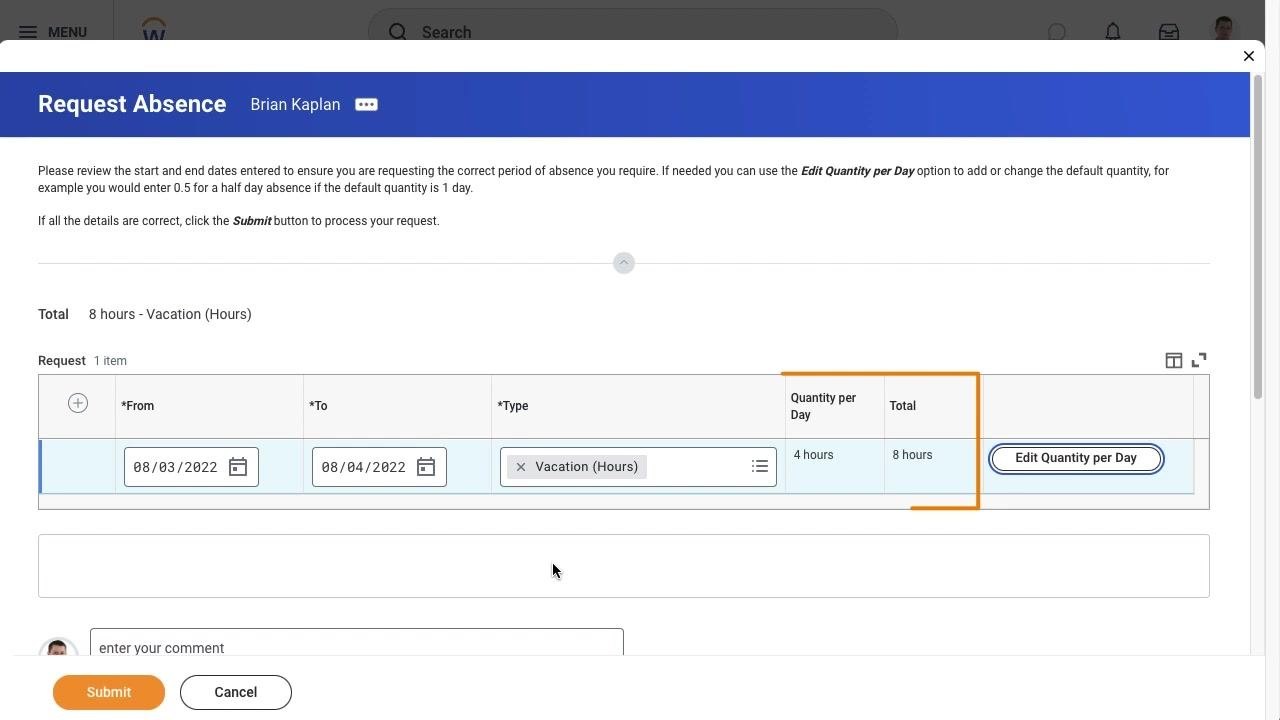
Adjust the quantity per day Update the Update All Quantities field or the individual Quantity per Day fields as needed. Once the values are correct, click Done to confirm the changes.
-
Review the updated totals After clicking Done, you return to the Request Absence screen, where the Quantity per Day and Total columns reflect your changes. The absence type and date range remain the same, and Edit Quantity per Day is still available if you need to make further adjustments.
-
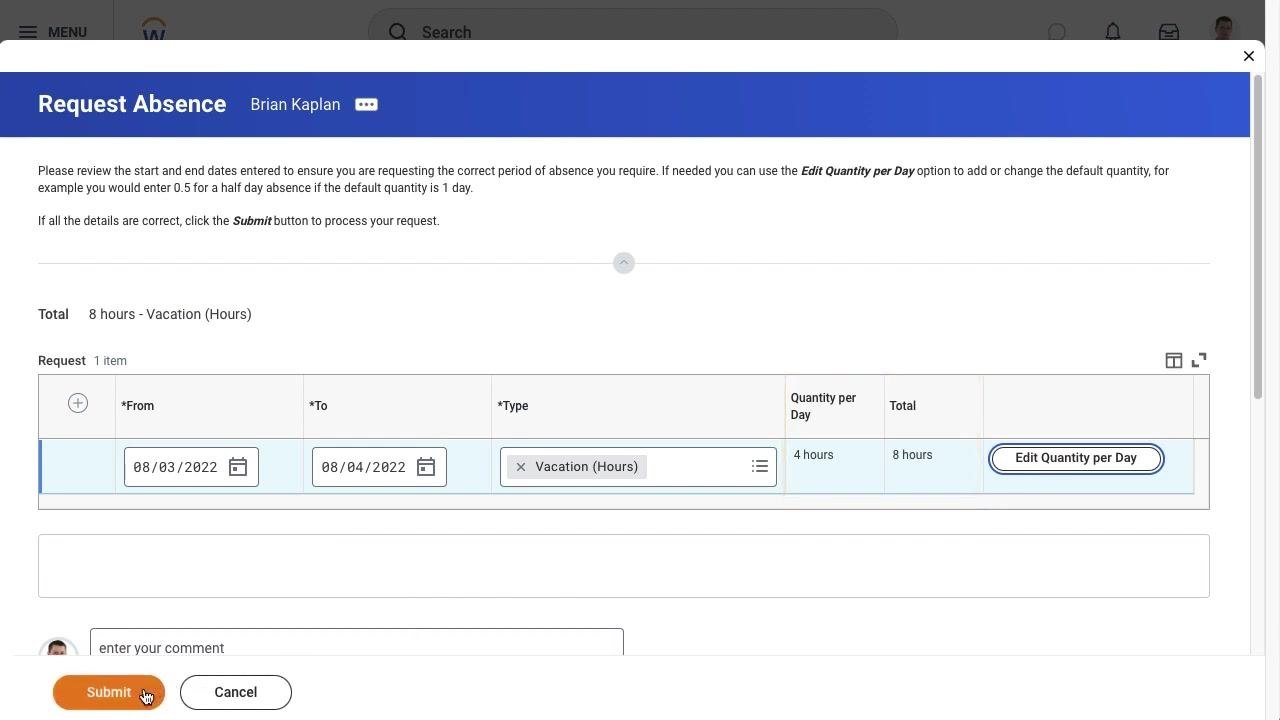
Submit the absence request Review all the details for accuracy, then click Submit at the bottom left to send your request for approval.
-
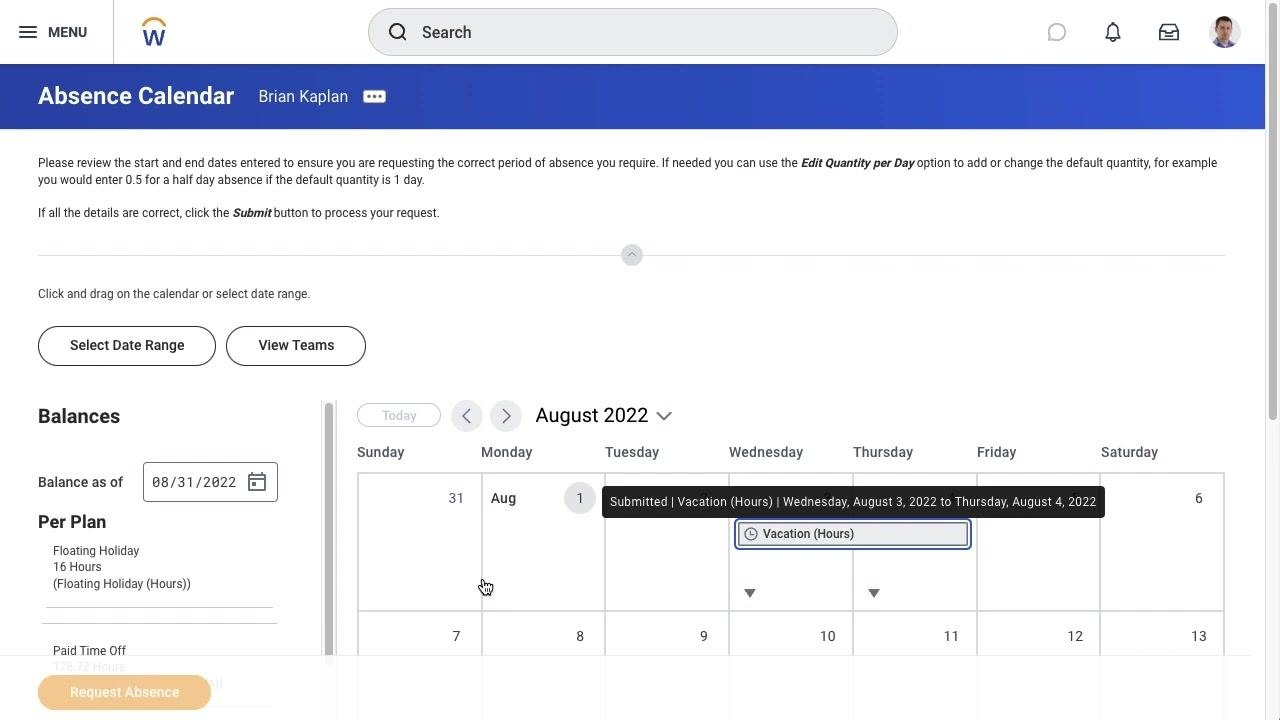
View the submission confirmation After submitting, you return to the Absence Calendar, where a confirmation message reads "Your request has been submitted." The calendar marks the requested dates with the absence type you selected, and the Balances panel shows your updated totals.
-
Verify the absence status on the calendar Hover over the marked dates to see details such as the status, absence type, and date range — for example, "Submitted | Vacation (Hours)" with the corresponding dates.
-
Return to the Workday home screen After confirming your submission, Workday returns you to the home screen, where the Awaiting Your Action, Timely Suggestions, and Announcements panels are displayed along with the current date. This completes the process of submitting your time off request.
Reviewing and managing your absence requests
-
Access the Absence dashboard From the Workday home screen, return to the Absence section. The Request and View panels appear as before, and the Available Balance as of Today section at the bottom shows your current hours for Floating Holiday and Paid Time Off. Note that this balance does not account for absences you've requested but that haven't yet been approved.
-
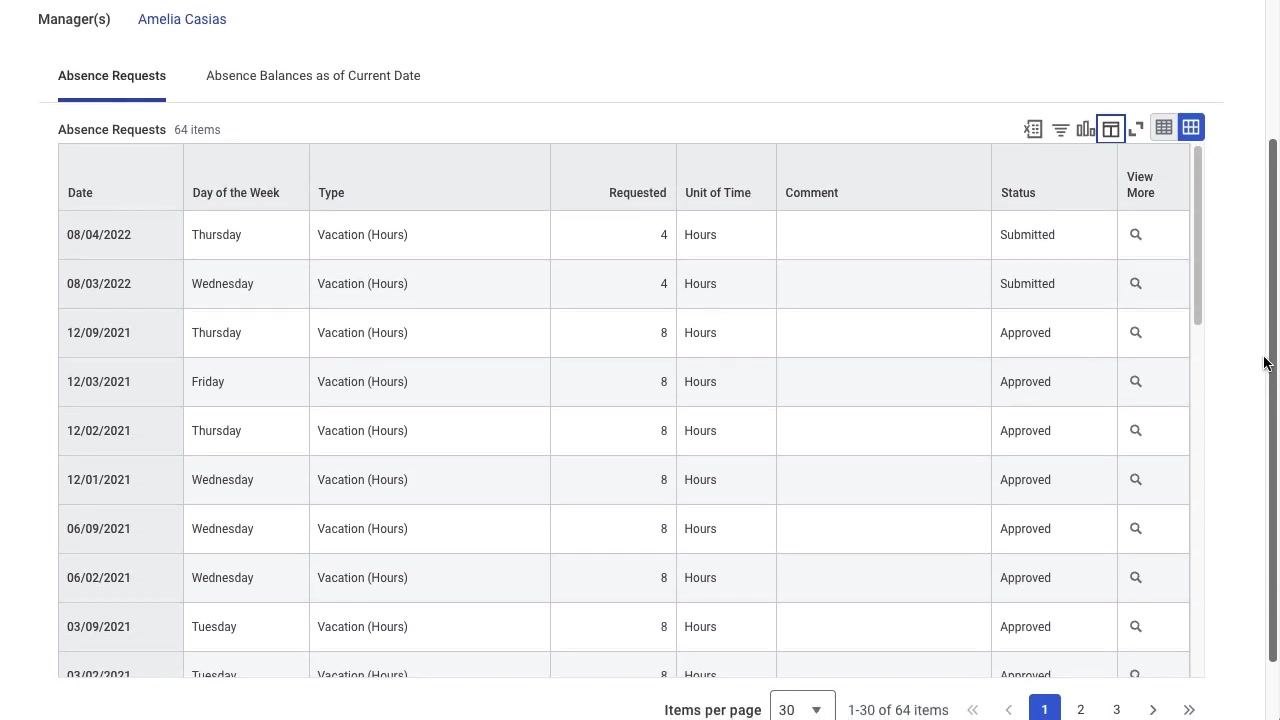
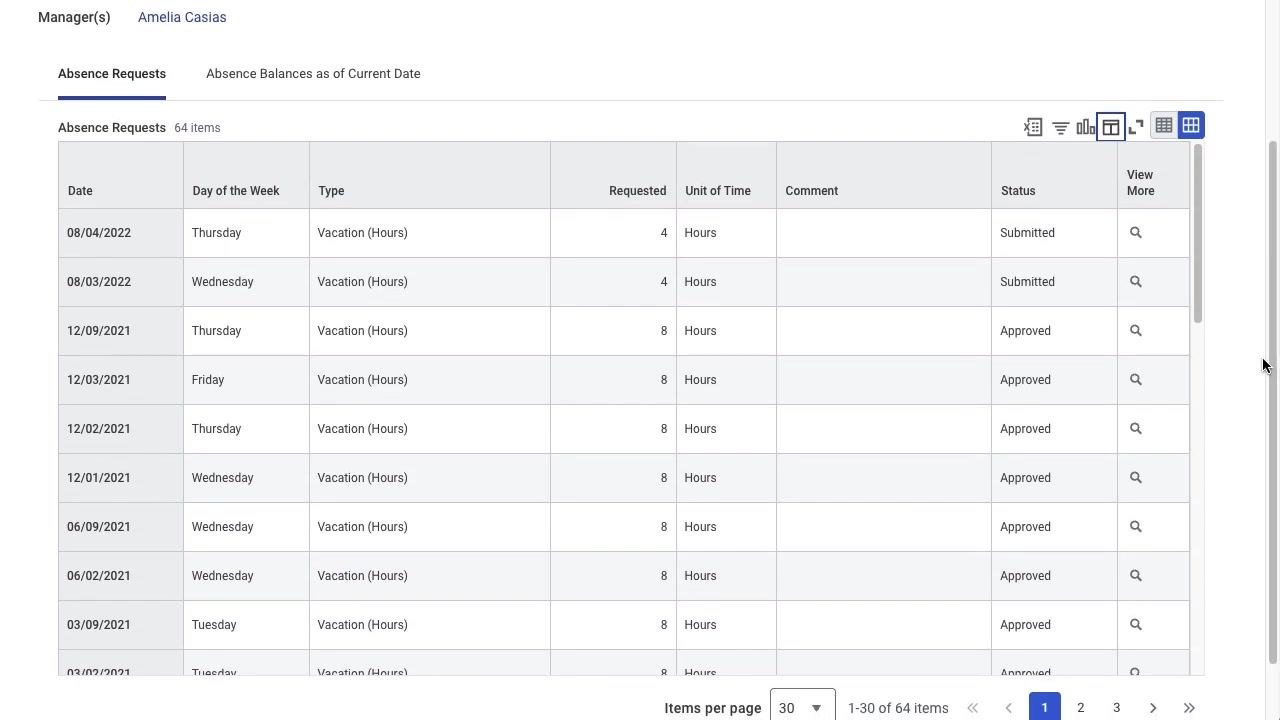
Review your absence history Select My Absence or a similar option to open the Absence Requests table. The table lists each request with columns for Date, Day of the Week, Type, Requested hours, Unit of Time, Comment, Status, and a View More icon for additional details. Recent requests may show a status of Submitted, while older, processed requests typically show Approved.
-
Verify the submission status Confirm that your most recent requests show the correct status, such as Submitted, and that earlier requests are marked Approved once processed. Use the View More icon to see additional details for any entry if needed.
Summary
- Review your available balances and the Absence Calendar before requesting time off.
- Select your dates either by clicking directly on the calendar or by using the Select Date Range dialog, then choose the appropriate absence type.
- Use Edit Quantity per Day to fine-tune the hours requested for each date before submitting.
- Click Submit to send your request for approval, and confirm the submission message on the Absence Calendar.
- Check the Absence Requests table at any time to verify the status of your current and past requests.
What's next
For further assistance with Workday absence requests, additional support resources are available at www.unf.edu/its.
Generation details: cost, quality tiers
Docsie billed 3,000 credits ($2.10) to analyze this 6-minute video at standard quality. The rewrite, template fill and Word/PDF exports were included. The same video at each quality tier:
| Quality | Frames sampled | Credits | Approx. cost |
|---|---|---|---|
| Draft | every 16-30 s | 1,500 | $1.05 |
| Standard (this guide) | every 8-15 s | 3,000 | $2.10 |
| Detailed | every 4-7 s | 6,000 | $4.20 |
| Ultra | every 1-3 s | 12,000 | $8.40 |
Credits priced at $0.70 per 1,000; plans include a monthly allowance. Enterprise customers on on-premise or bring-your-own-model deployments run this on their own inference and pay no per-video credits.
Generated by Docsie Video-to-Docs on 2026-10-01 from a 5-minute video. Screenshots are frames from the source video and belong to their creator, Information Technology Services, whose original is embedded above. If you own this video and want the guide removed or credited differently, contact us and we will act within one business day.