
How to Hire an Employee in Workday
This guide walks you through how to hire an employee in Workday when the individual is already set up as a pre-hire. You'll learn how to locate the pre-hire profile, launch the Hire Employee action, complete the required job and working time details, submit the request, and review the post-submission tasks that follow.
Video: How to Hire Employee In Workday/How to create Worker Profile by Wizard of HCM. All credit for the demonstration goes to the creator; watch the original on YouTube. The written guide below was generated from this video by Docsie. Creator? Request a change or removal.
This guide walks you through how to hire an employee in Workday when the individual is already set up as a pre-hire. You'll learn how to locate the pre-hire profile, launch the Hire Employee action, complete the required job and working time details, submit the request, and review the post-submission tasks that follow.
Prerequisites
Before you begin, make sure you have the following:
- Access to the Workday application with permissions to initiate a hire action.
- A pre-hire profile already created for the person you intend to hire.
- Knowledge of the supervisory organization, position, and job profile the new hire will be assigned to.
Access the Workday dashboard
Open the Workday application and confirm you're on the main dashboard. You should see widgets such as Awaiting Your Action and Your Top Apps, along with a search bar at the top of the screen. This dashboard is your starting point for locating the pre-hire record.
Search for the pre-hire employee
Click the search bar at the top of the dashboard and begin typing a relevant keyword, such as a letter of the person's name. A dropdown appears showing Recent Searches along with quick filter options like People, Tasks and Reports, Learning, and Drive.
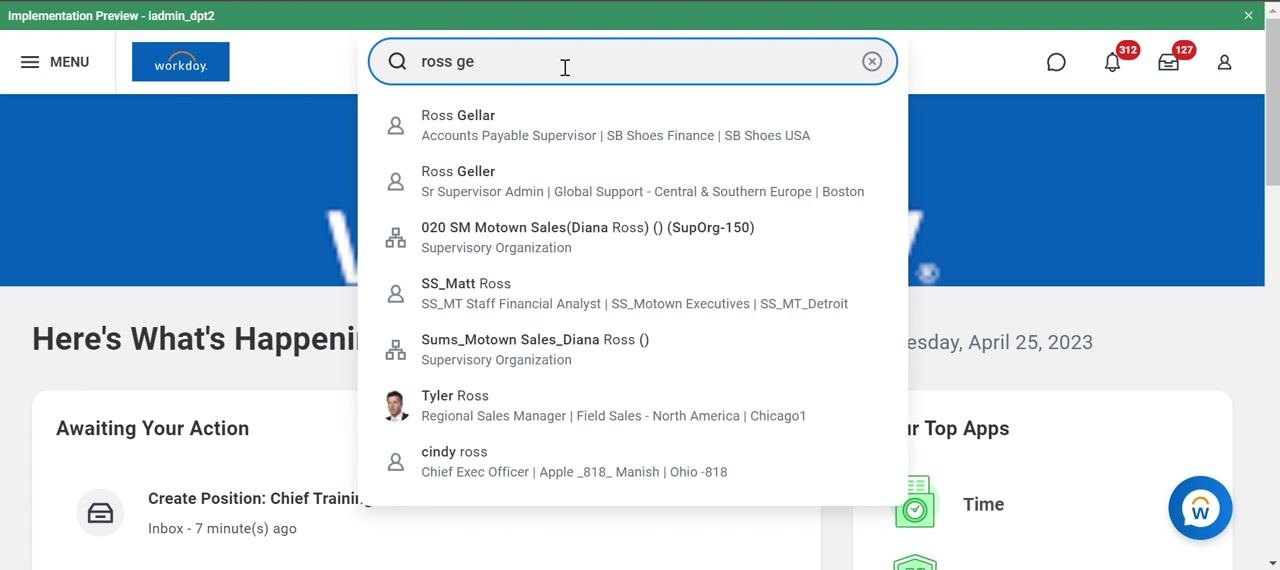
Continue typing the full name or search term (for example, "ross ge"). The dropdown populates with matching people and organizations, allowing you to locate the correct individual.
Select the pre-hire profile
Click the correct pre-hire name from the search results. Workday navigates to the People category and displays a list of matching pre-hire profiles. Confirm the profile details—such as the manager's name and pre-hire status—then click the profile to open it.
Open the Hire action
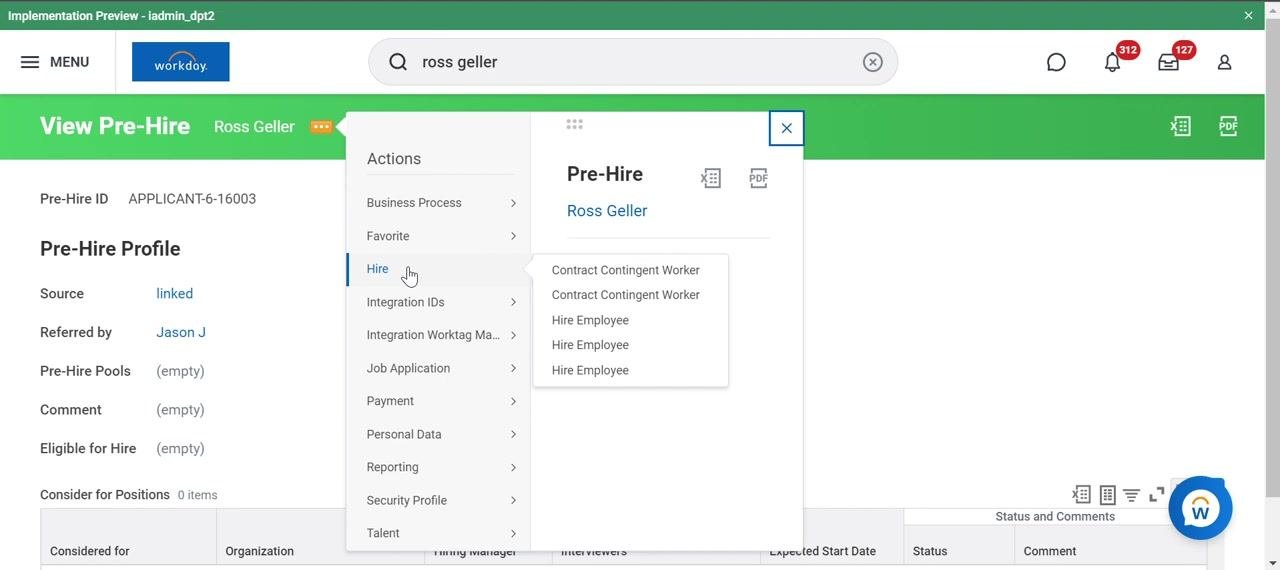
On the pre-hire profile page, locate the Actions menu and hover over or click Hire. A submenu appears with options including Contract Contingent Worker and Hire Employee. Select Hire Employee to proceed.
Choose the supervisory organization
In the Hire Employee dialog, type the relevant organization name into the Supervisory Organization field (for example, "betty"). Select the appropriate organization from the search results.
Enter the hire date
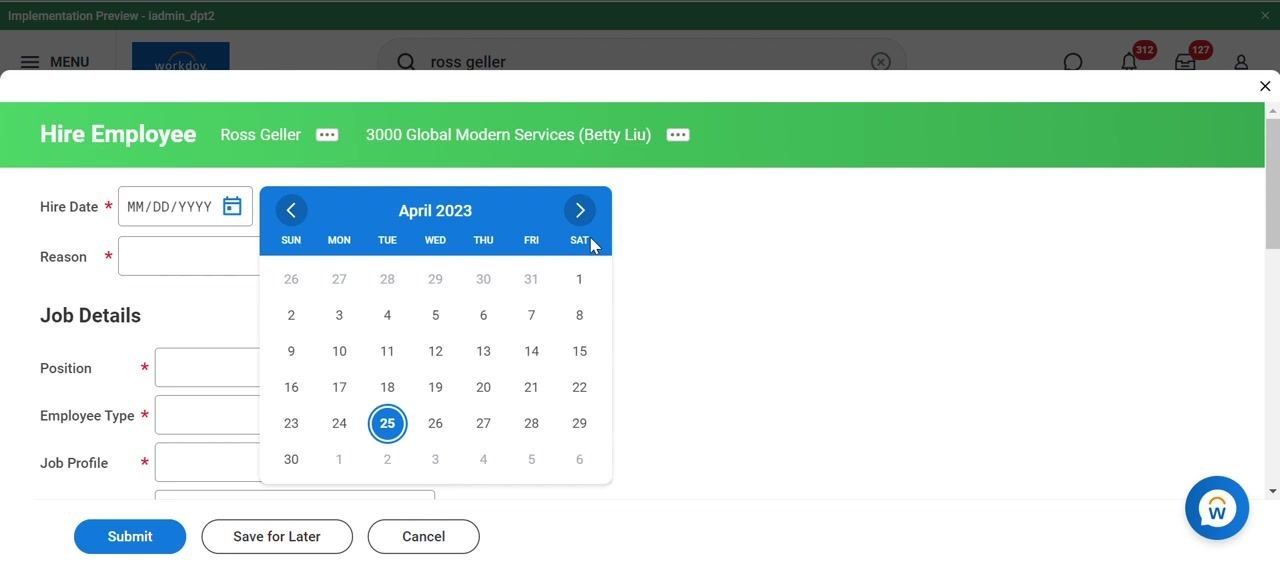
On the Hire Employee form, click the calendar icon and select the desired hire date. Use the calendar's navigation arrows to move to the correct month and date if needed. At this point the Reason, Position, Employee Type, and Job Profile fields are still to be completed.
Specify the reason for hire
In the Reason field, type or select the appropriate reason (for example, "hire > New Position"). Confirm the correct option is selected from the dropdown.
Select the position
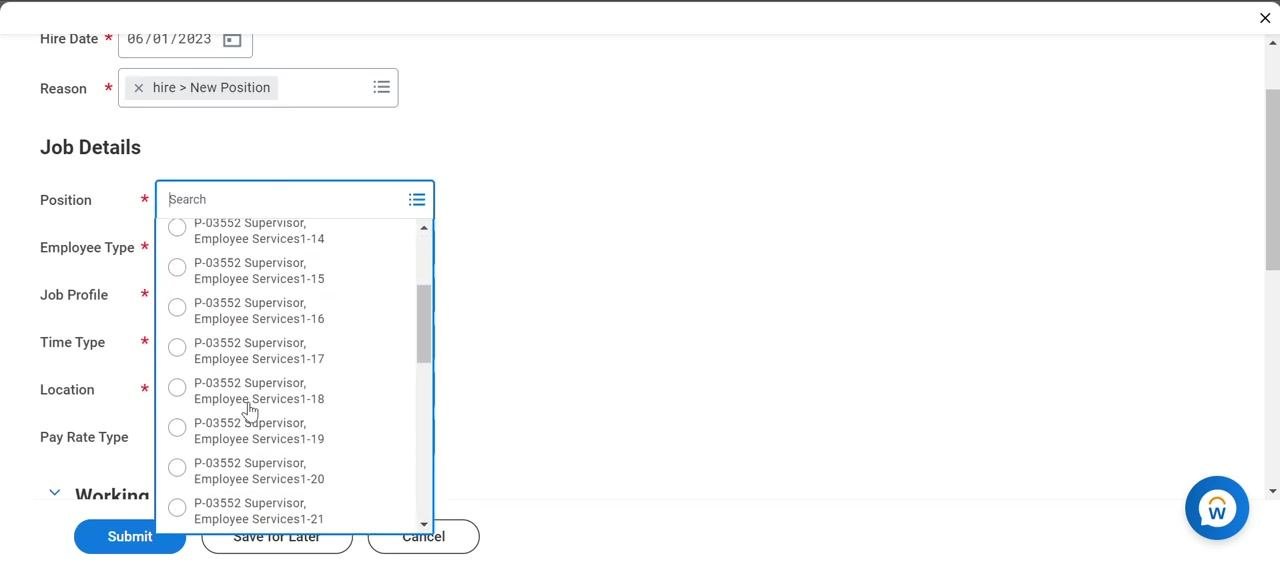
In the Position field, search for the appropriate role. Review the list of available positions and select the correct one for the new hire.
Review job details
Confirm that the core job details are filled in, including:
- Hire Date
- Reason
- Position
- Job Profile
- Time Type
- Location
If a required field is still missing, a red error indicator appears at the top right (for example, "1 Error"). The Submit, Save for Later, and Cancel buttons are available at the bottom of the form.
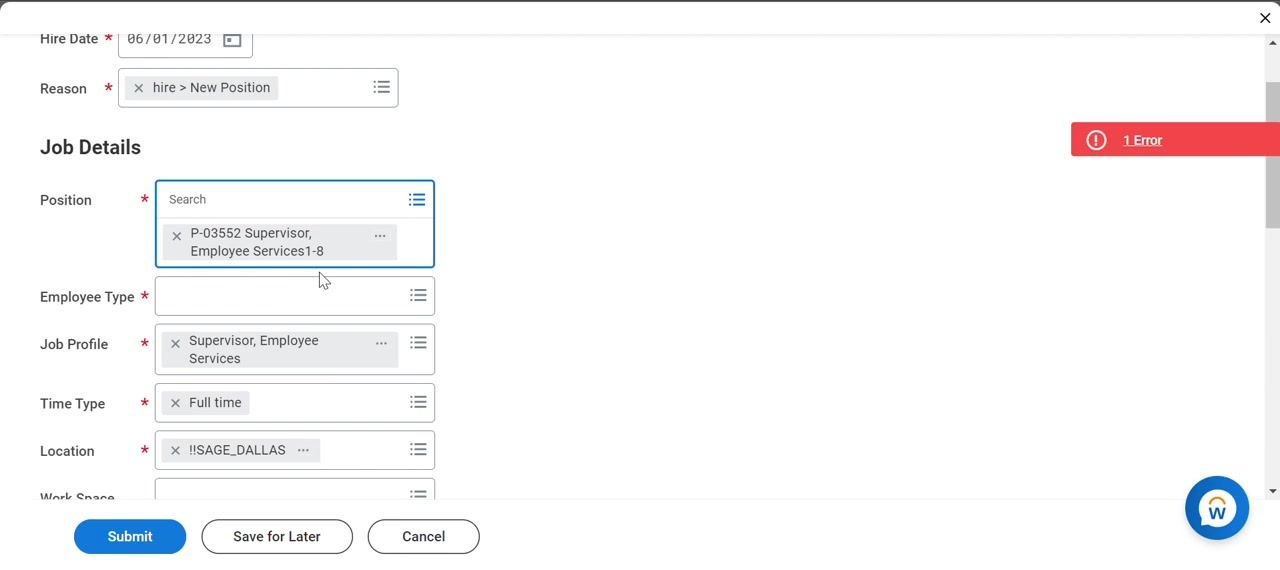
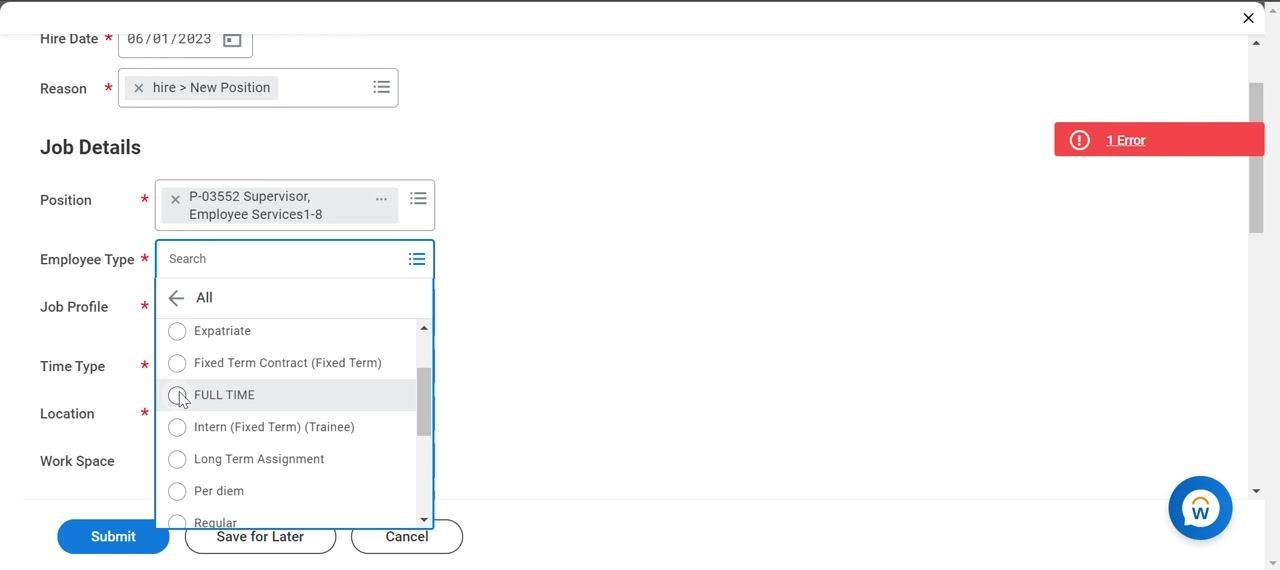
Select the employee type
Click the Employee Type field to open the dropdown, scroll through the options, and select the appropriate type (for example, FULL TIME). Confirm the selection appears in the field.
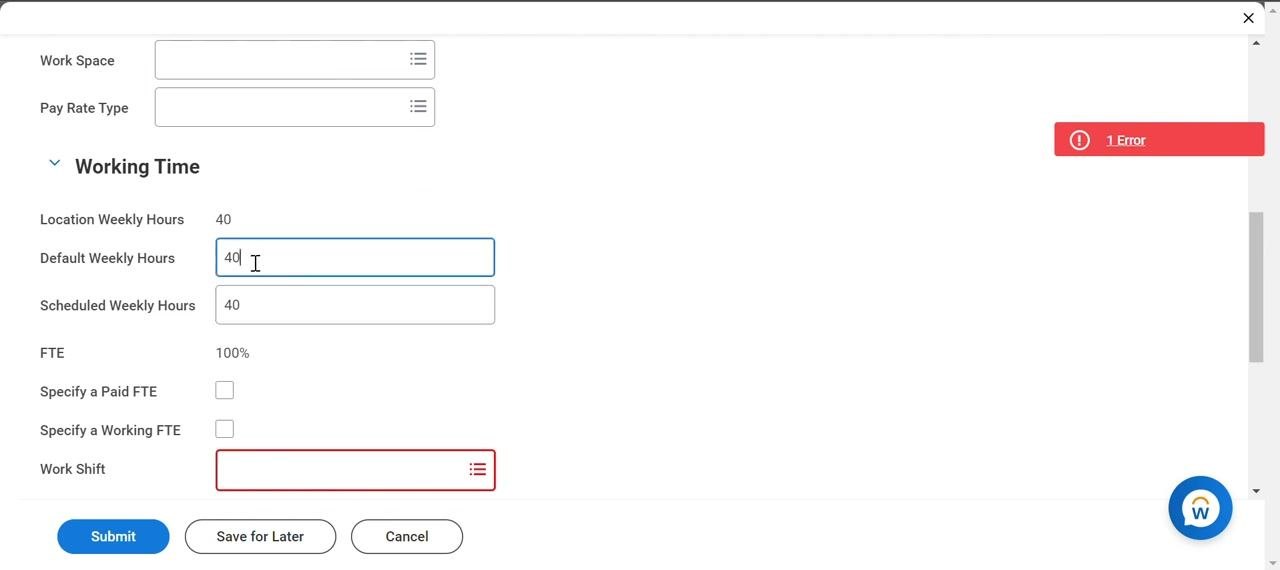
Enter working time details
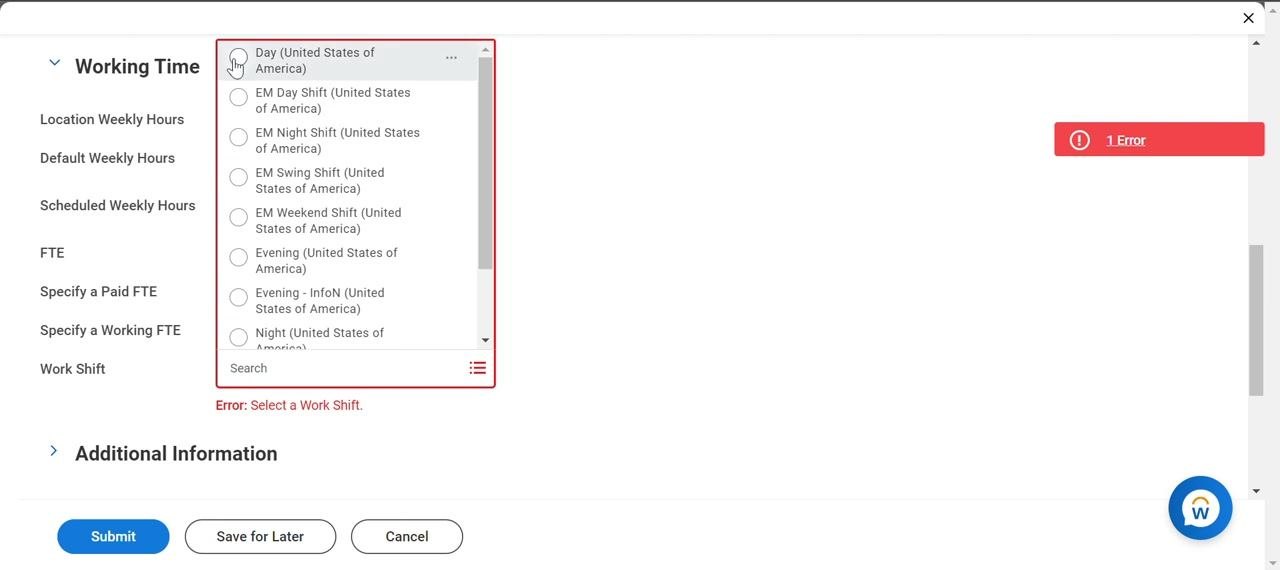
Scroll to the Working Time section and enter the following:
- Location Weekly Hours — pre-filled (for example, 40).
- Default Weekly Hours — enter the value and adjust as needed.
- Scheduled Weekly Hours — enter the value and adjust as needed.
- FTE — pre-filled (for example, 100%).
If you change the weekly hours, make sure Default Weekly Hours and Scheduled Weekly Hours match. Leave Specify a Paid FTE and Specify a Working FTE unchecked unless your situation requires them.
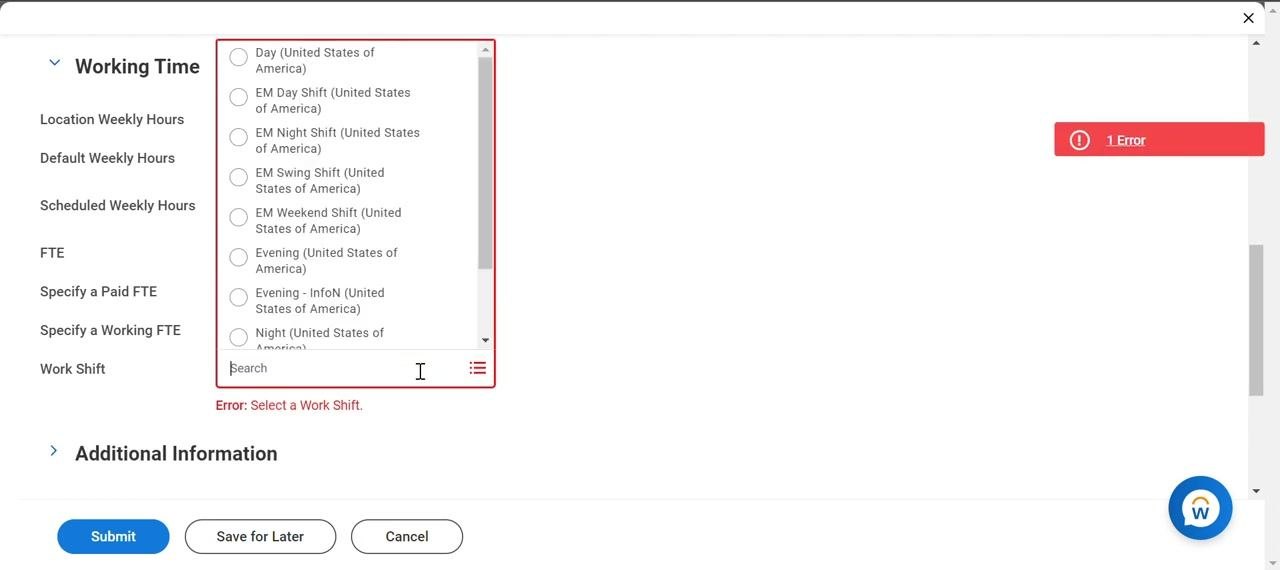
Select the work shift
Click the Work Shift field to open the dropdown. Review the available options, such as Day, EM Day Shift, EM Night Shift, EM Swing Shift, EM Weekend Shift, Evening, and Night (all United States of America). Select the appropriate shift—for example, Day (United States of America). Once selected, the "Error: Select a Work Shift" message disappears.
Add additional comments
In the Additional Information section, locate the comment field and enter any relevant notes about the hire. Review the related links provided, such as Business Policy Document and Curious?, for further guidance.
Submit the hire request
Review all entered information for accuracy, then click the blue Submit button at the bottom of the form to finalize the hire. You can also use Save for Later to pause and return to the form, or Cancel to discard your changes.
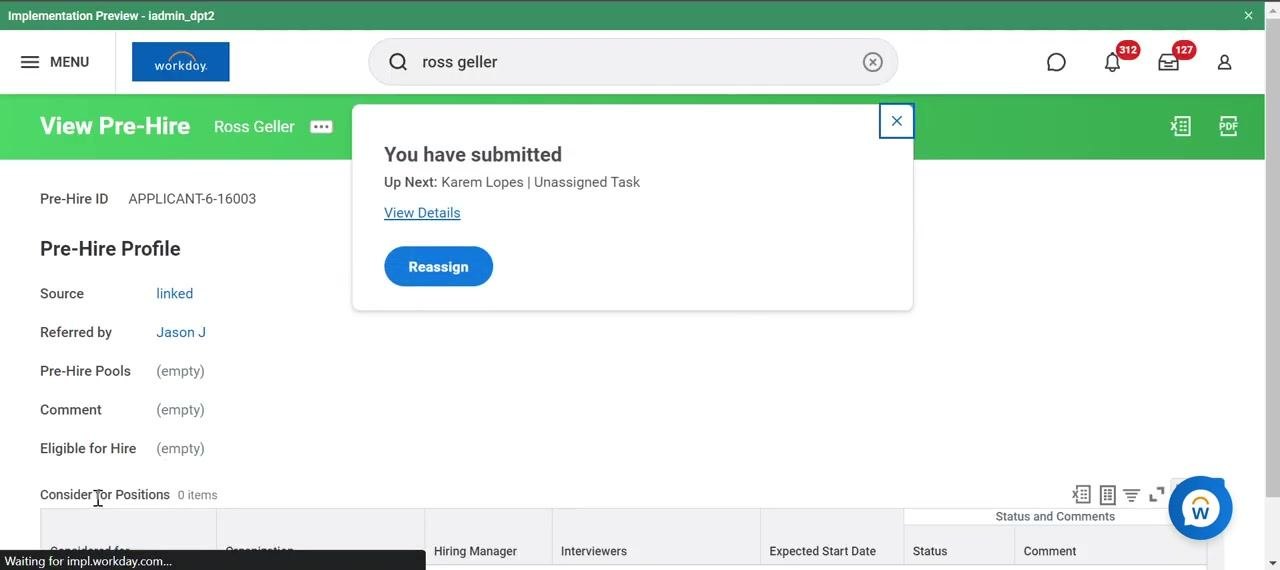
After submission, a confirmation message appears along with the next assigned task. Options to View Details or Reassign the task are available on the pre-hire profile page.
Check your inbox for new tasks
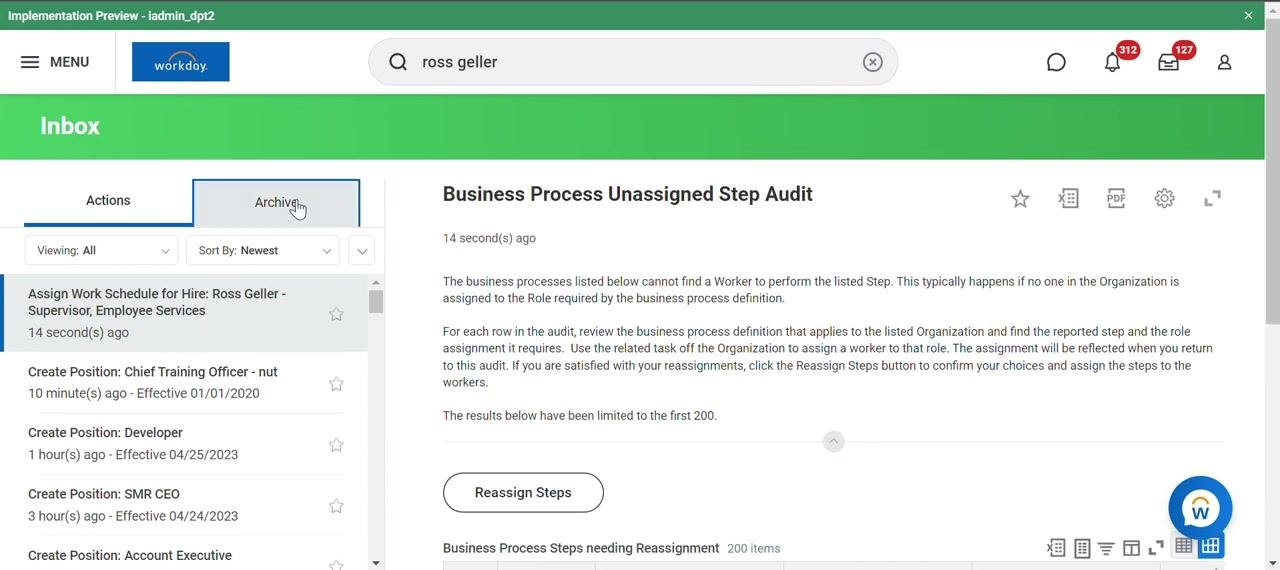
Navigate to your Workday Inbox to find any new tasks generated by the hire, such as "Assign Work Schedule for Hire." The Inbox also displays other recent and pending tasks, along with notification icons showing alert and message counts.
Review the business process audit
Navigate to the Archive tab to view completed or system-generated audit messages. Review the Business Process Unassigned Step Audit, which explains when a step cannot be assigned because no worker is available for the required role. Follow the instructions to review the business process definition and assign a worker, then use Reassign Steps to confirm if needed.
Verify hire completion
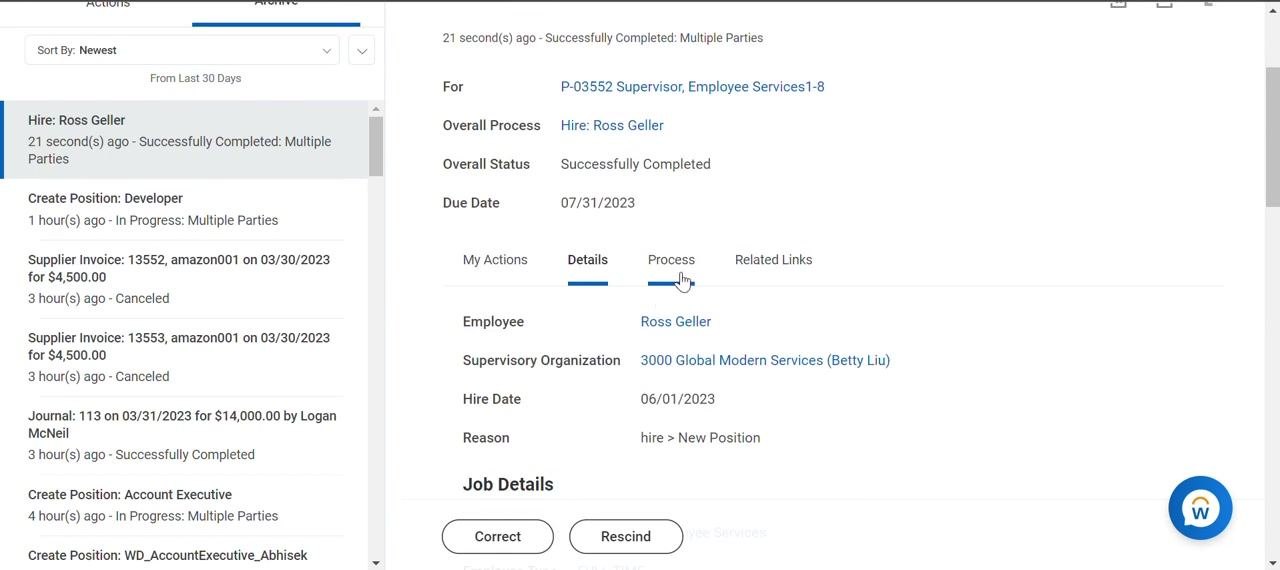
In the Archive tab, locate the hire entry with the status "Successfully Completed: Multiple Parties." The right pane shows the process details, including the position, overall process name, overall status, and due date. Under My Actions, review any pending items and click Reassign if you need to delegate the next step.
Review hire details
Click the Details tab to confirm the employee name, supervisory organization, hire date, and reason for hire. Additional job details appear below this summary. Use Correct or Rescind at the bottom if changes or cancellation are required.
View the event summary
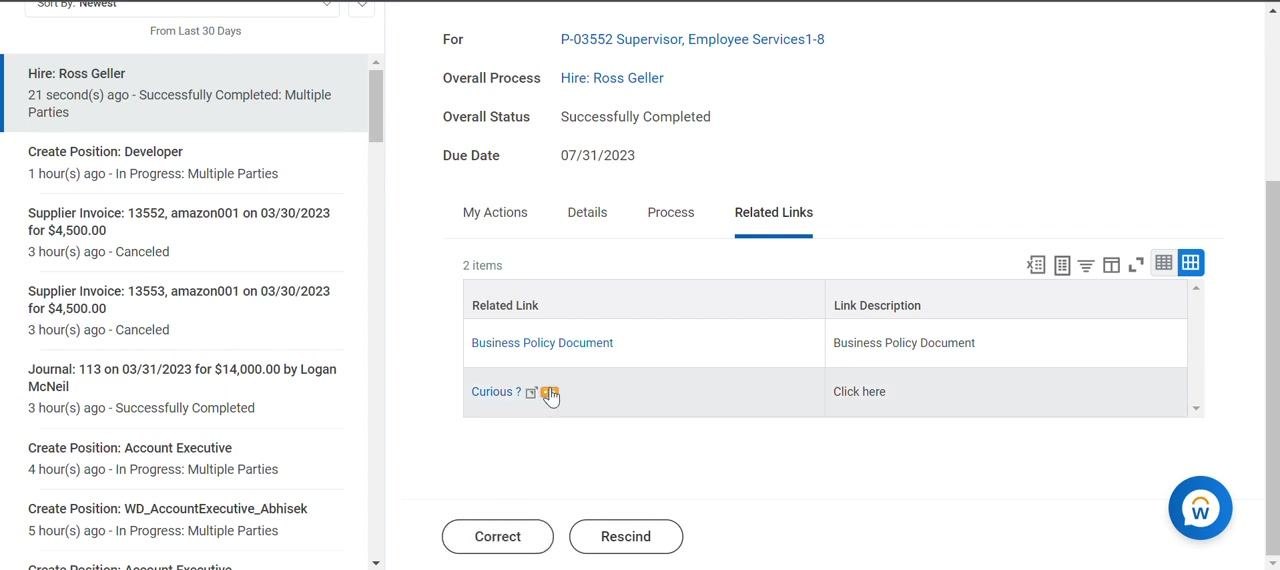
The View Event screen summarizes the completed hire, showing the position, overall process, overall status, and due date. Tabs for My Actions, Details, Process, and Related Links let you review or take further action. Use Correct or Rescind if post-completion changes are necessary.
Access related links and documentation
Click the Related Links tab to view supporting resources, including the Business Policy Document and a Curious? link for additional guidance. Open these links as needed for policy information.
Summary
You've now completed the full process of how to hire an employee in Workday, from locating a pre-hire profile and launching the Hire Employee action to entering job and working time details, submitting the request, and reviewing post-submission tasks. Always confirm that all required fields are completed and that error messages are resolved before submitting a hire request. Use the comments section to document any additional context, and check your Inbox and Archive regularly for follow-up tasks or audits. Use Reassign, Correct, or Rescind as appropriate to manage the workflow, and consult related policy documents for compliance and best practices.
Generation details: cost, quality tiers
Docsie billed 2,500 credits ($1.75) to analyze this 5-minute video at standard quality. The rewrite, template fill and Word/PDF exports were included. The same video at each quality tier:
| Quality | Frames sampled | Credits | Approx. cost |
|---|---|---|---|
| Draft | every 16-30 s | 1,250 | $0.88 |
| Standard (this guide) | every 8-15 s | 2,500 | $1.75 |
| Detailed | every 4-7 s | 5,000 | $3.50 |
| Ultra | every 1-3 s | 10,000 | $7.00 |
Credits priced at $0.70 per 1,000; plans include a monthly allowance. Enterprise customers on on-premise or bring-your-own-model deployments run this on their own inference and pay no per-video credits.
Generated by Docsie Video-to-Docs on 2026-10-01 from a 4-minute video. Screenshots are frames from the source video and belong to their creator, Wizard of HCM, whose original is embedded above. If you own this video and want the guide removed or credited differently, contact us and we will act within one business day.