
How to Drop a Class in Workday
This guide shows you how to drop a class in Workday, as well as how to search for courses, enroll in sections, and swap a course if you need a different schedule. It walks through the full process in the Workday student portal — from finding course sections through registering, dropping, and swapping classes — so you can manage your academic schedule from start to finish.
Video: Workday Student: Register, Drop, or Swap courses by UNO LRC. All credit for the demonstration goes to the creator; watch the original on YouTube. The written guide below was generated from this video by Docsie. Creator? Request a change or removal.
This guide shows you how to drop a class in Workday, as well as how to search for courses, enroll in sections, and swap a course if you need a different schedule. It walks through the full process in the Workday student portal — from finding course sections through registering, dropping, and swapping classes — so you can manage your academic schedule from start to finish.
Prerequisites
- Access to your institution's My Apps portal with the Workday application installed
- An active student account with a registration appointment, if your institution requires one
- Your institution's name and the correct academic period (for example, 2024 Fall)
Access Workday and open the Academics dashboard
- Go to your My Apps portal.
- Locate and select the Workday app to launch it.
- Once inside Workday, select the Menu button, usually located at the top left.
- Select Academics from the menu options.
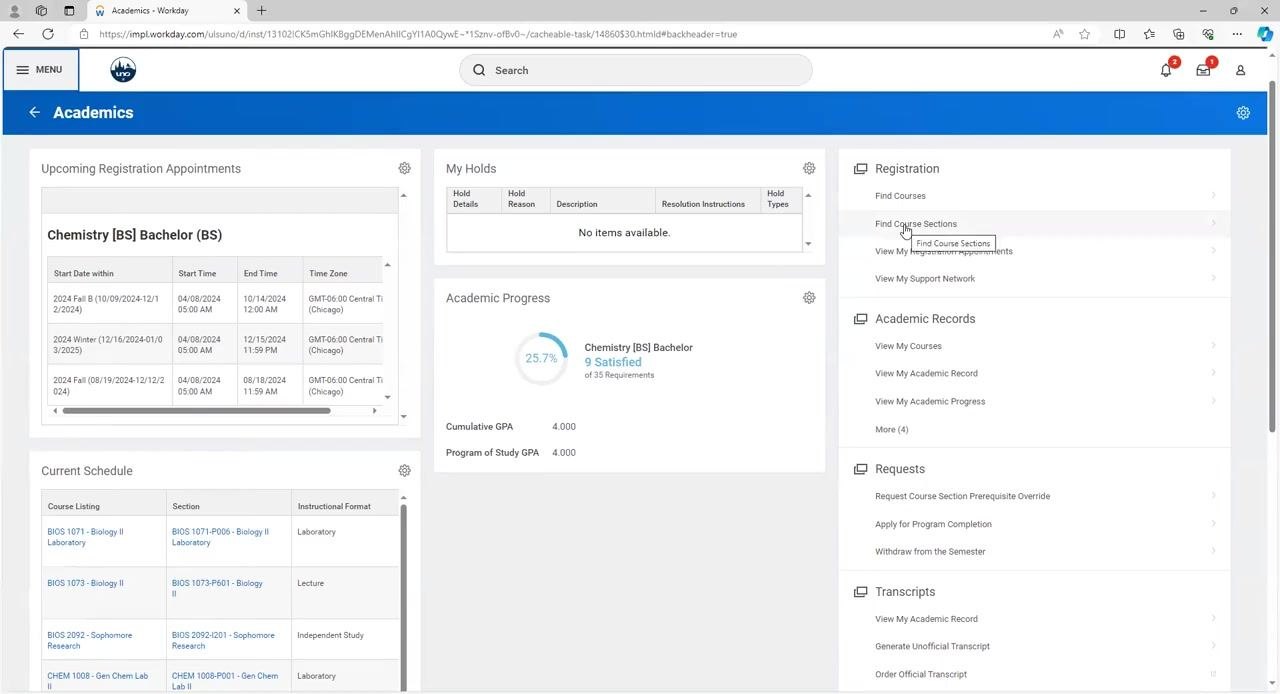
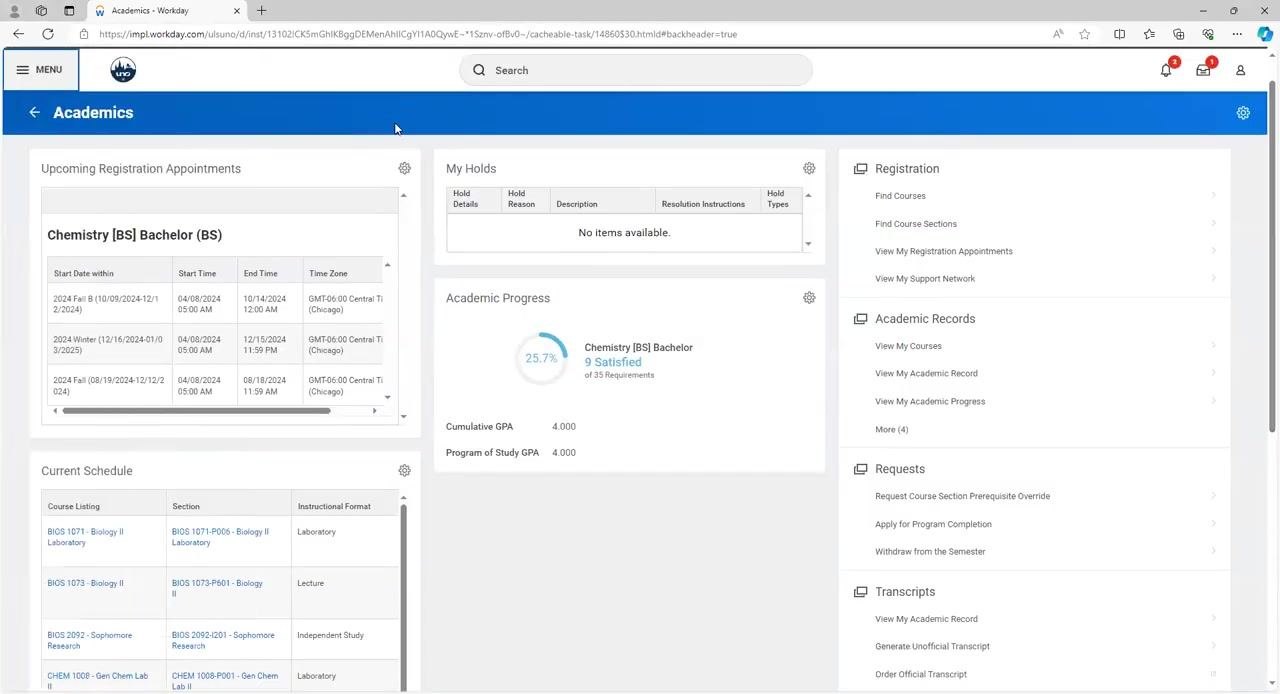
You will be brought to the Academics dashboard, which displays Upcoming Registration Appointments, Current Schedule, Academic Progress, and the Registration, Academic Records, Requests, and Transcripts panels.
Search for course sections
- In the Registration panel on the right, click Find Course Sections.
This opens a new dialog for searching available course sections.
- In the Find Course Sections dialog, confirm the Institution field (for example, University of New Orleans).
- Click the Start Date within dropdown and select your semester, such as "2024 Fall (08/19/2024-12/12/2024)" under "2024 - 2025 Academic Year."
- Set Academic Level to the option that applies to you — for example, Undergraduate. Other available options include Graduate, Dual Enrollment, and Non Credit.
- Click OK to proceed.
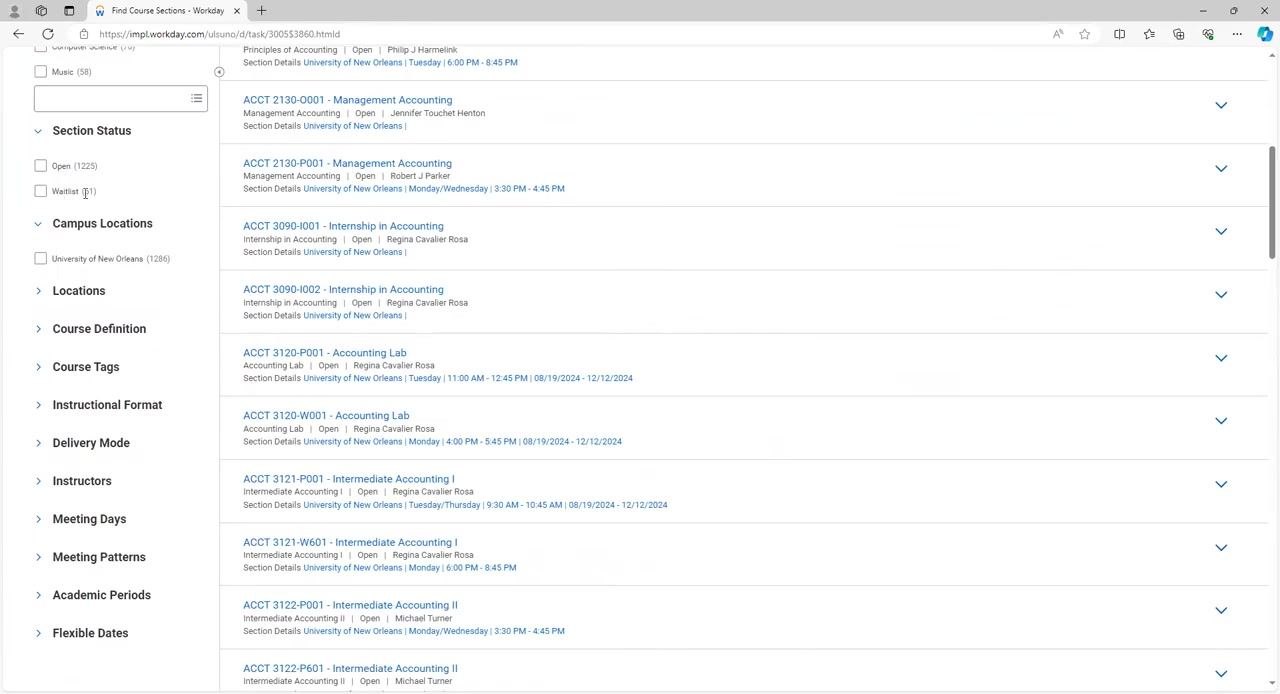
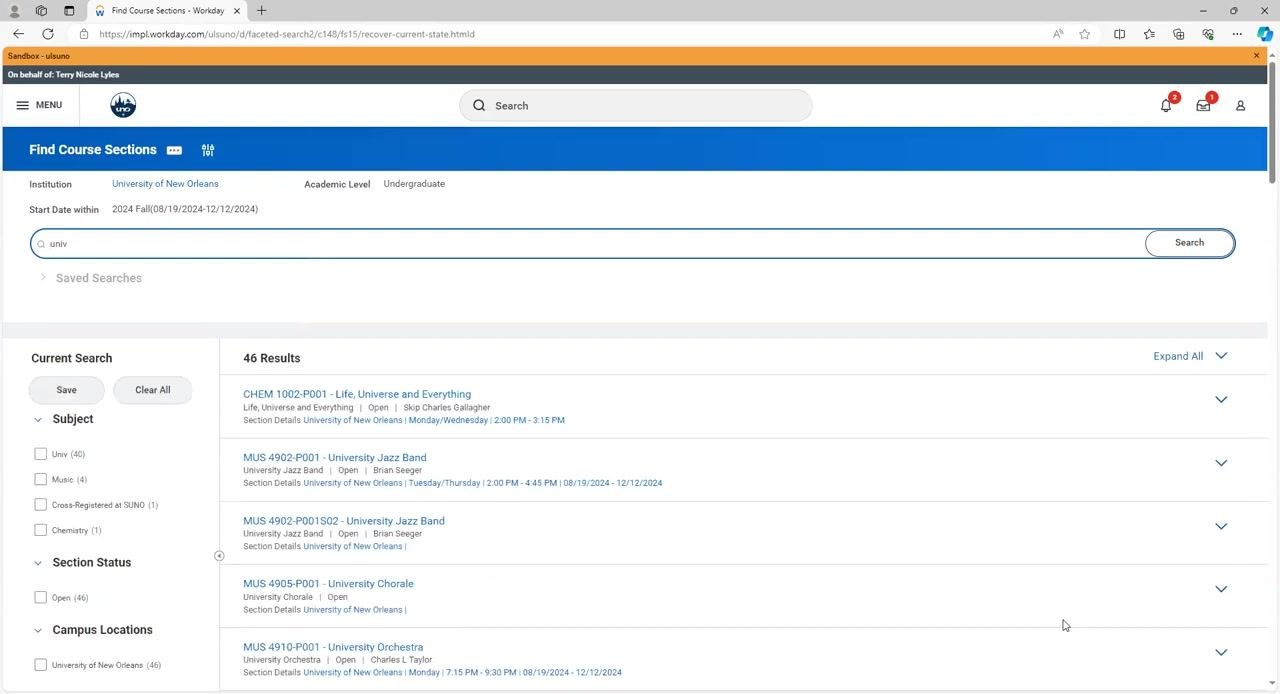
After confirming your selections, you will see a list of all classes offered for the selected semester and academic level. The results page shows a search bar, filters on the left, and a list of course sections with course codes, titles, section status, meeting days and times, and instructors.
Filter your search results
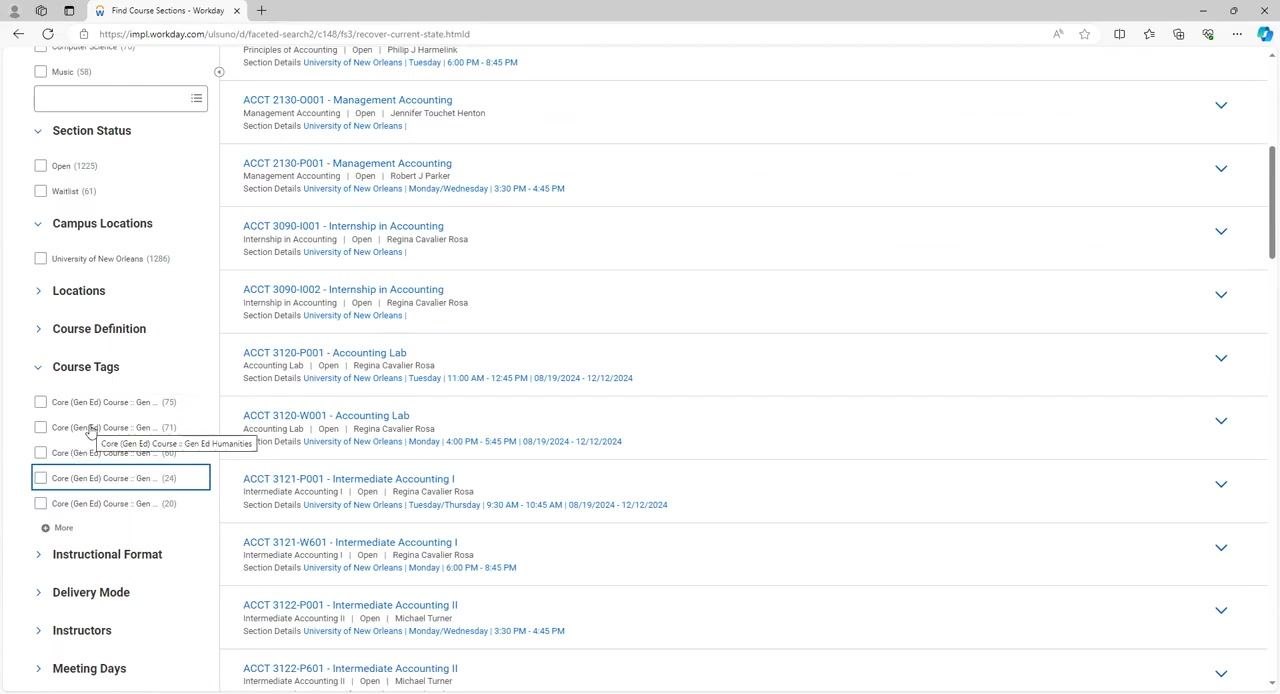
You can narrow the course list using the filters on the left side of the results page:
- Section Status — check "Open" or "Waitlist" to refine which sections appear.
- Course Tags — select general education requirements such as Gen Ed Social Science, Gen Ed Physical Science, Gen Ed English Composition, or Gen Ed Humanities.
- Instructional Format — choose a course type such as Lecture, Laboratory, or Independent Study.
- Delivery Mode — select In-Person, Online, or Hybrid depending on how you want to attend class.
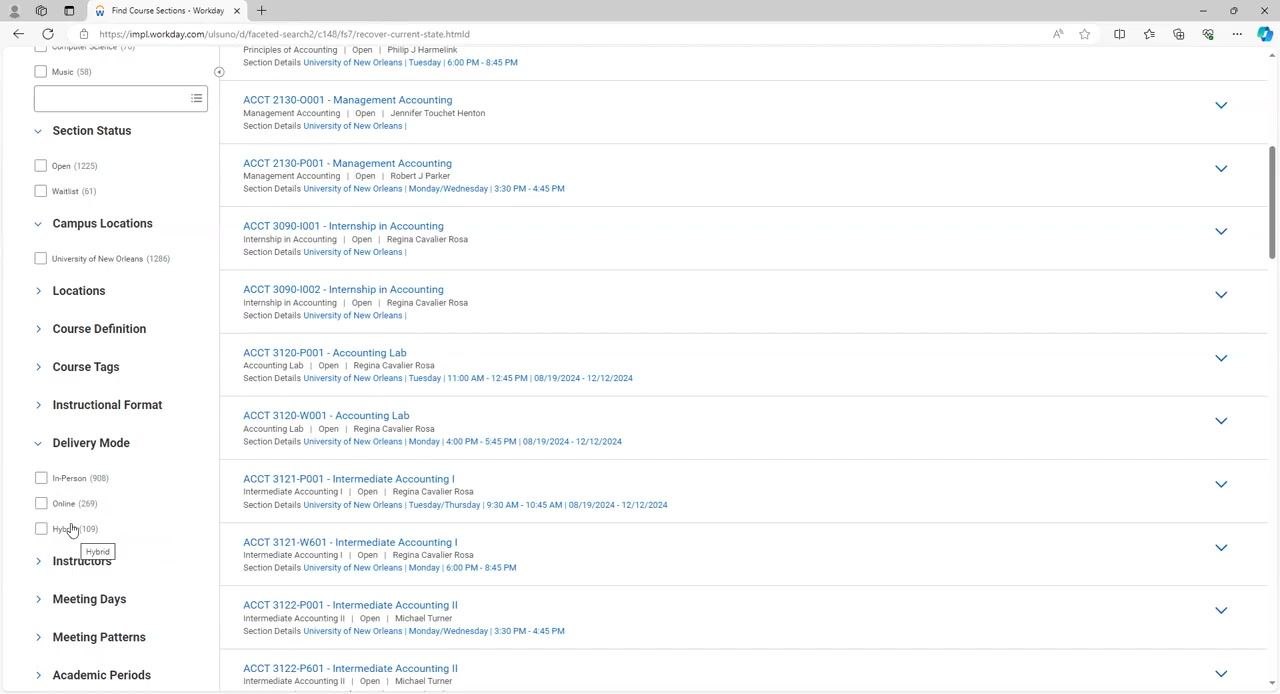
- Instructors — select a specific instructor if you want to enroll with someone you have previously had.
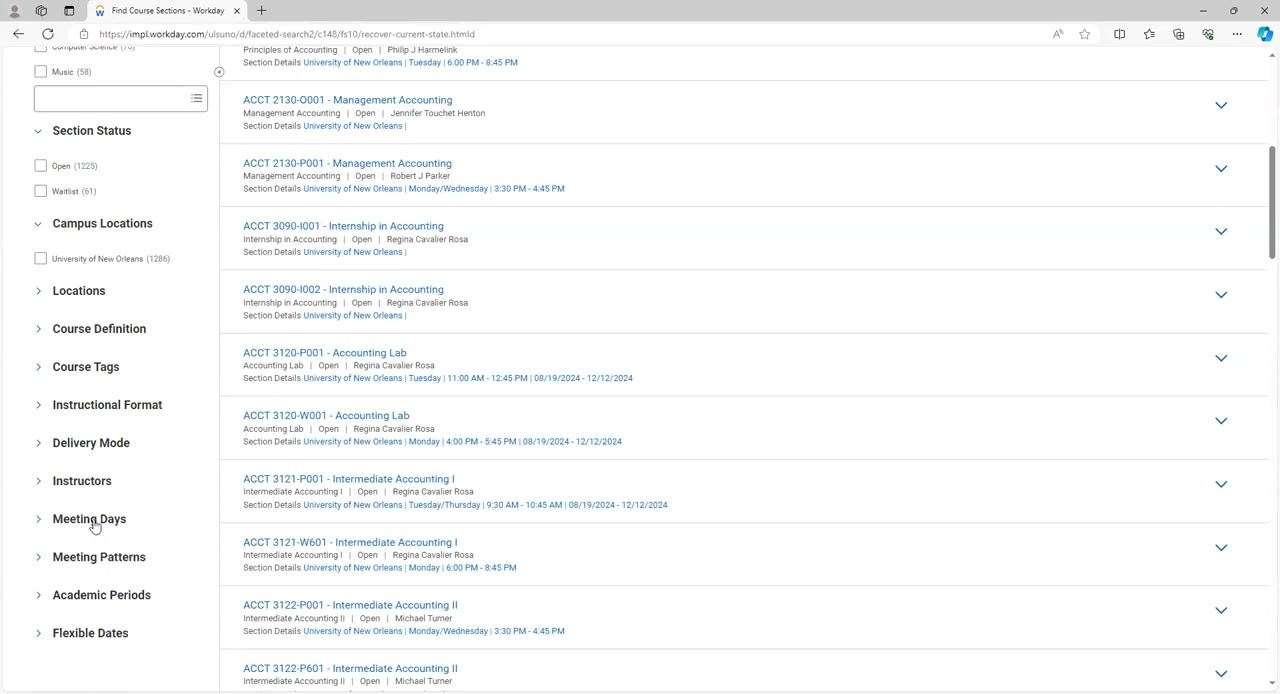
- Meeting Days — select days such as Monday/Wednesday/Friday or Tuesday/Thursday to match your availability.
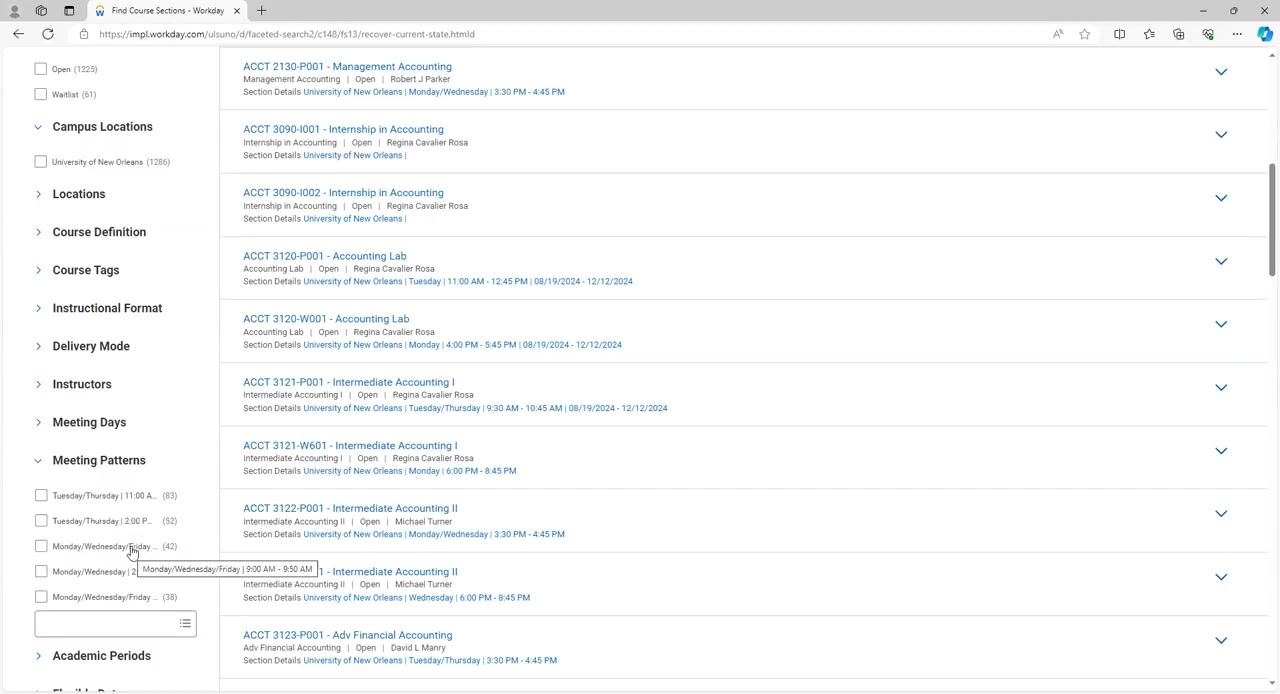
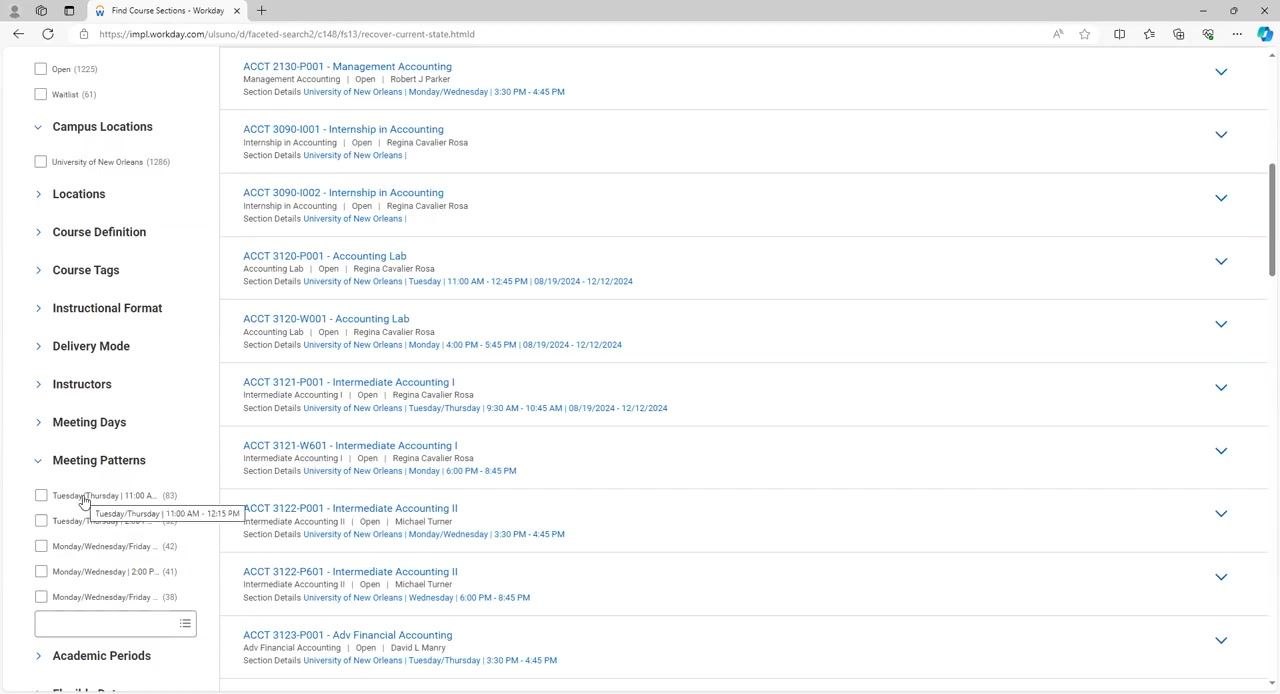
- Meeting Patterns — select a specific time slot, such as Tuesday/Thursday 11:00 AM or Monday/Wednesday/Friday 9:00 AM.
- Use the search bar at the top of the results page to enter a keyword or course code — for example, type "univ" to find University Success courses.
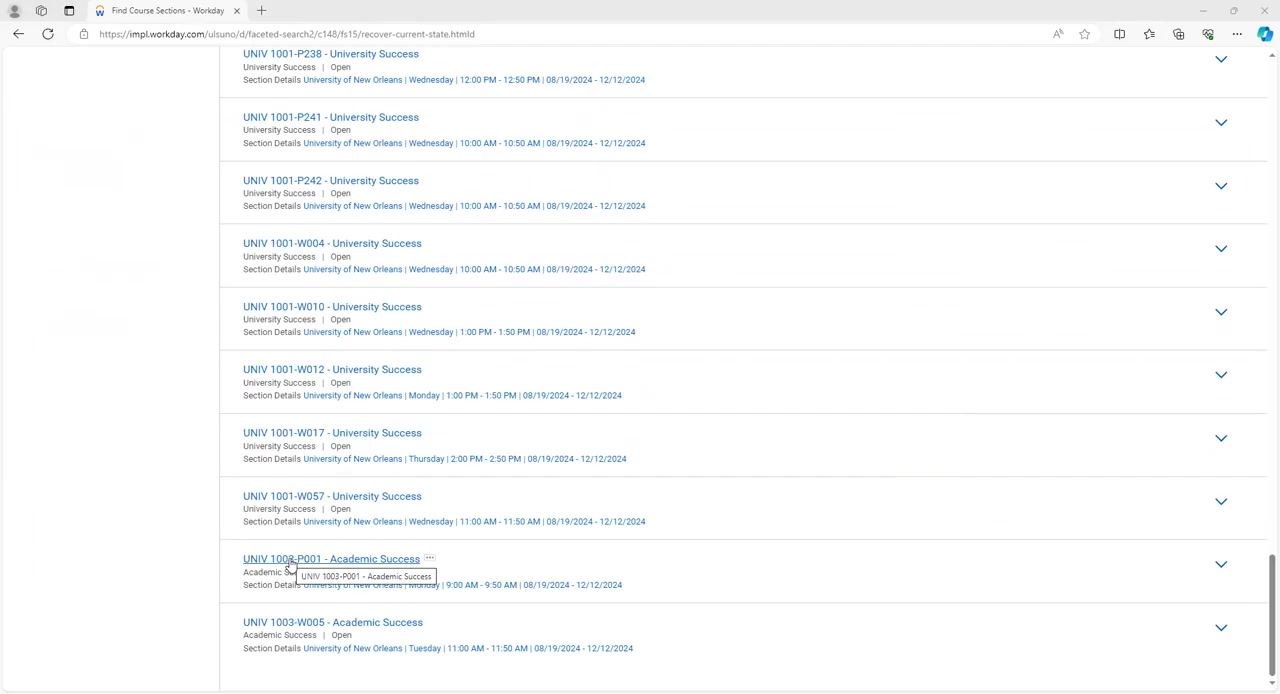
- Scroll through the results and click the course section you want, such as UNIV 1003-P001 - Academic Success.
Save a course section to your schedule
- In the Add Course Section to Saved Schedule dialog, select Create Student Registration Saved Schedule under "Saved Schedule."
This saves your selected course section for future registration.
- Enter a name for your saved schedule, such as "Fall 2024 Schedule," and click OK to confirm.
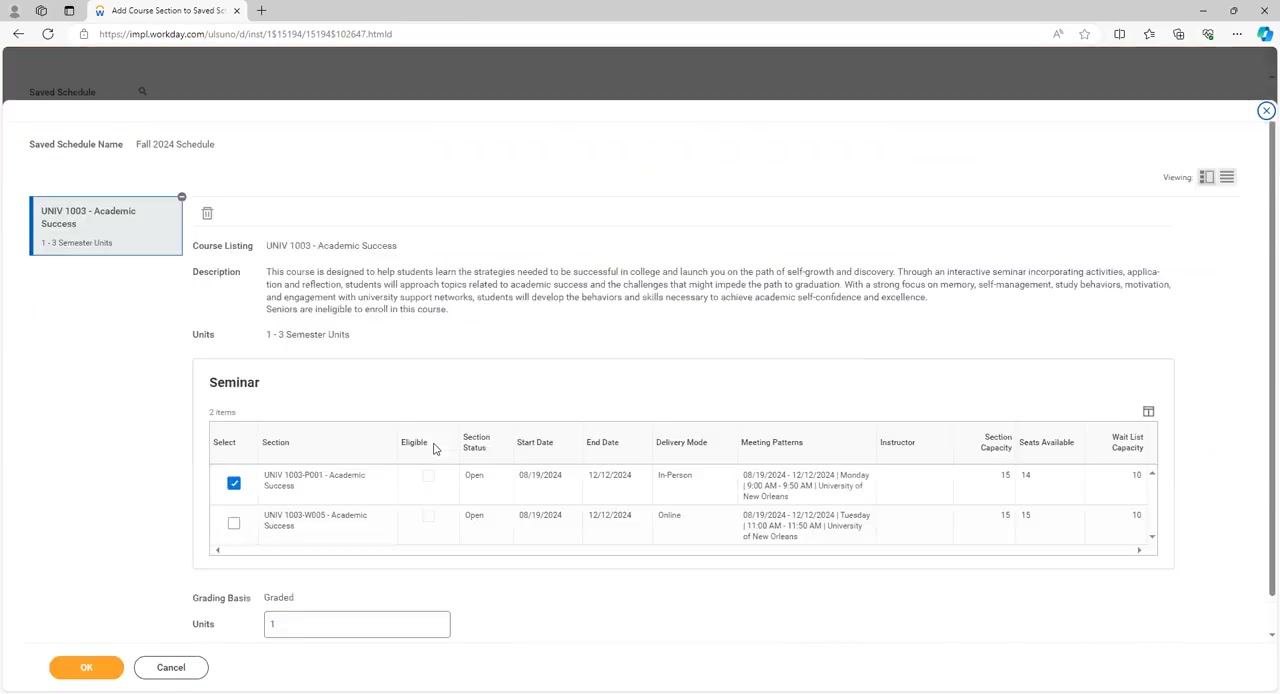
- Review the available sections and select the one that fits your schedule — for example, UNIV 1003-P001, Monday 9:00 AM - 9:50 AM, In-Person.
- Review the section details, including Section Status, Start and End Dates, Delivery Mode, Meeting Patterns, Instructor, Section Capacity, Seats Available, and Wait List Capacity.
- Set Grading Basis (for example, Graded) and Units (for example, 1), then click OK to add the section to your saved schedule.
Resolve conflicts and complete registration
If a course section you select conflicts with another course's meeting time, an error message appears in the "Errors and Alerts Found" section. For example: "You've selected a course section that conflicts in meeting time with 1 or more sections that you're already registered for."
- Deselect the conflicting section (for example, the online section) and choose a non-conflicting option instead (for example, the in-person section).
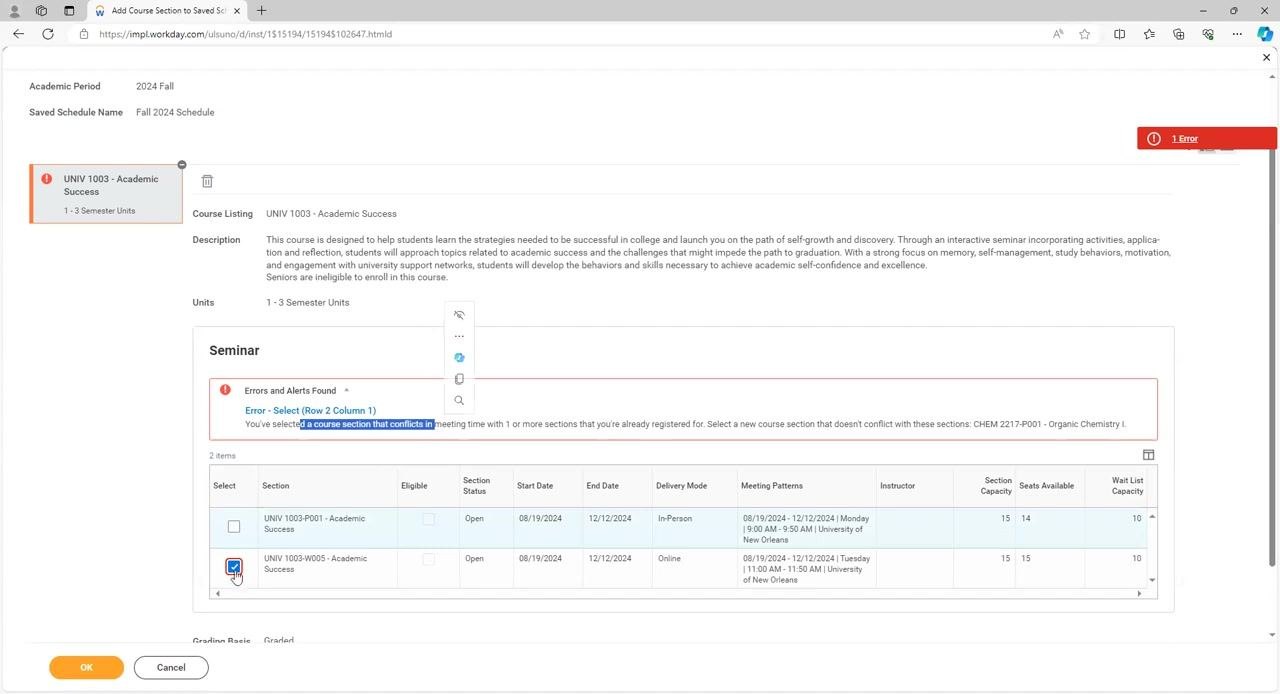
- Select the non-conflicting course section and click OK to add it to your saved schedule.
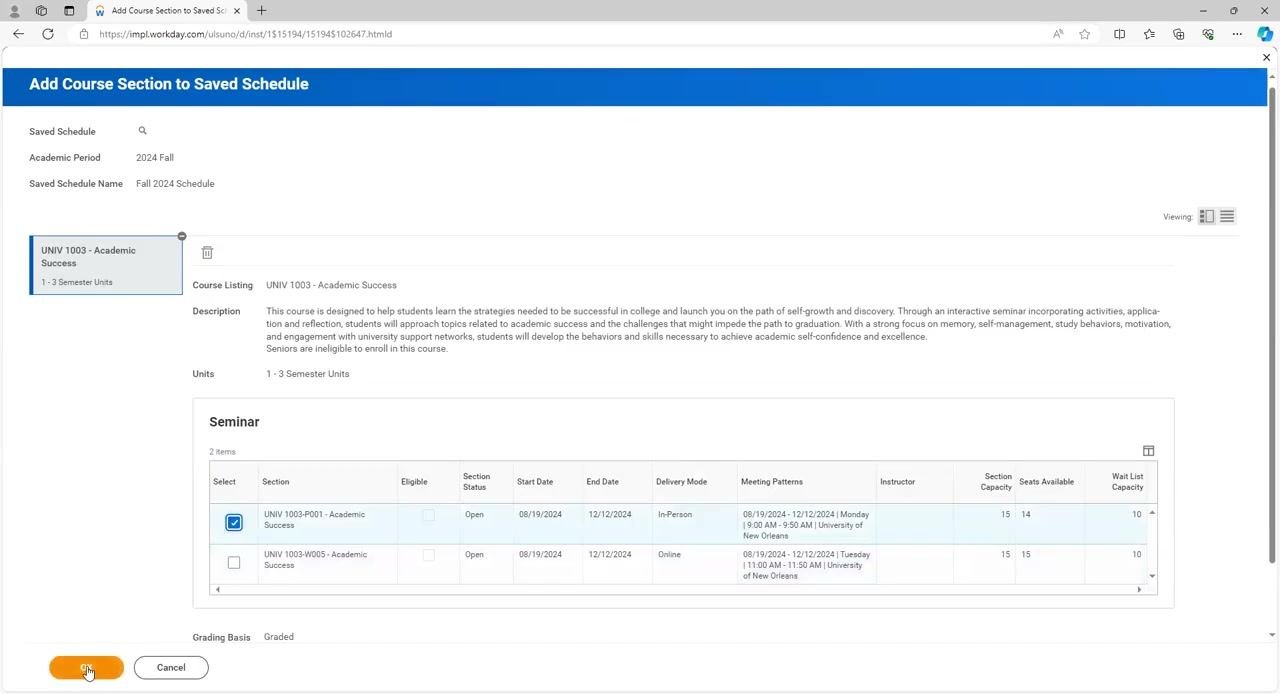
- Once your schedule is ready, click Start Registration from your saved schedule.
- Confirm the correct section is selected in the registration summary, then click Register to attempt enrollment.
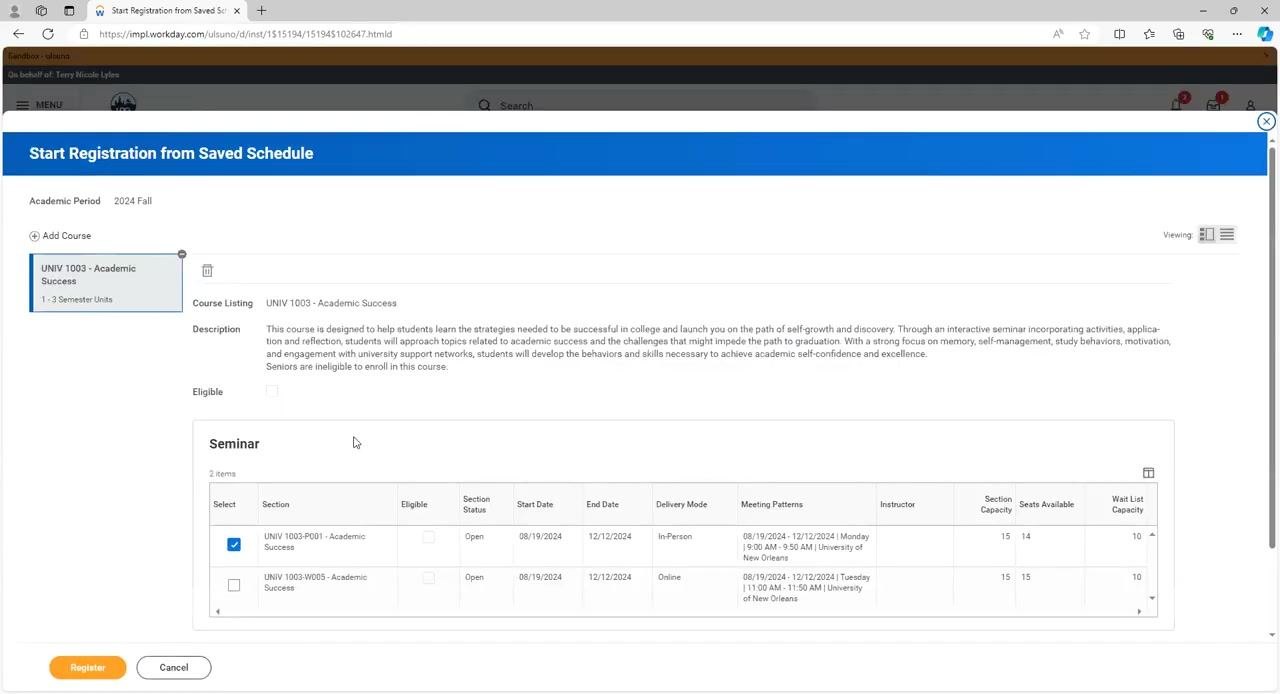
If your registration is unsuccessful, the system displays an "Unsuccessful Registrations" message with the reason — for example, "Does not meet registration eligibility requirements" — along with the course, section, available seats, meeting times, and location.
- Use the View Registered Courses or View Student Account buttons for further details.
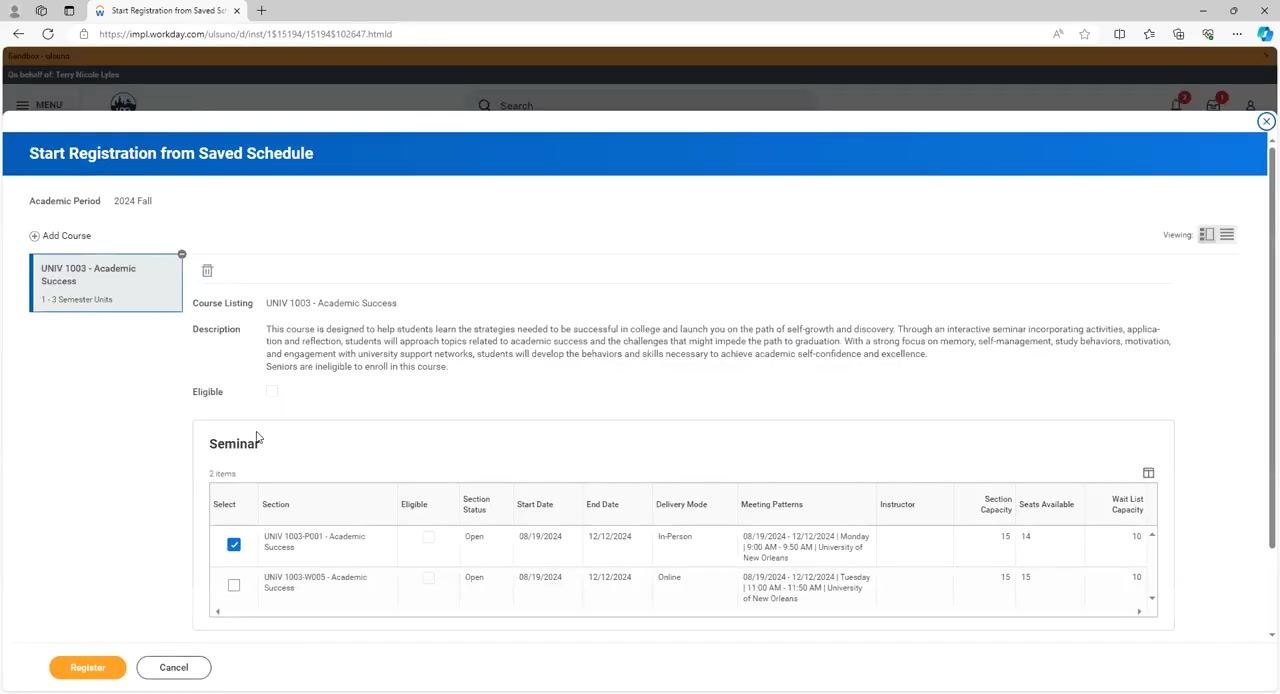
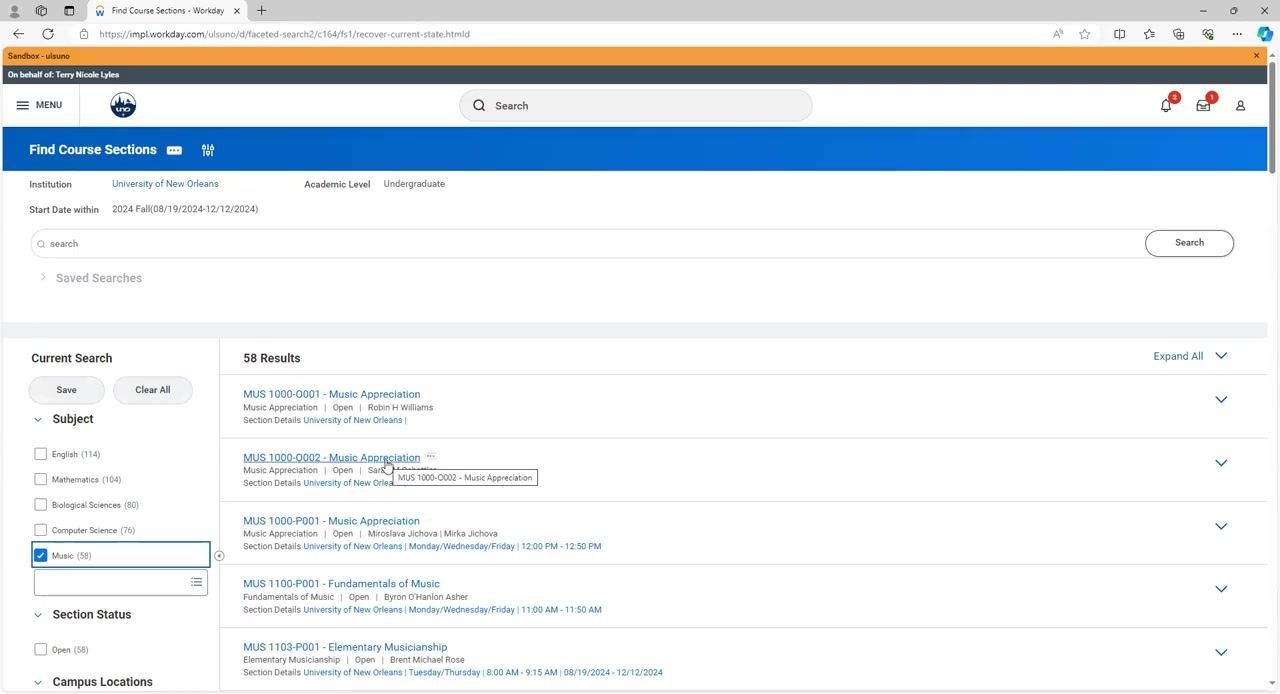
- Return to the Academics dashboard and click Find Course Sections under the Registration menu to start a new search.
-
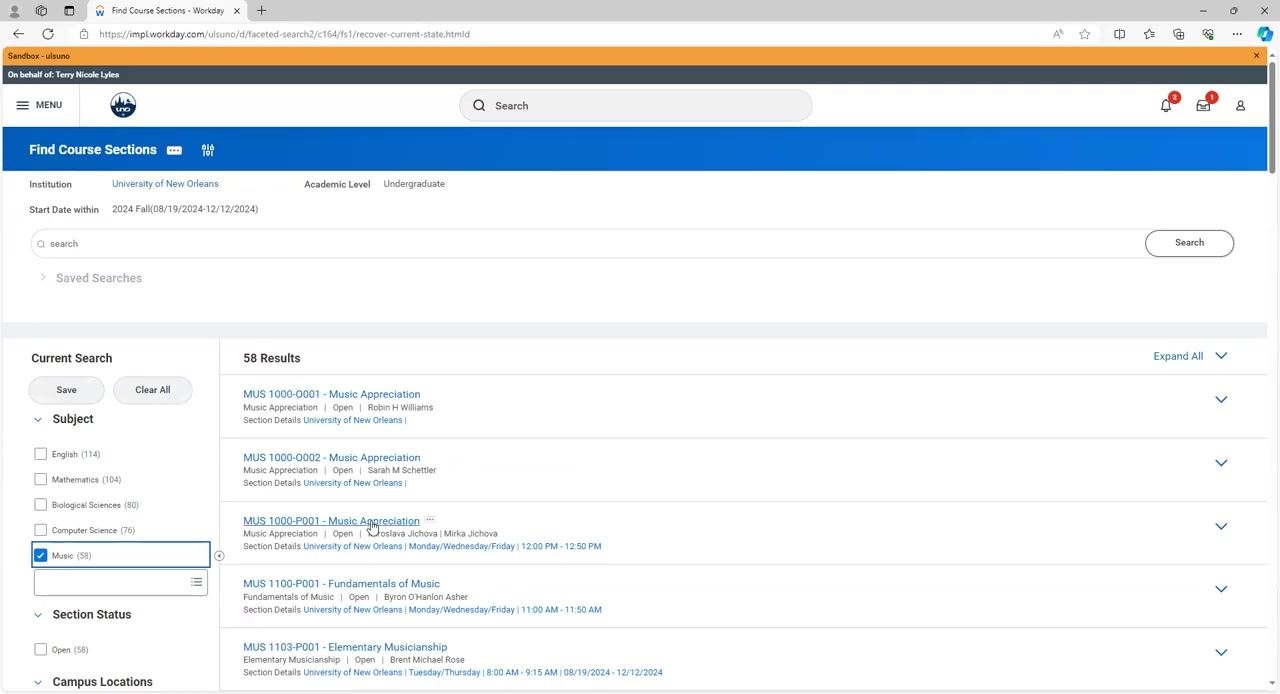
Use the search and filter options to find alternative courses — for example, filter by "Music" to find music-related courses.
-
Locate a course such as "Music Appreciation" (MUS 1000-P001) and click the course title to view section details. From here you can either add the course to your saved schedule or register directly for the section.
Register for a course section
- Navigate to the Register for Course Section page for the desired academic period, such as 2024 Fall.
- Locate the course in the left panel, for example MUS 1000 - Music Appreciation, and review its description, units, and eligibility status.
- In the Lecture section, review the available sections, including Section Status, Start and End Dates, Delivery Mode, Meeting Patterns, Instructor, and Seats Available.
- Check the Select box next to the section you want, for example MUS 1000-0002, Online.
- Confirm Grading Basis is set to "Graded" and Units is correct, then click Register to enroll.
Confirm successful registration
- After registering, verify the "Successful Registrations" screen lists your course and section, along with meeting times and location.
- Click View Registered Courses or View Student Account for more details.
View all registered courses
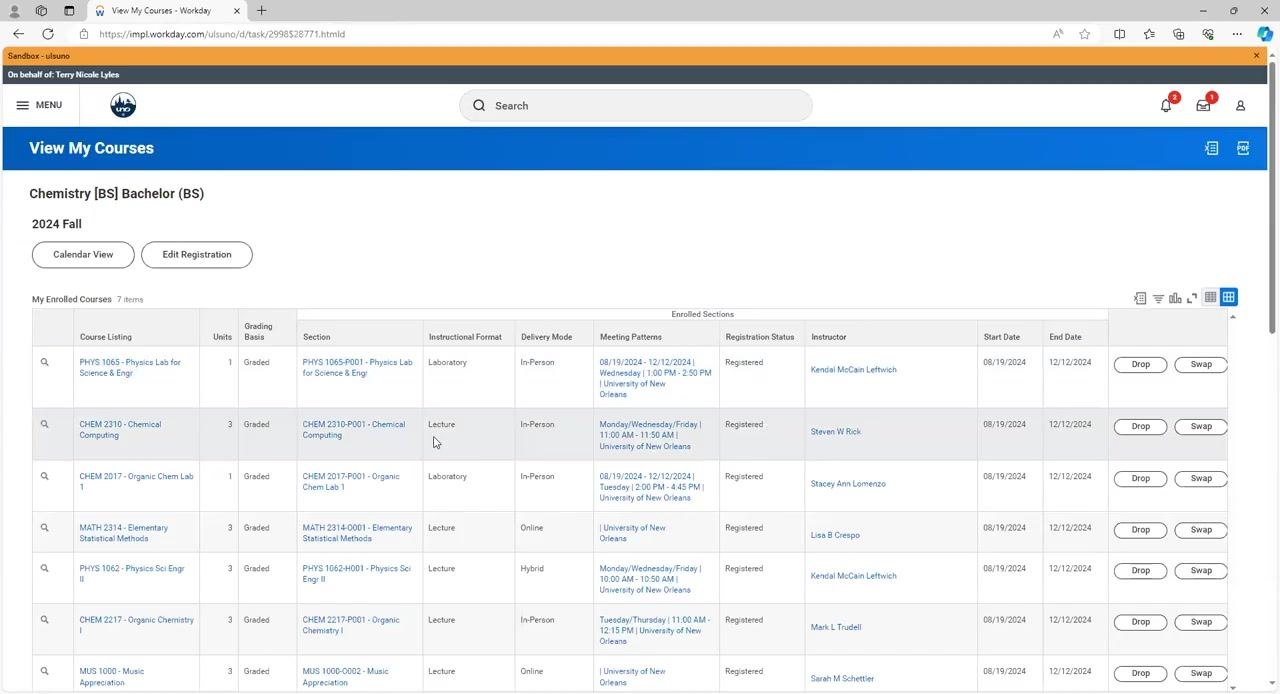
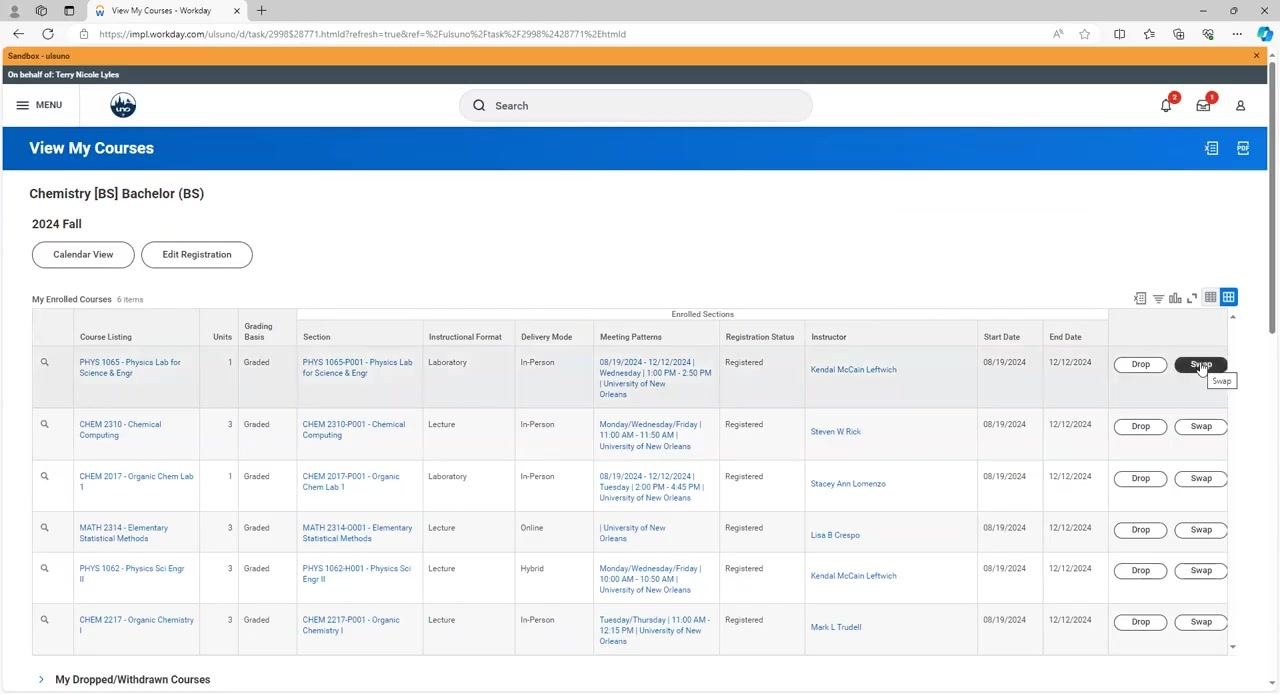
- Navigate to the View My Courses page and confirm your program and term, for example Chemistry [BS] Bachelor (BS), 2024 Fall.
- Review the list under My Enrolled Courses, which includes Course Listing, Units, Grading Basis, Section, Instructional Format, Delivery Mode, Meeting Patterns, Registration Status, Instructor, and Start and End Dates.
Each course row includes Drop and Swap buttons for management.
How to drop a class in Workday
- Review your total enrolled units at the bottom of the course list, for example "Enrolled Units: 17."
- Identify the course you want to drop, such as MUS 1000 - Music Appreciation.
- Click the Drop button next to the course.
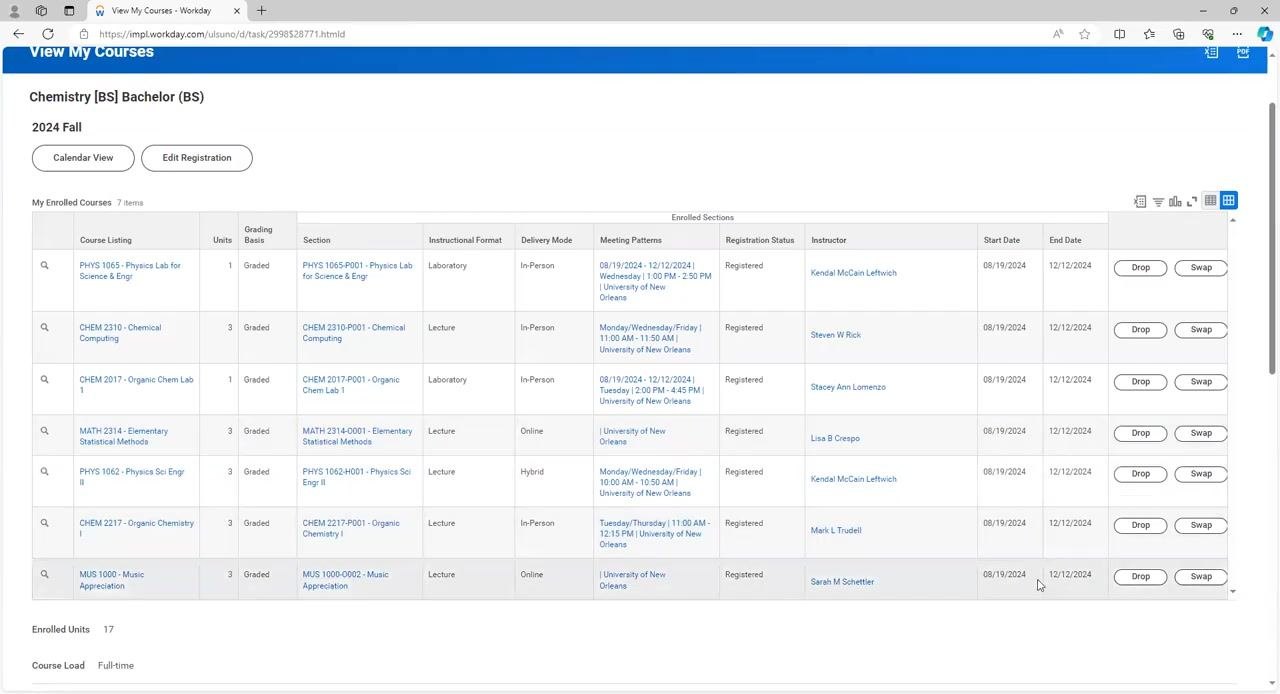
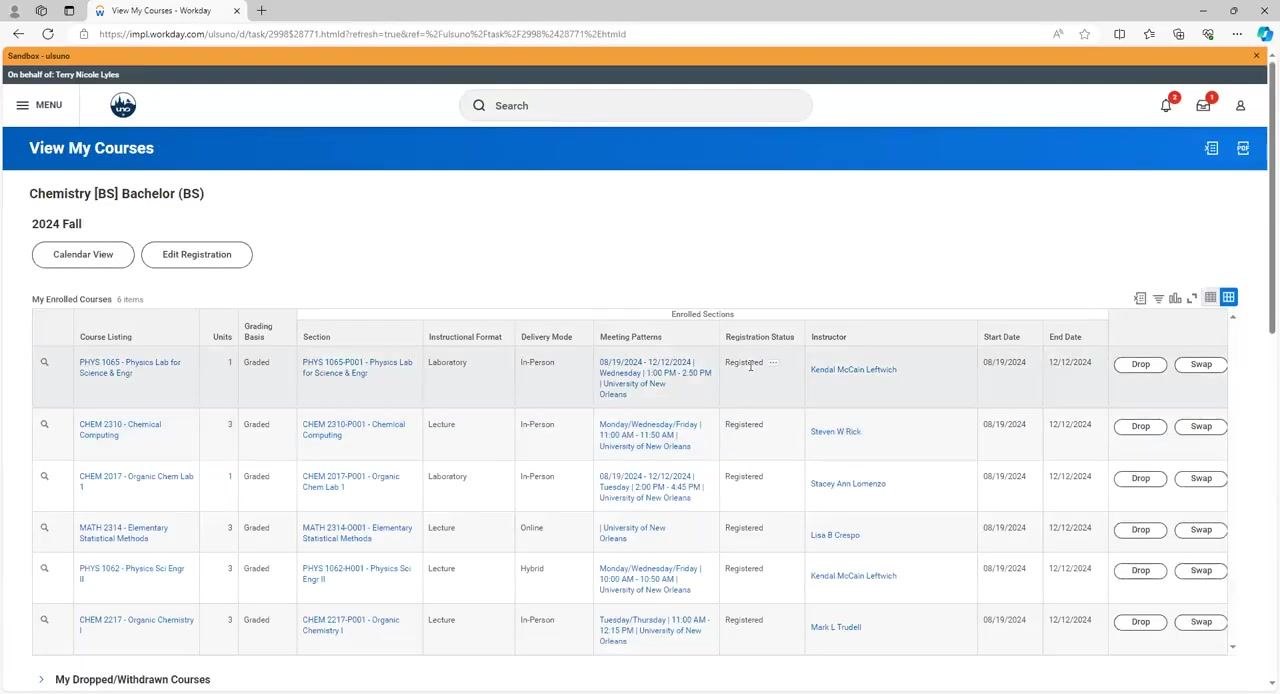
- Confirm the course is no longer listed in your enrolled courses.
The number of enrolled courses and units updates automatically after you drop the class.
Swap a course instead of dropping
If you want to change a course rather than drop it entirely, you can swap it for a different course or section.
- Click the Swap button next to the course you wish to change.
- In the Swap Student Course Registration window, choose whether you want a New Course or a New Section. The "New Course" option is selected by default.
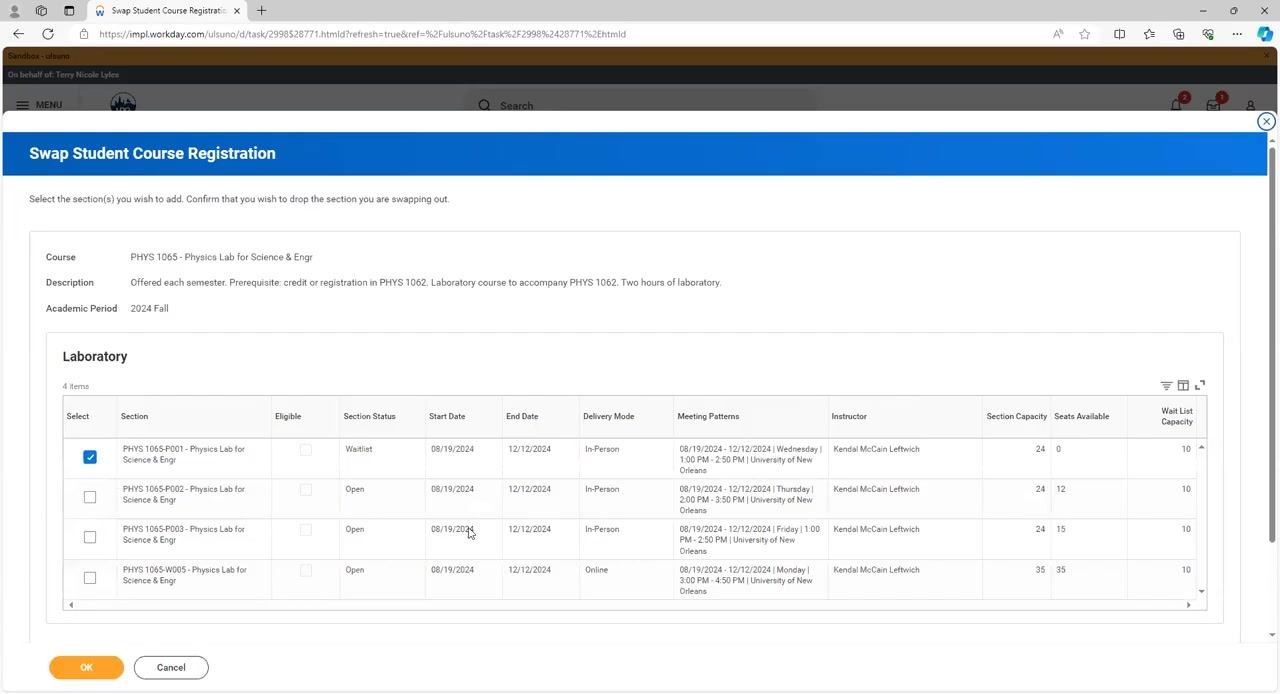
- Review the available sections for the course you are swapping, including Section, Eligible, Section Status, Start and End Dates, Delivery Mode, Meeting Patterns, Instructor, Section Capacity, Seats Available, and Wait List Capacity.
The currently enrolled section is checked by default.
- Deselect the checkbox for your currently enrolled section.
-
Select the checkbox for the new section you want, making sure it is marked "Open" with available seats.
-
Click OK at the bottom left of the window to proceed with the swap.
If there are any errors or alerts — such as scheduling conflicts or unmet prerequisites — a red "Errors and Alerts Found" banner appears at the top of the section list.
Review your updated schedule
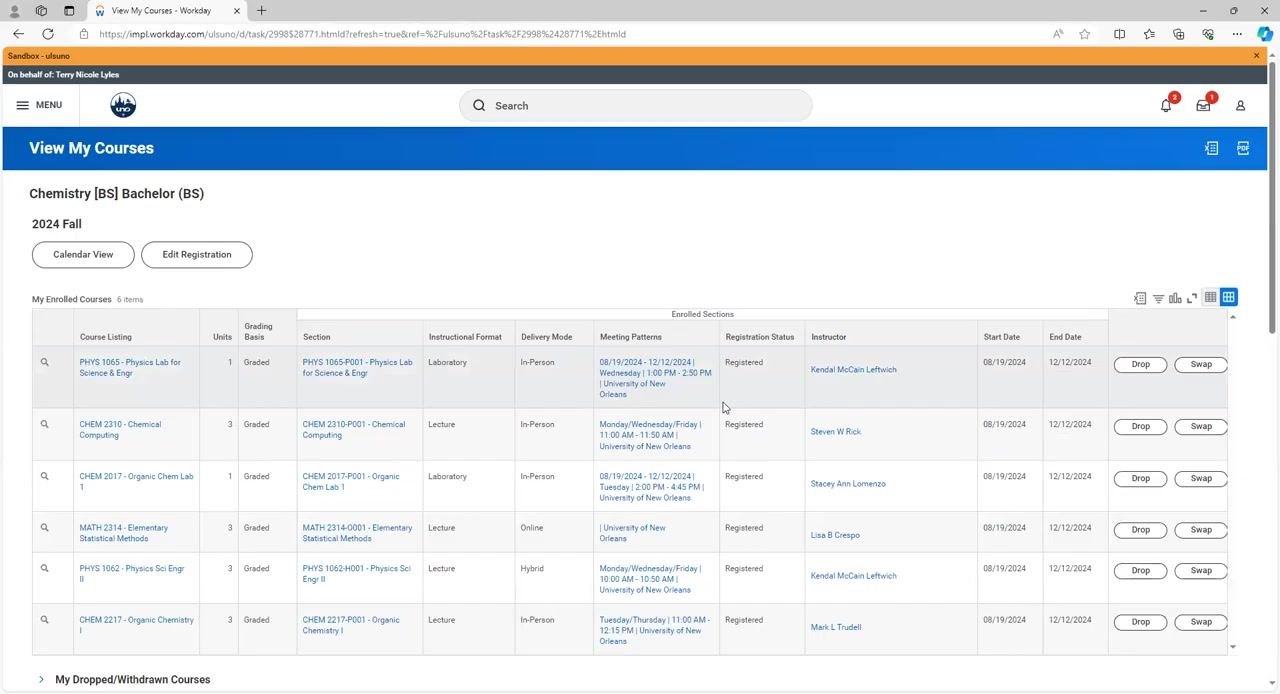
- Return to the View My Courses page to verify your updated schedule.
Your program and term appear at the top, and the My Enrolled Courses table lists all current courses with Drop and Swap buttons for further management.
- Click the MENU button in the upper left corner to navigate back to the main menu.
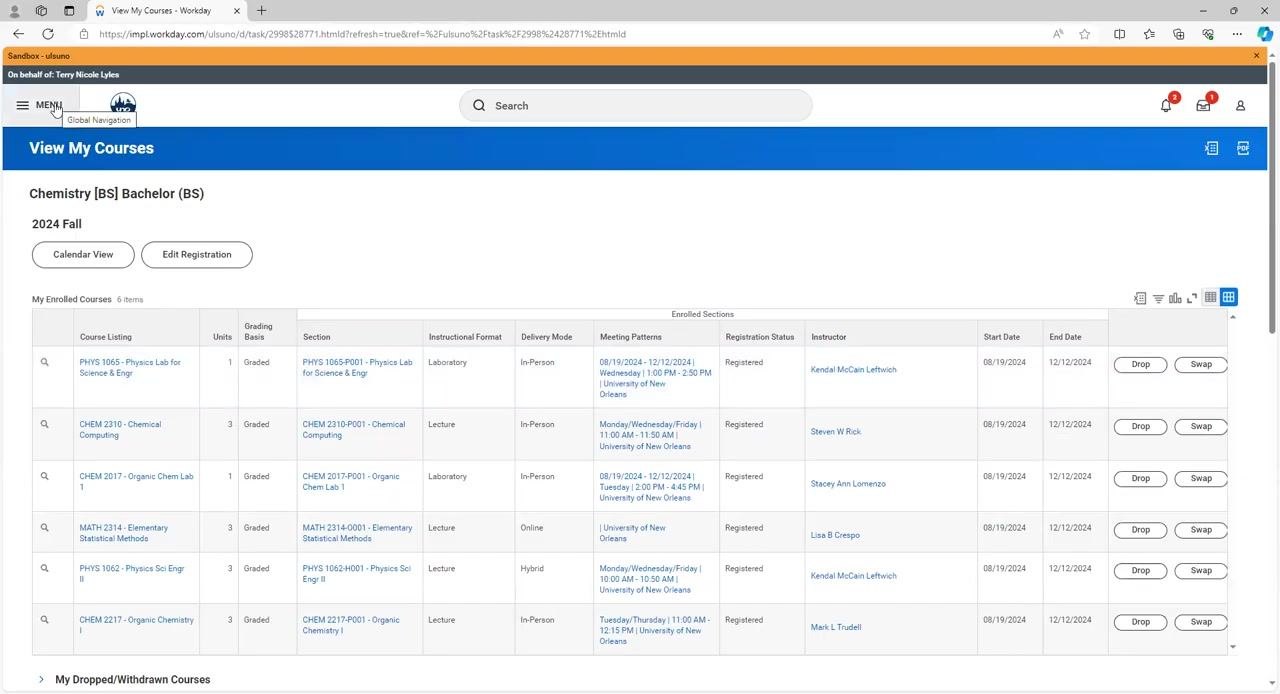
- On the Academics dashboard, review Upcoming Registration Appointments, My Holds, Academic Progress, Current Schedule, and the Registration, Academic Records, Requests, and Transcripts panels.
For example, Academic Progress might show "Chemistry [BS] Bachelor, 9 Satisfied of 35 Requirements, 25.7% progress."
What's next
With these steps, you can search and filter available classes, save course sections, complete registration, resolve scheduling conflicts, and manage your course load by dropping or swapping classes in Workday. From the Academics dashboard, you can also access Requests such as Request Course Section Prerequisite Override, Apply for Program Completion, or Withdraw from the Semester, as well as Transcripts options like View My Academic Record and Generate Unofficial Transcript.
Generation details: cost, quality tiers
Docsie billed 4,000 credits ($2.80) to analyze this 8-minute video at standard quality. The rewrite, template fill and Word/PDF exports were included. The same video at each quality tier:
| Quality | Frames sampled | Credits | Approx. cost |
|---|---|---|---|
| Draft | every 16-30 s | 2,000 | $1.40 |
| Standard (this guide) | every 8-15 s | 4,000 | $2.80 |
| Detailed | every 4-7 s | 8,000 | $5.60 |
| Ultra | every 1-3 s | 16,000 | $11.20 |
Credits priced at $0.70 per 1,000; plans include a monthly allowance. Enterprise customers on on-premise or bring-your-own-model deployments run this on their own inference and pay no per-video credits.
Generated by Docsie Video-to-Docs on 2026-10-06 from a 7-minute video. Screenshots are frames from the source video and belong to their creator, UNO LRC, whose original is embedded above. If you own this video and want the guide removed or credited differently, contact us and we will act within one business day.