
How to Create an Expense Report in Workday
This guide walks you through how to create an expense report in Workday, from opening the expense report task to entering expense lines, attaching receipts, and submitting the report for approval. You'll also learn how to review the remaining approval steps once your report has been submitted.
Video: Create an Expense Report in Workday by Information Technology Services. All credit for the demonstration goes to the creator; watch the original on YouTube. The written guide below was generated from this video by Docsie. Creator? Request a change or removal.
This guide walks you through how to create an expense report in Workday, from opening the expense report task to entering expense lines, attaching receipts, and submitting the report for approval. You'll also learn how to review the remaining approval steps once your report has been submitted.
Prerequisites
- You must be signed in and on the Workday Home page before starting.
- Have your receipt file ready to upload (for example, Receipt.png).
- Know the business purpose, attendees, and other details related to the expense you are reporting.
Steps to create the expense report
Access the Expenses section
From the navigation menu, select Expenses.
Start a new expense report
In the Expenses section, select Create Expense Report from the Actions menu. This opens the Create Expense Report task window.
Choose how to create the report
In the Create Expense Report window, under "Expense Report Information," confirm that the correct employee is listed in the Expense Report For field (for example, Brian Kaplan). Under Creation Options, choose one of the following:
- Create New Expense Report (default)
- Copy Previous Expense Report
- Create New Expense Report from Spend Authorization
Review the auto-populated fields
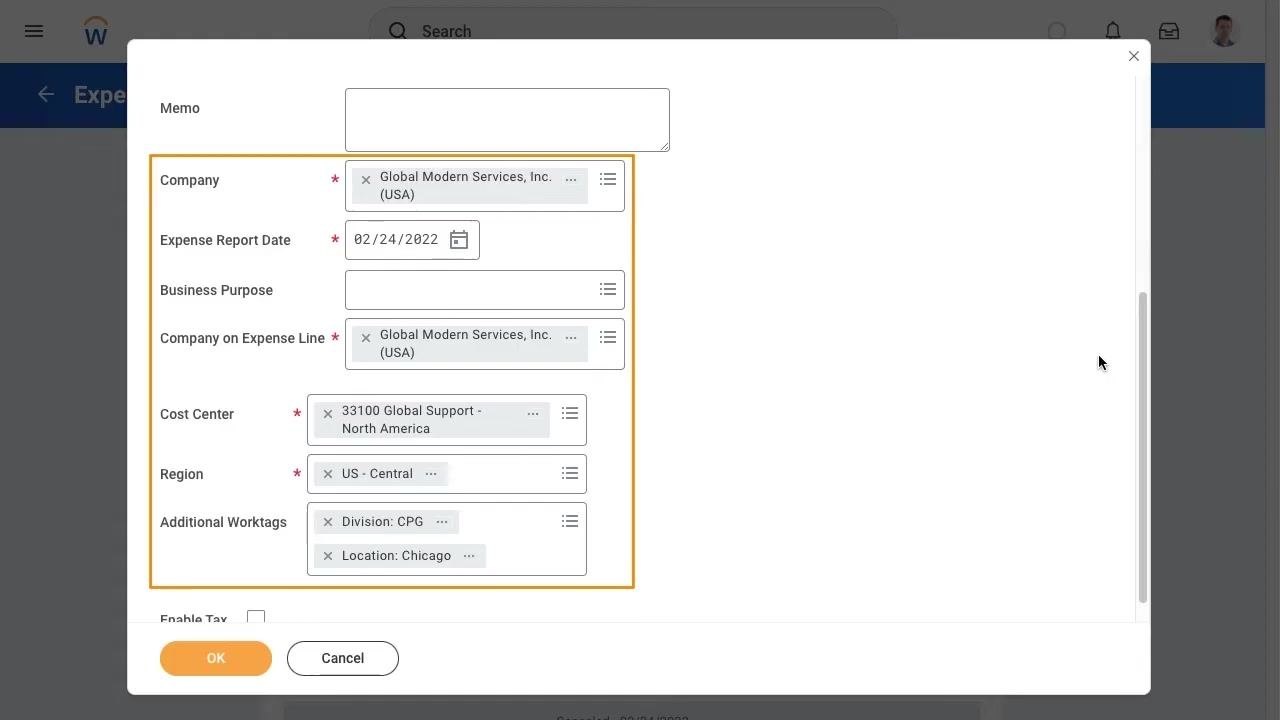
Several fields are automatically populated when the window opens, including:
- Company: Global Modern Services, Inc. (USA)
- Expense Report Date: current date (for example, 02/24/2022)
- Company on Expense Line: Global Modern Services, Inc. (USA)
- Cost Center: 33100 Global Support - North America
- Region: US - Central
- Additional Worktags: Division: CPG, Location: Chicago
You can modify any of these fields as needed.
Update the expense report date (if needed)
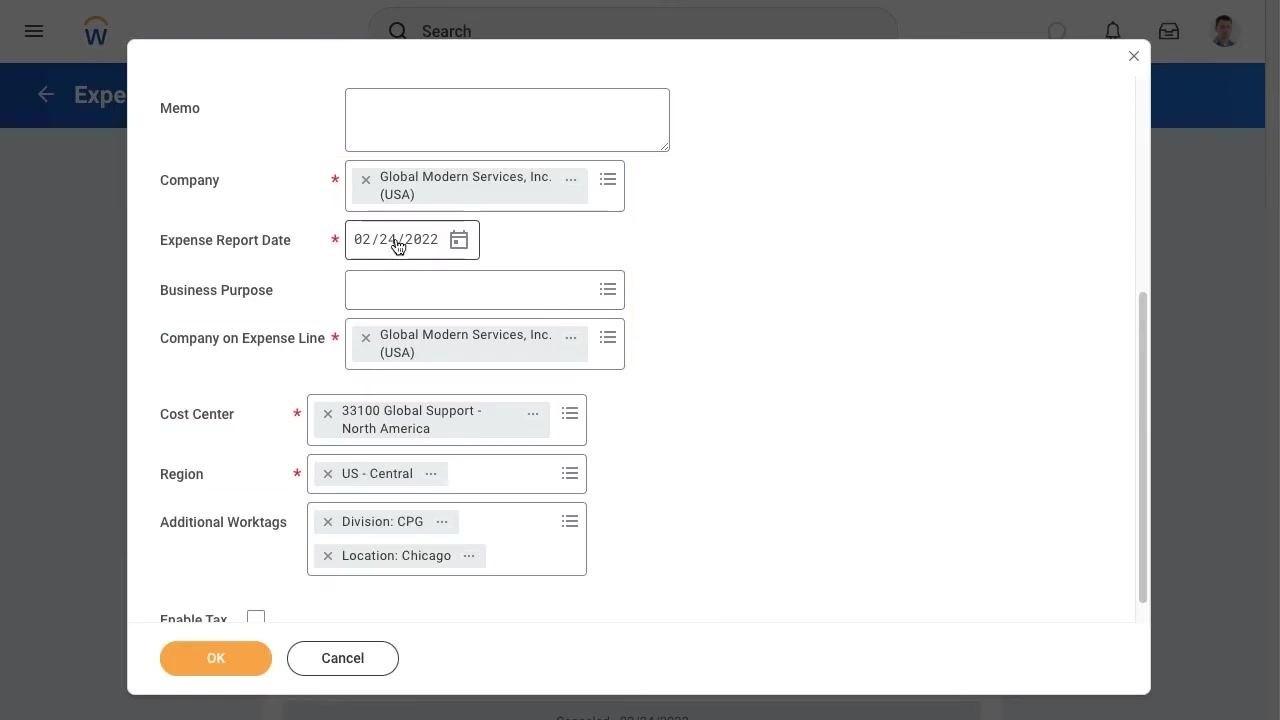
If the purchase took place on an earlier date, update the Expense Report Date field to reflect that date (for example, change it to 02/04/2022).
Select the business purpose and confirm
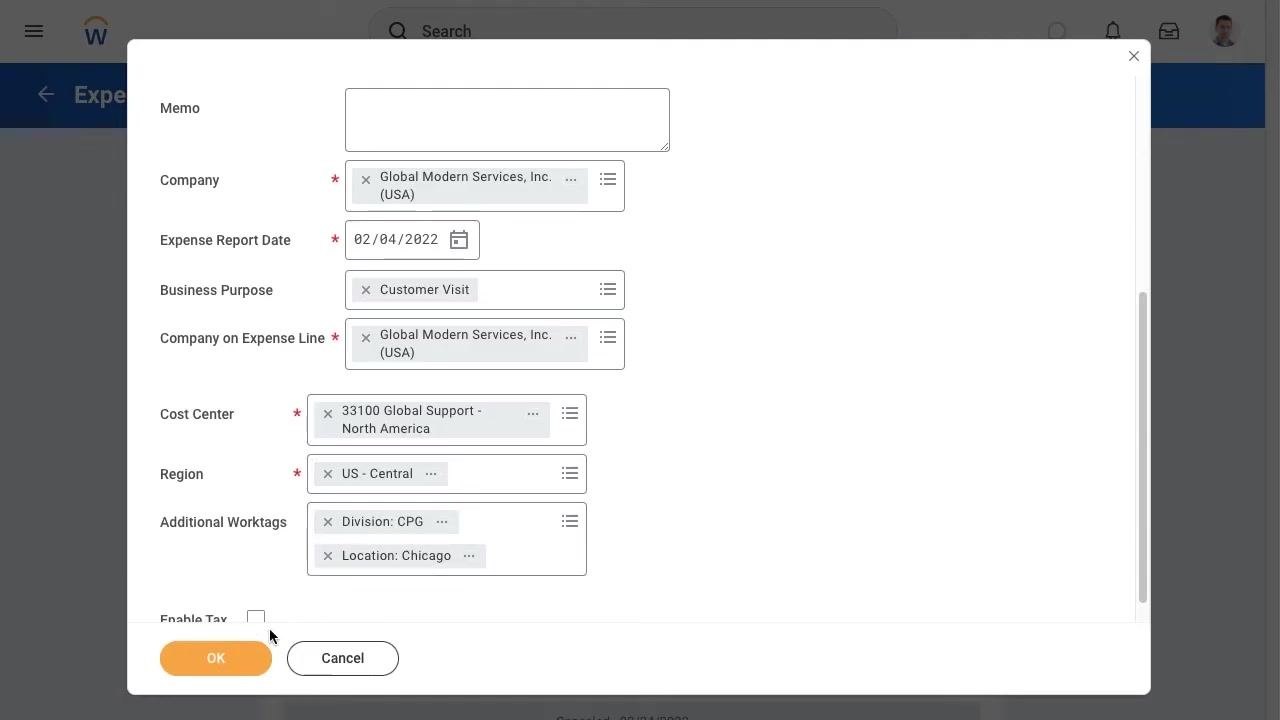
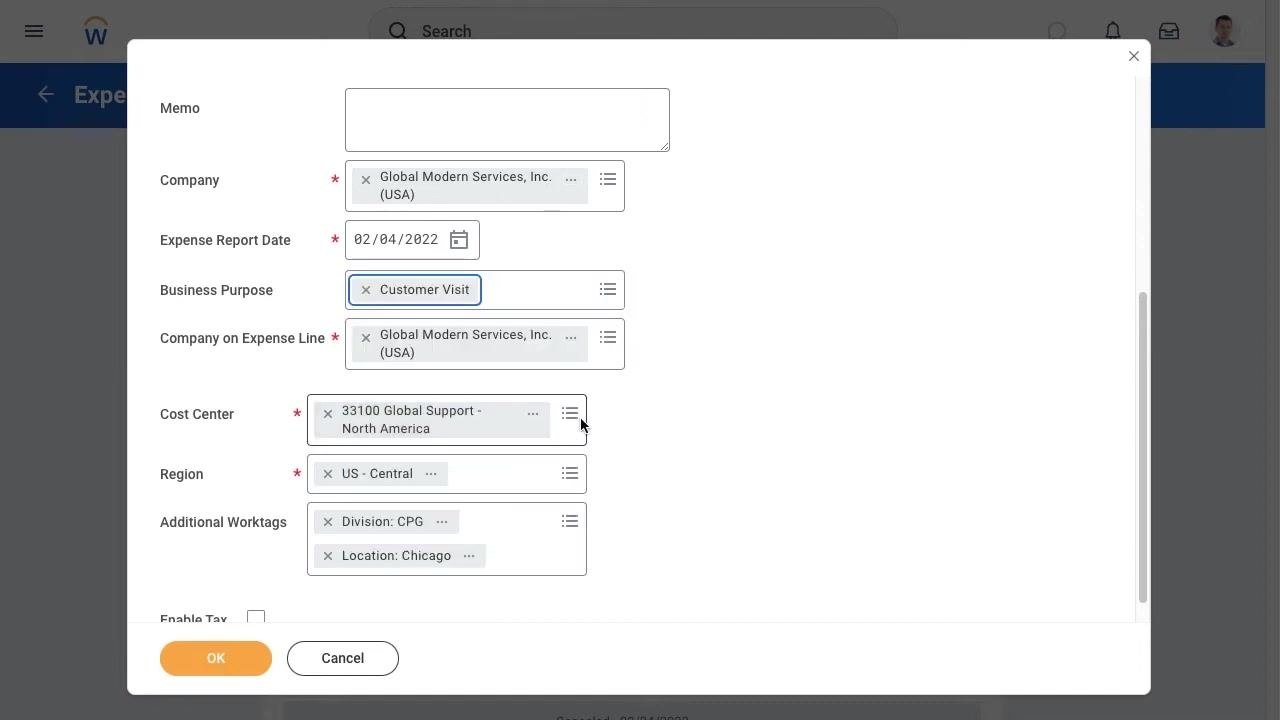
Use the prompt in the Business Purpose field to select the appropriate purpose (for example, "Customer Visit"). Once all required fields are completed and accurate, select OK to proceed.
Add an expense line
After you select OK, the Expense Lines tab displays. Select Add to begin adding a new expense line.
Attach a receipt
Attach a receipt by either dragging and dropping the file into the designated area, or by selecting Select Files and uploading the file (for example, Receipt.png).
Select the expense item
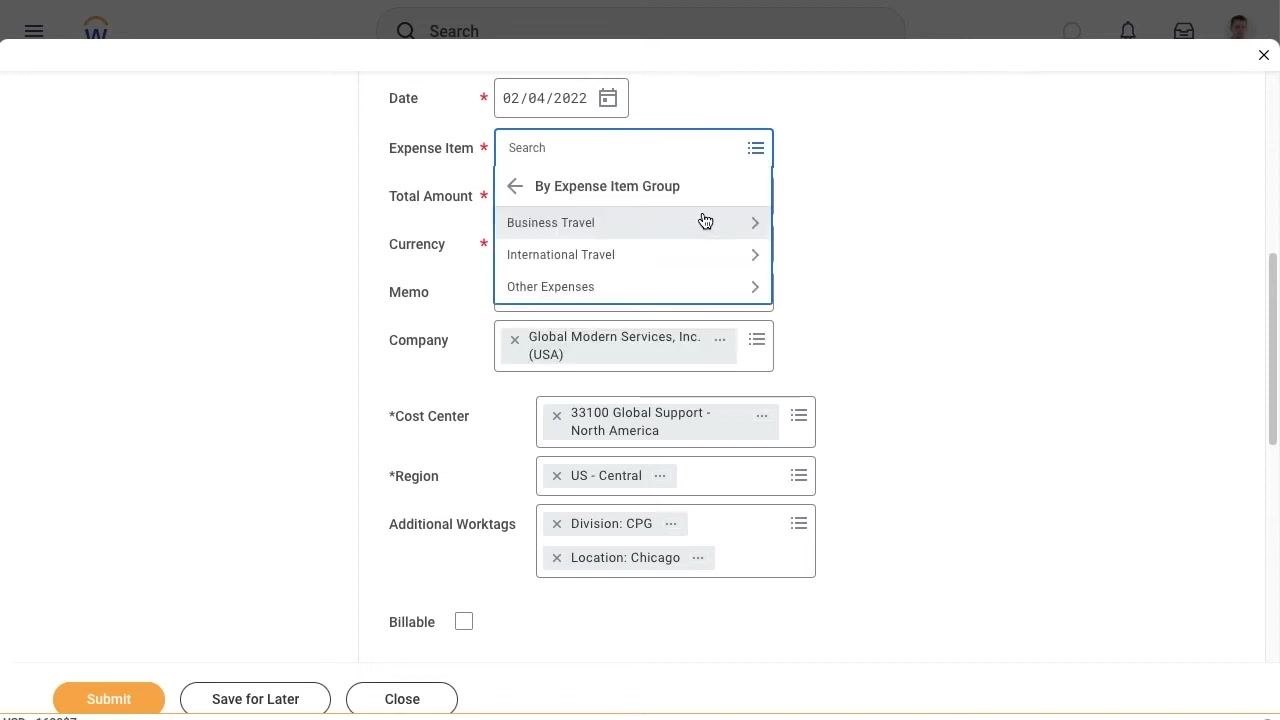
In the new expense line, use the Expense Item prompt to choose the appropriate category, such as Meals, Business Travel, International Travel, or Other Expenses.
Enter quantity and per unit amount
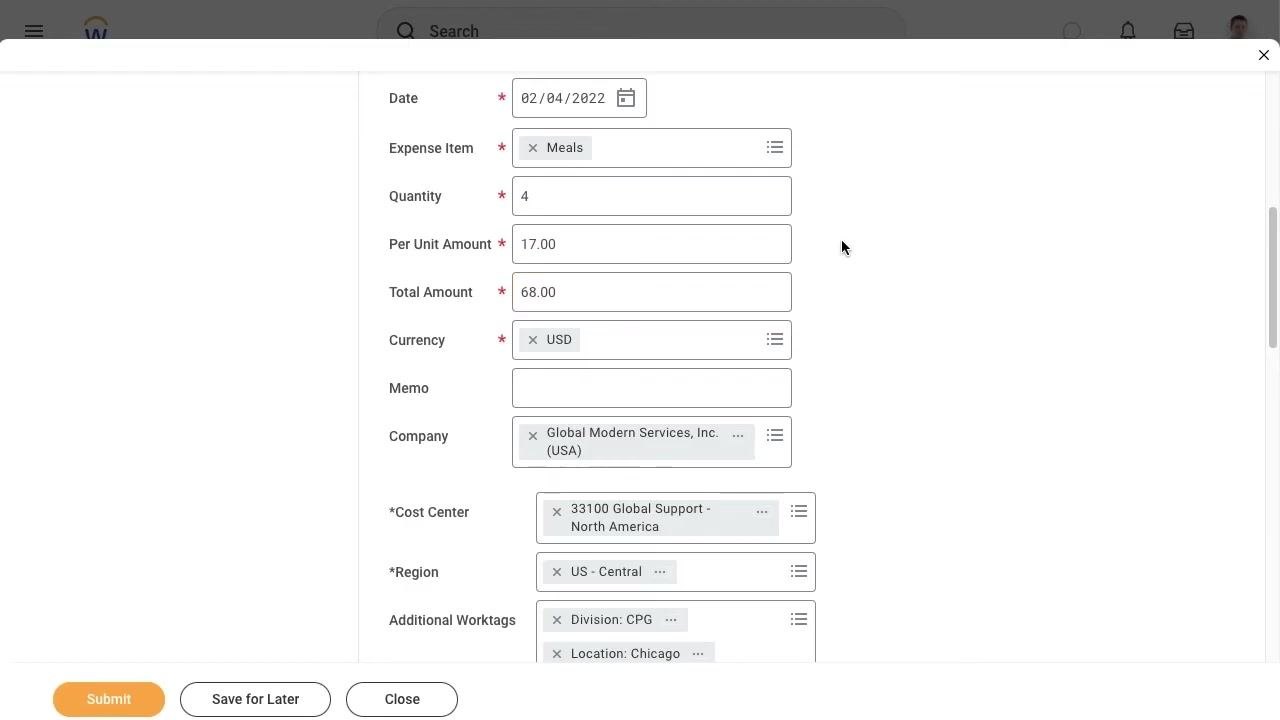
Enter the Quantity and Per Unit Amount for the expense. For example, enter a Quantity of 4 and a Per Unit Amount of 17.00. When you select outside the field, the Total Amount automatically calculates (in this case, 68.00). Confirm that the Currency is set to USD or your local currency; if you specify a different currency, Workday automatically converts it to the currency you are paid in.
Itemize the expense (optional)
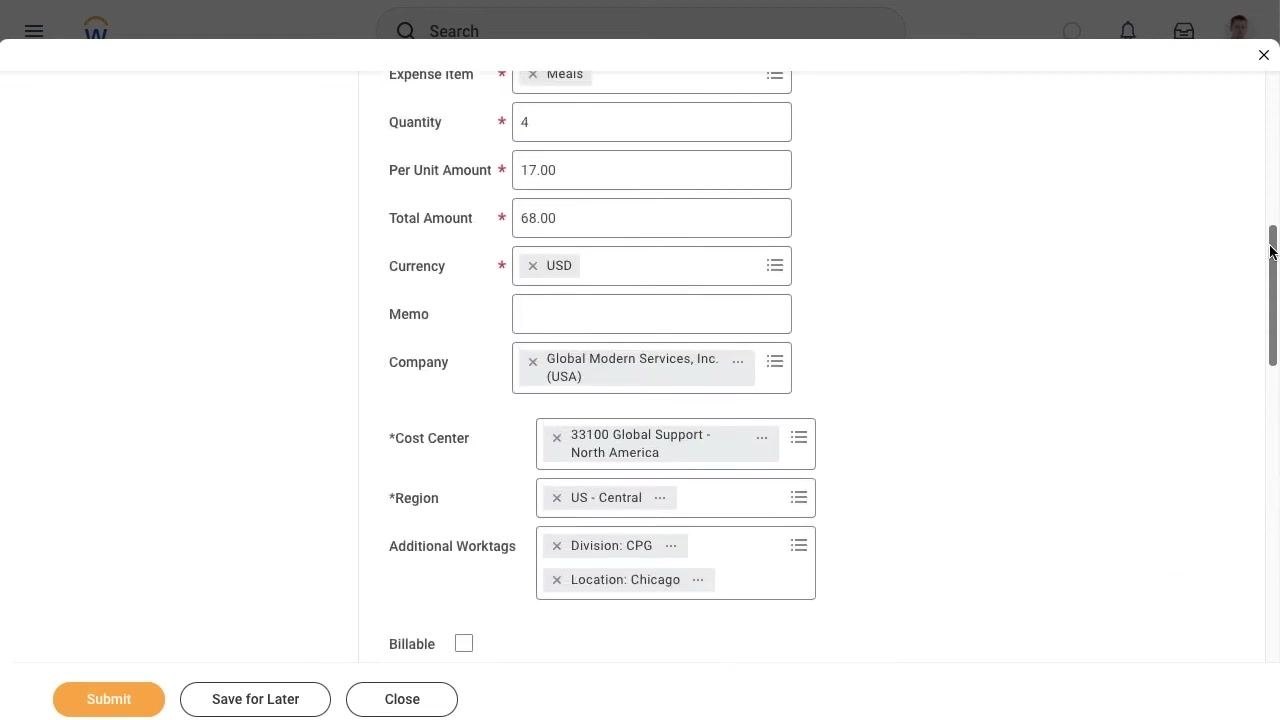
If you need to break the expense down into detailed components, select Add under the Itemization section. Check the Billable checkbox if the item should be marked as billable, and use the Receipt Included option to indicate whether a receipt has been attached.
Complete the item details
In the Item Details section, select the prompt icon in the Attendee(s) field and choose attendees from the list of workers in your supervisory organization (for example, Brian Kaplan and Laurie Jenkins). In the Business Topics field, enter the relevant topic (for example, "New Contact"), and fill in any additional fields required, such as Destination, Country, Document Number, and Venue.

Submit or save the expense report
Once all required fields and details are complete, choose one of the following:
- Select Submit to send the expense report for approval.
- Select Save for Later if you plan to add more expense entries before submitting.
View the expense report details
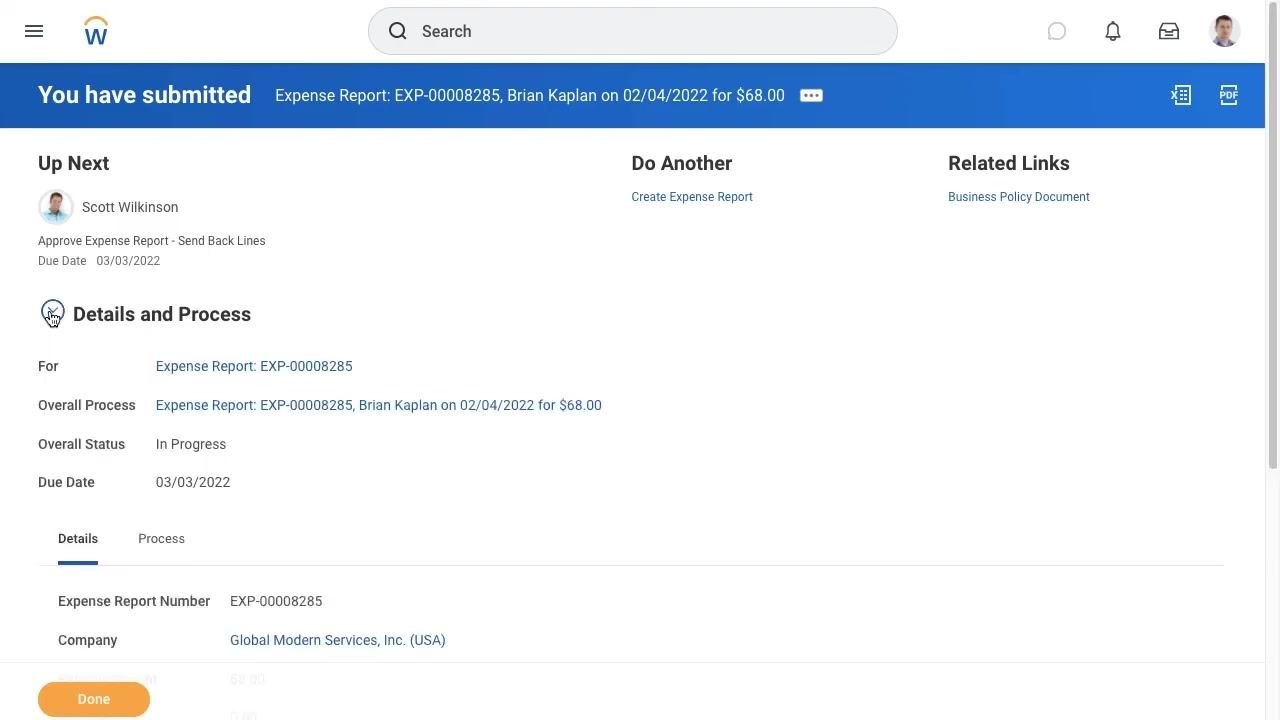
After submitting, select View Details to review the status and details of your report. The Details and Process section displays information such as:
- Expense Report Number (for example, EXP-00008285)
- Company (for example, Global Modern Services, Inc. (USA))
- Overall Status (for example, In Progress)
- Due Date (for example, 03/03/2022)
You can toggle between the Details and Process tabs to see all steps in the business process.
Review the remaining approval process
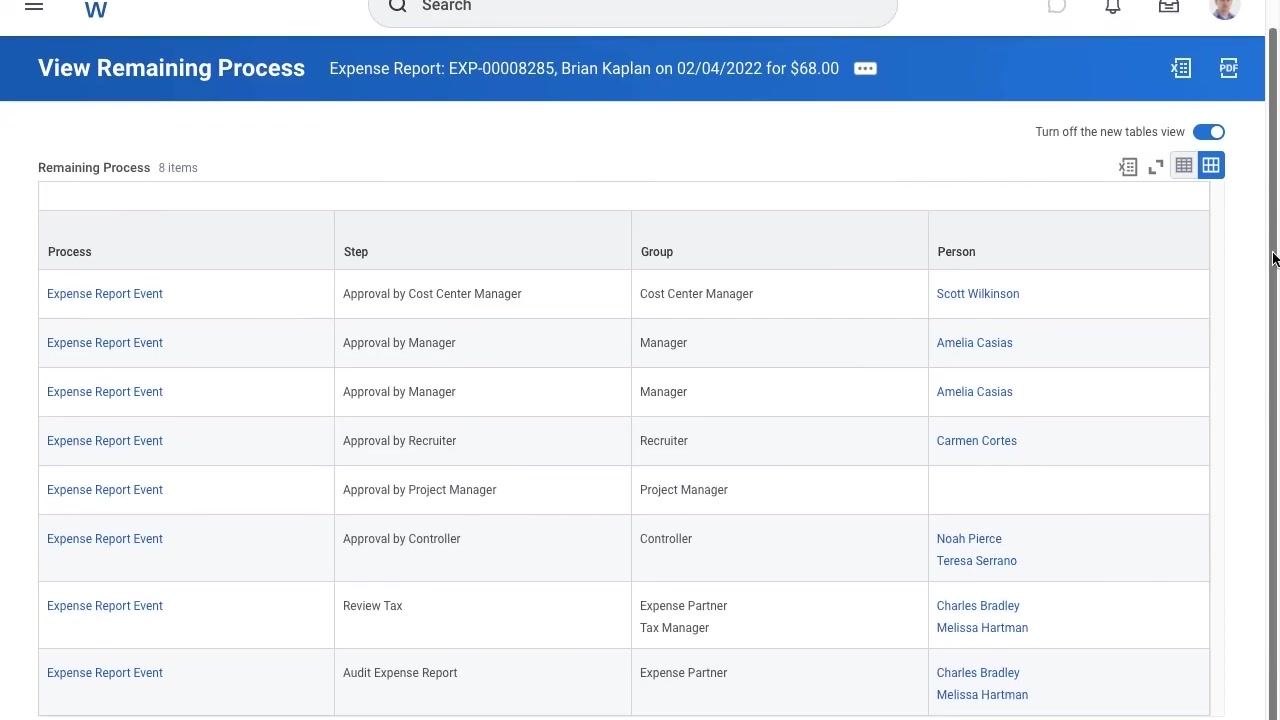
Select Remaining Process to see whether additional approvals are required. The View Remaining Process screen lists all pending steps, which may include:
- Approval by Cost Center Manager (for example, Scott Wilkinson)
- Approval by Manager (for example, Amelia Casias)
- Approval by Recruiter, Project Manager, Controller, and others
- Review Tax and Audit Expense Report steps
Approvals may be conditional based on the expense amount or the status of the expense submitter.
Understanding the approval workflow table
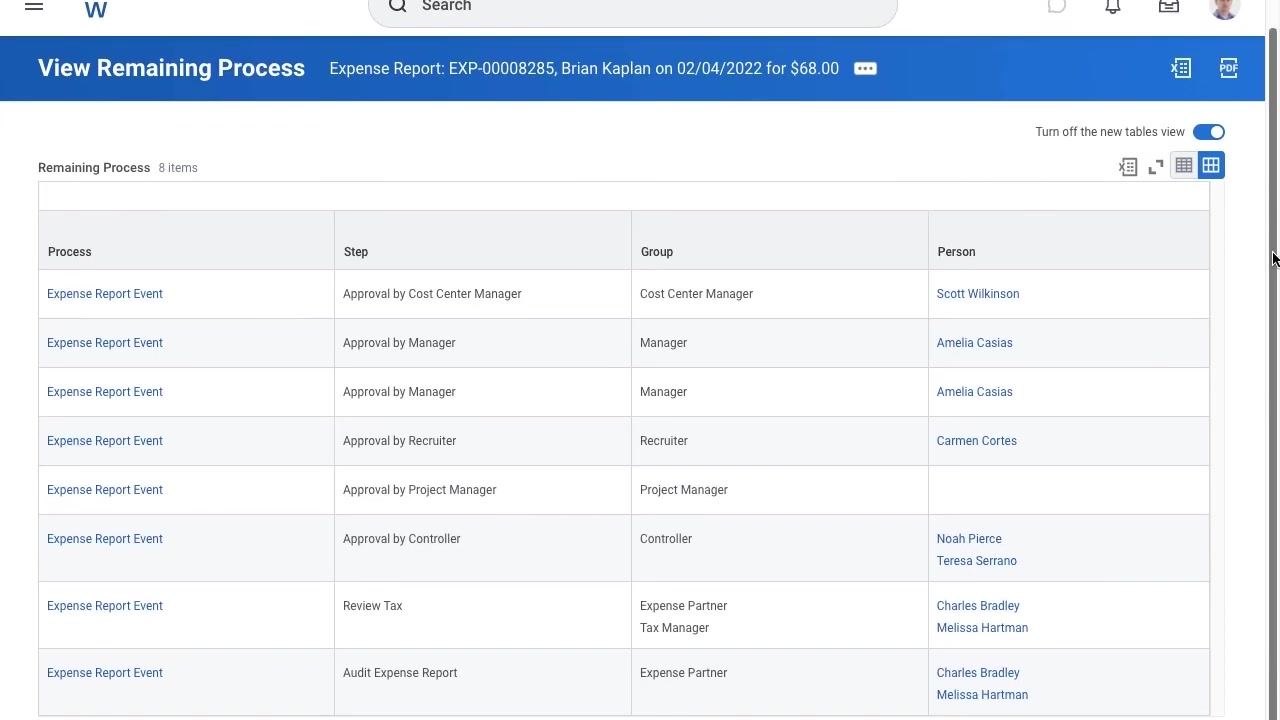
The View Remaining Process screen presents the approval workflow in a table with the following columns:
- Process: The type of event (for example, Expense Report Event).
- Step: The specific approval or review required (for example, Approval by Cost Center Manager, Approval by Manager, Approval by Recruiter, Approval by Project Manager, Approval by Controller, Review Tax, Audit Expense Report).
- Group: The group or role responsible for the step (for example, Cost Center Manager, Manager, Recruiter, Project Manager, Controller, Expense Partner, Tax Manager).
- Person: The individual(s) assigned to each step (for example, Scott Wilkinson, Amelia Casias, Carmen Cortes, Noah Pierce, Teresa Serrano, Charles Bradley, Melissa Hartman).
Use this table to track the progress of your expense report and follow up with the appropriate approvers if necessary.
Summary
You have now learned how to create, itemize, submit, and track an expense report in Workday. This included opening the Create Expense Report task, entering expense line details, attaching a receipt, specifying attendees and business details, and reviewing the full approval workflow. For additional help or to review other Workday processes, consult your organization's Workday support resources or help documentation.
Generation details: cost, quality tiers
Docsie billed 2,000 credits ($1.40) to analyze this 4-minute video at standard quality. The rewrite, template fill and Word/PDF exports were included. The same video at each quality tier:
| Quality | Frames sampled | Credits | Approx. cost |
|---|---|---|---|
| Draft | every 16-30 s | 1,000 | $0.70 |
| Standard (this guide) | every 8-15 s | 2,000 | $1.40 |
| Detailed | every 4-7 s | 4,000 | $2.80 |
| Ultra | every 1-3 s | 8,000 | $5.60 |
Credits priced at $0.70 per 1,000; plans include a monthly allowance. Enterprise customers on on-premise or bring-your-own-model deployments run this on their own inference and pay no per-video credits.
Generated by Docsie Video-to-Docs on 2026-10-01 from a 3-minute video. Screenshots are frames from the source video and belong to their creator, Information Technology Services, whose original is embedded above. If you own this video and want the guide removed or credited differently, contact us and we will act within one business day.