
How to Create a Position in Workday
This guide shows you how to create a position in Workday, from opening the request form to completing the required compliance questionnaire and submitting it for approval. Once you have finished these steps, the new position will move through approval and become available for recruiting.
Video: How to Create a New Position in Workday by HRM OCM. All credit for the demonstration goes to the creator; watch the original on YouTube. The written guide below was generated from this video by Docsie. Creator? Request a change or removal.
This guide shows you how to create a position in Workday, from opening the request form to completing the required compliance questionnaire and submitting it for approval. Once you have finished these steps, the new position will move through approval and become available for recruiting.
Prerequisites
- You have an active Workday login with access to the My Team worklet.
- You know which Supervisory Organization the new position belongs to.
- You have the job details ready, including the position request reason, job posting title, number of positions, and (if applicable) the job profile you plan to use.
- You have any supporting documents ready to attach, if needed.
Access the My Team worklet
Log in to Workday. On the Home screen, locate and select the My Team worklet.
Start the Create Position action
In the My Team worklet, open the Actions menu and select Create Position.
Confirm the supervisory organization
Workday prompts you to confirm the Supervisory Organization for the new position. By default, your own supervisory organization appears (for example, "Training Supervisory Org Top (William Blake)").
If the position belongs to a different supervisory organization, use the search bar to find that organization's manager by name. Once you have selected the correct organization, click OK.
Choose a position request reason
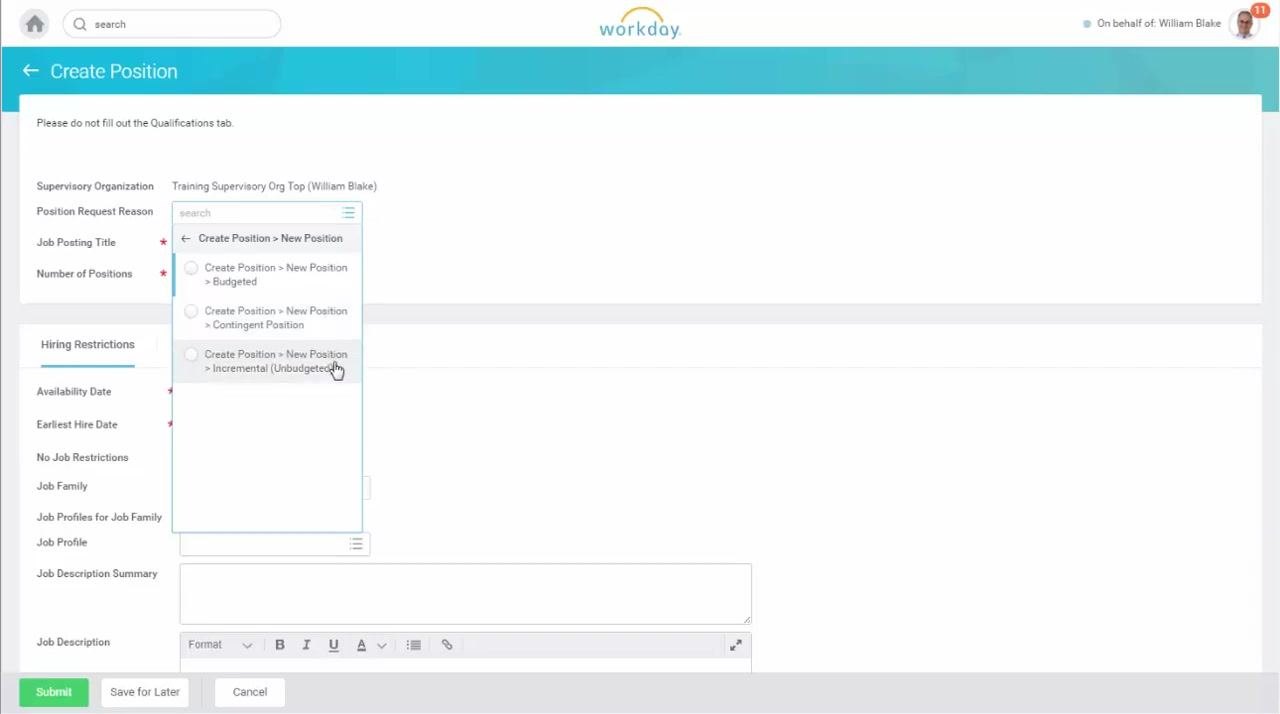
On the Create Position form, select a Position Request Reason:
- Budgeted: for a previously budgeted position.
- Contingent: for temporary or externally paid staff.
- Incremental (Unbudgeted): for new positions not previously budgeted for.
Enter the job posting title and number of positions
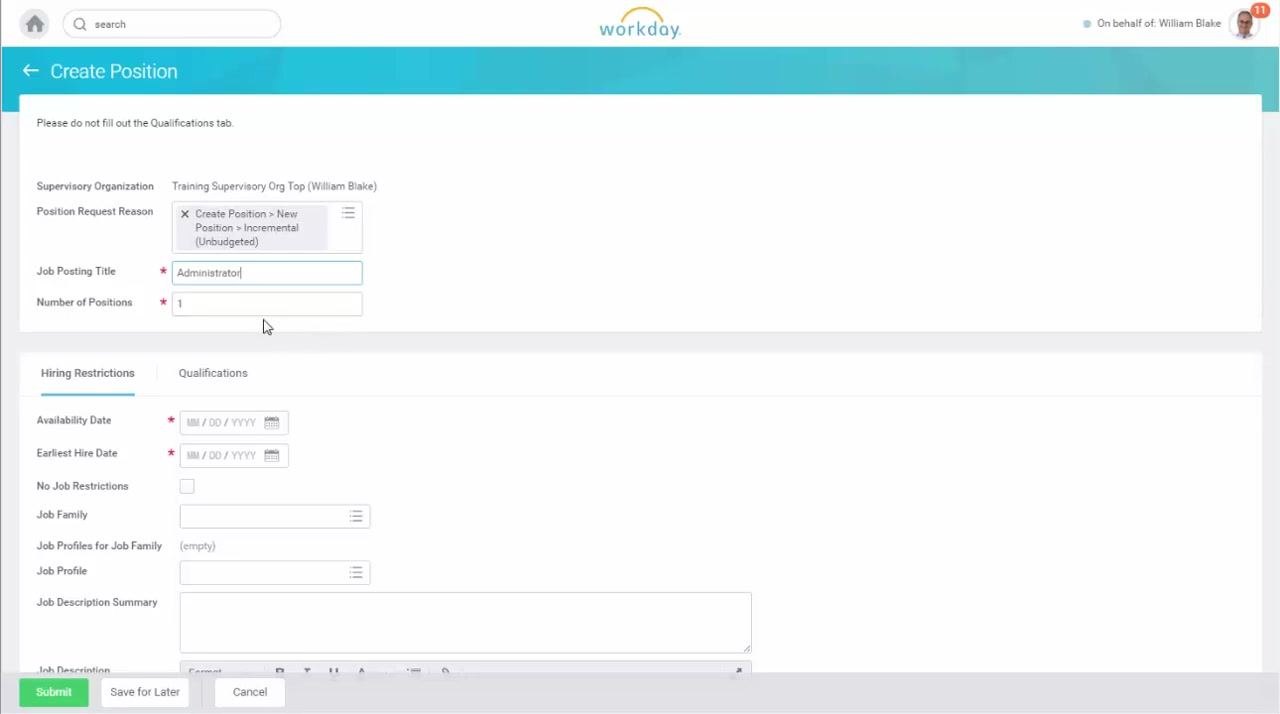
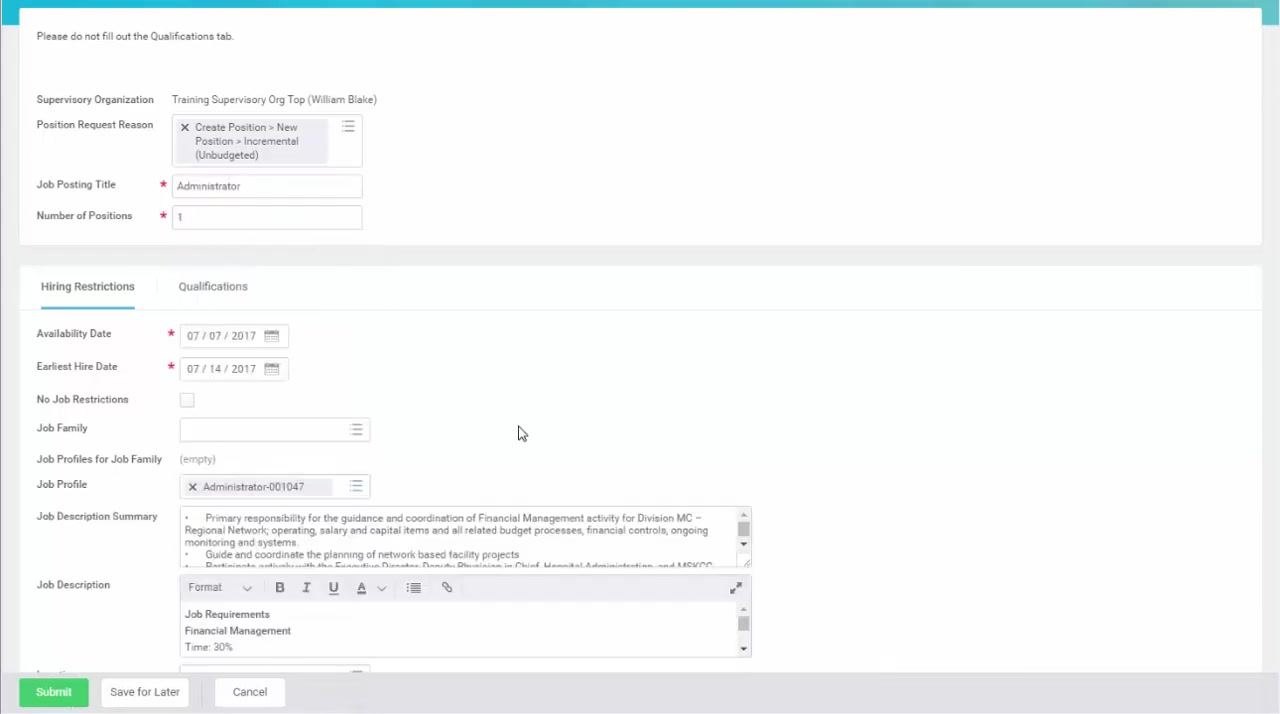
Enter the Job Posting Title, which is the title used for recruiting purposes (for example, "Administrator"). This field does not auto-populate from the job profile, so you must type it in manually.
Enter the Number of Positions. This is typically "1," but you can enter a different number if you are creating multiple positions at once.
Set the availability and earliest hire date
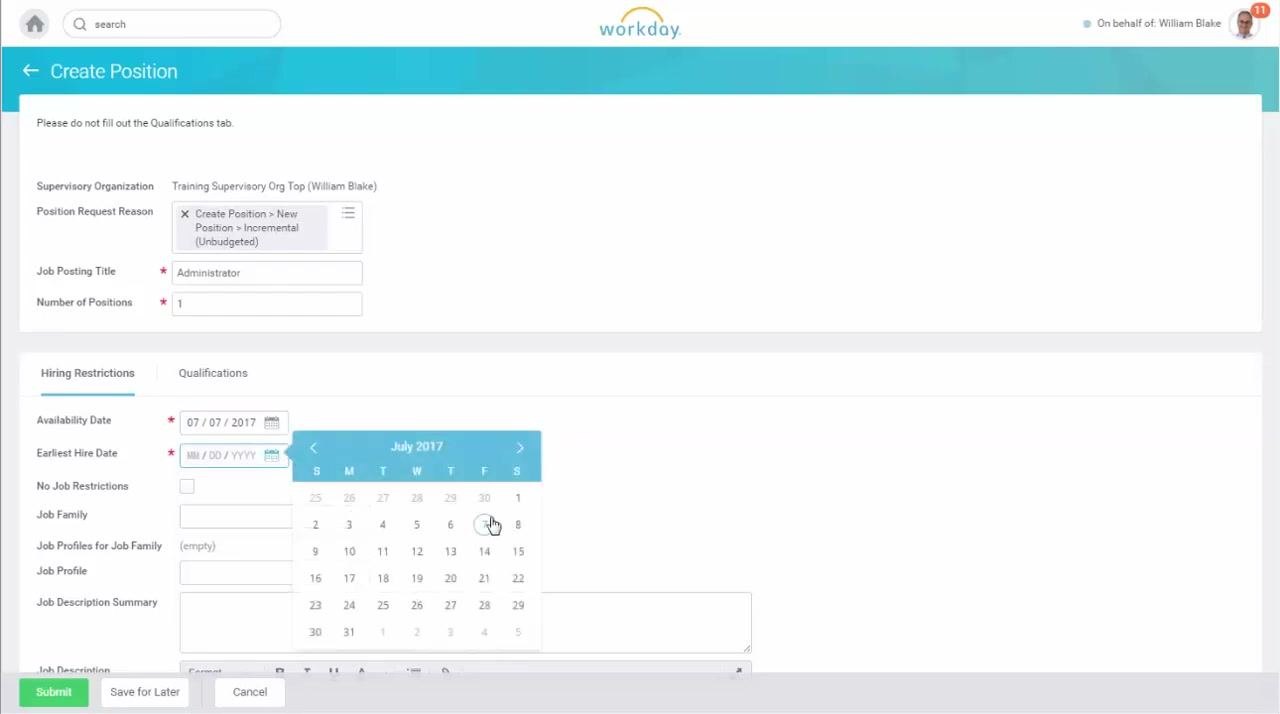
Enter the Availability Date, which is the date the position first opens (for example, "07/07/2017"). Then enter the Earliest Hire Date, the earliest date you want an employee to start in this position.
You can also complete these optional fields if they apply:
- No Job Restrictions: check this box if there are no restrictions.
- Job Family: select the appropriate job family.
- Job Profiles for Job Family: choose from the available profiles.
- Job Profile: select the specific job profile (covered in detail in the next step).
- Job Description Summary: enter a summary if required.
- Job Description: provide a detailed description if needed.
Assign a job profile to the position
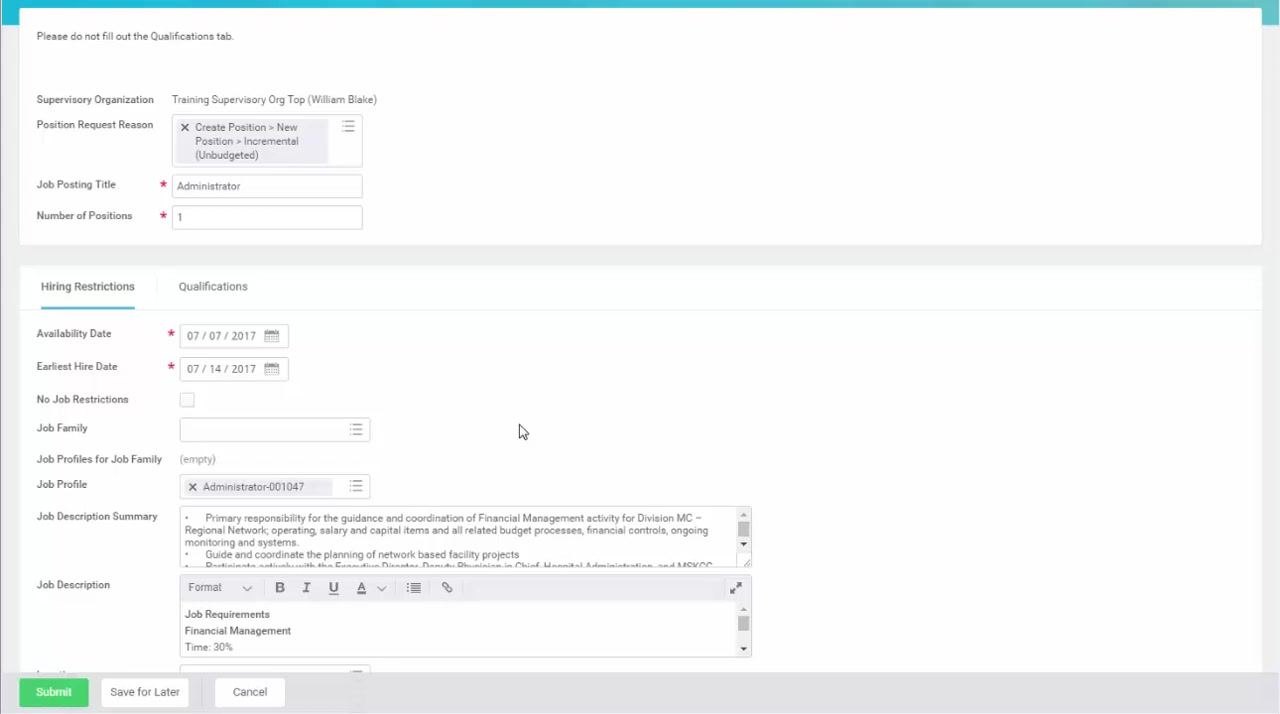
Skip the No Job Restrictions and Job Family fields, since they are not required for this step, and go directly to the Job Profile field. A Job Profile in Workday combines the job title and job description.
Click the drop-down menu in the Job Profile field. You can select a job profile that already exists in your organization, or one you have used previously in your supervisory organization. You can also search for another job profile by entering the job code or searching by job family category.
If you need to research job descriptions, use the MSK Job Descriptions link in your External Links worklet. If you select a job profile outside your organization, HR will need to review and approve its use, and may require you to create a new job description. You can leave the Job Profile field blank only if you intend to create a brand-new job description in MSK Job Descriptions.
Review the auto-populated job description fields
Once you select a job profile, Workday automatically populates the Job Description Summary and Job Description fields with content from MSK Job Descriptions. The summary field displays the job summary, and the description field lists the individual job responsibilities.
Complete location and worker details
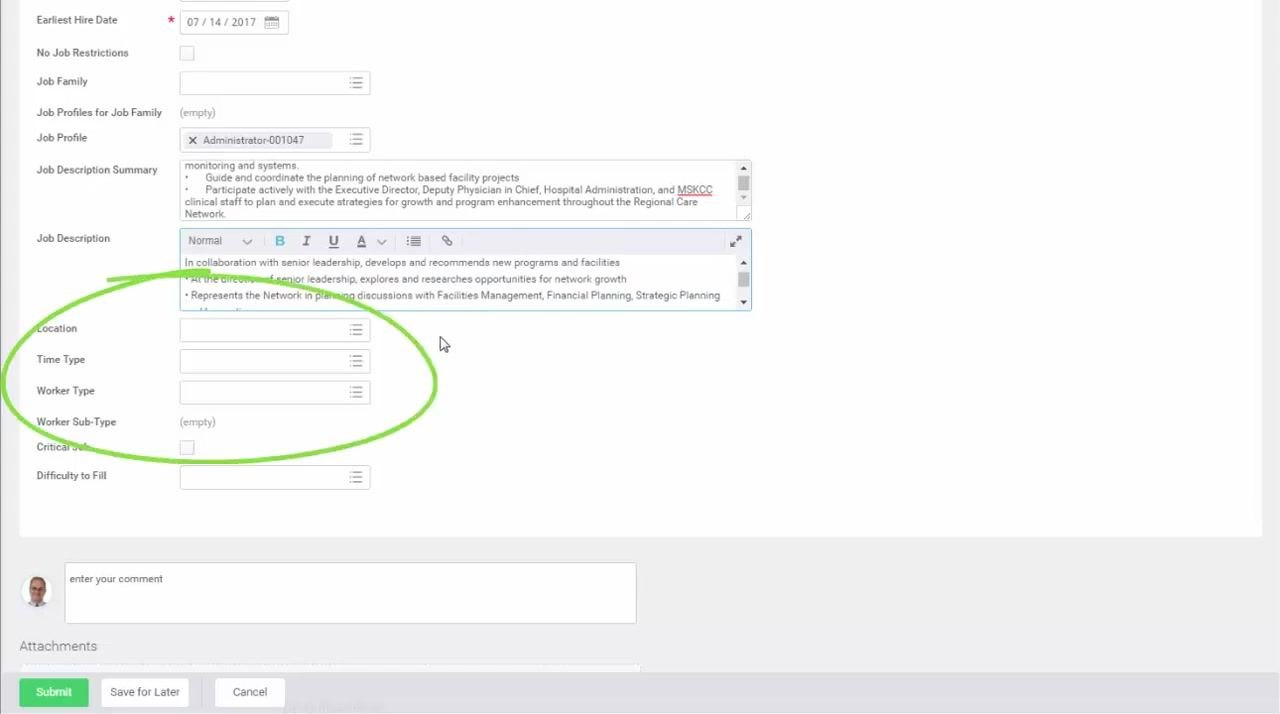
Fill in the following required fields:
- Location: the building or site within MSK where the position will be based.
- Time Type: whether the position is full-time or part-time.
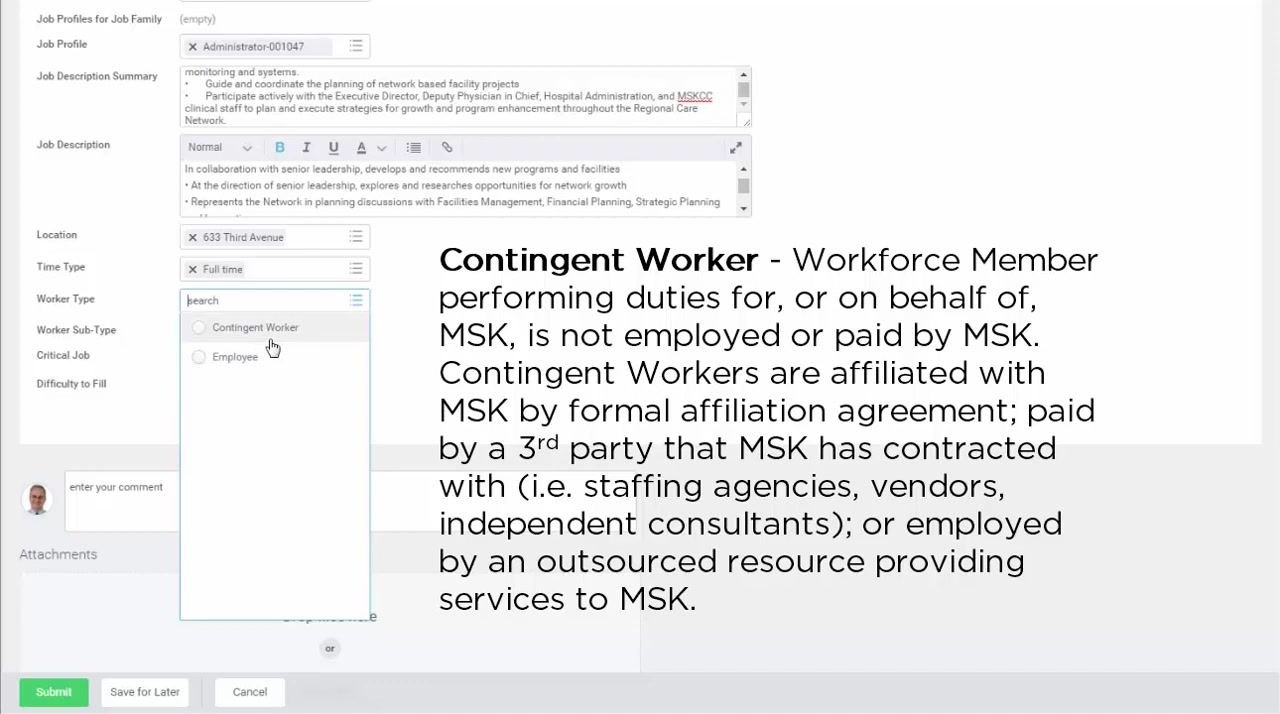
- Worker Type: the type of worker, such as employee or contractor.
- Worker Sub-Type: the appropriate sub-type, if applicable.
Specify the position location
If you are unsure of the exact location, or the position may work at several locations, list the building where the department is based. You can update this field later if needed.
Click the Location field and select the appropriate building or site from the drop-down menu (for example, "633 Third Avenue").
Select the time type
In the Time Type field, specify whether the position is Full time or Part time.
Choose the worker type
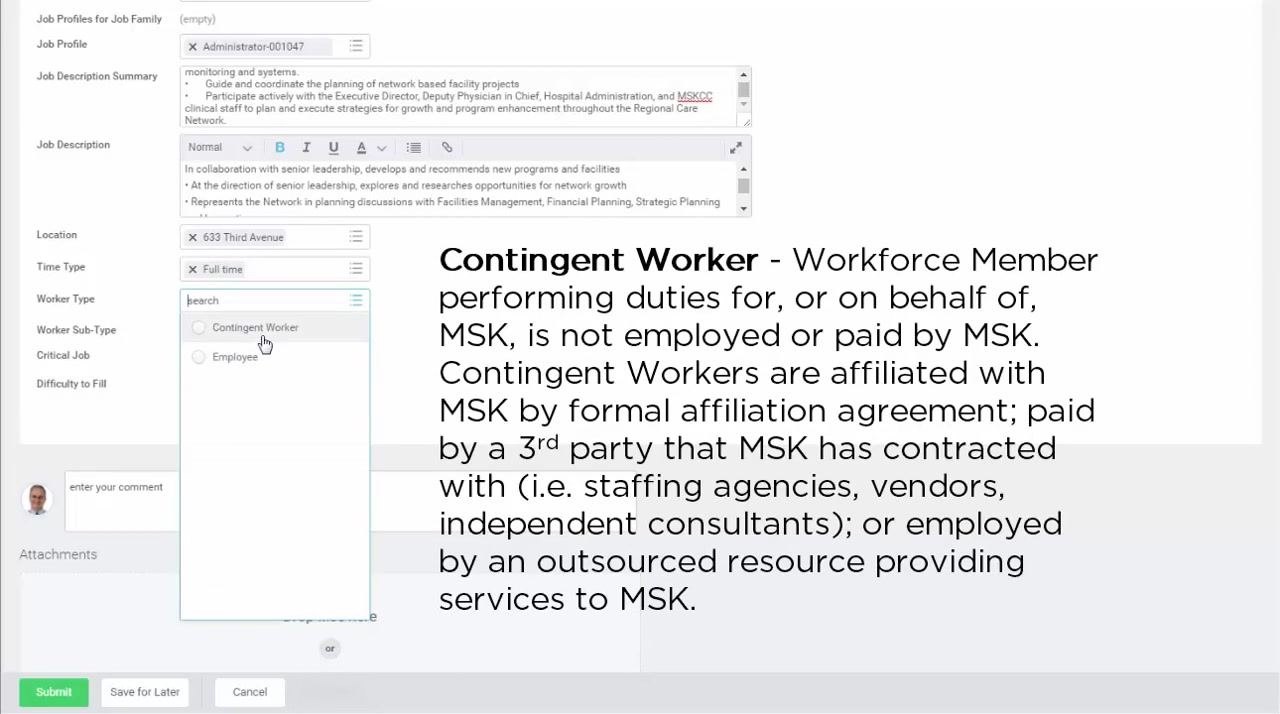
In the Worker Type field, select whether the position is for an Employee or a Contingent Worker. A Contingent Worker is a workforce member who performs duties for, or on behalf of, MSK but is not employed or paid by MSK. Contingent workers are paid by a third party, such as a staffing agency, vendor, or independent consultant, or are employed by an outsourced resource providing services to MSK.
Refer to the on-screen definition if you need clarification.
Select the worker sub-type
In the Worker Sub-Type field, choose the specific type of employee or contingent worker. Options may include:
- Externally Funded
- Per Diem
- Regular
- Student/Intern (Fixed Term, Seasonal)
- Trainee
For definitions of each worker subtype, visit Workday@MSK and select Glossary.
Indicate critical job or difficulty to fill (optional)
You are not required to complete the Critical Job or Difficulty to Fill fields. Check Critical Job if the position is highly critical for your department. Use Difficulty to Fill if the position is typically hard to recruit for.
Add comments and attachments (optional)
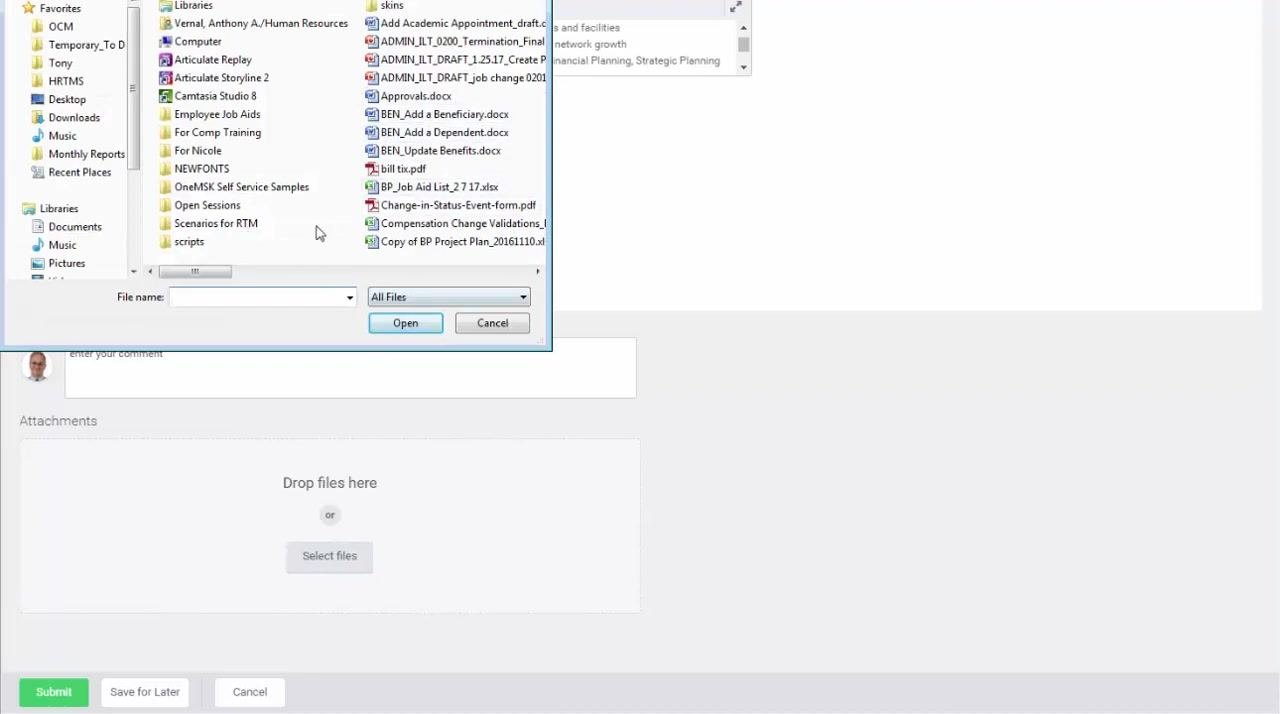
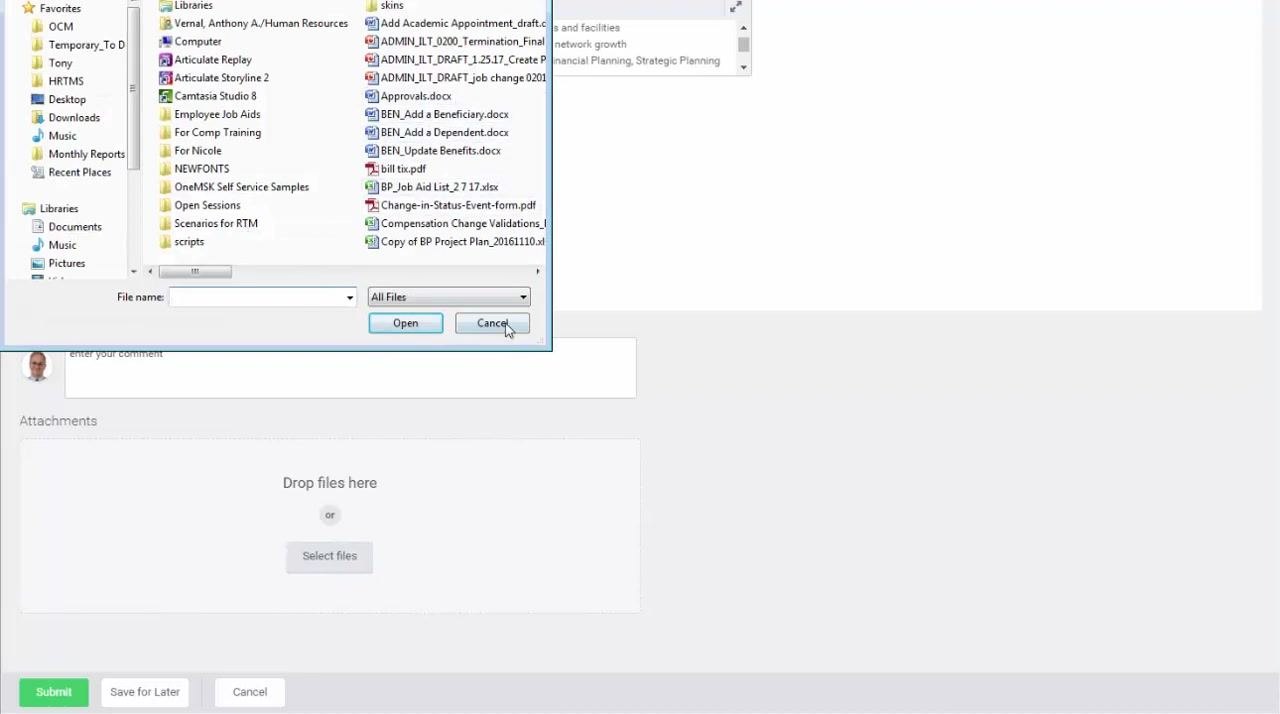
If you have documentation to support the position request, attach files under the Attachments section by clicking Select files and choosing the relevant documents.
You can also enter a comment in the provided field. Comments will be visible to anyone approving or working on this position.
Submit the position request
Once all required fields are completed and any optional information is added, click Submit to send the position for approval. Alternatively, click Save for Later if you need to finish the form another time, or Cancel to discard your changes.
Complete the Employee Health Regulatory Questionnaire
After submitting the position, you must complete the Employee Health Regulatory Questionnaire on the Edit Additional Data screen. This questionnaire helps determine health compliance considerations for the position and is required to comply with New York State Public Health law, federal regulations, and MSK hospital policies.
The form includes the following questions:
- Will this position ever work onsite or attend meetings at an MSK Facility/Office/location?
- Will this position work with animals?
- Will the employee work at an MSK Facility where patient care is provided?
- Will this position have contact with human blood or bodily fluids?
Answer each question by selecting Yes or No from the drop-down menus.
Submit the questionnaire
After answering all questions, click Submit to complete the process.
Confirmation
Once submitted, your new position is sent for approval. After approval, the position appears in your My Open Positions worklet, and you can begin the recruiting process.
Access your open positions and begin recruiting
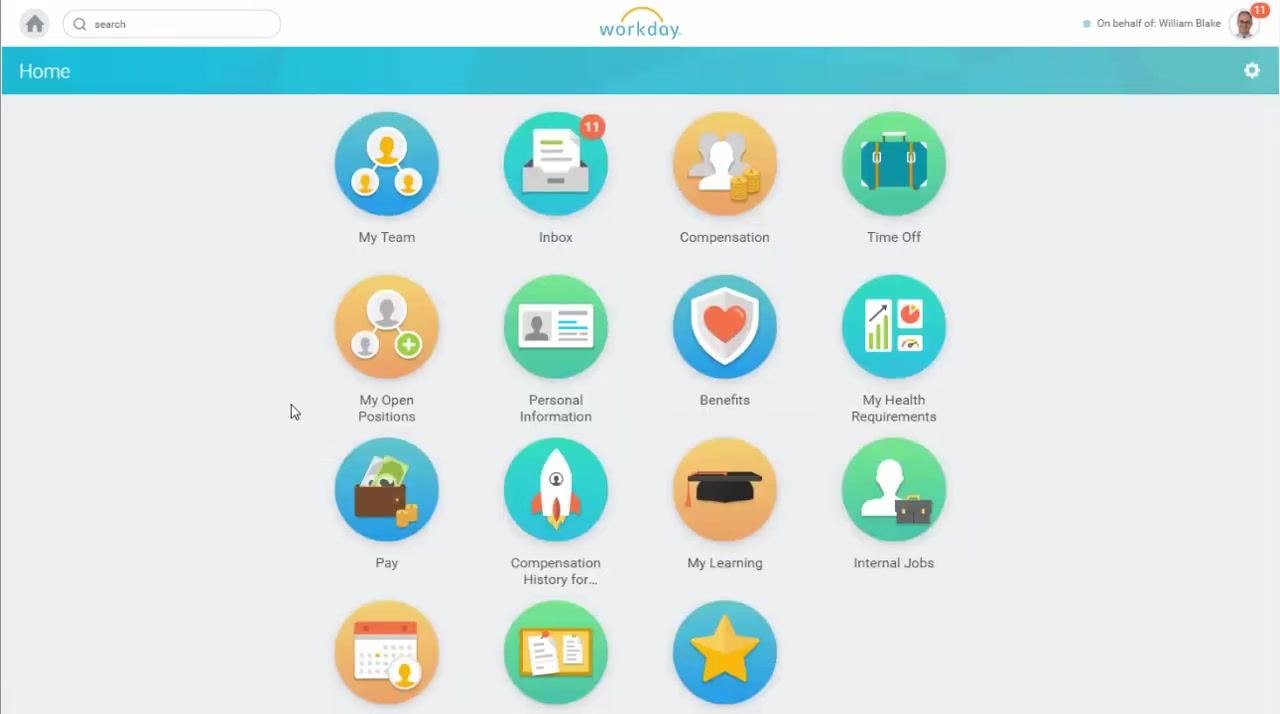
After your new position is approved, it appears in the My Open Positions worklet on the Workday home screen. Click the My Open Positions icon to open a requisition for the new position and begin the recruiting process. Use the available options to manage or initiate recruitment for your newly created position.
What's next
For more instructional videos, guides, and support, visit Workday@MSK. Go to OneMSK and search for "Workday," or use the My Help worklet within Workday for assistance. These resources provide answers to common questions and additional training materials.
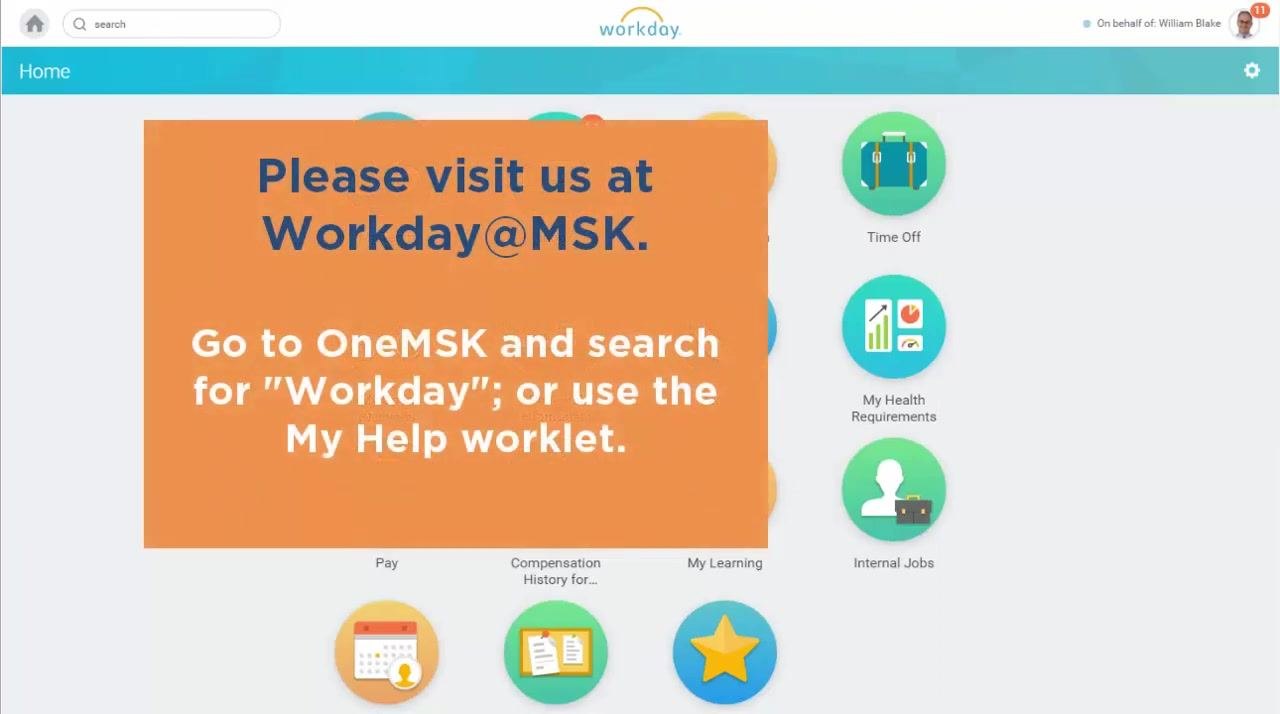
You have now completed the process of creating a new position in Workday, submitted all required information, and completed the employee health compliance steps. Your position is ready for approval and, once approved, for recruiting. For ongoing guidance, refer to Workday@MSK or the My Help worklet.
Generation details: cost, quality tiers
Docsie billed 3,000 credits ($2.10) to analyze this 6-minute video at standard quality. The rewrite, template fill and Word/PDF exports were included. The same video at each quality tier:
| Quality | Frames sampled | Credits | Approx. cost |
|---|---|---|---|
| Draft | every 16-30 s | 1,500 | $1.05 |
| Standard (this guide) | every 8-15 s | 3,000 | $2.10 |
| Detailed | every 4-7 s | 6,000 | $4.20 |
| Ultra | every 1-3 s | 12,000 | $8.40 |
Credits priced at $0.70 per 1,000; plans include a monthly allowance. Enterprise customers on on-premise or bring-your-own-model deployments run this on their own inference and pay no per-video credits.
Generated by Docsie Video-to-Docs on 2026-10-01 from a 5-minute video. Screenshots are frames from the source video and belong to their creator, HRM OCM, whose original is embedded above. If you own this video and want the guide removed or credited differently, contact us and we will act within one business day.