
How to Create a Job Requisition in Workday
When a position needs to be filled, you can create a job requisition in Workday to post the job internally and externally. This guide walks you through how to create a job requisition in Workday, from searching for the task to selecting the supervisory organization and position, entering recruiting and job details, adding skills, completing compensation information, and verifying that the requisition was created successfully.
Video: How to create Job Requisition in Workday HCM? by Wizard of HCM. All credit for the demonstration goes to the creator; watch the original on YouTube. The written guide below was generated from this video by Docsie. Creator? Request a change or removal.
When a position needs to be filled, you can create a job requisition in Workday to post the job internally and externally. This guide walks you through how to create a job requisition in Workday, from searching for the task to selecting the supervisory organization and position, entering recruiting and job details, adding skills, completing compensation information, and verifying that the requisition was created successfully.
Prerequisites
- Access to your Workday environment with permission to create job requisitions.
- The name of the supervisory organization for which you want to create the requisition.
- Knowledge of whether you are creating a brand-new position or converting an existing unfilled position into a requisition.
Searching for the Create Job Requisition task
- Open your web browser and navigate to your Workday environment.
- In the Workday search bar at the top of the page, type
Create Job req. - Review the search results under Tasks and Reports and locate Create Job Requisition.
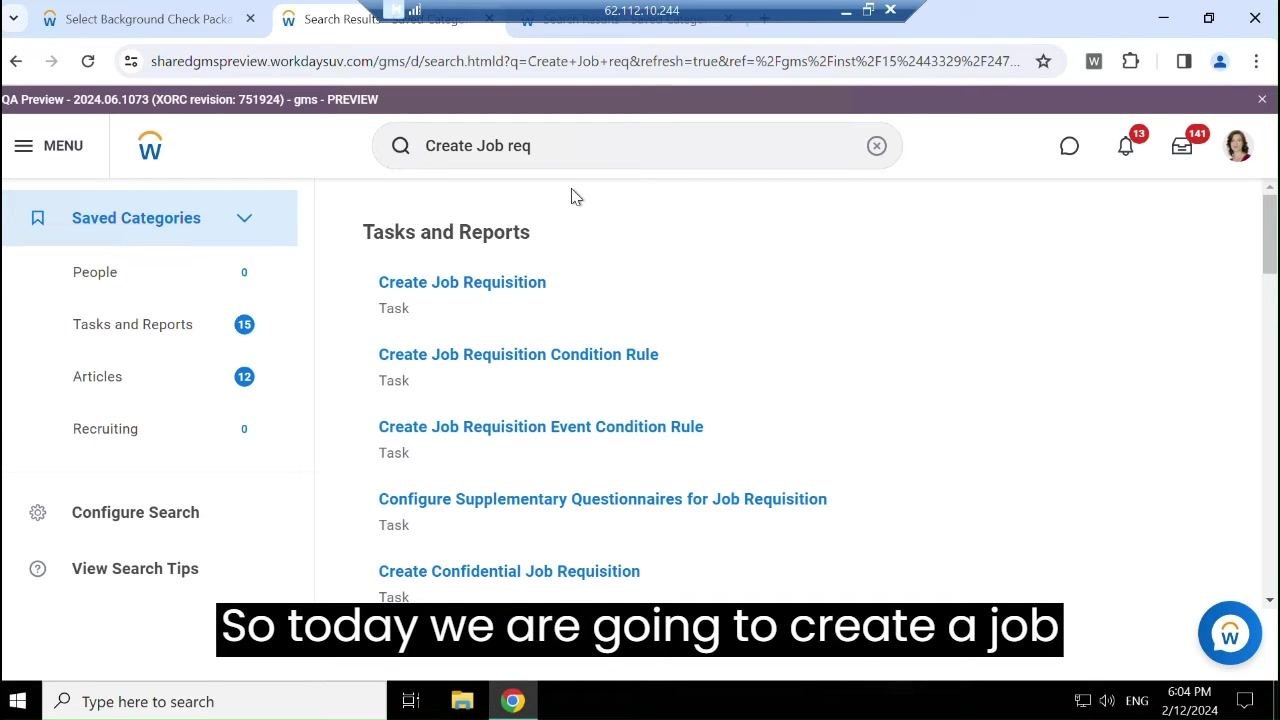
- Click Create Job Requisition to open the requisition creation dialog.
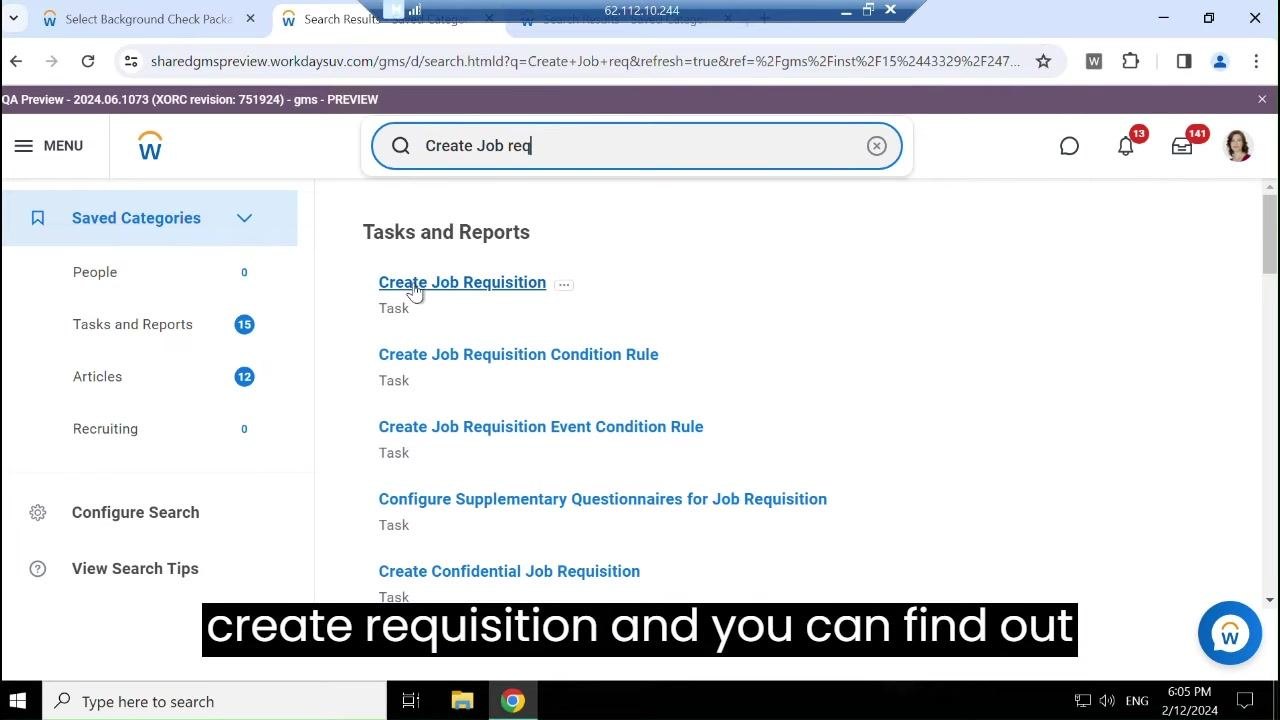
Selecting the supervisory organization and position
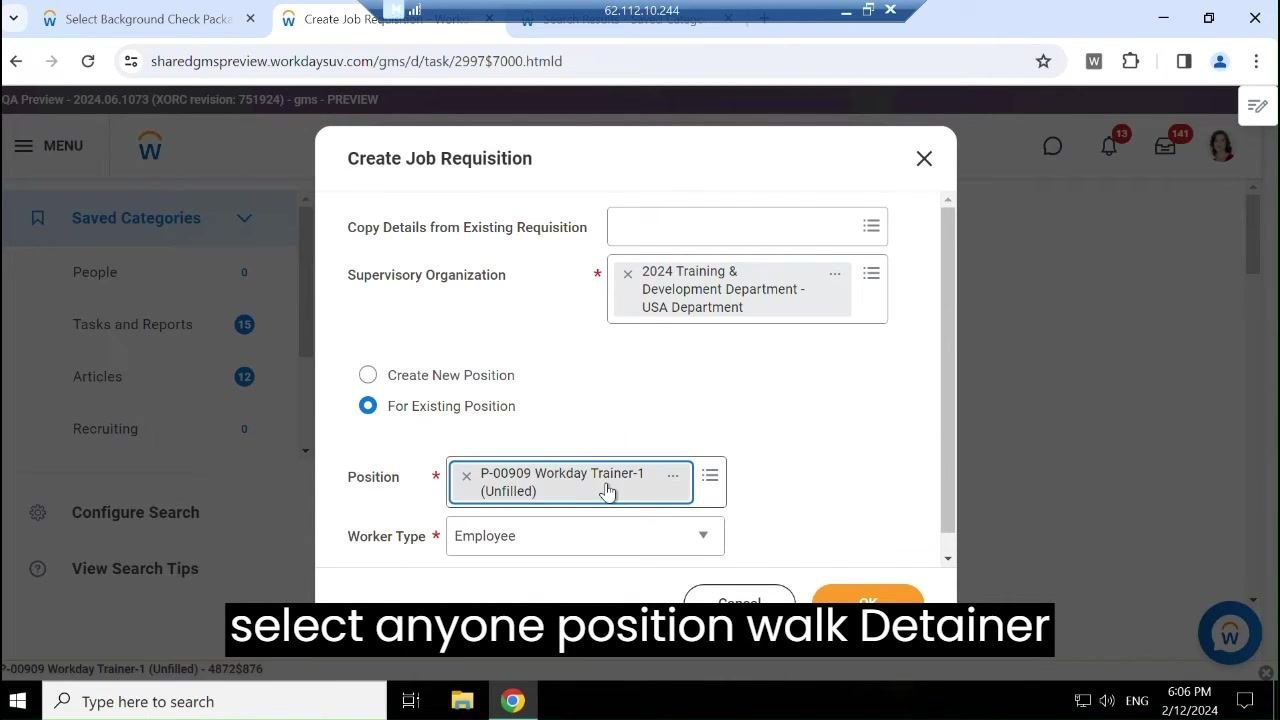
The Create Job Requisition dialog box displays several fields:
- Copy Details from Existing Requisition (optional)
- Supervisory Organization (required)
- Create New Position or For Existing Position
- Worker Type (default: Employee)
- Cancel and OK buttons
-
In the Supervisory Organization field, start typing the name of the organization, for example
2024 Training. -
If no matches appear, click the search icon or dropdown arrow to open the organization search dialog.
- In the search dialog, select the correct organization, for example
2024 Training & Development Department - USA Department.
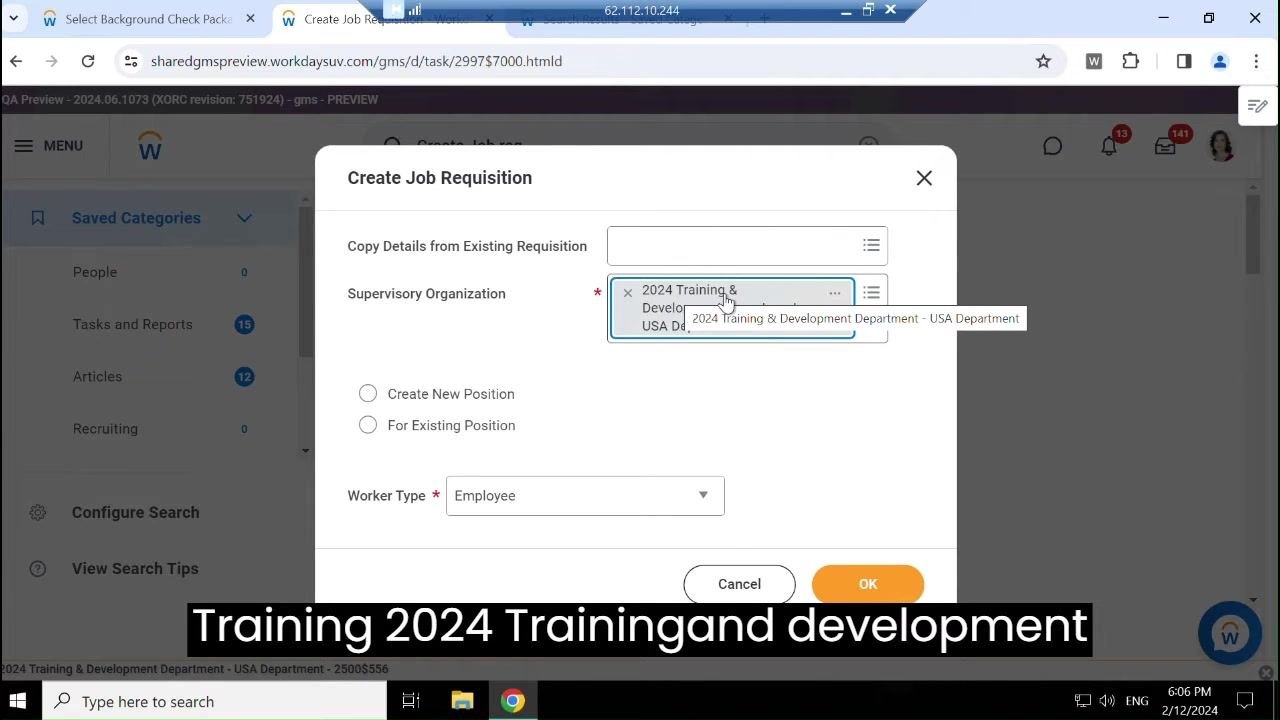
- Choose For Existing Position to convert an existing job position into a requisition.
- In the Position field, select the relevant position, for example
P-00908 Workday Trainer-2 (Unfilled)orP-00909 Workday Trainer-1 (Unfilled).
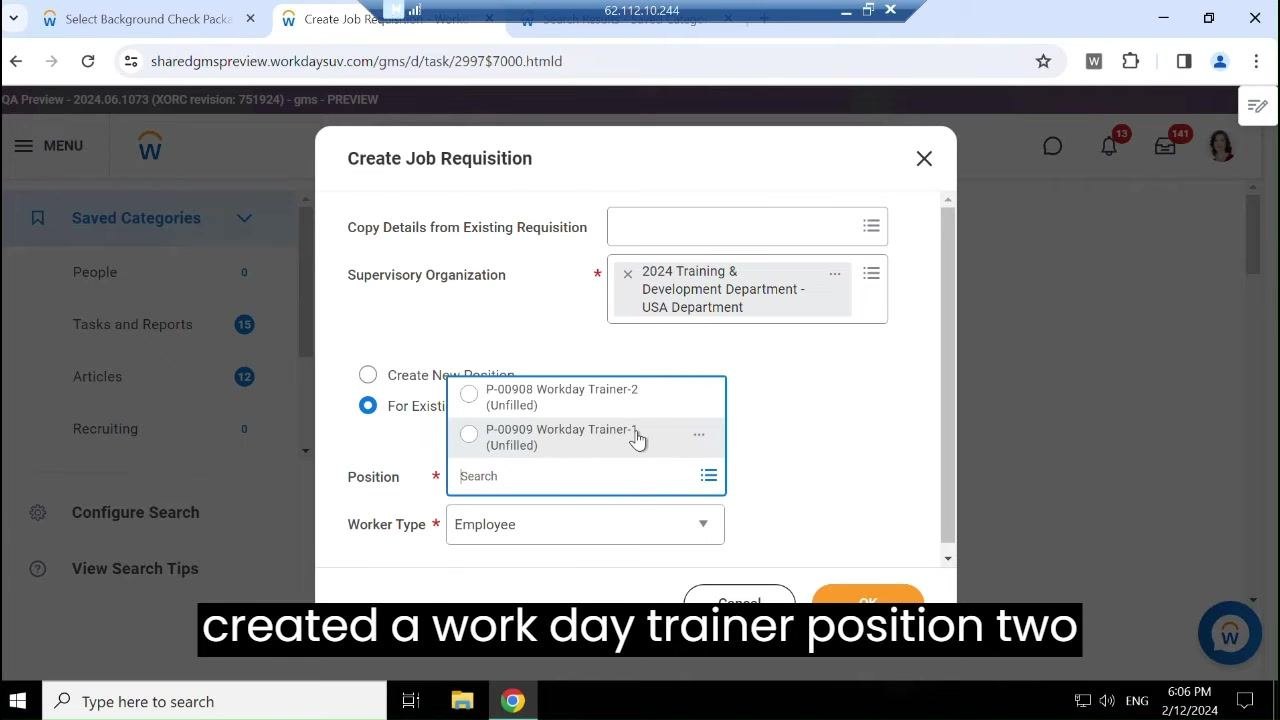
- Confirm that Worker Type is set to
Employee, then click OK.
Entering recruiting details
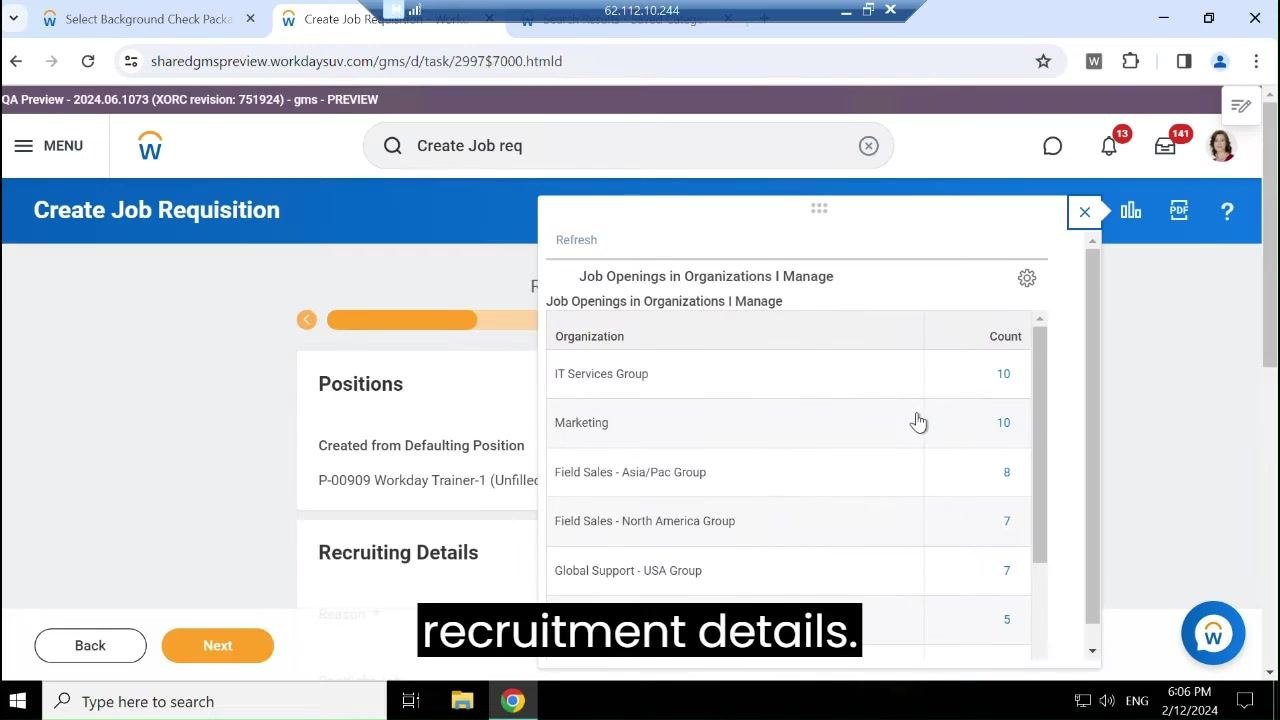
- On the Recruiting Information page, review the Positions section, which confirms the requisition is created from the defaulting position, and the Recruiting Details section, which you complete next.
-
In the Recruiting Details section, a dialog may list organizations such as IT Services Group, Marketing, and Field Sales. Select the relevant organization if required, or close the dialog to continue.
-
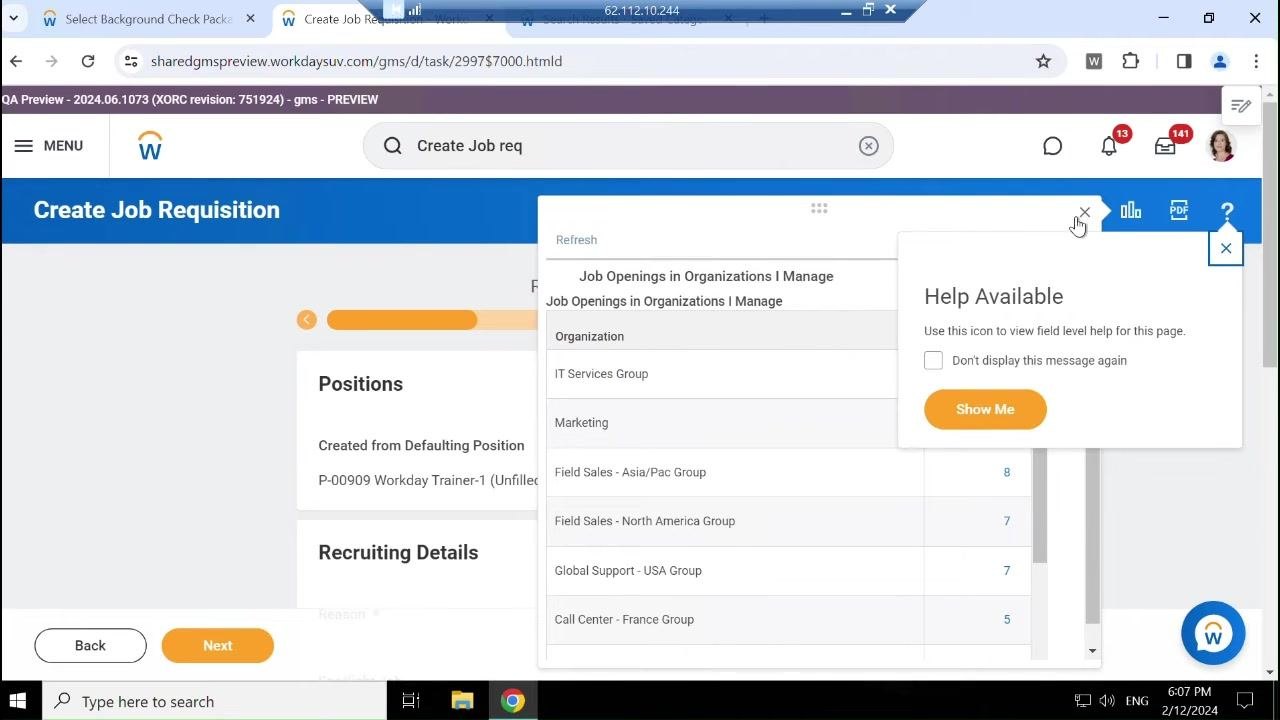
If a Help Available dialog appears, check Don't display this message again and close it, or click Show Me for additional guidance.
- Complete the Recruiting Details fields:
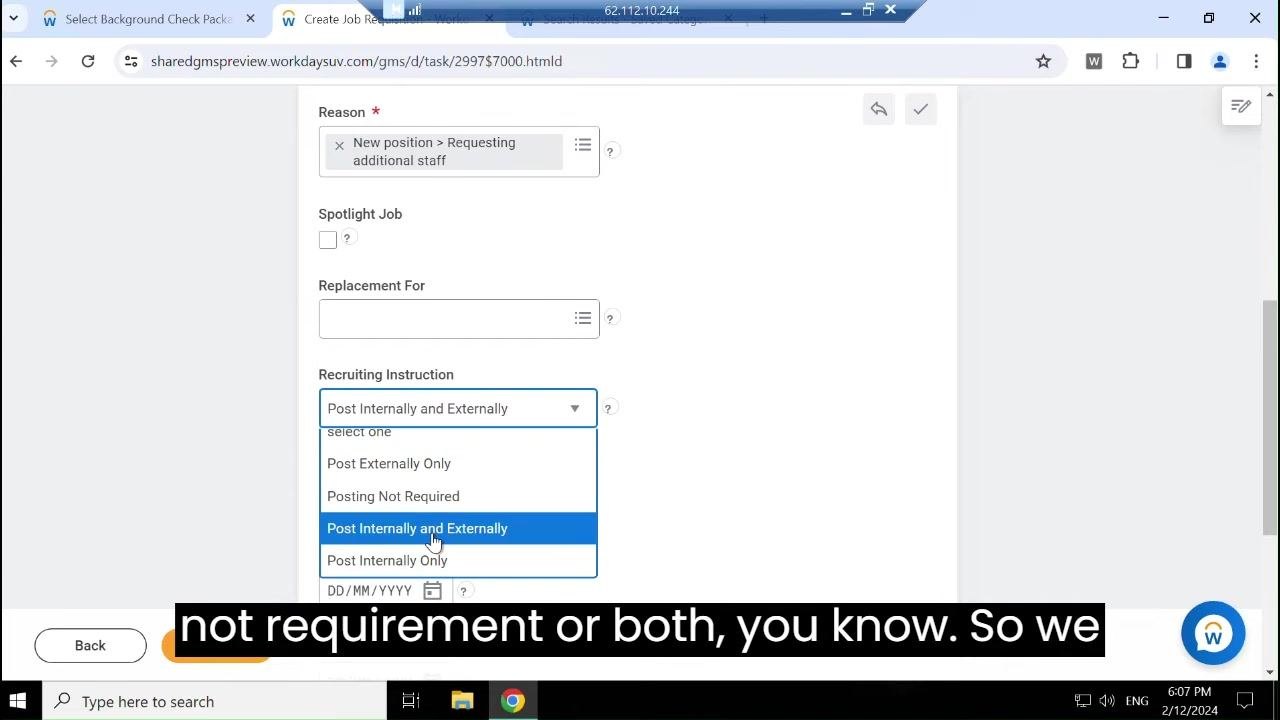
- Reason: select the reason for the requisition, for example New position > Requesting additional staff.
- Spotlight Job: check if applicable (optional).
- Replacement For: enter if the requisition replaces an existing employee (optional).
- Recruiting Instruction: open the dropdown and select Post Internally and Externally to post the job both inside and outside the organization.
- Set the recruitment dates:
- Recruiting Start Date: enter today's date, for example 12/02/2024.
- Target Hire Date: enter today's date or your desired hire date, for example 12/02/2024.
- Target End Date: enter if applicable (optional).
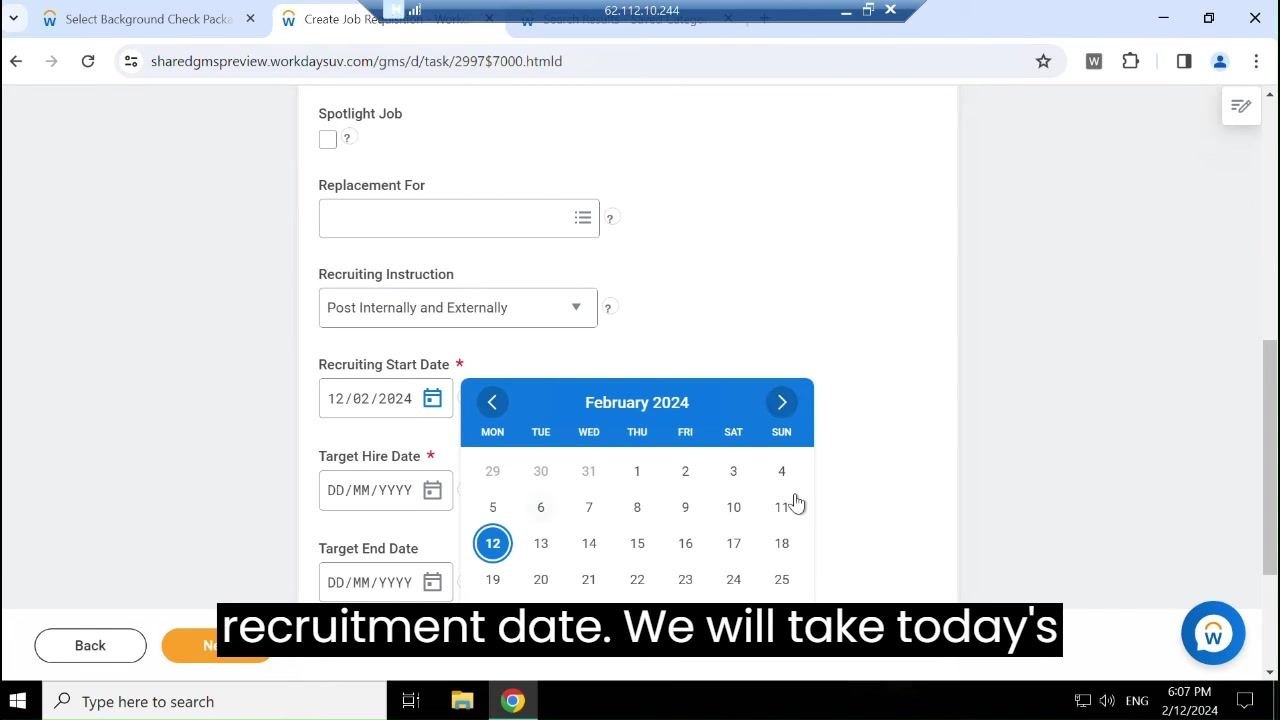
- Click Next to continue.
Completing job details
-
On the Job Details page, review and edit the Job Posting Title as needed, for example
Workday Trainer. -
In the Justification field, select the appropriate justification from the dropdown, such as Recent, By Job Family, With Unions, or Search.
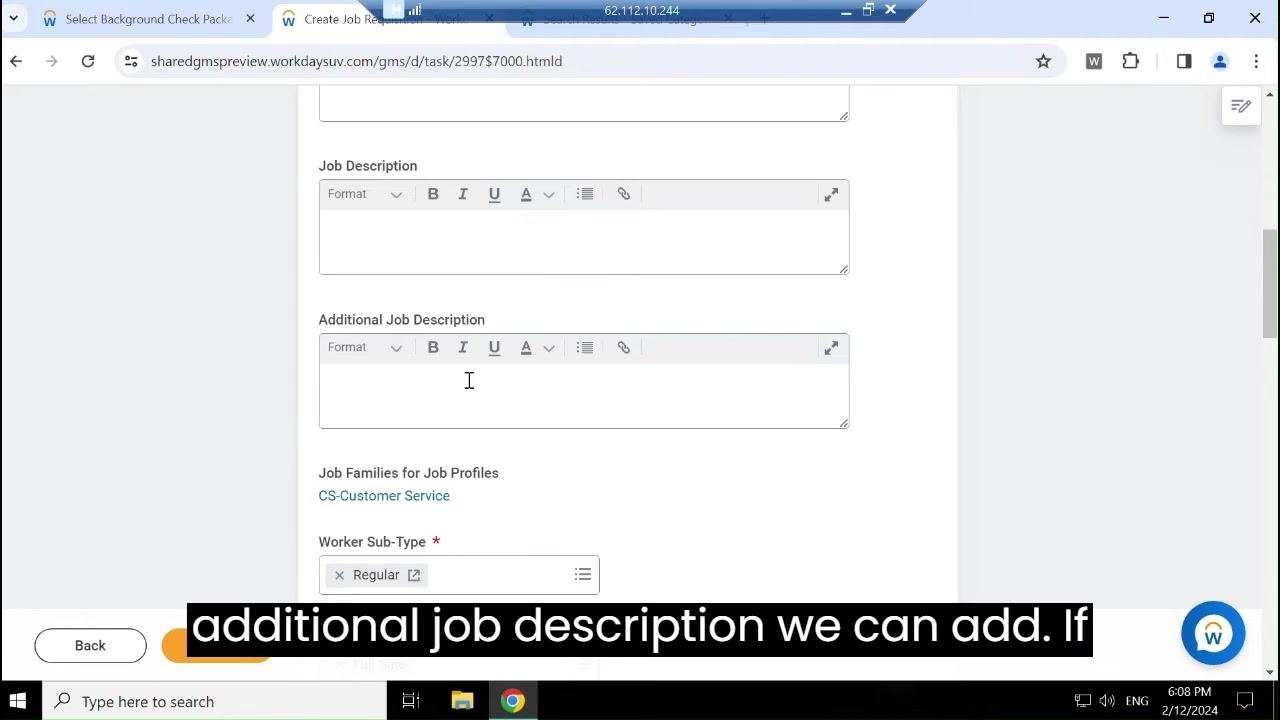
-
Enter the Job Description and, if needed, the Additional Job Description. Verify the Job Families for Job Profiles (for example
CS-Customer Service) and set the Worker Sub-Type (for exampleRegular). -
Confirm or update the location details:
- Remote Type: specify if the job is remote, or leave blank if not applicable.
- Primary Location: for example Home Office (USA).
- Primary Job Posting Location: for example Home Office (USA).
- Additional Locations or Additional Job Posting Locations, if required.
- Scheduled Weekly Hours: review or update as needed, for example 35.
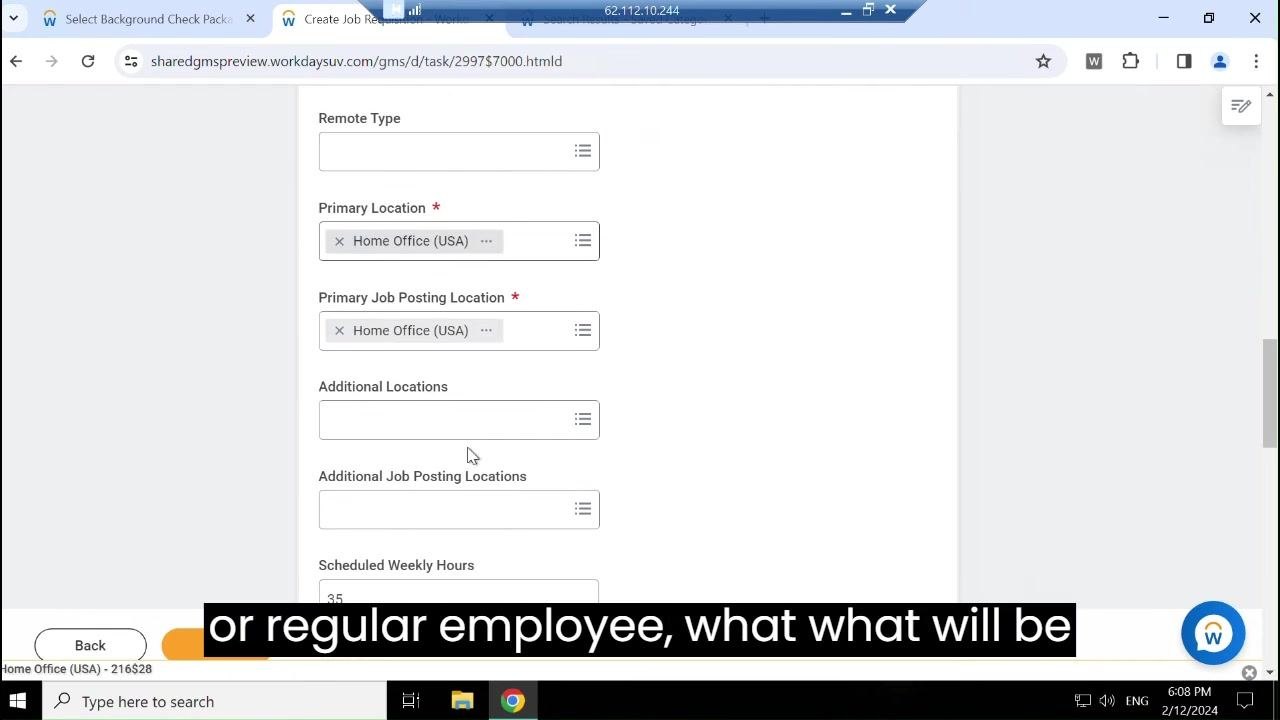
- Scroll to the bottom of the page and click Next.
Adding skills and other requirements
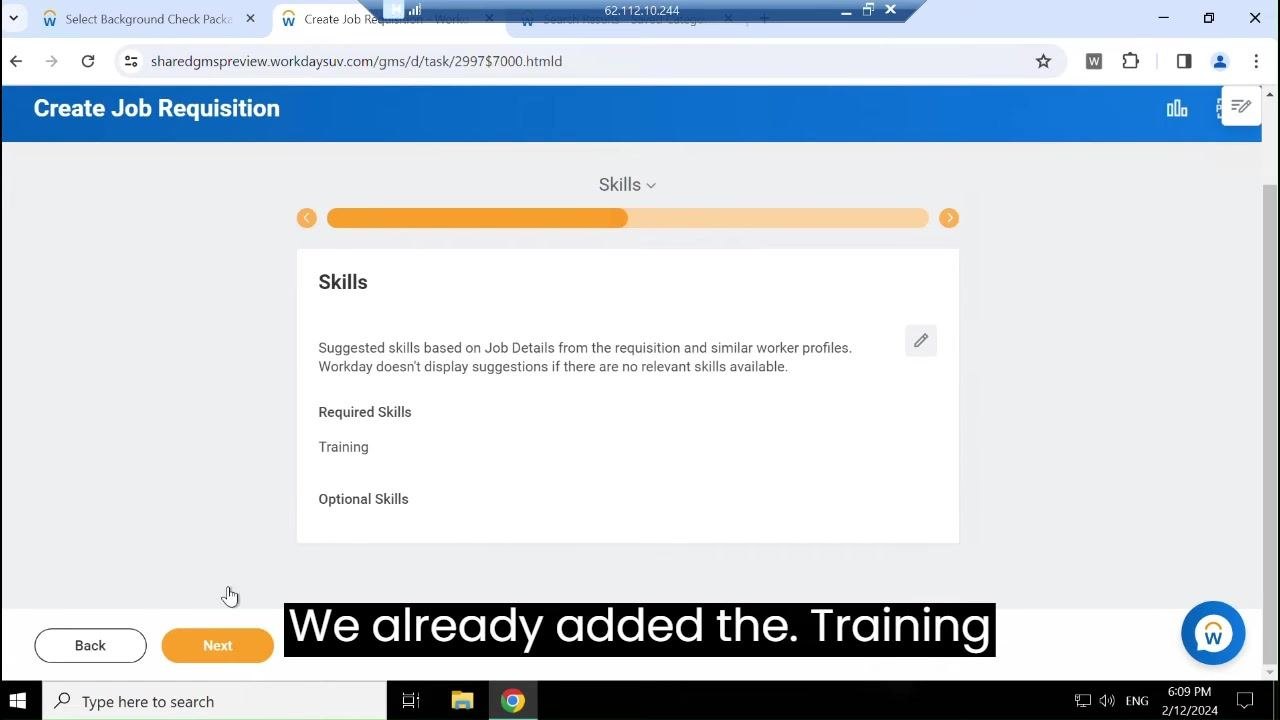
- On the Skills page, wait for the section to load. The system may suggest skills based on the job details and similar worker profiles.
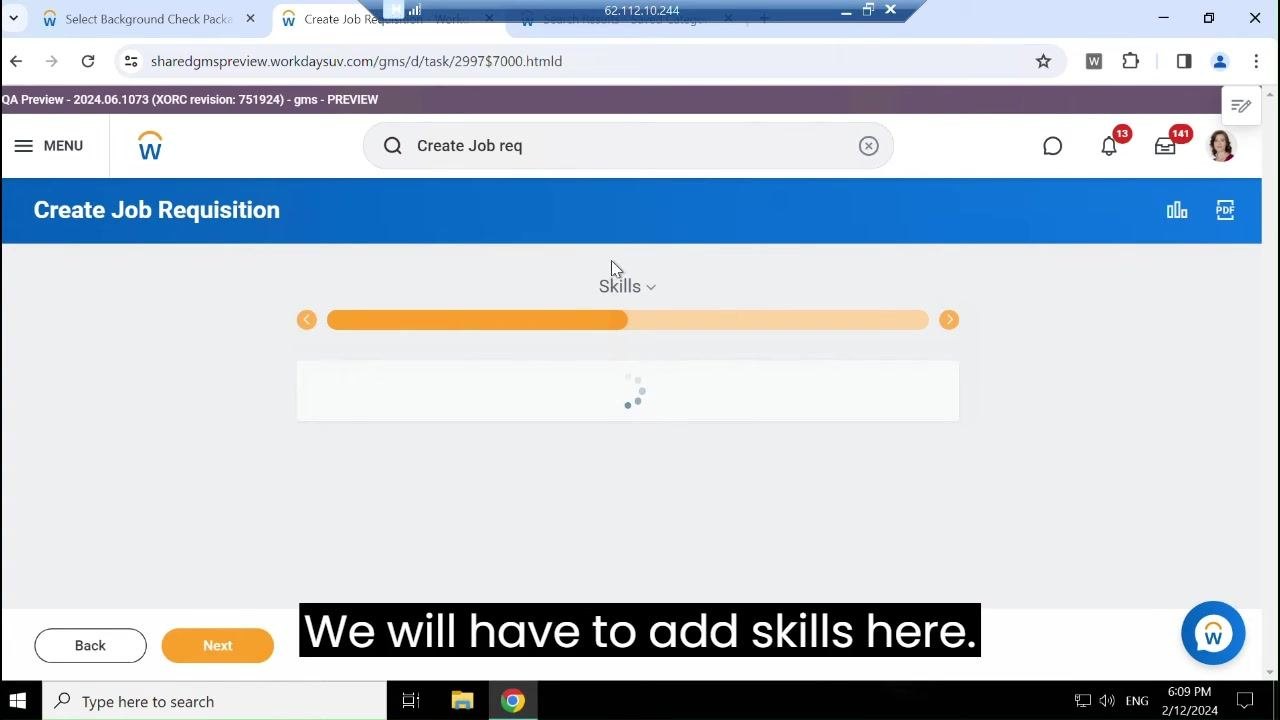
- In the Skills section, verify that required skills (for example
Training) are listed under Required Skills. Add or edit skills using the pencil (edit) icon, and add optional skills if desired.
-
If qualifications and language requirements were already added when the position was created, no further action is needed at this step.
-
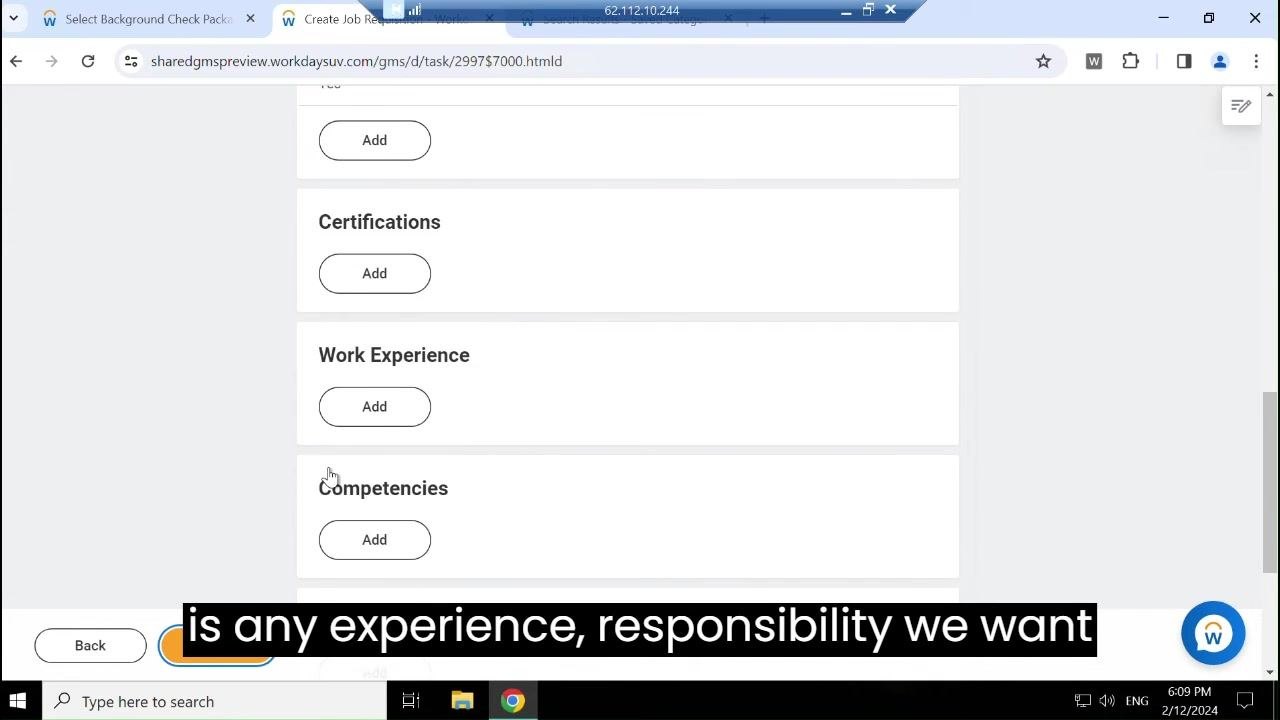
Add certifications, work experience, and competencies if needed by clicking Add in the Certifications, Work Experience, and Competencies sections.
Finalizing the job profile
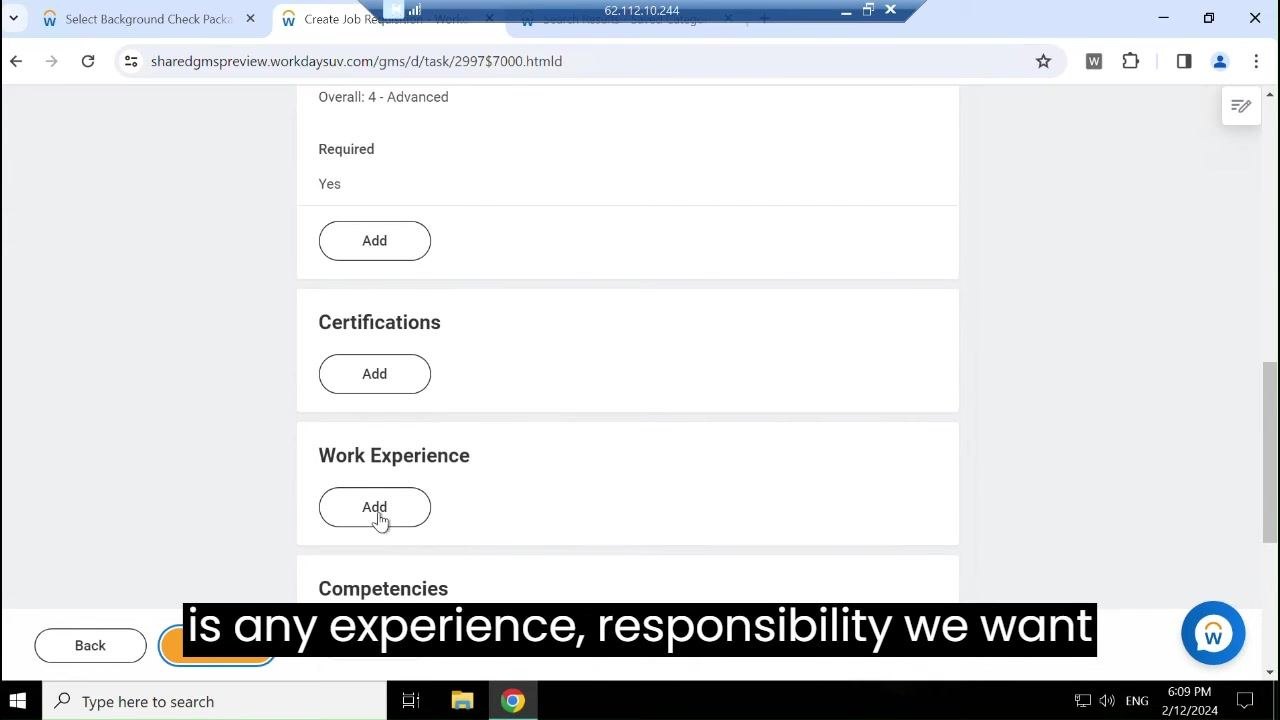
- Review the Certifications, Work Experience, and Competencies sections to confirm all required information has been added. Click Add in any section where more detail is needed.
- Scroll to the bottom of the page and click OK to save and confirm your entries.
Reviewing organization details
- On the Create Job Requisition screen, locate the Organizations section and confirm the Company (for example Global Modern Services, Inc. (USA)) and Cost Center (for example 40000 Office of CHRO) values. Use the pencil (edit) icon to make changes if needed, then click Next.
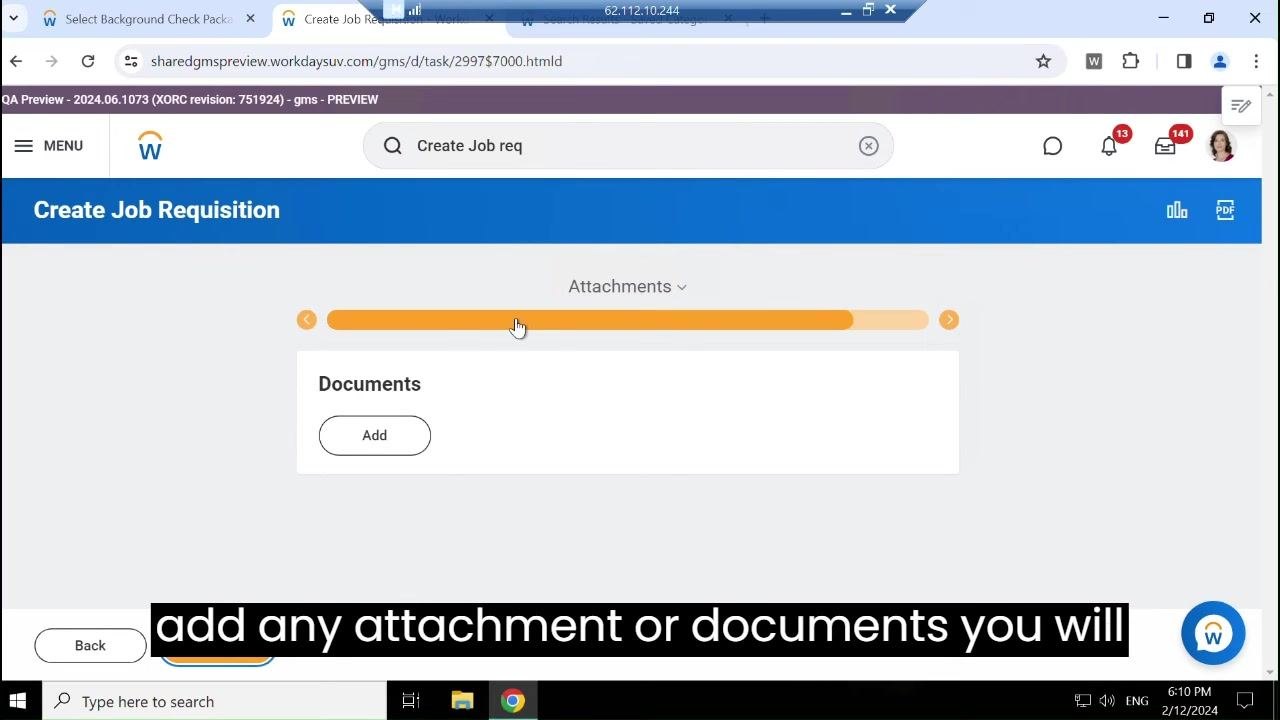
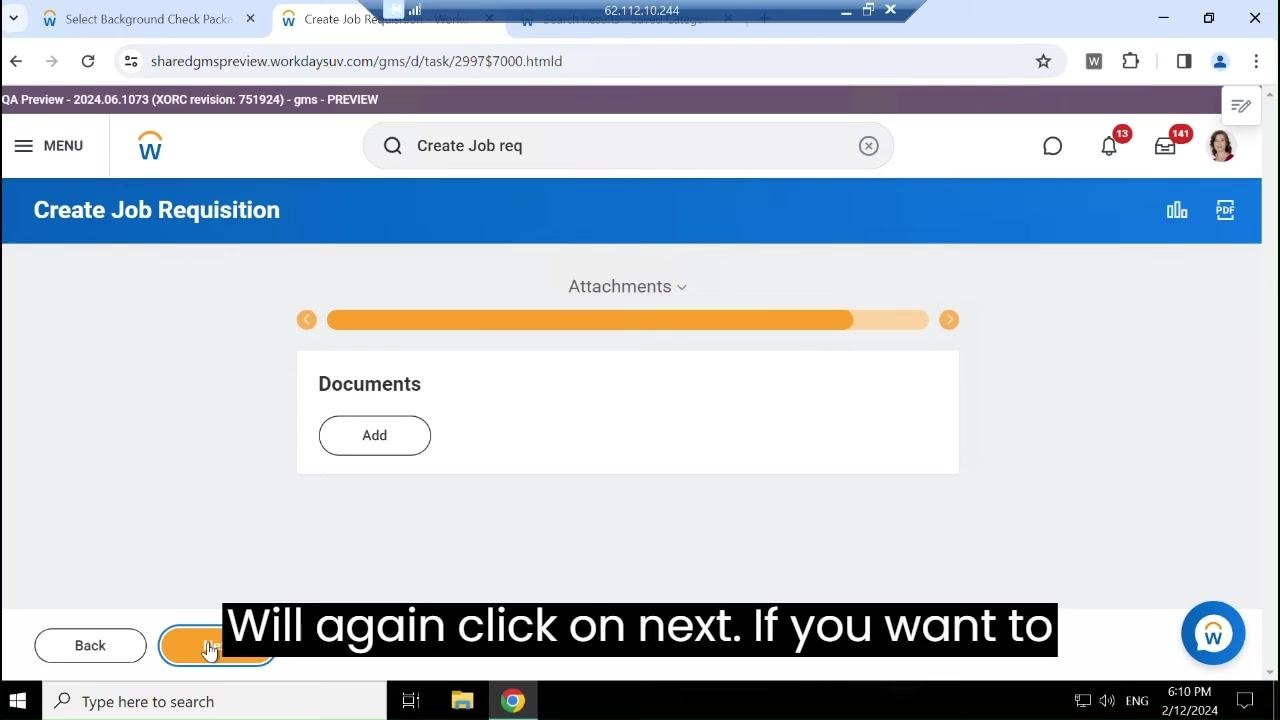
- On the Attachments screen, click Add under Documents to upload supporting files, or click Next if no attachments are needed.
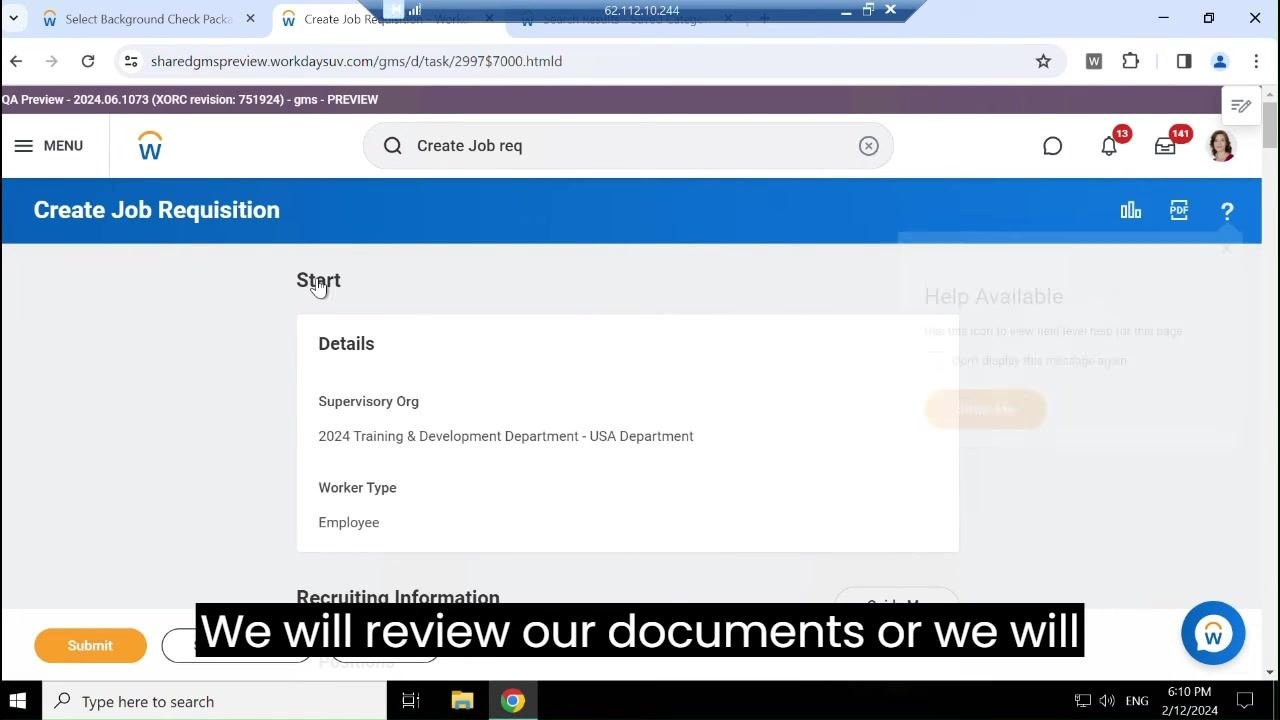
- Review the summary screen titled Start, which shows details such as Supervisory Org (2024 Training & Development Department - USA Department) and Worker Type (Employee). Confirm all information is correct.
- Scroll through the summary to verify Time Type (Full time), Primary Location (Home Office (USA)), Primary Job Posting Location (Home Office (USA)), and Scheduled Weekly Hours (35).
Adding compensation details
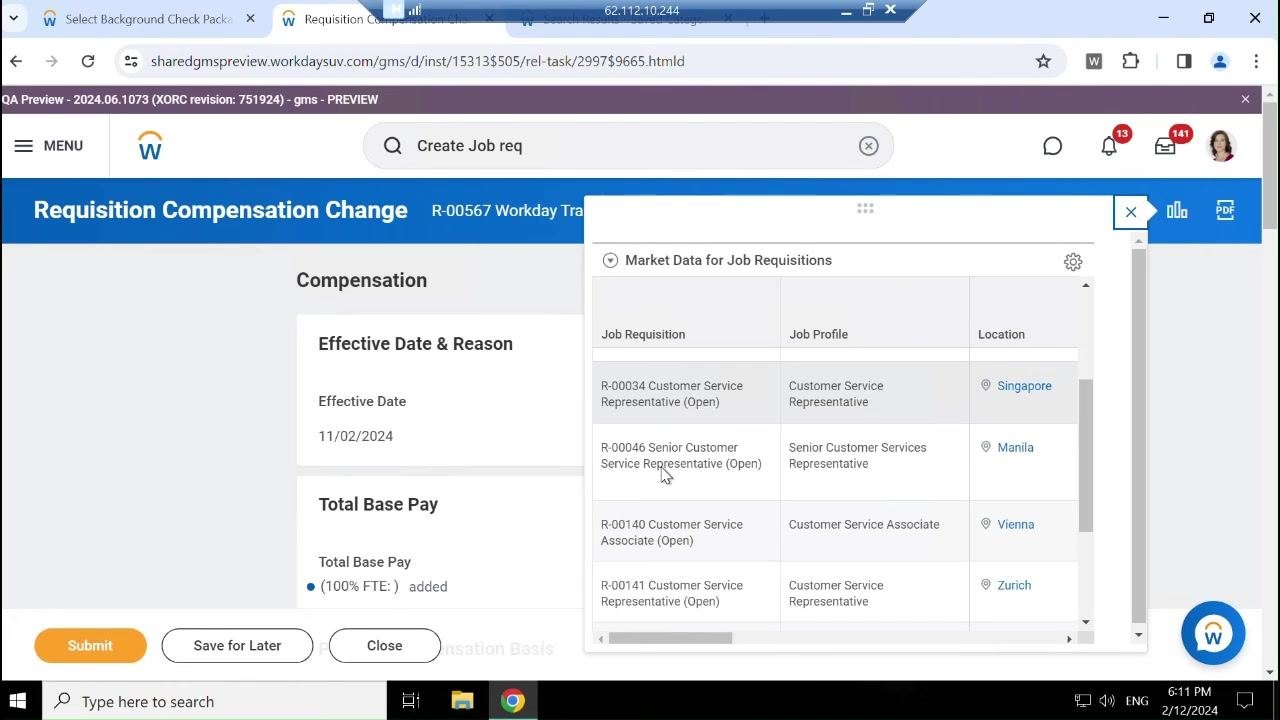
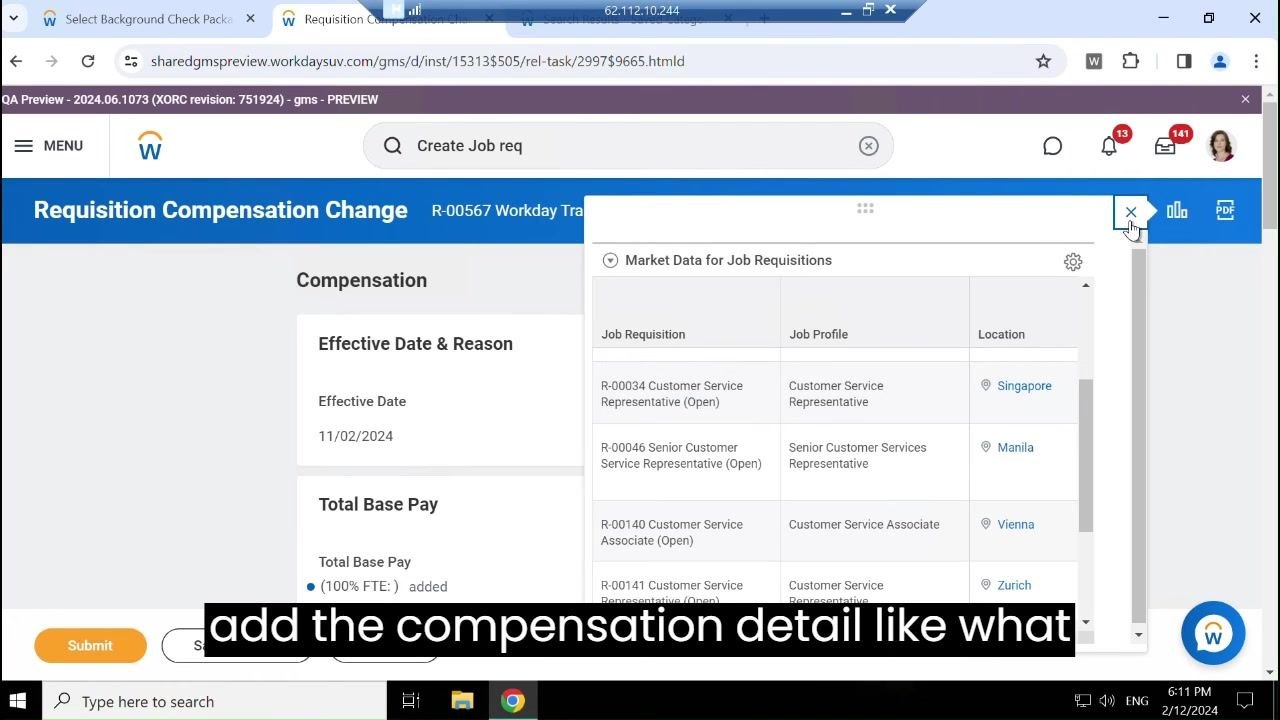
- On the Requisition Compensation Change screen, enter the Effective Date for the compensation (for example 11/02/2024) and review or enter the Total Base Pay for the position. Use the Market Data for Job Requisitions panel to compare compensation for similar roles, such as Customer Service Representative (Singapore), Senior Customer Services Representative (Manila), Customer Service Associate (Vienna), or Customer Service Representative (Zurich), then close the panel when finished.
- In the Guidelines section, click the Compensation Package field to open the list of available packages, and select the appropriate one, for example
HR Manager Package.
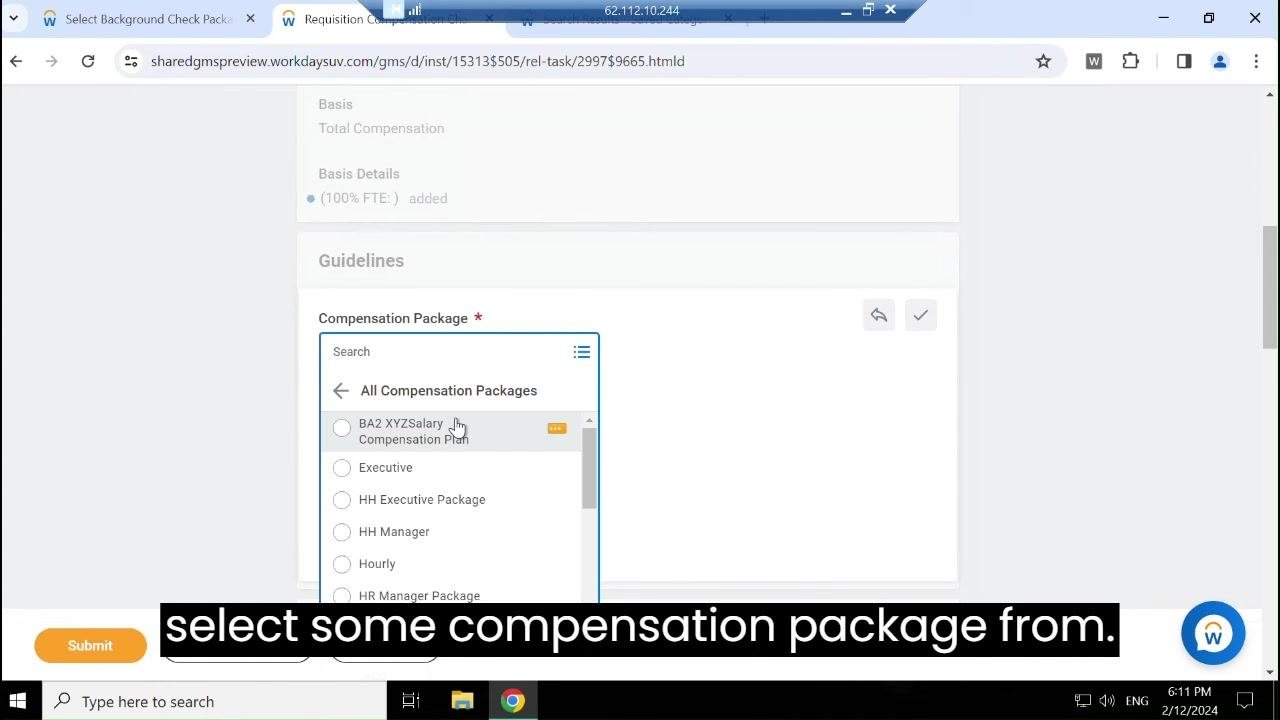
- Click the Compensation Grades field to display available grades, such as 07, BA2XYZManagement, ERA EG12 Bavaria, or Executive, and select the grade that best fits the job.
-
If the position is for a trainer, scroll through the compensation grades, select Trainer, and click the radio button next to it to assign this grade to the requisition.
-
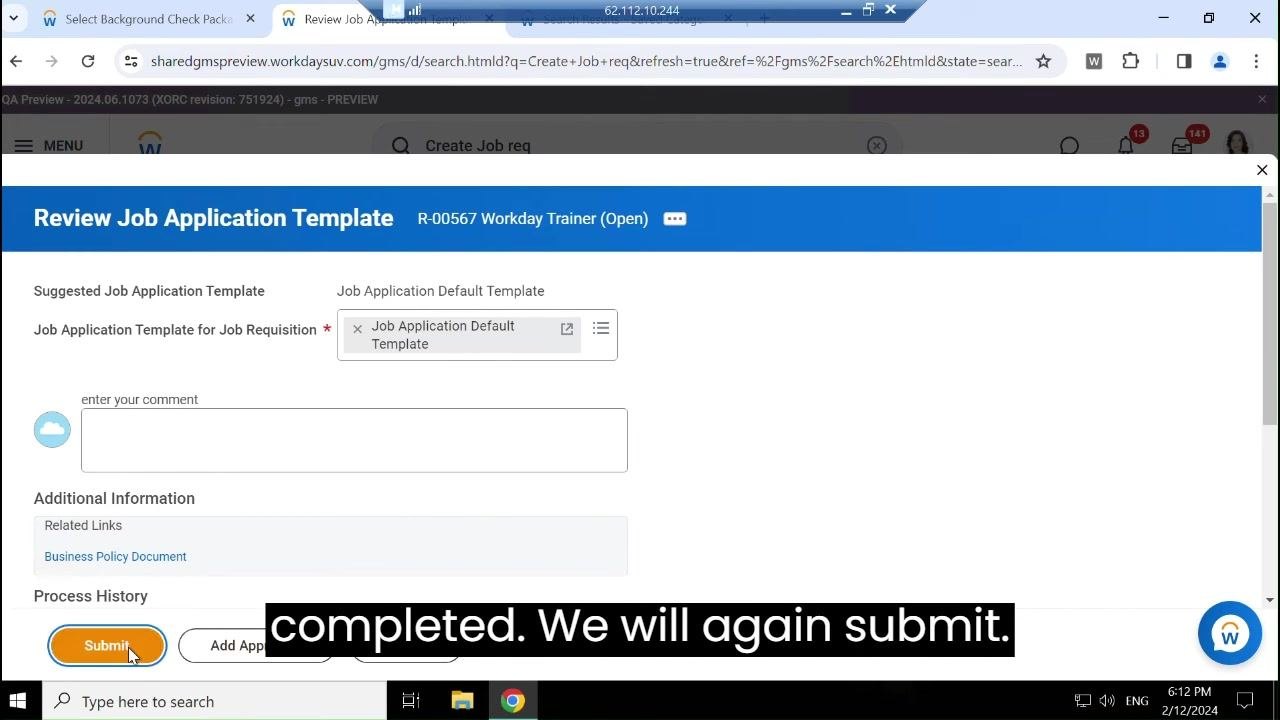
Review the Job Application Template screen. Confirm the Suggested Job Application Template is set to
Job Application Default Template, optionally enter comments, and click Submit to finalize.
Verifying the job requisition
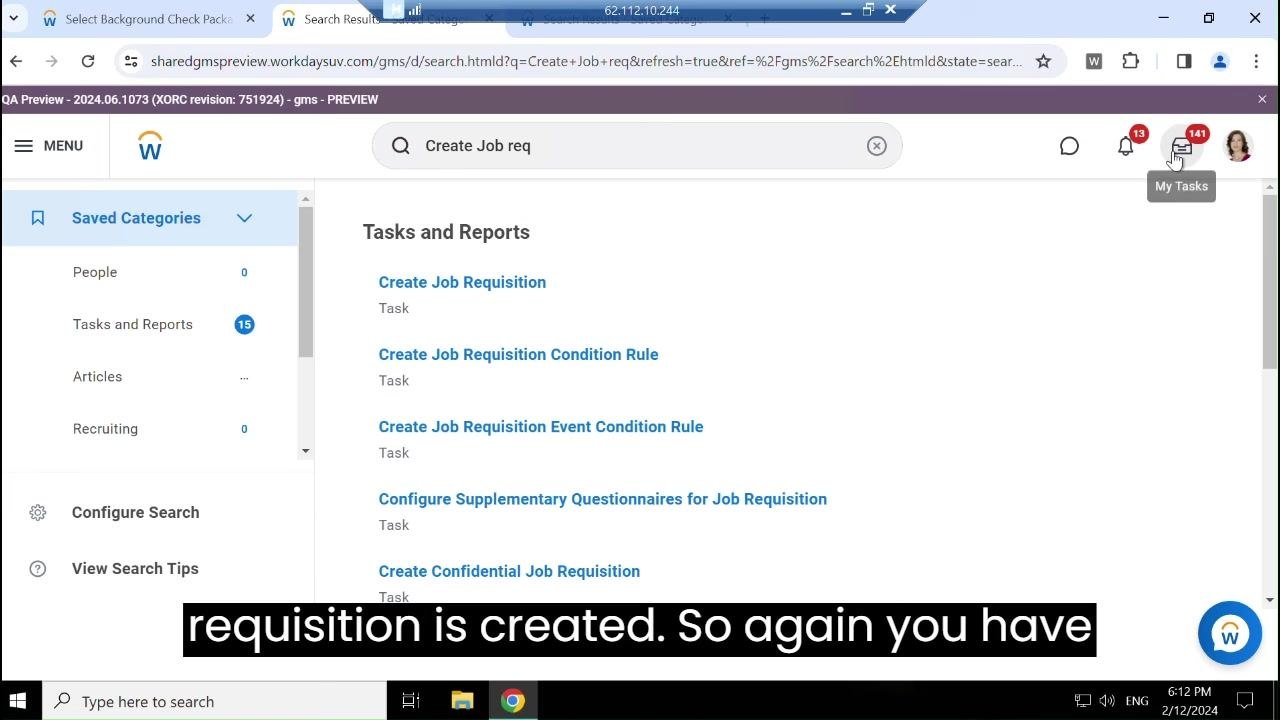
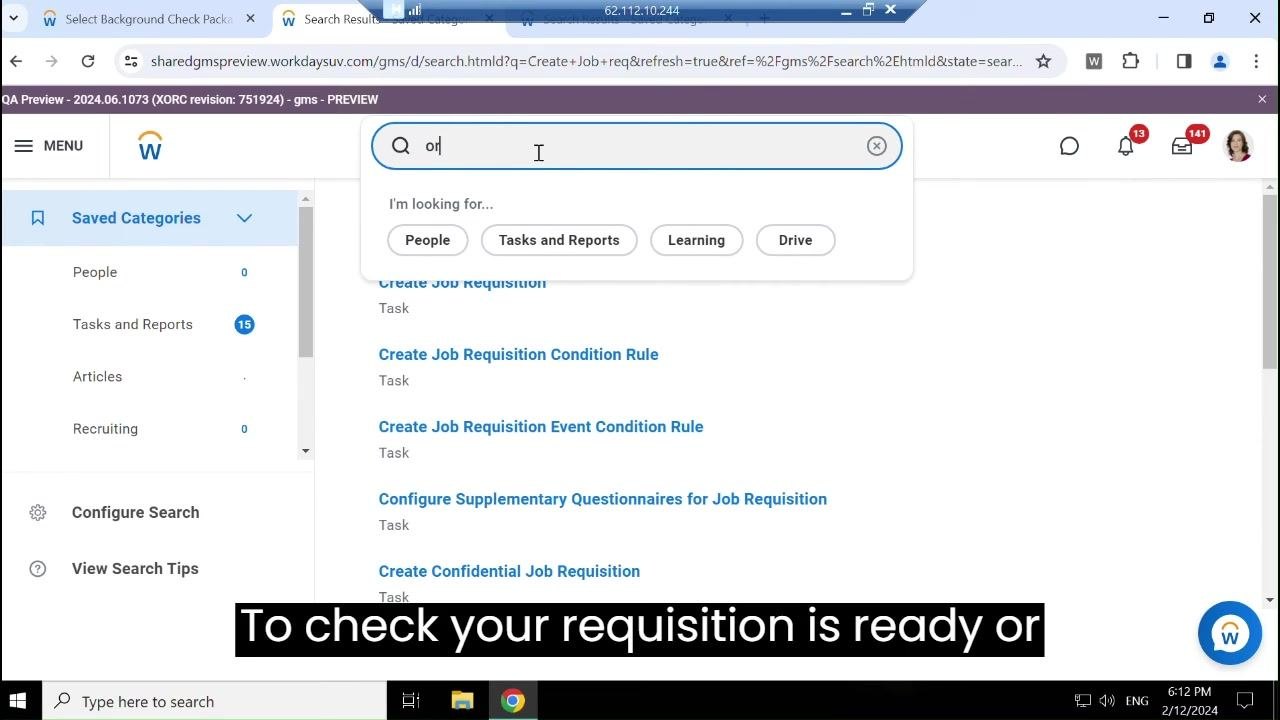
- After submitting, return to the main Workday search screen and search for your job position or organization, for example by typing
Create Job reqororg:2024 training.
- Enter the organization name or code in the search bar, for example
org:2024 training.
- Wait for the search results to load.
-
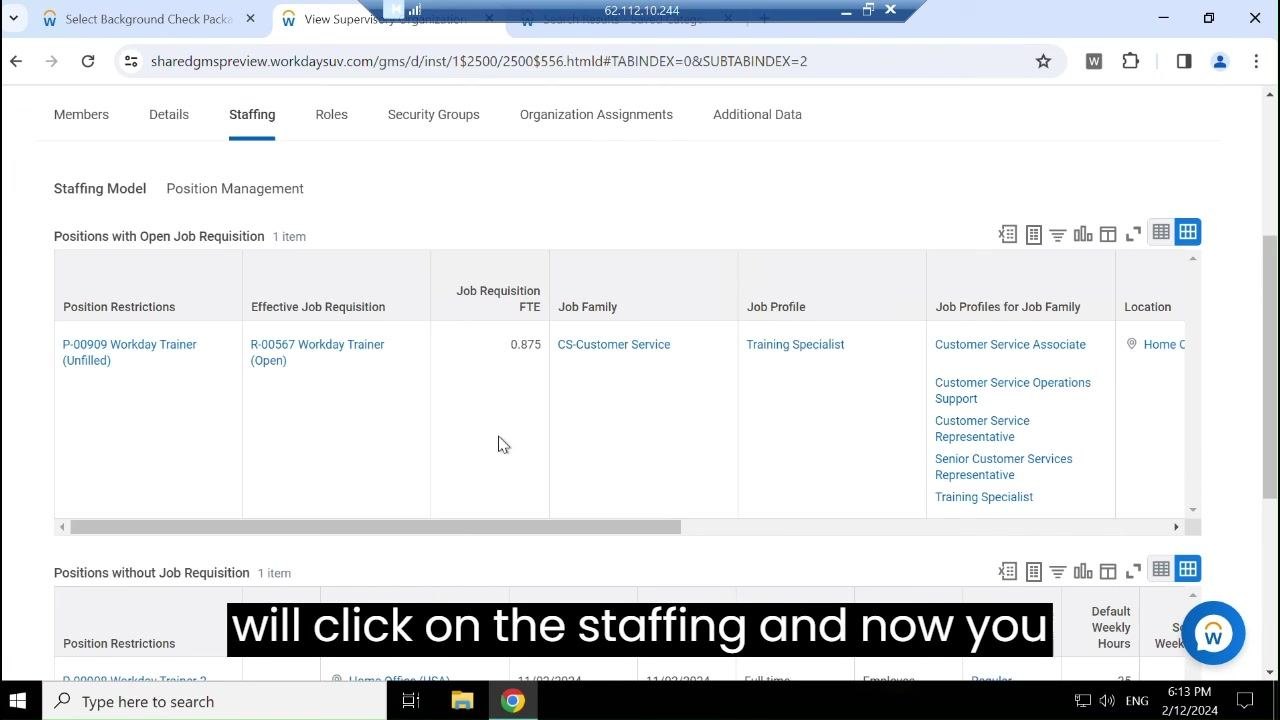
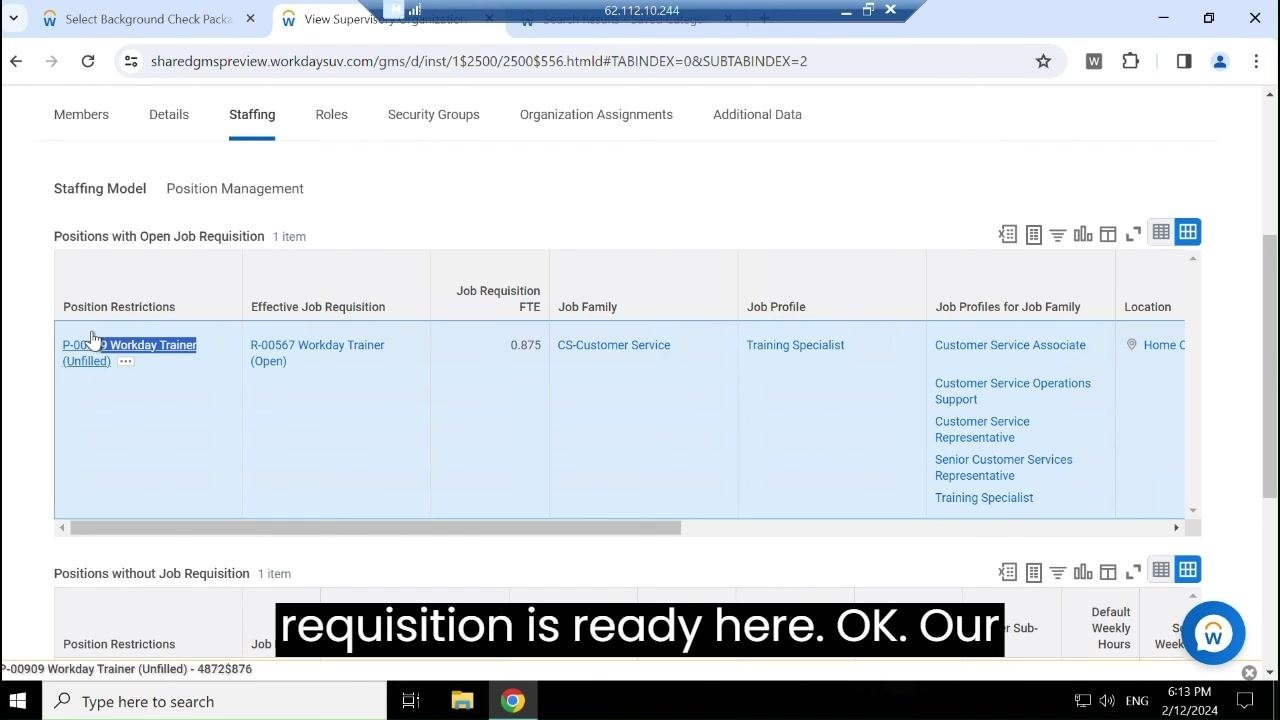
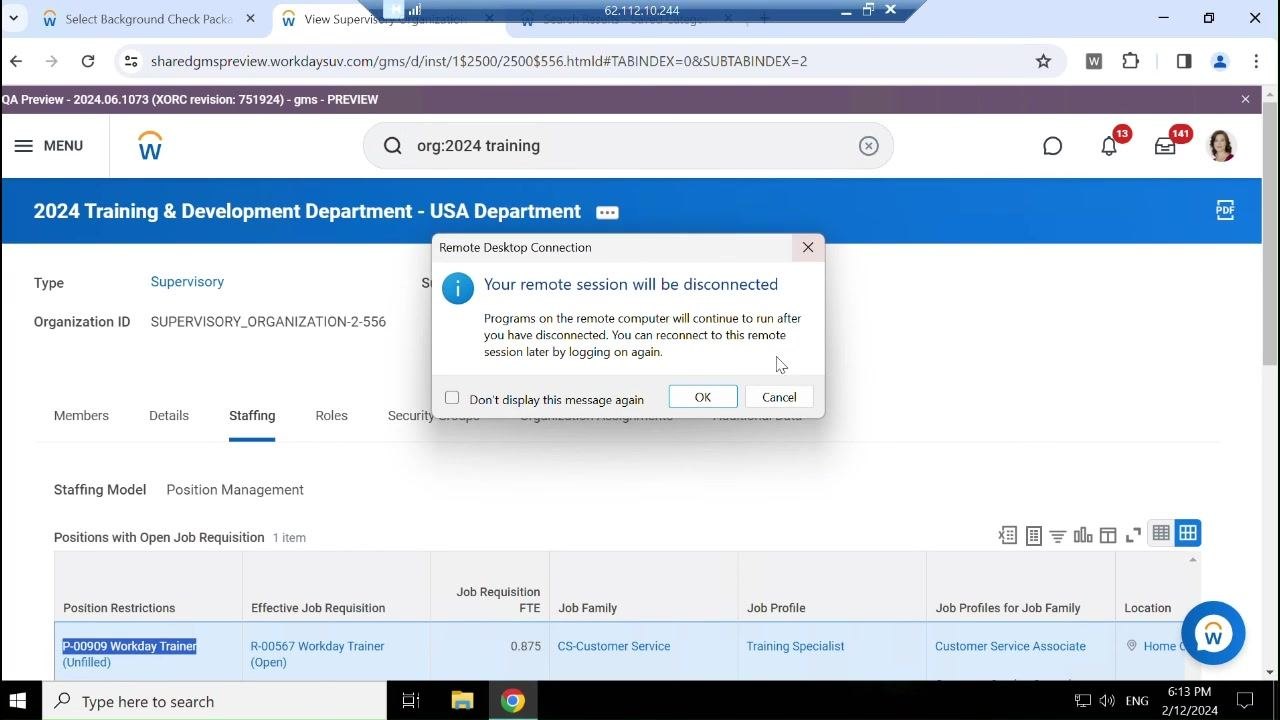
Once the organization page loads, go to the Staffing tab and review the Positions with Open Job Requisition section, including:
- Position Restrictions: for example P-00909 Workday Trainer (Unfilled)
- Effective Job Requisition: for example R-00567 Workday Trainer (Open)
- Job Requisition FTE: for example 0.875
- Job Family: for example CS-Customer Service
- Job Profile: for example Training Specialist
- Location: for example Home Office (USA)
-
Confirm the final requisition and position details on the Staffing tab, including Job Profiles for Job Family (Customer Service Associate, Customer Service Operations Support, Customer Service Representative, Senior Customer Services Representative, Training Specialist).
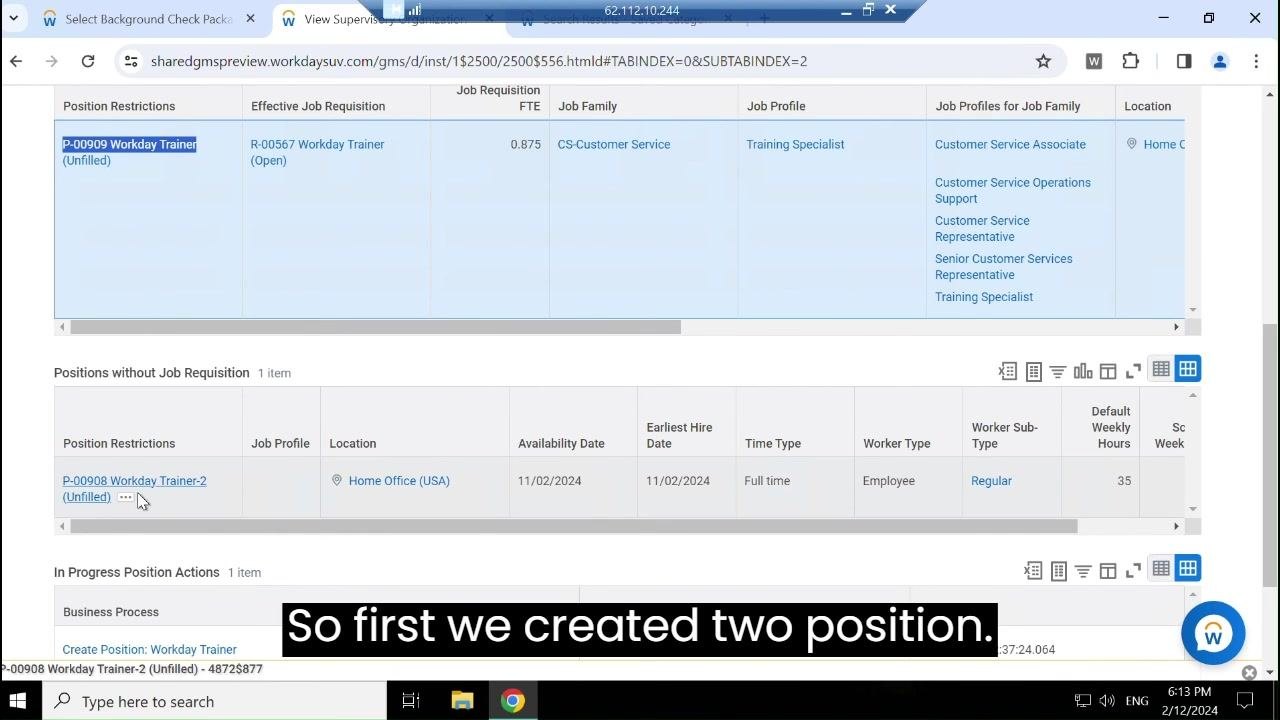
- Scroll down to the Positions without Job Requisition section and review any positions listed, such as P-00908 Workday Trainer-2 (Unfilled), with details including Location (Home Office (USA)), Availability Date (11/02/2024), Earliest Hire Date (11/02/2024), Time Type (Full time), Worker Type (Employee), Worker Sub-Type (Regular), and Default Weekly Hours (35). Use this section to track positions that have been created but do not yet have an associated job requisition.
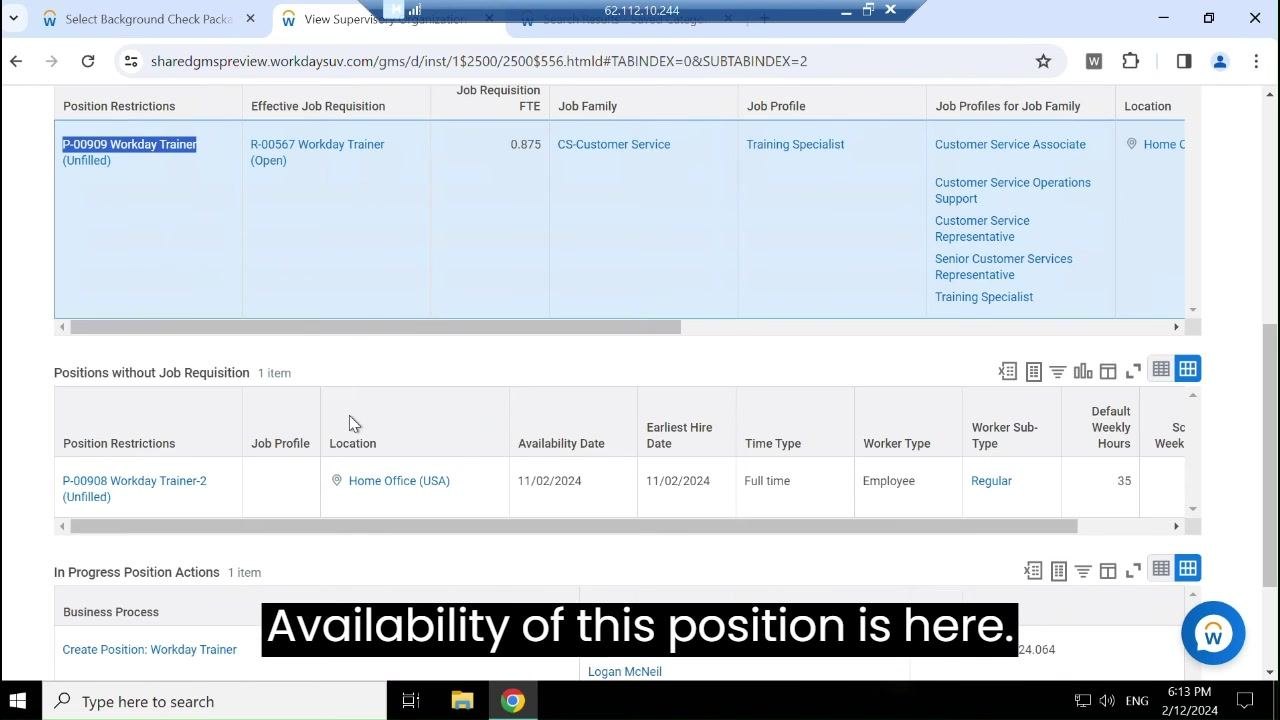
- Note that you can create multiple positions within an organization and convert any of them into a job requisition as needed. In this example, one position (P-00909 Workday Trainer) was converted into a job requisition, while the other (P-00908 Workday Trainer-2) remains without one.
Handling remote session disconnection
- If you are working in a remote desktop environment, you may see a notification stating that your remote session will be disconnected. Programs on the remote computer continue running after you disconnect, and you can reconnect by logging on again. Click OK to acknowledge and proceed, or Cancel to remain connected.
- Once all steps are complete and you have verified your job requisition and positions, you can close the session or continue with other tasks. If your session ends, log back in to Workday to resume work; the screen turns black when the remote session disconnects.
What's next
After you create the job requisition, the job can proceed through posting internally and externally so recruiters can begin reviewing candidates. You can return to the Staffing tab at any time to track both open requisitions and positions without a requisition, and convert additional positions into requisitions as hiring needs arise.
Generation details: cost, quality tiers
Docsie billed 5,000 credits ($3.50) to analyze this 10-minute video at standard quality. The rewrite, template fill and Word/PDF exports were included. The same video at each quality tier:
| Quality | Frames sampled | Credits | Approx. cost |
|---|---|---|---|
| Draft | every 16-30 s | 2,500 | $1.75 |
| Standard (this guide) | every 8-15 s | 5,000 | $3.50 |
| Detailed | every 4-7 s | 10,000 | $7.00 |
| Ultra | every 1-3 s | 20,000 | $14.00 |
Credits priced at $0.70 per 1,000; plans include a monthly allowance. Enterprise customers on on-premise or bring-your-own-model deployments run this on their own inference and pay no per-video credits.
Generated by Docsie Video-to-Docs on 2026-10-01 from a 9-minute video. Screenshots are frames from the source video and belong to their creator, Wizard of HCM, whose original is embedded above. If you own this video and want the guide removed or credited differently, contact us and we will act within one business day.