
How to Terminate an Employee in SuccessFactors
This guide explains how to terminate an employee in SuccessFactors using an approval workflow. You review the termination workflow, create a business rule that triggers it for the termination reason "Resignation - No Growth," and assign the rule to the Job Information Model. You then terminate an employee, approve the request as the manager, and verify the result.
Video: SAP SuccessFactors Employee Central | Workflow for Employee Termination | Realtime Scenario | @SAP by Life With SAP (2024). All credit for the demonstration goes to the creator; watch the original on YouTube. The written guide below was generated from this video by Docsie. Creator? Request a change or removal.
This guide explains how to terminate an employee in SuccessFactors using an approval workflow. You review the termination workflow, create a business rule that triggers it for the termination reason "Resignation - No Growth," and assign the rule to the Job Information Model. You then terminate an employee, approve the request as the manager, and verify the result.
Prerequisites
Before you begin, make sure you have the following:
- Access to the Admin Center, including Manage Organization, Pay and Job Structures, Configure Business Rules, and Manage Business Configuration.
- A workflow named termination wf (you review it in step 1).
- The termination reason Resignation - No Growth (TERTVTERM) available in your system.
- Access to the profile of the employee you want to terminate.
- Permission to proxy as the employee's manager, so you can approve the request.
Set up the termination workflow and business rule
Step 1: Review the termination workflow configuration
- Go to the Admin Center and open Manage Organization, Pay and Job Structures.
- Locate the workflow named termination wf.
- Confirm these settings:
- Workflow ID: termination wf
- Name: termination wf
- Approver Role: Manager
- Context: Source
- Edit Transaction: No Edit
- No Approver Behavior: Stop the Workflow
- Relationship to Approver: Employee
- Respect Permission: No
- Workflow Email Configuration: as set up by your organization
- Make sure the employee's manager is the approver and that the workflow stops if the request isn't approved.
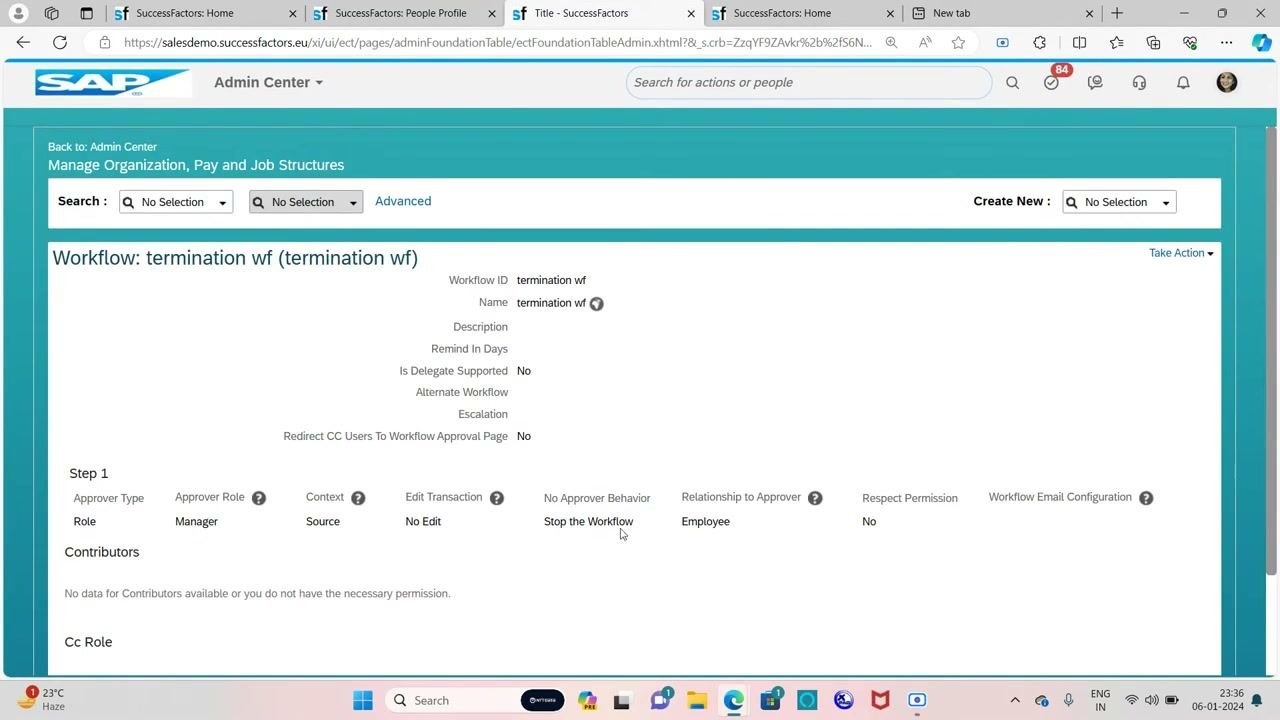
With this configuration, every termination for the specified reason requires explicit manager approval before it is finalized.
Step 2: Open Configure Business Rules
- On the SAP SuccessFactors home page, click the search bar at the top.
- Type configure business rule.
- Select Configure Business Rules from the dropdown.
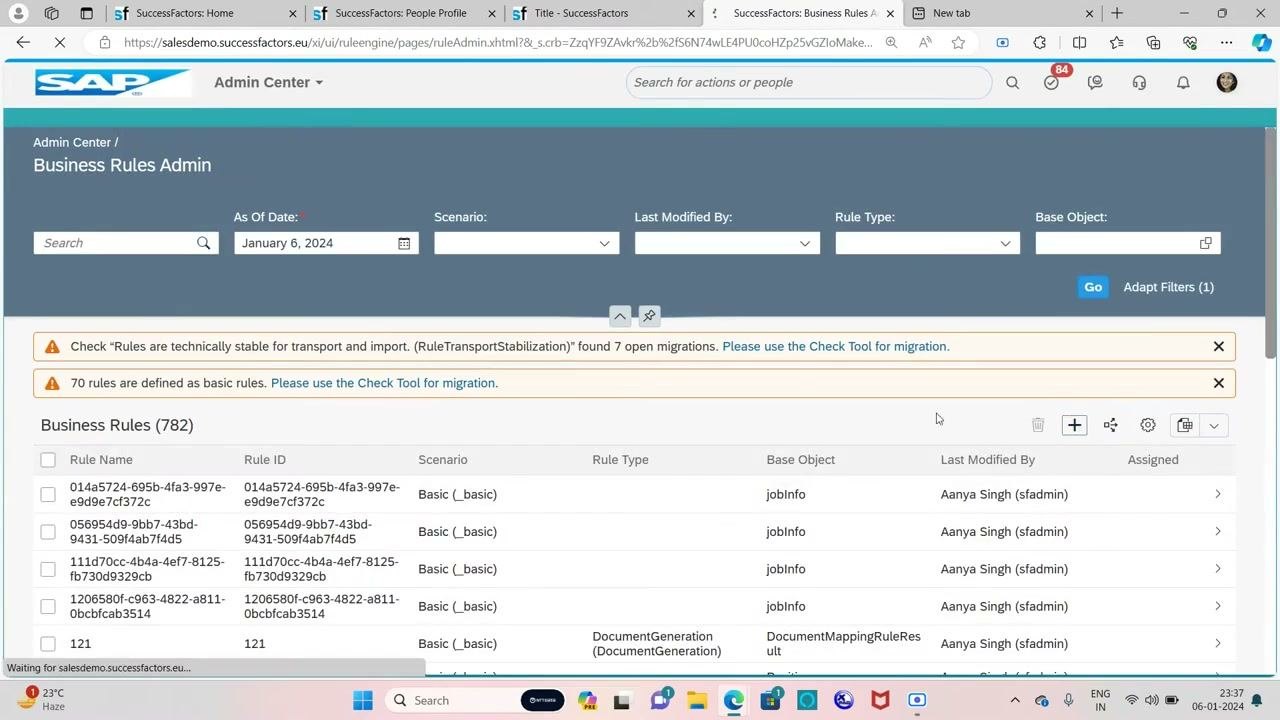
The Business Rules Admin page opens. You can view, create, and manage business rules here. Review the list of existing rules to confirm you are in the right place to create a rule.
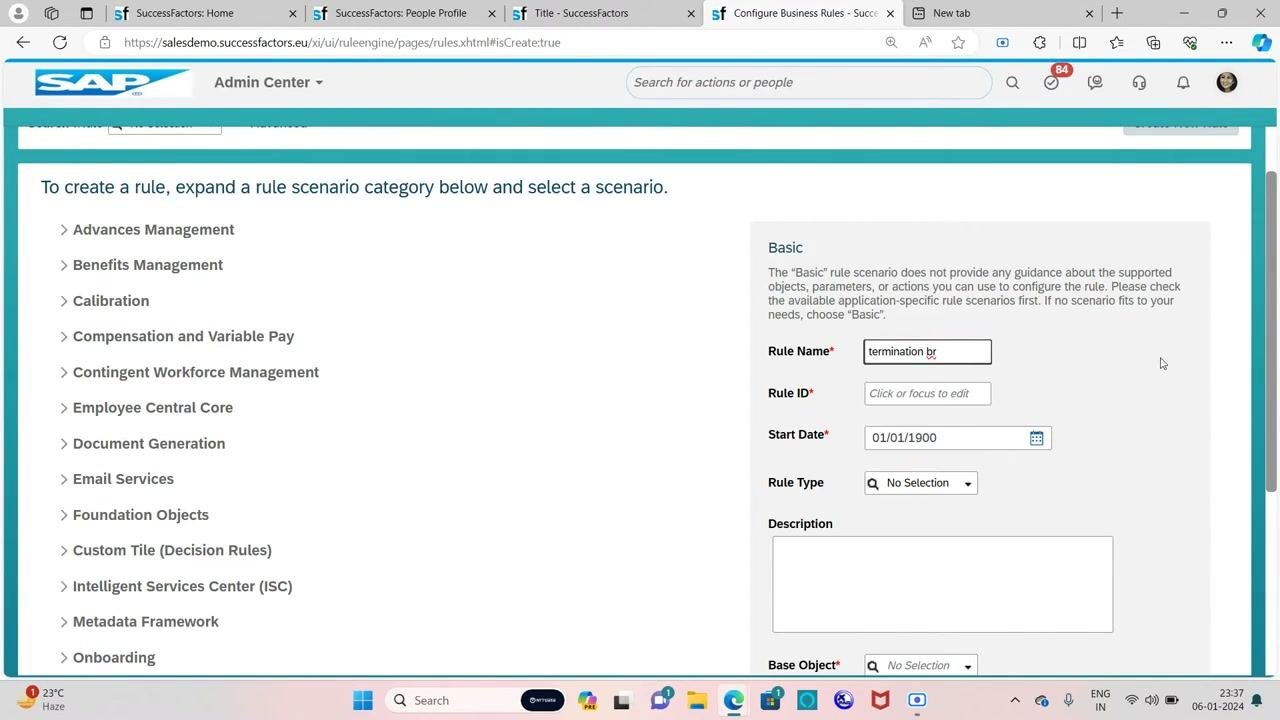
Step 3: Start a new business rule
- Click the plus (+) icon or the option to create a new rule.
- Enter the following values:
- Rule Name: termination br
- Rule ID: leave blank or auto-generate
- Start Date: 01/01/1900
- Rule Type: No Selection (leave the default for now)
- Base Object: Job Information Model (recommended)
- Click Continue.
Step 4: Define the rule condition
In the rule editor, set up the If condition:
- Select Job Information Model (recommended).Event Reason.Value.
- Set the operator to is equal to.
- Use the dropdown to search for and select Resignation - No Growth (TERTVTERM).
Step 5: Set the workflow in the Then section
In the Then section, configure the action:
- Set Job Information Model (recommended).wfConfig.Value.
- Choose to be equal to.
- Select termination wf (termination wf).
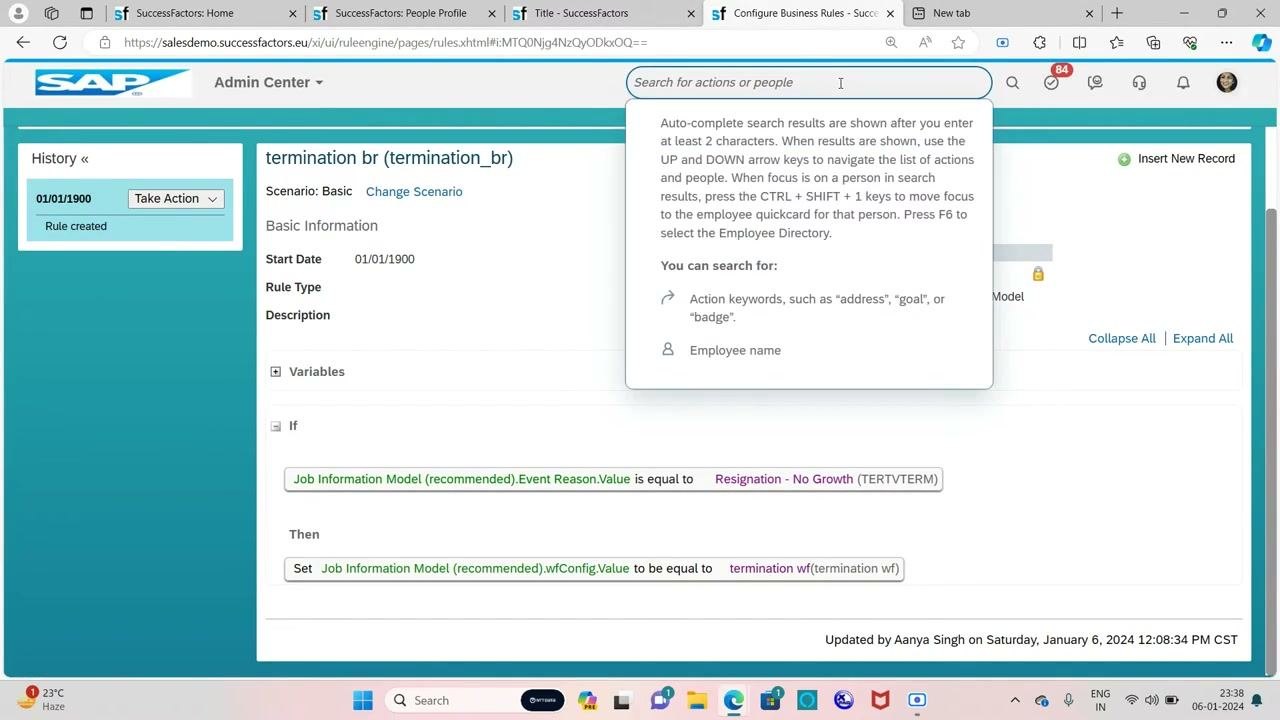
This ensures the workflow is triggered when the event reason is "Resignation - No Growth."
Step 6: Save the business rule
- Review the rule summary:
- If: Job Information Model (recommended).Event Reason.Value is equal to Resignation - No Growth (TERTVTERM)
- Then: Set Job Information Model (recommended).wfConfig.Value to be equal to termination wf (termination wf)
- Click Save.
- Confirm that the rule appears in the list and shows the correct user as the one who updated it.
Assign the rule to the Job Information Model
Step 7: Open Manage Business Configuration
Use the search bar to go to Manage Business Configuration. This is where you assign the new business rule to the Job Information Model.
Step 8: Open Job Information in HRIS Elements
- In the Admin Center, under Employee Central, expand HRIS Elements.
- Select jobInfo (Job Information) from the list.
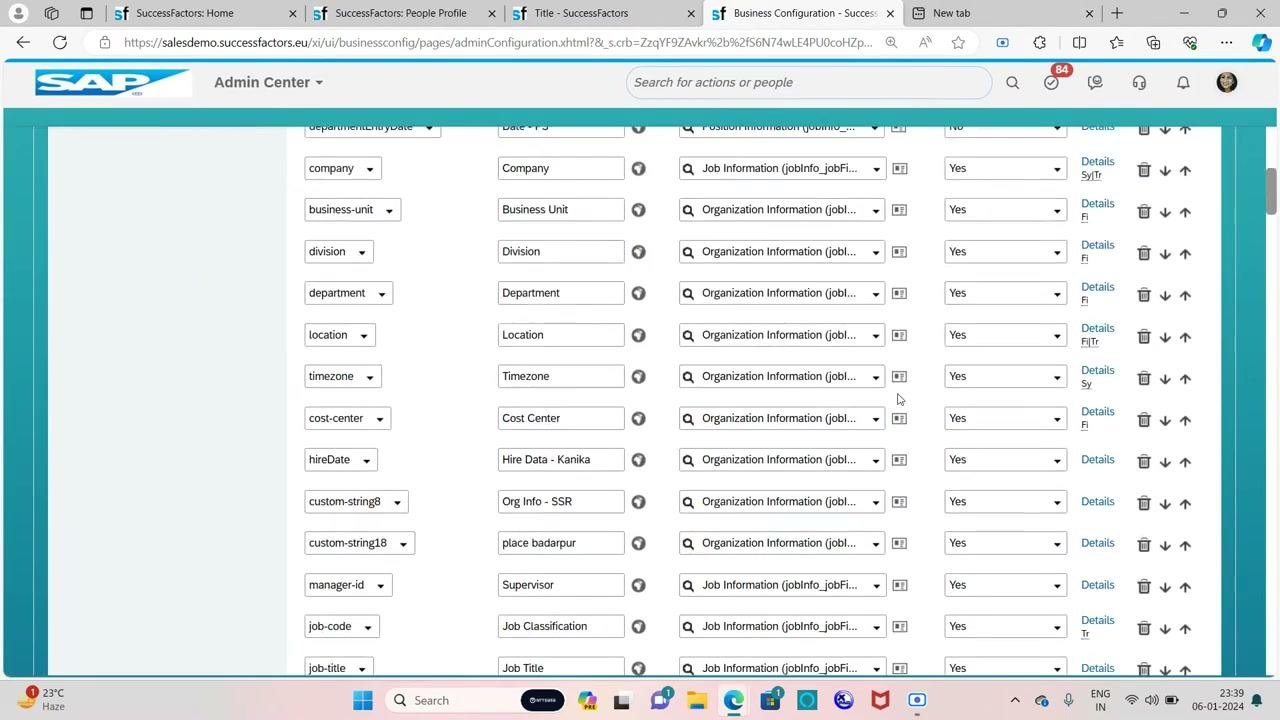
Step 9: Find the rule assignment area
Scroll through the Job Information configuration screen to the section where business rules are assigned. Review the fields and their associated rules to make sure you are in the correct area.
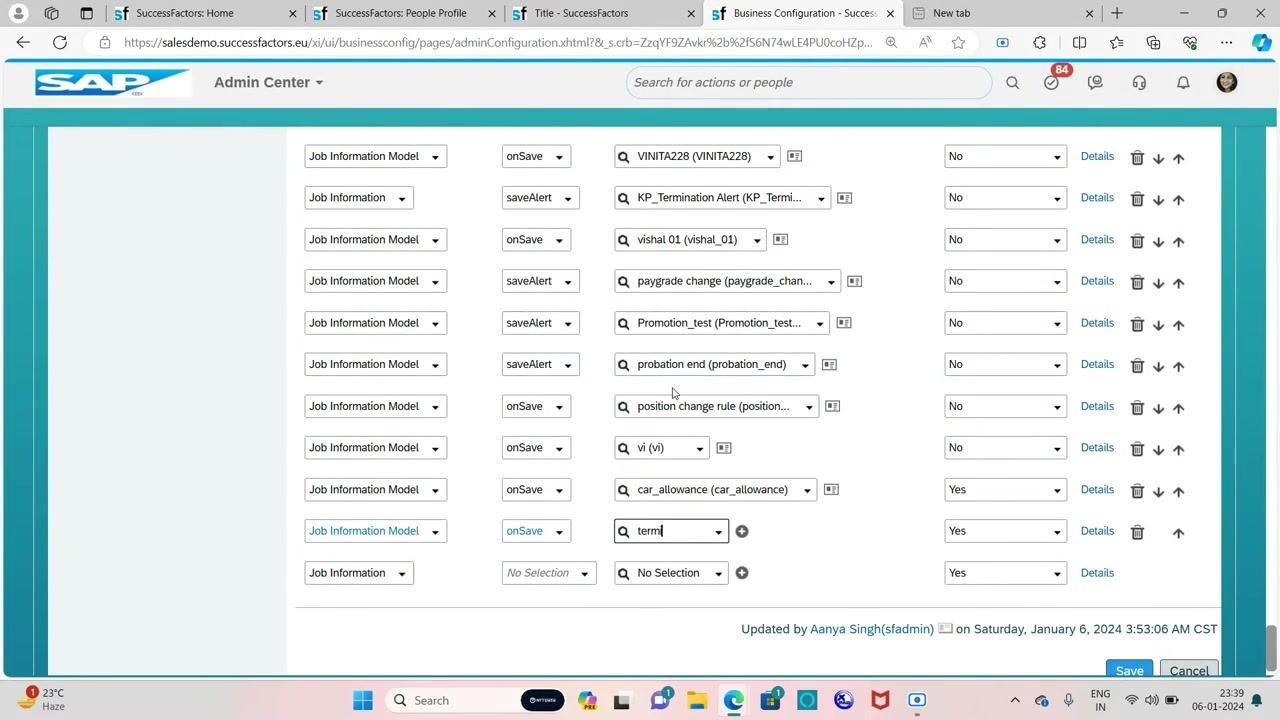
Step 10: Assign the termination business rule
- In the Job Information Model section, locate the row for rule assignment.
- In the dropdown under the onSave column, type term.
- Select termination br (termination_br) from the list.
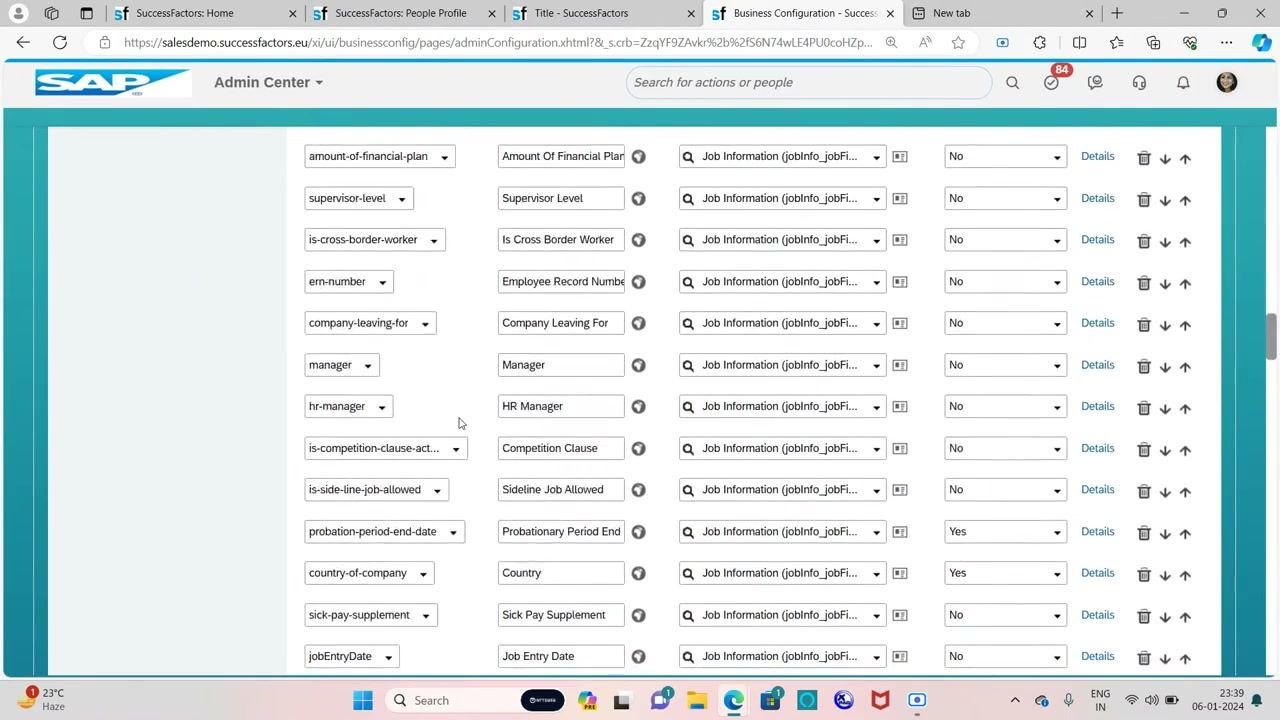
Step 11: Save and confirm the configuration
- Click Save at the bottom of the configuration screen.
- Review the confirmation dialog, which lists the changes and any deprecated fields.
- Click Confirm to finalize the assignment.
Terminate the employee and submit for approval
Step 12: Open the employee profile
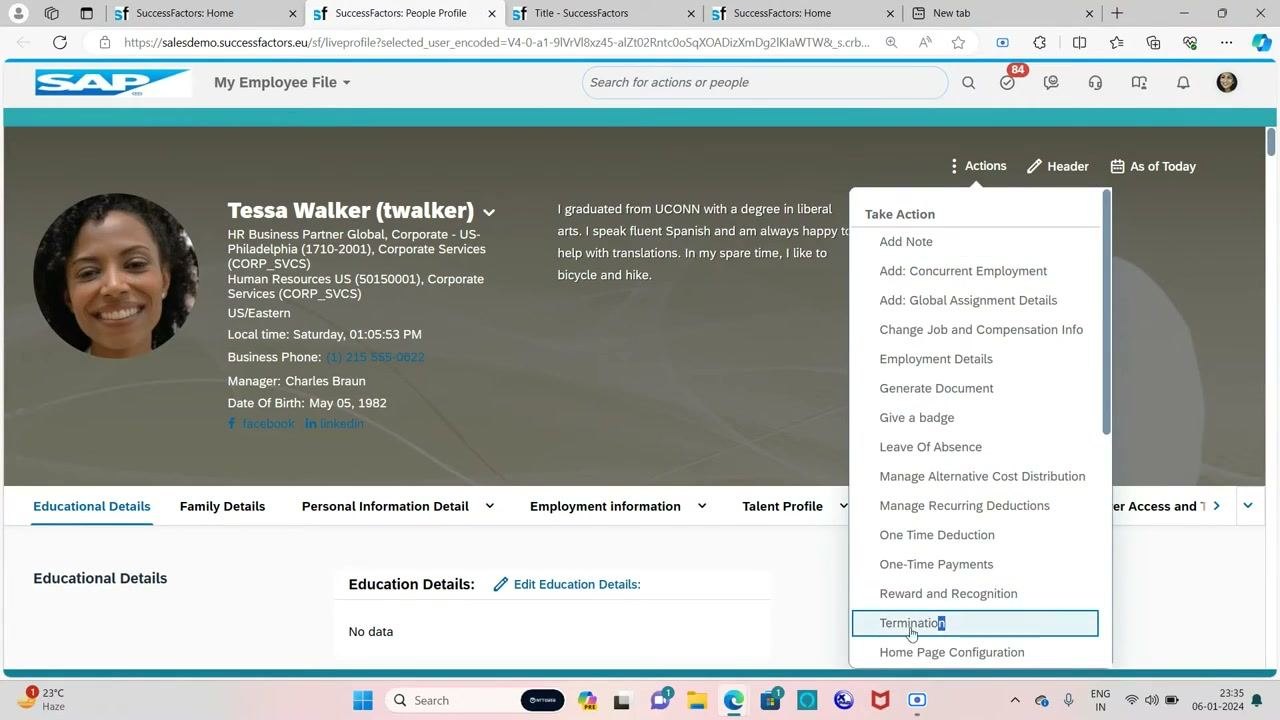
Open SAP SuccessFactors and go to the profile of the employee you want to terminate. Check details such as name, manager, and business phone to confirm you have the correct employee.
Step 13: Start the termination
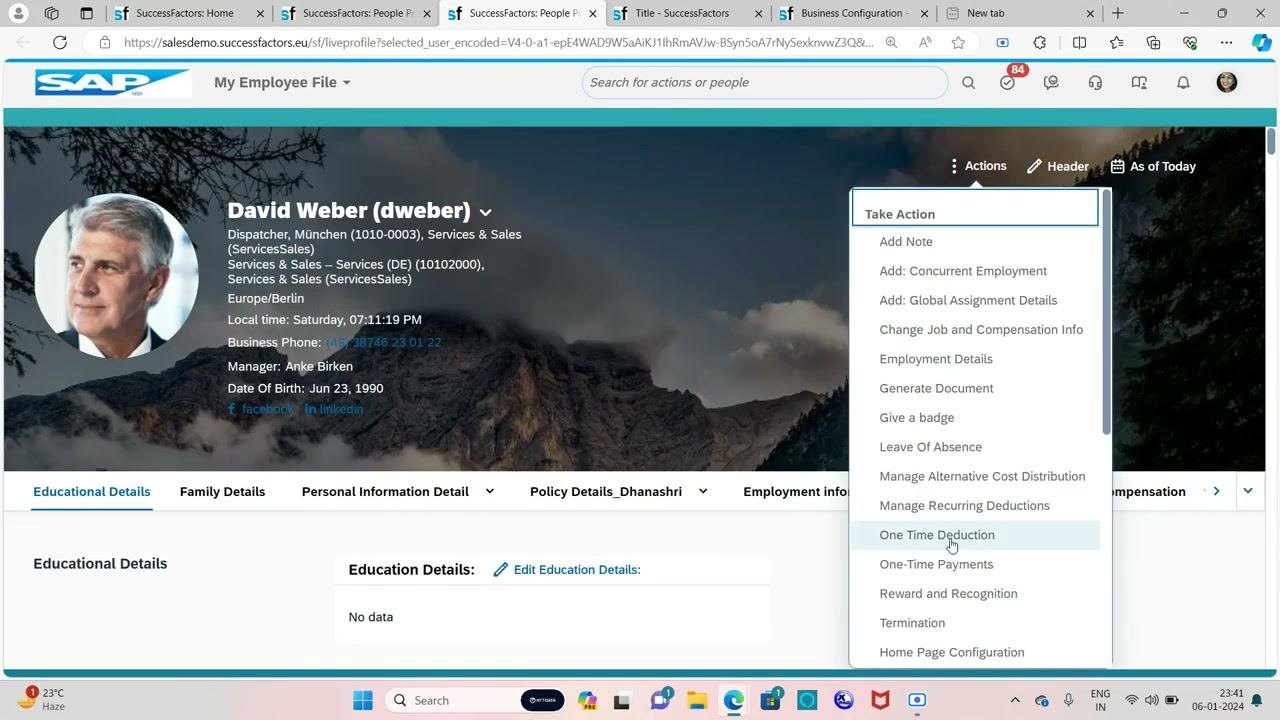
- Click the Actions menu at the top right.
- Select Take Action.
- Scroll the dropdown and click Termination.
Step 14: Complete the termination form
In the Termination dialog, enter the following:
- Termination Date: Select the appropriate date.
- Termination Reason: Choose Resignation - No Growth (TERTVTERM).
- OK to Rehire: Select No.
- Regret Termination: Select No.
- Eligible for Salary Continuation: Select No.
- Other fields, such as Payroll End Date, Last Date Worked, and Benefits End Date, as required.
Click Save to proceed.
Step 15: Confirm the termination request
A confirmation dialog appears with the text "Submitting Resignation - No Growth request for David Weber."
- Optionally, enter a comment.
- Click Show Workflow Participants to see who will approve the request.
Step 16: Review the participants and submit
The approver is displayed (in this example, "Anke Birken, Service Manager"). Click Submit to send the workflow for approval.
After you submit, a workflow approval request goes automatically to the employee's manager. The termination completes only after the manager approves it. If the manager doesn't approve, the workflow stops and the termination doesn't proceed.
Step 17: Handle any system message
If a message about employment details appears, read it carefully. For example:
"Since the transfer will be processed offline, you need to set the default termination event reason at Admin Center / Default event reason to use when processing direct reports and job relationships offline. The number of direct reports and job relationships that are to be adapted exceeds the threshold you've configured. As a result, the system adapts the reporting line and job relationships as a background job. You will receive an email when the background job is completed."
Click Close to dismiss the message.
Step 18: Check the pending resignation on the employee profile
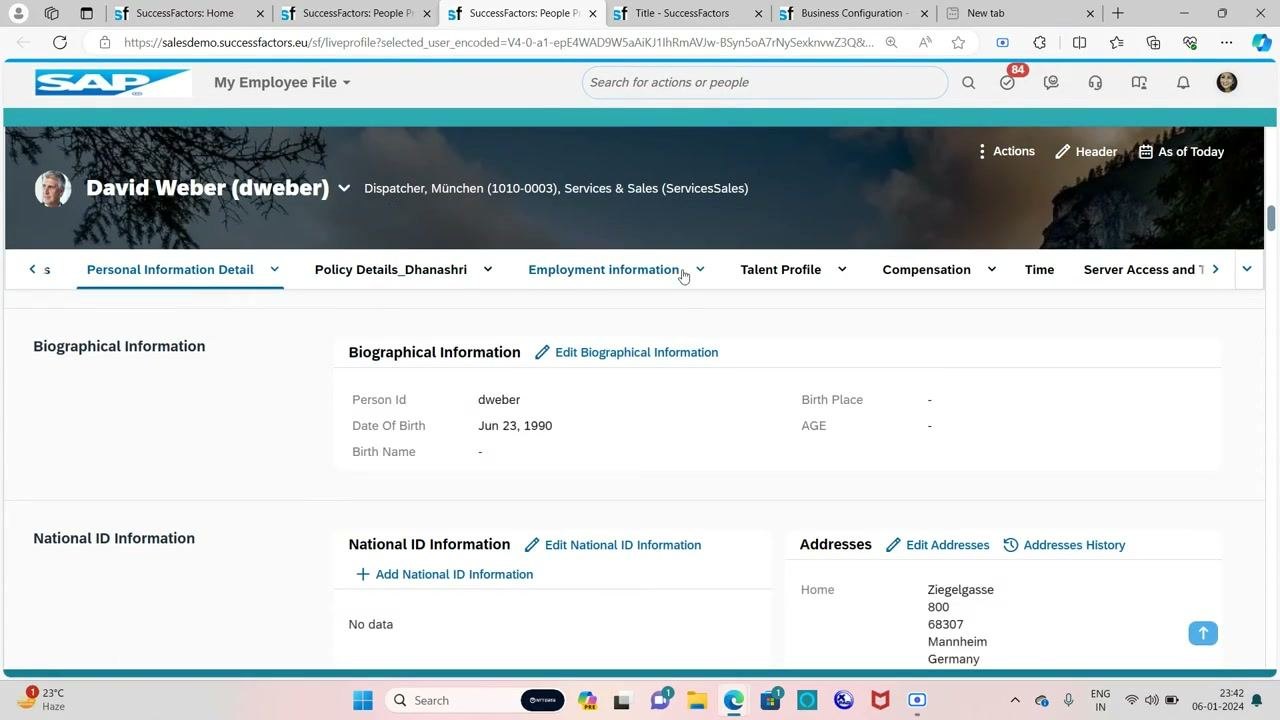
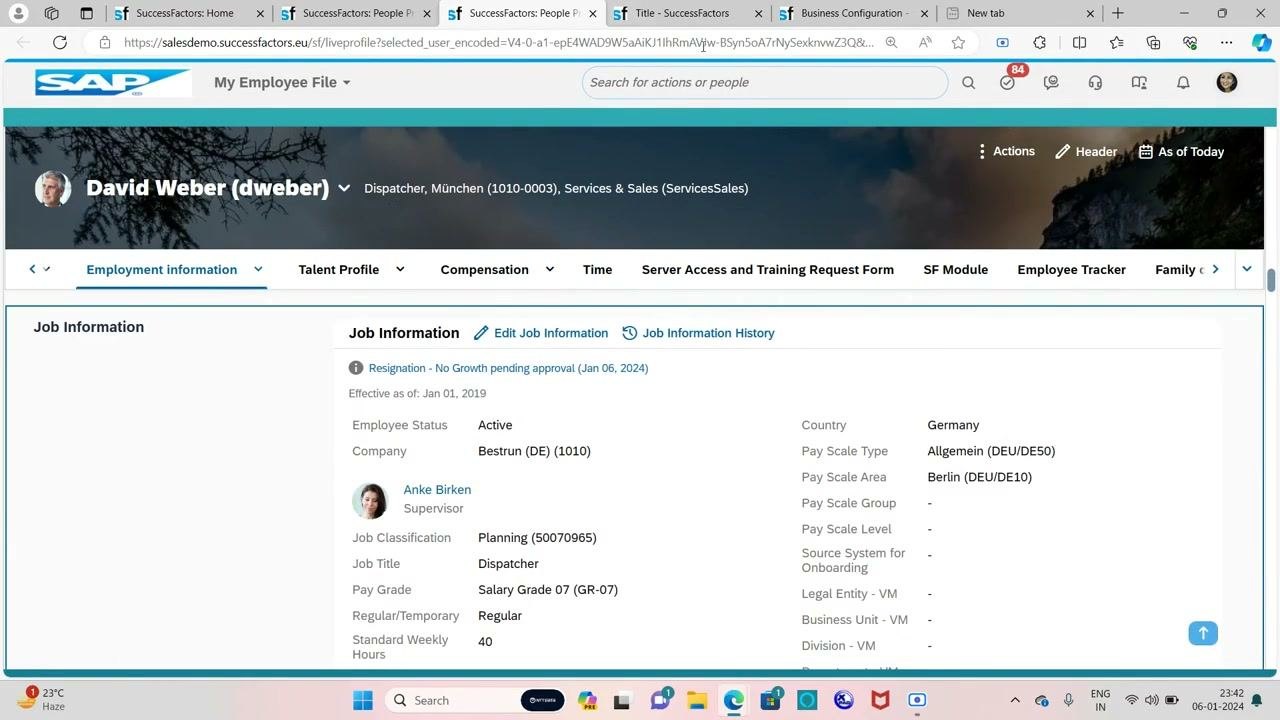
- Open the Employment Information tab of the employee's profile.
- Under Job Information, confirm the status "Resignation - No Growth pending approval (Jan 06, 2024)."
- Verify the supervisor (Anke Birken) and the other job details: Employee Status (Active), Company (Bestrun (DE)), Job Title (Dispatcher), Pay Grade (Salary Grade 07), and Standard Weekly Hours (40).
- Confirm the country (Germany) and the pay scale details.
Approve the termination as the manager
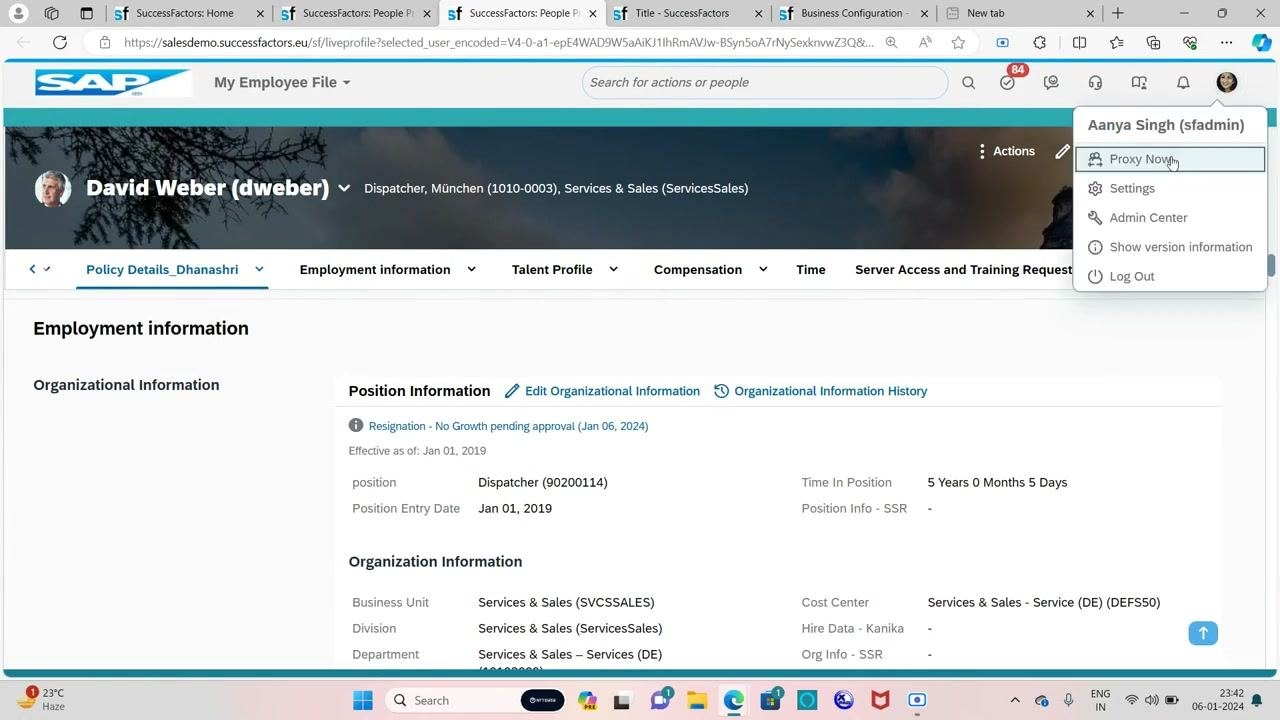
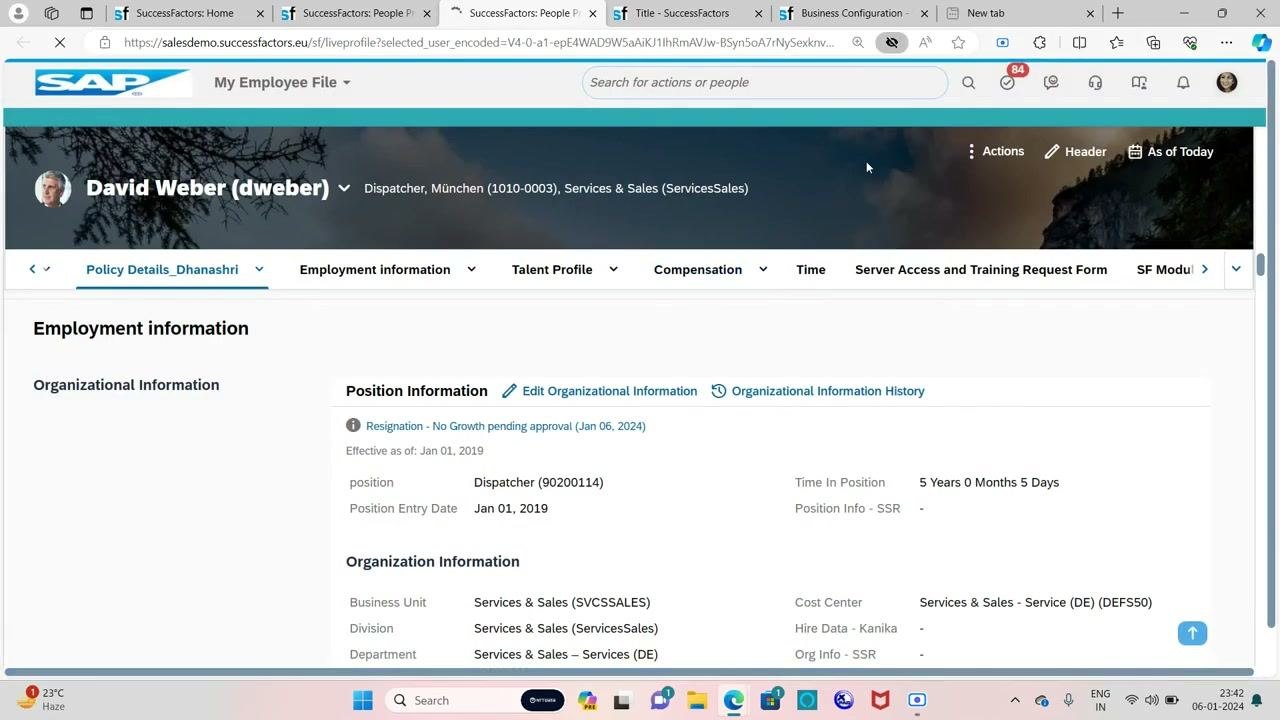
Step 19: Proxy as the manager
- Click the user profile icon in the top right corner.
- Select Proxy Now to act as the manager (for example, Kanika).
Step 20: Open the workflow request
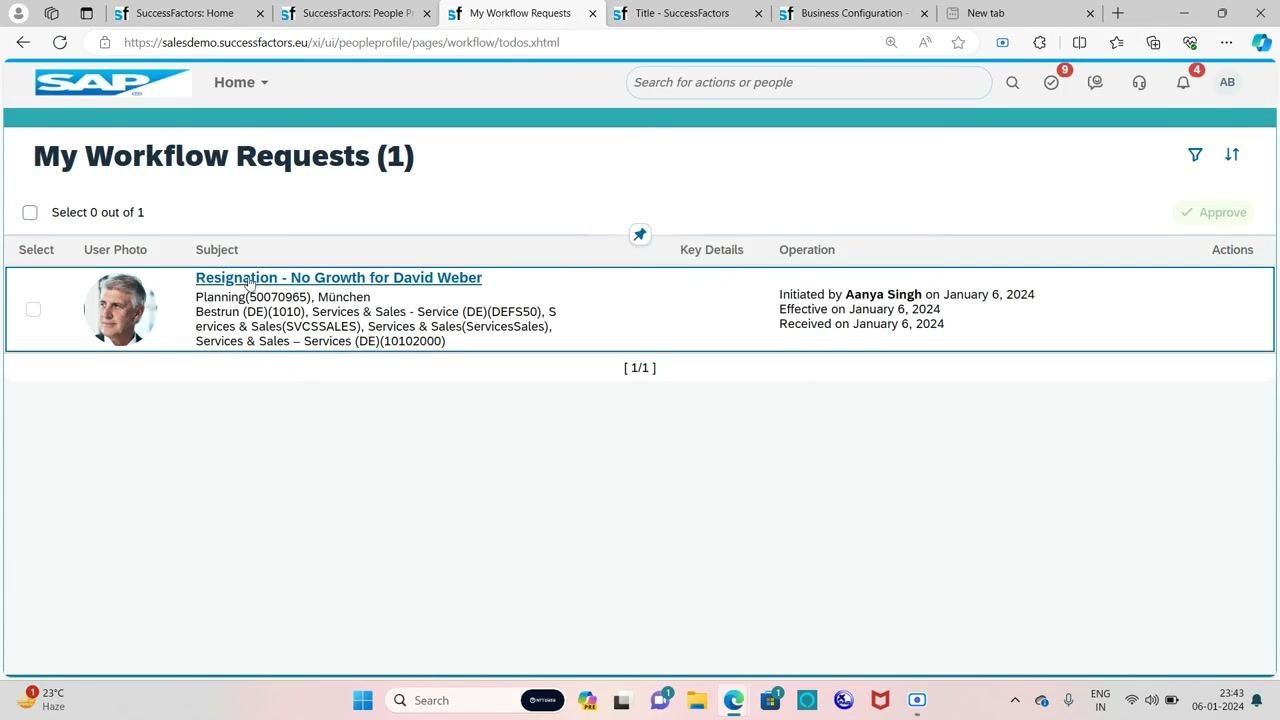
- Go to the My Workflow Requests page.
- Locate the request titled "Resignation - No Growth for David Weber."
- Review the details: Planning (50070965), München, Bestrun (DE)(1010), Services & Sales - Service (DE)(DEFS50), and other organizational information.
- Confirm that Aanya Singh initiated the request on January 6, 2024, and that it is effective January 6, 2024.
Step 21: Review the request details
- Click the subject "Resignation - No Growth for David Weber" to open the workflow details.
- Review the summary, including the effective date, initiator, and workflow participants.
- Confirm the termination details: Termination Date (Jan 06, 2024), OK to Rehire (No), Payroll End Date (Jan 06, 2024), Last Date Worked (Jan 06, 2024), Regret Termination (No), and other relevant fields.
Step 22: Approve or send back the request
- Scroll to the bottom of the workflow details page.
- Review Time Off Balances as of Termination Date (Comp Time: 00:00 hours available; Annual Leave (DEU): 30 days available).
- Optionally, enter a comment in the Comment box.
- Click Approve to finalize the resignation, or click Send Back if changes are needed.
Verify the termination
Step 23: Confirm no workflow requests remain
- Go to My Workflow Requests and make sure the list displays "No data," which means all requests have been processed.
- Open the user profile menu at the top right. It shows you are still acting on behalf of the manager (Anke Birken).
- Optionally, click Become Self to exit proxy mode.
Step 24: Find the employee
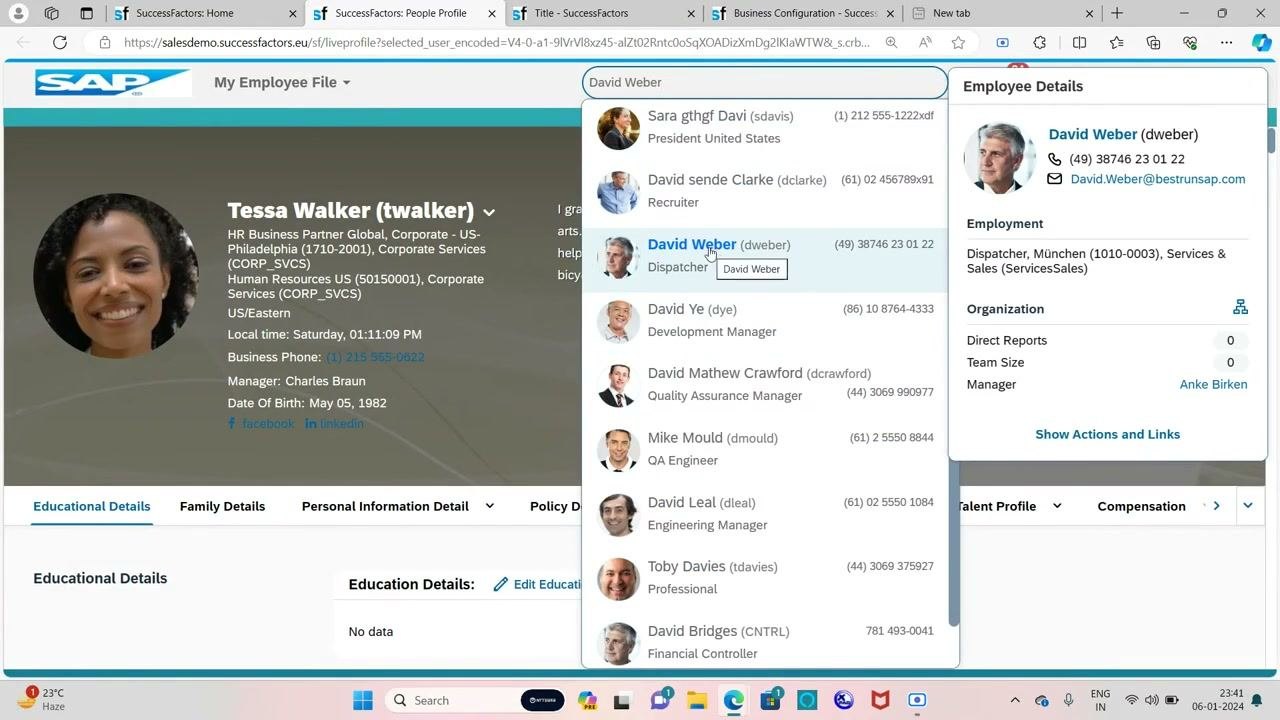
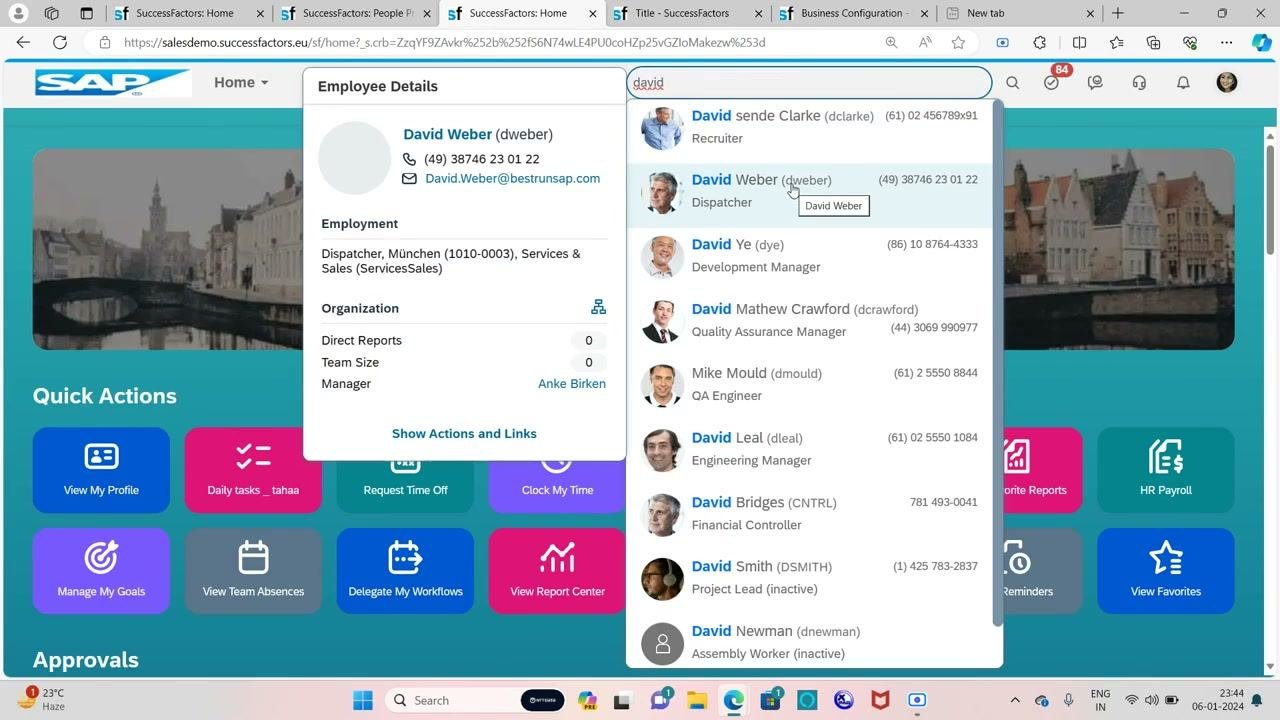
- Enter "David Weber" in the search bar at the top.
- Select David Weber (dweber) from the results.
- Review the Employee Details pop-up and confirm the job title (Dispatcher), location (München), and manager (Anke Birken).
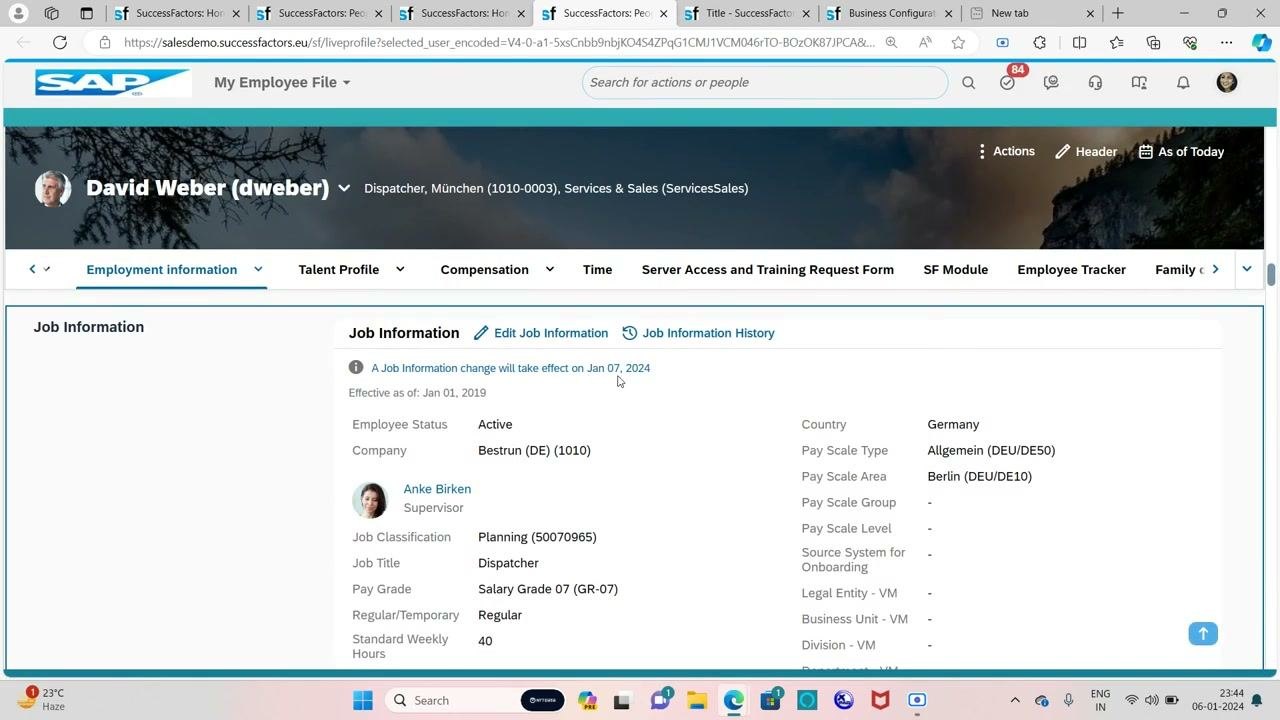
Step 25: Open Job Information
- Click David Weber's name to open the full profile.
- Go to the Employment Information tab.
- Select Job Information from the dropdown.
Step 26: Check the effective date
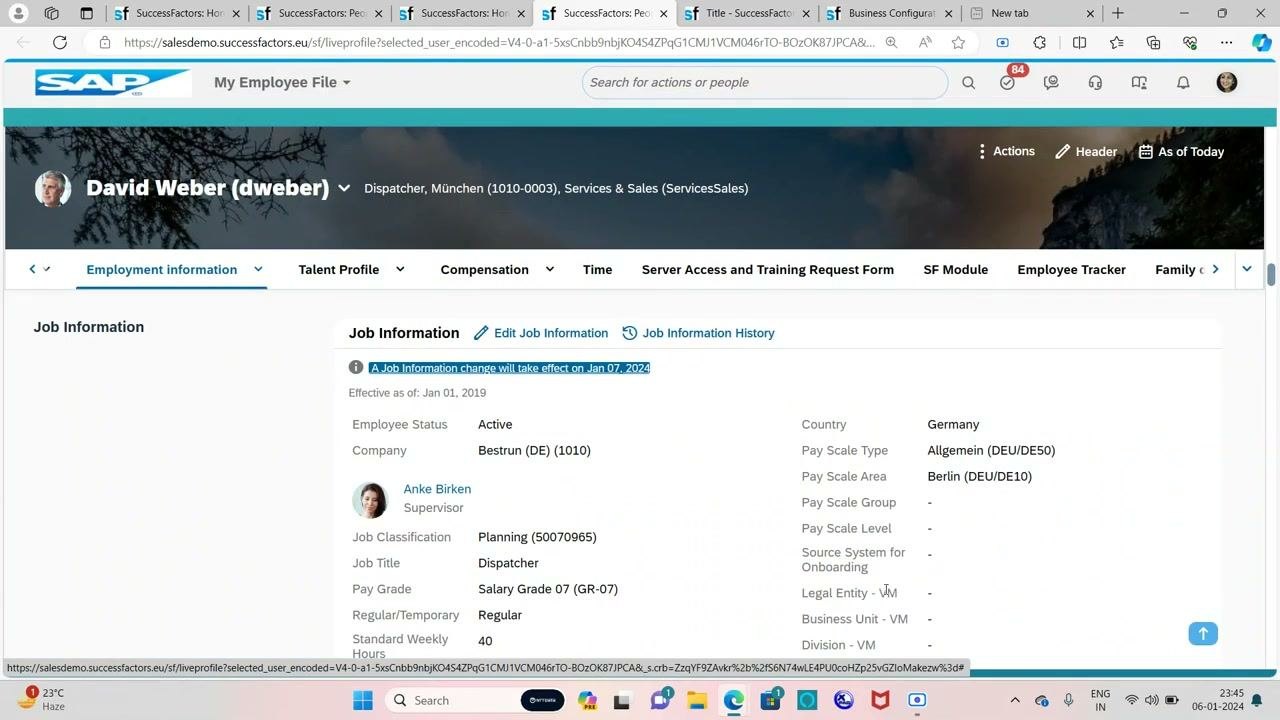
- Confirm the message "A Job Information change will take effect on Jan 07, 2024."
- Verify that Employee Status is "Active" and that the company, supervisor, job title, pay grade, and other details are correct.
Step 27: Review the change history
- Click Job Information History (or a similar option) to open the change history panel.
- Confirm these entries: Jan 07, 2024 "Resignation - No Growth" and Jan 01, 2019 "New Hire."
- Review the "New Hire" event details, including position, entry date, and time in position.
Step 28: Verify the termination record
Select the "Resignation - No Growth" entry dated Jan 07, 2024, and confirm the following:
- Employee Status: Terminated
- Event: Termination
- Event Reason: Resignation - No Growth (TERTVTERM)
- Position: Dispatcher (90200114)
- Position Entry Date: Jan 01, 2019
- Time in Position: 5 Years 0 Months 6 Days
- Company: Bestrun (DE) (1010)
- Business Unit, Division, Department, Location, Timezone, Cost Center: as previously listed
Optionally, click View Approval History for a workflow audit.
Step 29: Confirm the future-dated termination
The termination takes effect on Jan 07, 2024, as the job information and change history show. Until that date, the employee status remains "Active." After the effective date, it updates to "Terminated."
Summary
You now know how to terminate an employee in SuccessFactors with manager approval. You reviewed the termination wf workflow (Approver Role: Manager, No Approver Behavior: Stop the Workflow, Relationship to Approver: Employee). You created the termination br business rule on the Job Information Model and assigned it to the onSave column in Manage Business Configuration.
When you terminated the employee with the reason Resignation - No Growth (TERTVTERM), the workflow sent the request to the manager. After the manager approved it, you verified the termination record. The system updates the employee's status to "Terminated" on the effective date set in the workflow.
Generation details: cost, quality tiers
Docsie billed 5,000 credits ($3.50) to analyze this 10-minute video at standard quality. The rewrite, template fill and Word/PDF exports were included. The same video at each quality tier:
| Quality | Frames sampled | Credits | Approx. cost |
|---|---|---|---|
| Draft | every 16-30 s | 2,500 | $1.75 |
| Standard (this guide) | every 8-15 s | 5,000 | $3.50 |
| Detailed | every 4-7 s | 10,000 | $7.00 |
| Ultra | every 1-3 s | 20,000 | $14.00 |
Credits priced at $0.70 per 1,000; plans include a monthly allowance. Enterprise customers on on-premise or bring-your-own-model deployments run this on their own inference and pay no per-video credits.
Generated by Docsie Video-to-Docs on 2026-11-15 from a 9-minute video. Screenshots are frames from the source video and belong to their creator, Life With SAP, whose original is embedded above. If you own this video and want the guide removed or credited differently, contact us and we will act within one business day.