
How to Create a Job Requisition in SuccessFactors
This guide shows you how to create a job requisition in SuccessFactors, route it through approval, and publish it to your career sites. You work in the Recruiting module of SAP SuccessFactors. You start from a template, choose a job role, complete the requisition form, add screening questions, and submit the requisition. After the manager approves it, the recruiting team posts the job.
Video: Create Requisition - Recruiting Management in SuccessFactors Part 1 by Sven Ringling - Cloud HXM (2017). All credit for the demonstration goes to the creator; watch the original on YouTube. The written guide below was generated from this video by Docsie. Creator? Request a change or removal.
This guide shows you how to create a job requisition in SuccessFactors, route it through approval, and publish it to your career sites. You work in the Recruiting module of SAP SuccessFactors. You start from a template, choose a job role, complete the requisition form, add screening questions, and submit the requisition. After the manager approves it, the recruiting team posts the job.
Prerequisites
Before you begin, make sure you have the following:
- Access to the SAP SuccessFactors login page in your web browser.
- Administrator credentials. In this example, the user is logged in as Jane Moneypenny (sfadmin) on behalf of Tessa Walker (twalker), a recruiter.
- Access to the proxy feature if you need to act as another user, such as the recruiter or the approving manager.
Access Recruiting
Log in to SAP SuccessFactors
Open your web browser and go to the SAP SuccessFactors login page. Log in with your administrator credentials.
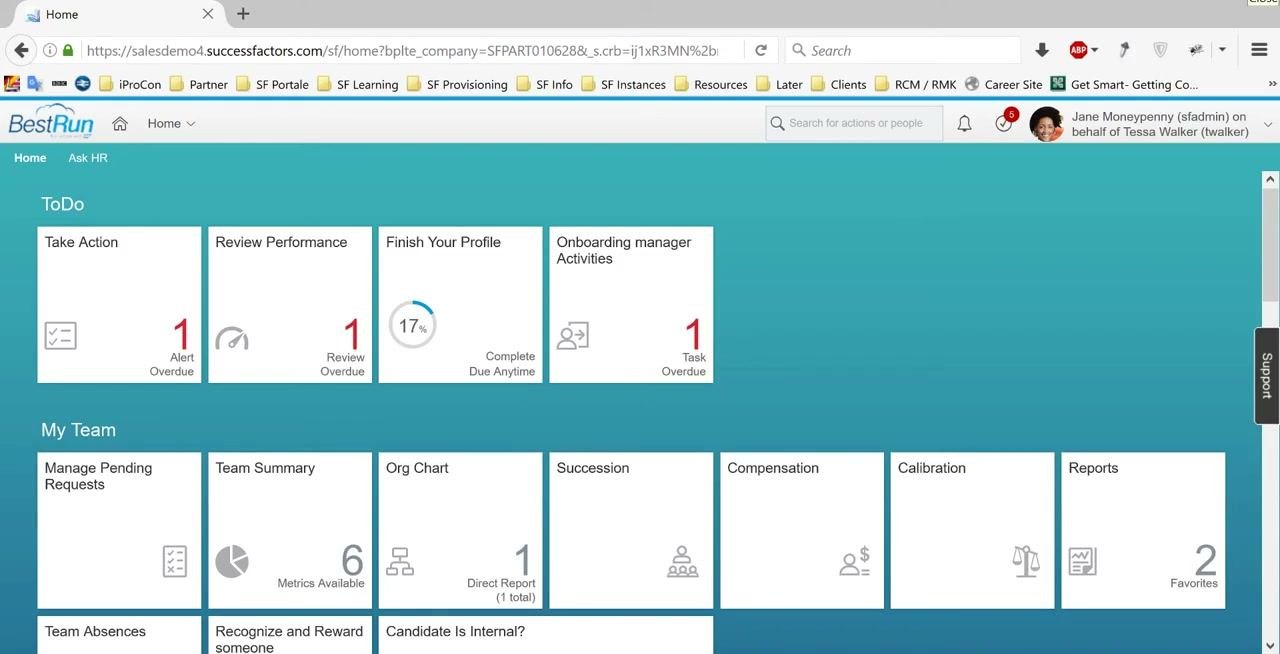
After you log in, the SAP SuccessFactors Home page appears. It shows these sections:
- ToDo, with tiles for Take Action, Review Performance, Finish Your Profile, and Onboarding manager Activities.
- My Team, with tiles for Manage Pending Requests, Team Summary, Org Chart, Succession, Compensation, Calibration, Reports, Team Absences, Recognize and Reward someone, and Candidate Is Internal?.
Notifications and user information appear in the top right corner.
Confirm your proxy status
If you need to act as another user, confirm that you are proxied as that user. In this example, the admin is proxied as Tessa Walker, a recruiter, so that you can perform recruiter-specific actions.
Open the Recruiting overview
Click the Home dropdown or navigation menu and select Recruiting. This opens the Recruiting module, where you can manage job requisitions.
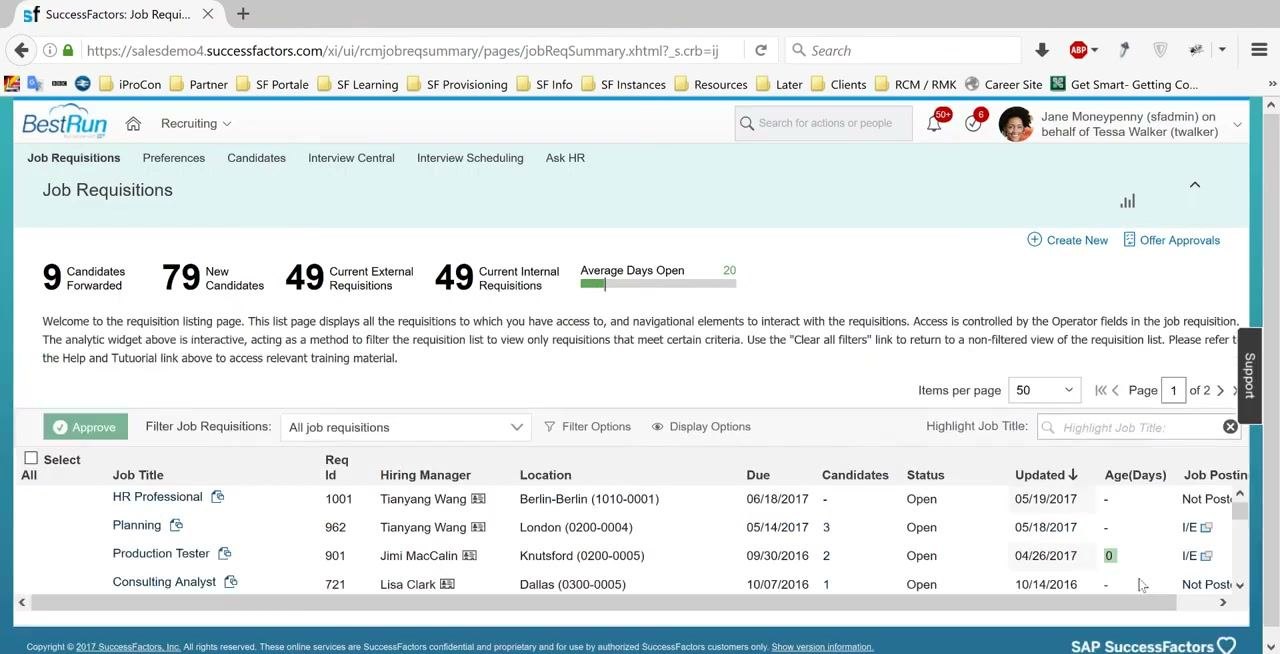
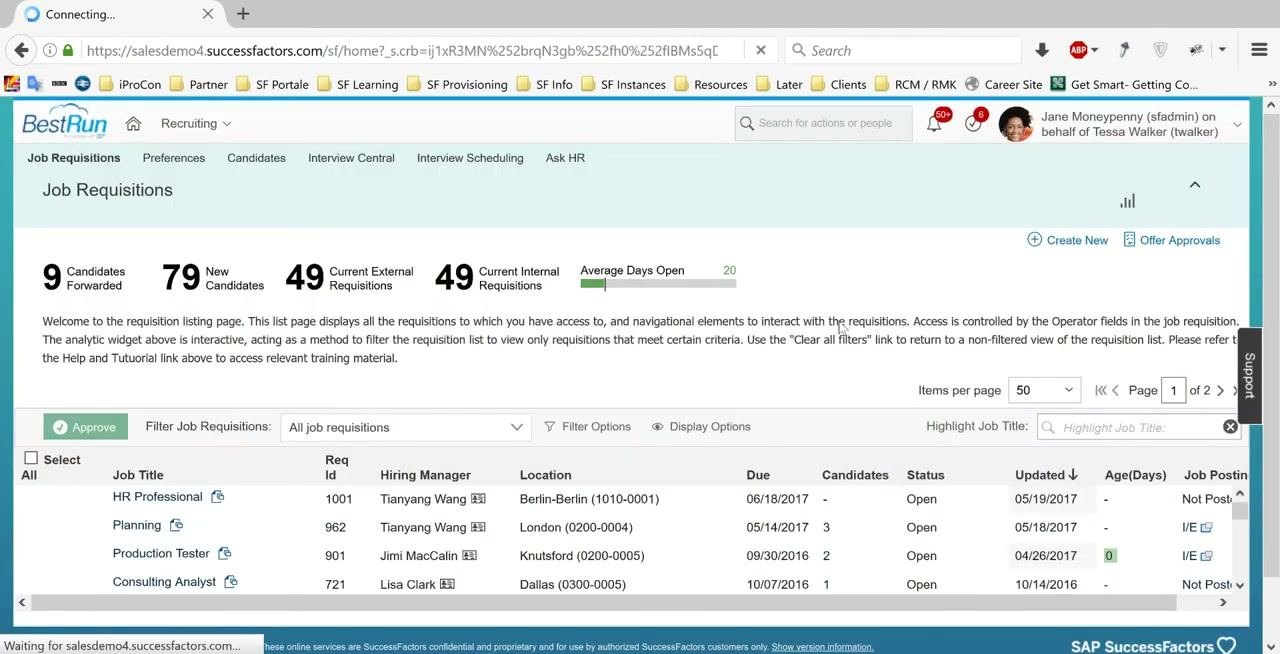
Review the Recruiting Overview page
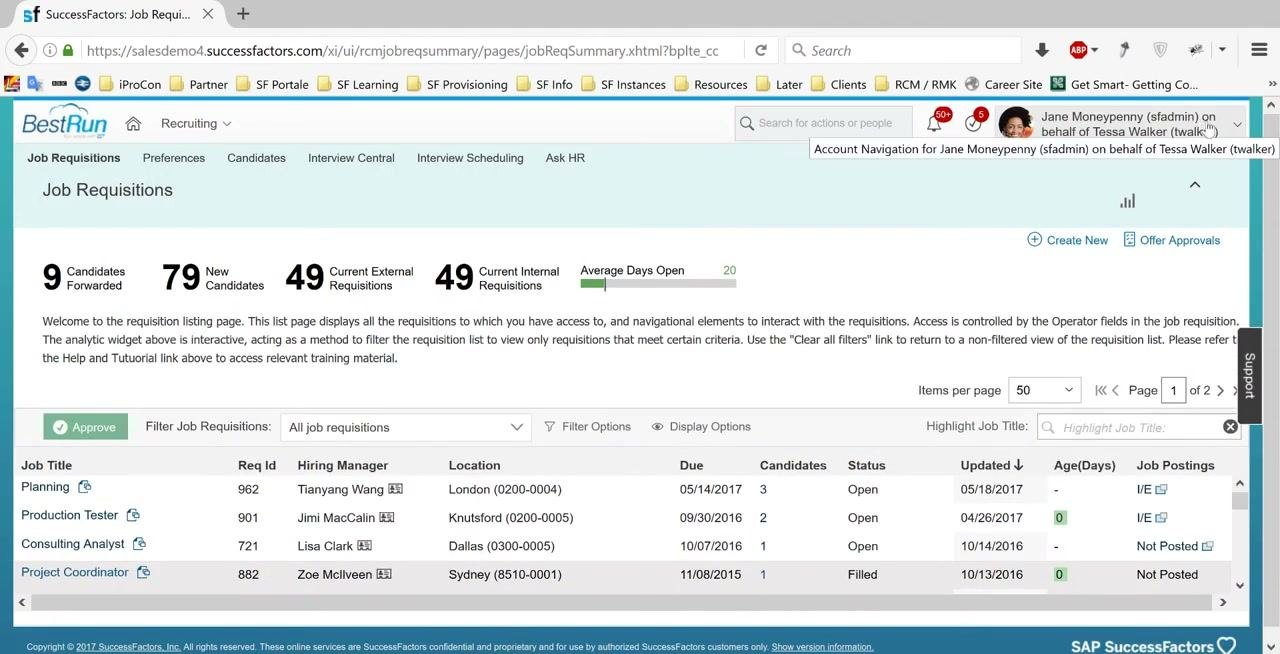
The page summarizes your job requisitions:
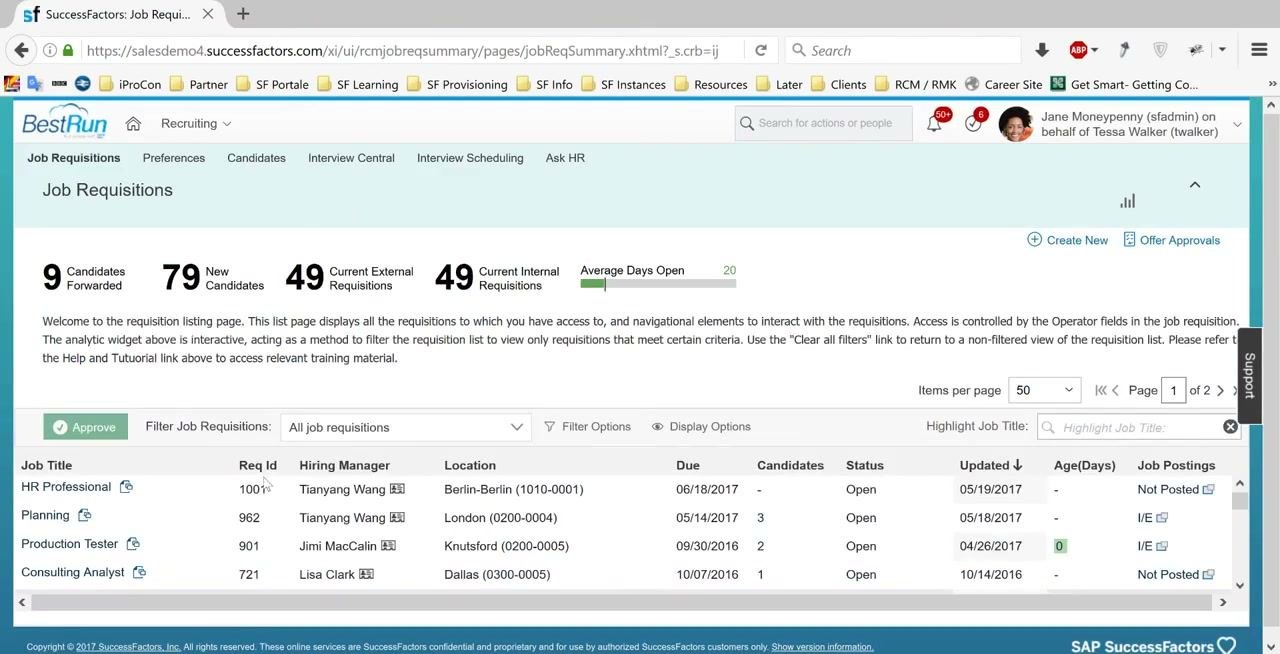
- 9 Candidates Forwarded
- 79 New Candidates
- 49 Current External Requisitions
- 49 Current Internal Requisitions
- Average Days Open: 20
Below the summary, a list shows the job requisitions you are responsible for. The columns are Job Title, Req Id, Hiring Manager, Location, Due, Candidates, Status, Updated, Age(Days), and Job Postings.
Example requisitions in the list:
- Planning (Req Id: 962, Hiring Manager: Tianyang Wang, Location: London, Due: 05/14/2017, Candidates: 3, Status: Open)
- Production Tester (Req Id: 901, Hiring Manager: Jimi MacCalin, Location: Knutsford, Due: 09/30/2016, Candidates: 2, Status: Open)
- Consulting Analyst (Req Id: 721, Hiring Manager: Lisa Clark, Location: Dallas, Due: 10/07/2016, Candidates: 1, Status: Open)
- Project Coordinator (Req Id: 882, Hiring Manager: Zoe McIlveen, Location: Sydney, Due: 11/08/2015, Candidates: 1, Status: Filled)
Create a new job requisition
Start to create a job requisition in SuccessFactors
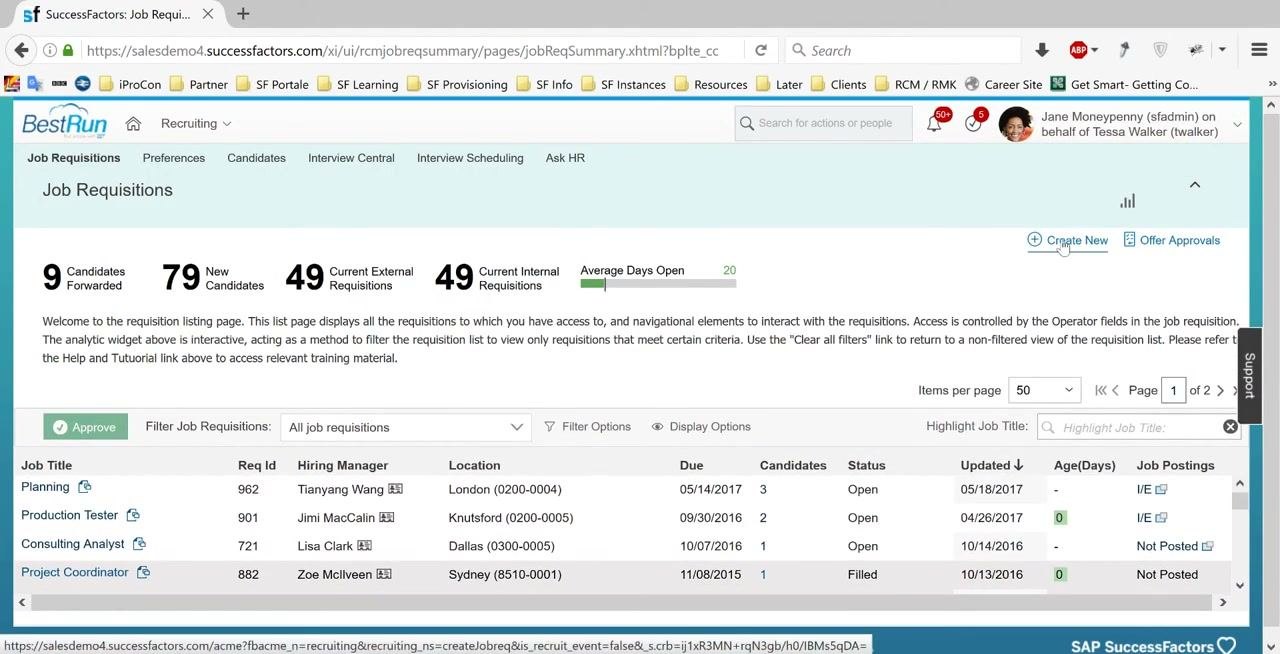
On the Job Requisitions page, click the Create New button in the upper right area.
Select a job requisition template
On the Create New Job Requisition page, choose a template. You see two options:
- Simple Job Requisition
- Standard Job Requisition
The templates differ in the fields and features available. For example, you might use one template for students and another for employees. In this guide, click the Standard Job Requisition link.
Choose how to start the requisition
You can copy an existing job requisition, browse Families & Roles, or create a new job requisition from a blank template. In this guide, click Create New Job Requisition From Blank Template.
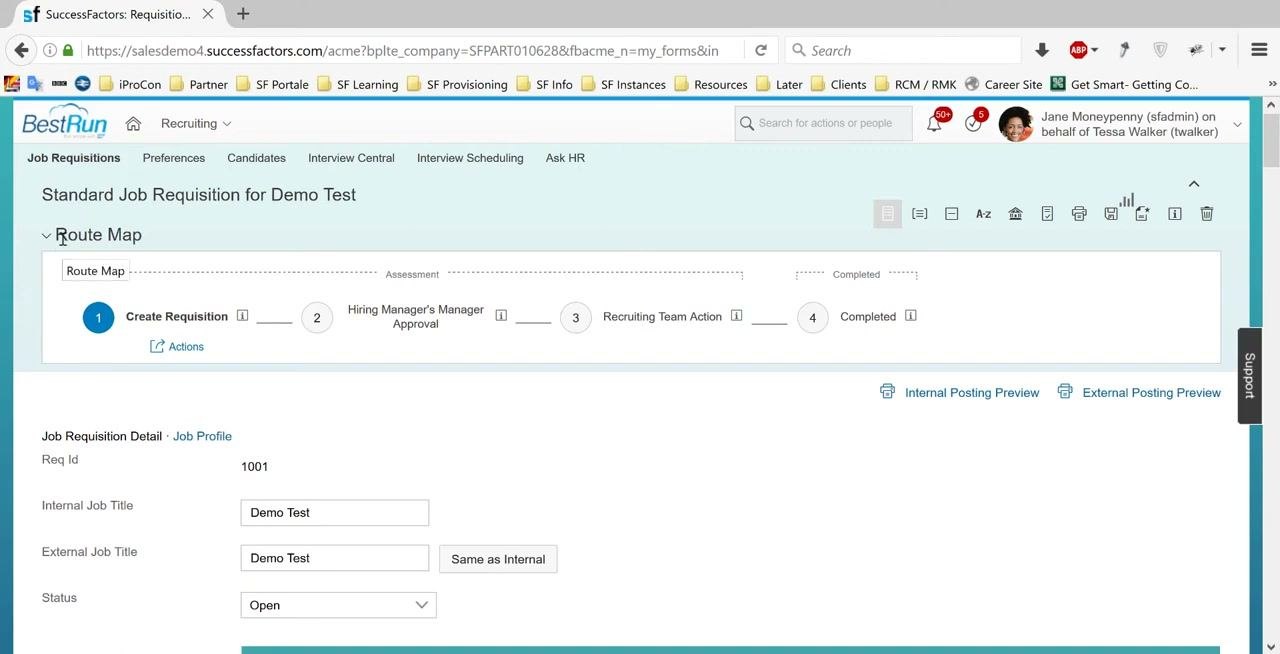
Review the Route Map
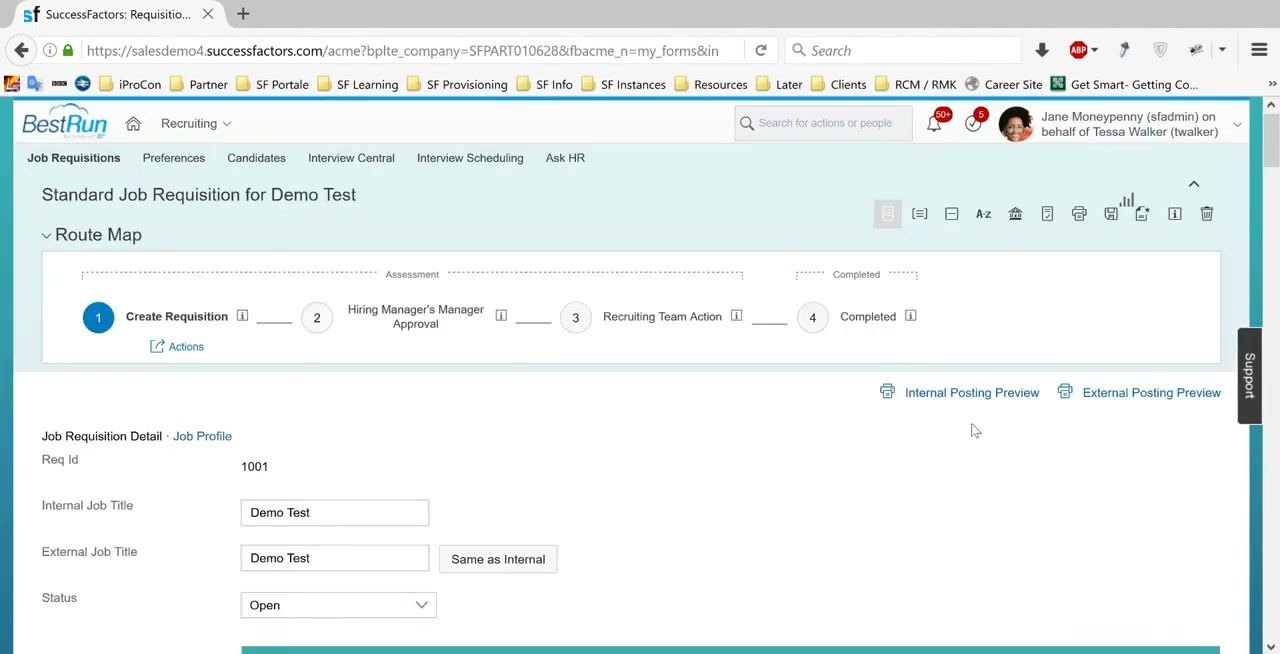
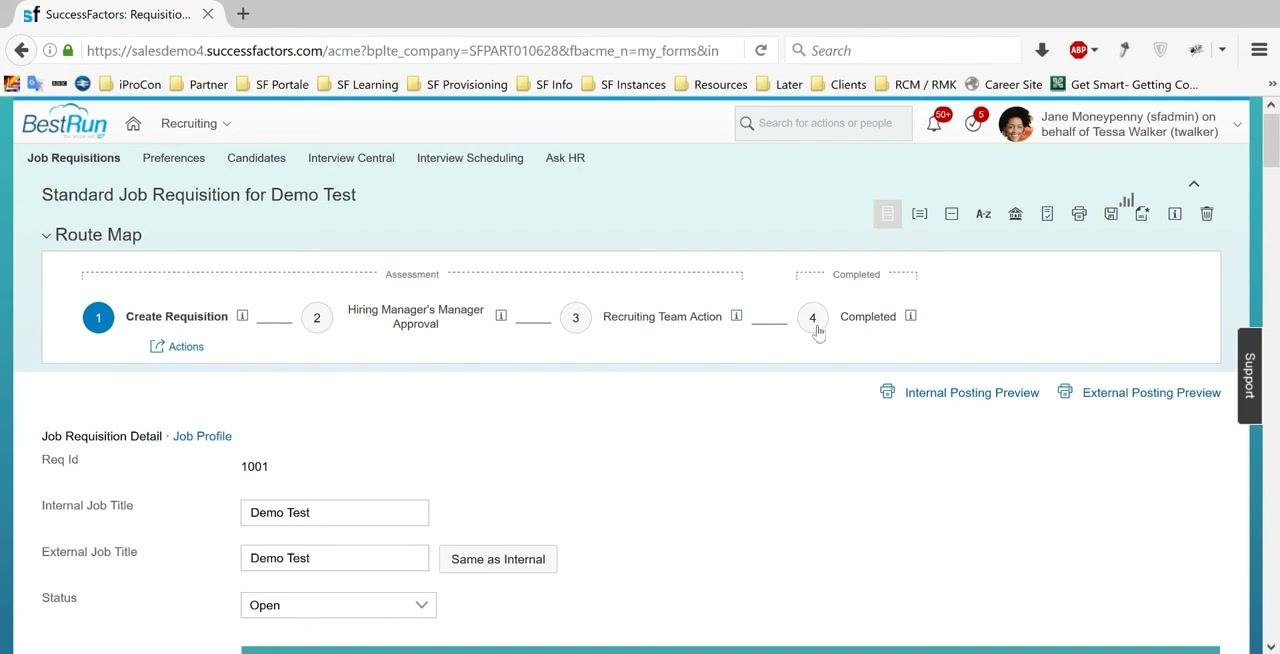
The job requisition form opens on the Standard Job Requisition for Demo Test page. A Route Map at the top outlines the approval workflow:
- Step 1: Create Requisition (current step)
- Step 2: Hiring Manager’s Manager Approval
- Step 3: Recruiting Team Action
- Step 4: Completed (requisition can be published)
The Route Map tracks progress through each approval stage.
Review the job requisition detail fields
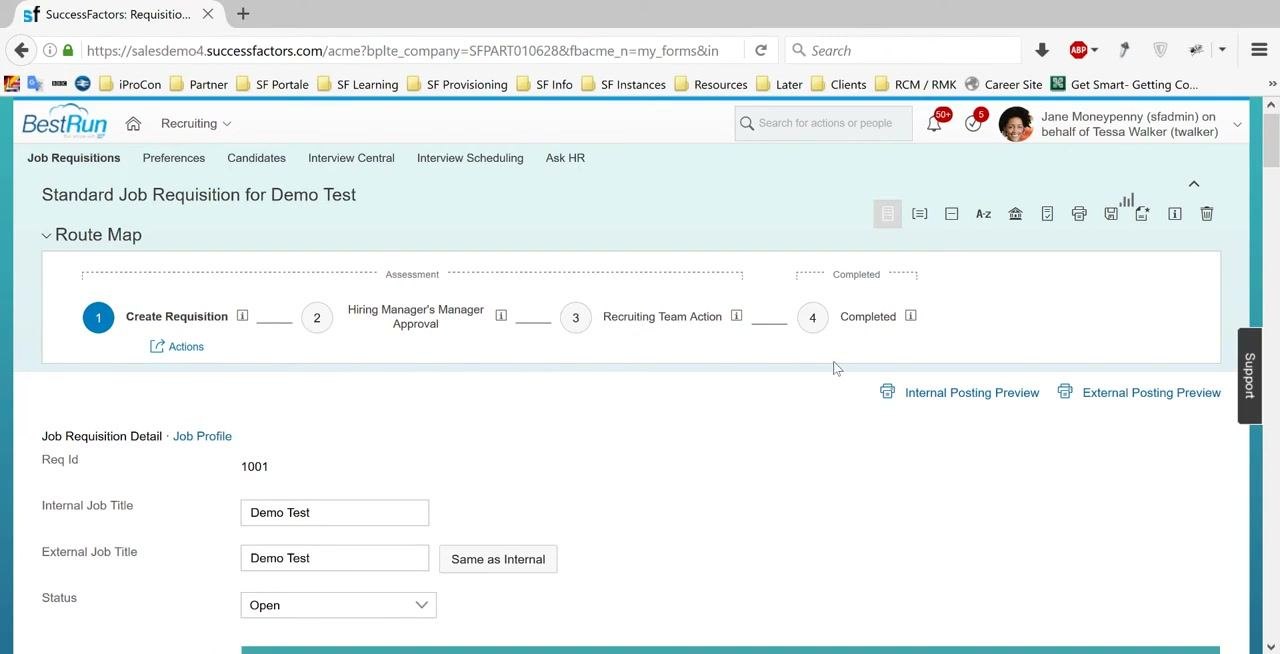
The form contains a mix of standard and custom fields, which you can tailor to your organization’s needs. A red asterisk (*) marks required fields.
Example fields at the top of the form:
- Req Id: 1001
- Internal Job Title: Demo Test
- External Job Title: Demo Test (with an option to set it as "Same as Internal")
- Status: Open
Additional sections include Organizational Information (Legal Entity, Division, Department, and so on).
Begin filling out the required fields
Select values for required fields such as Location, Posting Country, and Job Country. Use the dropdown menus to choose from the available options. For example, select "Boston-Boston (3400-0001)" for Department, or choose a country for Location.
You must complete required fields before you proceed.
Select a job role and review the job profile
Open the Job Profile tab
The system provides a Job Roles and Families feature. It lets you define roles and associate them with predefined content, including job descriptions, responsibilities, summaries, competencies, skills, education requirements, and interview questions. This streamlines the requisition process and keeps similar roles consistent.
Go to the Job Profile tab in your job requisition. If no job role is selected, this warning appears:
“No Job Role. You currently have no job role selected for this requisition. Selecting a role will allow you to create your job description from a structured job profile that exactly matches what will be expected of the job candidate in their new role.”
Click the Select Role button to begin.
Select a job family
In the "Select the job role that matches your requisition" section, open the Job Family dropdown menu. Choose the family that fits your position. Example options include:
- Administrative Support Family
- Human Resources Family
- Managerial and Supervisory Family
- Marketing/Community Relations Family
- Services and Maintenance Family
- Skilled Craft Family
For this example, select Human Resources Family.
Choose a job role and review the job profile content
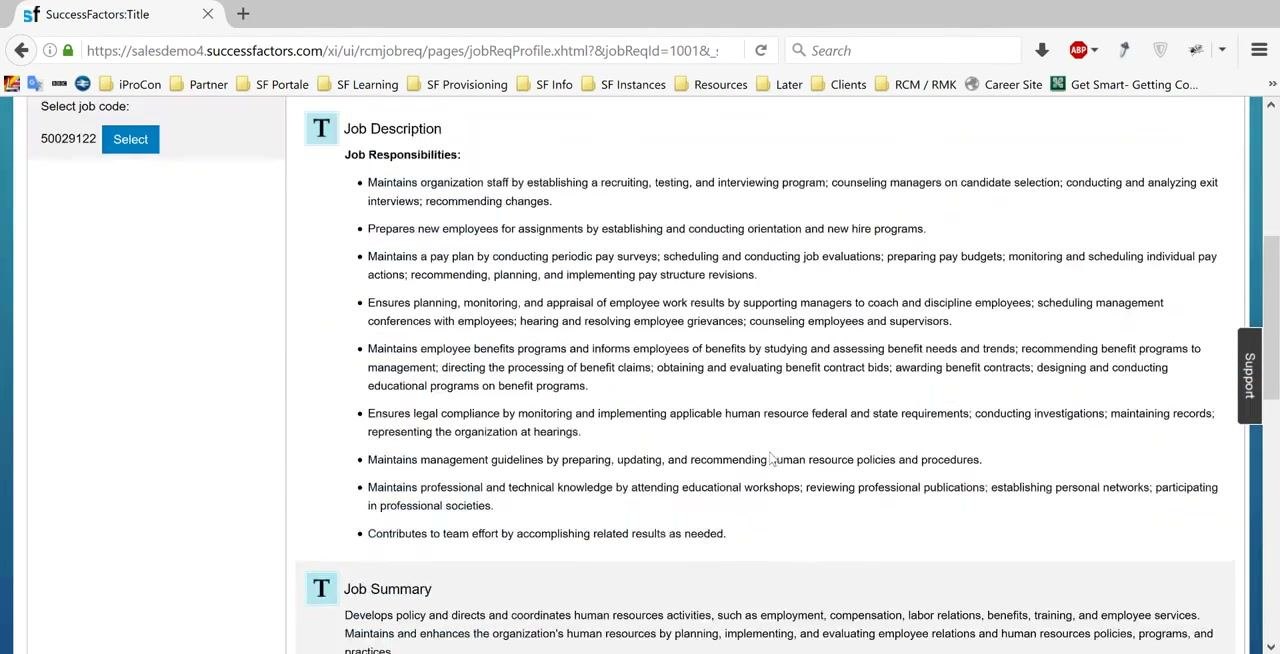
After you select the family, the available roles within it appear. For the Human Resources Family, select HR Professional.
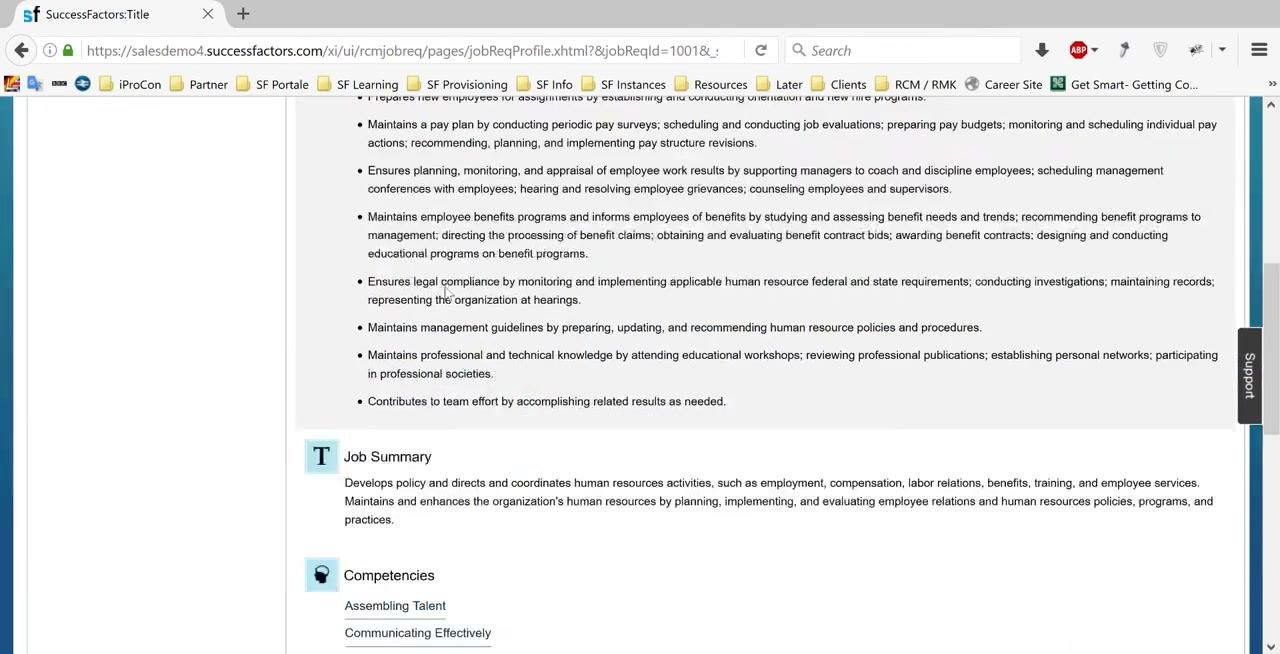
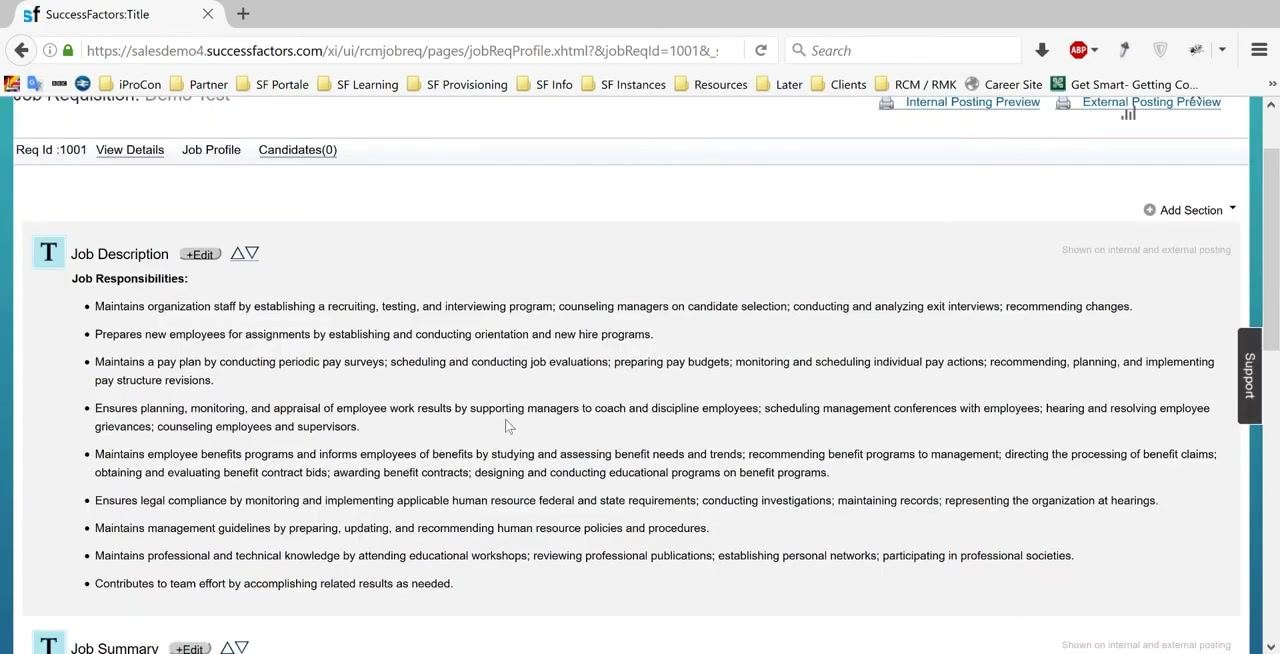
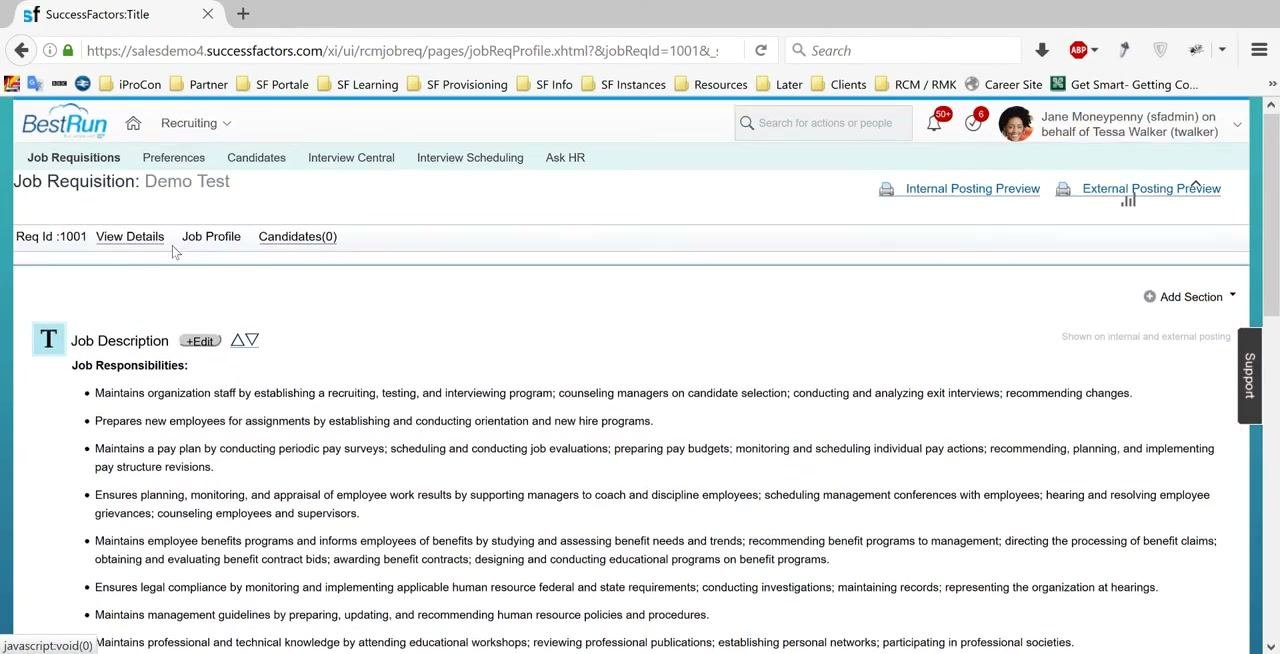
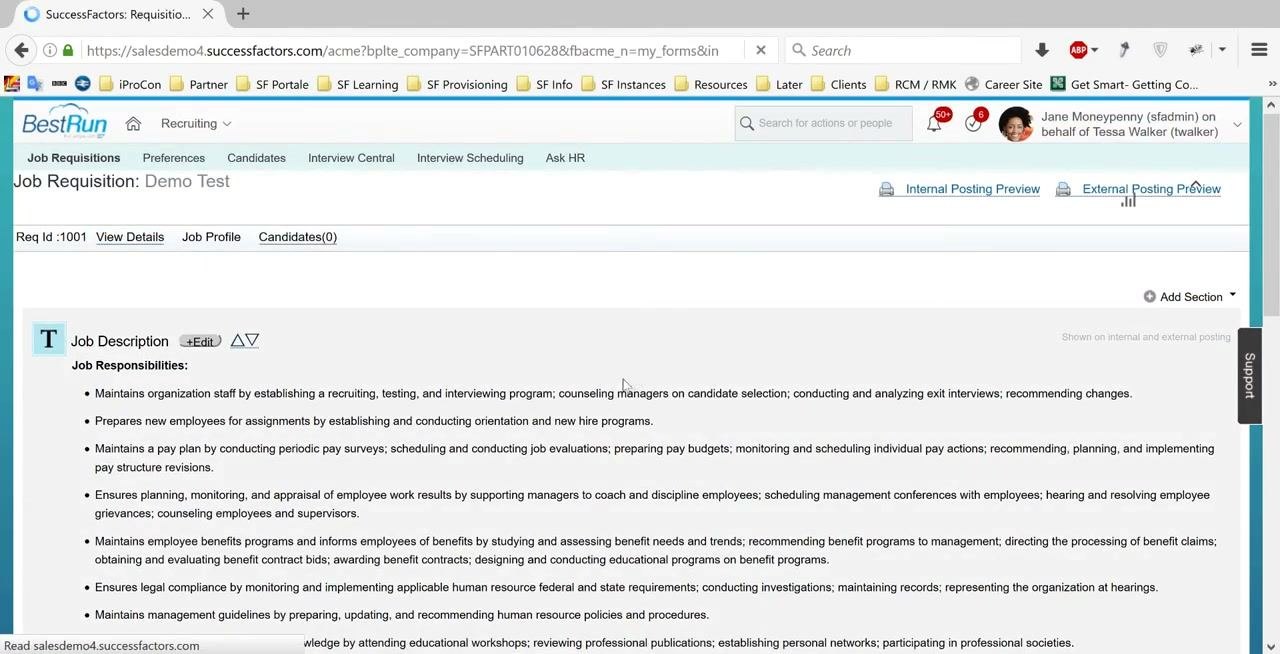
Once you select a role, the system fills in several sections with predefined content:
- Job Description, including Job Responsibilities
- Job Summary
- Competencies, such as Assembling Talent and Communicating Effectively
These sections give the requisition a clear structure, and you can customize them as needed.
Add or customize sections
Click Add Section to add a custom section to the job profile. Click the Edit button next to a section header to edit an existing section. Changes and additions you make here are reflected in the job requisition.
Continue filling out the requisition form
Enter or confirm the following details in the Organizational Information section:
- Internal Job Title: HR Professional
- External Job Title: HR Professional (or select "Same as Internal")
- Status: Open
- Location: Berlin-Berlin (1010-0001)
- Posting Country: Germany (DE)
- Job Country: Select the appropriate country from the dropdown.
A red asterisk (*) marks required fields.
Specify the job function
In the Job Function dropdown, select the functional area for the job. For an HR Professional, choose Human Resource. Tooltips such as "Choose the functional area of this job" may appear to guide your selection.
Note: Job roles and families keep your job requisitions consistent, comprehensive, and aligned with organizational standards. Predefined content saves time and reduces errors, while custom sections give you flexibility when needed. Always review and save your changes before you submit the requisition for approval.
Fill in all required fields in the requisition form
Complete the remaining required fields
Fill in all required fields in the requisition form, focusing on those marked with a star (*). Example fields include:
- Replacement for whom
- Recruitment Justification
- Salary and Benefits Information
- Is this a budgeted position
- Currency (set to USD)
- Base Salary
- Salary Frequency
- Employment Type
- Pay Type
Define the requisition team
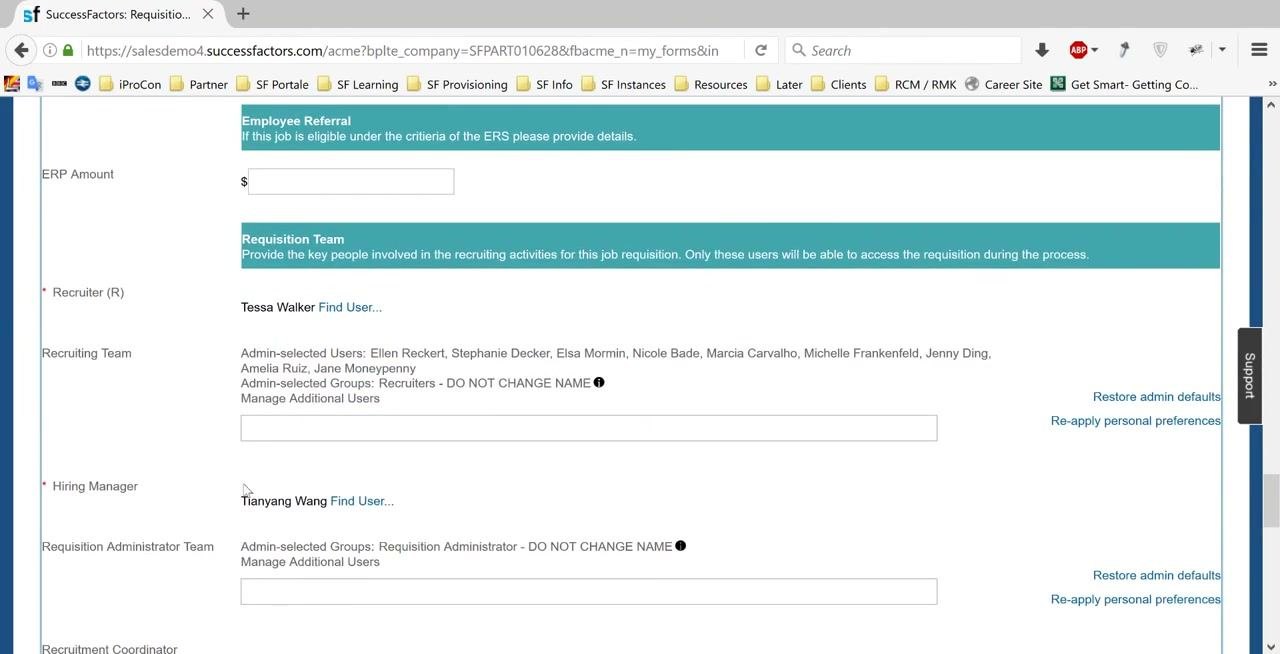
In the Requisition Team section, define the key people involved in the recruiting process:
- Enter or confirm the Recruiter (for example, Tessa Walker).
- Enter or confirm the Hiring Manager (for example, Tianyang Wang).
- Review or add members to the Recruiting Team and the Requisition Administrator Team as needed.
- Optionally, add ERP Amount and Employee Referral details if applicable.
Add competencies and skills
Include relevant competencies or skills in the requisition. Hiring managers or recruiters use these later to rate candidates during the evaluation process.
Add screening questions
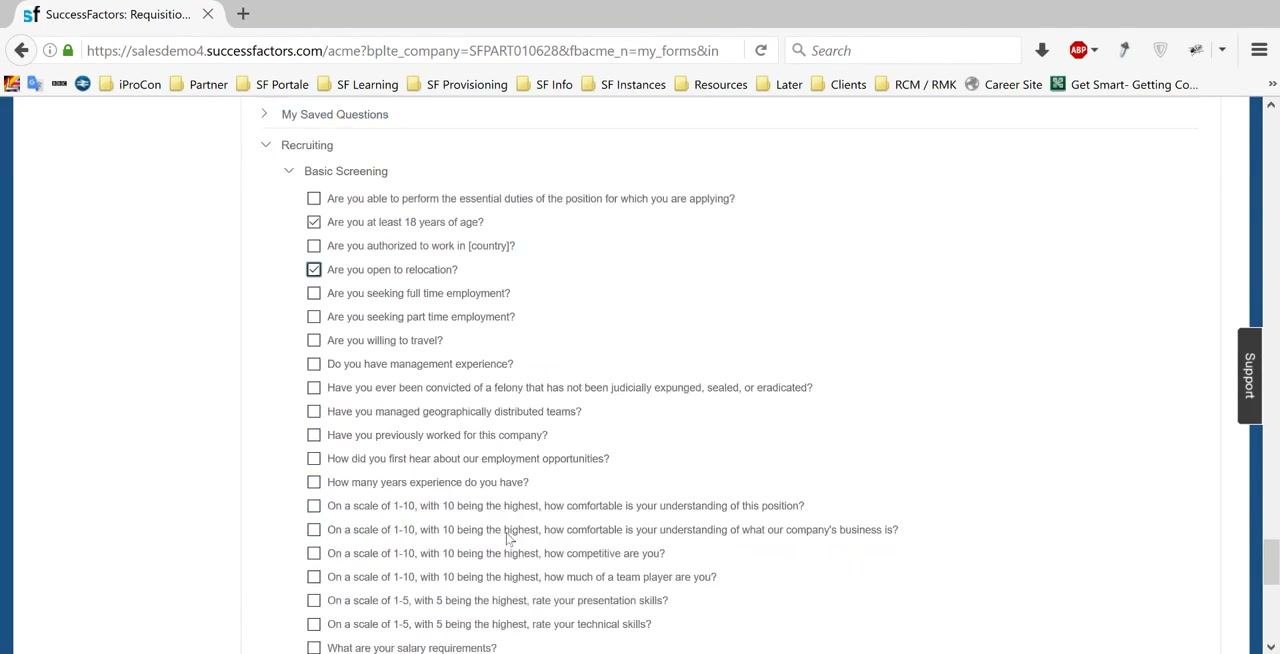
Add screening questions to the requisition to help evaluate candidates:
- Click Add more questions in the Questions section.
- Use the Browse tab to select existing questions or create new ones.
- Set the language for the questions (for example, English US).
Example questions include "Are you able to perform the essential duties of the position?", "Are you at least 18 years of age?", "Are you authorized to work in [country]?", and "Are you open to relocation?".
Select required and disqualifier questions
Choose which questions are required and which are disqualifiers:
- Select the Required box for questions that all candidates must answer.
- Select the Disqualifier box for questions that automatically disqualify a candidate if answered incorrectly.
- Assign scores and weights to each question as needed (for example, Score: 50).
When a candidate answers a disqualifying question incorrectly, the system can automatically disqualify the candidate and send an email notification.
Set the required score
Set the required total score that candidates must reach to pass the screening (for example, Required Score: 100.0).
Add overall comments
If needed, enter comments in the Overall Comments field. These comments are included in the email notification sent to the next person in the approval chain.
Submit the requisition for approval
Submit the job requisition
Click the Create Requisition button to submit the completed requisition. The system forwards it to the next person in the approval workflow, typically the Hiring Manager's Manager.
The next screen confirms that the requisition will be sent for approval. It shows the route map and the recipient (for example, "Forward Form to Yi Lu"). Optionally, enter Email Notification Comments to include in the approval notification.
Proxy as the approver
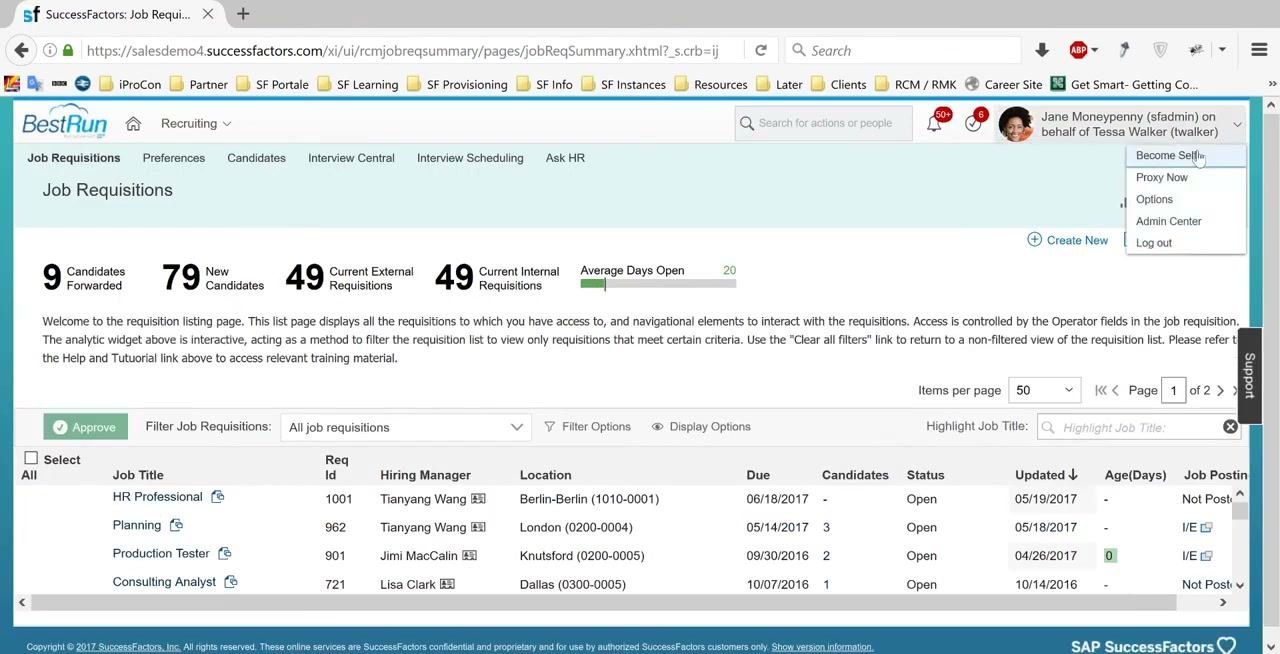
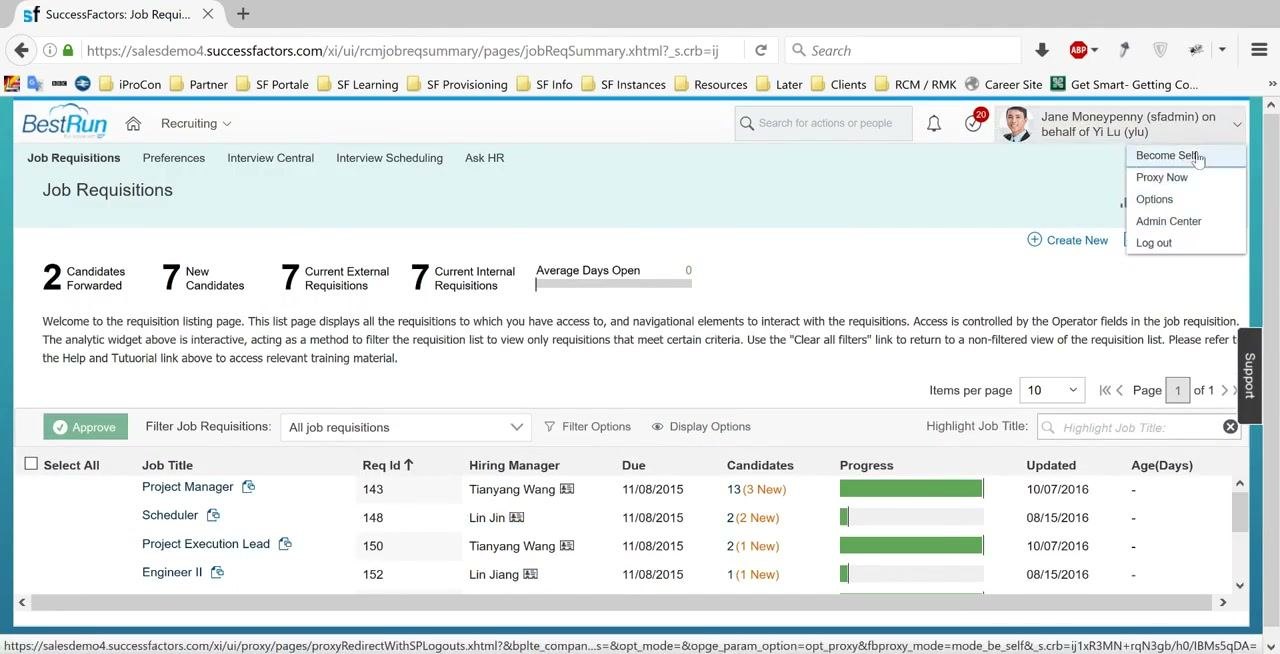
To approve the requisition as the manager, use the proxy feature to act on behalf of the approver (for example, Yi Lu). On the Job Requisitions summary page, find the user menu in the top right corner. Select Proxy Now or the equivalent option to switch to the approver's view.
The summary page lists all job requisitions, with job title, requisition ID, hiring manager, location, due date, candidate count, and status.
Review the requisition as the approver
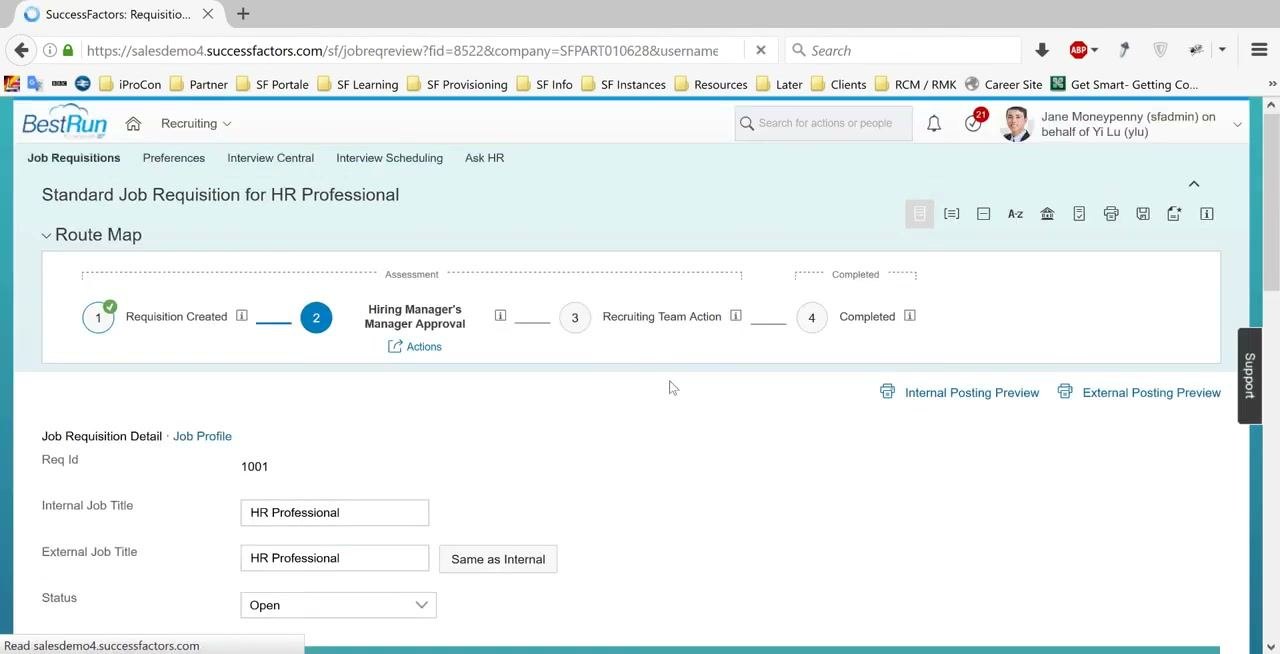
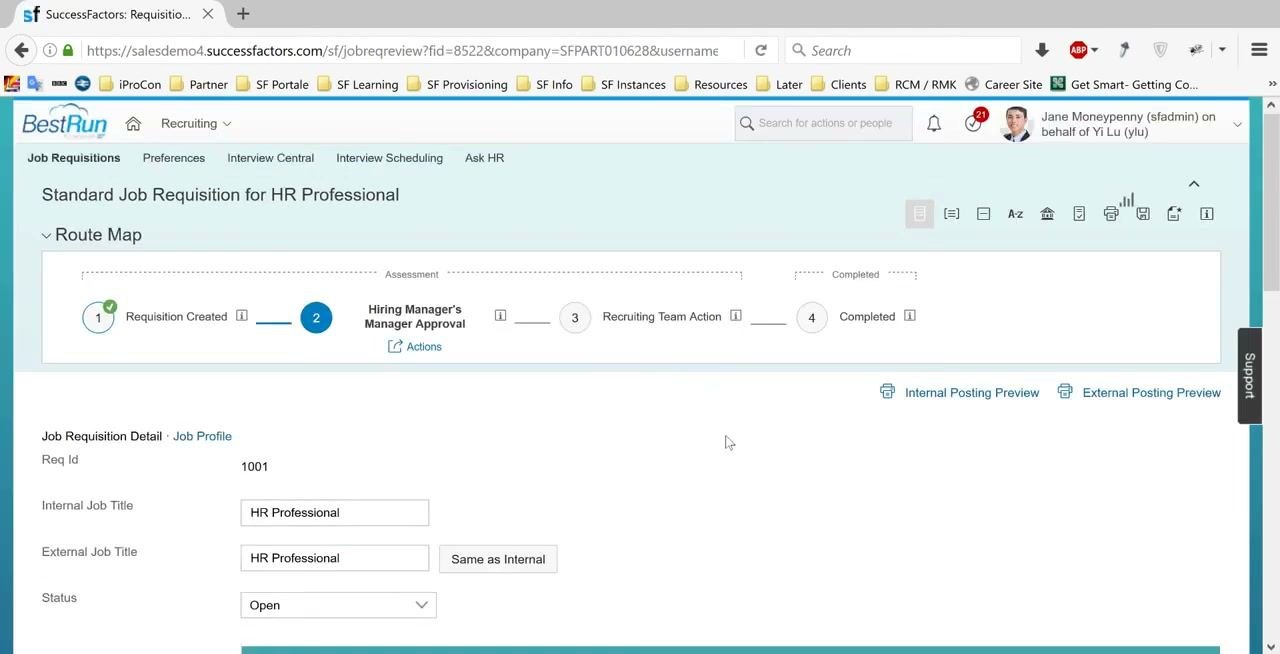
Click the requisition you want to review (for example, "HR Professional" with Req Id 1001) to open the approval view. The Standard Job Requisition for HR Professional screen appears. Its route map highlights the current step, "Hiring Manager's Manager Approval."
The approver sees only essential fields, such as job title, requisition ID, and status.
Approve the requisition
Scroll to the bottom of the requisition review screen. Optionally, add comments in the Overall Comments or Requisition Comments fields. Click the Approve button to move the requisition to the next step in the workflow.
Forward the approved requisition to the recruiting team
After you approve, a confirmation screen shows that the requisition will be sent to the recruiting team for review. The Forward Form to field shows the next recipient (for example, Tessa Walker).
Optionally, add Email Notification Comments before you finalize the approval. Then click Approve to complete the process.
Complete the recruiting team action and post the job
Return to the Job Requisitions summary page
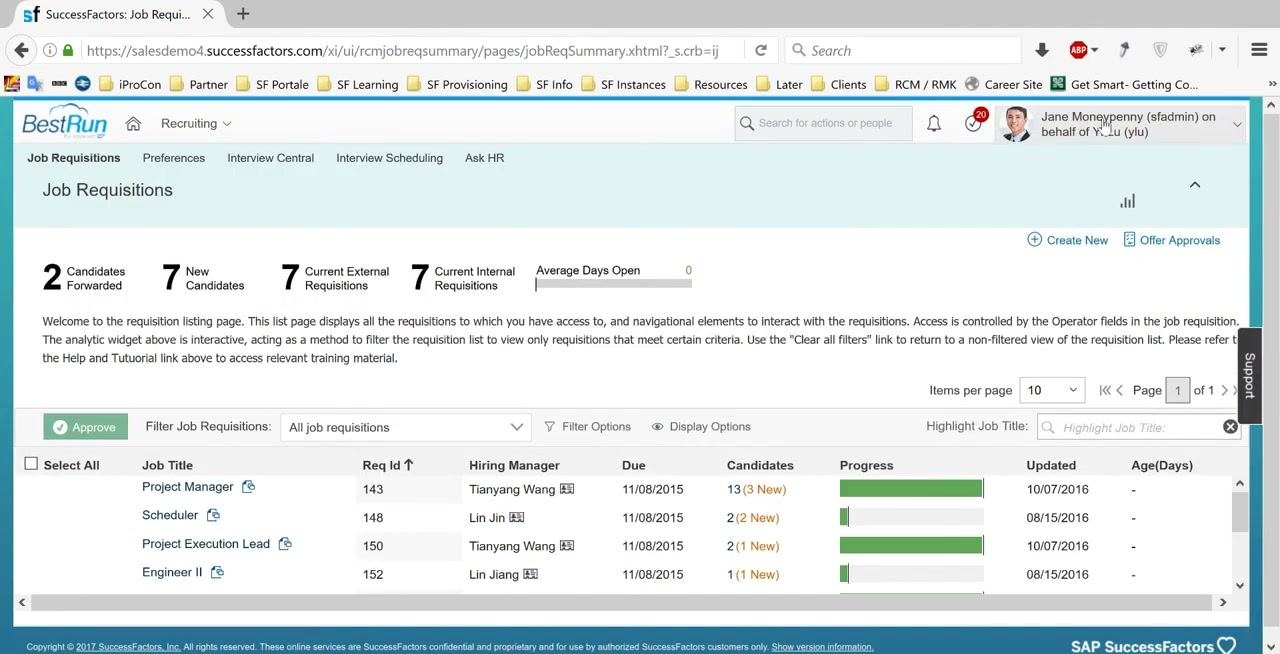
After the requisition is approved and forwarded to the recruiting team, return to the Job Requisitions summary page. Key analytics appear at the top:
- 2 Candidates Forwarded
- 7 New Candidates
- 7 Current External Requisitions
- 7 Current Internal Requisitions
- Average Days Open: 0
Below the analytics, a list shows all job requisitions. The columns are Job Title, Req Id, Hiring Manager, Due Date, Candidates, Progress, Updated, and Age (Days). The user menu in the top right corner lets you switch proxy roles or return to your own profile.
Open the requisition at the Recruiting Team Action step
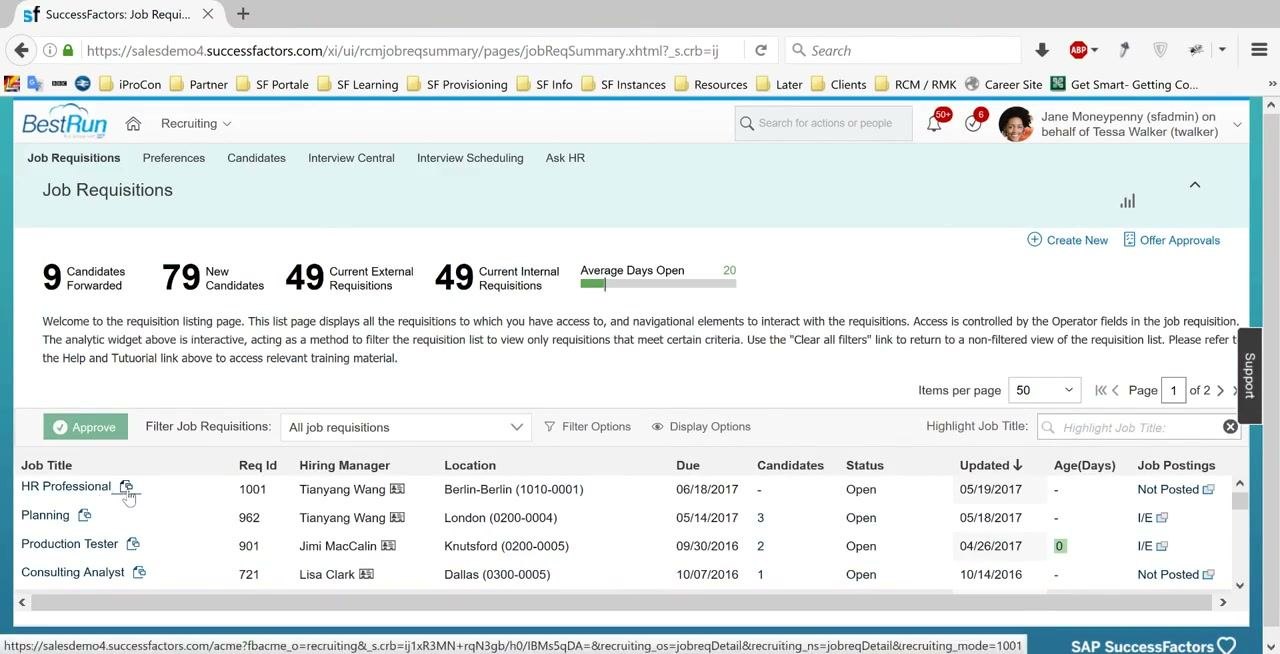
Find the requisition you want to work with (for example, "HR Professional" with Req Id 1001). Click the job title to open the requisition details. The Standard Job Requisition for HR Professional screen appears.
The route map shows the current step, "Recruiting Team Action" (Step 3). The previous steps, "Requisition Created" and "Requisition Approved," are complete. The requisition status is "Open," and both internal and external job titles are "HR Professional."
Set the posting start date
Open the requisition and go to the JOB POSTINGS tab. Under "Job postings," find the rows for "Internal Career Site Posting" and "External Career Site Posting." Both are marked "Not Posted."
Click the Posting Start Date field to open the date picker. Select the start date (for example, 05/19/2017). Make sure the date matches the intended go-live date for the job posting.
Publish the job requisition to the career sites
Do the following for each posting type, Internal and External Career Site Posting:
- Set the Posting Start Date (for example, 05/19/2017).
- Optionally, set the Posting Start Time, Posting End Date, and Posting End Time if required.
- Click the Post Job button in the Action column to publish the job.
The system updates the posting status to "Posted" for the selected sites.
Verify the posting status
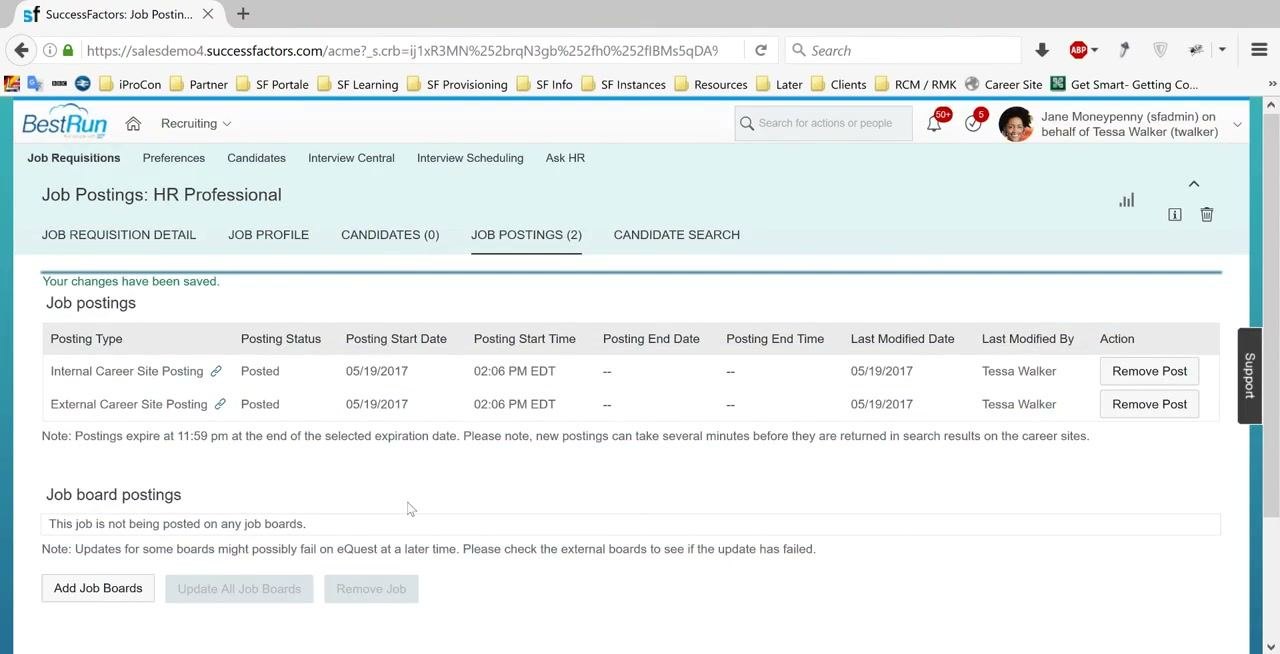
After posting, confirm that the Posting Status for both Internal and External Career Site Posting is "Posted." The Posting Start Date and Posting Start Time should reflect the values you selected (for example, 05/19/2017, 02:06 PM EDT).
The Last Modified Date and Last Modified By columns update to show the posting details (for example, Tessa Walker). To unpublish the job from a specific site, click the Remove Post button.
Manage job board postings
To post the job to external job boards, click the Add Job Boards button in the "Job board postings" section. The job is not currently posted on any job boards.
Use Update All Job Boards or Remove Job as needed to manage postings on external boards. Updates for some boards may be delayed, so check the external boards to confirm.
Finalize and monitor the process
After publishing, monitor the workflow to make sure all steps are complete and the requisition is visible on the intended career sites. If further actions are required, such as additional approvals or edits, follow your organization's workflow procedures.
Summary
You now know how to create a job requisition in SuccessFactors from start to finish. You created a requisition from the Standard Job Requisition template and selected a job family and role. You completed the required fields, defined the requisition team, and added screening questions with scoring. After the manager approved the requisition, the recruiting team posted it to the internal and external career sites.
Each step in the workflow is tracked and documented, with opportunities to add comments and notifications along the way.
What's next
- Monitor the requisition on the Job Requisitions summary page to confirm it is visible on the intended career sites.
- Add the job to external job boards with Add Job Boards, and check those boards for updates.
- Follow your organization's workflow procedures if the requisition needs further approvals or edits.
Generation details: cost, quality tiers
Docsie billed 5,500 credits ($3.85) to analyze this 11-minute video at standard quality. The rewrite, template fill and Word/PDF exports were included. The same video at each quality tier:
| Quality | Frames sampled | Credits | Approx. cost |
|---|---|---|---|
| Draft | every 16-30 s | 2,750 | $1.92 |
| Standard (this guide) | every 8-15 s | 5,500 | $3.85 |
| Detailed | every 4-7 s | 11,000 | $7.70 |
| Ultra | every 1-3 s | 22,000 | $15.40 |
Credits priced at $0.70 per 1,000; plans include a monthly allowance. Enterprise customers on on-premise or bring-your-own-model deployments run this on their own inference and pay no per-video credits.
Generated by Docsie Video-to-Docs on 2026-11-15 from a 10-minute video. Screenshots are frames from the source video and belong to their creator, Sven Ringling - Cloud HXM, whose original is embedded above. If you own this video and want the guide removed or credited differently, contact us and we will act within one business day.