
How to Export Foundation Data in SuccessFactors
Many customers use the import and export method to make mass changes to MDF (Metadata Framework) objects instead of editing each record by hand. This guide shows how to export foundation data in SuccessFactors, edit it in a spreadsheet, and import it back. It uses a position record, "VP of Finance – Financial Services", as the example.
Video: How to Export Existing MDF Foundation data using Imports&Exports In Successfactors Employee Central by SAP SuccessFactors Learning (2024). All credit for the demonstration goes to the creator; watch the original on YouTube. The written guide below was generated from this video by Docsie. Creator? Request a change or removal.
Many customers use the import and export method to make mass changes to MDF (Metadata Framework) objects instead of editing each record by hand. This guide shows how to export foundation data in SuccessFactors, edit it in a spreadsheet, and import it back. It uses a position record, "VP of Finance – Financial Services", as the example.
You first review and edit an existing record, then export it, prepare the edited CSV file, import it, and verify the result.
Prerequisites
Before you start, make sure you have:
- Access to Manage Data, Import and Export Data, and Monitor Jobs in SAP SuccessFactors.
- An MDF object with existing records, such as a position.
- A spreadsheet application that opens CSV files, such as OpenOffice Calc.
- A folder on your computer where you can store the exported files by version.
Review an existing record
Open Manage Data
- On the SAP SuccessFactors home screen, click the search bar at the top.
- Type
manage da. - Select Manage Data from the dropdown list.
Find the position and start a correction
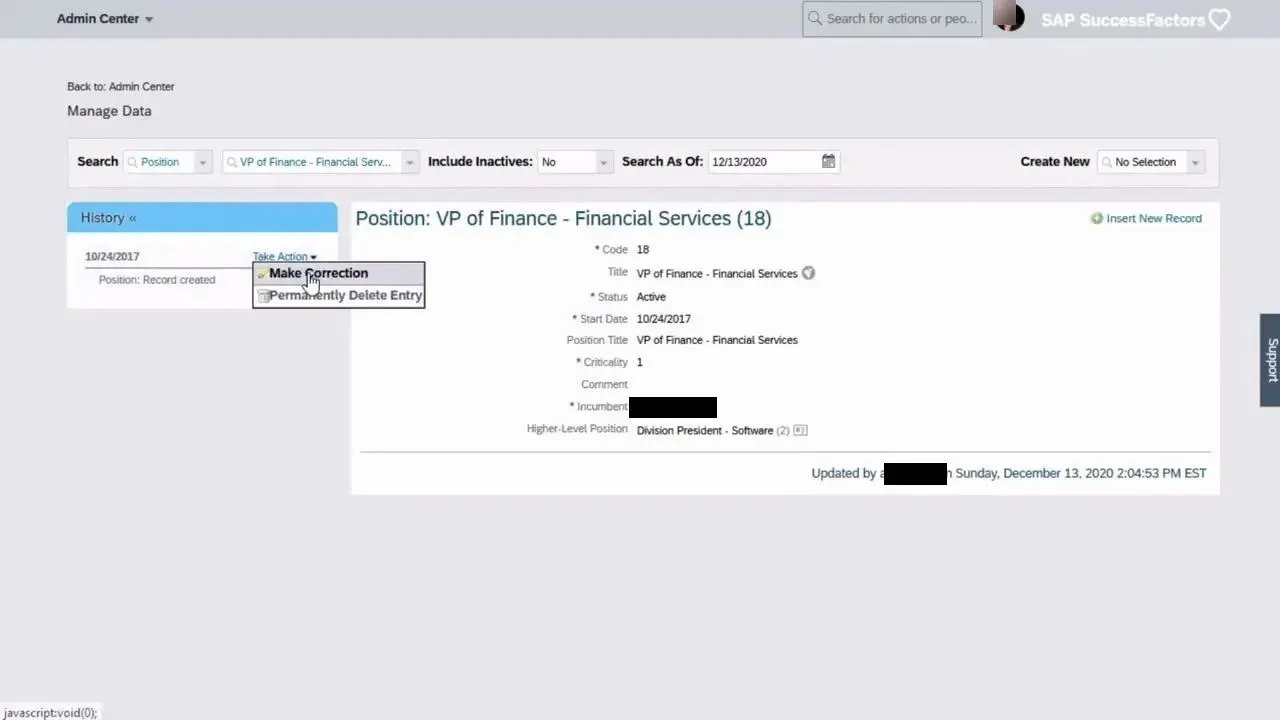
- On the Manage Data screen, set Search by to Position.
- Enter the position name VP of Finance – Financial Services and locate the record in the results.
- In the position details, click Take Action.
- Select Make Correction.
Change the position title and check translations
- In the editable fields, update the position title. For example, add your initials so the title reads VP of Finance – Financial Services OB.
- If translations are available, a dialog appears. Review the Default Value and any language-specific fields, such as French (Canada). Change them if necessary, or leave them as they are.
- Click Done to close the translations dialog.
Save the change
Click Save. The record updates and a "Successfully Saved" message appears.
Export the data
Open Import and Export Data
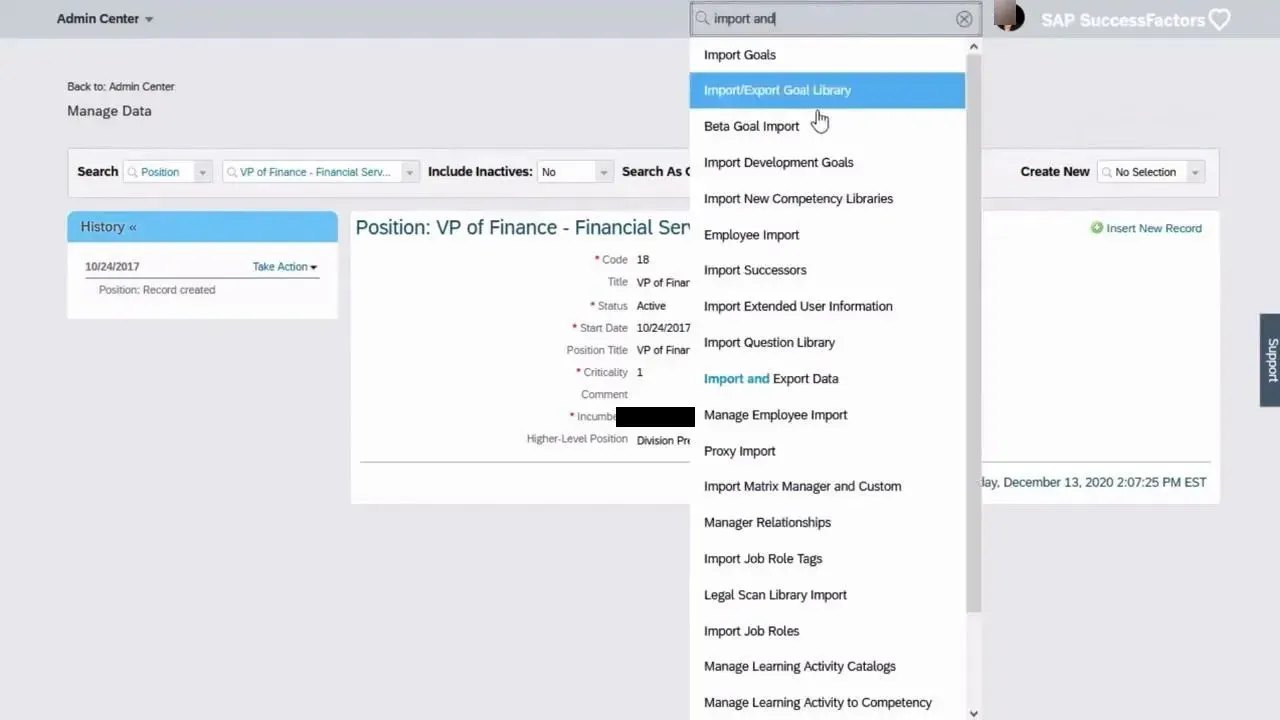
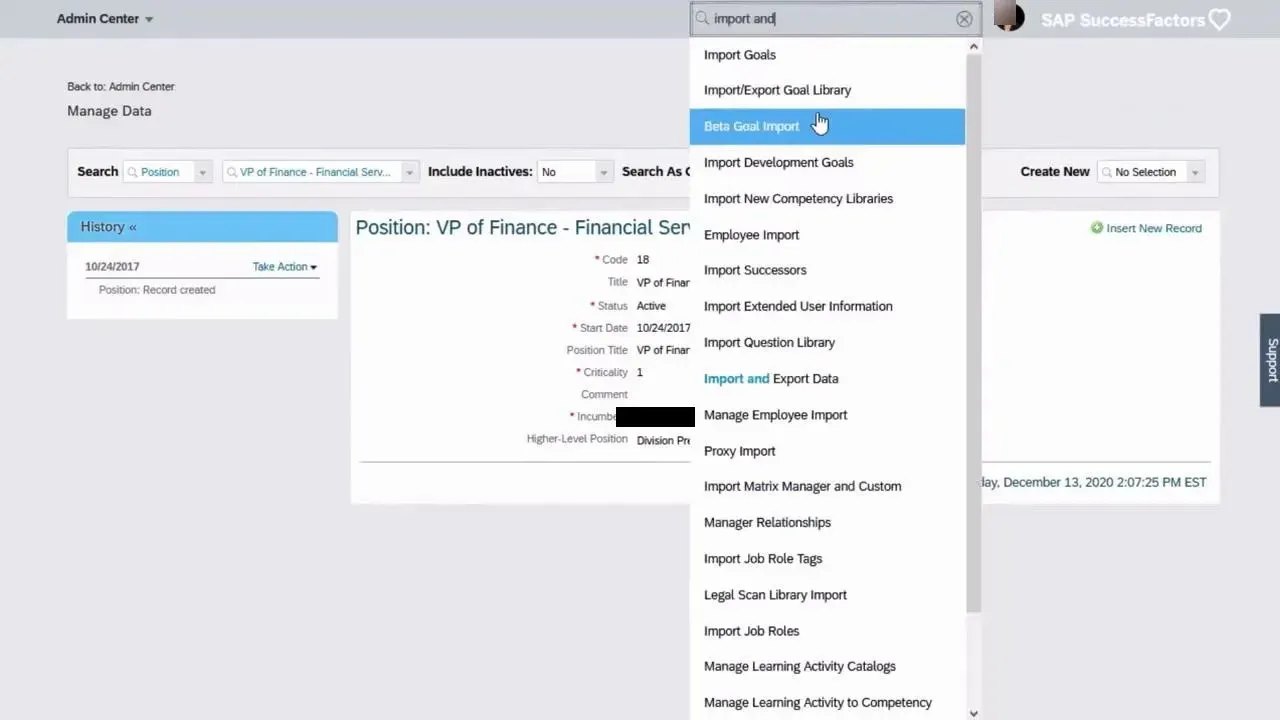
- Click the search bar again.
- Type
import and. - Select Import and Export Data from the dropdown list.
Configure the settings to export foundation data in SuccessFactors
On the Import and Export Data screen:
- Set Select the action to perform to Export Data.
- For Select Generic Object, type and select Position.
- Set Include dependencies to No.
Leave the other options at their defaults unless you need to change them:
- Include Immutable IDs: No
- Include Inactive Records: No
- Exclude reference objects: No
- Select all data records: Yes
- Key Preference: Business Key
- Hide External Code: No
- Identity Type: User ID
Run the export
Click Export to start the export process.
Download the exported file from Monitor Jobs
- Use the search bar to go to Monitor Jobs.
- Find your most recent export job at the top of the list.
- On the right side of the job row, click Download Status.
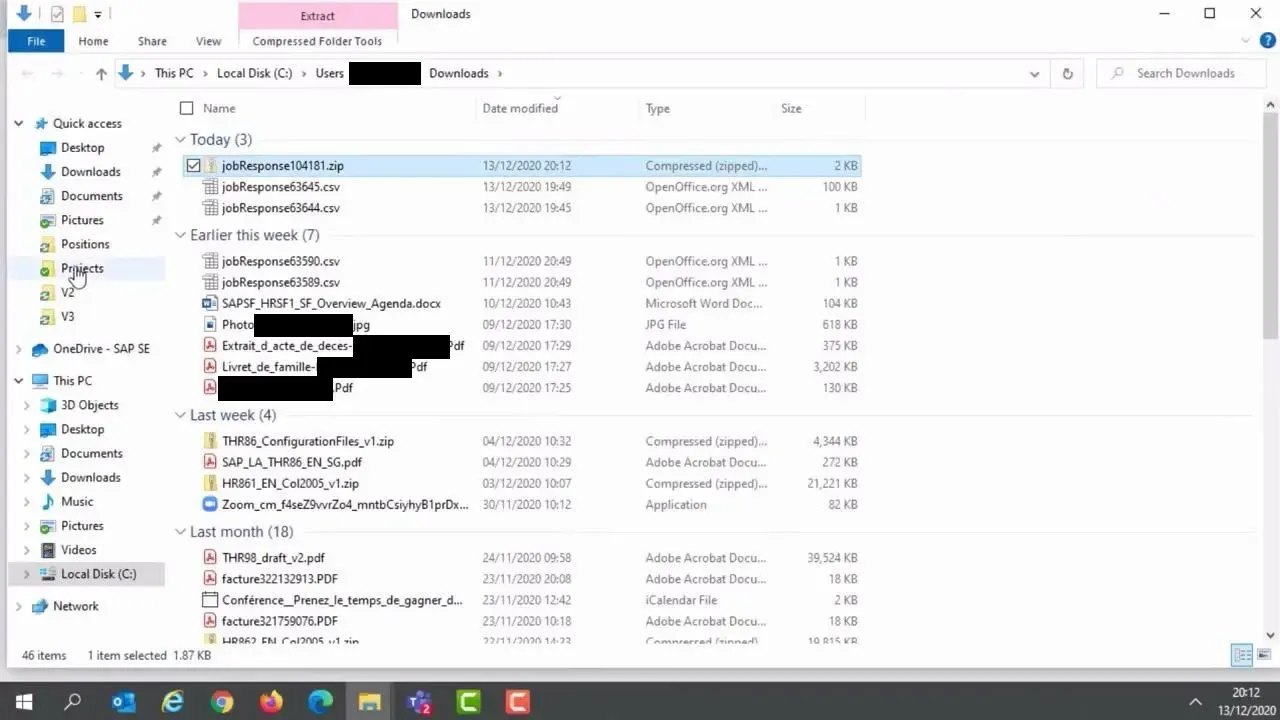
- When prompted, select Save File for the ZIP archive (for example,
jobResponse104181.zip). - Click OK to save the file to your computer.
Prepare the edited CSV file
Create a folder for the current version
- In your positions directory (for example,
Desktop > Videos THR80 > Positions), right-click and select New > Folder. - Name the folder according to your versioning scheme, such as
V5.
Move the ZIP file into the version folder
- Open your Downloads folder, or wherever you saved the ZIP file.
- If you keep several versions of your position files, make sure you have a folder for this version, such as
V5. - Move the downloaded ZIP file into that folder.
Extract and open the CSV
- Go to your version folder (for example,
V5). - Extract the contents of
jobResponse104181.zip. - Find the extracted CSV file, such as
Position.csv. - Open it in a spreadsheet application such as OpenOffice Calc.
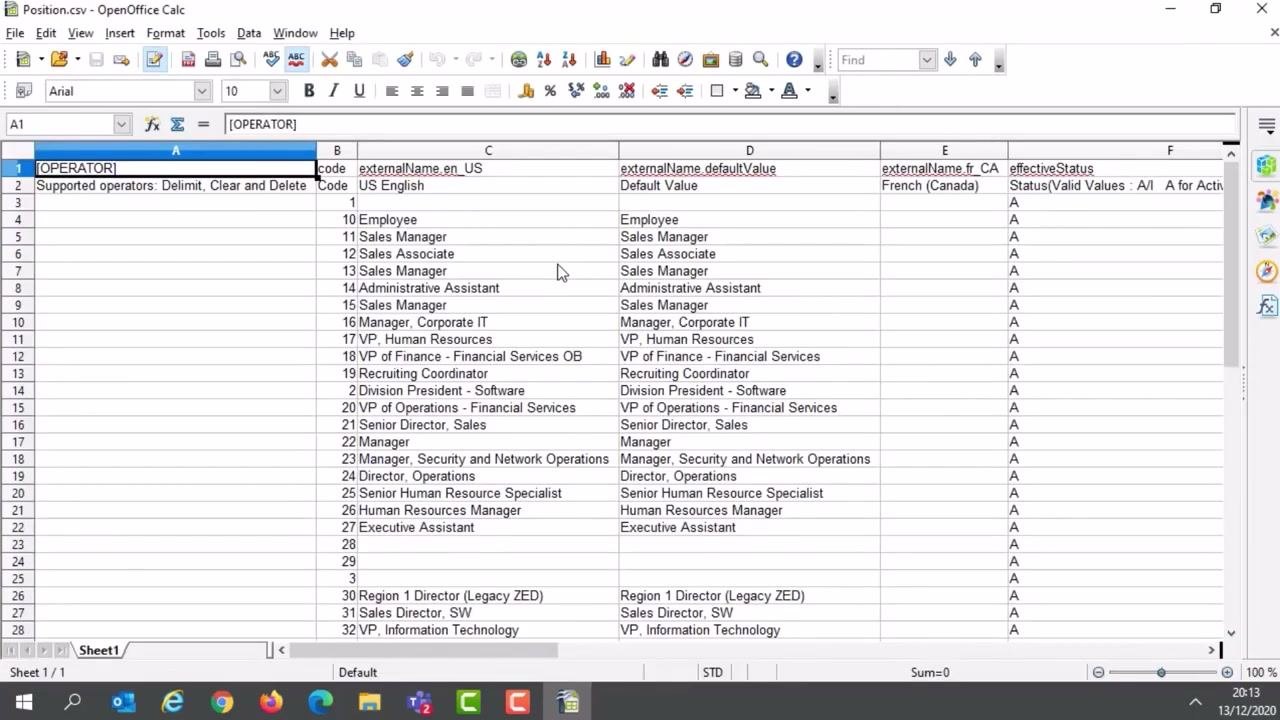
Find the target position
Review the columns in the spreadsheet:
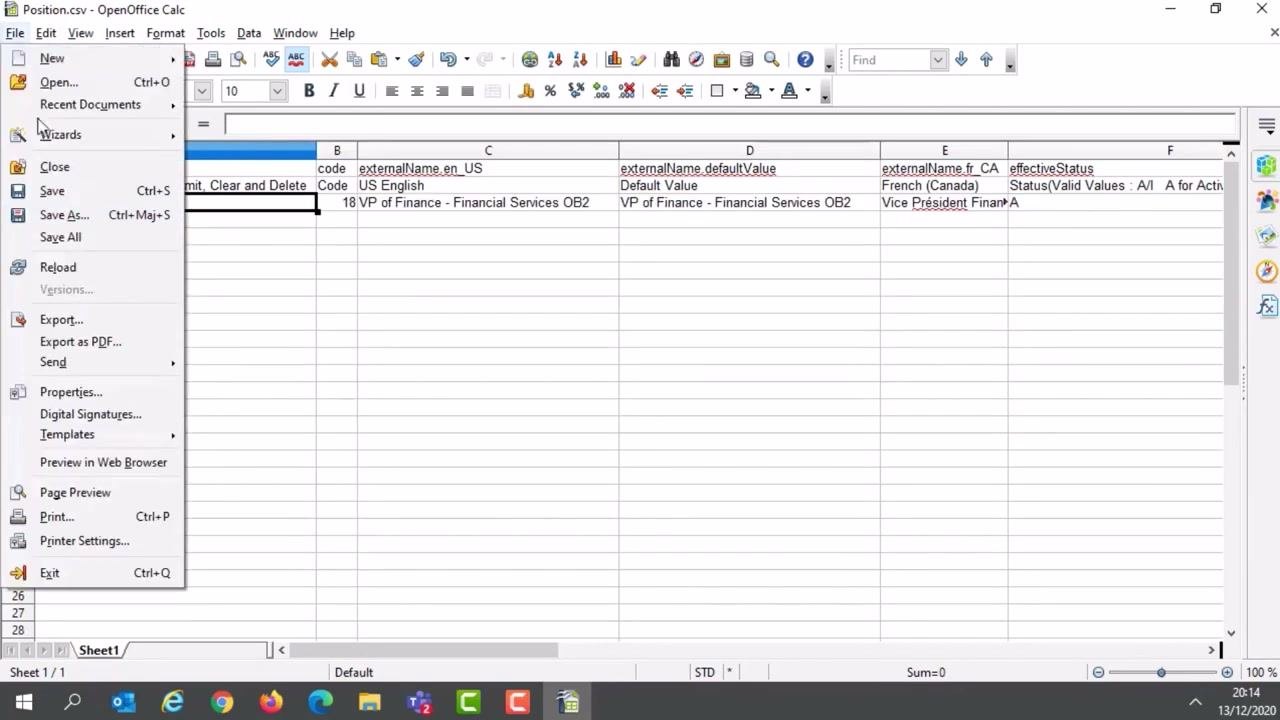
code: the position codeexternalName_en_US: the US English nameexternalName_defaultValue: the default valueexternalName_fr_CA: the French (Canada) nameeffectiveStatus: A for Active
Locate the row for your target position, for example VP of Finance – Financial Services OB.
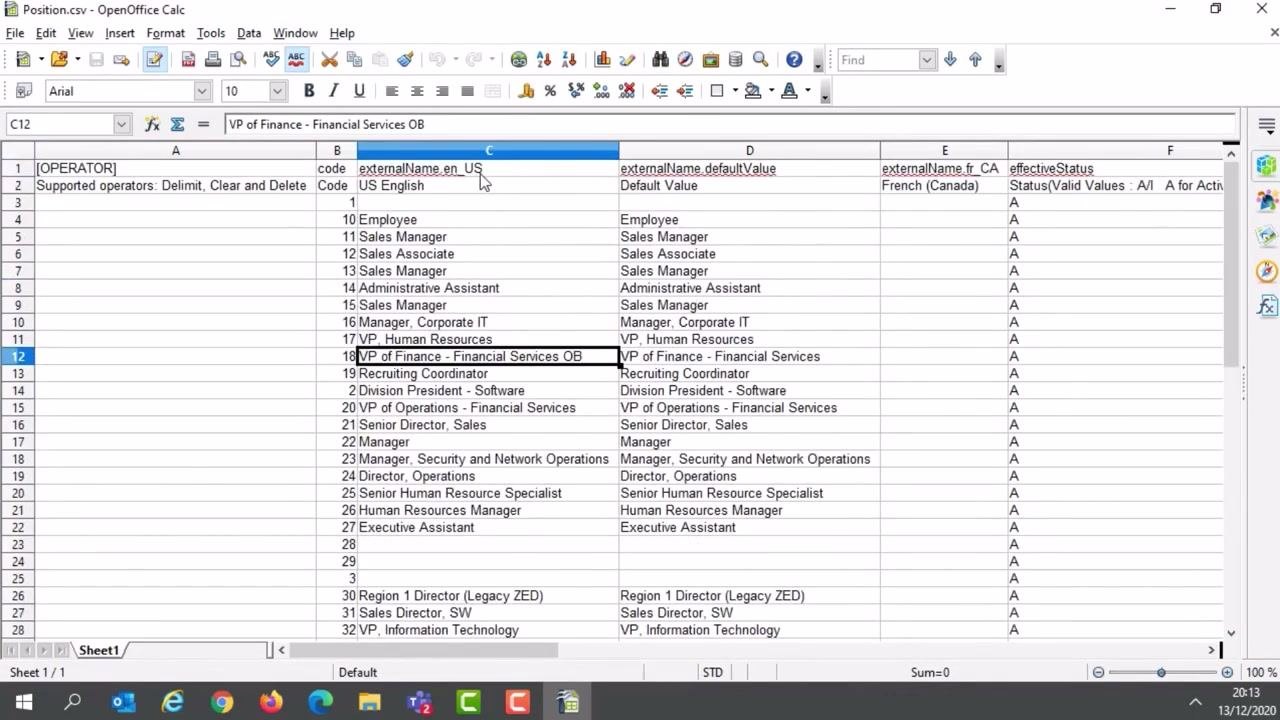
Edit the position data
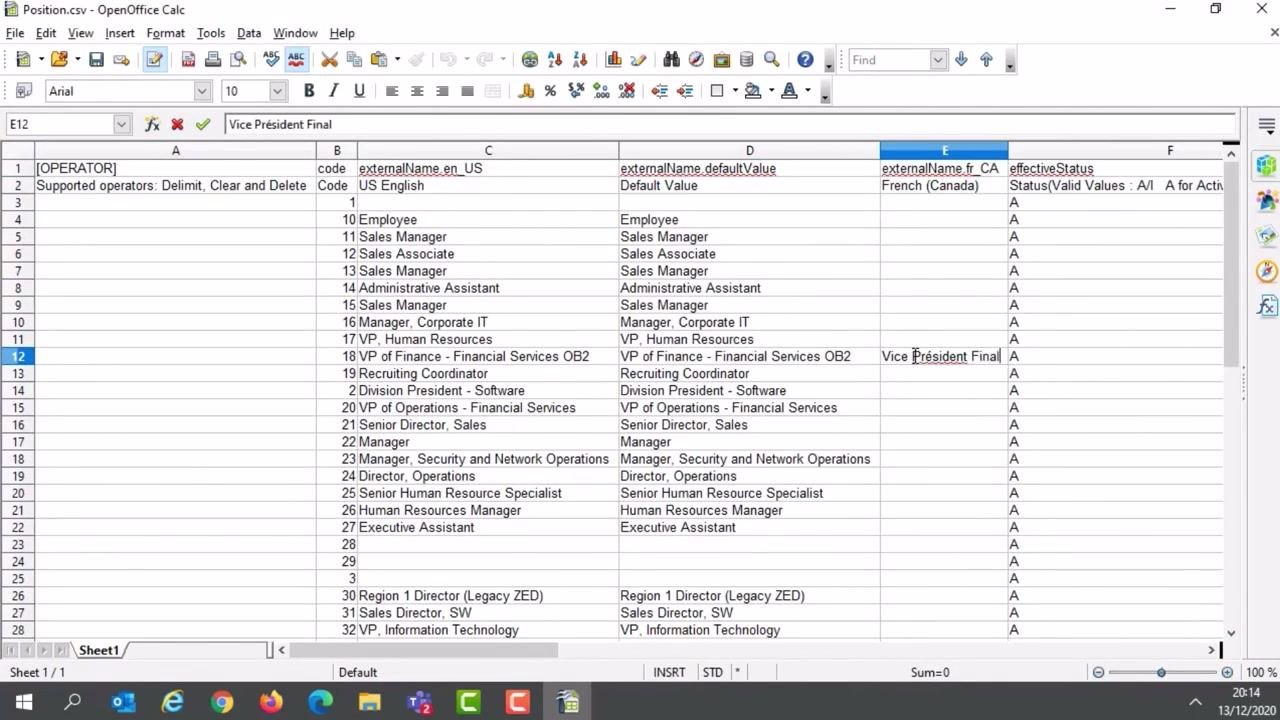
- Change
externalName_en_USandexternalName_defaultValuefrom VP of Finance – Financial Services OB to VP of Finance – Financial Services OB2. - If needed, update the French (Canada) translation. For example, set
externalName_fr_CAto Vice President Final.
You can add a distinguishing number or text to show that the record is a new version.
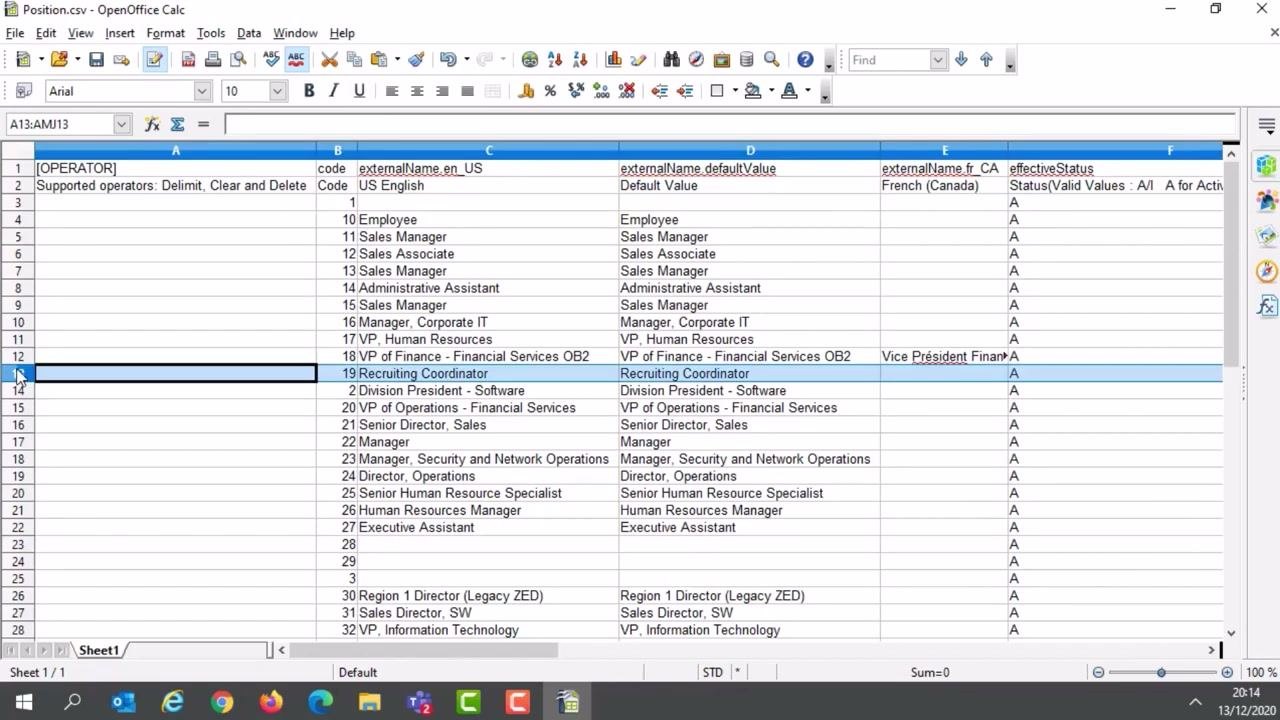
Remove the records you don't need
- Select all rows except the header and your target position.
- Right-click the selection and choose Delete Rows or Delete Contents.
- Confirm that only row 1 (the header) and row 2 (your edited position) remain.
Verify your edits
Check the spreadsheet to confirm your changes:
externalName_en_US(column C) for your target position (for example, code 18) reads VP of Finance – Financial Services OB2.externalName_defaultValue(column D) matches the new value, VP of Finance – Financial Services OB2.externalName_fr_CA(column E) shows Vice President Final or your preferred translation.
Also confirm that only the header and the relevant position row remain.
Save the edited CSV as a new version
- Open the File menu and select Save As.
- Enter a new filename for version control, such as
PositionV2.csv. - Click Save.
Close the file and return to SAP SuccessFactors
Make sure PositionV2.csv is saved and closed in your spreadsheet application. Then return to the SAP SuccessFactors Admin Center.
Import the data
Open Import and Export Data again
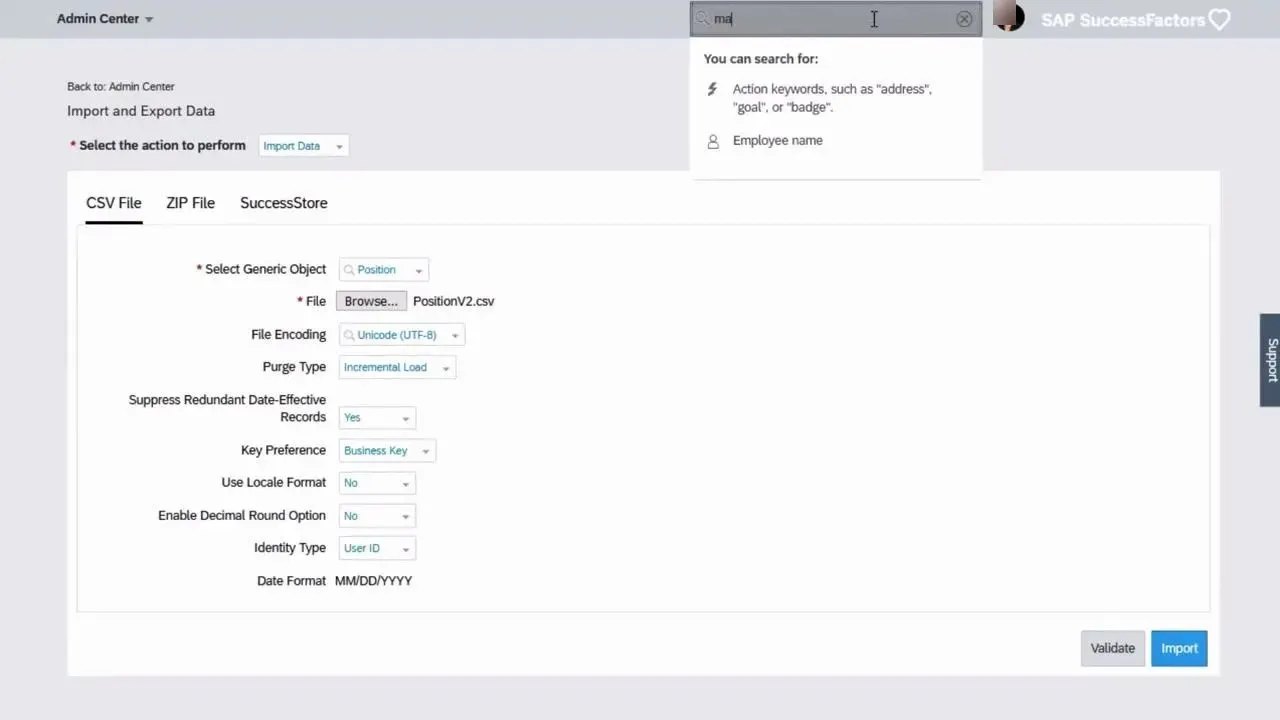
- In the Admin Center, use the search bar at the top to search for Import and Export Data.
- Select Import and Export Data from the search results.
Choose the import action and file type
- In the Import and Export Data section, choose Import instead of Export.
- Select CSV file as the file type. Don't select the ZIP or SuccessFactors Tour options.
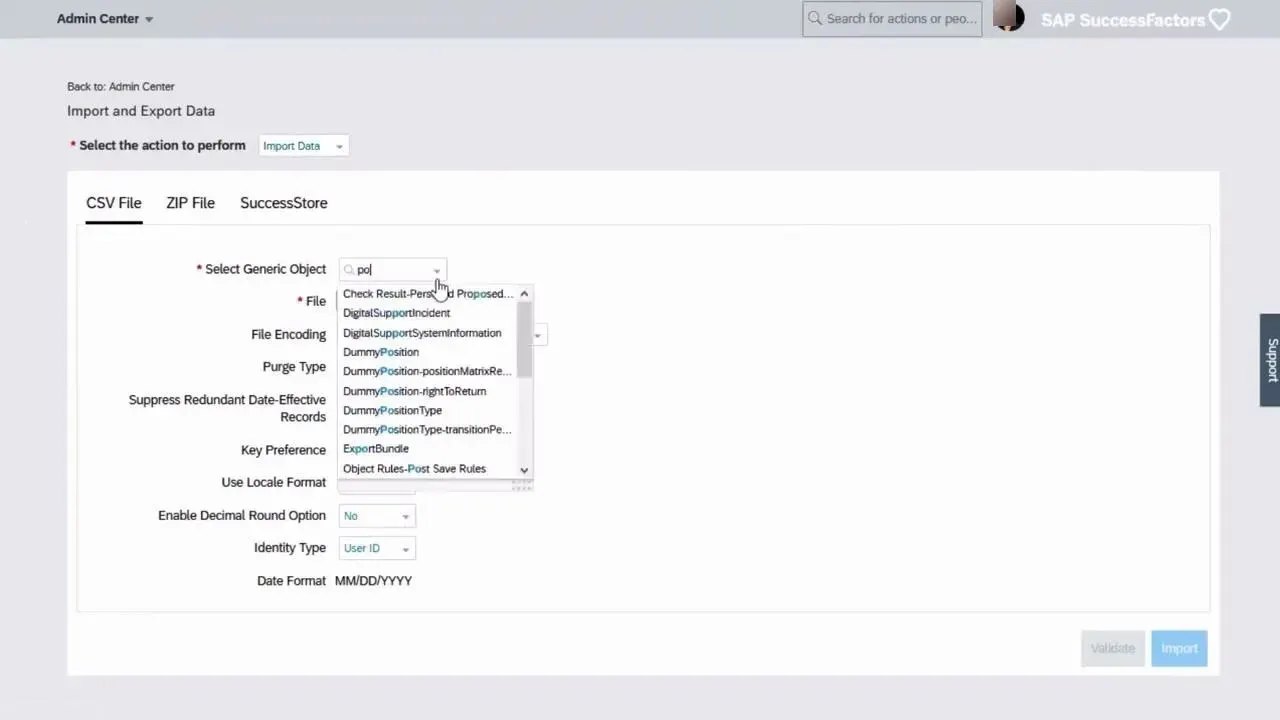
Select the generic object
- On the CSV File tab, find Select Generic Object.
- Start typing
Positionto filter the list. - Select Position from the filtered options.
Select your file
Click Browse... next to the File field and select your import file, for example PositionV2.csv.
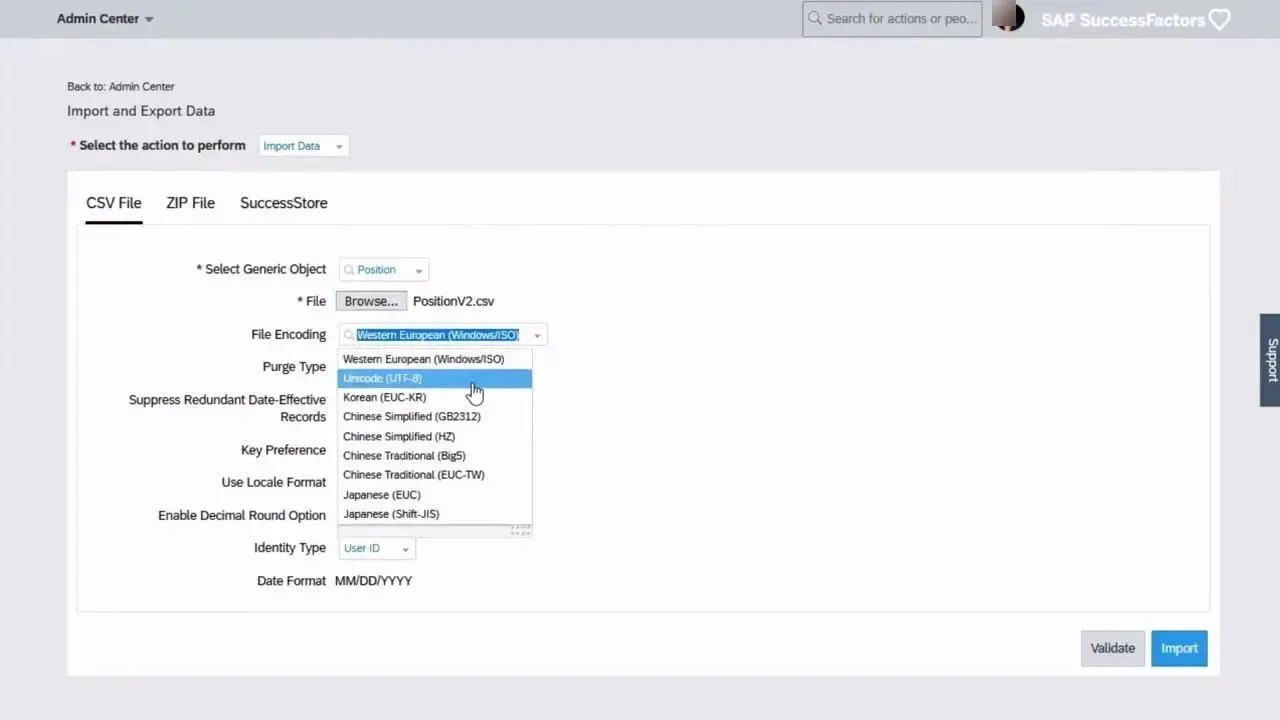
Set the file encoding
Open the File Encoding dropdown and select Unicode (UTF-8). This is the best practice.
Set the purge type
Set Purge Type to Incremental Load. This imports only new or changed data.
Review the remaining options
Leave the remaining options at their defaults unless you have specific requirements:
- Suppress Redundant Date-Effective Records: Yes
- Key Preference: Business Key
- Use Locale Format: No
- Enable Decimal Round Option: No
- Identity Type: User ID
- Date Format: MM/DD/YYYY
Validate the file (optional)
If you're unsure about the data you're importing, click Validate to check the file before importing. You can monitor the job status later to make sure everything is processed correctly.
Run the import
After validation, or if you're confident in your file, click Import to upload the data. A confirmation message appears:
"Your file has been uploaded to the server successfully, and will be examined for the proper text file format. An email notification will be generated once your file has been processed indicating the final status of your request. The import/validation process can take up to an hour, depending on the size of the uploaded file. If you do not receive an email notification regarding your process, please contact our technical support."
Verify the position data
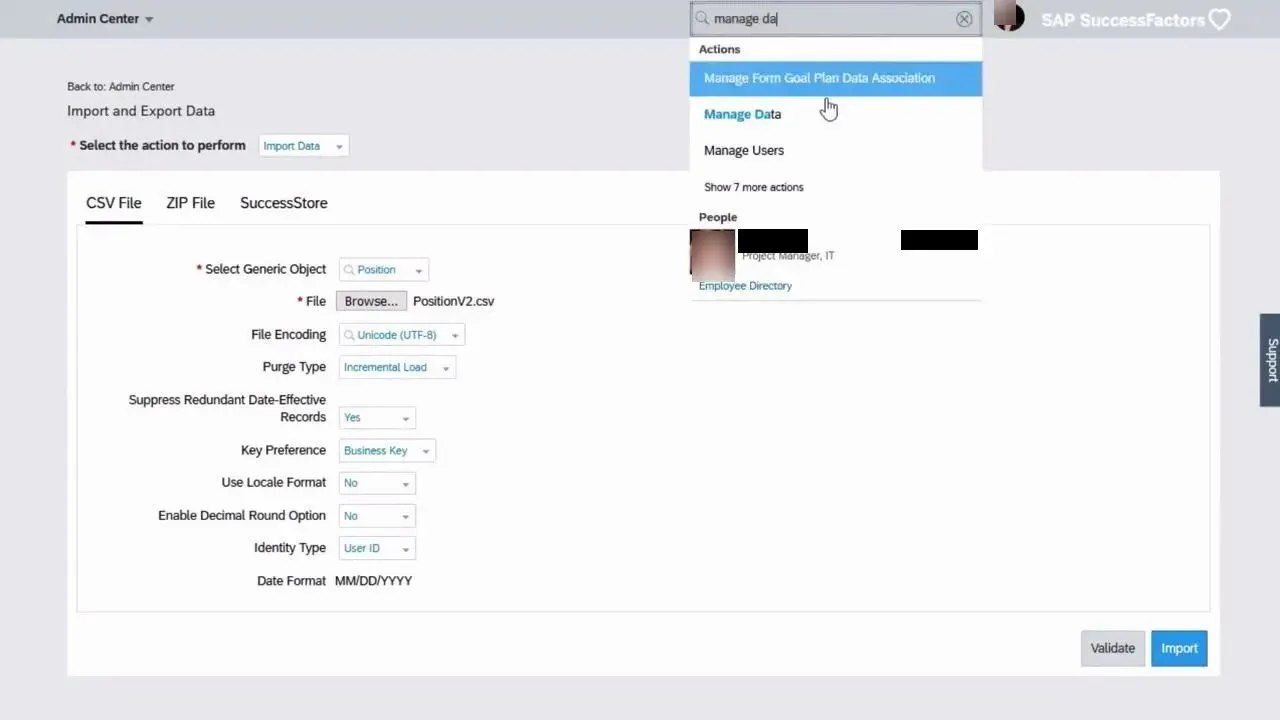
Reopen Manage Data
In the search bar at the top, start typing manage data and select Manage Data from the Actions list.
Search for the imported position
On the Manage Data screen, search for the imported position, for example "VP of Finance - Financial Services OB2". Confirm that the record appears with the correct details, such as code, title, status, start date, incumbent, and higher-level position.
Check the translations
- Click the information icon next to the position title.
- Review the translations in the popup. For example, Default Value shows VP of Finance - Financial Services OB2 and French (Canada) shows Vice Président Finance OB2.
- Click Done to close the popup.
What's next
You can repeat this process for other MDF objects. Export the object, edit only the rows you need, save the file as a new version, and import it with Incremental Load.
Summary
You now know how to export foundation data in SuccessFactors and use import and export to make mass changes. You exported the Position object from Import and Export Data, downloaded the ZIP file from Monitor Jobs, and edited the CSV in a spreadsheet. You then imported the file and checked the updated record and its translations in Manage Data.
Generation details: cost, quality tiers
Docsie billed 3,500 credits ($2.45) to analyze this 7-minute video at standard quality. The rewrite, template fill and Word/PDF exports were included. The same video at each quality tier:
| Quality | Frames sampled | Credits | Approx. cost |
|---|---|---|---|
| Draft | every 16-30 s | 1,750 | $1.22 |
| Standard (this guide) | every 8-15 s | 3,500 | $2.45 |
| Detailed | every 4-7 s | 7,000 | $4.90 |
| Ultra | every 1-3 s | 14,000 | $9.80 |
Credits priced at $0.70 per 1,000; plans include a monthly allowance. Enterprise customers on on-premise or bring-your-own-model deployments run this on their own inference and pay no per-video credits.
Generated by Docsie Video-to-Docs on 2026-11-15 from a 6-minute video. Screenshots are frames from the source video and belong to their creator, SAP SuccessFactors Learning , whose original is embedded above. If you own this video and want the guide removed or credited differently, contact us and we will act within one business day.