
How to Create a User in SuccessFactors
If you need to know how to create a user in SuccessFactors, you can do it in several ways. This guide covers the first method, the User Data File (UDF). You download the user data template from the Admin Center, fill in the user details, save the file as CSV, and prepare it for import or further processing.
Video: SAP SuccessFactors UDF User Creation Tutorial | Learn SAP SuccessFactors | SAP Training | Upptalk by Upptalk (2024). All credit for the demonstration goes to the creator; watch the original on YouTube. The written guide below was generated from this video by Docsie. Creator? Request a change or removal.
If you need to know how to create a user in SuccessFactors, you can do it in several ways. This guide covers the first method, the User Data File (UDF). You download the user data template from the Admin Center, fill in the user details, save the file as CSV, and prepare it for import or further processing.
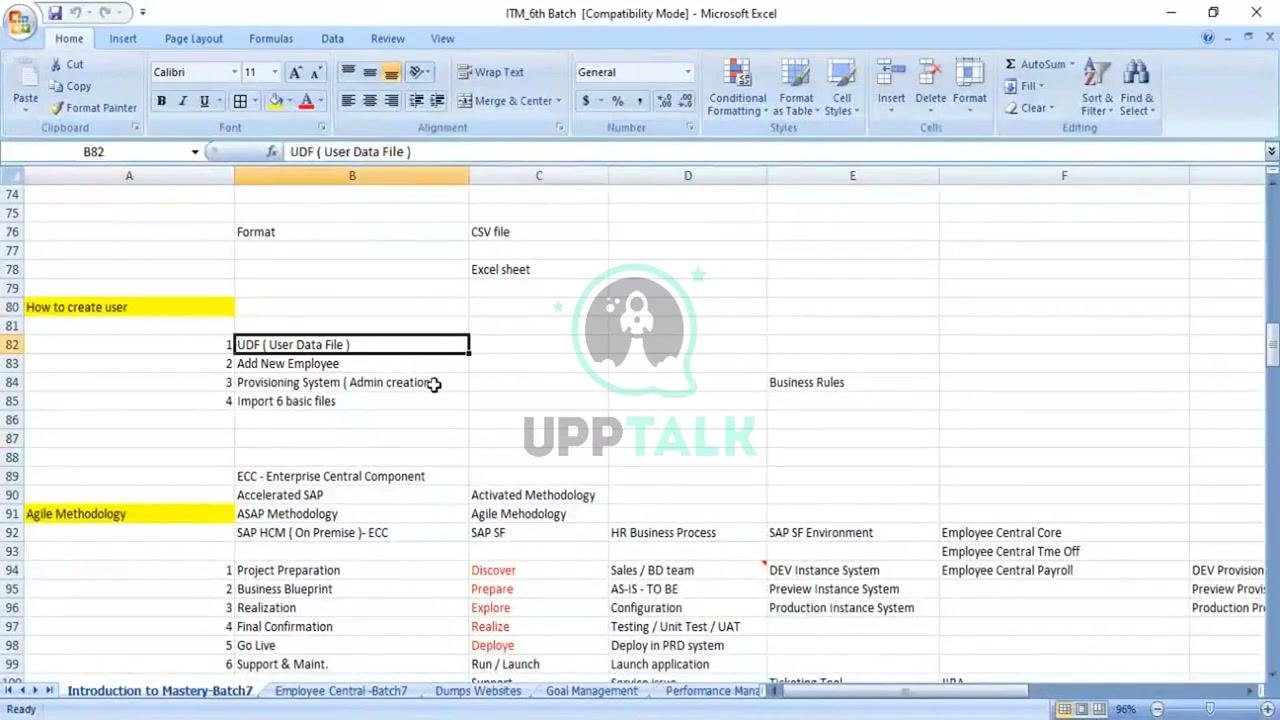
User creation methods
You can create a user in the system with any of these methods:
- UDF (User Data File)
- Add New Employee
- Provisioning System (Admin creation)
- Import 6 basic files
Prerequisites
Before you start, make sure you have:
- Your login credentials for the Uptalk platform.
- Access to the Employee Export option and the Admin Center.
- Microsoft Excel or a compatible spreadsheet editor.
- The user information you need to enter, such as status, user ID, name, email, and organizational details.
- Confirmation from your organization or customer of whether the USERID should match the user's email or another unique value.
Steps to create a user in SuccessFactors with the UDF
Log in to the Uptalk platform
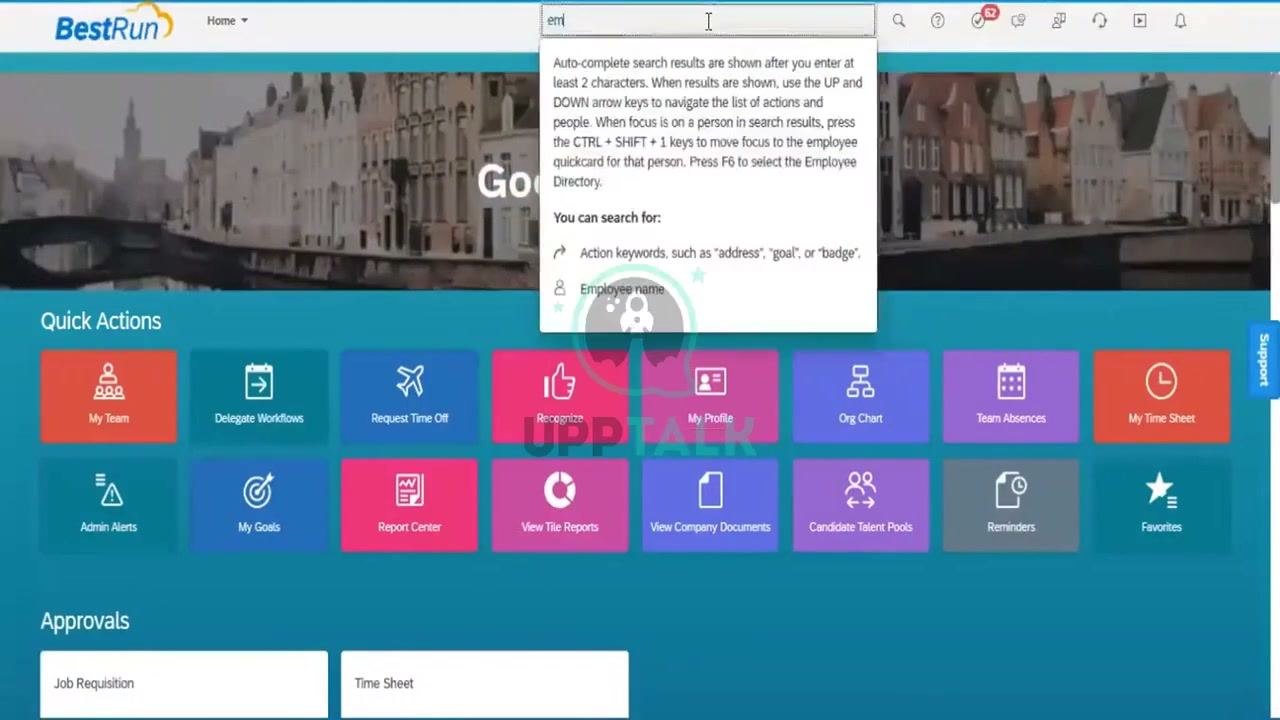
Open the Uptalk platform and sign in with your credentials. After a successful login, the home page opens and shows Quick Actions and other dashboard elements.
Search for Employee Export
To create a user via UDF, you first need the user data template. In the search bar at the top of the dashboard, type "employee expo". Then select Employee Export from the dropdown list.
Download the user data file template
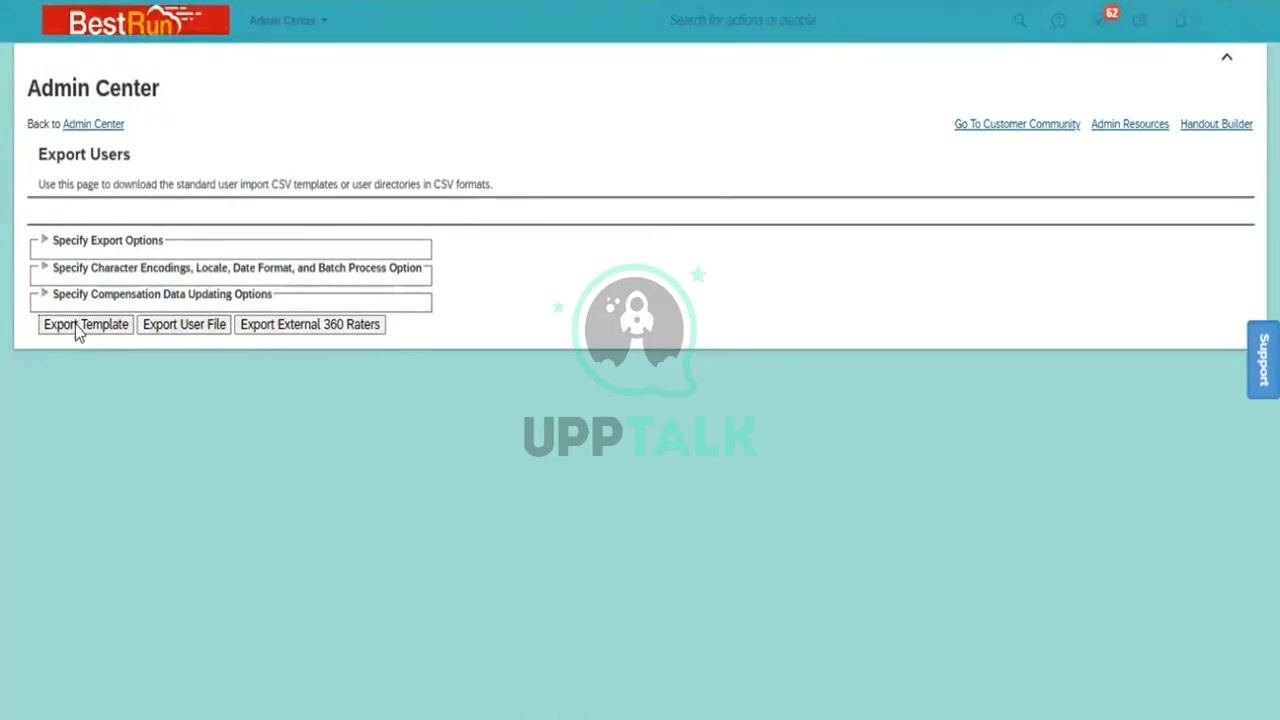
Selecting Employee Export takes you to the Export Users page in the Admin Center. Here you can download standard user import CSV templates or user directories in CSV format. The page also offers export settings, character encodings, and compensation data options.
Click Export Template to download the user data file template.
Open the downloaded template
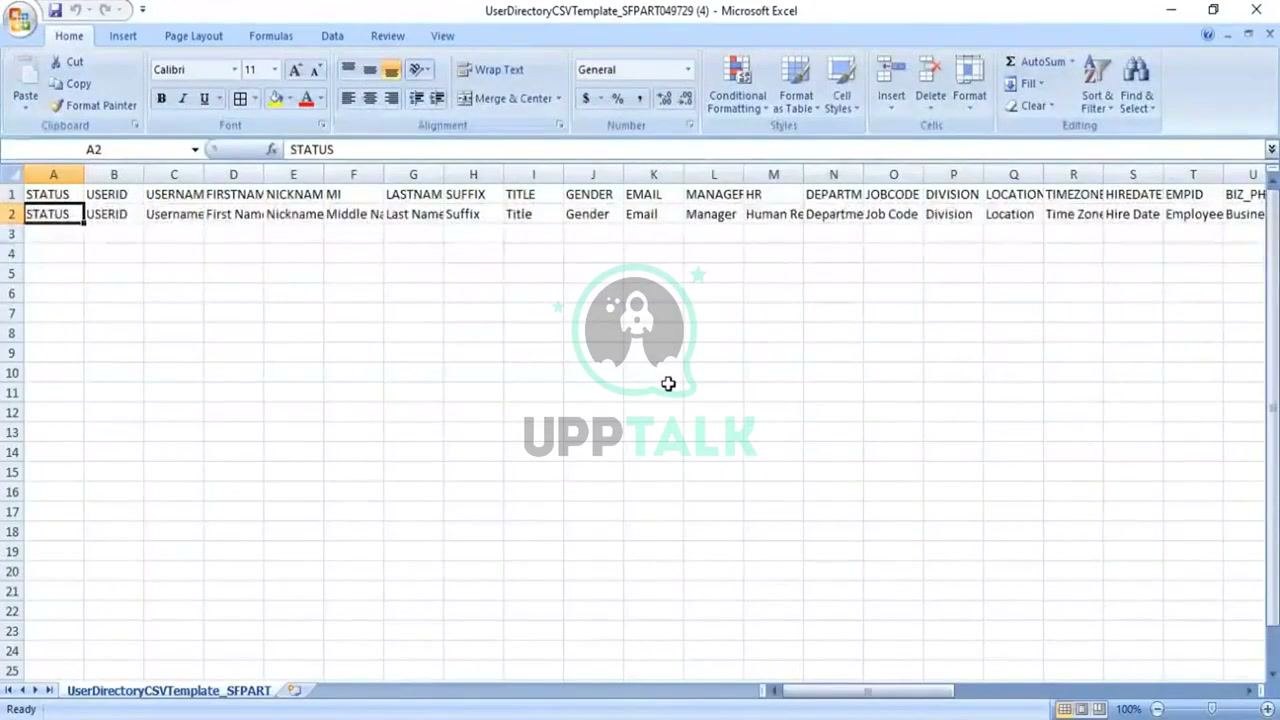
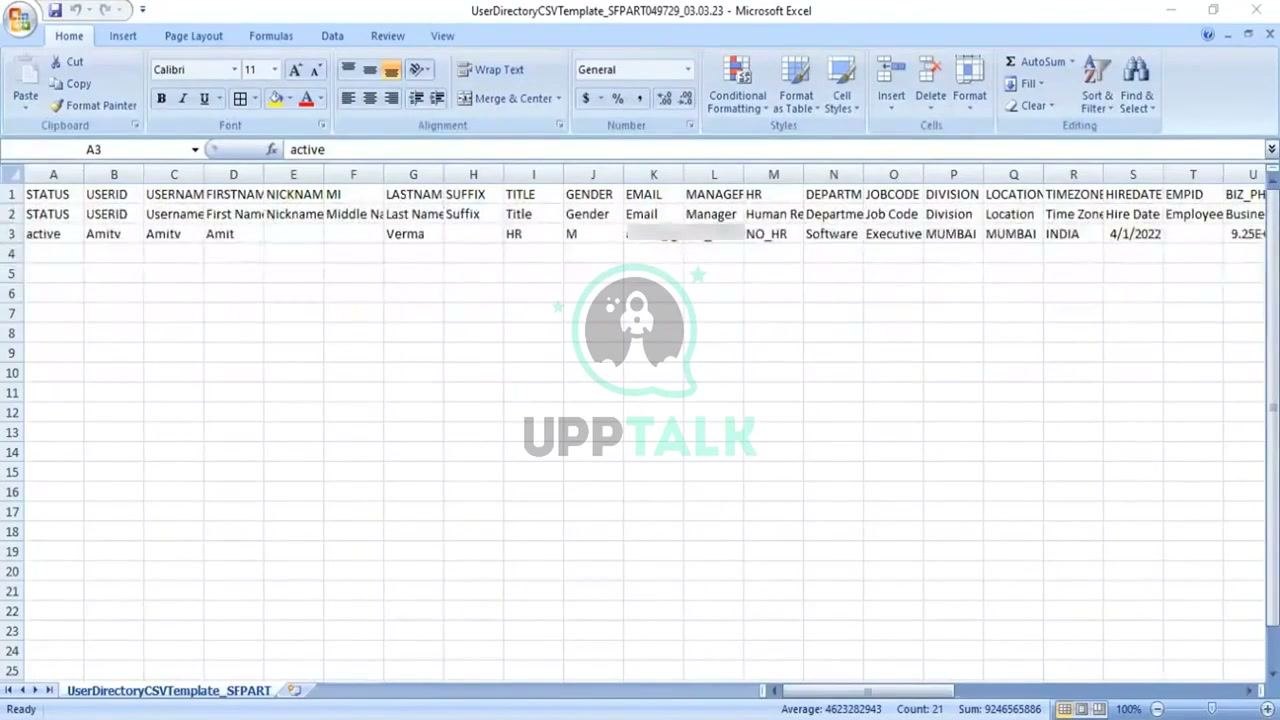
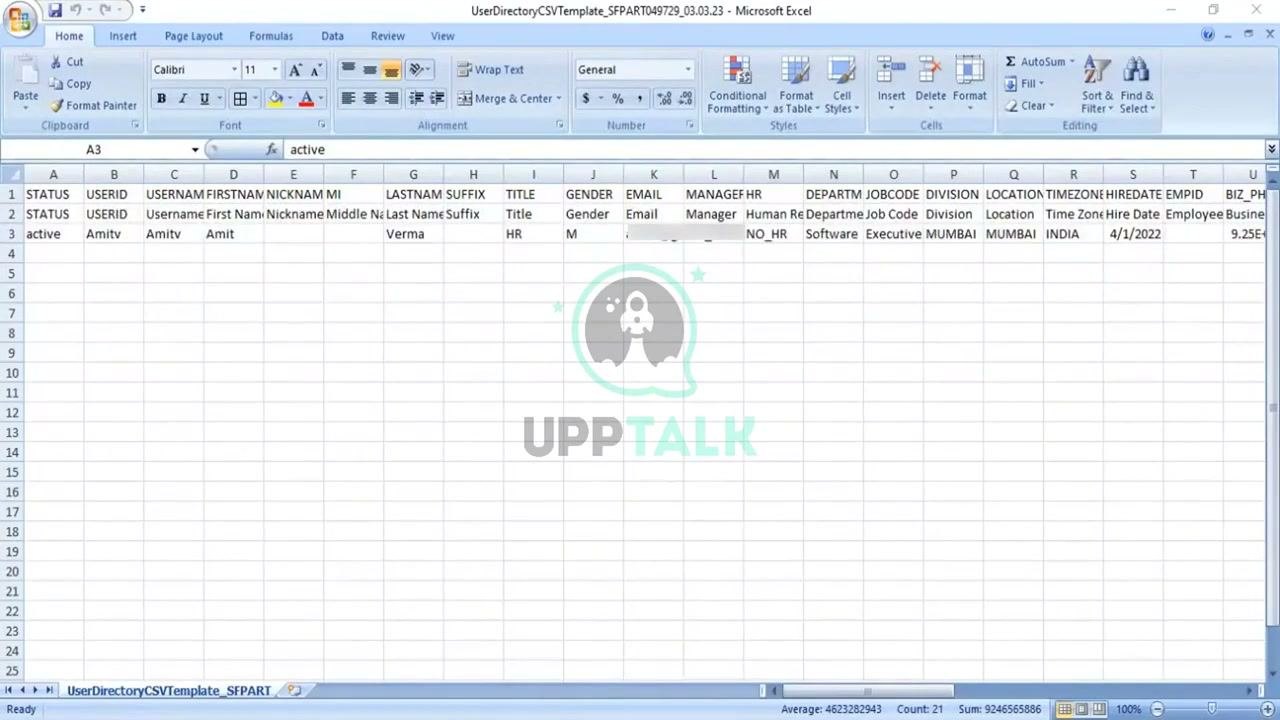
Find the downloaded file in your Downloads folder. It is typically named UserDirectoryCSVTemplate_SFPART049729.csv or similar. Open it in Microsoft Excel or a compatible spreadsheet editor, and confirm that it opens and is visible on your screen.
Review the structure of the template
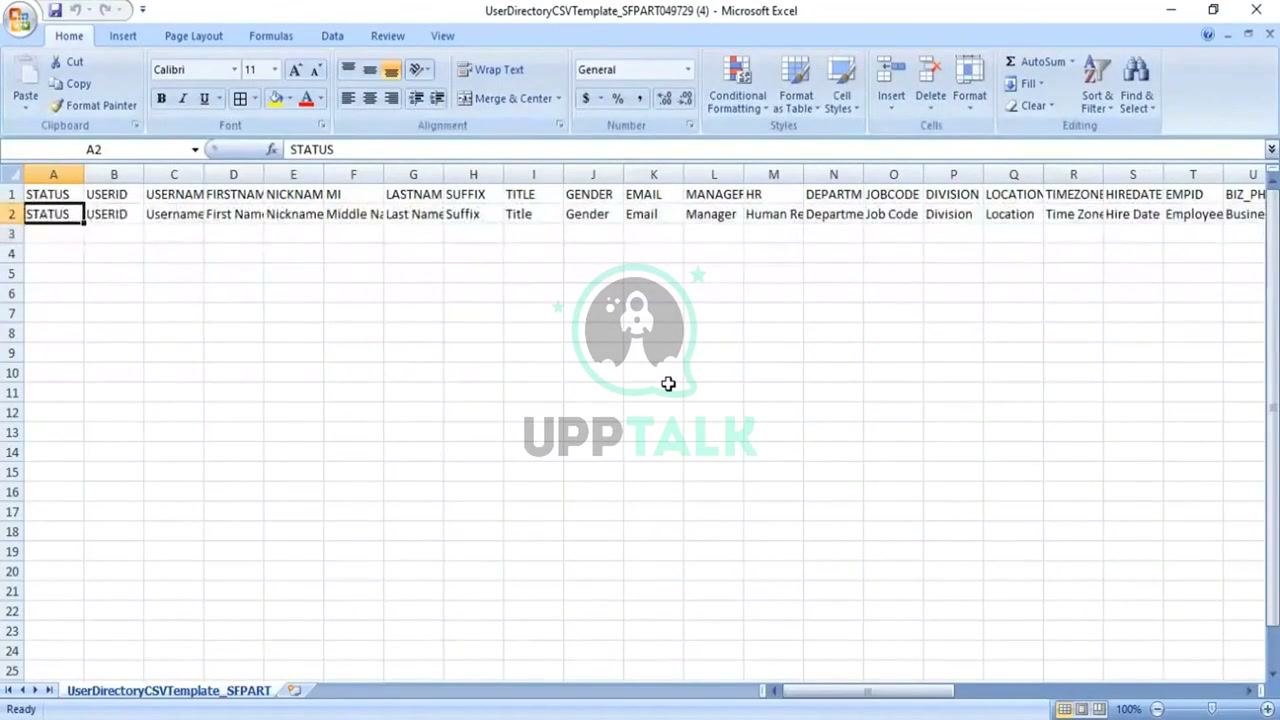
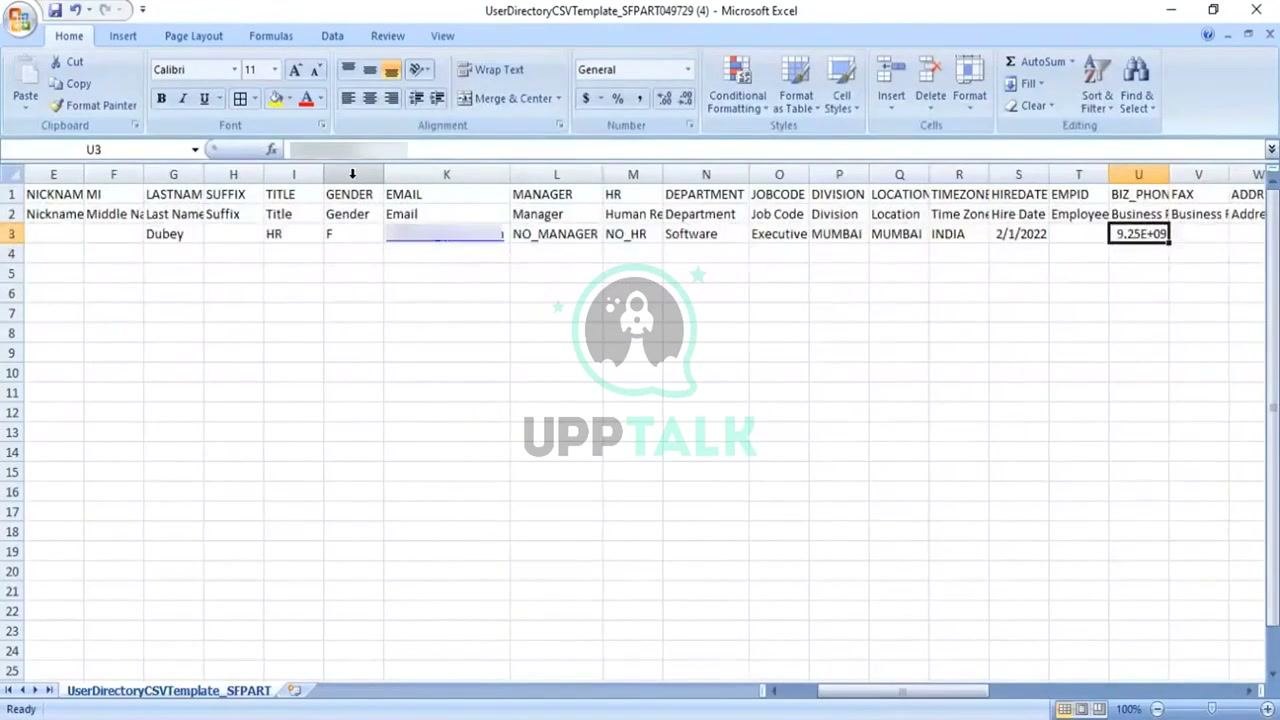
The template is blank except for the header row and a sample row. Each column represents a user attribute that you fill in to create a new user. The columns include:
- STATUS, USERID, USERNAME, FIRSTNAME, NICKNAME, MI (Middle Initial), LASTNAME, SUFFIX
- TITLE, GENDER, EMAIL, MANAGER, HR, DEPARTMENT, JOBCODE, DIVISION
- LOCATION, TIMEZONE, HIREDATE, EMPID, and additional fields as required
Understand the data entry requirements
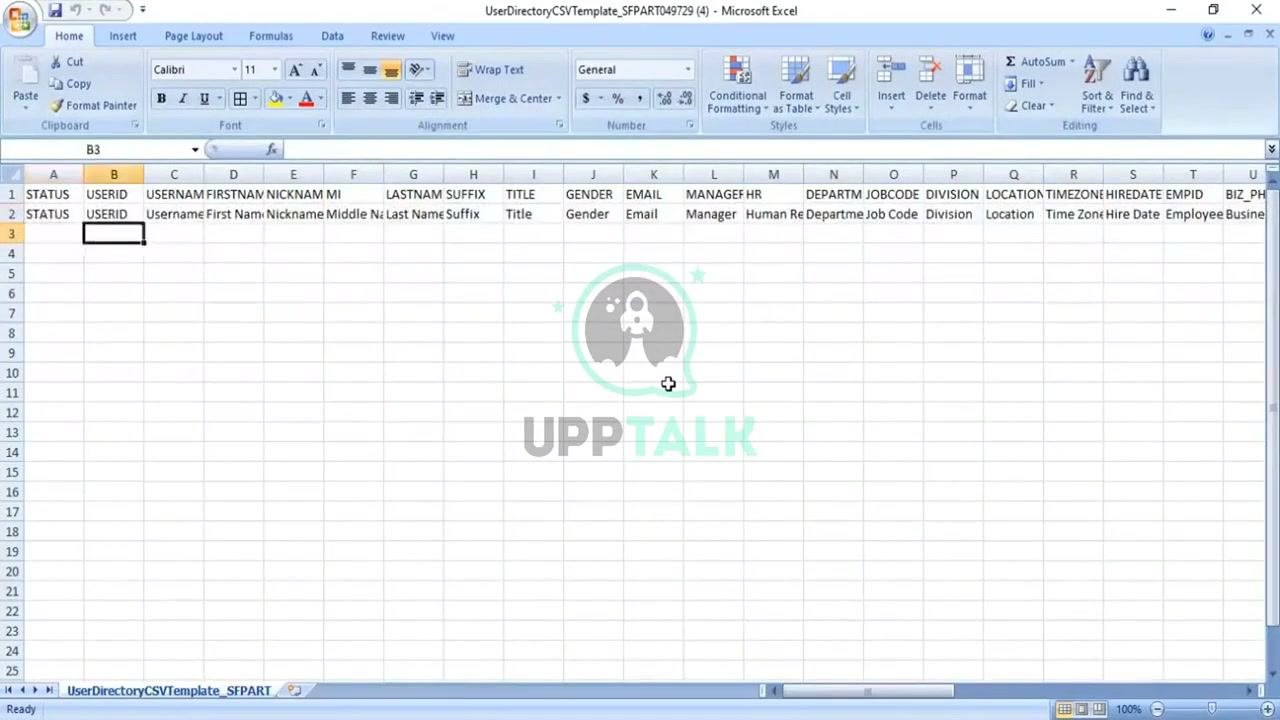
Fill in the details for each user you want to create, as the column headers indicate. Required fields typically include STATUS, USERID, FIRSTNAME, LASTNAME, EMAIL, and other organizational details. Complete each field according to your organization's data standards and the template's requirements.
Prepare and align your user data
Gather the user information from your records or HR system. If you have several users to add, prepare all their details in advance so entry is efficient.
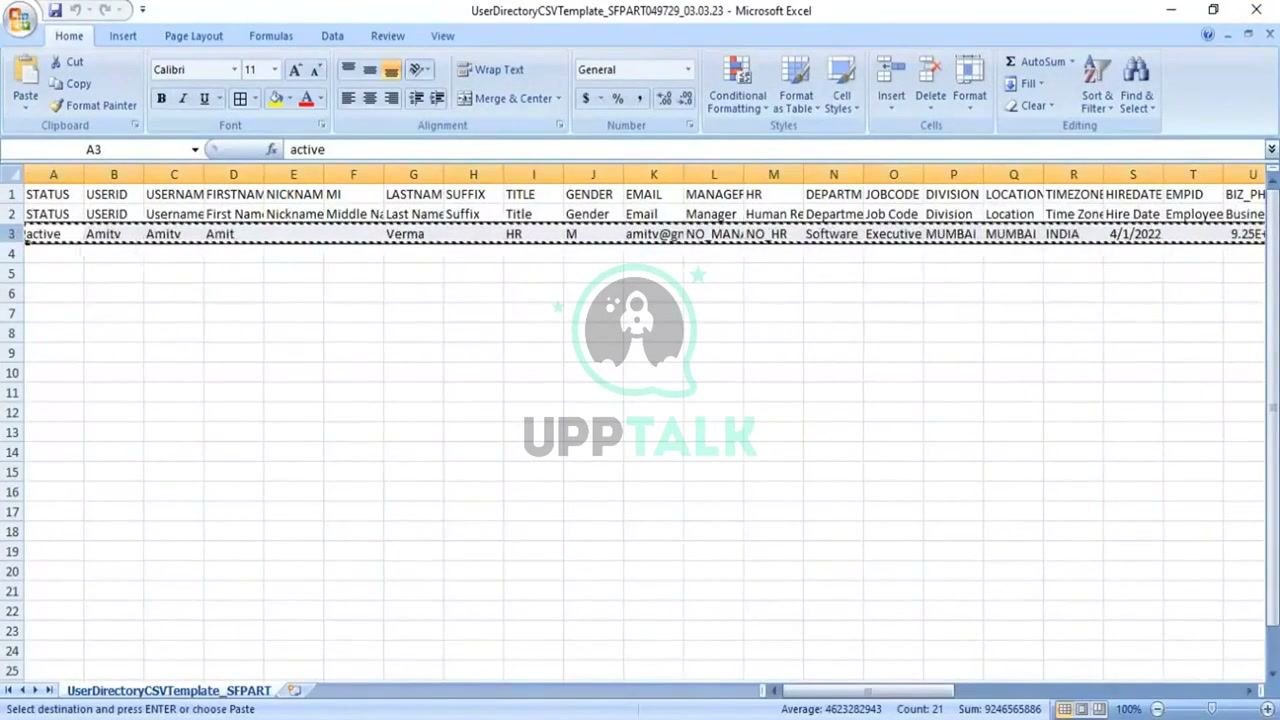
If your data comes from another source, such as an HR export, align the columns to match the template. Copy the data and paste it into the template, making sure each value lands in the correct column. Then check that all required fields are filled and formatted correctly.
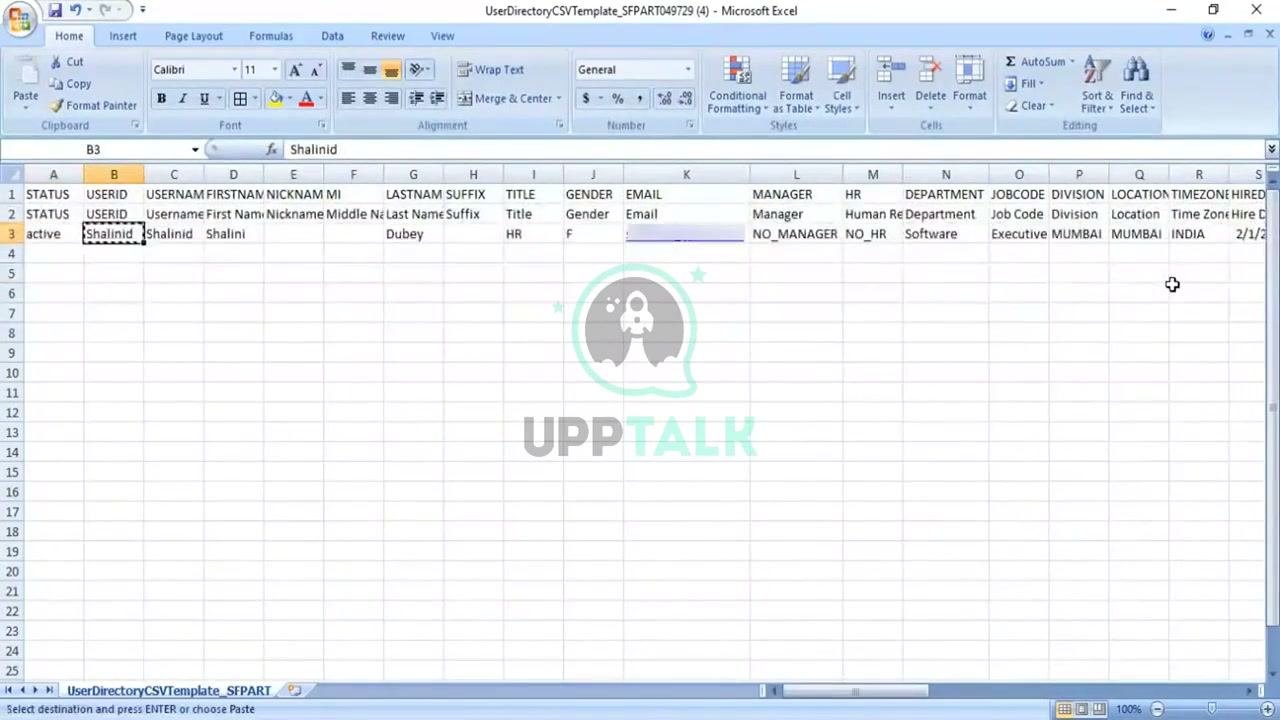
Enter the user details
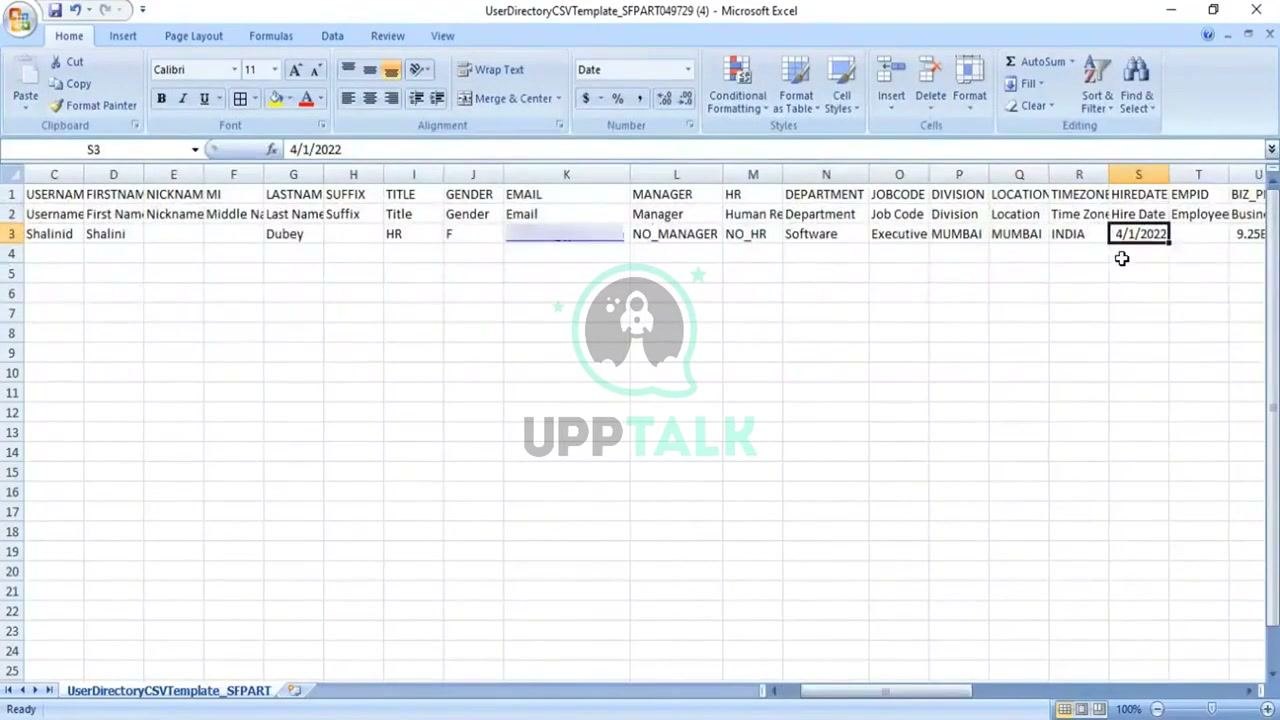
Fill in the following columns for each user:
- STATUS: Enter
active. - USERID: Enter the unique user ID (for example,
Shalinid). - USERNAME: Enter the username (for example,
Shalini). - FIRSTNAME: Enter the first name (for example,
Shalini). - LASTNAME: Enter the last name (for example,
Dubey). - TITLE: Enter the title (for example,
HR). - GENDER: Enter
Ffor female orMfor male. - EMAIL: Enter the user's email address.
- MANAGER: Enter the manager, or
NO_MANAGERif the user has none. - HR: Enter the HR code (for example,
NO_HR). - DEPARTMENT: Enter the department (for example,
Software). - JOBCODE: Enter the job code (for example,
Executive). - DIVISION: Enter the division (for example,
MUMBAI). - LOCATION: Enter the location (for example,
MUMBAI). - TIMEZONE: Enter the time zone (for example,
INDIA). - HIREDATE: Enter the hire date in MM/DD/YYYY format (for example,
4/1/2022).
If you are not assigning a manager, enter NO_MANAGER in the MANAGER column. Use all capital letters, with an underscore only between "NO" and "MANAGER". If you are not assigning an HR representative, enter NO_HR in the HR column in the same way.
Make sure each USERID is unique
The USERID field must contain a unique identifier for each user. If you reuse an existing USERID, verify that it is correct and not duplicated elsewhere in the file.
Verify the department and job code
Make sure the DEPARTMENT and JOBCODE columns contain the correct, pre-created values. Do not change them if they are already set up. For example, use Software for the department and Executive for the job code.
Review the hire date and business phone number
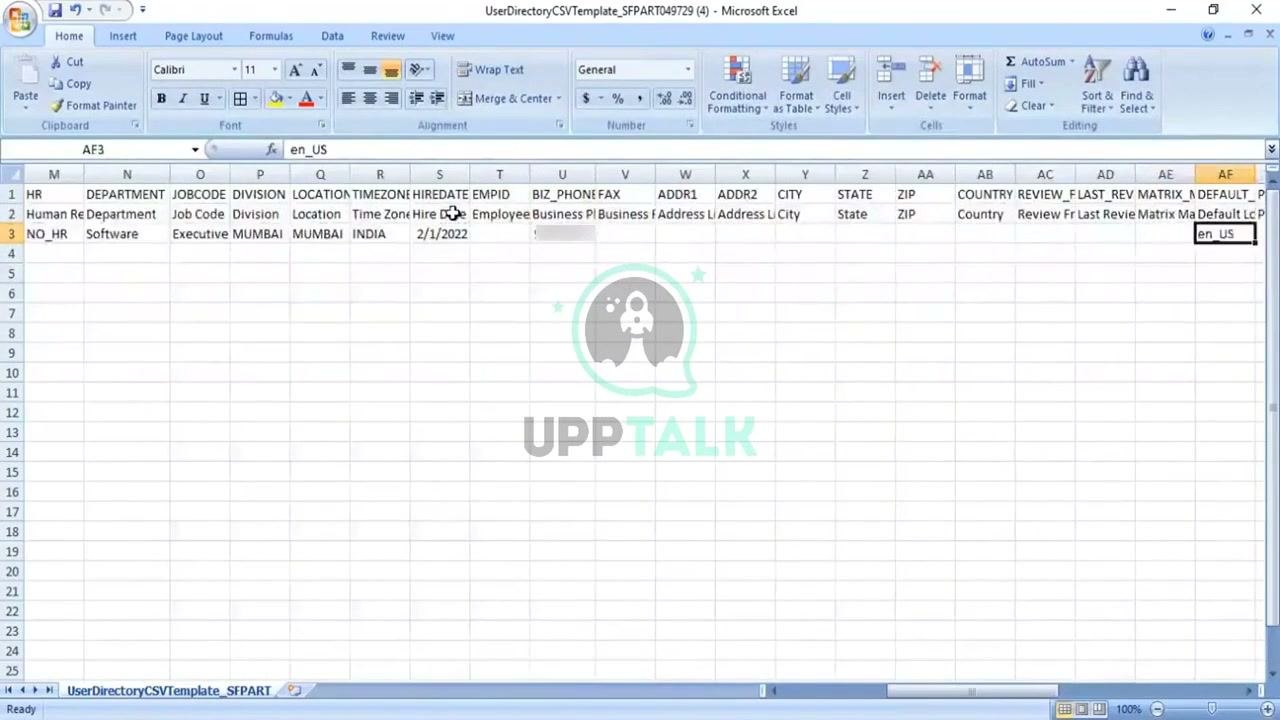
Check that the HIREDATE column uses MM/DD/YYYY format (for example, 2/1/2022). Then go to the BIZ_PHONE column. If the phone number appears in scientific notation (for example, 9.25E+09), reformat the cell to show the full number as text or a standard number. Enter or correct the business phone number as needed.
Add optional details
If required, fill in other fields such as FAX, ADDR1, ADDR2, CITY, STATE, ZIP, and COUNTRY. In the DEFAULT_LOCALE column, enter the locale code (for example, en_US).
Not every field in the template is mandatory. Complete only the required fields and those relevant to your organization or process. Leave the rest blank if you don't have the information or it doesn't apply.
Enter the user ID in the assignment fields
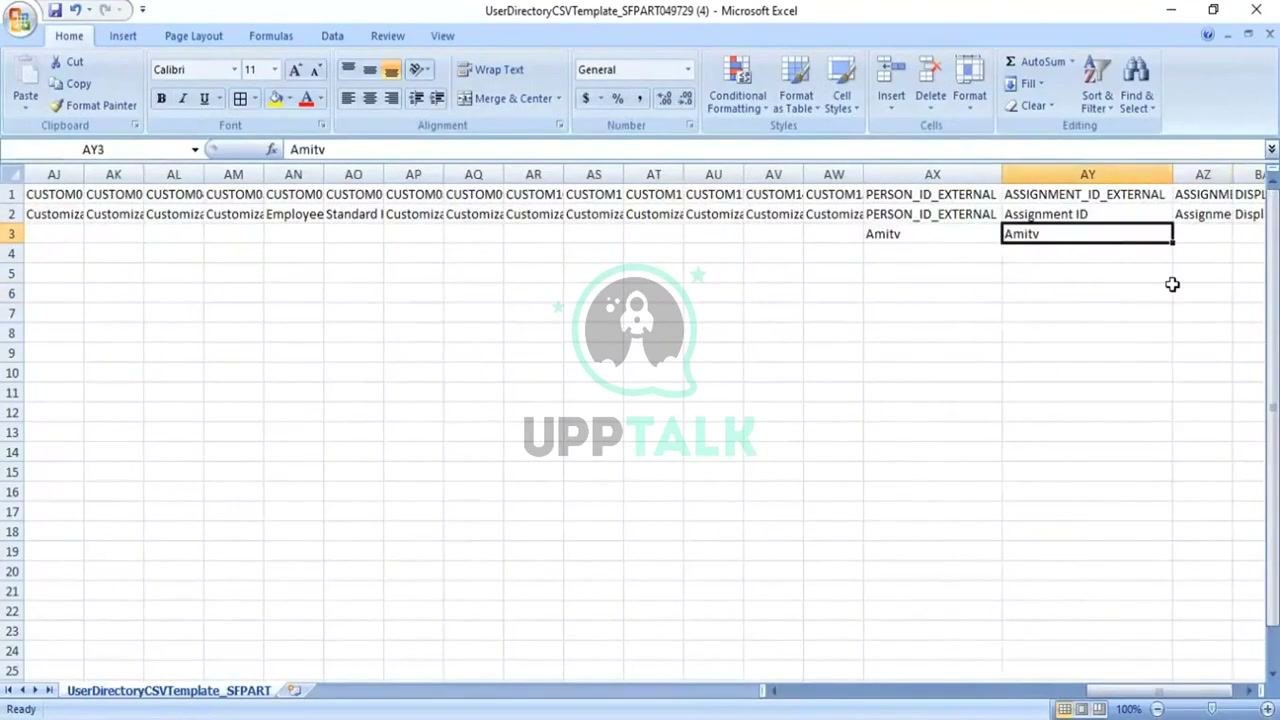
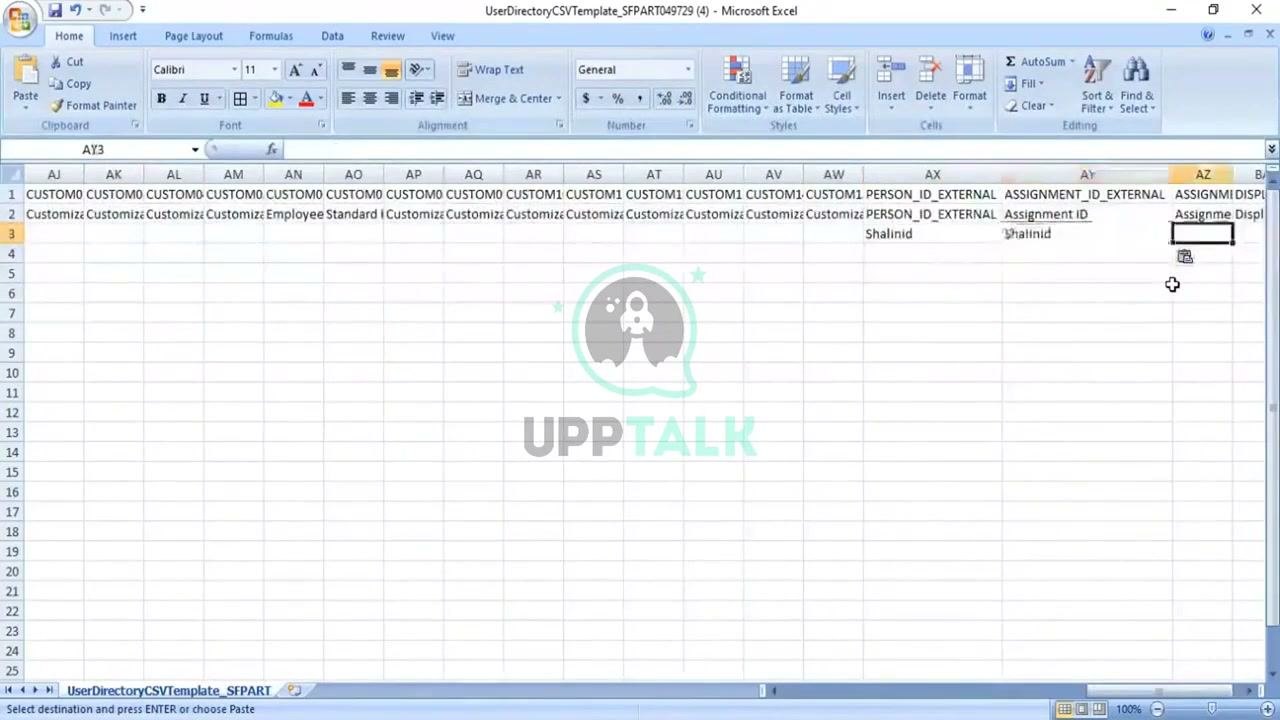
Scroll to the far right of the template to find the PERSON_ID_EXTERNAL and ASSIGNMENT_ID_EXTERNAL columns. Enter the user ID (for example, Shalinid) in both fields for the corresponding user. If other assignment-related fields need the user ID, enter it consistently.
To keep the values consistent, copy the user ID from its original cell and paste it into each column that needs it.
Verify all entered data
Double-check every field you entered or edited for accuracy and completeness. Make sure no required field is blank and all data is in the correct format.
Save the file in CSV format
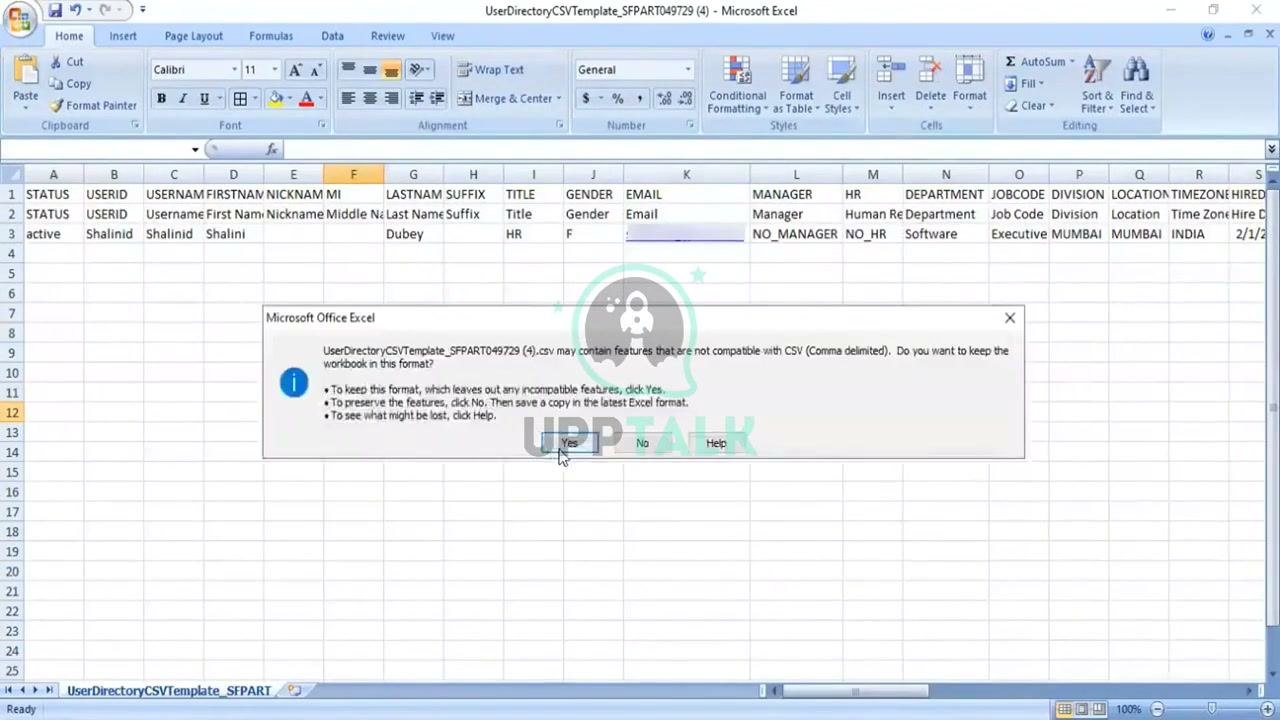
In Excel, click the Save icon at the top left or press Ctrl + S. A dialog may warn that some features aren't compatible with the CSV (Comma delimited) format. Click Yes to keep the file in CSV format.
Open and review the saved CSV
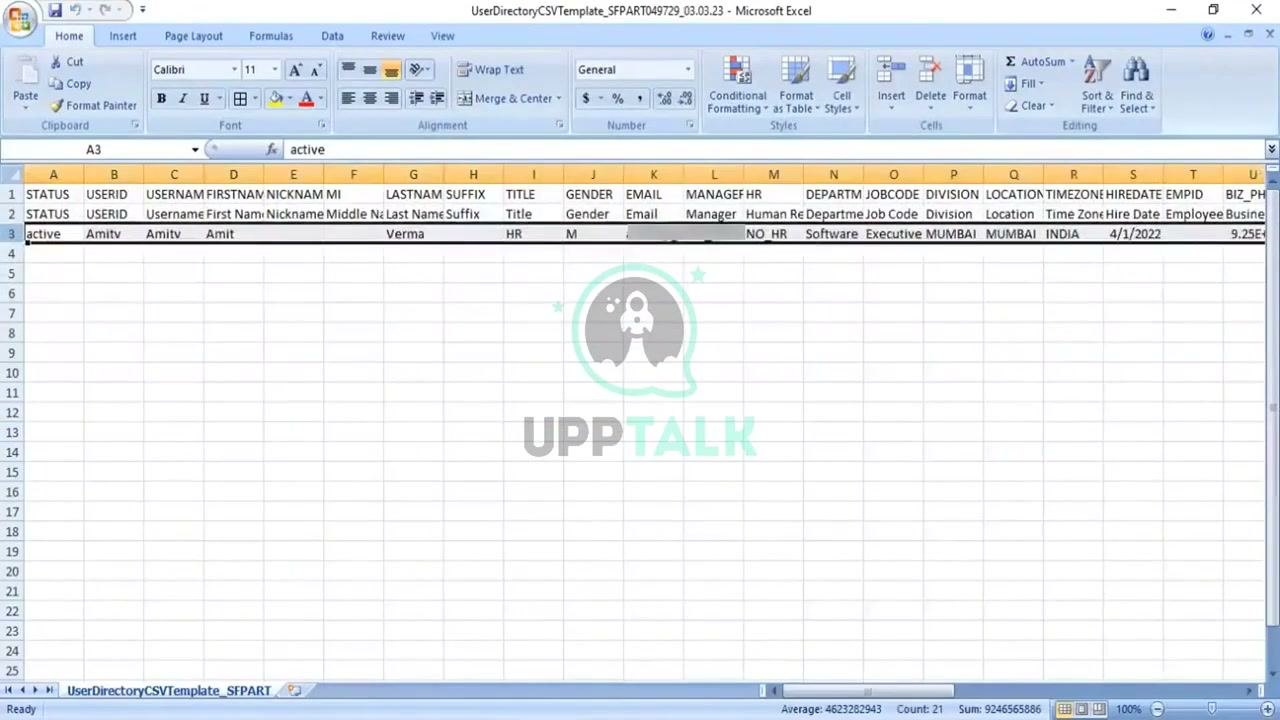
Go to the folder where you saved the file, commonly Downloads. If you don't see the folder, open your file explorer and browse to it. Double-click the CSV file to open it, then check that all data is present and correctly formatted. Some formatting can be lost when you save as CSV.
Copy the data for further use
To transfer data from this CSV to another sheet or system, select the relevant cells or rows. Press Ctrl + C to copy them.
Paste the data into the required sheet
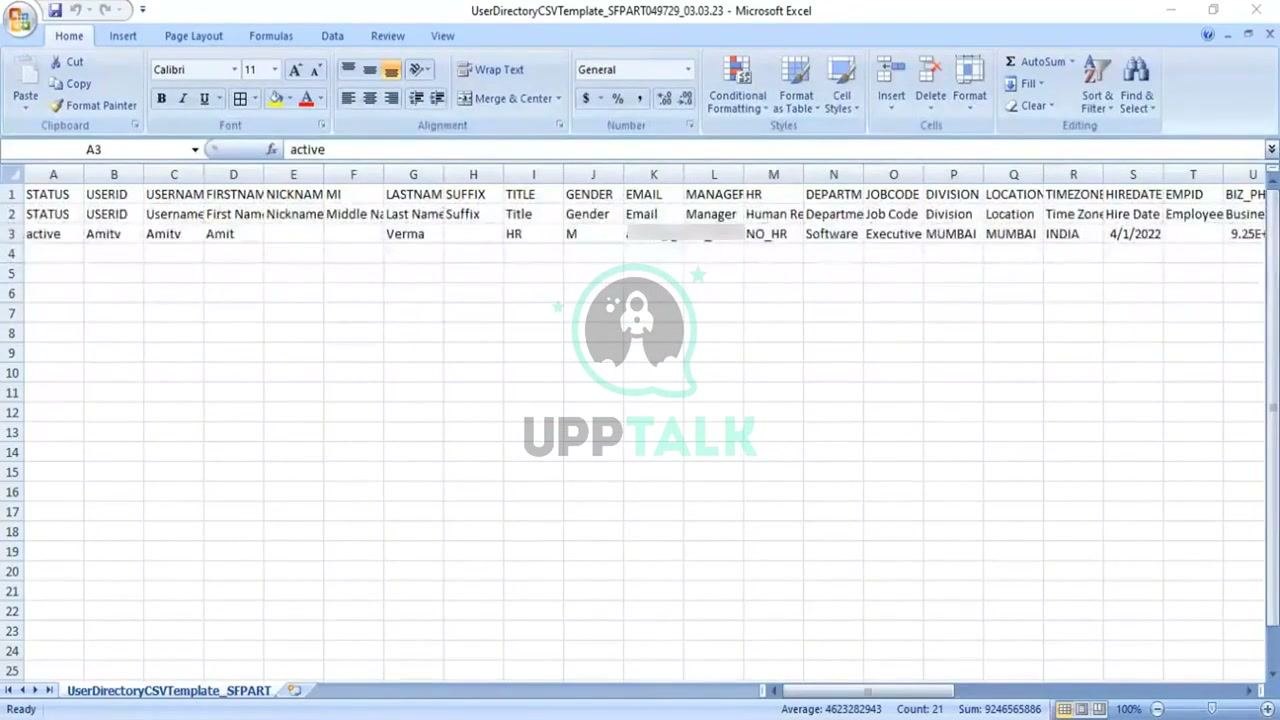
Go to the target sheet or location and press Ctrl + V to paste the data. Check that the data appears correctly and matches the original formatting as closely as possible.
Get help
If you have a question or run into a problem, email the support team at sales@upptalk.com. Include your completed CSV file and a description of your issue or question.
Summary
You now know how to create a user in SuccessFactors with the UDF method. You downloaded the template through Employee Export, filled in the user details, saved the file as CSV, and reviewed it. Always confirm that the CSV format is kept and that no critical data is lost when you save.
What's next
- Import or further process the completed User Directory CSV file in your organization's systems.
- Contact support at
sales@upptalk.comif you have uncertainties or technical issues.
Generation details: cost, quality tiers
Docsie billed 5,500 credits ($3.85) to analyze this 11-minute video at standard quality. The rewrite, template fill and Word/PDF exports were included. The same video at each quality tier:
| Quality | Frames sampled | Credits | Approx. cost |
|---|---|---|---|
| Draft | every 16-30 s | 2,750 | $1.92 |
| Standard (this guide) | every 8-15 s | 5,500 | $3.85 |
| Detailed | every 4-7 s | 11,000 | $7.70 |
| Ultra | every 1-3 s | 22,000 | $15.40 |
Credits priced at $0.70 per 1,000; plans include a monthly allowance. Enterprise customers on on-premise or bring-your-own-model deployments run this on their own inference and pay no per-video credits.
Generated by Docsie Video-to-Docs on 2026-11-15 from a 10-minute video. Screenshots are frames from the source video and belong to their creator, Upptalk, whose original is embedded above. If you own this video and want the guide removed or credited differently, contact us and we will act within one business day.