
How to Create a Position in SuccessFactors
This guide shows you how to create a position in SuccessFactors using the Manage Data method in Employee Central. You also learn how positions fit into the organizational structure, how to correct or delete a position, and how to work with positions in the Position Org Chart.
Video: Create Positions in Employee Central #success factors #employee central #SAP Technologies by SAP Technologies (2023). All credit for the demonstration goes to the creator; watch the original on YouTube. The written guide below was generated from this video by Docsie. Creator? Request a change or removal.
This guide shows you how to create a position in SuccessFactors using the Manage Data method in Employee Central. You also learn how positions fit into the organizational structure, how to correct or delete a position, and how to work with positions in the Position Org Chart.
Prerequisites
Before you start, make sure you have:
- Access to Employee Central and the ability to log in.
- The job code, pay grade, and parent position you plan to use. The example in this guide uses the job code account manager, the pay grade Apple_S123_B_B2, and a parent position with the code 0011.
- Values ready for every mandatory field. Mandatory fields are marked with an asterisk (*).
Understand the organizational structure
An organizational structure has three main objects:
- Organizational Unit, such as the Accounts Department or the HR Department.
- Position, such as Account Manager, Executive, or Deputy Manager.
- Person, the individual who occupies a position.
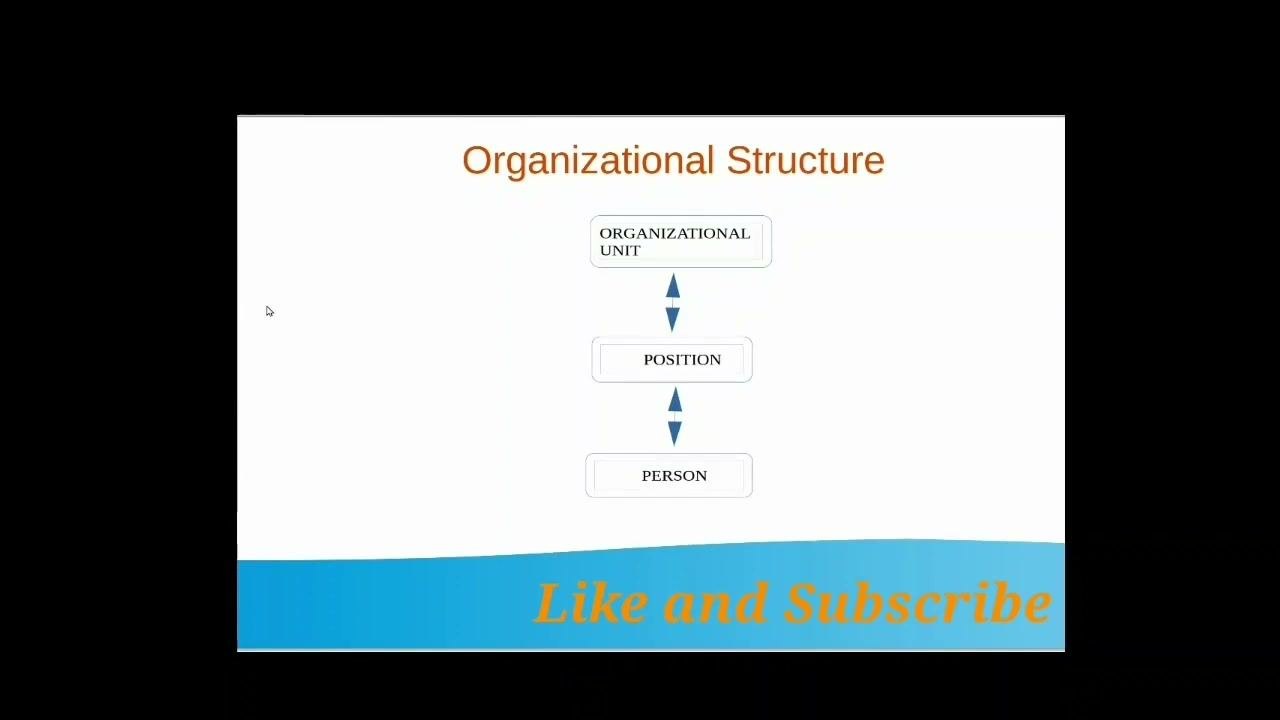
The relationship is hierarchical. An Organizational Unit contains one or more Positions, and a Person occupies each Position.
Choose a method to create a position
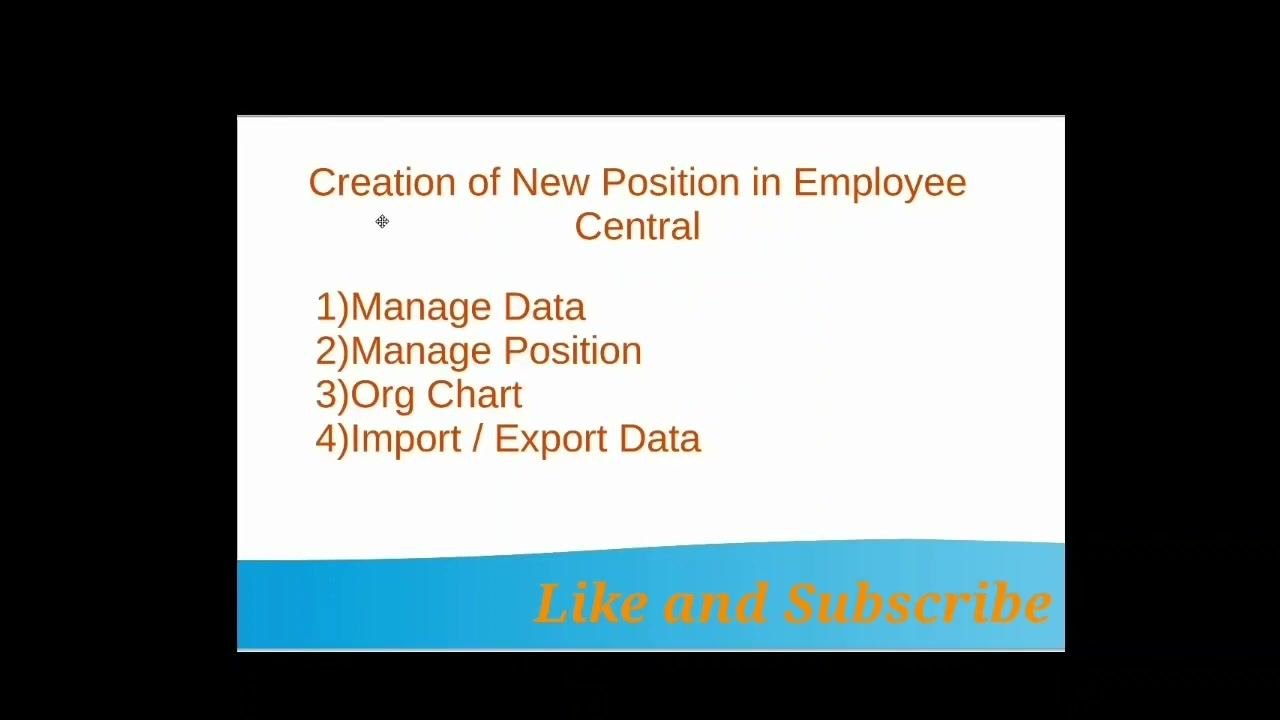
You can create a new position in Employee Central in four ways:
- Manage Data
- Manage Position
- Org Chart
- Import / Export Data
The first three methods create and manage positions directly in the system. This guide walks through Manage Data in detail.
Create a position with Manage Data
Step 1: Open the Employee Central home screen
- Log in to Employee Central.
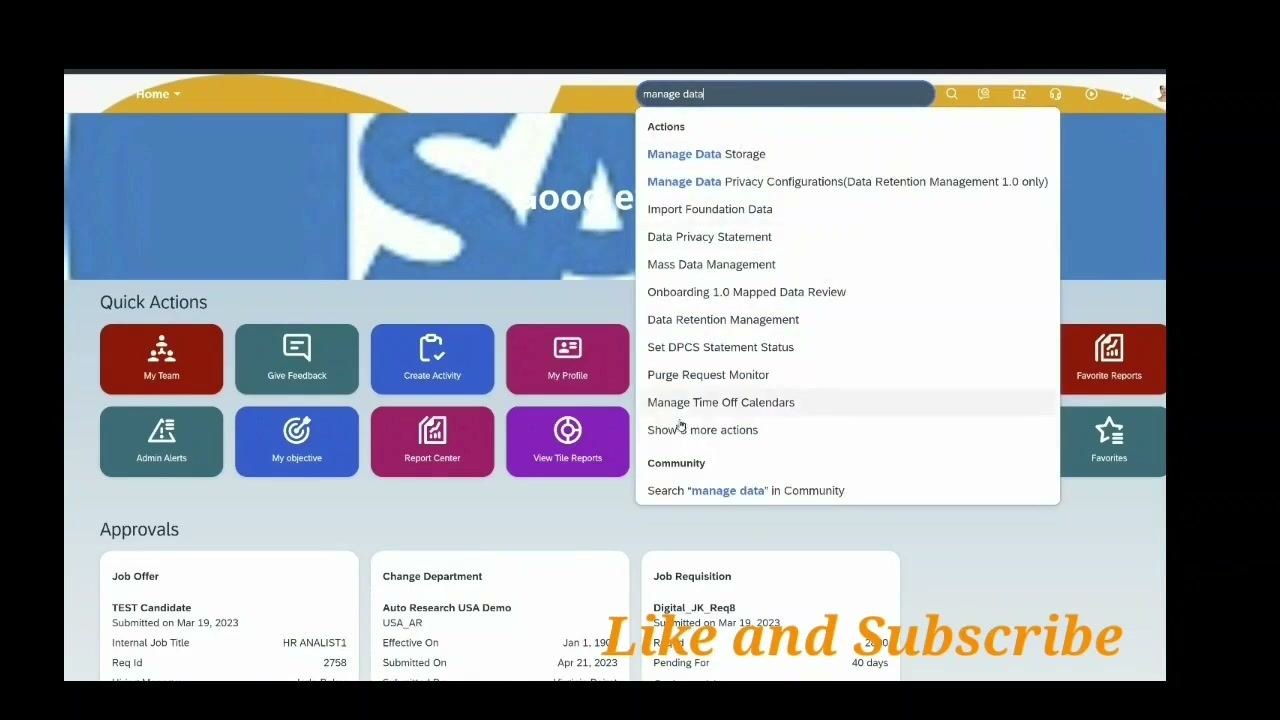
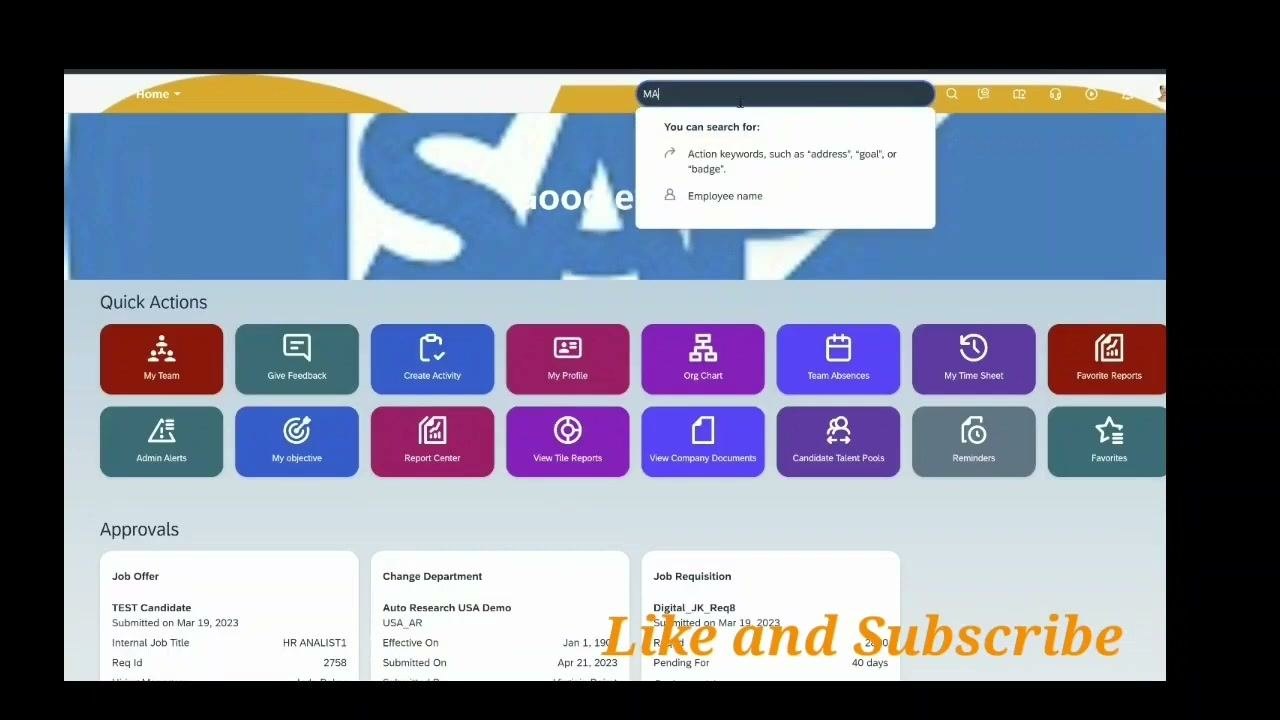
- On the home screen, find the Quick Actions section. It contains tiles such as My Team, Give Feedback, Create Activity, Org Chart, Team Absences, My Time Sheet, and Favorite Reports.
- Locate the search bar at the top of the screen, labeled Search for actions or people.
Step 2: Go to Manage Data
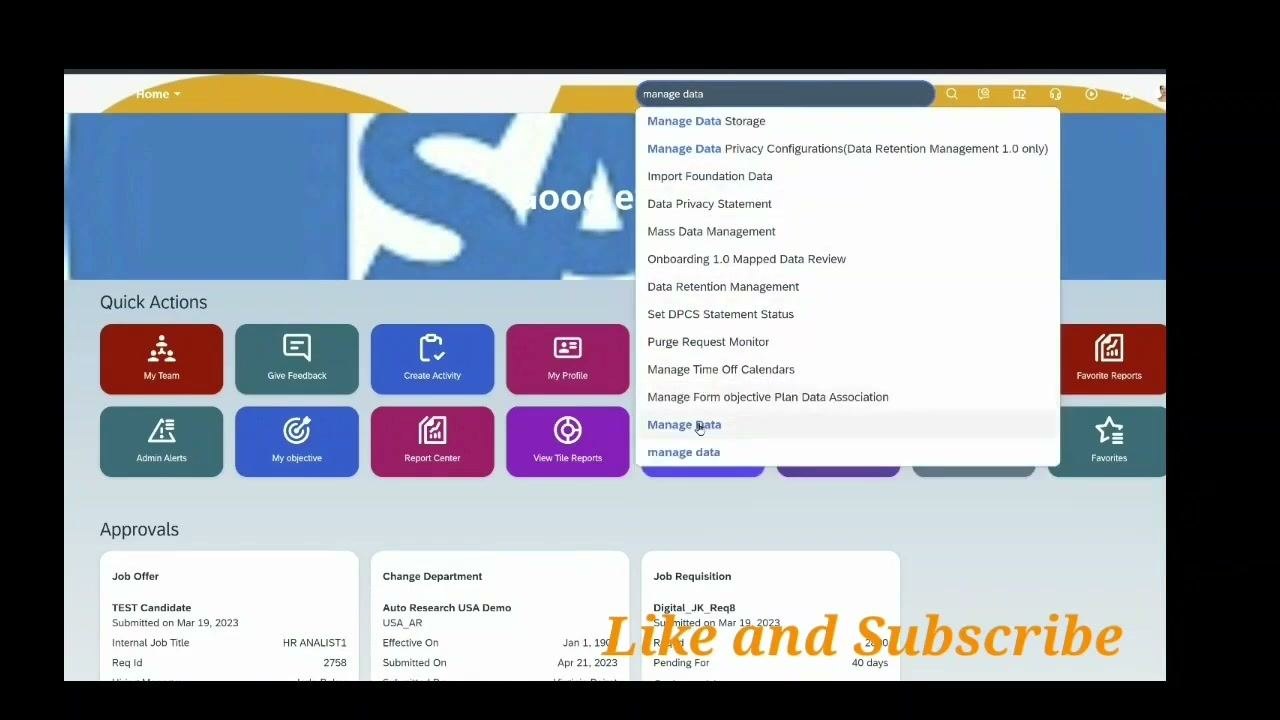
- Click the search bar and type manage data.
- Wait for the dropdown menu of actions to appear.
- Select Manage Data from the list.
Step 3: Start a new position
- On the Manage Data screen, open the Search field and select Position.
- Click Create New.
The Position and Job Details form opens.
Step 4: Fill out the position and job details
Complete the form using the values below. This example creates an account manager position.
- Position Code: You can't edit this field. The system generates it after you save.
- Start Date: Confirm the default date (for example, 04/29/2023).
- Select Job Code: Open the dropdown and select account manager (account manager).
Then complete the remaining fields:
- Change Reason: Leave as "No Selection" unless you need a specific reason.
- Position Title: Enter account manager.
- New Position Code Title: Leave blank unless you need a custom code title.
- Position Description: Optionally, enter a description.
- Position Type: Select the appropriate type if required.
- FTE: Enter the Full-Time Equivalent value. This field is mandatory.
- Mass Position: Select "No" unless this is a mass position.
- Critical Position?: Select "No" unless the position is critical.
- Parent Position: Select a parent position if applicable.
- To Be Hired: Select the value you need.
- Employee Class: Choose Employee (M).
- Pay Grade: Select the appropriate pay grade (for example, Apple_S123_B_B2).
- Job Level: Select the value you need.
- Regular/Temporary: Choose Regular.
- Status: Make sure it is set to Active.
- Source of Creation: Leave as "No Selection" unless otherwise specified.
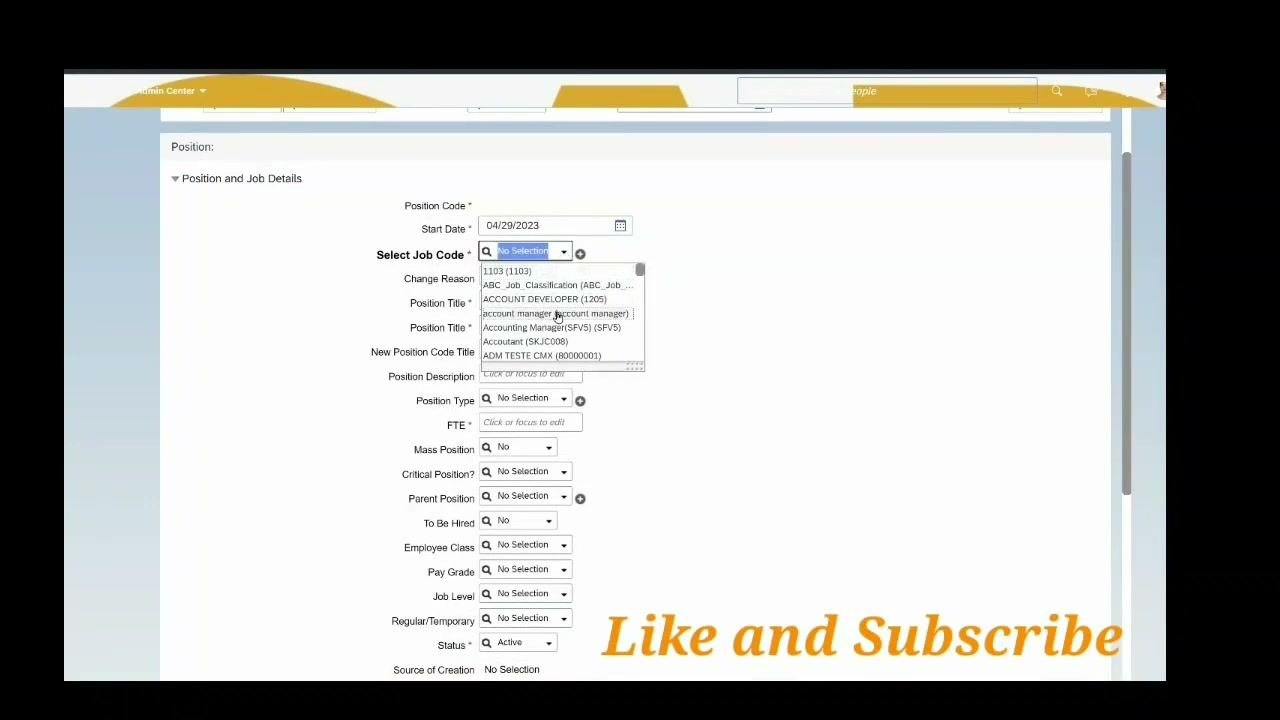
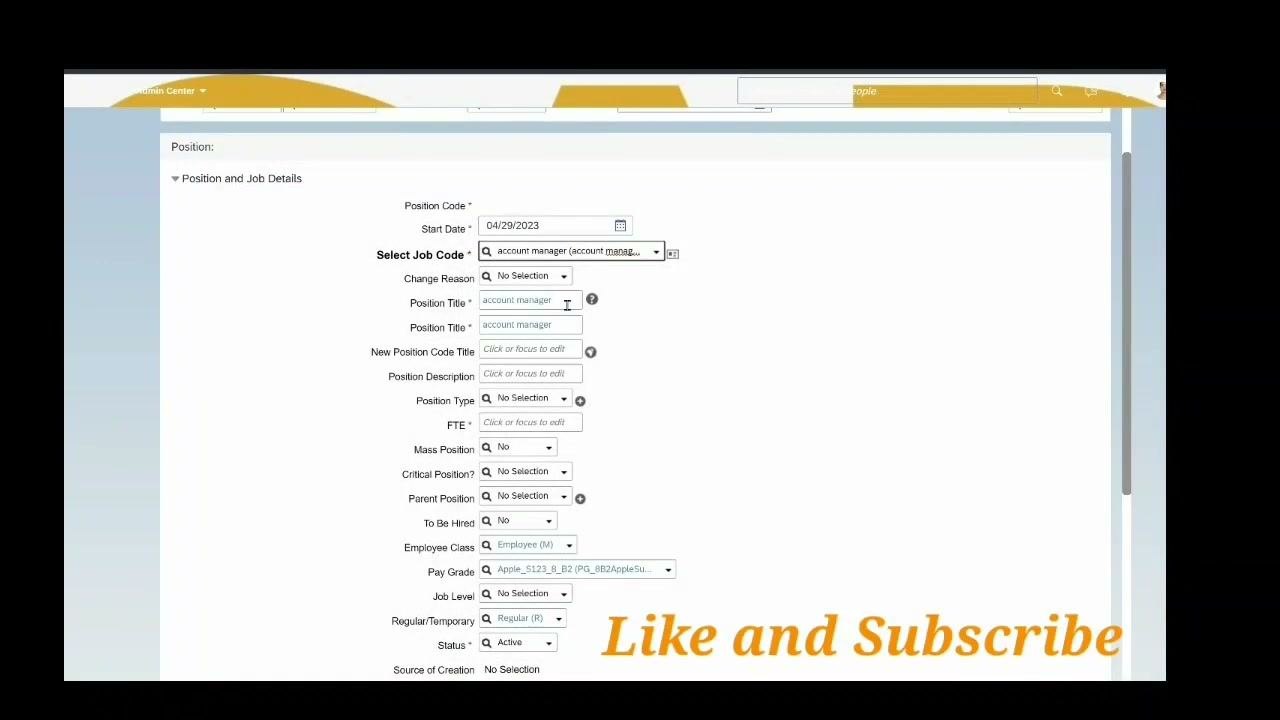
Make sure every field marked with an asterisk (*) is filled in. You can't save the new position without them.
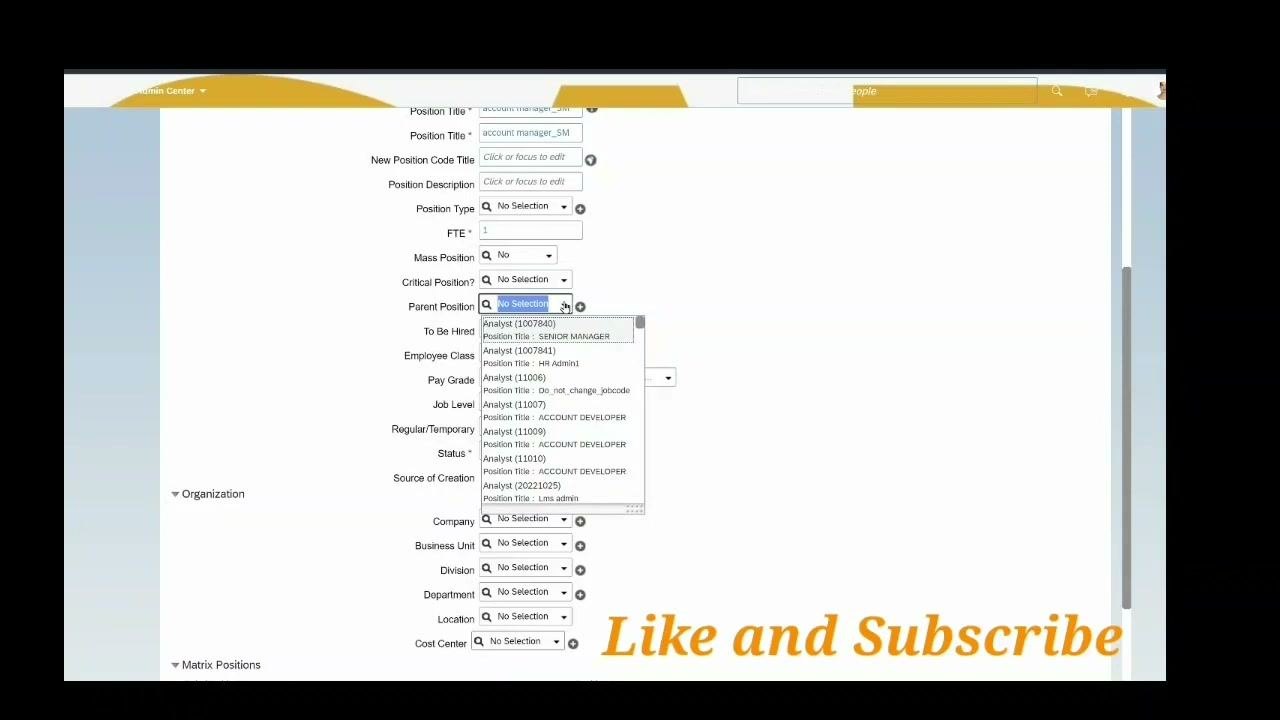
Step 5: Set the FTE and assign a parent position
- In the FTE field, enter 1 to indicate a full-time position for one employee. This value represents the number of full-time employees assigned to the position.
- Click the dropdown next to Parent Position. This is the position the new position reports to.
- Scroll through the list or type to search.
- Select 0011 (0011), Position Title: account manager.
Step 6: Set To Be Hired and the other key fields
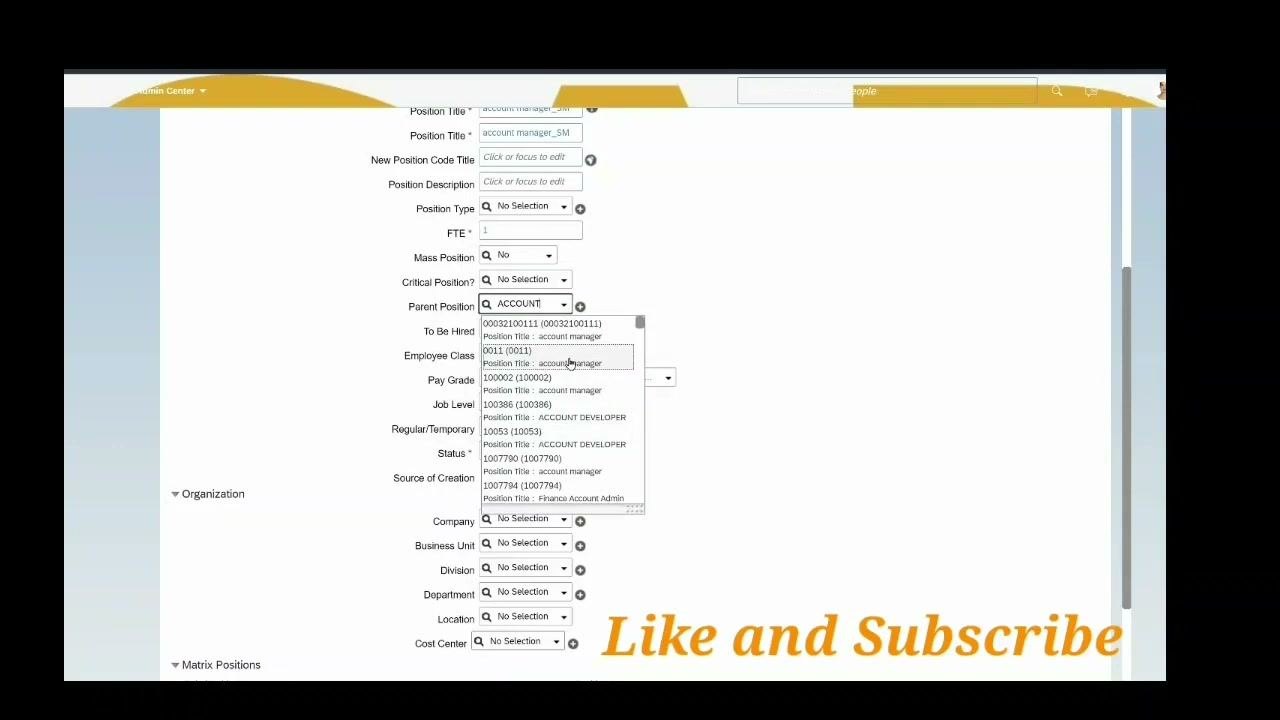
-
Open the To Be Hired dropdown and choose Yes if you intend to assign the position to a new employee.
-
Check that the following fields are set correctly:
- Regular/Temporary: Regular (R).
- Status: Active.
- Employee Class: Employee (M).
- Pay Grade: The appropriate pay grade, for example Apple_S123_B_B2.
- Job Level: The value you need.
- Source of Creation: "No Selection" unless otherwise specified.
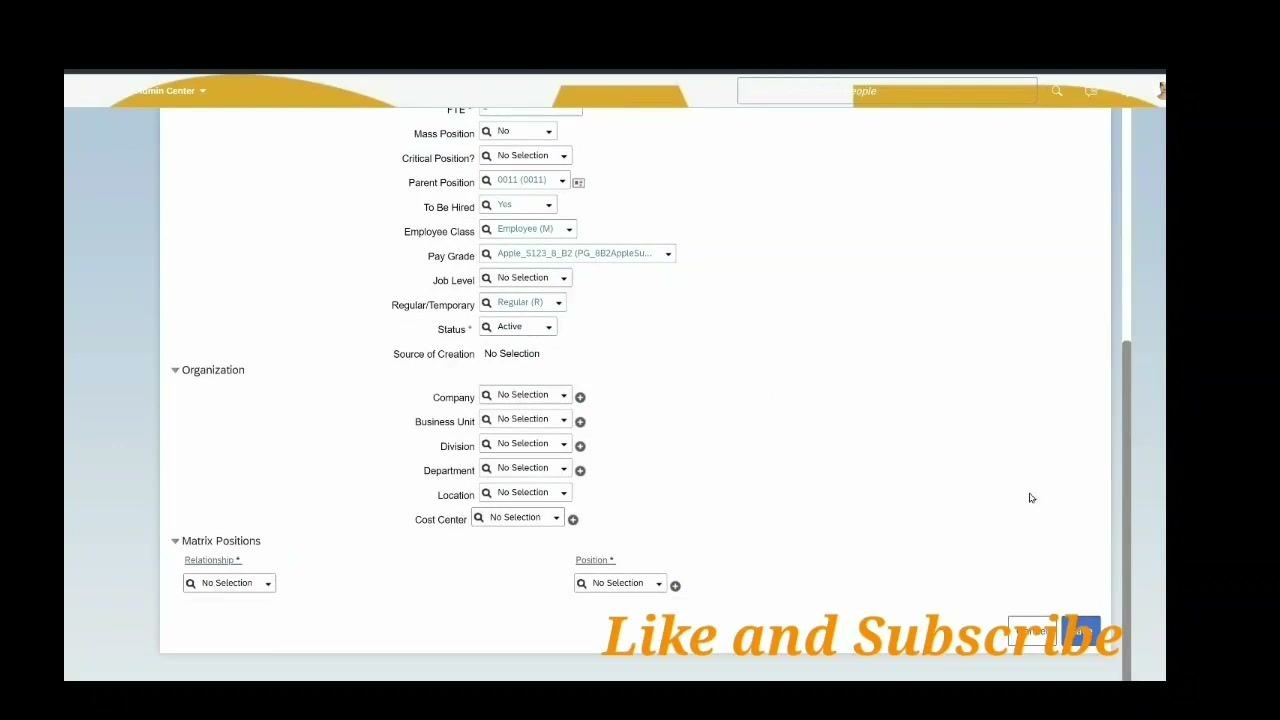
Step 7: Review the organization details
- Scroll down to the Organization section.
- Use the dropdown menus to select values for the fields you need:
- Company
- Business Unit
- Division
- Department
- Location
- Cost Center
Step 8: Review the confirmation dialog
After you fill out the required fields and submit the position, a dialog titled Please confirm your request appears.
- Check that the position identifier shown in the dialog is correct. In the example, the dialog shows Create Position (po_3001225).
- Optionally, add a comment.
- Optionally, view the workflow participants.
Step 9: Confirm the new position
-
Click Confirm to finalize the position. The system processes your request.
-
Wait for the redirect back to the Manage Data screen. The new position's details appear there. In the example, they include:
- Position Code: po_3001226
- Start Date: 04/29/2023
- Job Code: account manager (account manager)
- Position Title: account manager_SM
- FTE: 1
- Mass Position: No
- Critical Position: No
- Parent Position: 0011 (0011)
- To Be Hired: Yes
- Employee Class: Employee (M)
- Pay Grade: Apple_S123_8_B2 (PG_8B2AppleSunita123)
- Regular/Temporary: Regular (R)
- Status: Active
- Source of Creation: No Selection
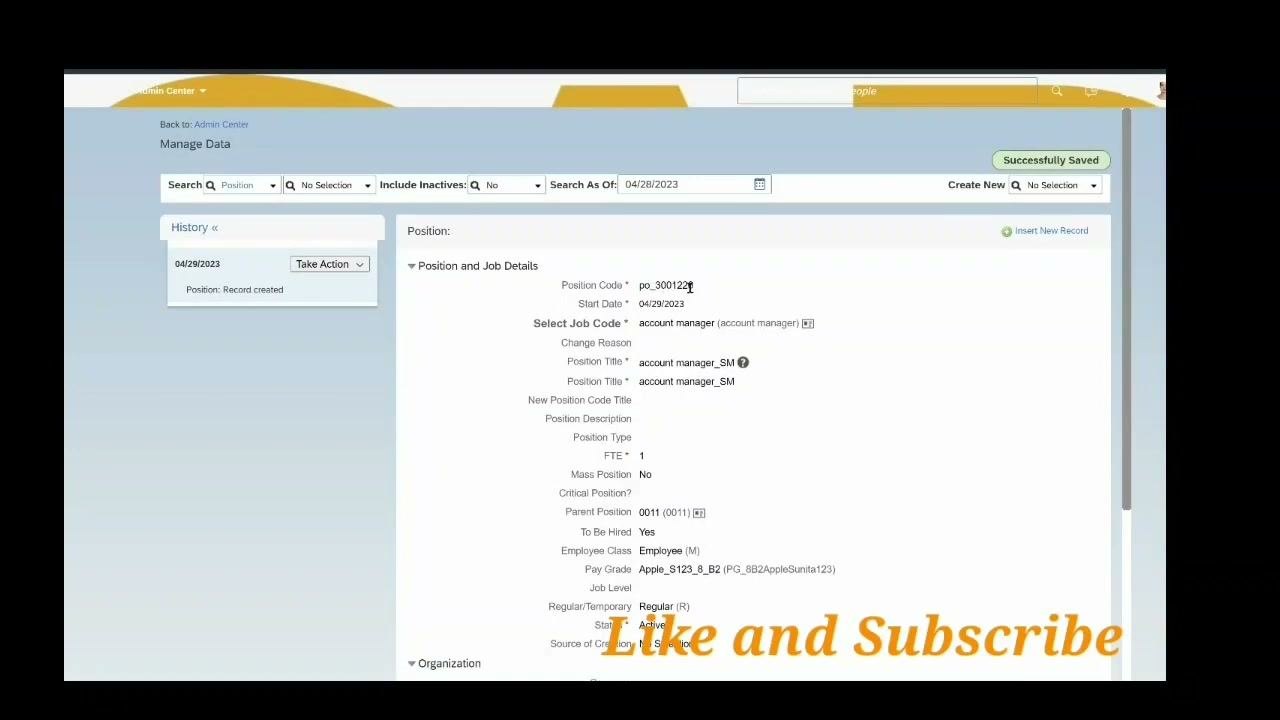
The organization details are also available on this screen.
Correct or delete a position
Step 10: Make a correction
- On the Manage Data screen, go to the History tab on the left.
- Click the Take Action dropdown next to the relevant date or record.
- Select Make Correction to edit the position details. Alternatively, select Permanently Delete Entry to remove the position from the system.
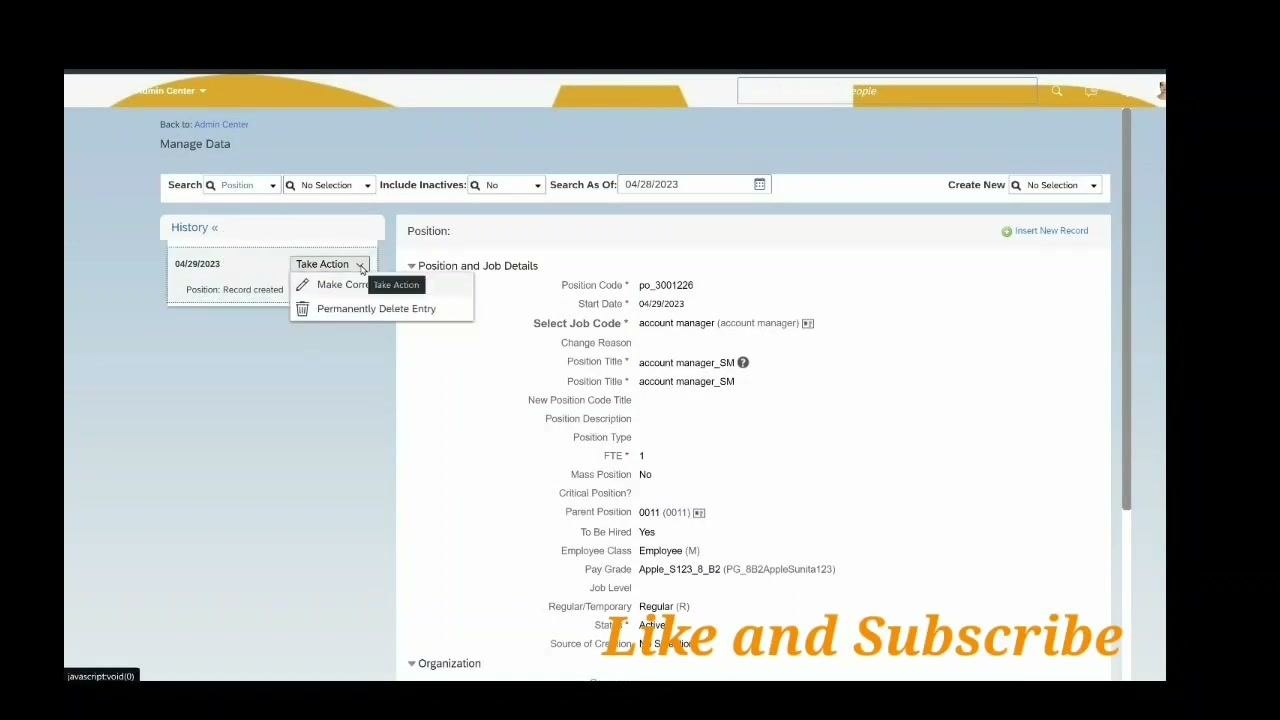
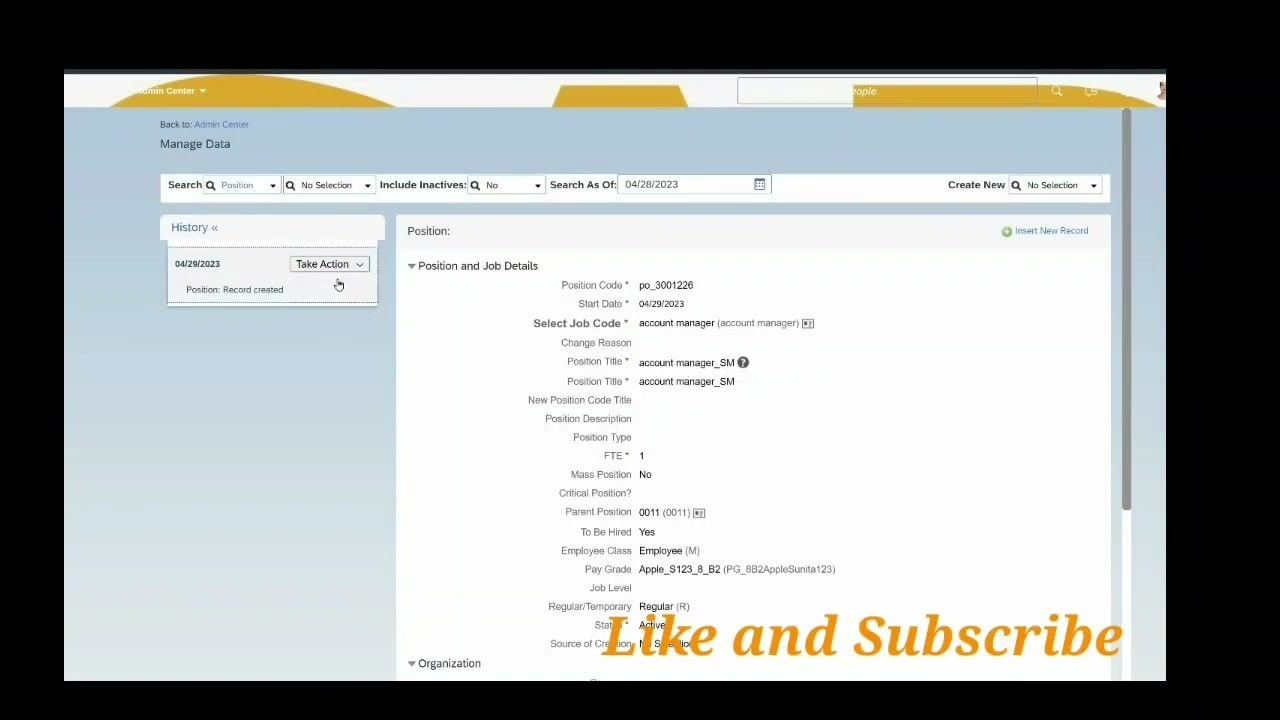
After you take action, the updated position details appear on the same Manage Data screen. Confirm that your changes were applied, or that the entry was deleted.
Open Manage Positions
Step 11: Find Manage Positions from the dashboard
- Click the search bar at the top of the home screen.
- Start typing "MANAGE POSITIONS" or a similar keyword.
- Choose the module or action the system suggests.
The dashboard also gives you quick access to other features, including My Team, Give Feedback, Create Activity, Org Chart, Team Absences, My Time Sheet, Favorite Reports, Admin Alerts, My Objective, Report Center, View Tile Reports, View Company Documents, Candidate Talent Pools, Reminders, and Favorites.
Work with positions in the Position Org Chart
Step 12: Open the Org Chart
- Click the search bar at the top of the dashboard and type "ORG CHART".
- Review the suggestions in the dropdown, such as View Org Chart, View succession org chart, and Org Chart Configuration.
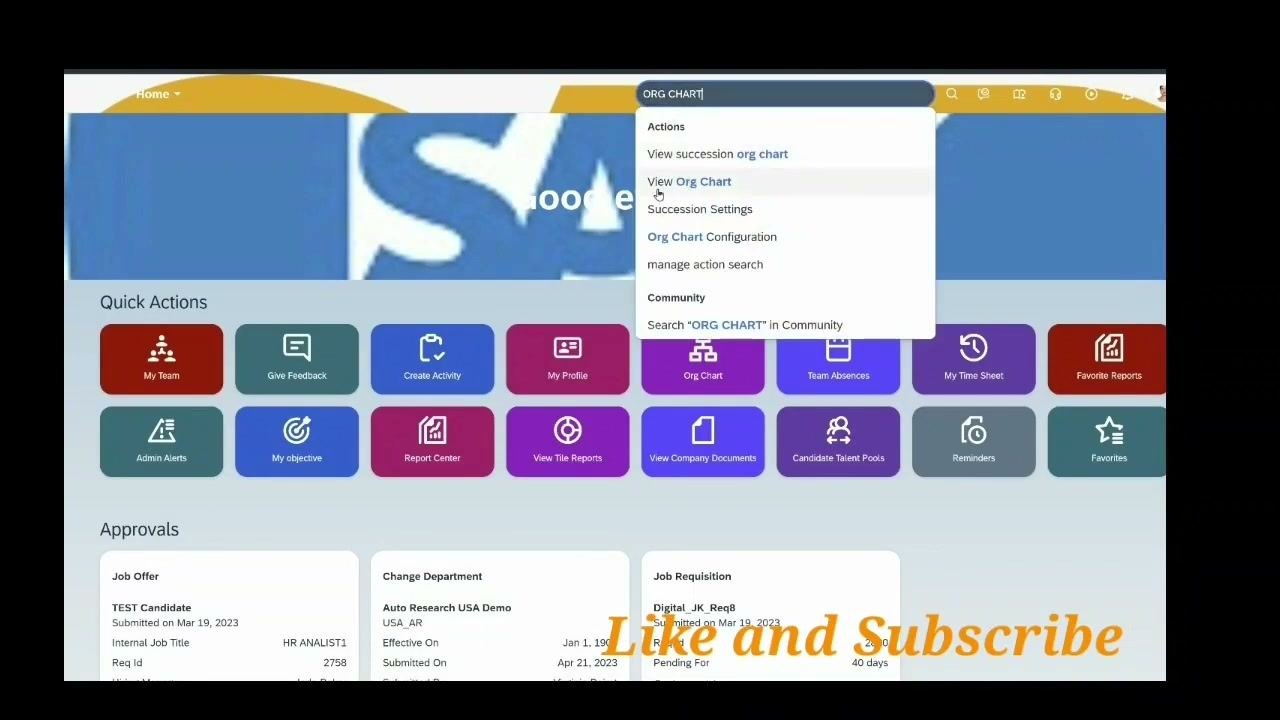
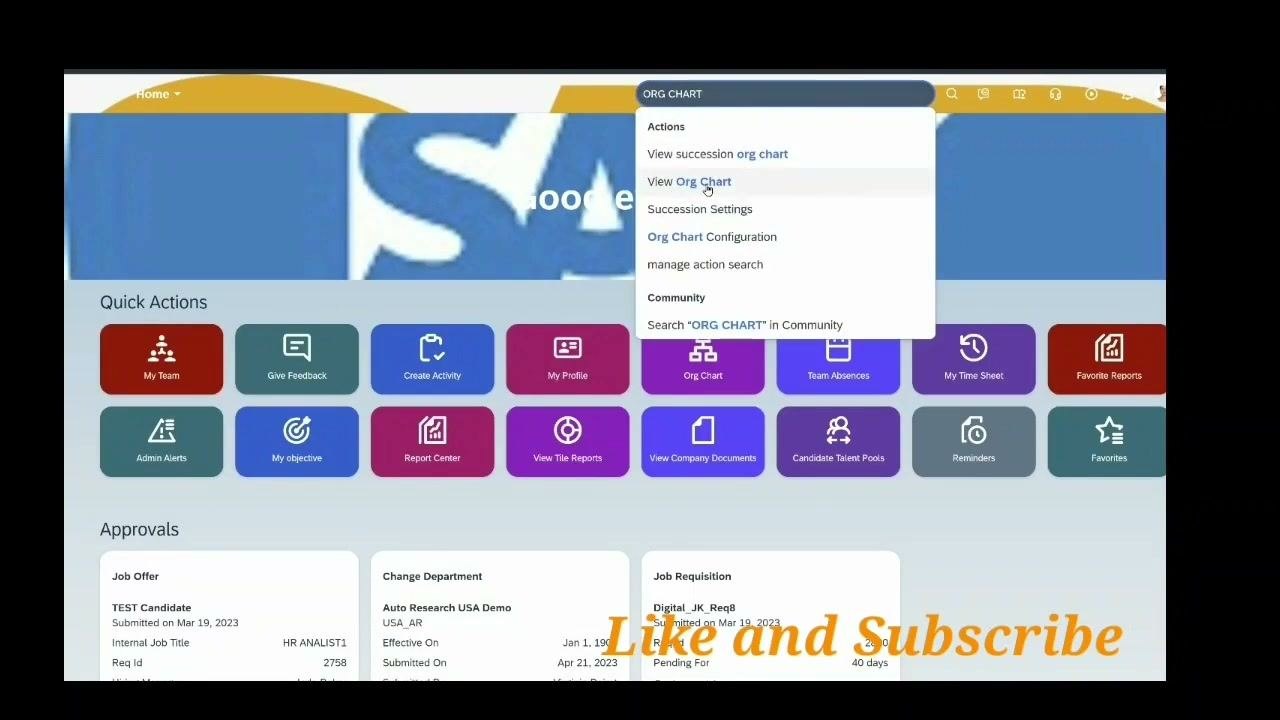
- Select View Org Chart. You are redirected to the Position Org Chart view.
Step 13: Locate a position and check whether it is vacant
- In the Position Org Chart view, find the position you want to review. The screen shows a vertical card with details such as Type, Company, Location, Division, Position Title, Status, Cost Center, Department, Start Date, Job Code, Job Level, Pay Grade, Regular/Temporary, Mass Position, Key Position, Business Unit, Employee Class, Title, Code, STATE, and Position Control.
- Look at the FTE indicator at the bottom of the card. In the example, the card shows 0 / 1 FTE, which means the position is vacant and has no incumbent assigned.
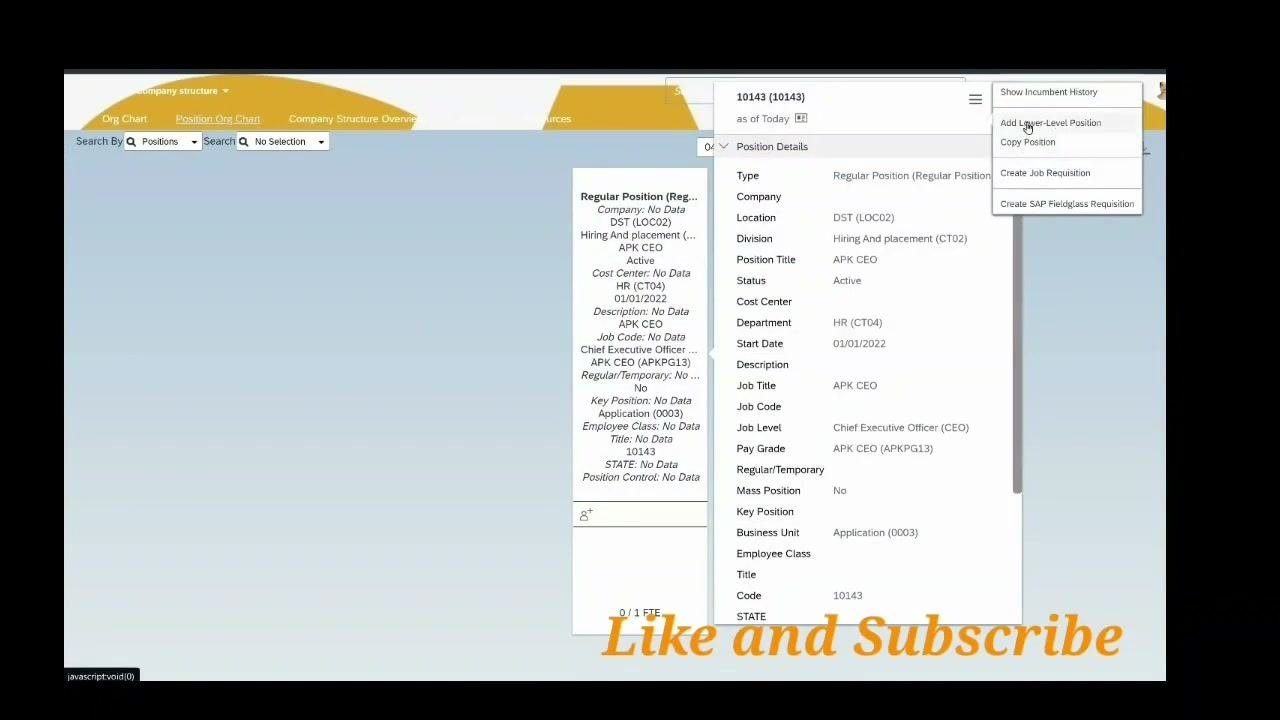
In the example, the card for the APK CEO position shows these values:
- Type: Regular Position
- Location: DST (LOC02)
- Division: Hiring And placement (CT02)
- Position Title: APK CEO
- Status: Active
- Department: HR (CT04)
- Start Date: 01/01/2022
- Job Level: Chief Executive Officer (CEO)
- Pay Grade: APK CEO (APKPG13)
- Business Unit: Application (0003)
- Code: 10143
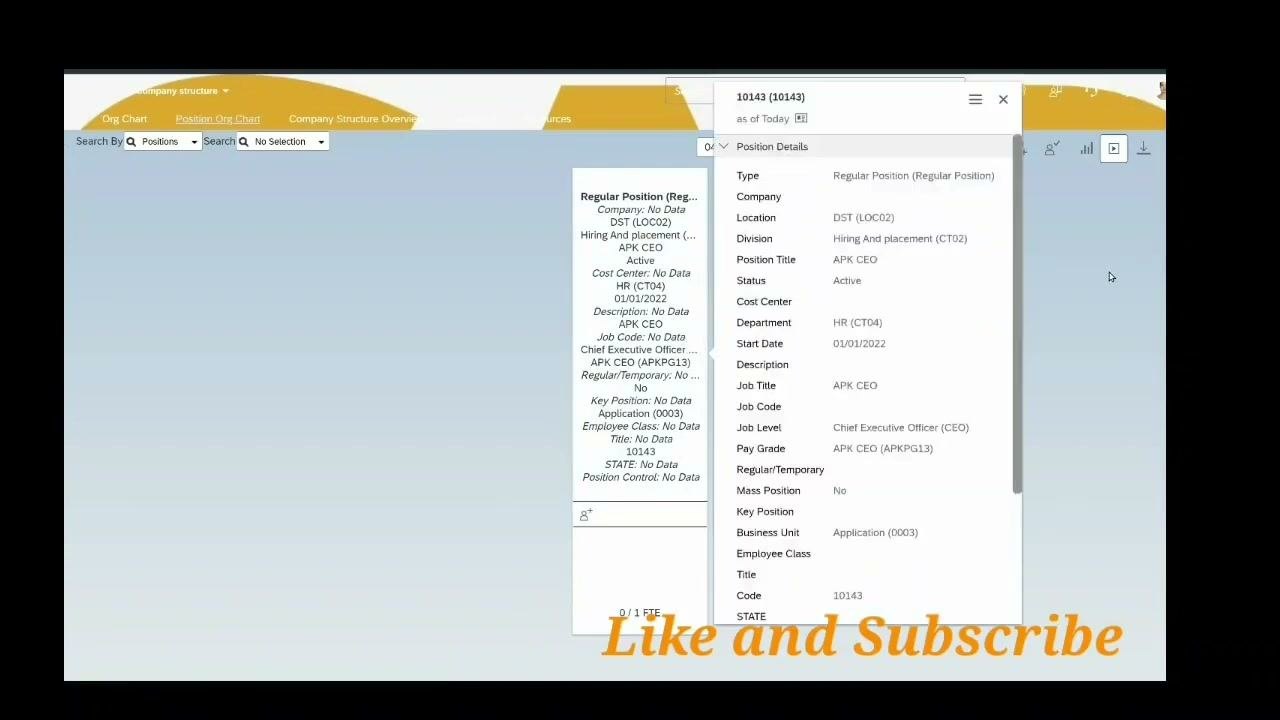
Fields that aren't populated display "No Data".
Step 14: Expand the position details
- Click the position card, or select the position, to open the Position Details panel on the right side of the screen.
- Review the full breakdown of fields. In addition to the fields on the card, the panel shows Description (APK CEO) and Job Title (APK CEO).
- Use the scroll bar to see all fields if the list is long.
Step 15: Open the position menu
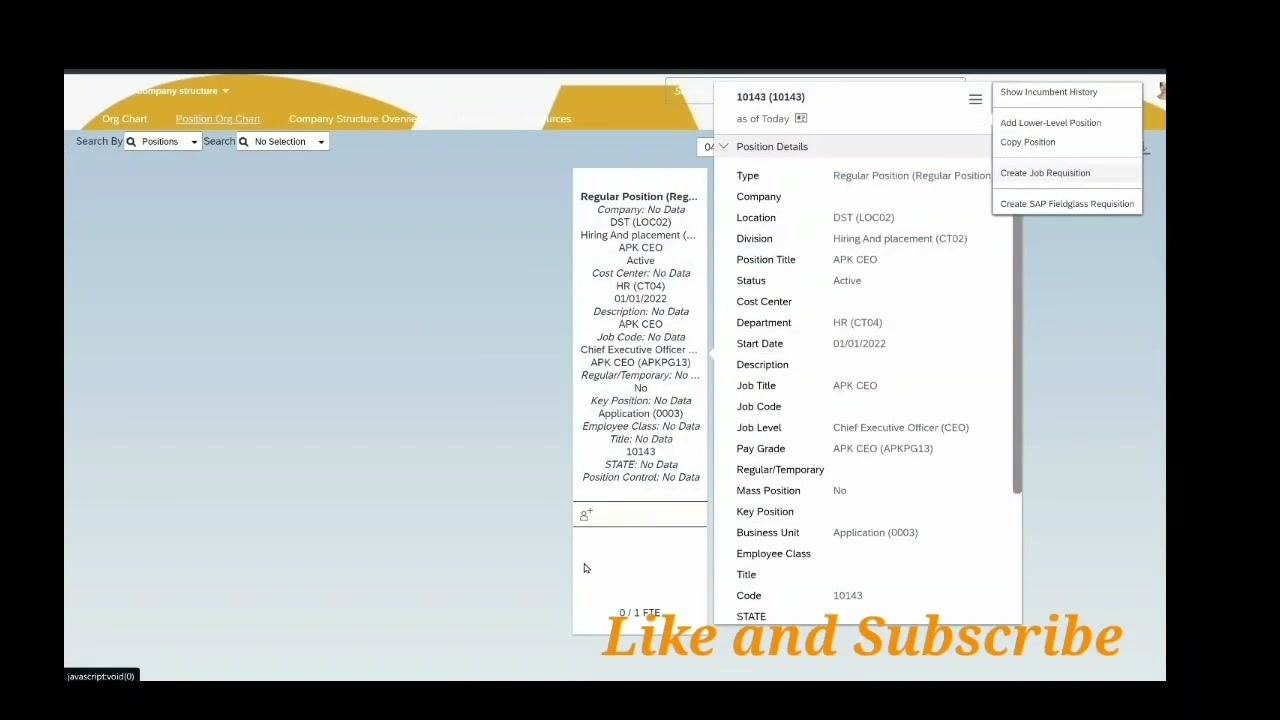
- Click the three-bar menu (hamburger icon) on the position card.
- Review the actions in the context menu:
- Show Incumbent History
- Add Lower-Level Position
- Copy Position
- Create Job Requisition
- Create SAP Fieldglass Requisition
Step 16: Add a lower-level position or copy a position
- Select Add Lower-Level Position to create a new position that reports to the current one. This establishes a hierarchical relationship.
- Select Copy Position to duplicate the current position, including its details. This lets you quickly create similar roles.
Step 17: View history or start hiring
- Select Show Incumbent History to see who has held the position.
- Select Create Job Requisition or Create SAP Fieldglass Requisition to start the hiring process for the position.
What's next
After you create a position, you can correct or delete it from the History tab, review it in Manage Positions, and see where it sits in the Position Org Chart. From the org chart, you can add lower-level positions, copy existing roles, and start requisitions.
Summary
You now know how to create a position in SuccessFactors using the Manage Data method in Employee Central. You fill out the Position and Job Details form, set the FTE, parent position, and To Be Hired value, review the organization details, and confirm the request. You can then correct or delete the position, and use the Position Org Chart to review it, add subordinate positions, copy roles, and start requisitions.
Generation details: cost, quality tiers
Docsie billed 5,500 credits ($3.85) to analyze this 11-minute video at standard quality. The rewrite, template fill and Word/PDF exports were included. The same video at each quality tier:
| Quality | Frames sampled | Credits | Approx. cost |
|---|---|---|---|
| Draft | every 16-30 s | 2,750 | $1.92 |
| Standard (this guide) | every 8-15 s | 5,500 | $3.85 |
| Detailed | every 4-7 s | 11,000 | $7.70 |
| Ultra | every 1-3 s | 22,000 | $15.40 |
Credits priced at $0.70 per 1,000; plans include a monthly allowance. Enterprise customers on on-premise or bring-your-own-model deployments run this on their own inference and pay no per-video credits.
Generated by Docsie Video-to-Docs on 2026-11-15 from a 10-minute video. Screenshots are frames from the source video and belong to their creator, SAP Technologies, whose original is embedded above. If you own this video and want the guide removed or credited differently, contact us and we will act within one business day.