
How to Create a Notification in ServiceNow
This guide walks you through how to create a notification in ServiceNow that automatically sends an email when an incident's priority changes to Priority 1 (Critical). You will configure the notification record, define its trigger conditions and recipients, and then test and verify that the email is delivered correctly.
Video: How to Create a Notification and Trigger Email in ServiceNow by Beyond20. All credit for the demonstration goes to the creator; watch the original on YouTube. The written guide below was generated from this video by Docsie. Creator? Request a change or removal.
This guide walks you through how to create a notification in ServiceNow that automatically sends an email when an incident's priority changes to Priority 1 (Critical). You will configure the notification record, define its trigger conditions and recipients, and then test and verify that the email is delivered correctly.
Prerequisites
- Access to a ServiceNow instance with administrator privileges.
- Permission to navigate the System Administration area and create records under System Notification.
- An existing incident record (or the ability to create one) to use for testing.
Part 1: Create the notification
Step 1: Access the ServiceNow dashboard
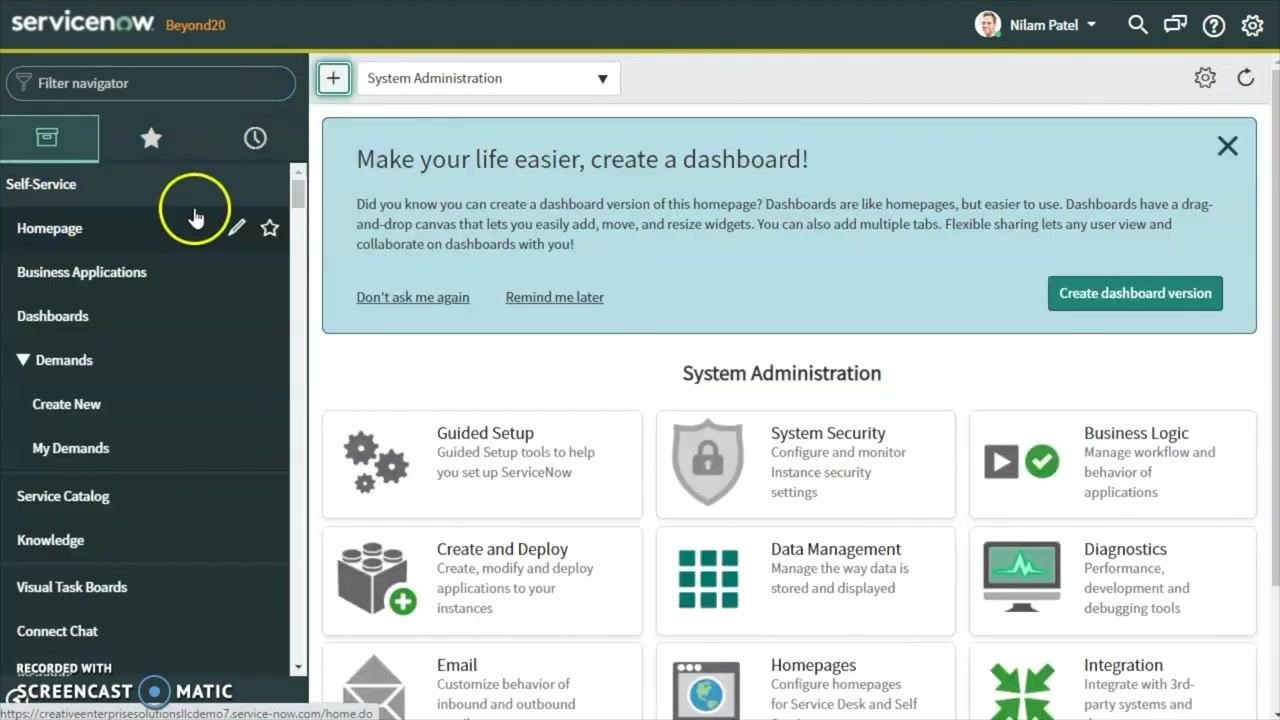
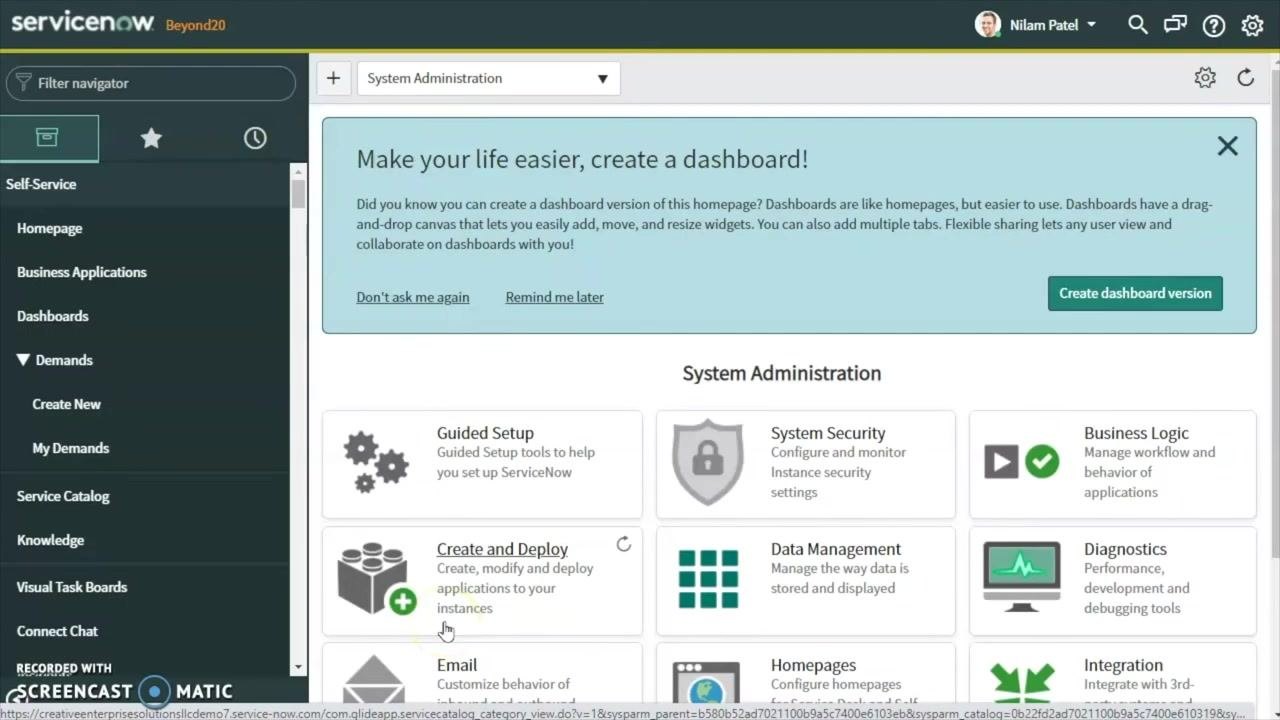
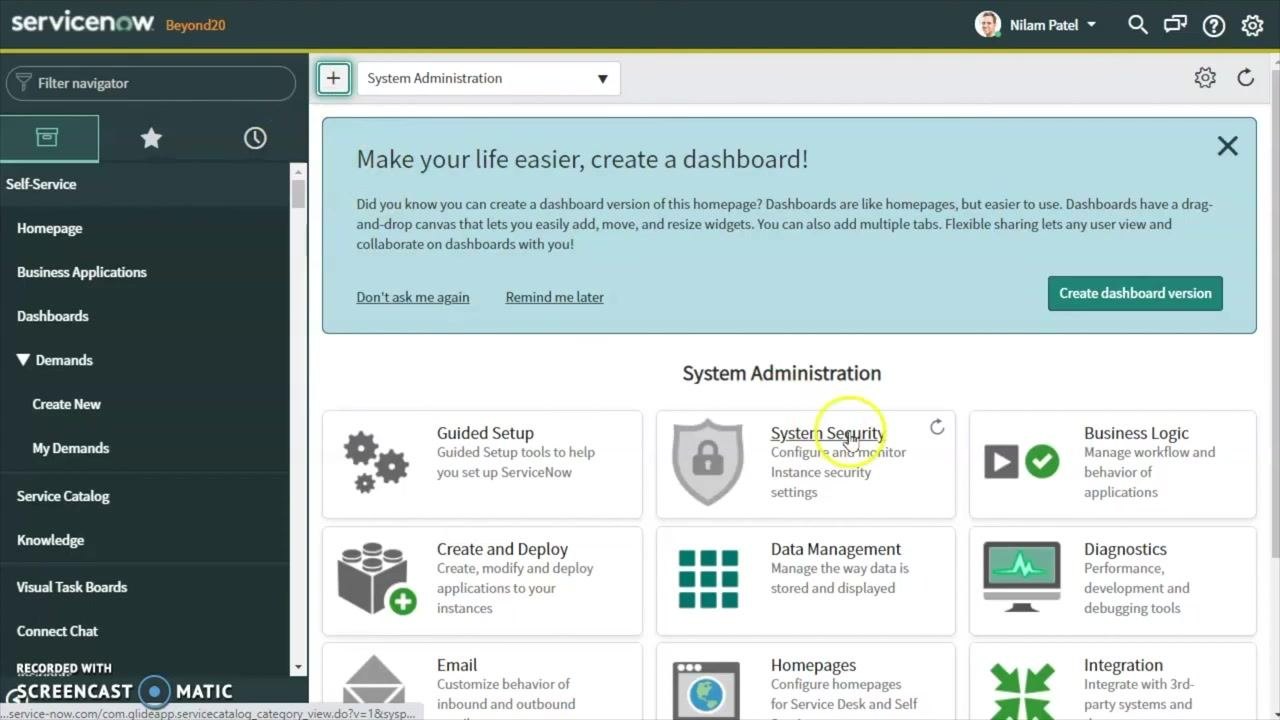
Log in to your ServiceNow instance and confirm you are on the main dashboard under System Administration. The dashboard displays administration options such as Guided Setup, System Security, Business Logic, Create and Deploy, Data Management, Diagnostics, Email, Homepages, and Integration.
Step 2: Search for the Notification module
Click into the Filter navigator search bar at the top left of the screen and type Notification. Related menu items will appear in the left navigation pane as you type.
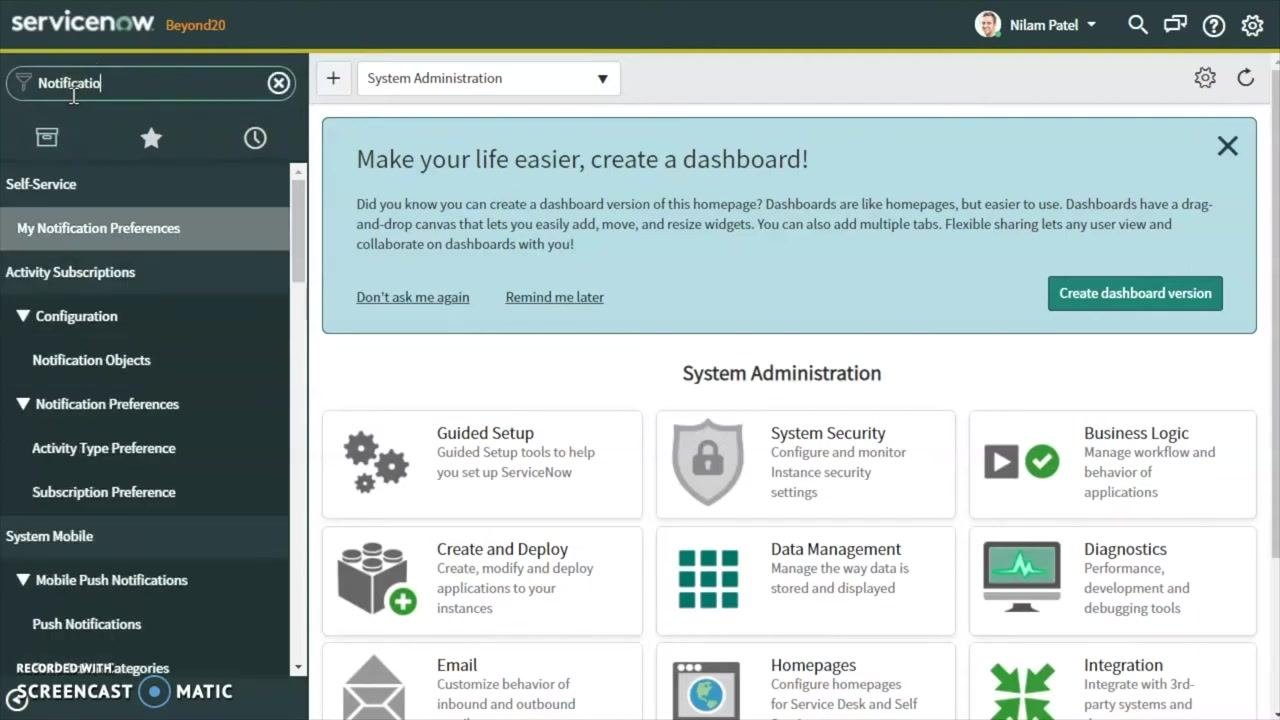
Step 3: Navigate to email notifications
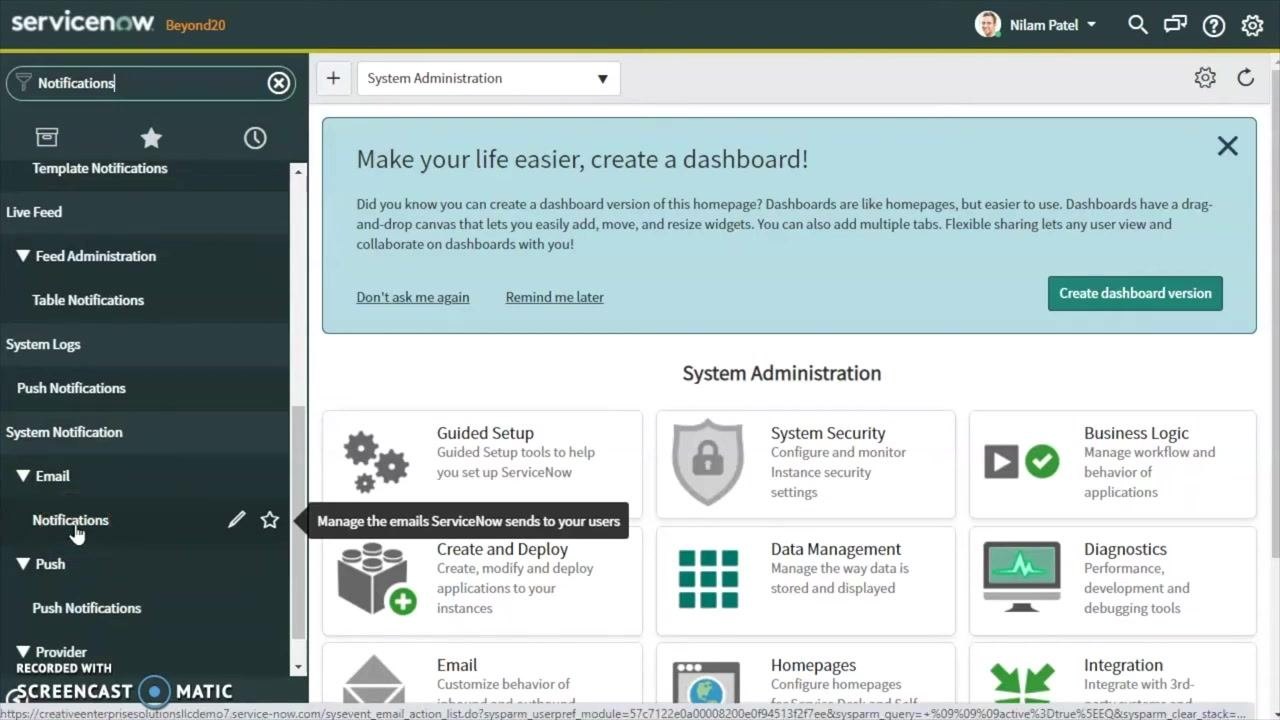
Under the expanded System Notification section, click Email, then select Notifications. This section lets you manage the emails ServiceNow sends to users.
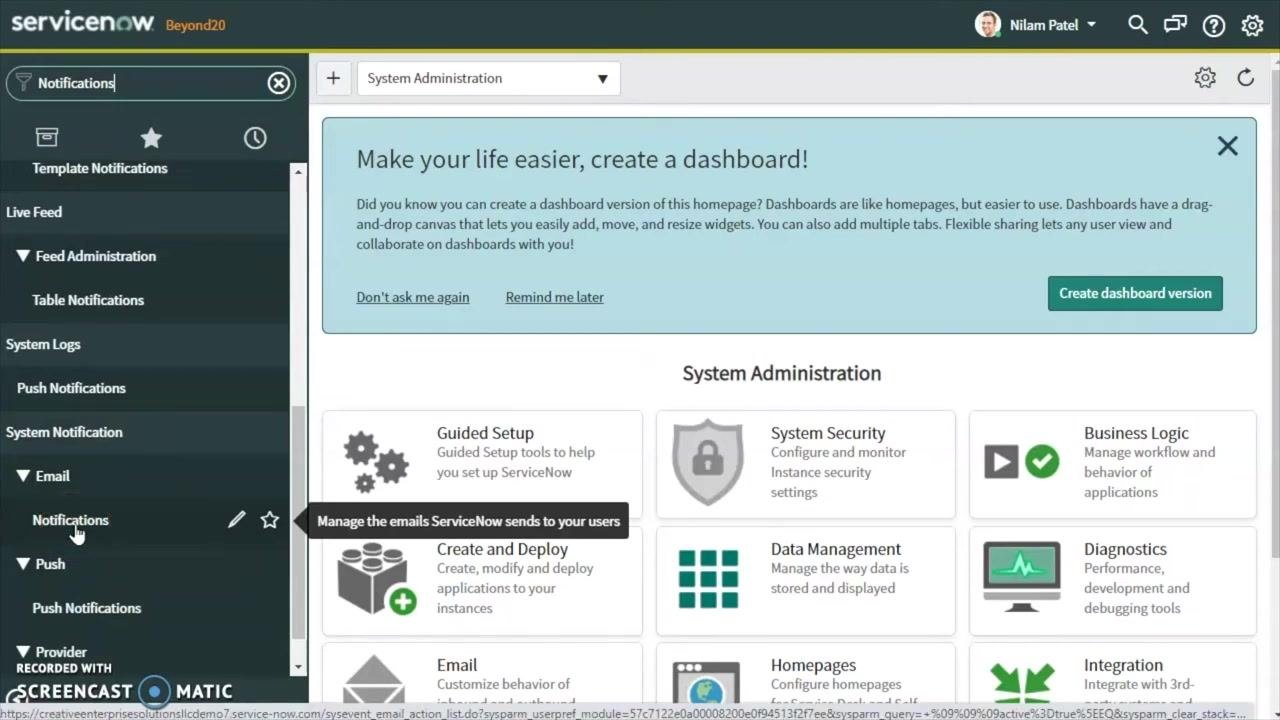
Step 4: Create a new notification record
Click Notifications to open the notification management screen, then click New to start a new notification record.
Step 5: Configure the notification details
On the Notification form, enter the following:
- Name:
Demo Notification - Application:
Global - Active: checked
The form also includes tabs for When to send, Who will receive, and What it will contain.
Step 6: Select the table
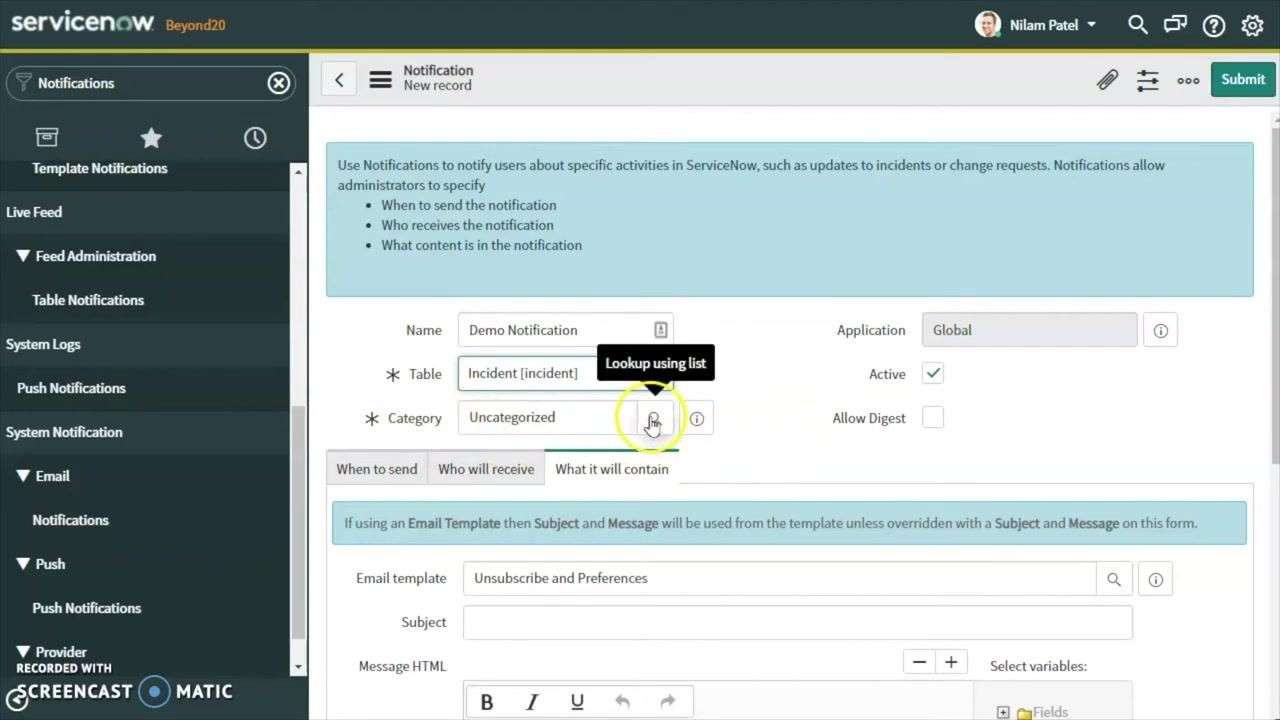
In the Table field, type and select Incident [incident] from the dropdown list. This ensures the notification is triggered based on incident records.
Step 7: Set the category (optional)
By default, Category is set to Uncategorized. If you want to trigger notifications for a specific category, click the lookup icon next to the Category field and choose the desired category. For this example, leave it as Uncategorized.
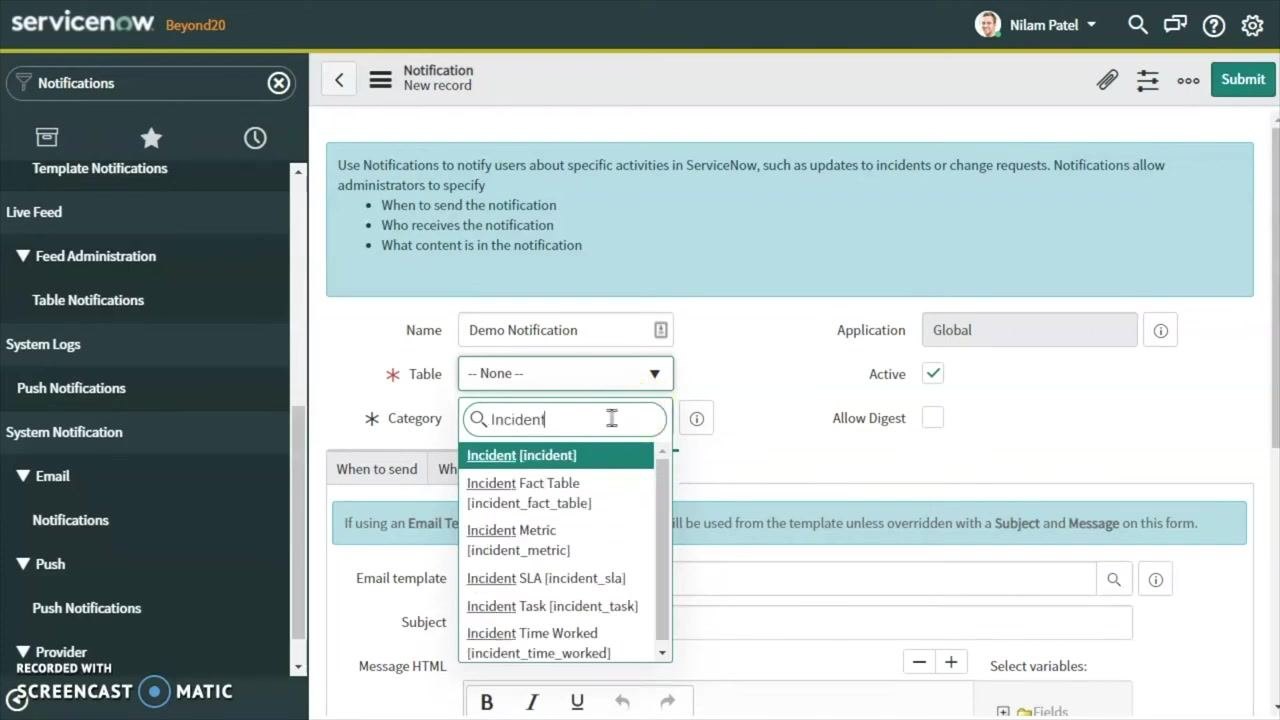
Step 8: Customize category conditions further (optional)
If you want the notification to trigger only for a P1 incident in a specific category, use the lookup list to set the category accordingly.
Step 9: Configure the email template and subject
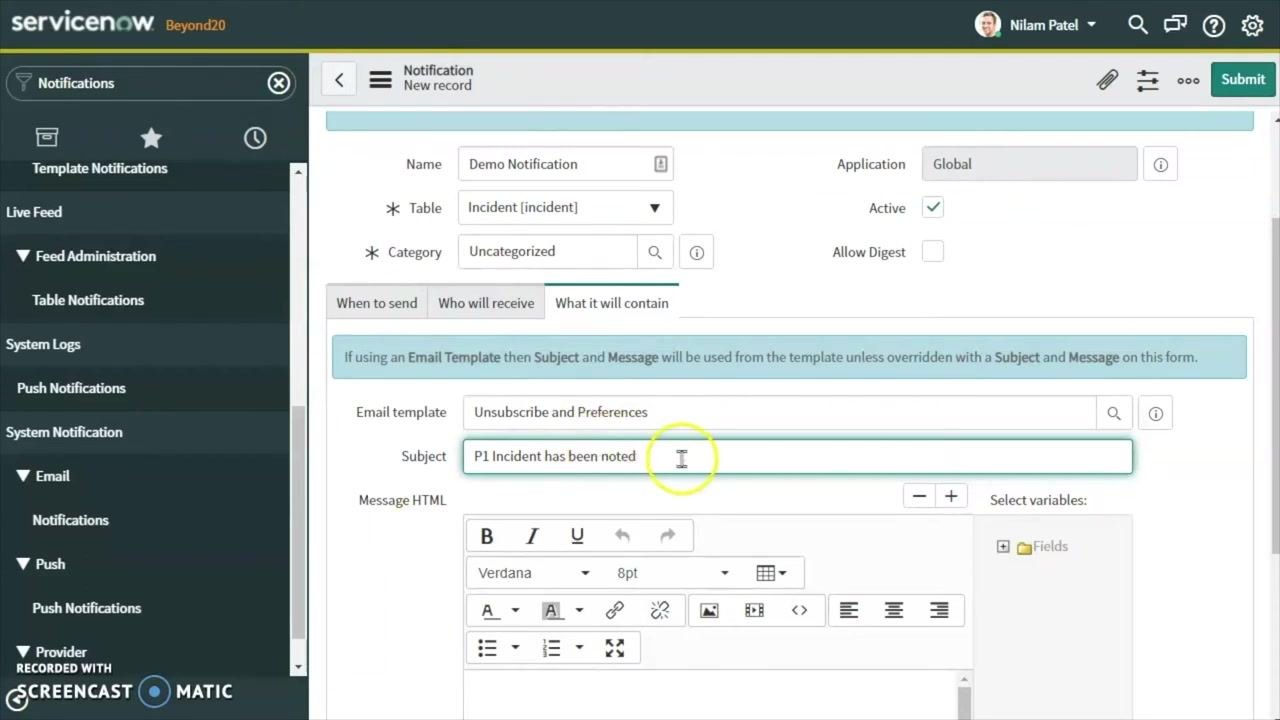
On the What it will contain tab, locate the Email template field and select Unsubscribe and Preferences. In the Subject field, enter P1 Incident has been noted. This subject will appear in the email sent to recipients.
Step 10: Compose the email body
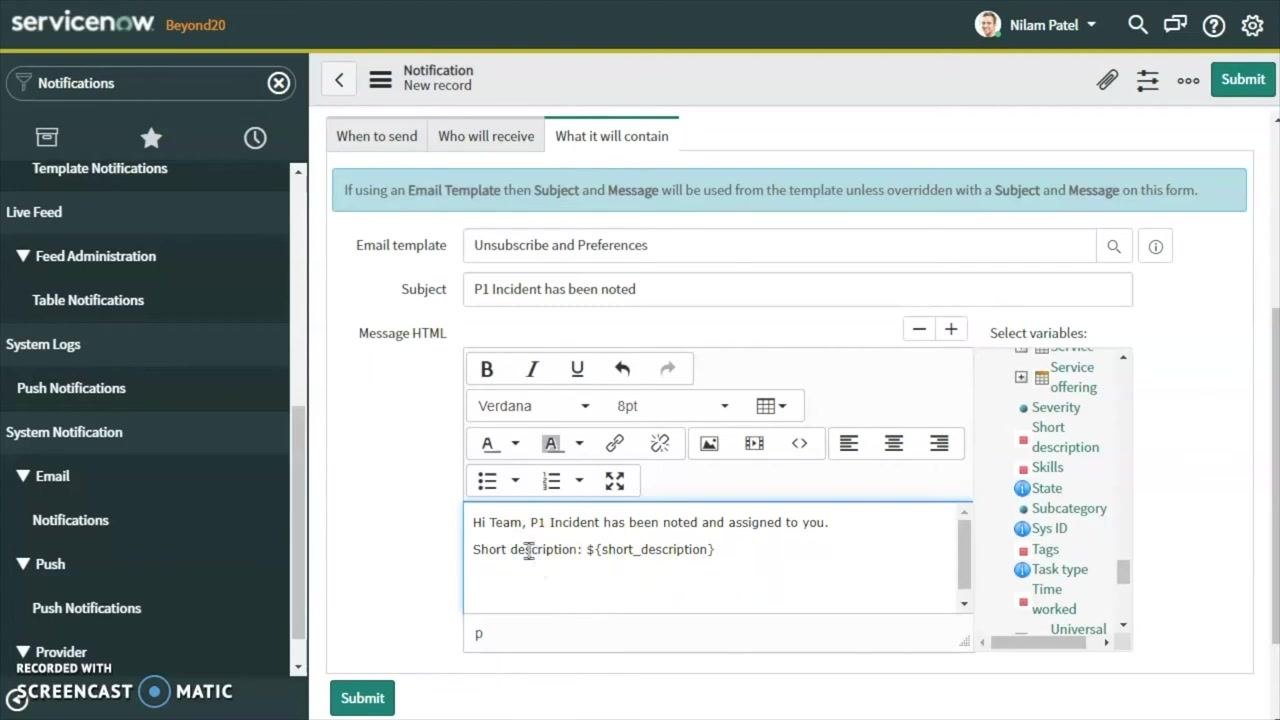
In the Message HTML section, enter the body of the email:
Hi Team,P1 Incident has been noted and assigned to you.
You can personalize the greeting with the user's name using variables, but this example uses "Hi Team".
Step 11: Insert incident details using variables
Click the Fields section to the right of the Message HTML editor and insert the variable for the short description by adding the line Short description: ${short_description}. You can optionally use the full description or other variables, but this example adds only the short description.
Step 12: Add additional variables (optional)
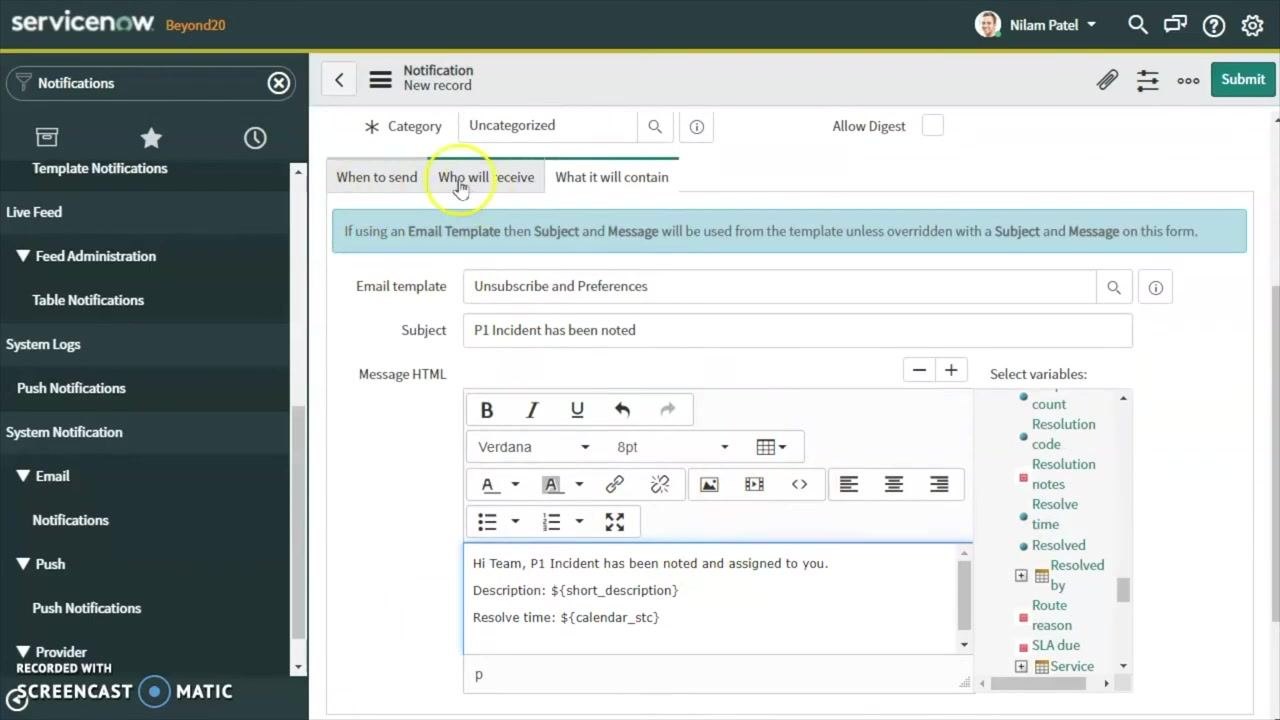
If desired, add more variables from the Fields list, such as Description or Resolution time. This demonstration includes only the short description, since resolution time is not configured.
Step 13: Add the resolution time variable (optional)
You can also add the resolution time variable for additional context by inserting the line Resolve time: ${calendar_stc}. Note that this value may not display if resolution time is not configured.
Step 14: Configure when to send the notification
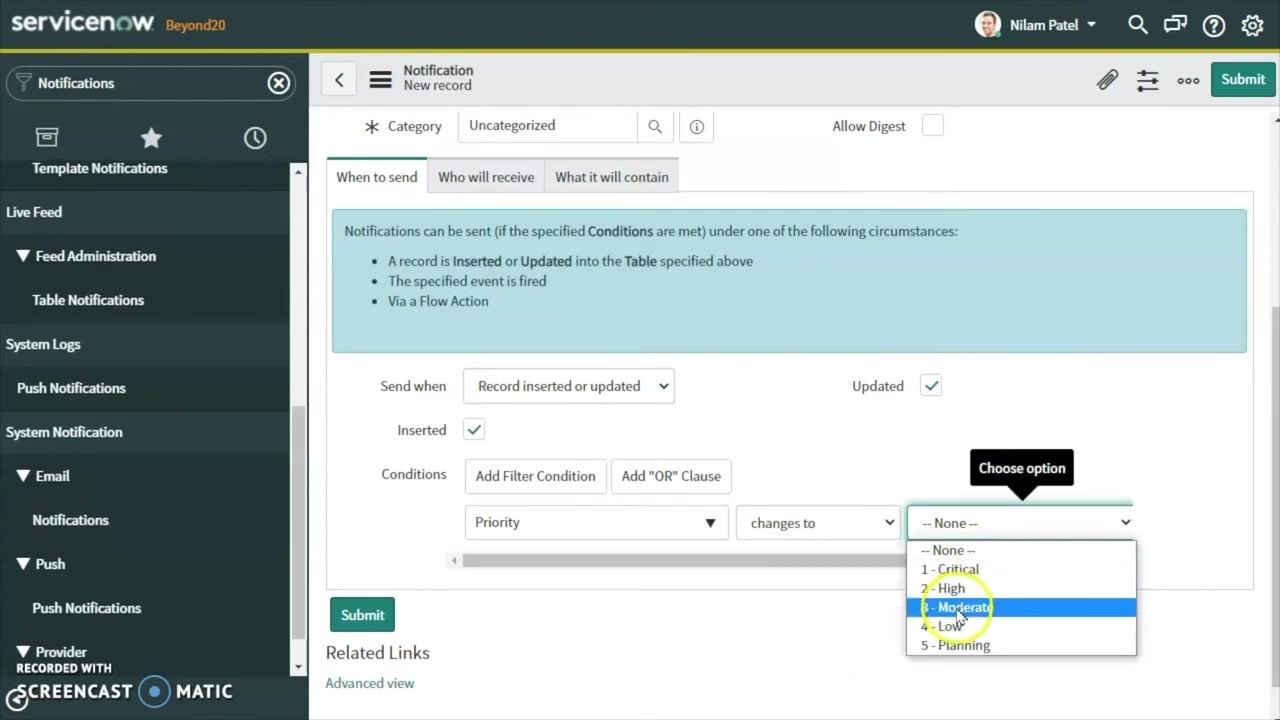
Click the When to send tab and set Send when to Record inserted or updated. Check both Inserted and Updated so that notifications are sent for new and existing incidents alike.
Step 15: Set the trigger condition for priority
In the Conditions section, click Add Filter Condition and set:
- Field:
Priority - Operator:
changes to - Value:
1 - Critical
This ensures the notification is sent only when the incident's priority changes to Critical.
Step 16: Specify notification recipients
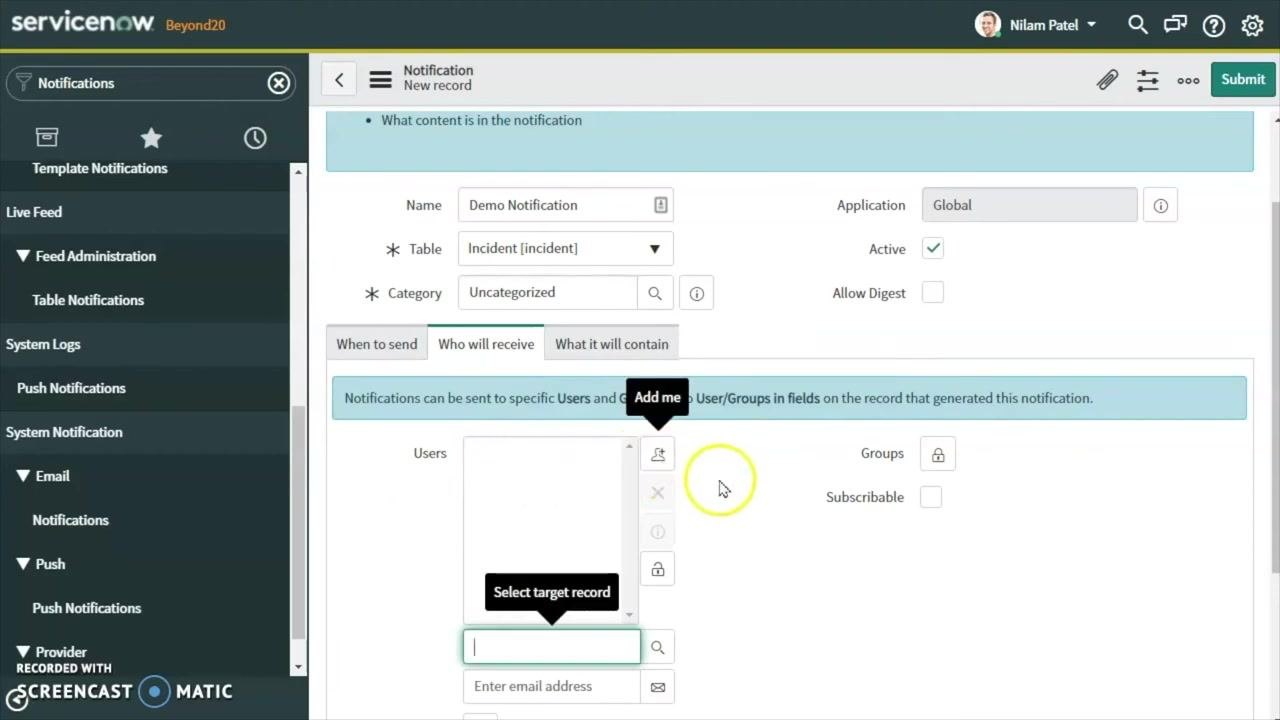
Click the Who will receive tab. To add yourself as a recipient, click the Unlock Users icon, then click Add me. Your name will appear in the Users list.
Step 17: Add groups as recipients
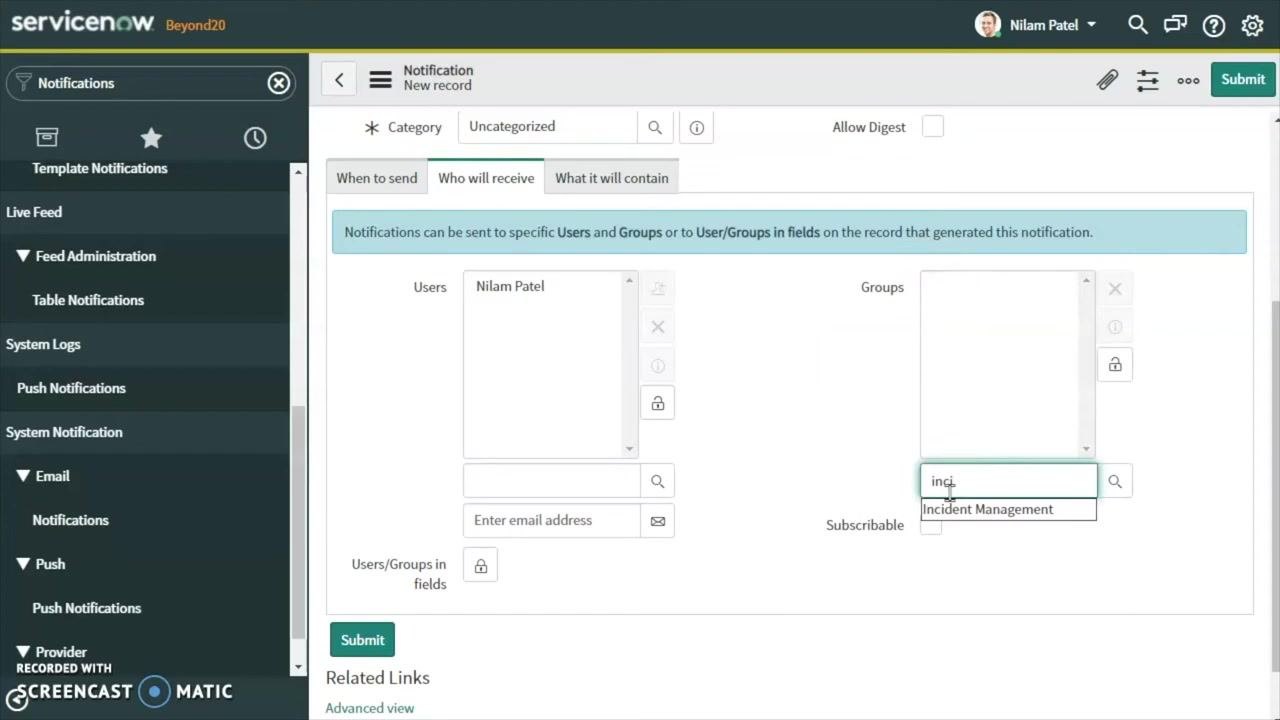
In the Groups field, type Incident Management and select it from the dropdown. This adds the Incident Management group as a recipient of the notification.
Part 2: Configure and test the incident notification
Step 1: Review the notification configuration
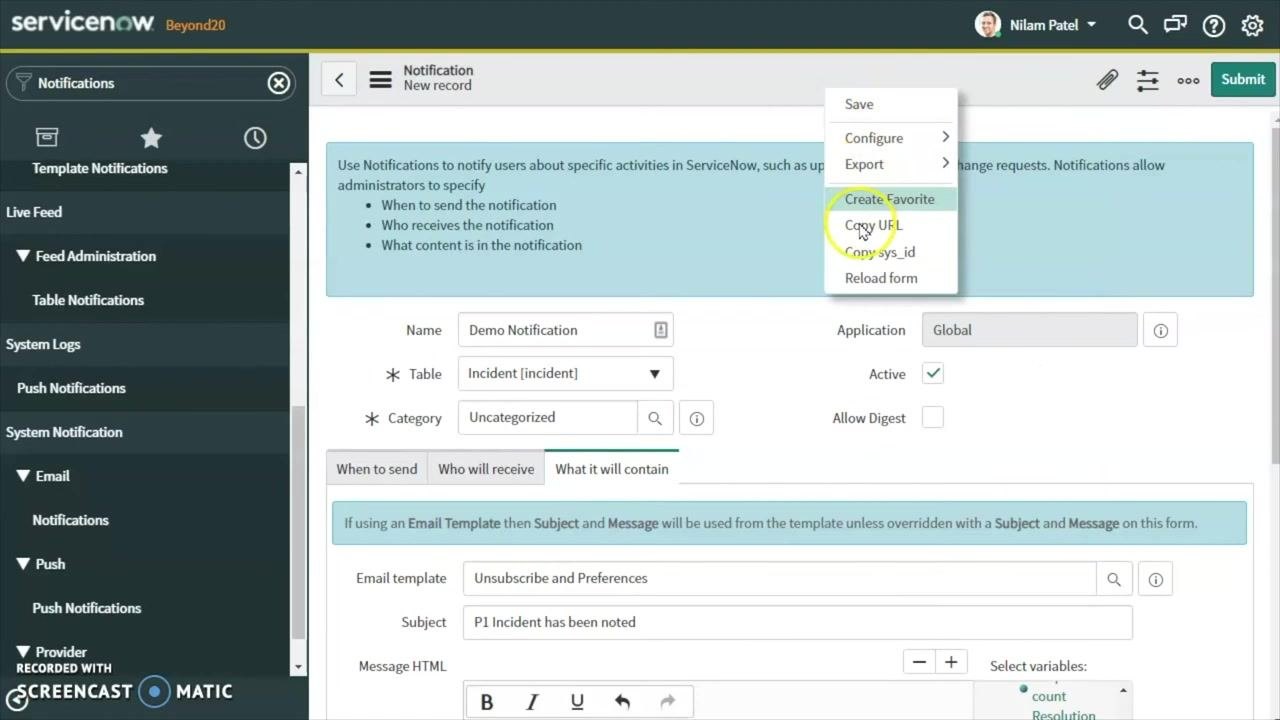
Open the notification record you created and confirm the following fields:
- Name: Demo Notification
- Table: Incident [incident]
- Category: Uncategorized
- Application: Global
- Active: checked
- Allow Digest: unchecked
Step 2: Confirm the trigger condition
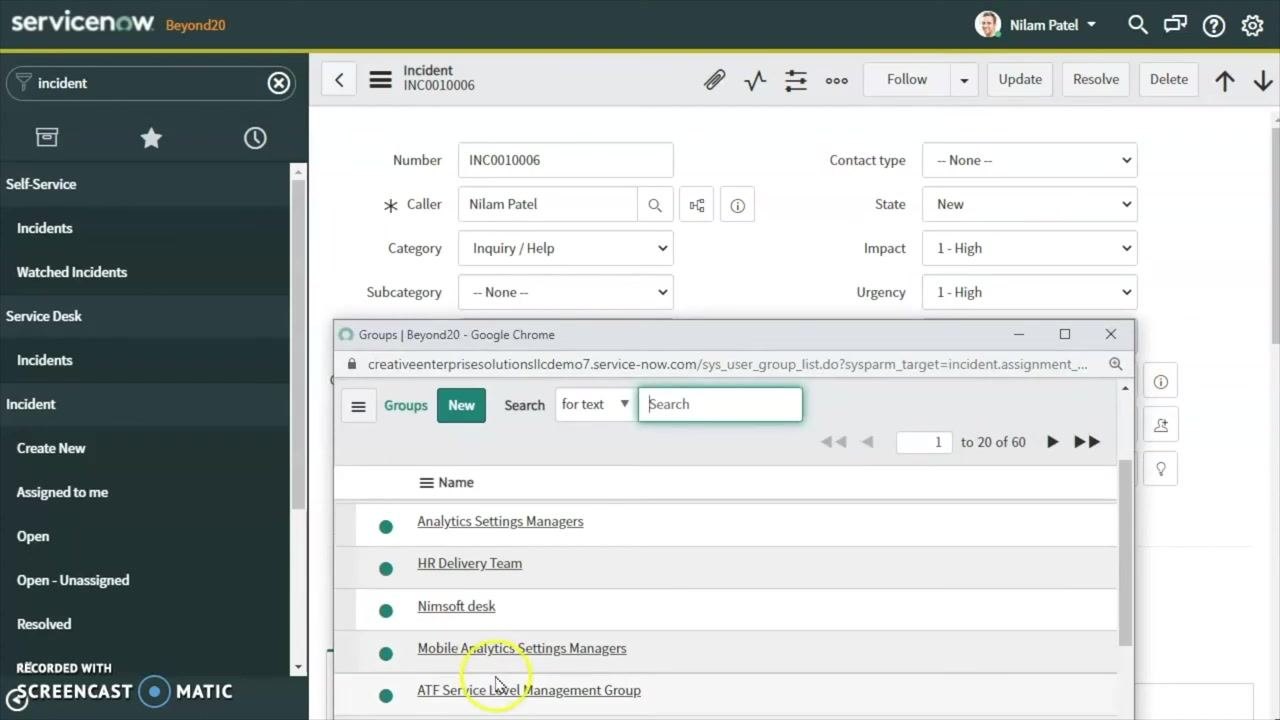
On the When to send tab, confirm Send when is set to Record inserted or updated, with Inserted and Updated both checked. Confirm the filter condition is set to Priority changes to 1 - Critical.
Step 3: Confirm notification recipients
Click the Who will receive tab and confirm the recipients, such as the incident management group or specific users.
Step 4: Confirm the notification content
Click the What it will contain tab. Confirm the email template (such as Unsubscribe and Preferences), the Subject set to "P1 Incident has been noted", and the message entered in Message HTML.
Step 5: Save the notification
Click the menu icon (three dots) in the top right of the form and select Save to save the notification configuration.
Step 6: Open the incident list
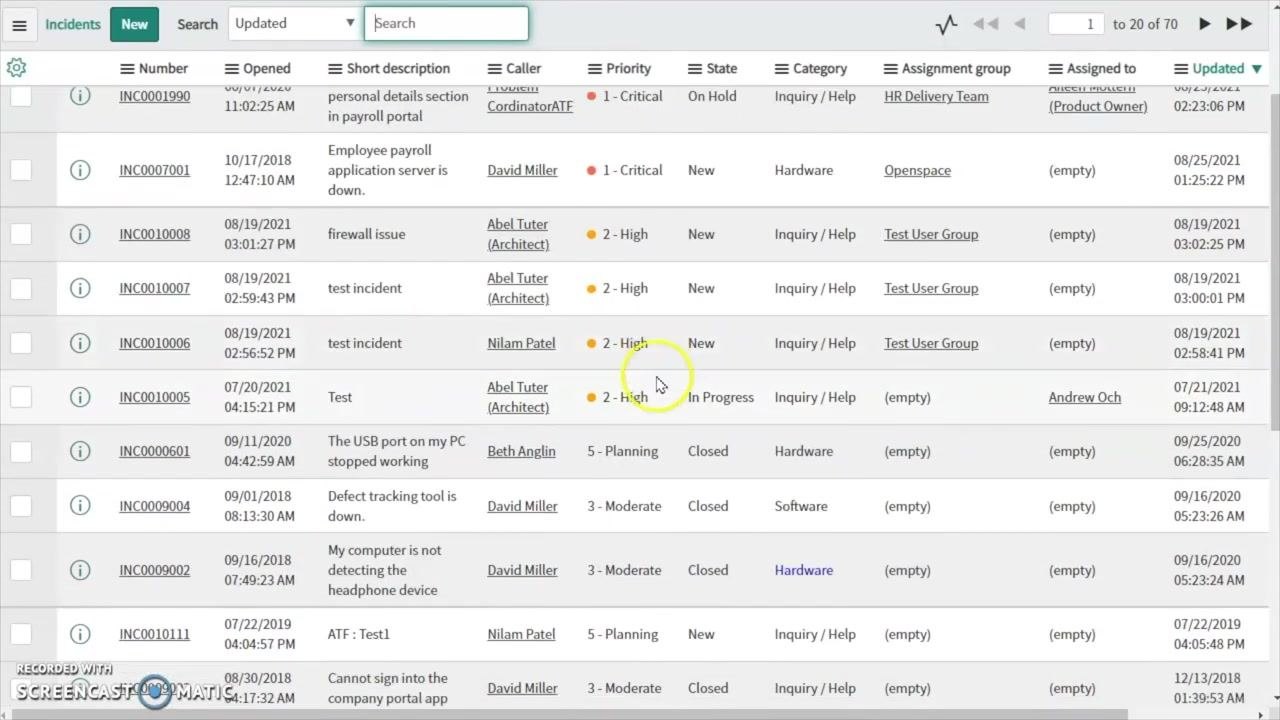
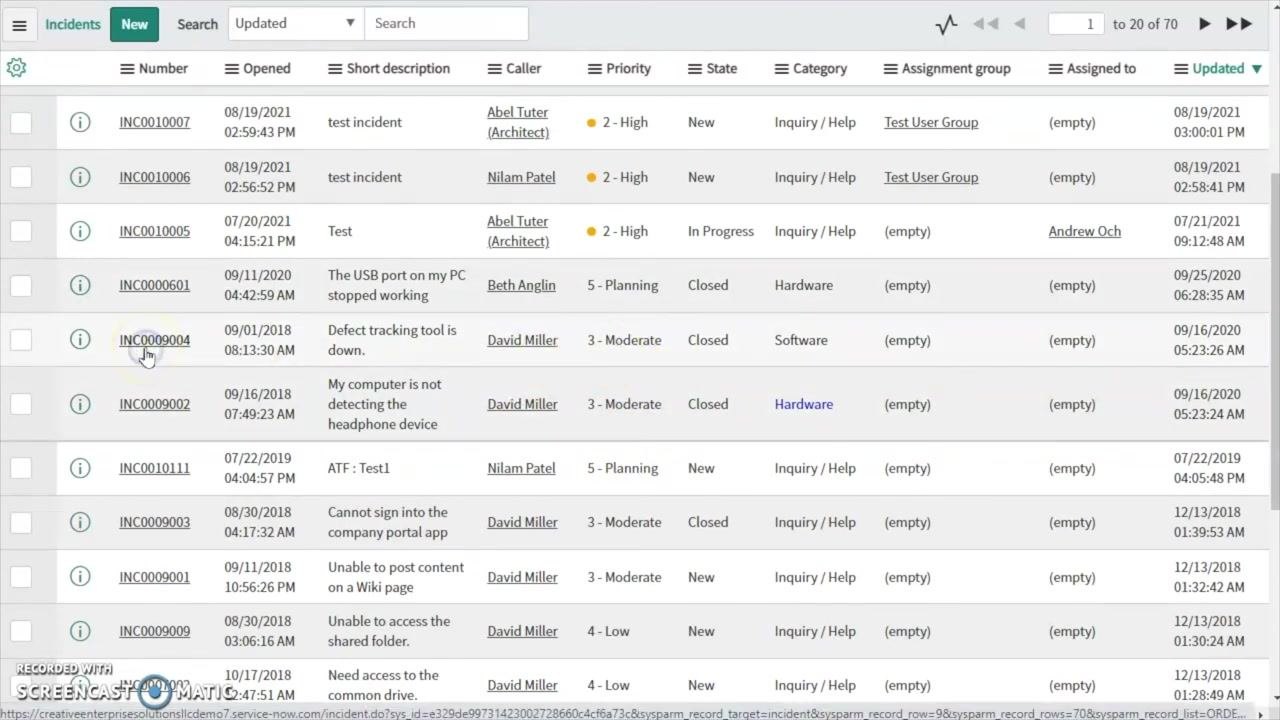
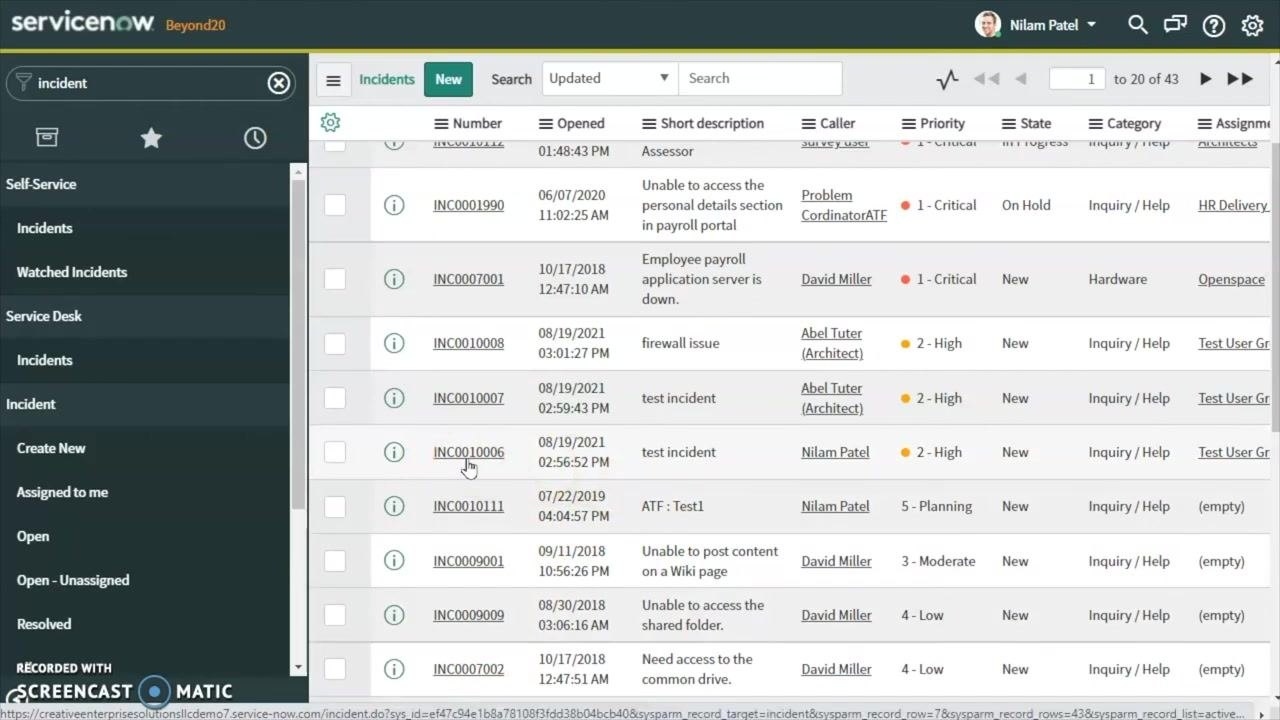
Use the left navigation pane to search for and open the Incidents list. The list displays columns such as Number, Opened, Short description, Caller, Priority, State, Category, Assignment group, Assigned to, and Updated.
Step 7: Select an incident to test the notification
Identify an incident with Priority = 3 - Moderate (or another value you want to change) and click its incident number to open the record.
Step 8: Update the incident priority and assignment
In the incident record, change Priority to 1 - Critical. Click the lookup icon next to Assignment group to open the group selection window and choose the appropriate group (for example, "Portfolio Managers"). Assign the incident to a specific user if required (for example, Megan Burke).
Step 9: Add notes and save the incident
In the Short description or Notes section, add a note such as "demo notification", then click Save to update the incident.
Part 3: Verify notification delivery and the email log
Step 1: Save the updated incident
Confirm the incident record shows:
- Priority: 1 - Critical
- Assignment group: Portfolio Managers
- Assigned to: Megan Burke
- Short description: test incident
Click the menu icon (three dots) at the top right of the incident form and select Save to commit the changes.
Step 2: Navigate to the email log
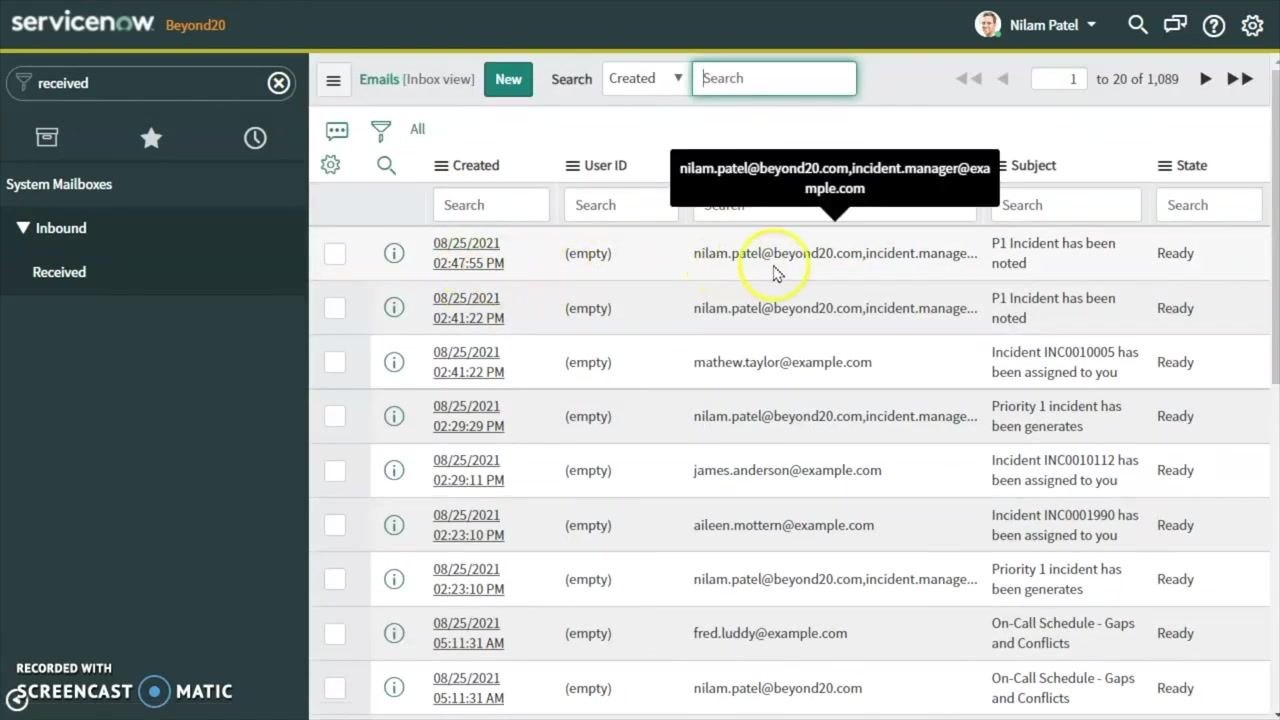
In the left navigation pane, use the filter navigator to search for "received". Under System Mailboxes, click Received to open the list of received emails.
Step 3: Locate the notification email
In the Emails [Inbox view] list, look for the entry with the subject "P1 Incident has been noted". Confirm it was sent to the intended recipients (for example, nilam.patel@beyond20.com, incident.manager@example.com) and that the State column shows Ready.
Step 4: Preview the notification email
Click the email entry with the subject "P1 Incident has been noted" to open its details, then click Preview Email. Confirm the preview contains:
- The greeting and message: "Hi Team, P1 Incident has been noted and assigned to you."
- Description: test incident
- Resolve time: (blank if not configured)
- Links for Unsubscribe and Notification Preferences
- A reference ID (for example, Ref:MSG0002762_PXcTjfpQwkLeUJuukzEk)
Step 5: Review the email log details
Scroll down in the email details view to see the Headers and Email Log. Confirm the notification source and version in the headers (such as X-ServiceNow-Source and X-ServiceNow-SysEmail-Version), and review the Email Log for additional delivery information.
Step 6: Return to the administration dashboard
Use the navigation pane to return to the Homepage or System Administration dashboard. From here you can access additional configuration options such as Guided Setup, System Security, Business Logic, and Data Management.
Summary
You have now learned how to create a notification in ServiceNow that triggers an email when an incident's priority changes to Critical (P1). You configured the notification's trigger conditions, recipients, and email content, then tested it by updating an incident's priority and assignment. Finally, you verified that the email was generated correctly by reviewing the Received email log and previewing the notification content.
Generation details: cost, quality tiers
Docsie billed 4,500 credits ($3.15) to analyze this 9-minute video at standard quality. The rewrite, template fill and Word/PDF exports were included. The same video at each quality tier:
| Quality | Frames sampled | Credits | Approx. cost |
|---|---|---|---|
| Draft | every 16-30 s | 2,250 | $1.57 |
| Standard (this guide) | every 8-15 s | 4,500 | $3.15 |
| Detailed | every 4-7 s | 9,000 | $6.30 |
| Ultra | every 1-3 s | 18,000 | $12.60 |
Credits priced at $0.70 per 1,000; plans include a monthly allowance. Enterprise customers on on-premise or bring-your-own-model deployments run this on their own inference and pay no per-video credits.
Generated by Docsie Video-to-Docs on 2026-10-01 from a 8-minute video. Screenshots are frames from the source video and belong to their creator, Beyond20, whose original is embedded above. If you own this video and want the guide removed or credited differently, contact us and we will act within one business day.