
How to Check the Instance Version in ServiceNow
Knowing how to check the instance version in ServiceNow helps you confirm which feature release, patch, and hotfix level your environment is running. This guide walks you through three ways to find this information: the Application Navigator stats page, a direct URL, and the Admin Center dashboard. It also covers how to restrict access to the diagnostic pages for security purposes.
Video: Where To Find The ServiceNow Instance Version? by ServiceNow on Toast (2024). All credit for the demonstration goes to the creator; watch the original on YouTube. The written guide below was generated from this video by Docsie. Creator? Request a change or removal.
Knowing how to check the instance version in ServiceNow helps you confirm which feature release, patch, and hotfix level your environment is running. This guide walks you through three ways to find this information: the Application Navigator stats page, a direct URL, and the Admin Center dashboard. It also covers how to restrict access to the diagnostic pages for security purposes.
Prerequisites
- An account with the admin role in your ServiceNow instance.
- Access to your instance URL (for the direct URL method).
Method 1: View build information using the Application Navigator
Step 1: Log in to your instance
Log in to your ServiceNow instance using an account that has the admin role.
Step 2: Search for the stats page
In the Application Navigator on the left, locate the filter/search box at the top. Type stats into the box.
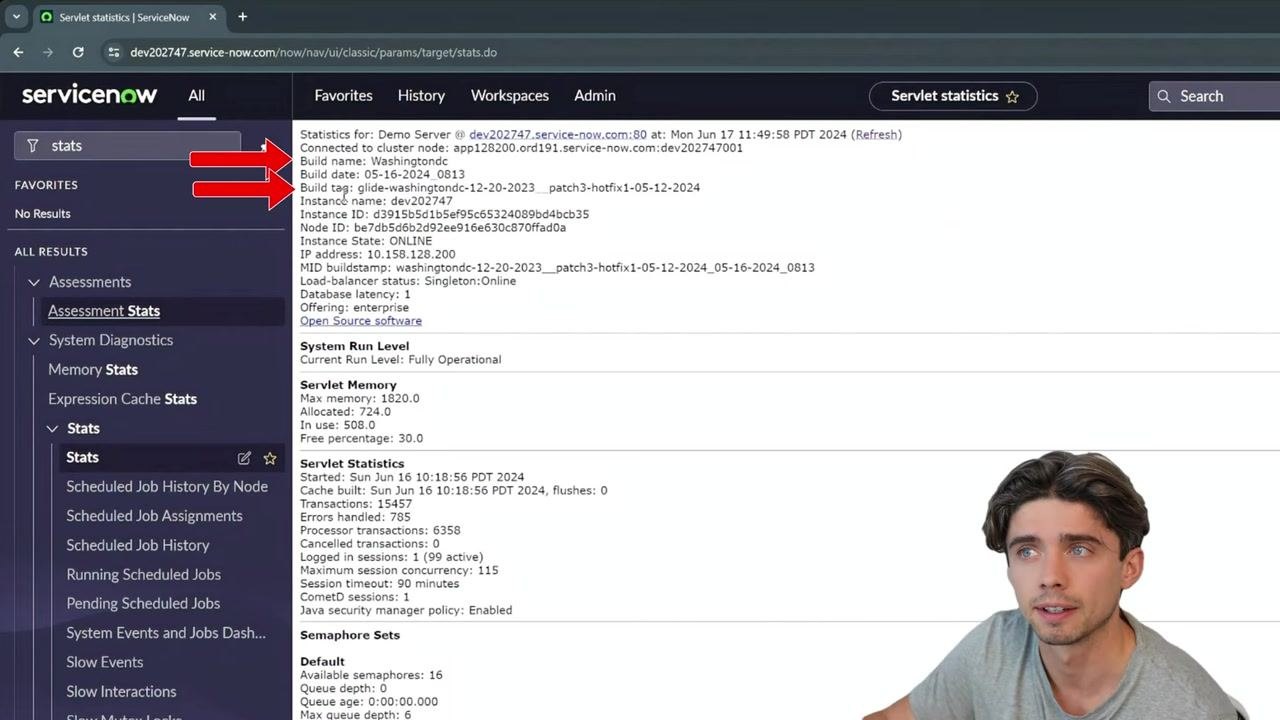
Under the System Diagnostics section, find and click the Stats link.
Step 3: Review the build name and build tag
You are taken to the Servlet statistics (stats) page. At the top of this page, locate the following information:
- Build name – for example,
Washingtondc - Build tag – for example,
glide-washingtondc-12-20-2023_patch3-hotfix1-05-12-2024
These fields indicate the current feature release and the specific patch/hotfix level of your instance.
Method 2: Access the stats page directly via URL
Step 4: Enter the direct stats URL
In your browser, enter the following URL, replacing <instance-name> with your ServiceNow instance name, then press Enter:
https://<instance-name>.service-now.com/stats.do
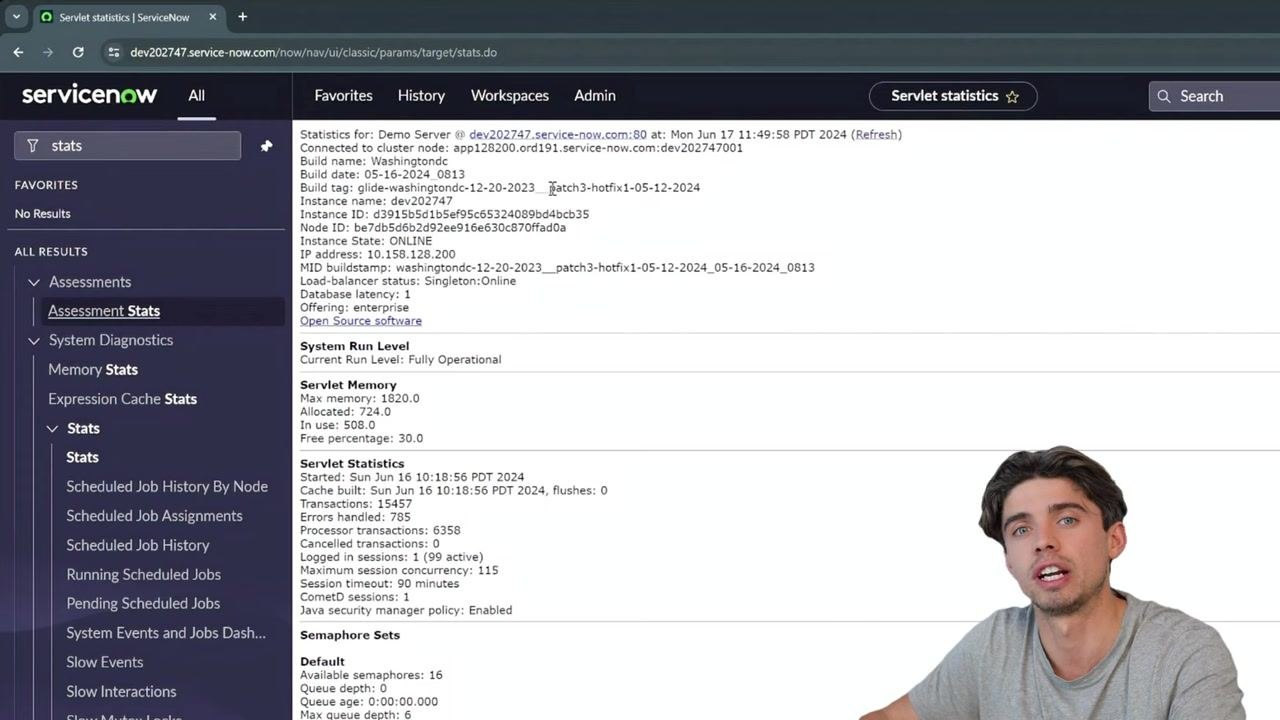
Note: By default, there is no restriction on accessing this page via the direct URL, which can be a potential security concern.
Understanding build name and build tag
- The build name indicates the current feature release (for example, "Washington DC"), which is one of the two major releases ServiceNow rolls out each year.
- The build tag provides more granular information about the specific patch and hotfix applied to your instance.
- ServiceNow Support uses the
/stats.doURL to monitor instance health, which is why it's accessible without admin privileges by default. - Consider restricting access to
/stats.doif you have security concerns.
Restrict access to the /stats.do page
Step 5: Navigate to the System Properties table
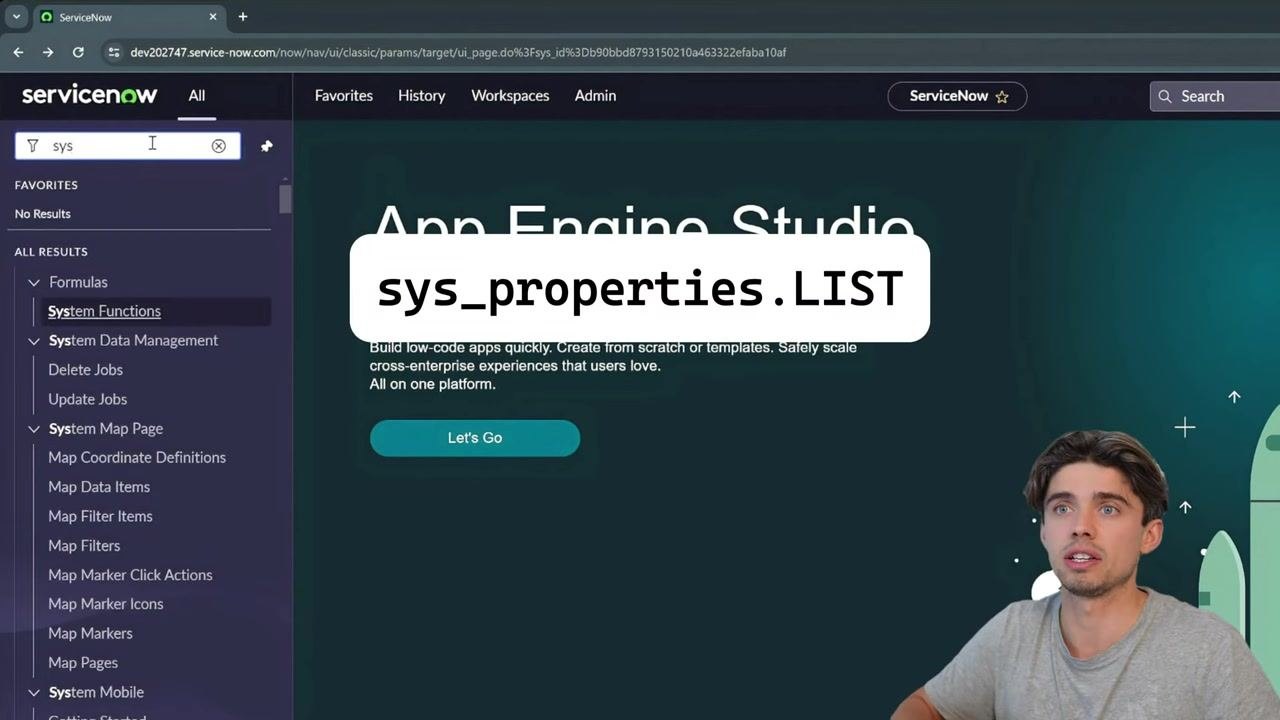
In the Application Navigator filter box, type sys. Open the sys_properties.LIST page in a new browser tab to access the System Properties table.
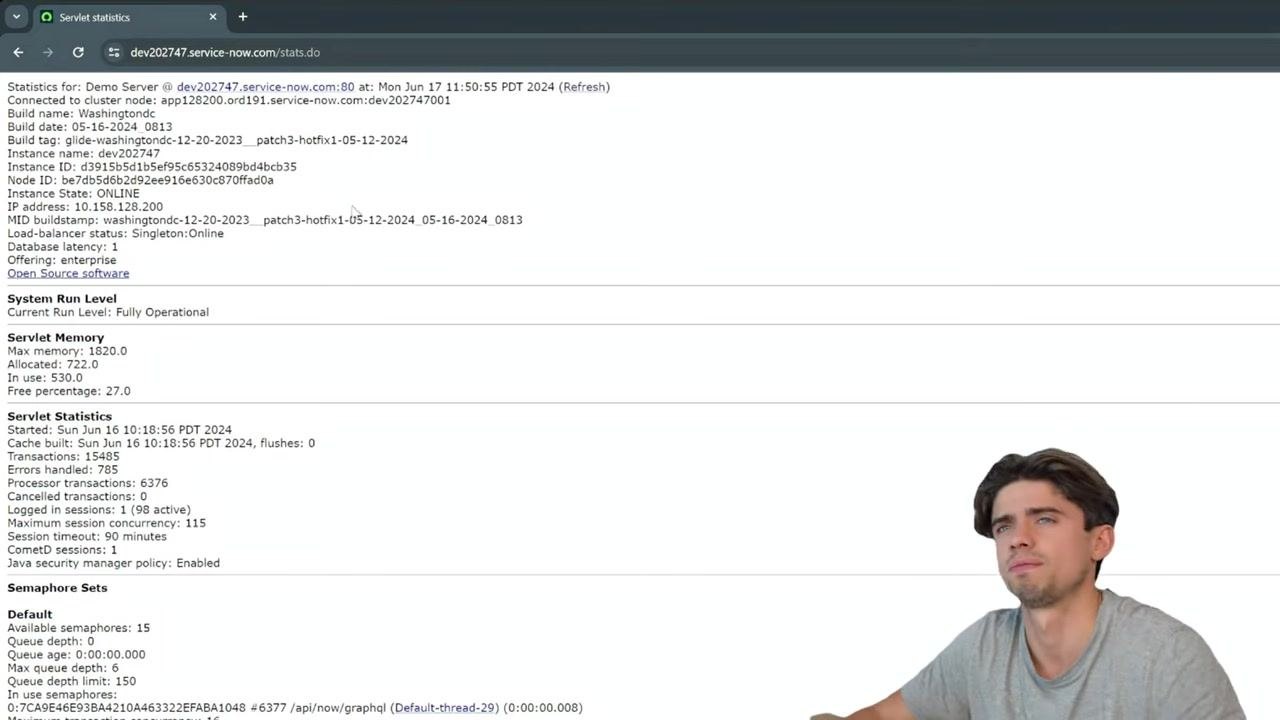
Step 6: Search for the security property
In the System Properties list, search for the property named glide.security.diag_txns_acl.
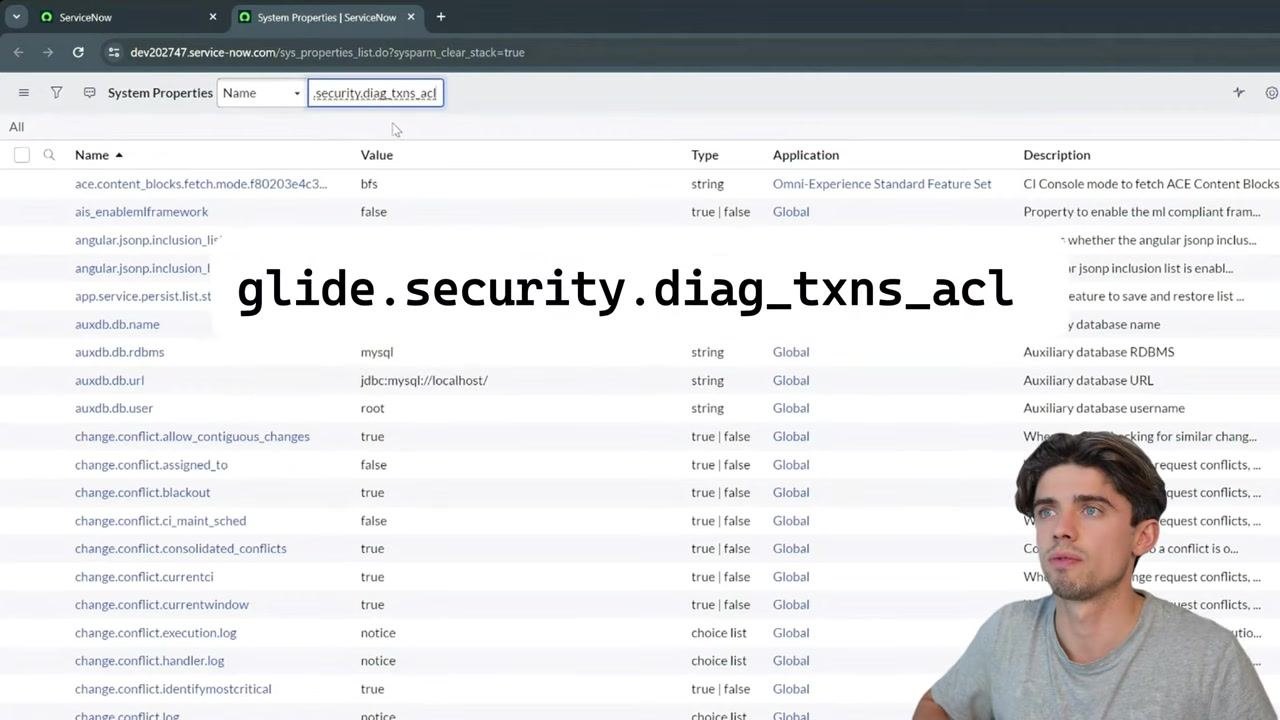
If the property does not already exist, you need to add it manually.
Step 7: Set the property value to restrict access
Set the value of glide.security.diag_txns_acl to true. This restricts access to the /stats.do, /threads.do, and /replication.do pages to admin users only.
Hover over the property's description to confirm the behavior; the full text confirms that, when set to true, only an admin user can access these pages.
Be aware of potential security risks: Accessing version information via diagnostic URLs such as /stats.do can expose sensitive details to unauthorized users. Ensure you have set the glide.security.diag_txns_acl property to true to restrict access to admin users only.
Method 3: View the instance version using Admin Center
ServiceNow also provides the Admin Center, a dashboard available in recent releases, that allows admins to view instance version and upgrade details.
Step 8: Open the Admin Center
In the Application Navigator filter box, type ADMIN. Under the results, locate and click Admin Center, then click Admin Home to open the admin home dashboard.
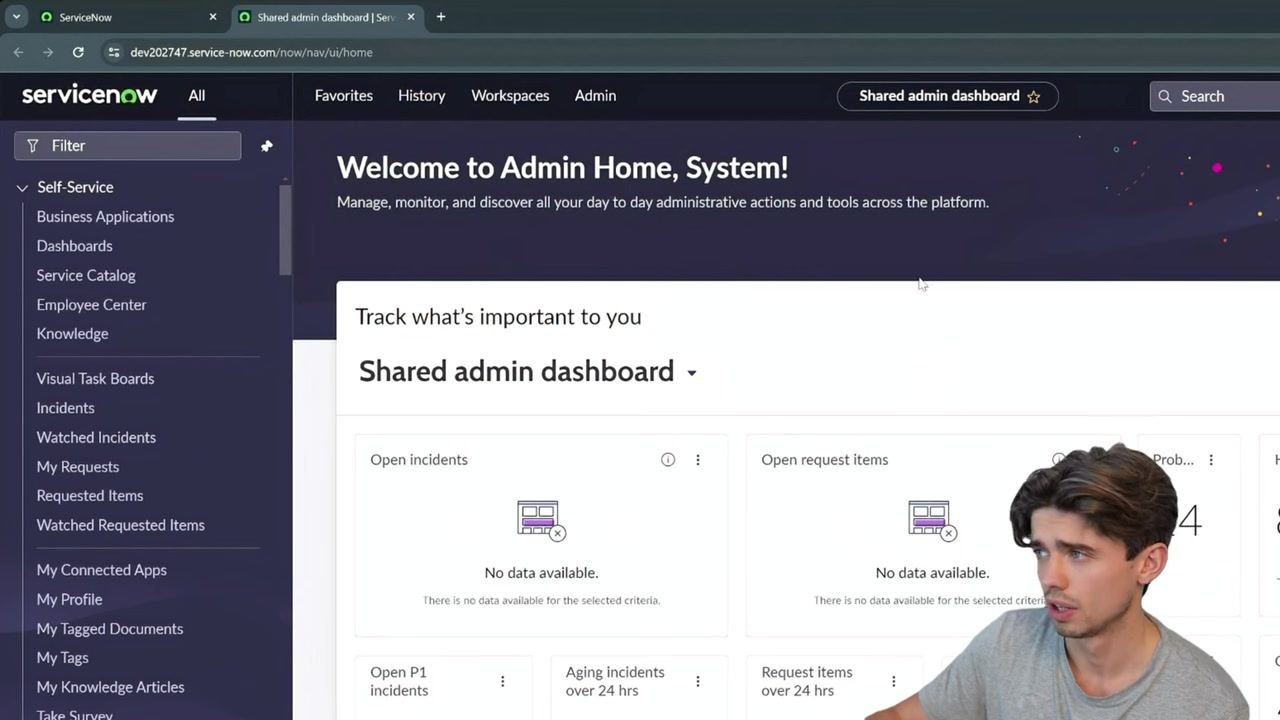
Step 9: Locate the instance information widget
On the Admin Home dashboard, scroll to the bottom and find the widget labeled Get information about your instance. Here you see:
- Current version – for example,
Washingtondc - No upgrade scheduled (if applicable)
- Upgradability violations – for example,
0 - A link to Visit upgrade center
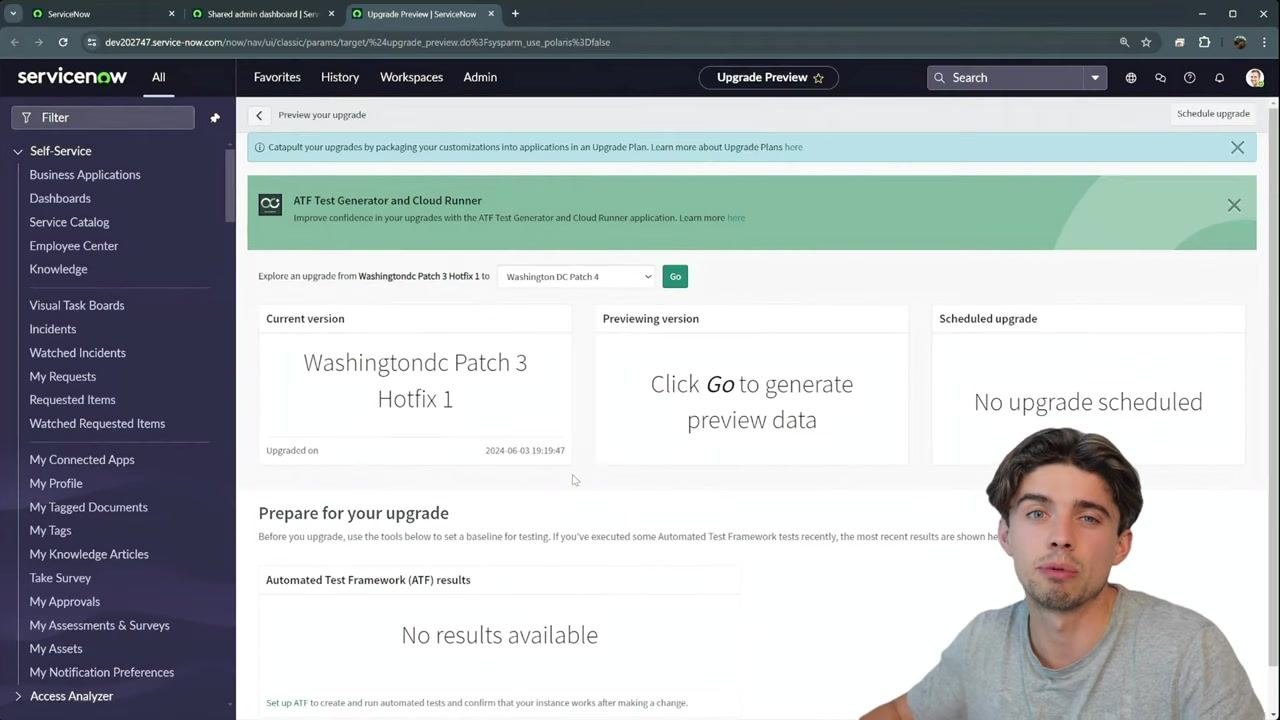
Step 10: View detailed patch and hotfix information
Click Visit upgrade center in the widget. In the Upgrade Center, view the Current version field for detailed release information, such as:
Washingtondc Patch 3 Hotfix 1- The upgrade date, for example
2024-06-03 19:19:47
Understanding version details
The ServiceNow instance version includes three components:
- Feature release – for example, "Washingtondc"
- Patch number – for example, "Patch 3"
- Hotfix number – for example, "Hotfix 1"
The patch number indicates incremental updates that address bugs or minor improvements since the main feature release. The hotfix number represents urgent fixes applied after a patch, usually for critical issues.
What's next
- To restrict access to diagnostic pages, add or set the
glide.security.diag_txns_aclproperty to true in System Properties. - To view your instance version going forward, use the Admin Center's Get information about your instance widget and the Upgrade Center for patch/hotfix details.
- Both methods described in this guide require the admin role.
By following these steps, you can secure sensitive diagnostic pages and easily check your ServiceNow instance's version and patch level using either the stats page, the direct URL, or the Admin Center dashboard.
Generation details: cost, quality tiers
Docsie billed 2,000 credits ($1.40) to analyze this 4-minute video at standard quality. The rewrite, template fill and Word/PDF exports were included. The same video at each quality tier:
| Quality | Frames sampled | Credits | Approx. cost |
|---|---|---|---|
| Draft | every 16-30 s | 1,000 | $0.70 |
| Standard (this guide) | every 8-15 s | 2,000 | $1.40 |
| Detailed | every 4-7 s | 4,000 | $2.80 |
| Ultra | every 1-3 s | 8,000 | $5.60 |
Credits priced at $0.70 per 1,000; plans include a monthly allowance. Enterprise customers on on-premise or bring-your-own-model deployments run this on their own inference and pay no per-video credits.
Generated by Docsie Video-to-Docs on 2026-10-11 from a 3-minute video. Screenshots are frames from the source video and belong to their creator, ServiceNow on Toast, whose original is embedded above. If you own this video and want the guide removed or credited differently, contact us and we will act within one business day.