
How to Create a Type Group in SAP
A type group is a repository object in the ABAP Dictionary. It lets you define data types in the Dictionary instead of inside an ABAP program. This guide shows you how to create a type group in SAP ABAP, define types in it, and verify it. It then shows you how to use those types in an ABAP report.
Video: SAP ABAP - Type group by TutorialsPoint (2018). All credit for the demonstration goes to the creator; watch the original on YouTube. The written guide below was generated from this video by Docsie. Creator? Request a change or removal.
A type group is a repository object in the ABAP Dictionary. It lets you define data types in the Dictionary instead of inside an ABAP program. This guide shows you how to create a type group in SAP ABAP, define types in it, and verify it. It then shows you how to use those types in an ABAP report.
Prerequisites
Before you start, review the naming rules for type groups:
- The name of a type group can have a maximum of 5 characters.
- Every data type you define in a type group must begin with the type group name, followed by an underscore (_). For example, in a type group named
ZTYPE, a data type is namedZTYPE_AGE.
This guide uses a type group named Ztyp1. It defines two types, ZTYP1_NAME and ZTYP1_AGE.
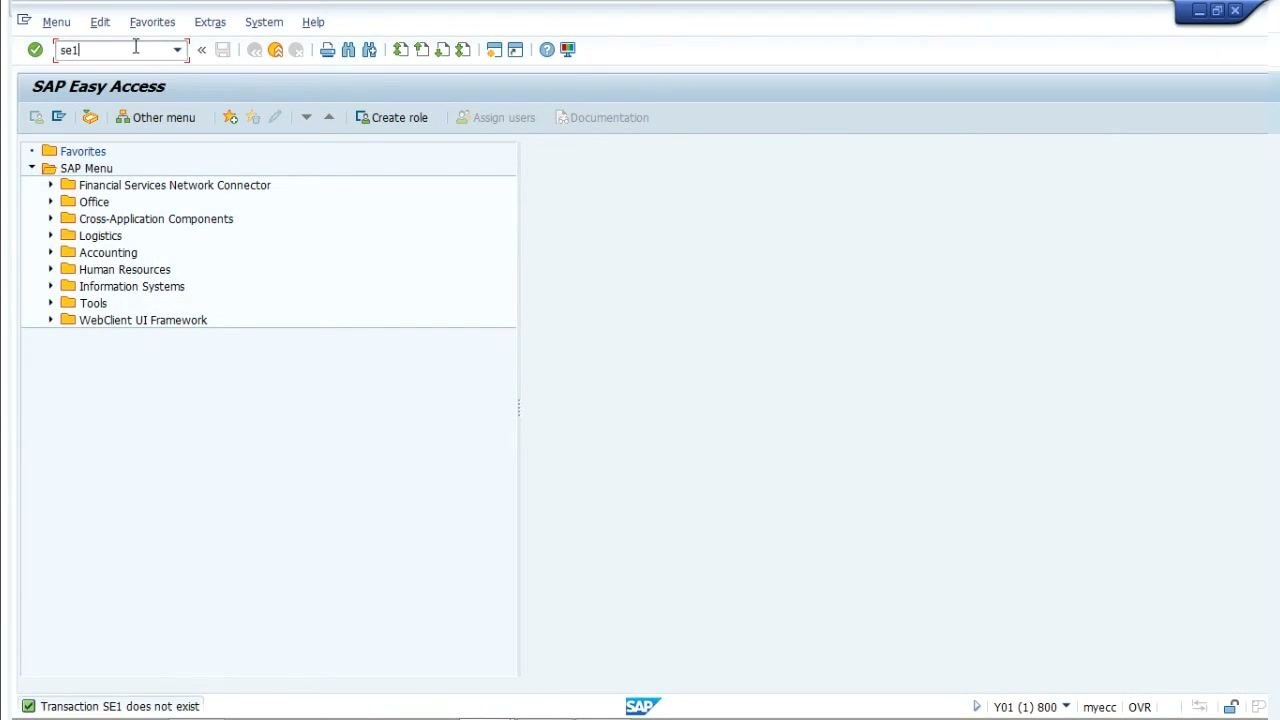
Open the ABAP Dictionary with transaction SE11
- On the SAP Easy Access screen, enter the transaction code
SE11in the command field. - Press Enter to open the ABAP Dictionary.
If you enter an incorrect transaction code, such as SE1, a message appears at the bottom of the screen: "Transaction SE1 does not exist." Re-enter the code correctly to continue.
Select Type Group and enter a name
To create a type group in SAP ABAP, start from the initial screen of the ABAP Dictionary.
- On the ABAP Dictionary: Initial Screen, select the Type Group radio button.
- Enter the type group name in the input field. For this example, enter
Ztyp1. - Click Create.
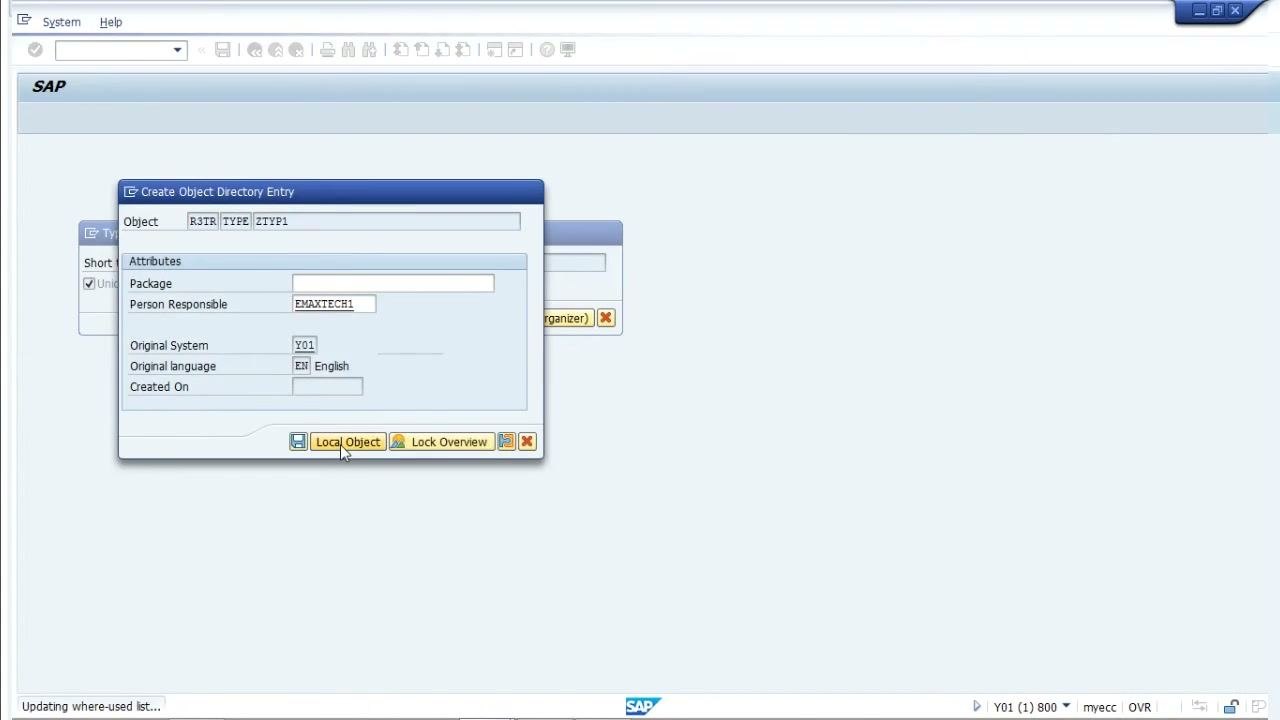
Enter a description and save as a local object
- In the Create Type Group dialog, enter a short description. For this example, enter "Type group".
- When the Create Object Directory Entry dialog appears, click Local Object to save the type group locally.
Define the types in the type group editor
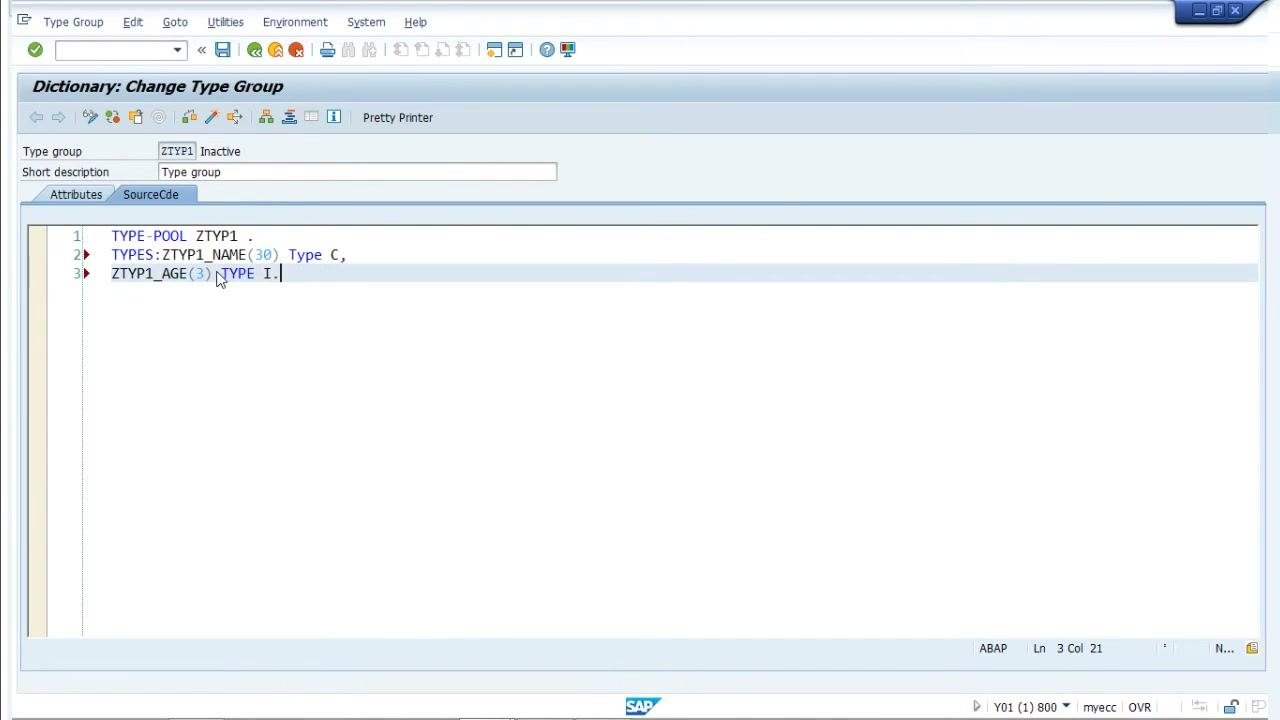
The Dictionary: Change Type Group editor opens with a template that contains TYPE-POOL ZTYP1 .. Define your custom types under the SourceCde tab.
TYPE-POOL ZTYP1 .
TYPES: ZTYP1_NAME(30) TYPE C,
       ZTYP1_AGE(3) TYPE I.
ZTYP1_NAMEis a character type of length 30.ZTYP1_AGEis an integer type of length 3.
Both type names start with the type group name followed by an underscore, as the naming rules require.
Save, check, and activate the type group
After you enter the type definitions, complete these actions in order:
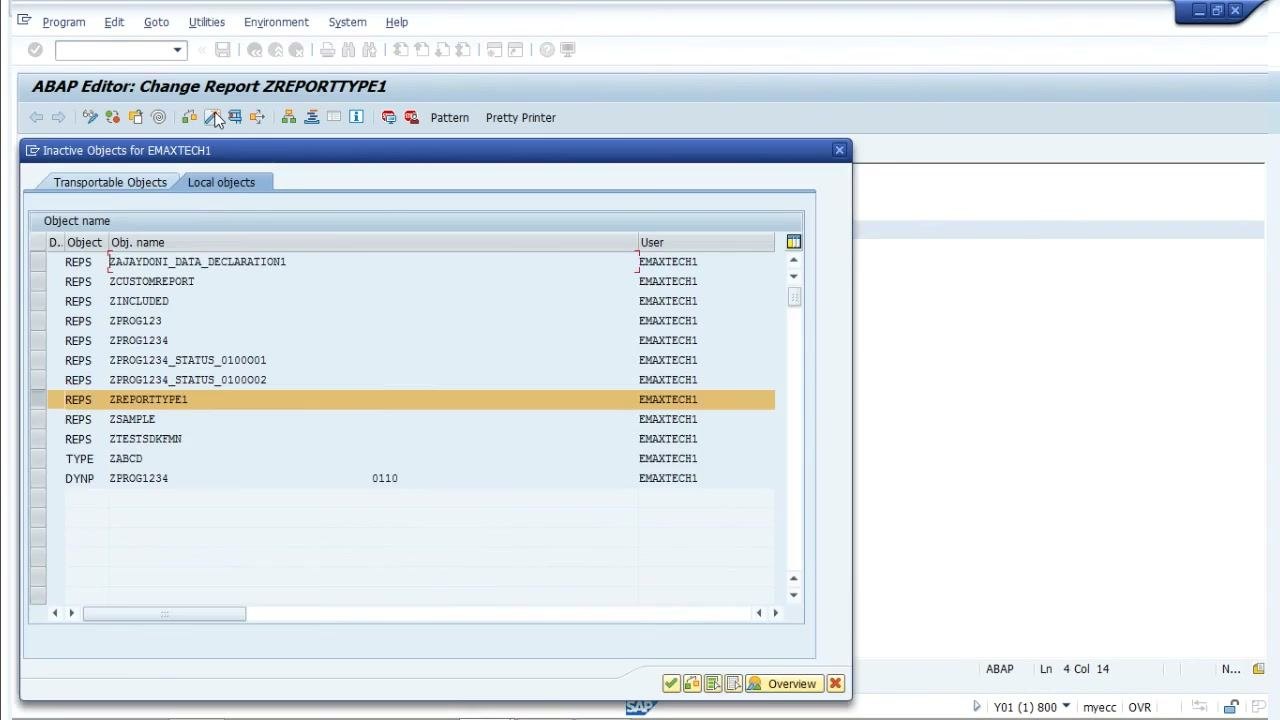
- Click Save to store your changes.
- Click Check (the checkmark icon) to validate the type group for syntax errors.
- Click Activate (the yellow circle icon) to make the type group available for use in ABAP programs.
Verify the type group definitions
- Open the Dictionary: Display Type Group screen.
- Confirm that these definitions exist:
TYPES: ZTYP1_NAME(30) TYPE C,ZTYP1_AGE(3) TYPE I.
- Make sure the type group is active.
Start a new ABAP report to use the type group
Now use the type group in a report.
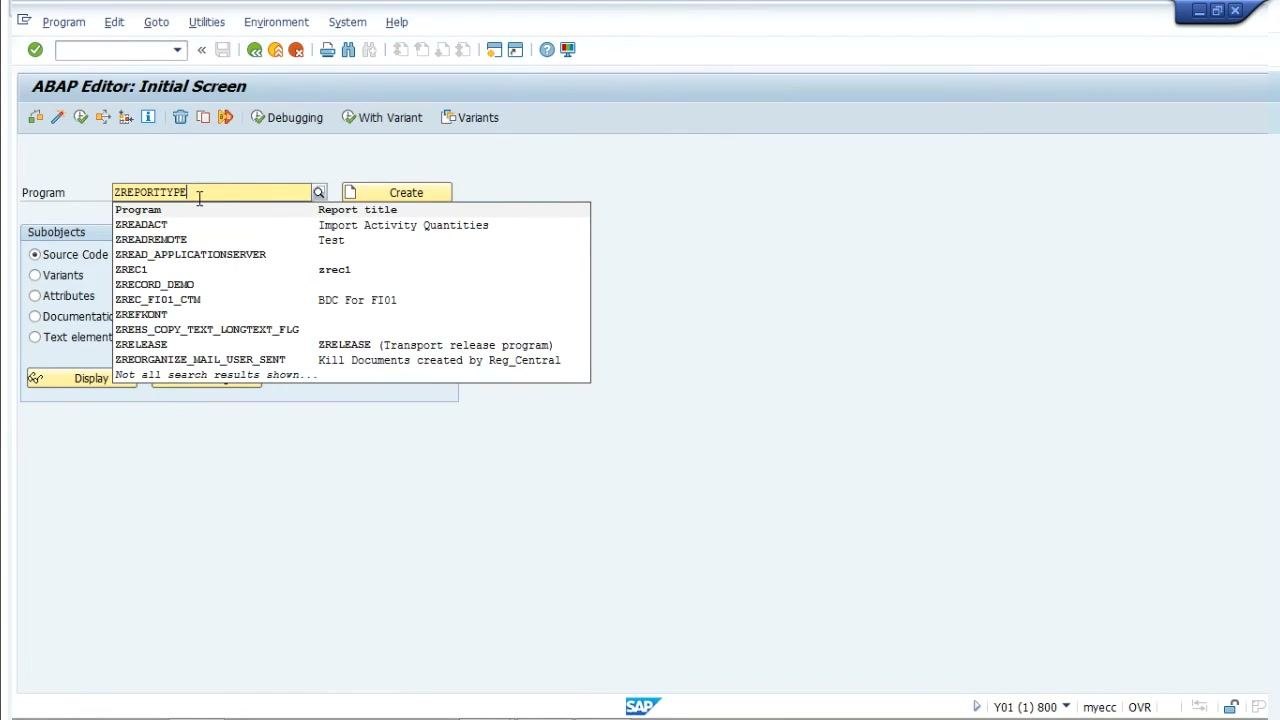
- Go to the ABAP Editor: Initial Screen.
- Enter a program name in the Program field. For this example, enter
ZREPORTTYPE1. - Click Create to start a new report.
A dropdown list may appear showing similar program names and their descriptions.
Set the program attributes
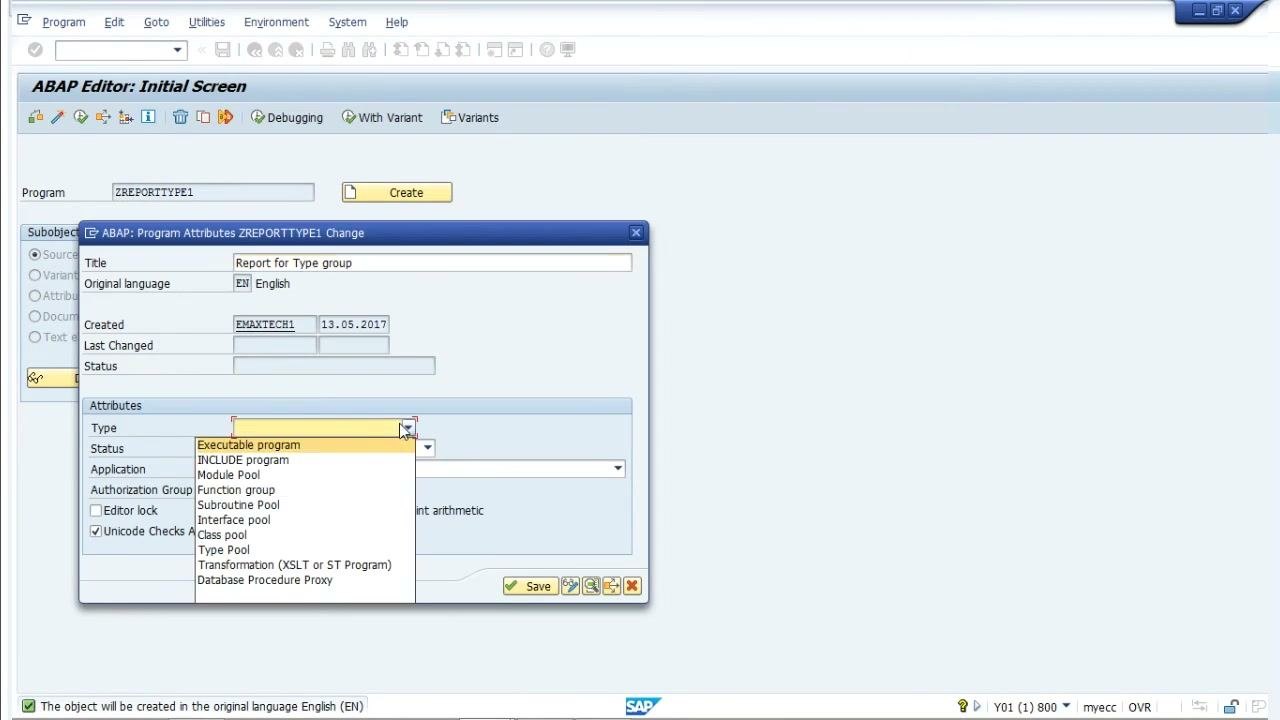
- In the ABAP: Program Attributes dialog, enter these values:
- Title: Report for Type group
- Original language: EN English
- Type: Executable program (select it from the dropdown list)
- Leave the Status, Application, and Authorization Group fields at their defaults, or fill them in as required.
- Make sure Unicode Checks Active is selected.
- Click Save to confirm the attributes.
Reference the type group in the report
In the ABAP Editor, begin your report with these lines:
REPORT ZREPORTTYPE1.
TYPE-POOLS ZTYP1.
The TYPE-POOLS statement makes the type definitions from your type group available in the report. The program status stays Inactive until you activate it.
Declare data with the type group types
Declare both fields in a single DATA statement. Separate the fields with a comma and end the statement with a period.
DATA: NAME TYPE ZTYP1_NAME,
      AGE TYPE ZTYP1_AGE.
This declares both variables with the types from your type group.
Resolve syntax errors in the declaration
If you start a new line with AGE TYPE ... outside the DATA: statement, the ABAP Editor shows a syntax error:
Statement "AGE" is not defined. Check your spelling.
To fix it, declare all fields within the same DATA: statement and separate them with commas.
Summary
To create a type group in SAP ABAP and use it in a report:
- Enter transaction code
SE11to open the ABAP Dictionary. - Select Type Group, enter a name of up to 5 characters (for example,
Ztyp1), and click Create. - Enter a short description and save the type group as a Local Object.
- Define your types so that each name starts with the type group name and an underscore.
- Save, check, and activate the type group.
- Verify the definitions in Dictionary: Display Type Group.
- In a report, add
TYPE-POOLS ZTYP1.and declare your variables in a singleDATA:statement.
Generation details: cost, quality tiers
Docsie billed 4,000 credits ($2.80) to analyze this 8-minute video at standard quality. The rewrite, template fill and Word/PDF exports were included. The same video at each quality tier:
| Quality | Frames sampled | Credits | Approx. cost |
|---|---|---|---|
| Draft | every 16-30 s | 2,000 | $1.40 |
| Standard (this guide) | every 8-15 s | 4,000 | $2.80 |
| Detailed | every 4-7 s | 8,000 | $5.60 |
| Ultra | every 1-3 s | 16,000 | $11.20 |
Credits priced at $0.70 per 1,000; plans include a monthly allowance. Enterprise customers on on-premise or bring-your-own-model deployments run this on their own inference and pay no per-video credits.
Generated by Docsie Video-to-Docs on 2026-11-15 from a 7-minute video. Screenshots are frames from the source video and belong to their creator, TutorialsPoint, whose original is embedded above. If you own this video and want the guide removed or credited differently, contact us and we will act within one business day.