
How to Create a Functional Area in SAP
This guide shows you how to create a functional area in SAP by adding new entries on the Change View "Functional areas": Overview screen. You add five functional areas (ASH1 to ASH5) in sequence, then check them in the overview table.
Video: Create/Define Functional Area in SAP FI module. by SAP CLASS (2017). All credit for the demonstration goes to the creator; watch the original on YouTube. The written guide below was generated from this video by Docsie. Creator? Request a change or removal.
This guide shows you how to create a functional area in SAP by adding new entries on the Change View "Functional areas": Overview screen. You add five functional areas (ASH1 to ASH5) in sequence, then check them in the overview table.
Prerequisites
- You have SAP GUI installed and can log in to your SAP system.
- You can open the Change View "Functional areas": Overview screen.
- You know the codes and names of the functional areas you want to add.
Steps
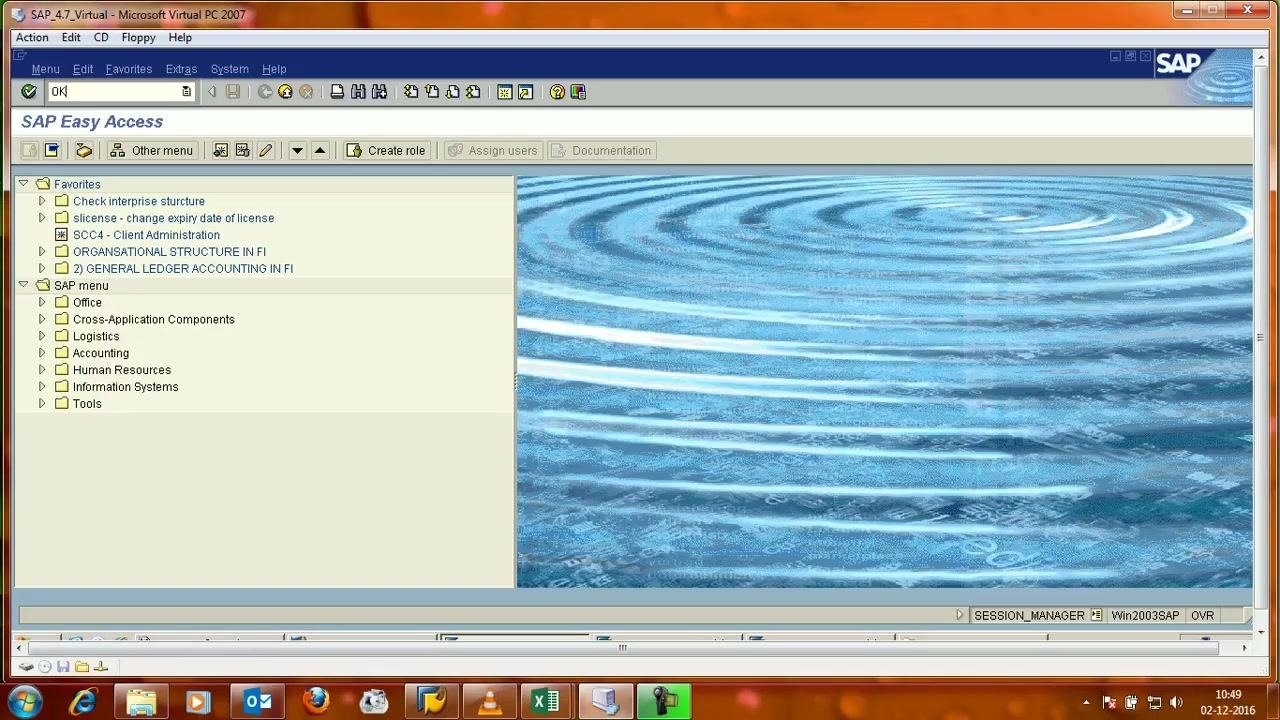
Open SAP Easy Access
Launch SAP GUI and log in. The main window shows SAP Easy Access. The navigation tree on the left contains Favorites and SAP menu.
Favorites can include entries such as "Check enterprise structure", "SCC4 - Client Administration", and "GENERAL LEDGER ACCOUNTING IN FI". SAP menu includes folders such as Office, Cross-Application Components, Logistics, Accounting, Human Resources, Information Systems, and Tools.
Open the functional areas overview
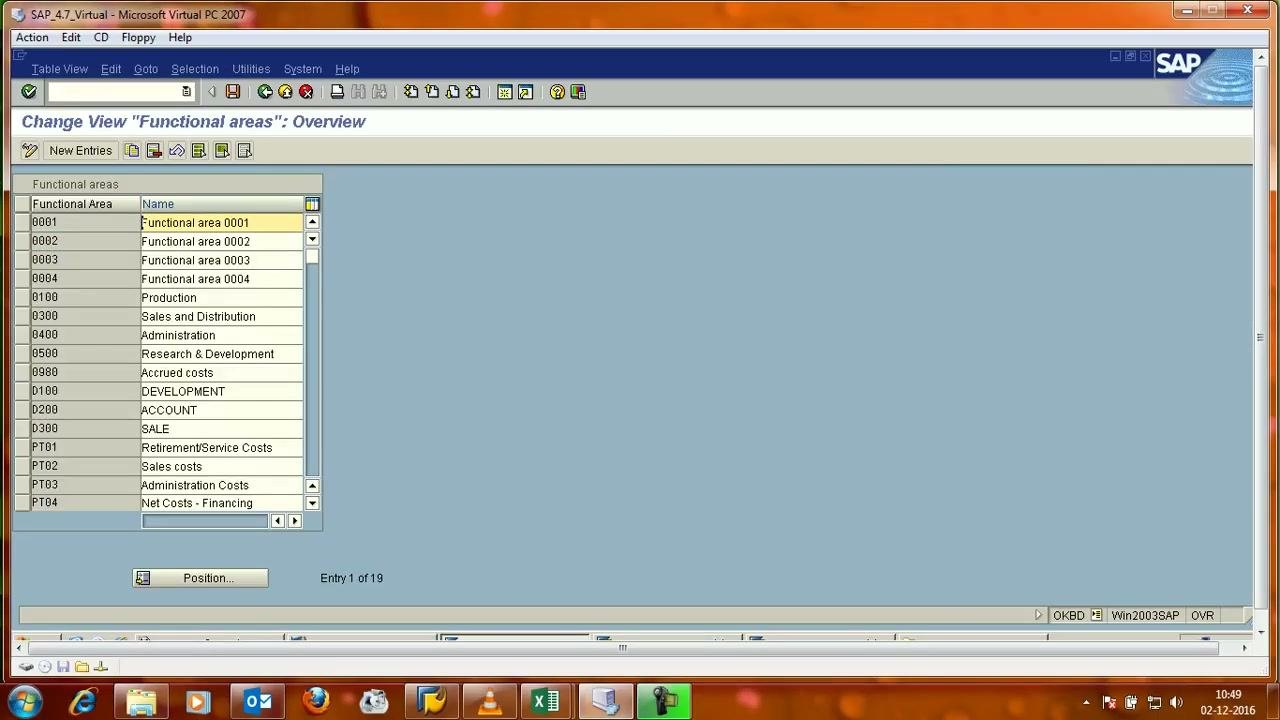
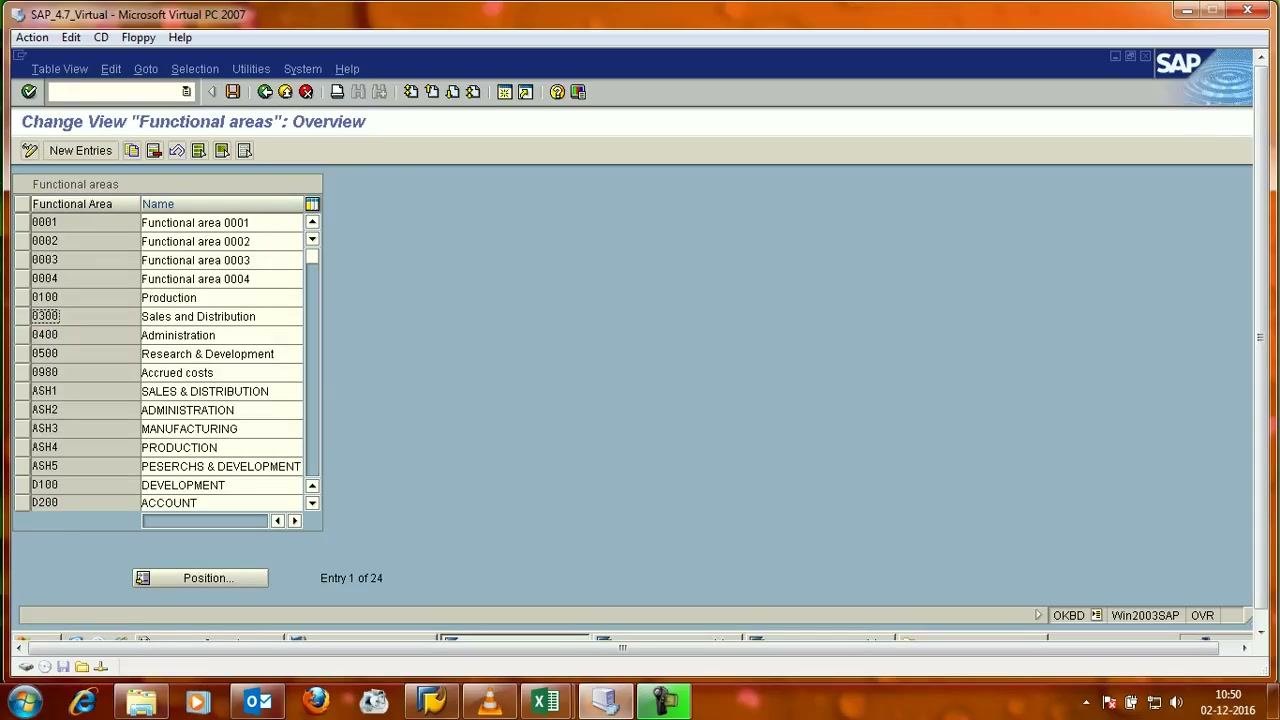
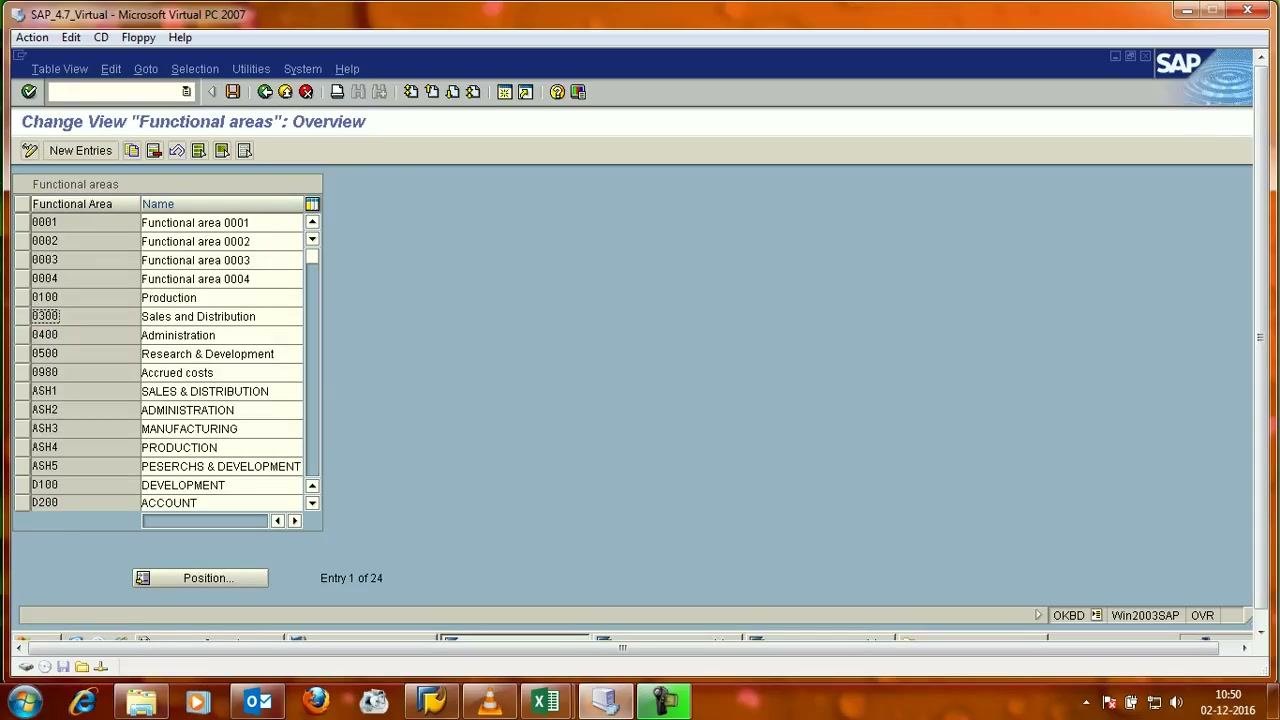
Go to the Change View "Functional areas": Overview screen. The table has two columns, Functional Area and Name.
Existing entries include:
- 0001 to 0004: functional area 0001 to functional area 0004
- 0100: Production
- 0300: Sales and Distribution
- 0400: Administration
- 0500: Research & Development
- 0980: Accrued costs
- D100: DEVELOPMENT
- D200: ACCOUNT
- D300: SALE
- PT01: Retirement/Service Costs
- PT02: Sales costs
- PT03: Administration Costs
- PT04: Net Costs - Financing
Click New Entries to start creating a functional area in SAP
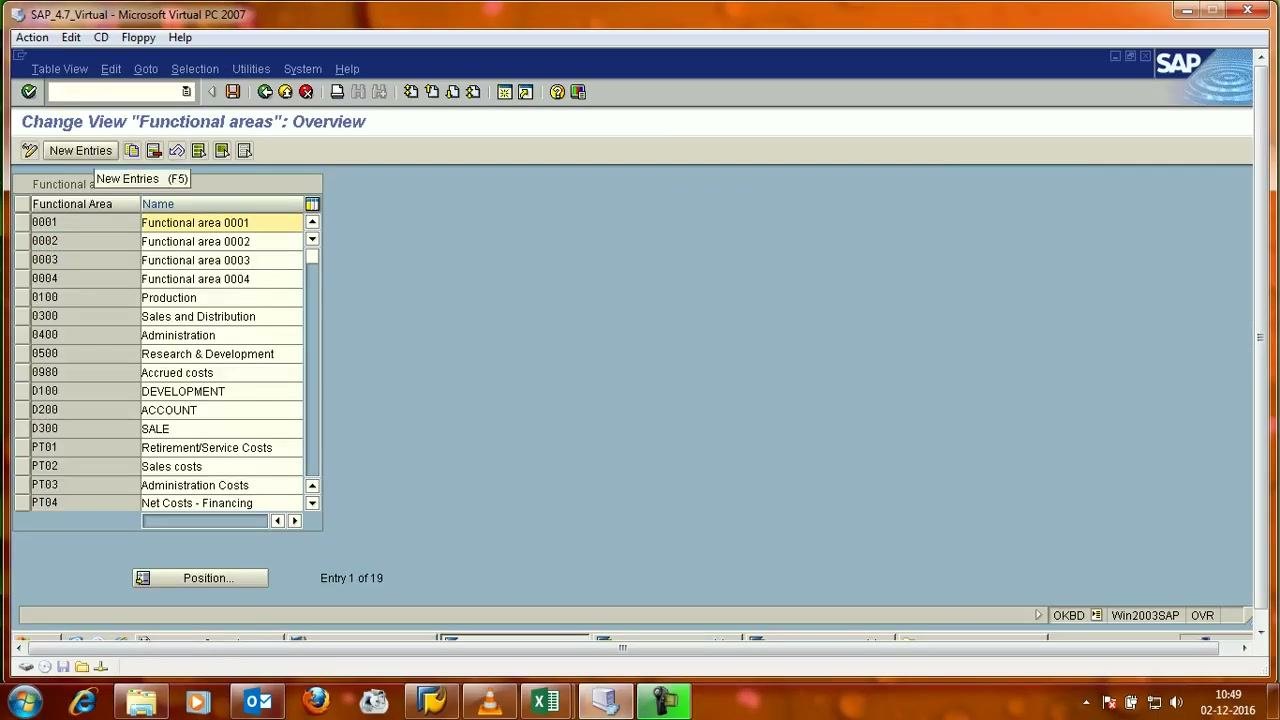
Click New Entries at the top of the screen, or press F5. The screen changes to New Entries: Overview of Added Entries, and the table is empty and ready for input.
Enter the first functional area
In the first row, enter the following values:
- Functional Area:
ASH1 - Name:
SALES & DISTRIBUTION
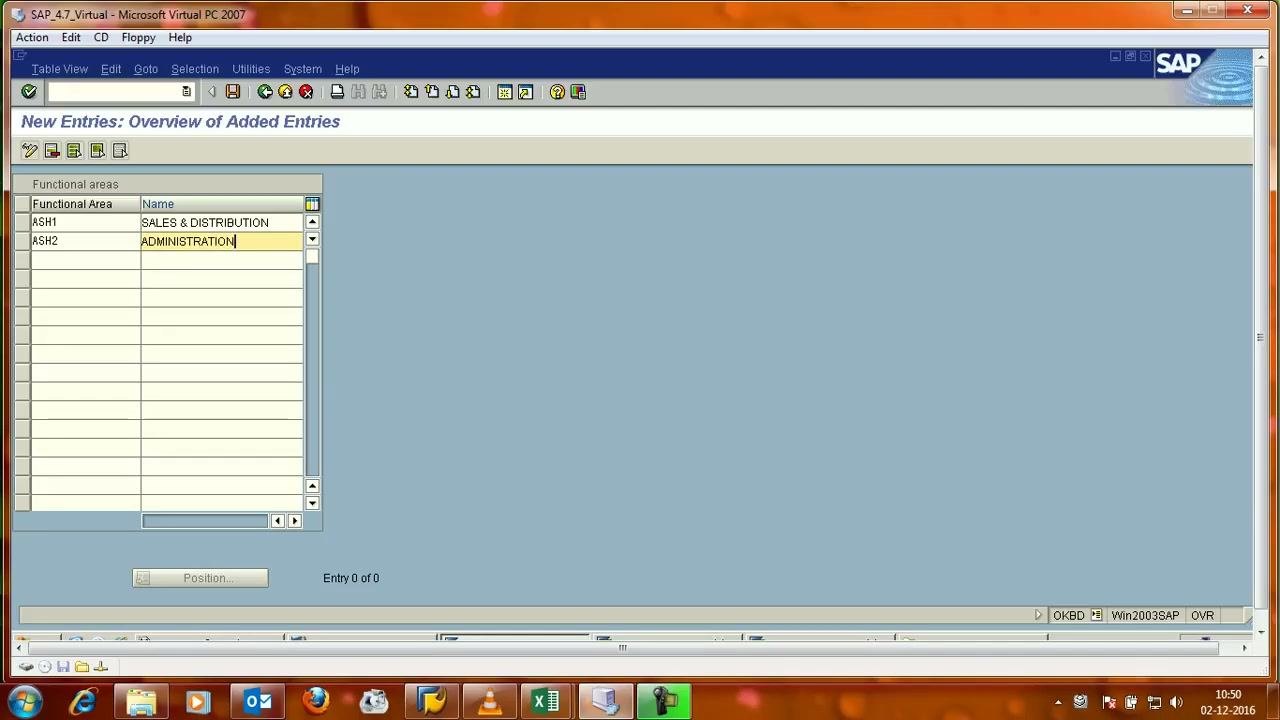
Enter the second functional area
In the second row, enter the following values. The first row stays as you entered it.
- Functional Area:
ASH2 - Name:
ADMINISTRATION
Enter the third functional area
In the third row, enter the following values. The previous two rows remain unchanged.
- Functional Area:
ASH3 - Name:
MANUFACTURING
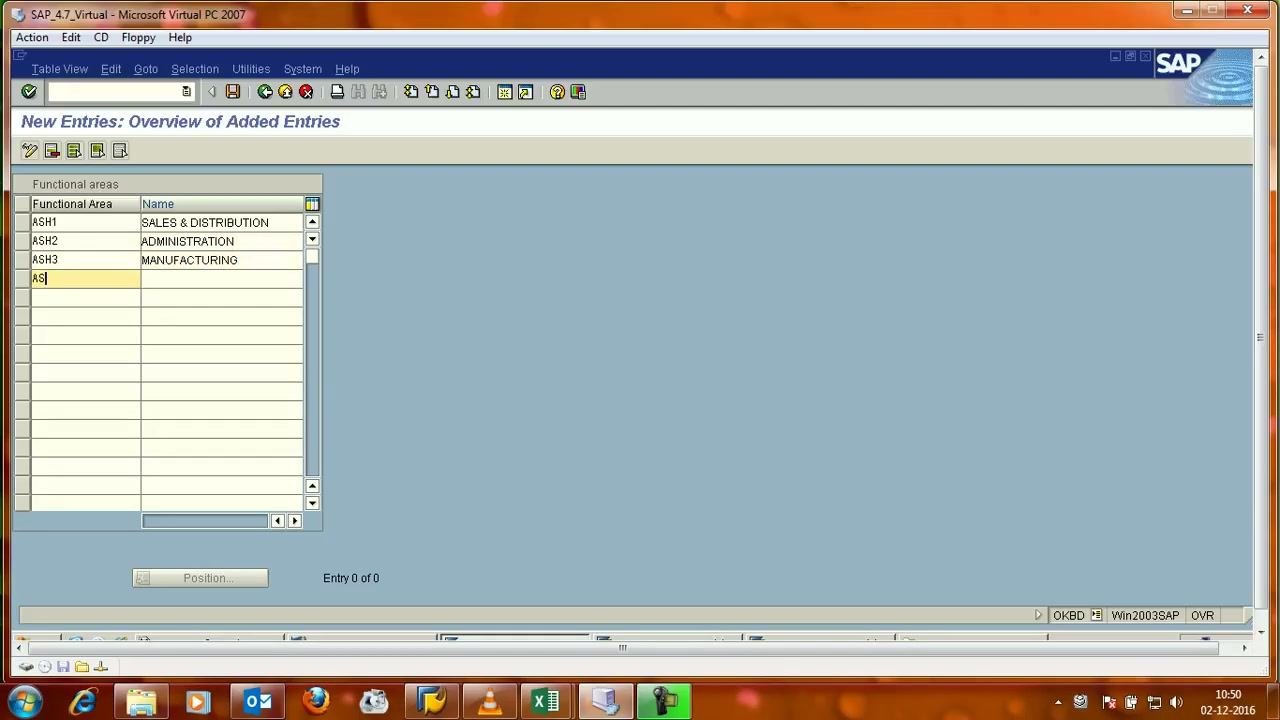
Enter the fourth functional area
In the fourth row, enter the following values. The previous three rows remain unchanged.
- Functional Area:
ASH4 - Name:
PRODUCTION
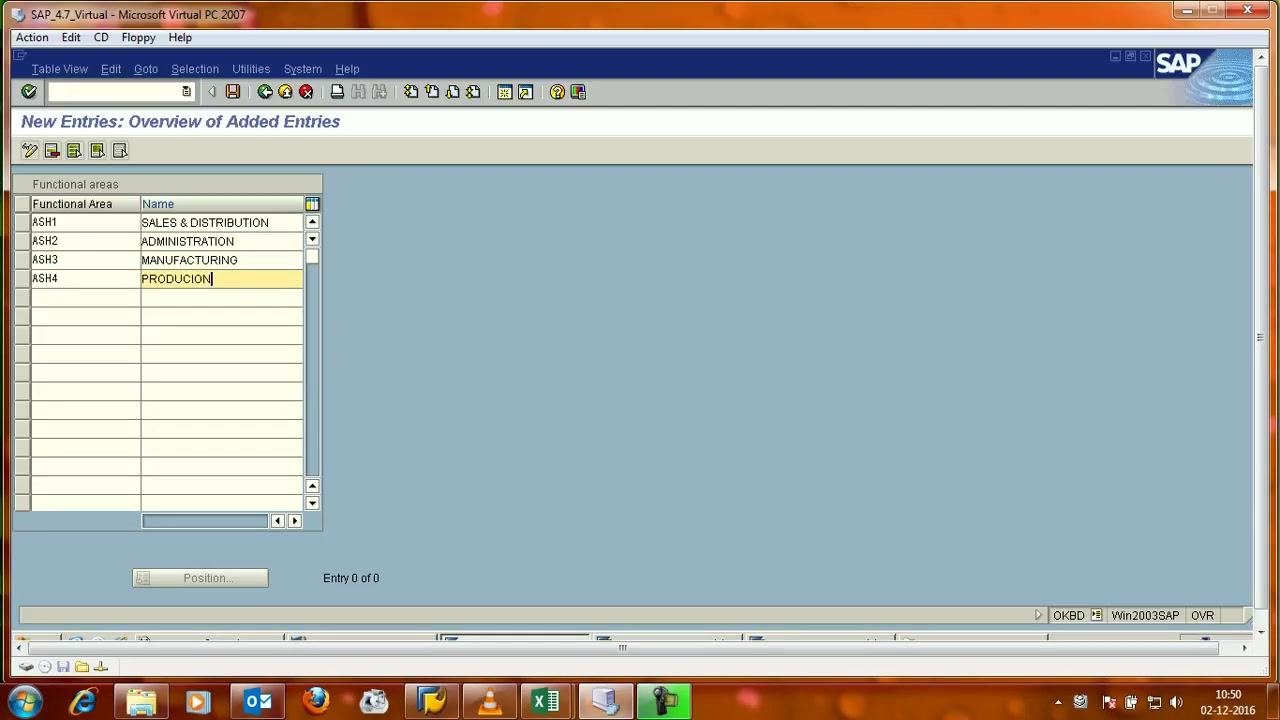
Start the fifth functional area
In the fifth row, enter the following values. The previous four rows remain unchanged.
- Functional Area:
ASH5 - Name:
PESERCHS
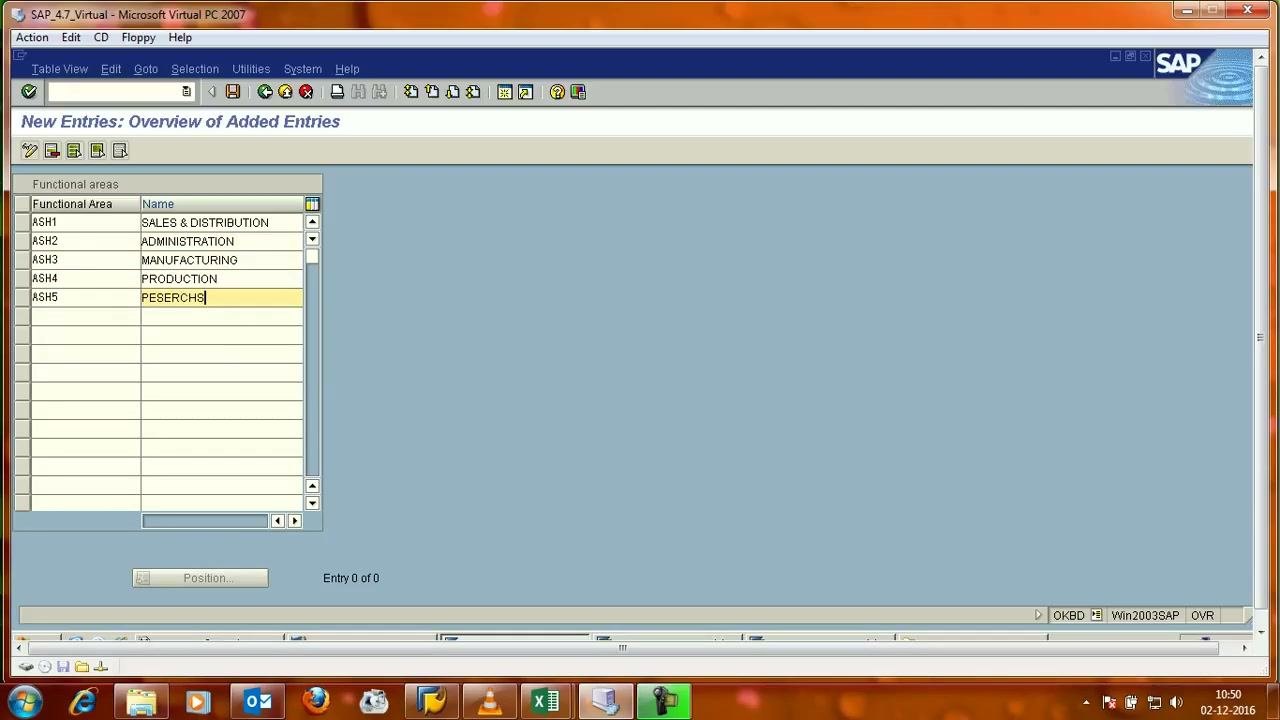
Complete the fifth functional area name
Update the name in the fifth row so that it reads PESERCHS & DEVELOPMENT. The functional area code stays ASH5. All five new entries are now visible in the table.
Type each entry exactly as shown, including spelling and formatting.
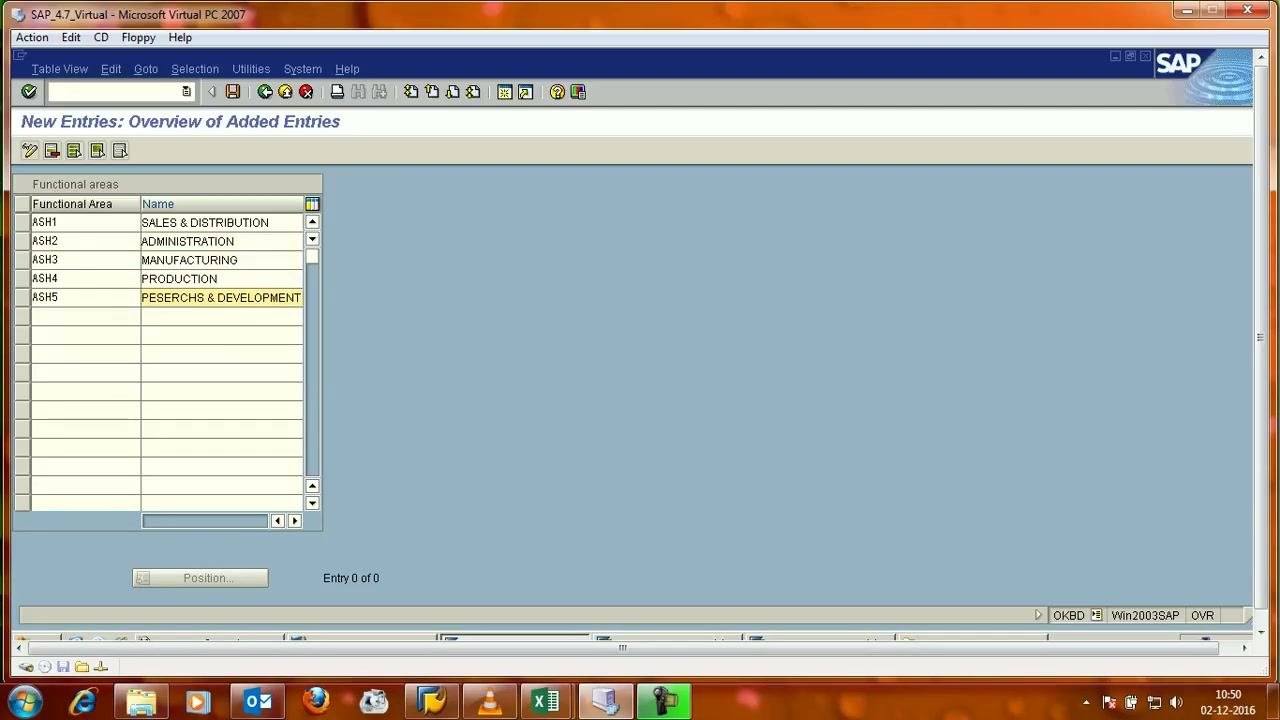
Return to the overview
After you enter all the functional areas, the system returns to the Change View "Functional areas": Overview screen. The table now shows the existing entries and the new ones:
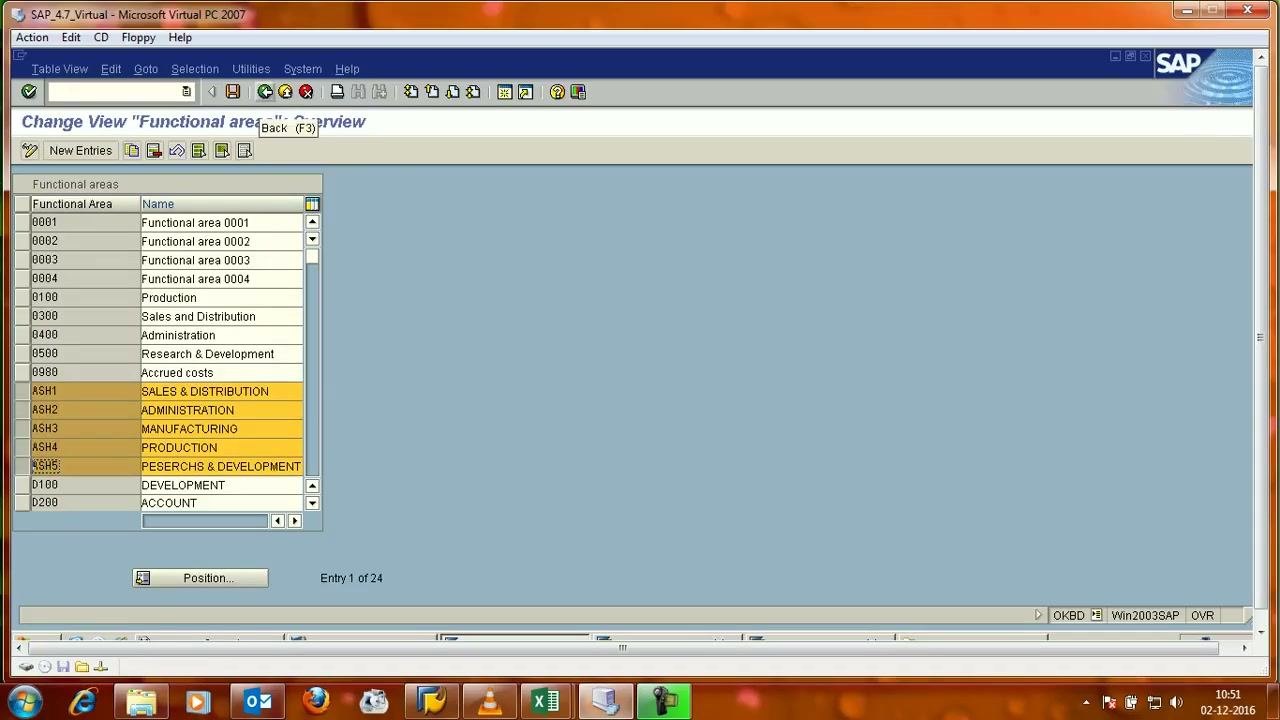
- ASH1: SALES & DISTRIBUTION
- ASH2: ADMINISTRATION
- ASH3: MANUFACTURING
- ASH4: PRODUCTION
- ASH5: PESERCHS & DEVELOPMENT
A vertical scrollbar indicates that the table contains more entries than fit on the screen.
Verify the codes and names
Review the table and confirm that ASH1 to ASH5 are listed. Check that each code and name matches what you entered. This is a visual check only, so you don't need to edit or delete anything.
Confirm the highlighted entries
The five new functional areas (ASH1 to ASH5) appear with a yellow background, which makes them stand out from the rest of the table. This confirms which entries you just added.
Highlighting is a visual confirmation and may be applied automatically by the SAP system or manually by the user.
Summary
You opened the functional areas overview, chose New Entries, and entered five new functional areas: ASH1 (SALES & DISTRIBUTION), ASH2 (ADMINISTRATION), ASH3 (MANUFACTURING), ASH4 (PRODUCTION), and ASH5 (PESERCHS & DEVELOPMENT). You then checked them in the overview table.
What's next
- Save your entries according to your organization's SAP procedures. This guide does not cover the saving step.
- If you need to export the data, follow your organization's SAP procedures.
- Double-check your entries for accuracy before you move on to other SAP tasks.
Generation details: cost, quality tiers
Docsie billed 1,500 credits ($1.05) to analyze this 3-minute video at standard quality. The rewrite, template fill and Word/PDF exports were included. The same video at each quality tier:
| Quality | Frames sampled | Credits | Approx. cost |
|---|---|---|---|
| Draft | every 16-30 s | 750 | $0.52 |
| Standard (this guide) | every 8-15 s | 1,500 | $1.05 |
| Detailed | every 4-7 s | 3,000 | $2.10 |
| Ultra | every 1-3 s | 6,000 | $4.20 |
Credits priced at $0.70 per 1,000; plans include a monthly allowance. Enterprise customers on on-premise or bring-your-own-model deployments run this on their own inference and pay no per-video credits.
Generated by Docsie Video-to-Docs on 2026-11-15 from a 2-minute video. Screenshots are frames from the source video and belong to their creator, SAP CLASS, whose original is embedded above. If you own this video and want the guide removed or credited differently, contact us and we will act within one business day.