
How to Create Item Master Data in SAP Business One
This guide shows you how to create item master data in SAP Business One. You open the Item Master Data screen, enter general item details, and configure purchasing, sales, inventory, planning, and production data. You then assign properties, add an image and attachments, and save the item.
Video: How-To: Create Item Master Data by Support One Inc. (2022). All credit for the demonstration goes to the creator; watch the original on YouTube. The written guide below was generated from this video by Docsie. Creator? Request a change or removal.
This guide shows you how to create item master data in SAP Business One. You open the Item Master Data screen, enter general item details, and configure purchasing, sales, inventory, planning, and production data. You then assign properties, add an image and attachments, and save the item.
Prerequisites
- You are logged in to SAP Business One with permissions to manage inventory items.
- You know the item code, description, item type, and group you want to use. This guide uses the example item
TESTITEM1.
Open Item Master Data and start a new item
Step 1: Open Item Master Data
- In the main menu on the left side of the screen, click Inventory to expand the inventory options.
- Select Item Master Data.
The Item Master Data screen opens in Find mode, so you can search for existing items.
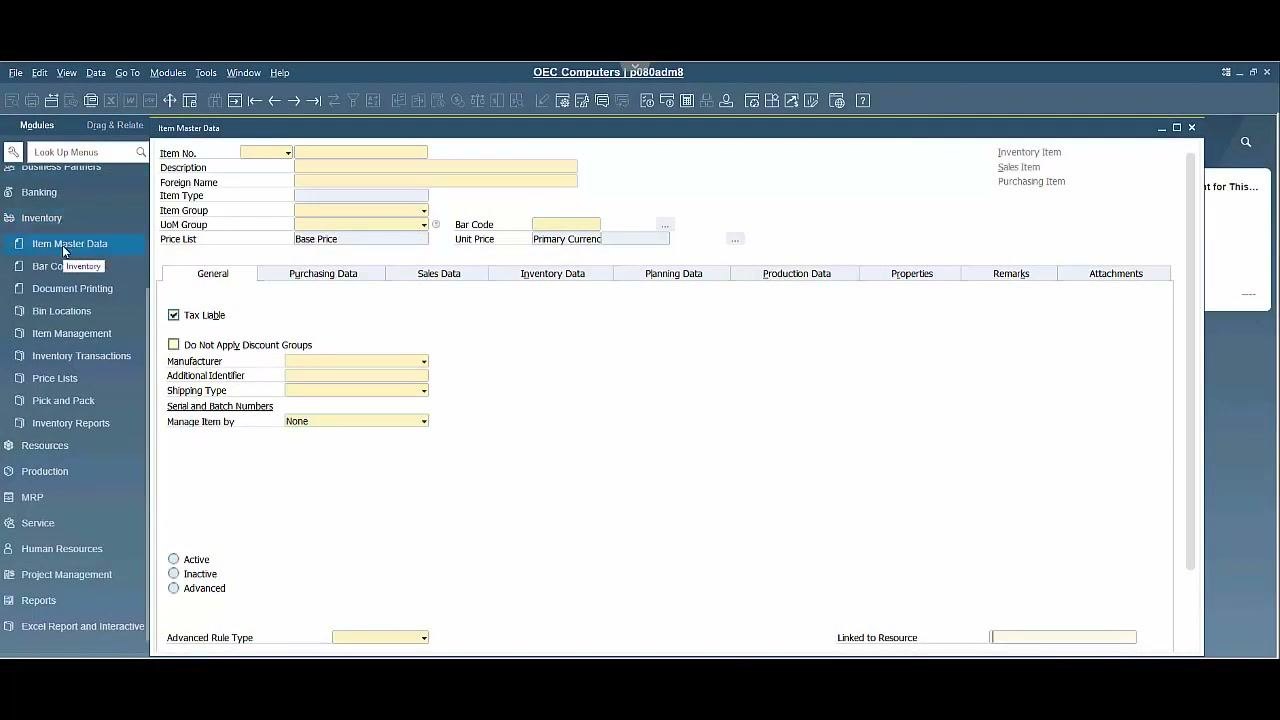
Step 2: Click Add to start a new item
In the icon bar at the top of the screen, click the Add button. It usually appears as a blank sheet or plus icon.
This clears the form and opens all fields for new data entry.
Enter general item data
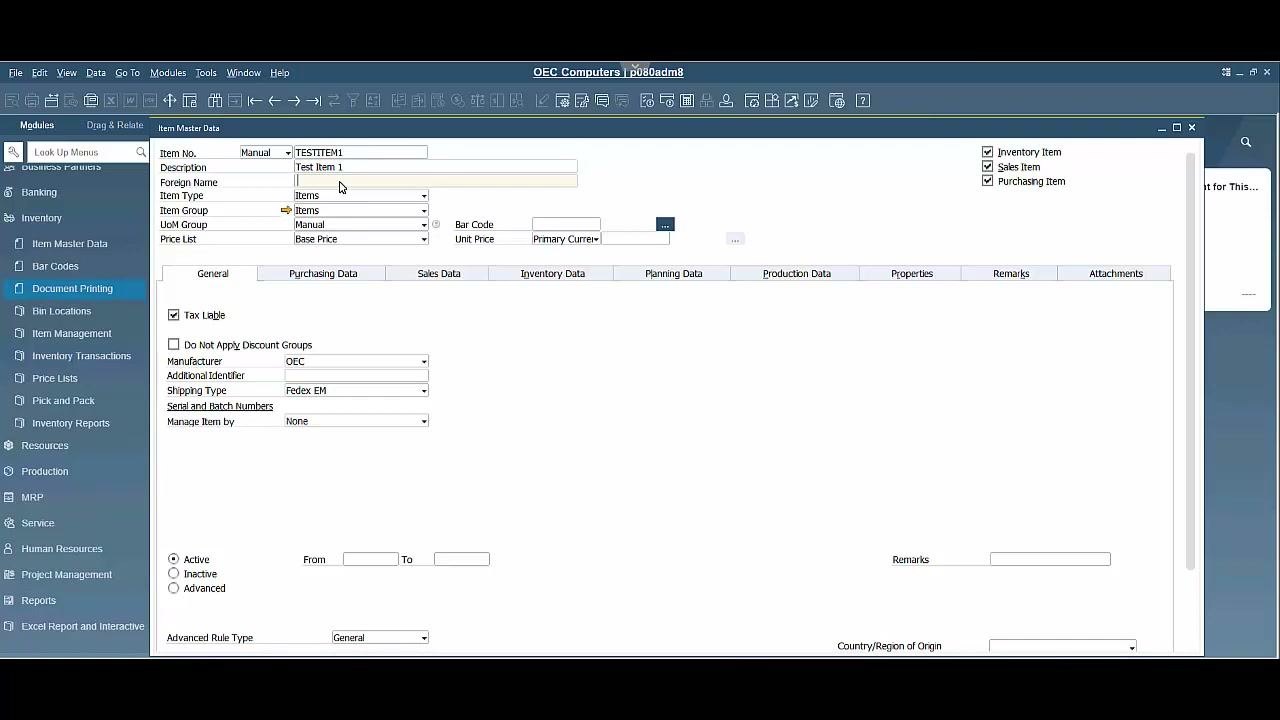
Step 3: Review the Foreign Name field
The Foreign Name field is optional. Use it if your organization requires an alternate or translated item name. Otherwise, leave it blank.
In this example, all fields are visible by default for demonstration purposes.
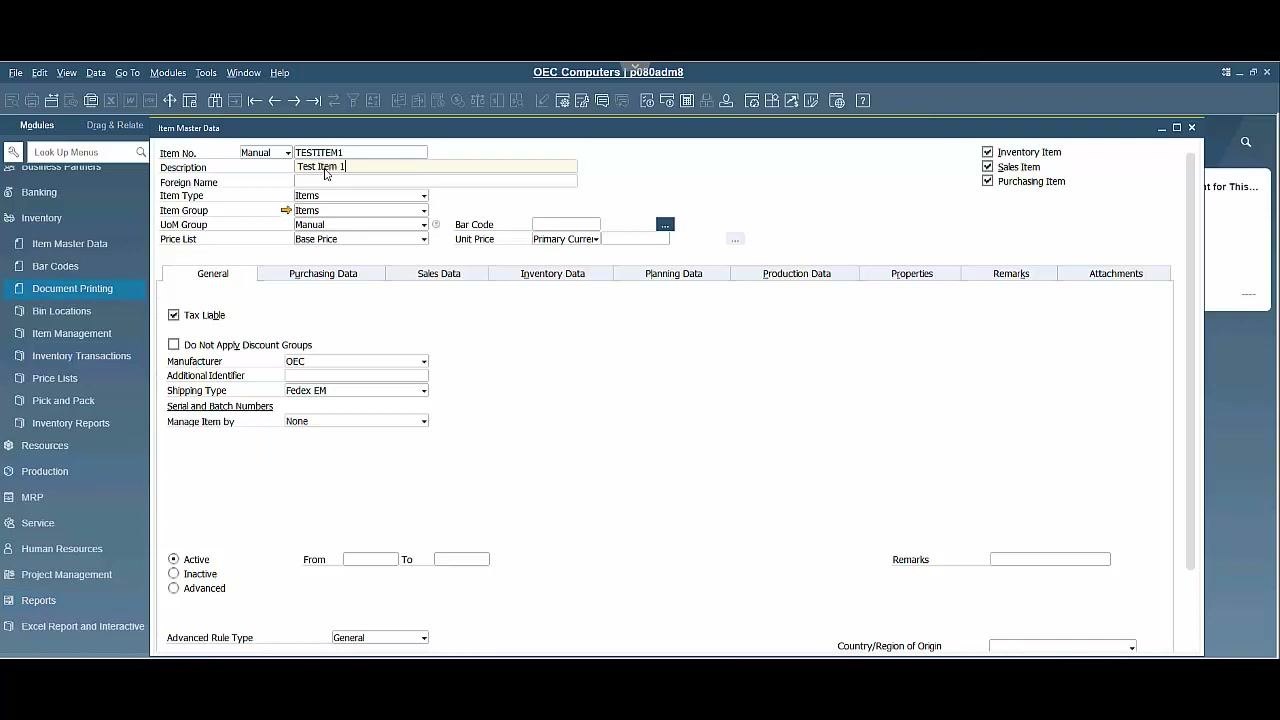
Step 4: Hide unused fields (optional)
To reduce screen clutter, hide fields you do not use with UI Configuration. This streamlines data entry and reduces confusion about which fields you must fill in. Hidden fields stay available, and you can re-enable them at any time.
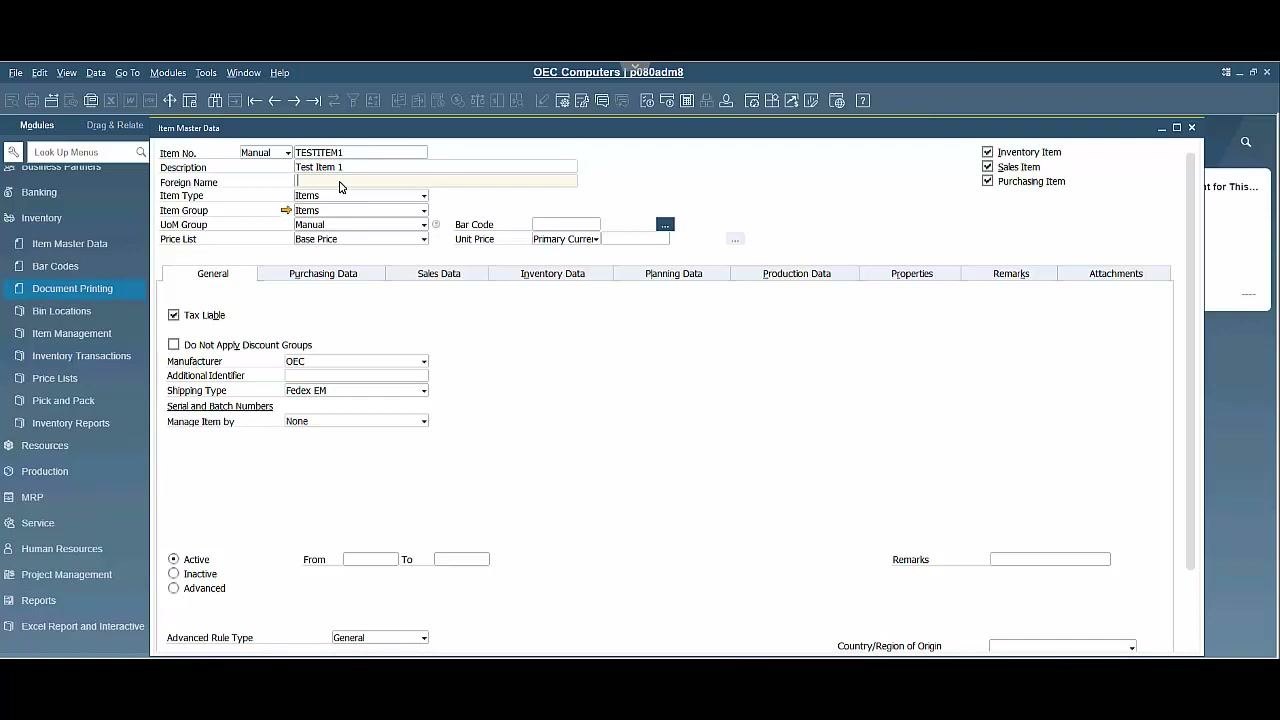
Step 5: Enter the item number
In the Item No. field, make sure the numbering method is set to Manual. If you have configured auto-incrementing under Document Numbering, the system numbers the item for you.
For this example, enter TESTITEM1. This code is used internally and appears on all related documents, such as sales orders.
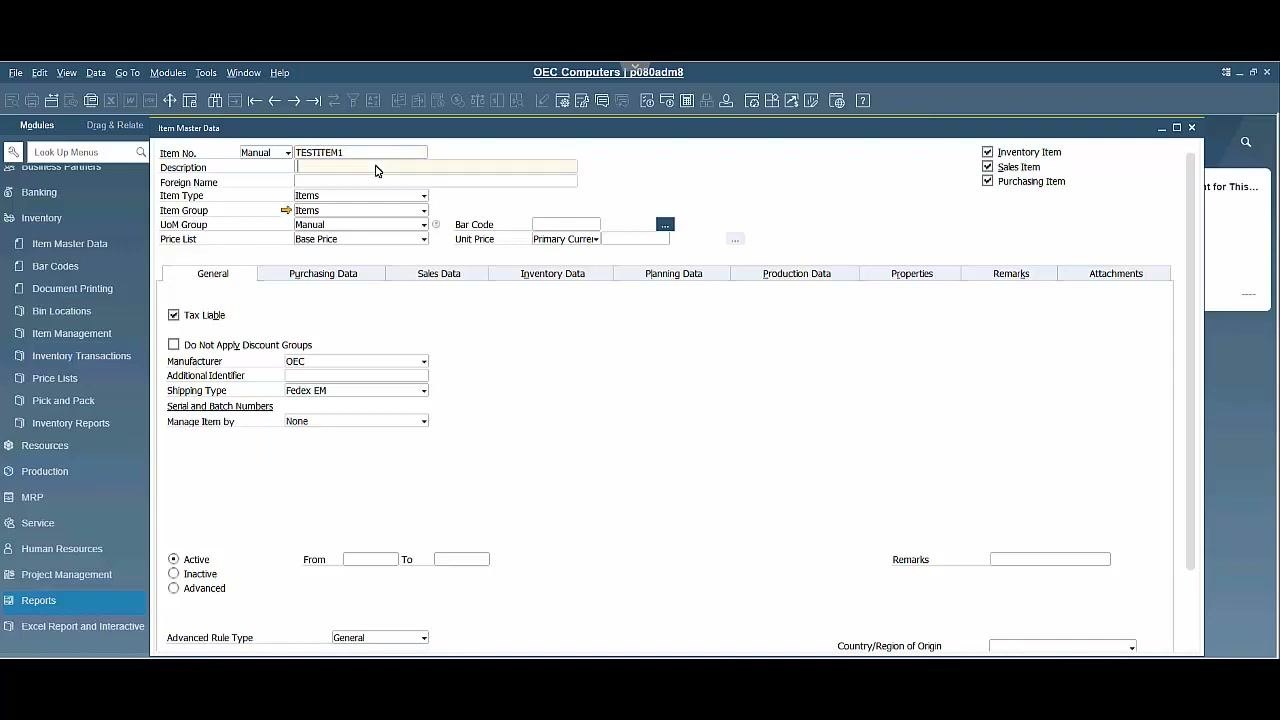
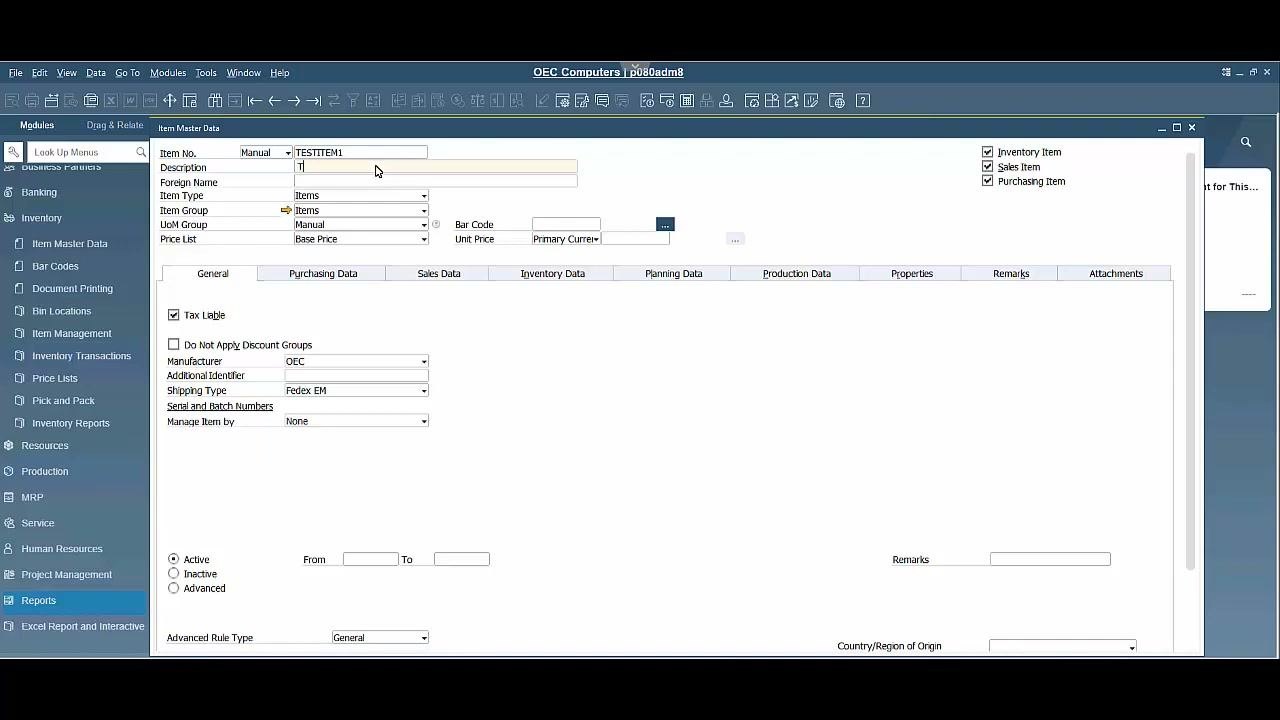
Step 6: Enter a description
In the Description field, enter a clear description of the item. For this example, type Test Item Number 1.
Step 7: Select the item type
Open the Item Type dropdown and select the type that fits your entry:
- Items for physical goods
- Labor for services
- Travel for travel-related items
For this example, select Items. The system can track all types.
Step 8: Assign an item group
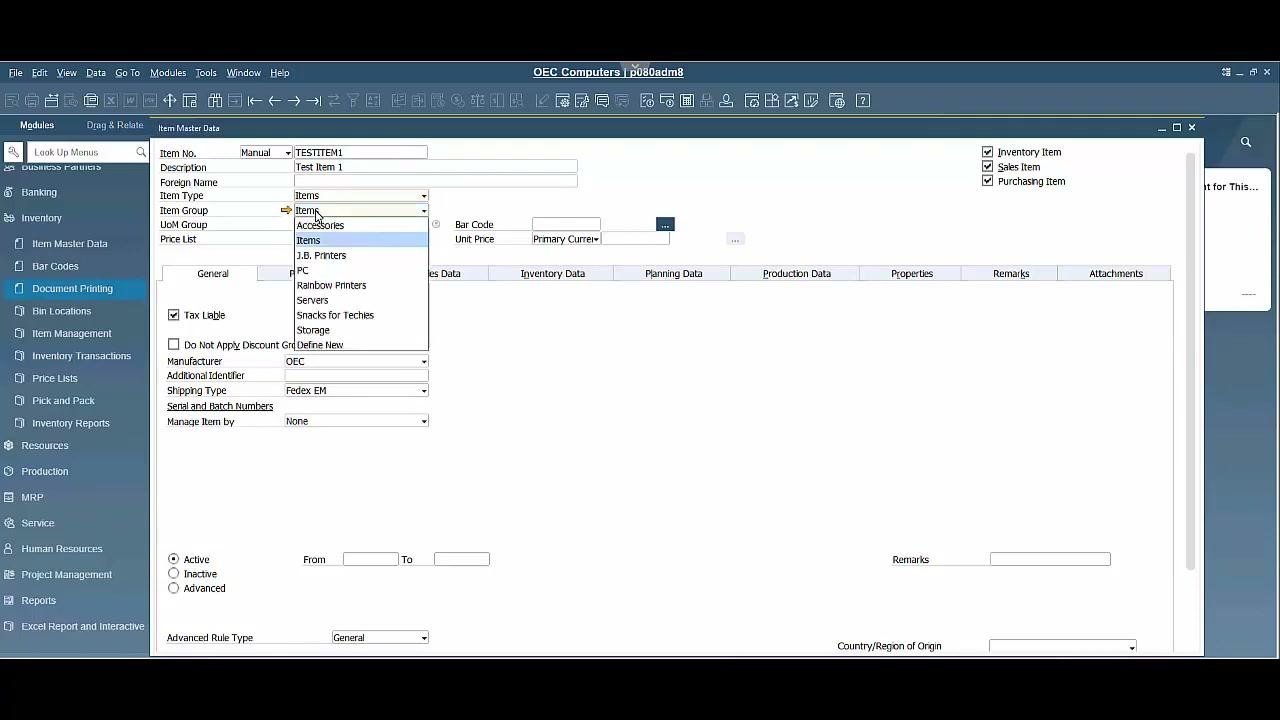
Use the Item Group dropdown to select an existing group. Item groups help with data tracking and filtering.
The example groups are Accessories, Items, J.B. Printers, PC, Rainbow Printers, Servers, Snacks for Techies, and Storage. To create a new group, select Define New from the dropdown.
Step 9: Select the UoM group
Select the appropriate UoM Group for your item, for example Manual. You can create and manage UoM groups separately if needed.
Step 10: Review the price list field
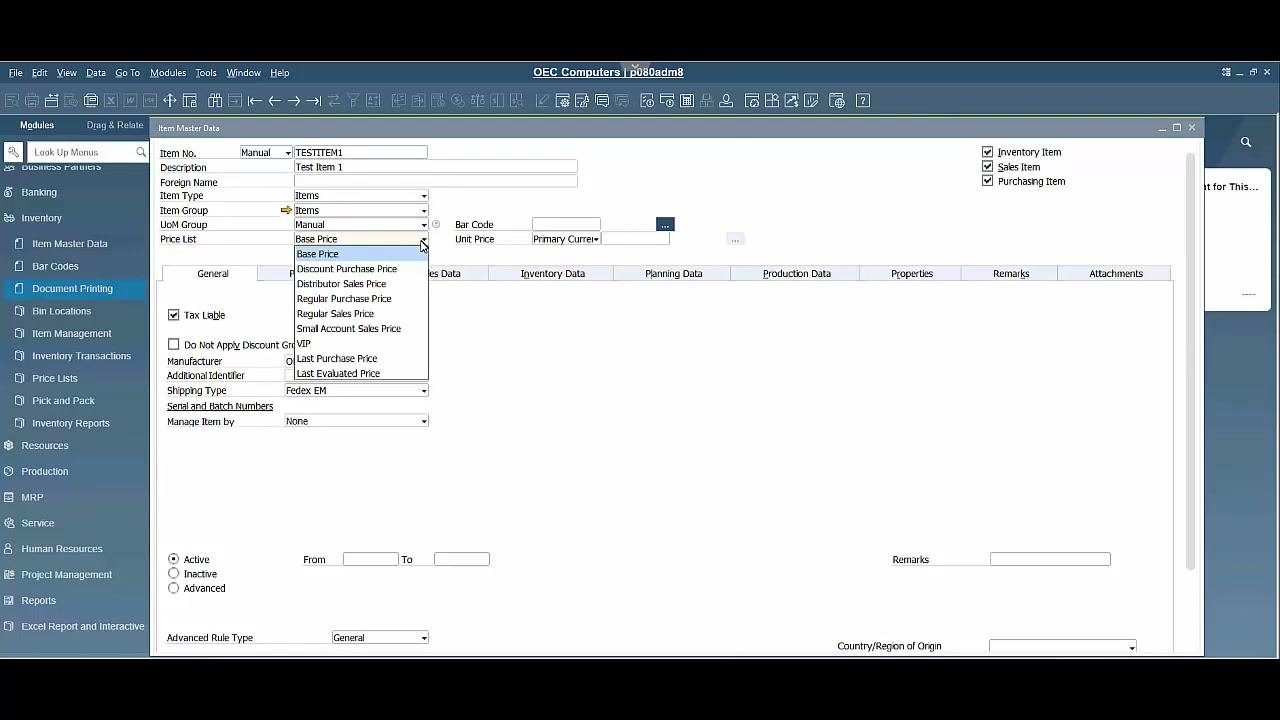
The Price List field displays the available price lists, for example Base Price, Discount Purchase Price, Regular Sales Price, and VIP.
This field does not set the item's price. It shows what the price would be if one were defined. Select the relevant price list for display purposes.
Tips for this section:
- Hide unused fields through UI Configuration to simplify the form.
- Use item groups and types to organize and track your inventory more effectively.
- The Price List field is informational. You manage actual pricing elsewhere.
Step 11: Set tracking and availability checkboxes
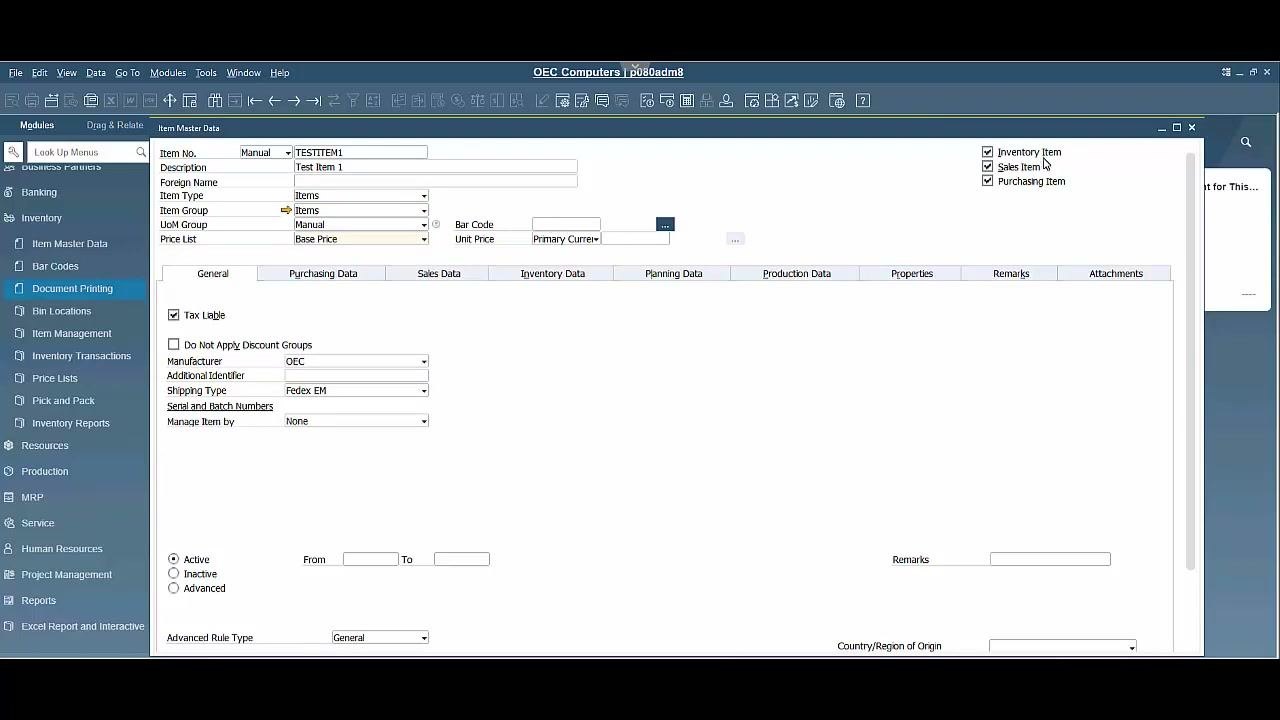
At the top right of the Item Master Data screen, locate these checkboxes:
- Inventory Item: Enables inventory tracking. The system increases stock when you purchase the item and decreases stock when you sell it.
- Sales Item: Allows the item on sales documents such as sales orders and invoices. If you clear it, you cannot sell the item.
- Purchasing Item: Allows the item on purchasing documents such as purchase orders. If you clear it, you cannot purchase the item.
For most standard items, leave all three checkboxes selected.
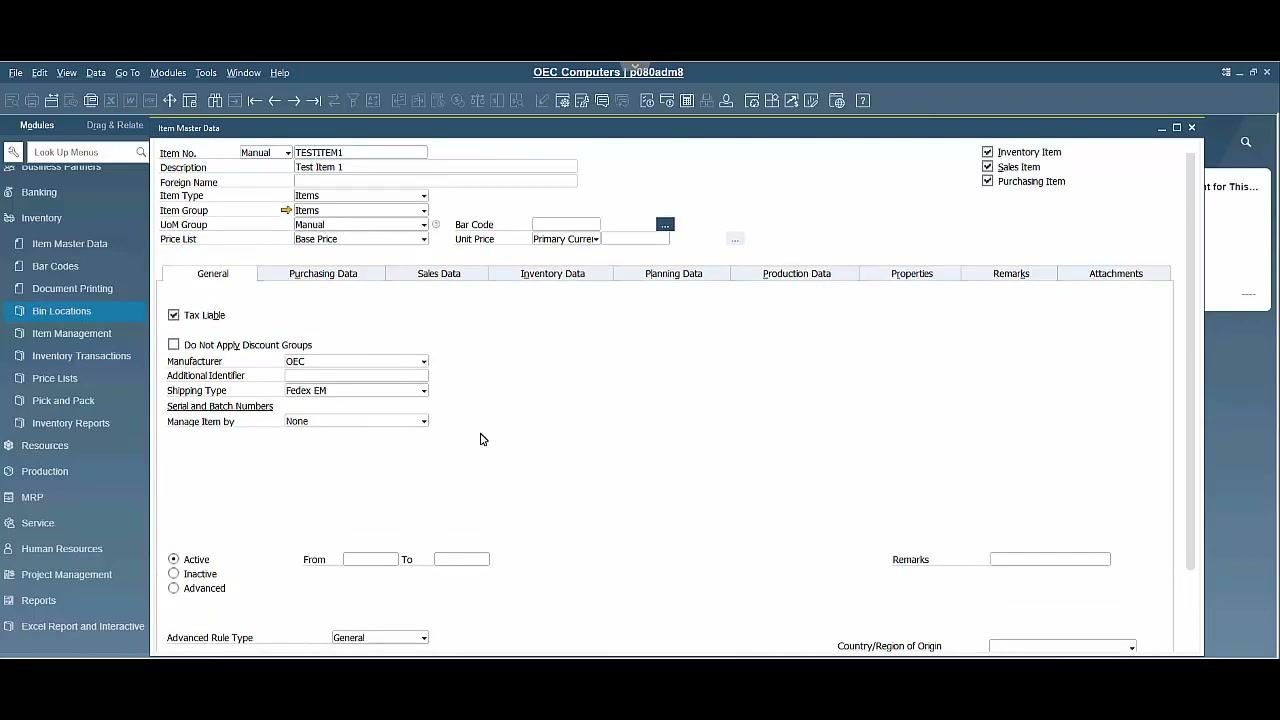
Step 12: Configure the General tab
On the General tab, review and set these options:
- Tax Liable: Select this if the item is subject to tax.
- Do Not Apply Discount Groups: Select this if you do not want discount groups to apply to the item.
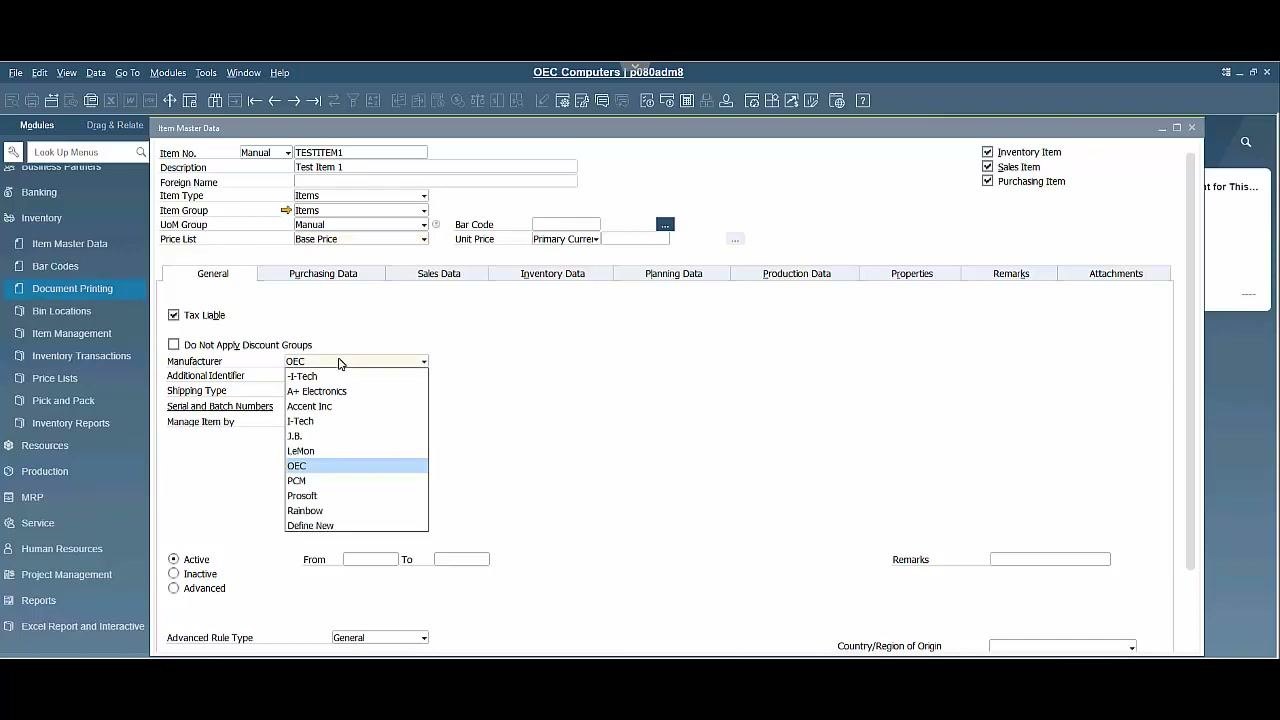
- Manufacturer: Select the manufacturer from the dropdown list. To add a new manufacturer, select Define New.
- Additional Identifier: Enter an alternate identifier or alias for the item, similar to the Foreign Name field.
- Shipping Type: Select the typical shipping method for the item, for example Fedex EM.
- Serial and Batch Numbers: If the item requires serial or batch number tracking, select the appropriate option. Otherwise, leave it as None.
- Manage Item by: Choose how the item is managed, for example by serial, batch, or none.
Step 13: Set the item status
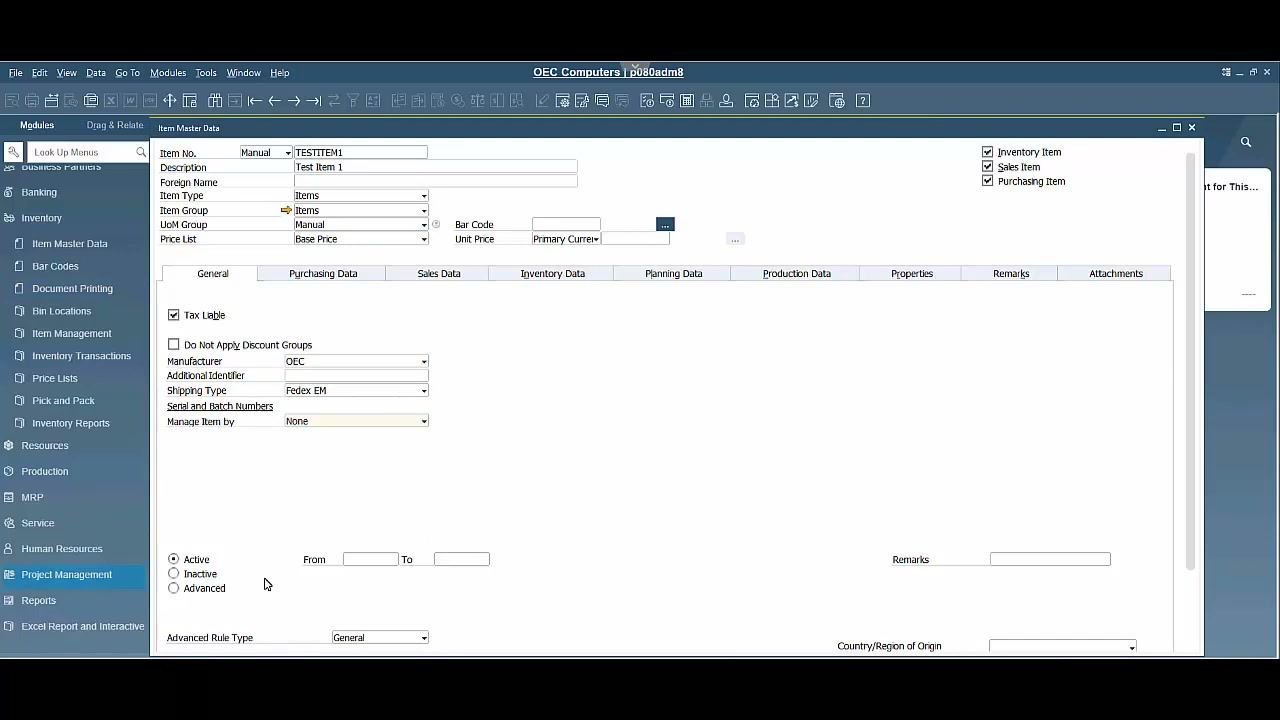
At the bottom of the General tab, choose the item's status:
- Active: Makes the item available for use.
- Inactive: Makes the item unavailable for transactions.
- Advanced: Lets you set specific active or inactive date ranges.
If you select Advanced, enter the From and To dates for the active and inactive periods. Then use the Advanced Rule Type dropdown to specify the rule behavior, for example General. This automates item availability based on date ranges.
Tips for this section:
- Use the header checkboxes to control whether the item is tracked in inventory, available for sale, or available for purchase.
- Use the General tab to specify tax status, manufacturer, shipping, and serial or batch tracking as needed.
- Set the item status to control when the item is available for use in the system.
Configure purchasing data
Step 14: Open the Purchasing Data tab
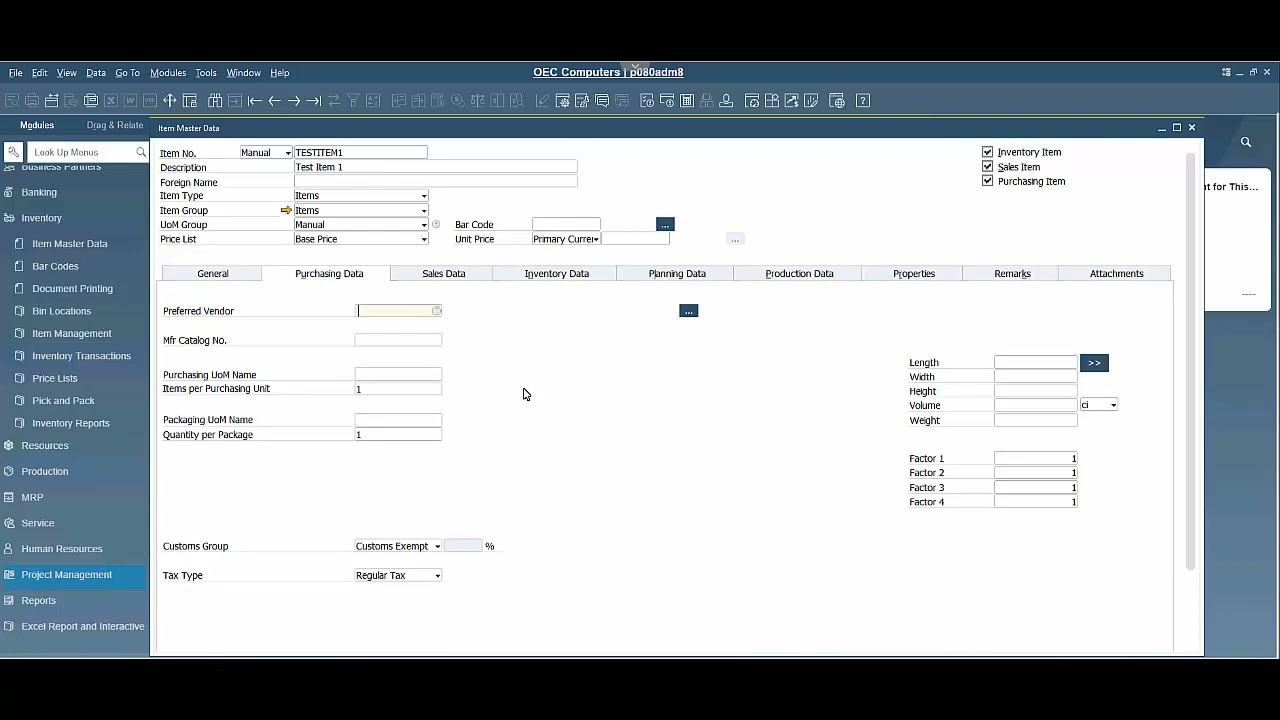
Make sure you are in the Item Master Data window for the item you are creating, for example Item No. TESTITEM1 with the description Test Item 1. Then click the Purchasing Data tab.
The tab displays these fields:
- Preferred Vendor
- Manufacturer Catalog No.
- Purchasing UoM Name
- Items per Purchasing Unit
- Packaging UoM Name
- Quantity per Package
- Customs Group
- Tax Type
The left navigation menu confirms you are in the Inventory > Item Master Data section. The item is marked as an Inventory Item, Sales Item, and Purchasing Item.
Step 15: Specify preferred vendors
In the Preferred Vendor field, enter the vendor code or select a vendor from the list of available vendors.
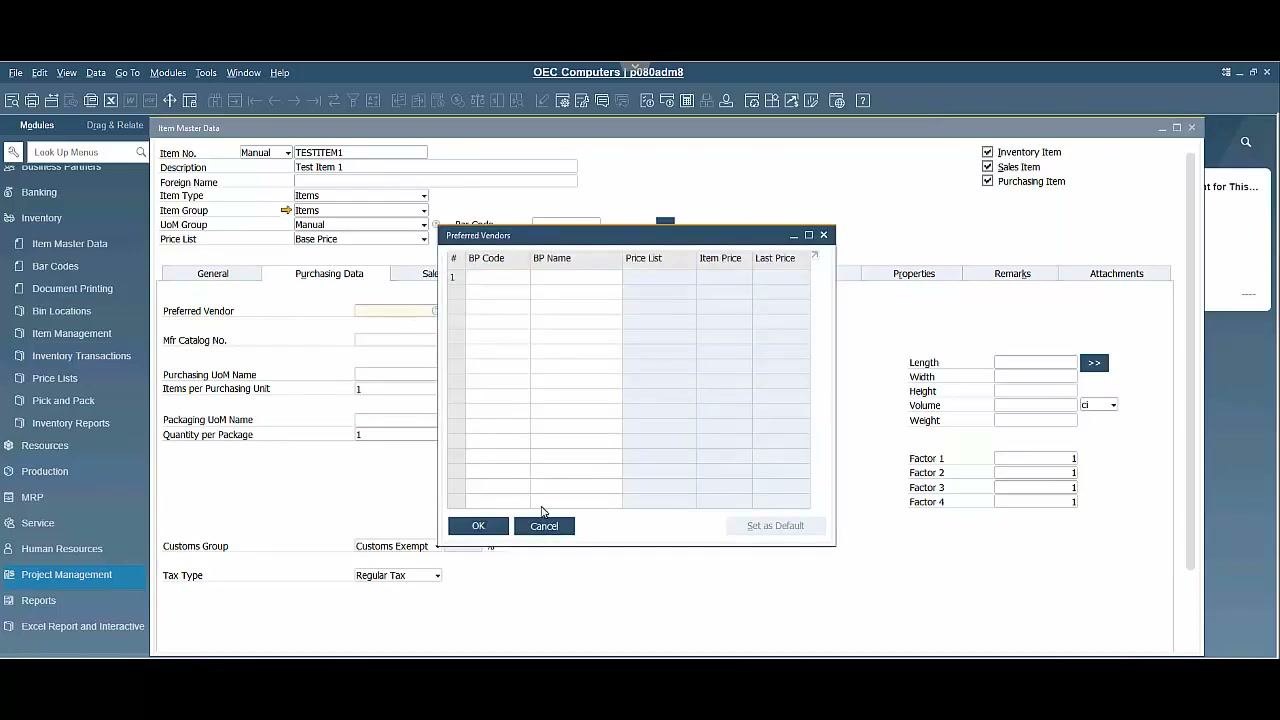
To add multiple preferred vendors, click the selection button (...) next to the field. The Preferred Vendors dialog opens, where you can add several vendors with details such as BP Code, BP Name, Price List, Item Price, and Last Price. Click OK to confirm, or Cancel to exit without changes.
Step 16: Enter the manufacturer catalog number
In the Mfr Catalog No. field, enter the unique catalog number the manufacturer assigned to the item. This number can differ from your internal item number. It is useful for cross-referencing with vendor catalogs.
Step 17: Configure purchasing units of measure
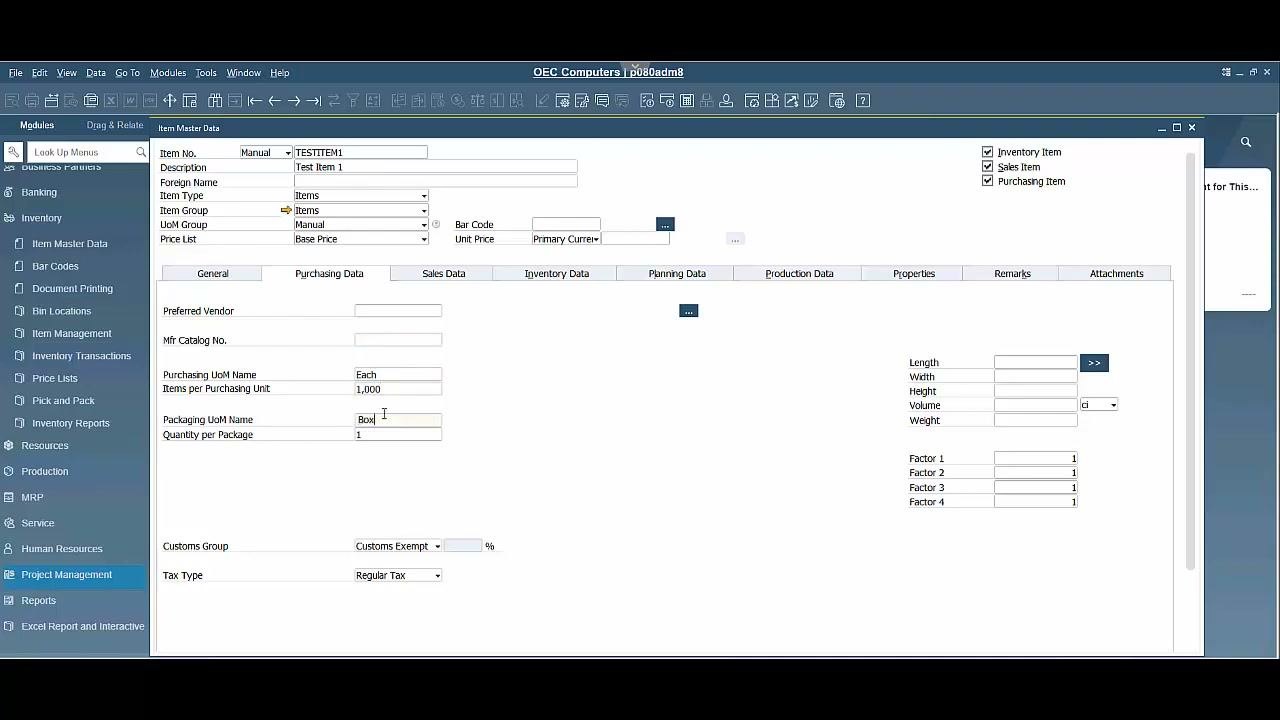
Fill in these fields, using the example values:
- Purchasing UoM Name: Enter the unit of measure you use when purchasing the item, for example
Each. - Items per Purchasing Unit: Enter the quantity in one purchasing unit, for example
1,000if a box contains 1,000 items. - Packaging UoM Name: Enter the packaging unit, for example
Box. - Quantity per Package: Enter how many purchasing units are in each package, for example
1.
With this configuration, the system recognizes that purchasing one box adds 1,000 items to inventory.
Step 18: Set customs and tax information
- In the Customs Group field, select the appropriate customs group, or indicate that the item is customs exempt.
- In the Tax Type field, choose the applicable tax type, for example
Regular Tax.
This setup helps the system track purchasing units, vendor relationships, and packaging details accurately. It is essential for correct purchase order processing and inventory management.
Step 19: Enter physical measurements
On the right side of the Purchasing Data tab, locate the Length, Width, Height, Volume, and Weight fields. Enter the item's physical dimensions and weight if you want to store them.
These fields are optional but useful for logistics, shipping, and storage calculations.
Configure sales, inventory, and planning data
Step 20: Configure sales units of measure
Click the Sales Data tab and enter these fields as needed:
- Sales UoM Name: The unit of measure used for sales, for example
Each. - Items per Sales Unit: The number of items in one sales unit. The default is 1.
- Packaging UoM Name: The packaging unit for sales, for example
Box. - Quantity per Package: The number of sales units per package. The default is 1.
These settings ensure accurate sales order processing and packaging calculations.
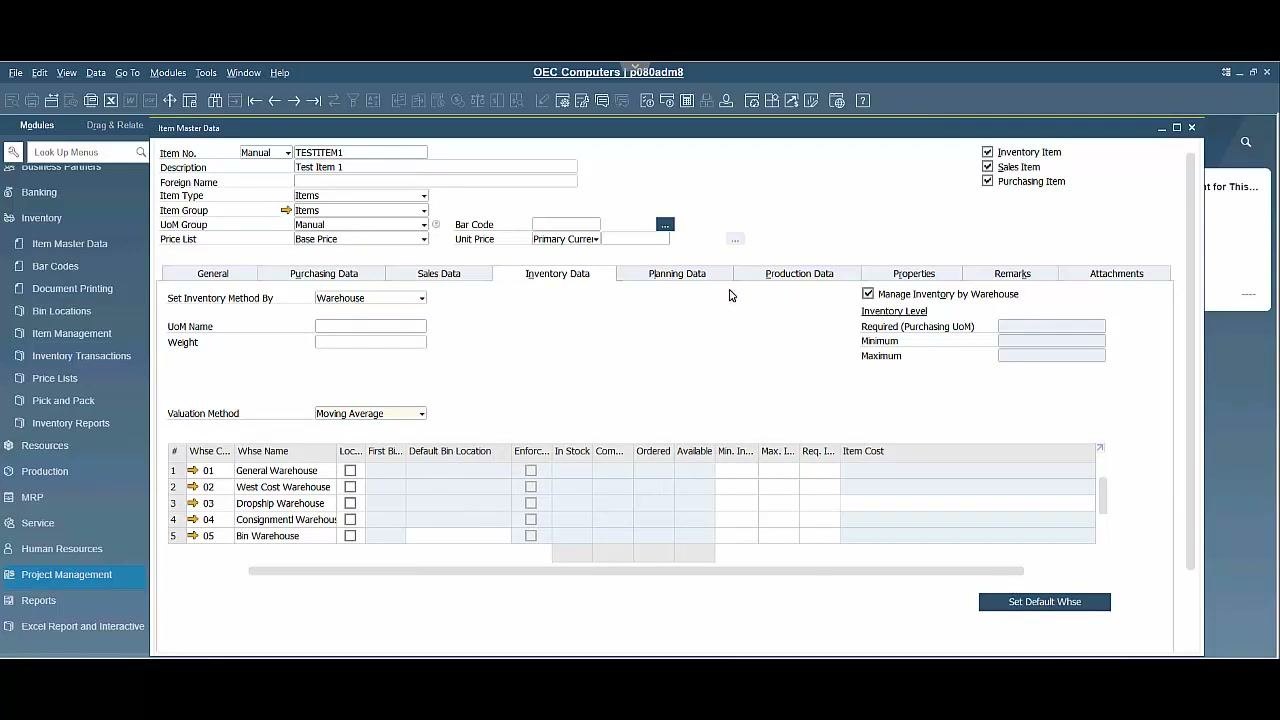
Step 21: Set inventory management parameters
Click the Inventory Data tab and configure these options:
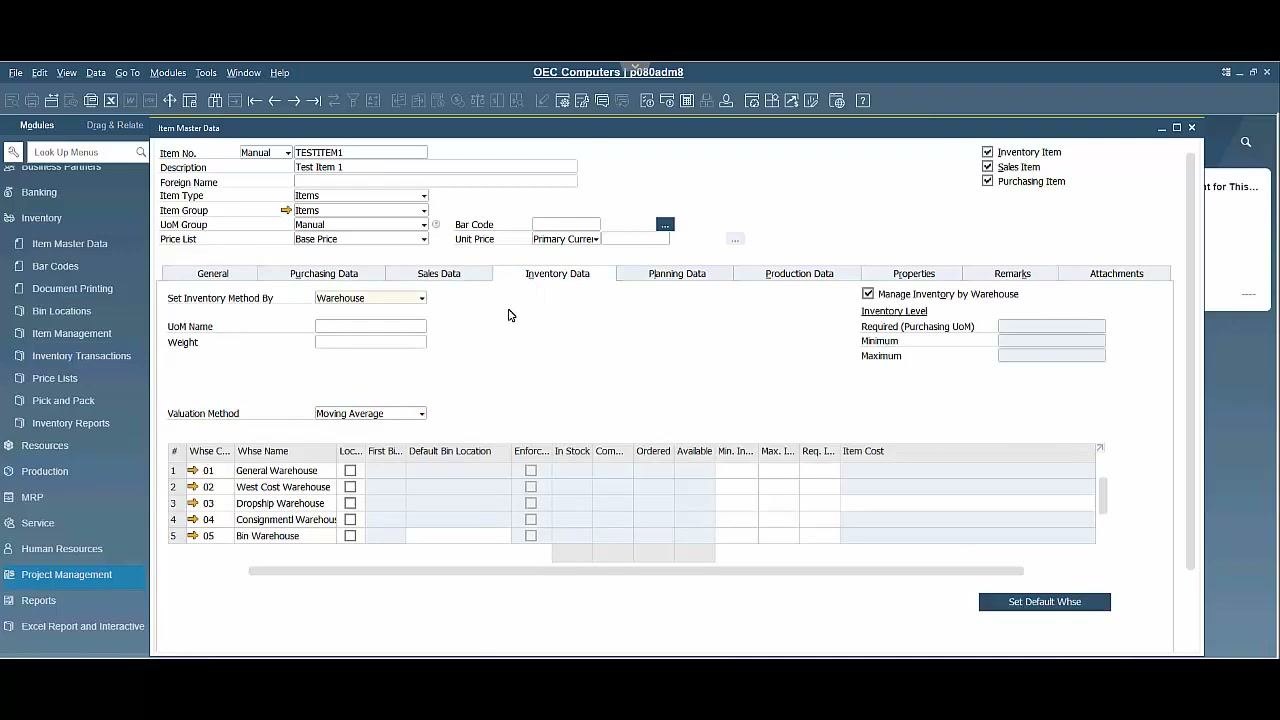
- Set Inventory Method By: Use the dropdown to choose how inventory is tracked: Warehouse, Item Group, or Item Level.
- Manage Inventory by Warehouse: Select this to track inventory separately for each warehouse.
- UoM Name: Enter the unit of measure for inventory tracking.
- Weight: Enter the item's weight if applicable.
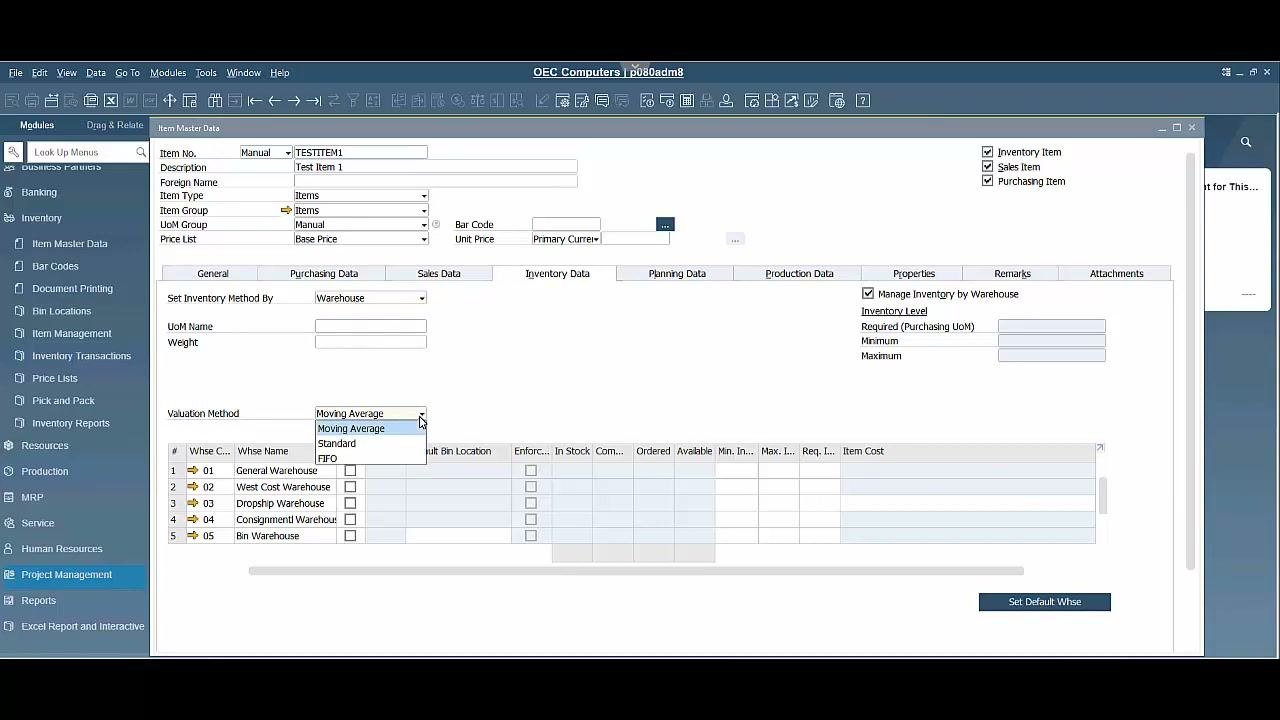
- Valuation Method: Use the dropdown to select how inventory value is calculated: Moving Average, Standard, or FIFO. Choose the method that suits your business.
- Inventory Level: Enter the required, minimum, and maximum inventory levels in the specified purchasing UoM.
Then review and configure the warehouse-specific settings in the warehouse table:
- Warehouse Code and Name
- Default Bin Location
- Enforce Bin Location
- In Stock, Committed, Ordered, and Available quantities
- Minimum Inventory, Maximum Inventory, Required Inventory, and Item Cost
If needed, click Set Default Whse to designate a default warehouse.
Step 22: Access Material Resource Planning settings
If you use Material Resource Planning (MRP), click the Planning Data tab. Configure the planning parameters you need for automated procurement and production planning.
Configure production data, properties, and attachments
Step 23: Configure production data
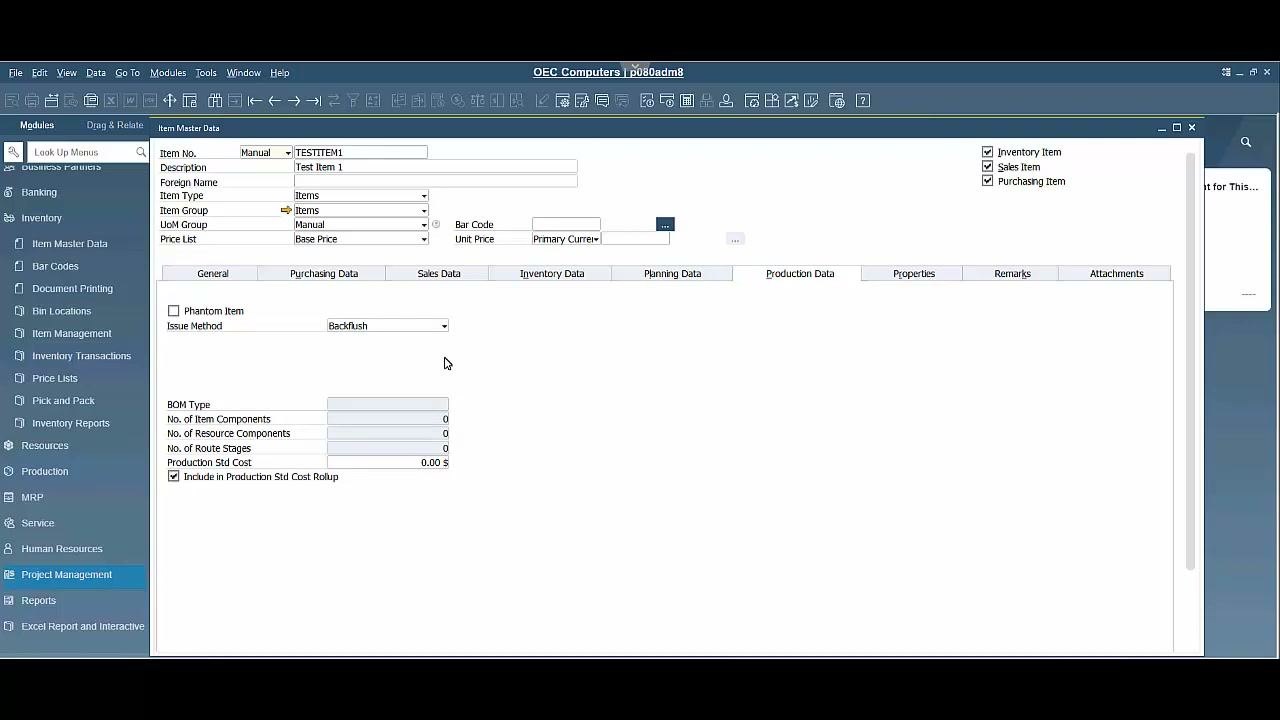
Click the Production Data tab. If the item is a production item that you manufacture in-house, configure these fields:
- Phantom Item: Select this if the item is a phantom item, which is used only in BOMs and not stocked.
- Issue Method: Select the issue method from the dropdown, for example Backflush.
- BOM Type: Specify the Bill of Materials type if applicable.
- No. of Item Components: Enter the number of item components in the BOM.
- No. of Resource Components: Enter the number of resource components.
- No. of Route Stages: Enter the number of route stages.
- Production Std Cost: Enter the standard production cost.
- Include in Production Std Cost Rollup: Select this to include the item in the standard cost rollup.
These settings are essential for items that you use in production orders and manage through BOMs.
Step 24: Assign properties
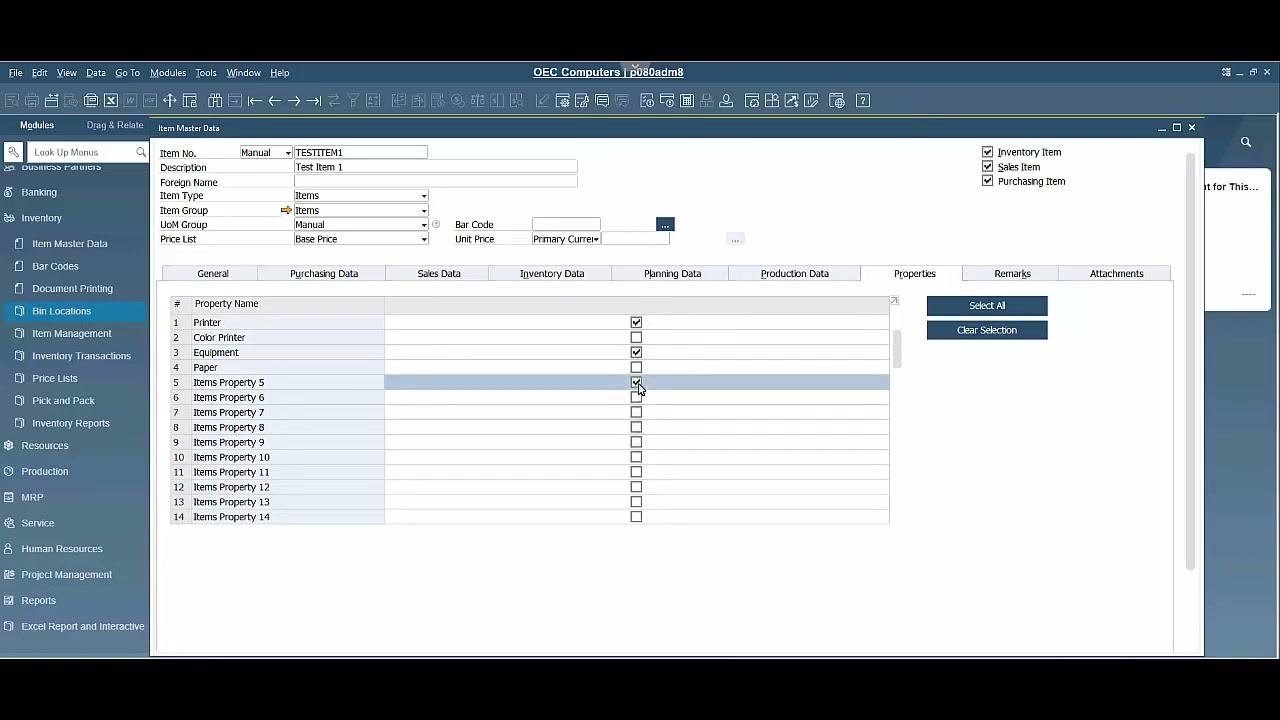
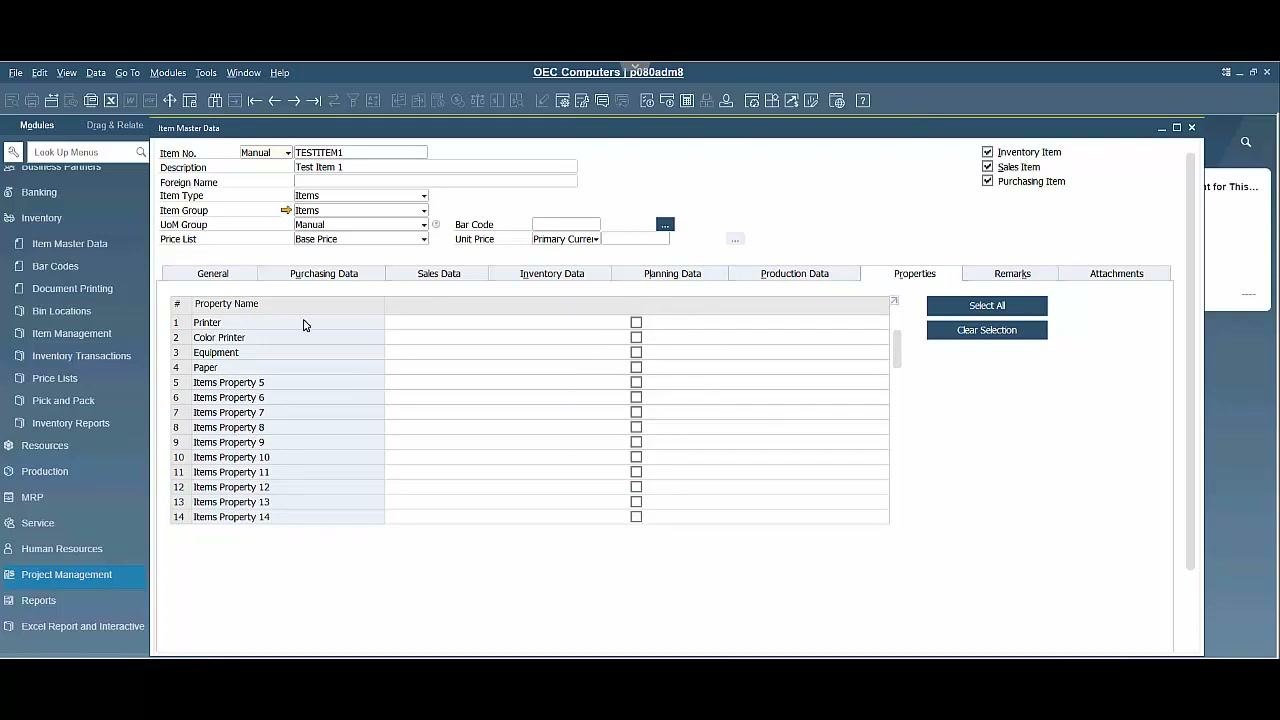
Click the Properties tab. The list shows the available properties, for example Printer, Color Printer, Equipment, Paper, and Items Property 5–14.
To assign a property, select the checkbox next to its name. Use Select All or Clear Selection to assign or remove all properties at once. Assigned properties allow advanced filtering and reporting on items with specific characteristics.
Step 25: Add an image
On the Properties tab, locate the Insert Image icon at the bottom right of the properties section. Click it to upload and attach an image to the item. An image helps you identify the item visually in the system.
Step 26: Attach supporting documents
Click the Attachments tab and use the Browse button to locate and select files, such as PDFs, Excel files, or Word documents. Attached files appear in a table with the columns Target Path, File Name, Attachment Date, and Free Text.
Click Display to view an attachment, or Delete to remove it. Attachments are useful for storing technical documents, certifications, or manuals related to the item.
Review and add the item
Step 27: Add the item to the system
- Return to the General tab to review everything you entered.
- Confirm that all required fields and configurations are complete: Item No., Description, Item Type, Item Group, UoM Group, Price List, Manufacturer, Shipping Type, Serial and Batch Numbers, and Activity Status.
- Click the Add button at the bottom left of the window to save the new item.
The item is now fully configured and available for purchasing, sales, inventory, production, and reporting processes.
Summary
You now know how to create item master data in SAP Business One, from the general item details through purchasing, sales, inventory, planning, and production data to properties, images, and attachments. This guide used these example values:
- Item No.:
TESTITEM1 - Description: Test Item Number 1
- Item Type: Items
- Purchasing UoM Name: Each
- Items per Purchasing Unit: 1,000
- Packaging UoM Name: Box
- Quantity per Package: 1
- Tax Type: Regular Tax
For Preferred Vendor, Mfr Catalog No., and Customs Group, select or enter values as needed for your item.
Generation details: cost, quality tiers
Docsie billed 5,500 credits ($3.85) to analyze this 11-minute video at standard quality. The rewrite, template fill and Word/PDF exports were included. The same video at each quality tier:
| Quality | Frames sampled | Credits | Approx. cost |
|---|---|---|---|
| Draft | every 16-30 s | 2,750 | $1.92 |
| Standard (this guide) | every 8-15 s | 5,500 | $3.85 |
| Detailed | every 4-7 s | 11,000 | $7.70 |
| Ultra | every 1-3 s | 22,000 | $15.40 |
Credits priced at $0.70 per 1,000; plans include a monthly allowance. Enterprise customers on on-premise or bring-your-own-model deployments run this on their own inference and pay no per-video credits.
Generated by Docsie Video-to-Docs on 2026-11-15 from a 10-minute video. Screenshots are frames from the source video and belong to their creator, Support One Inc., whose original is embedded above. If you own this video and want the guide removed or credited differently, contact us and we will act within one business day.