
How to Create a Bill of Materials (BOM) in SAP Business One
This guide shows you how to create a bill of materials (BOM) in SAP Business One for a production item. The example builds a production BOM for a company laptop. You define route stages, text notes, item components, resources, and a byproduct, then add the finished BOM to the system.
Video: SAP Business One - Creating a Bill of Material by SAP Business One (2018). All credit for the demonstration goes to the creator; watch the original on YouTube. The written guide below was generated from this video by Docsie. Creator? Request a change or removal.
This guide shows you how to create a bill of materials (BOM) in SAP Business One for a production item. The example builds a production BOM for a company laptop. You define route stages, text notes, item components, resources, and a byproduct, then add the finished BOM to the system.
Prerequisites
- Access to SAP Business One.
- A product number for the item you want to build. This example uses
C0096, "Company Laptop". - Items, resources, and route stages that you can select from the lists in the system. This example uses a motherboard, a laptop case, technicians, and machines.
Create the BOM structure
Open the Bill of Materials window
- Open SAP Business One.
- In the left navigation pane, click Production.
- Select Bill of Materials.
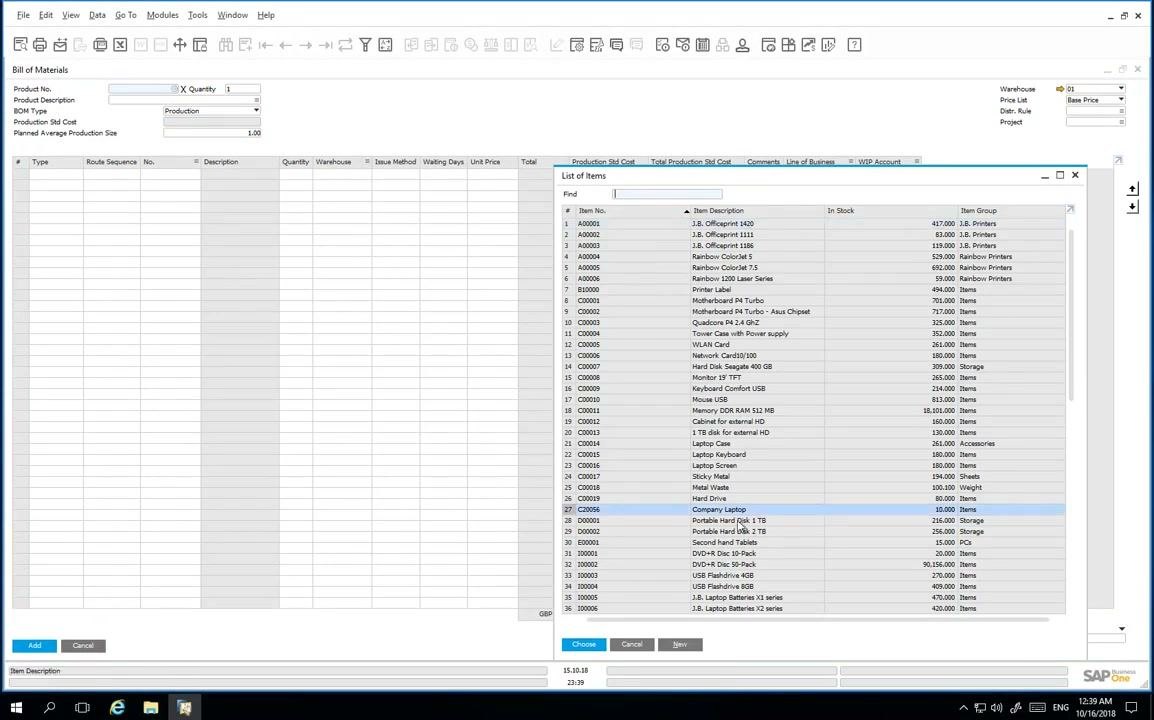
Select the product in Add Mode
- Make sure the Bill of Materials window is in Add Mode.
- In the Product No. field, select the product number for the company laptop, for example
C0096. - Confirm that BOM Type is set to Production.
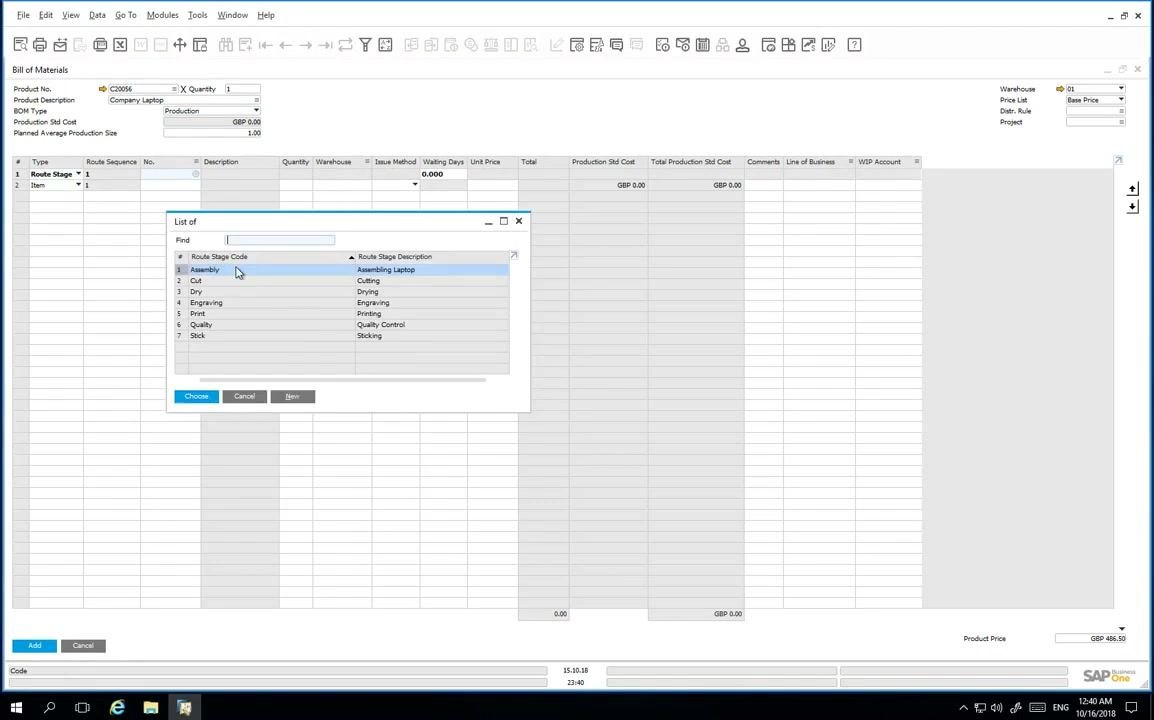
Add the first route stage
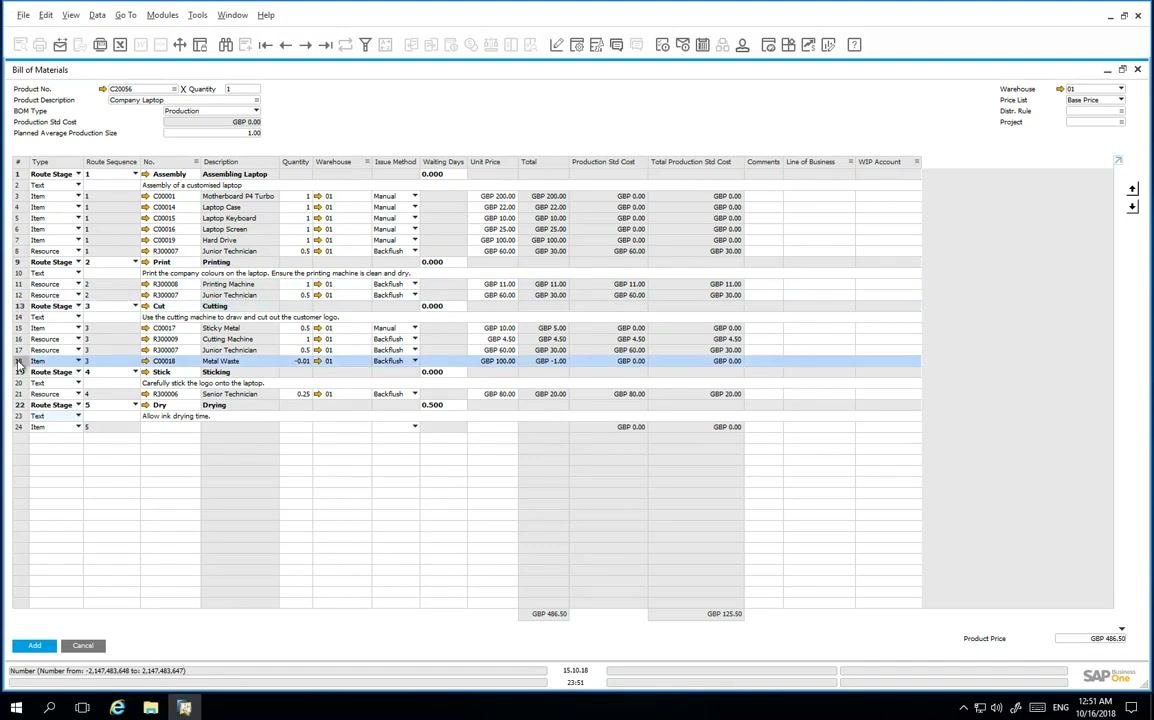
- In the BOM line items section, set the Type of the first line to Route Stage.
- From the list of route stages, select Assembly. The description shows "Assembling Laptop".
Add a text line
- Add a new line and set the Type to Text.
- In the text details window, enter a description such as
Assembly of a customised laptop. - Click OK to save the text line.
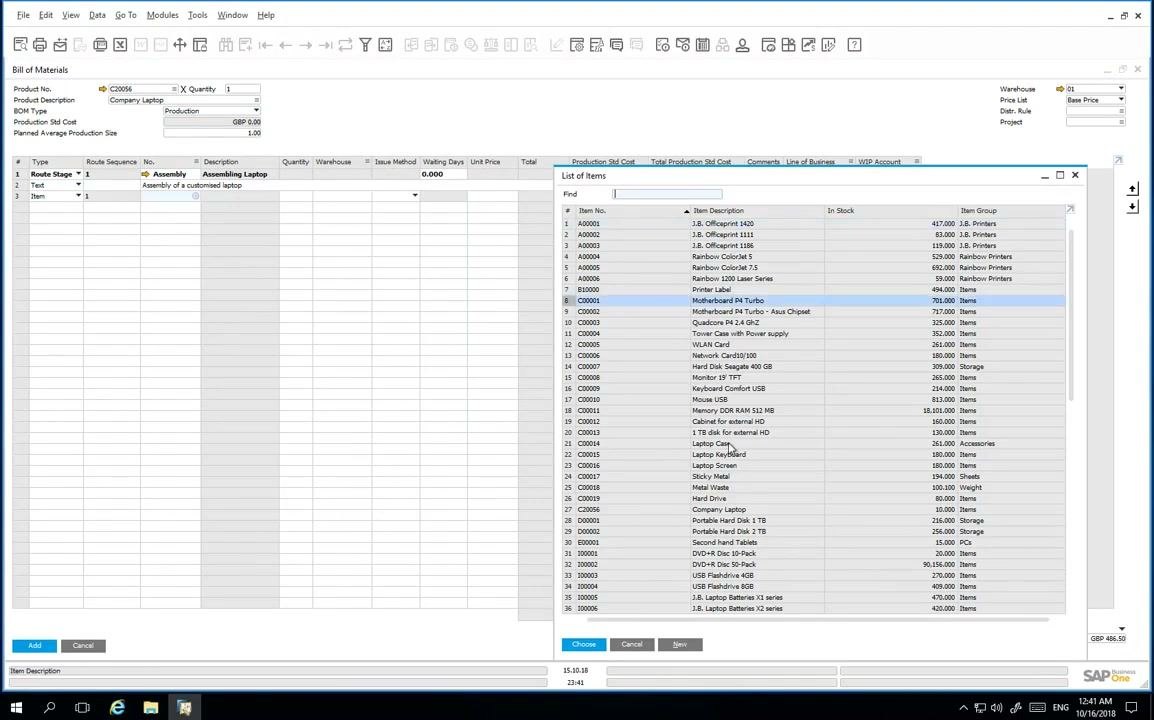
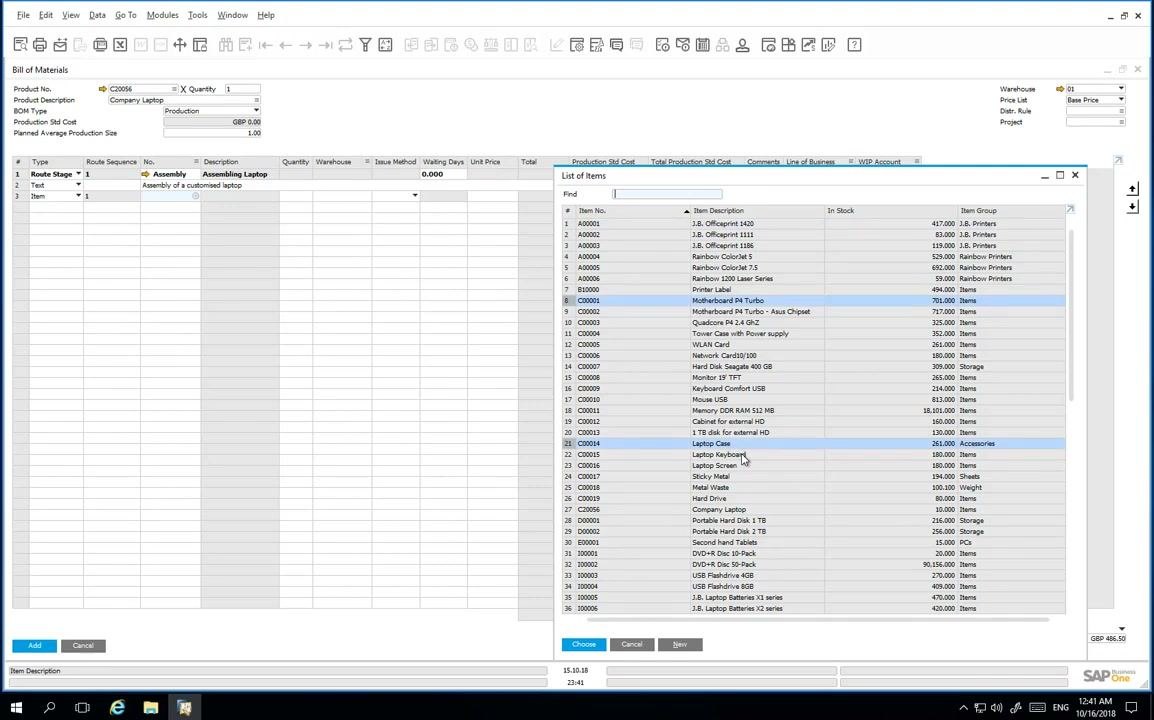
Add the required components
- Add a new line and set the Type to Item.
- Select each of the following items from the list of available items in the system:
- Motherboard
- Laptop Case
- Laptop Keyboard
- Laptop Screen
- Hard Drive
Add resources and route stages
Add a resource to the assembly stage
- On the next available line under the assembly route stage, open the dropdown in the Type column and select Resource.
-
In the List of Resources dialog, select Junior Technician and click Choose.
-
In the Quantity field, enter
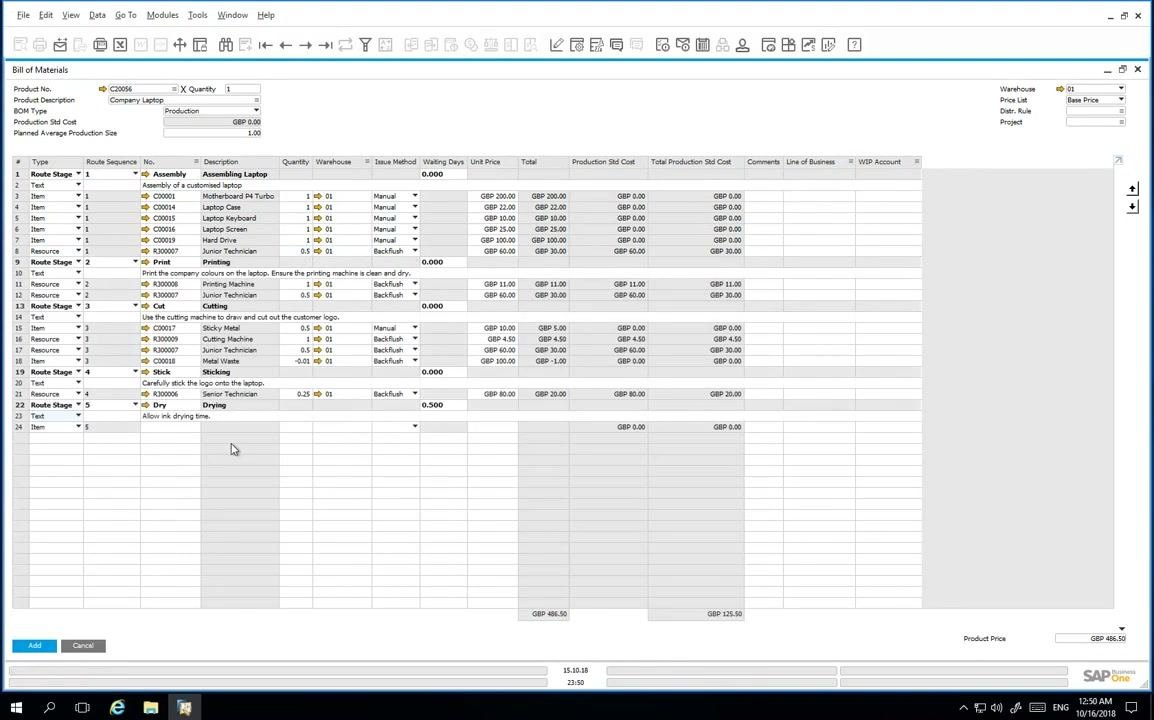
0.5. A quantity of 1 equals one hour, so0.5represents 30 minutes.
Add the remaining route stages
Continue adding route stages, resources, and items as follows.
Printing stage
- Description: Print the company colours on the laptop. Ensure the printing machine is clean and dry.
- Resource: Printing Machine, quantity 0.1
- Resource: Junior Technician, quantity 0.5
Cutting stage
- Description: Use the cutting machine to draw and cut out the customer logo.
- Item: Sticky Metal, quantity 0.5
- Resource: Cutting Machine, quantity 0.5
- Resource: Junior Technician, quantity 0.5
- Byproduct: Metal Waste, quantity -0.01. The negative value returns the waste to inventory.
Sticking stage
- Description: Carefully stick the logo onto the laptop.
- Resource: Senior Technician, quantity 0.25
Drying stage
- Description: Allow ink drying time.
- Resource: Drying, quantity 0.5
Define the drying route stage
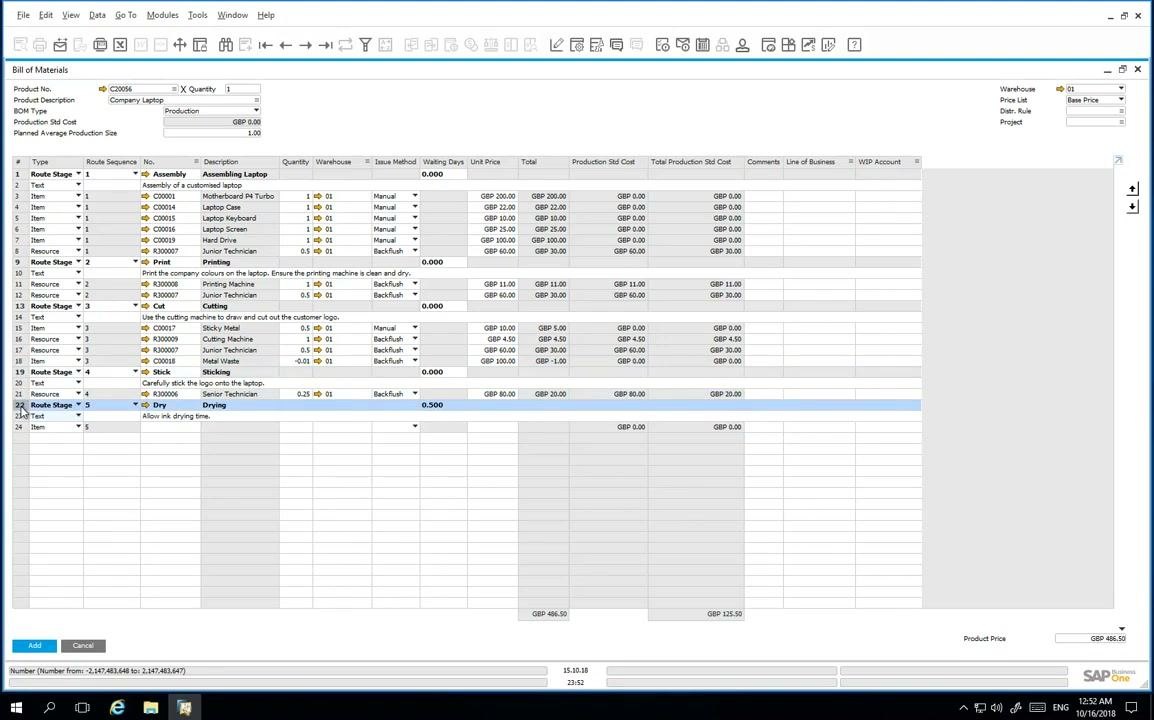
- In the Type column, select Route Stage and enter Drying as the description.
- Set Waiting Days to
0.500to define the drying period. - Optionally, add a Text line under this stage with the note "Allow ink drying time."
- Assign a resource if needed, for example the Drying resource.
Manage the BOM
Rearrange BOM lines
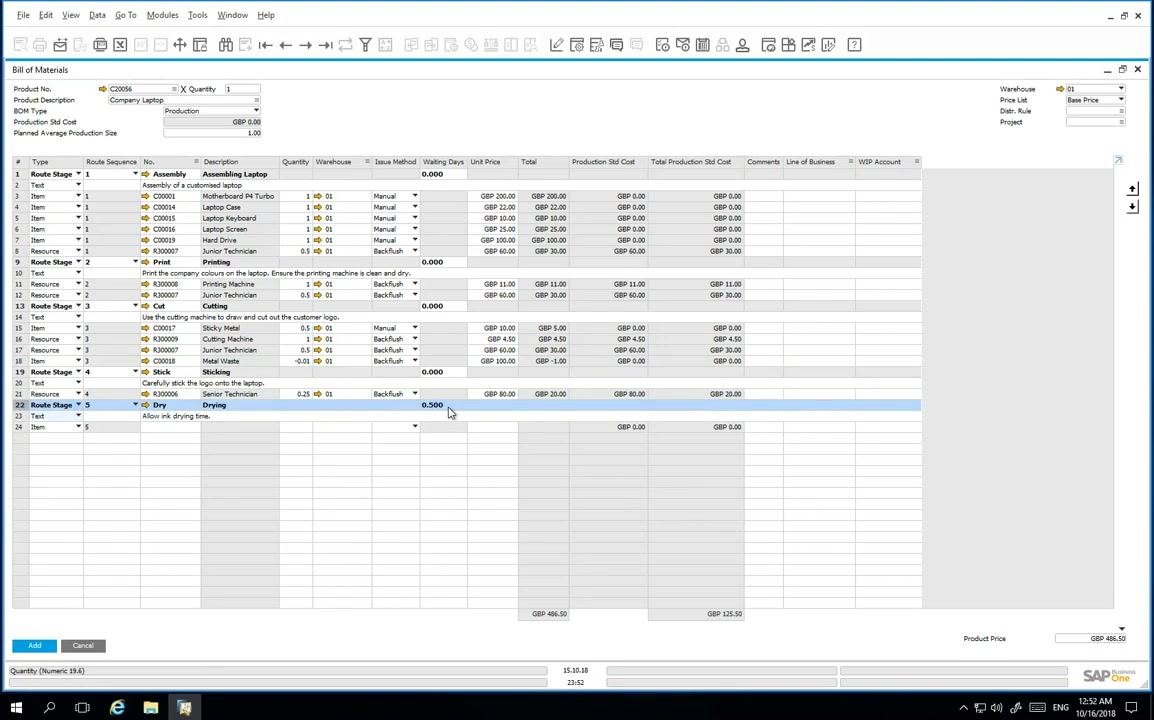
- Use the indicator arrows on the left side of the BOM window to move a single line (resource, item, or text) up or down.
- To move several lines at once, hold Ctrl, select the rows, and use the indicator arrows to move them together.
- To move an entire route stage, change its Routing Sequence number. The BOM reorders the stages automatically.
Adjust the product price
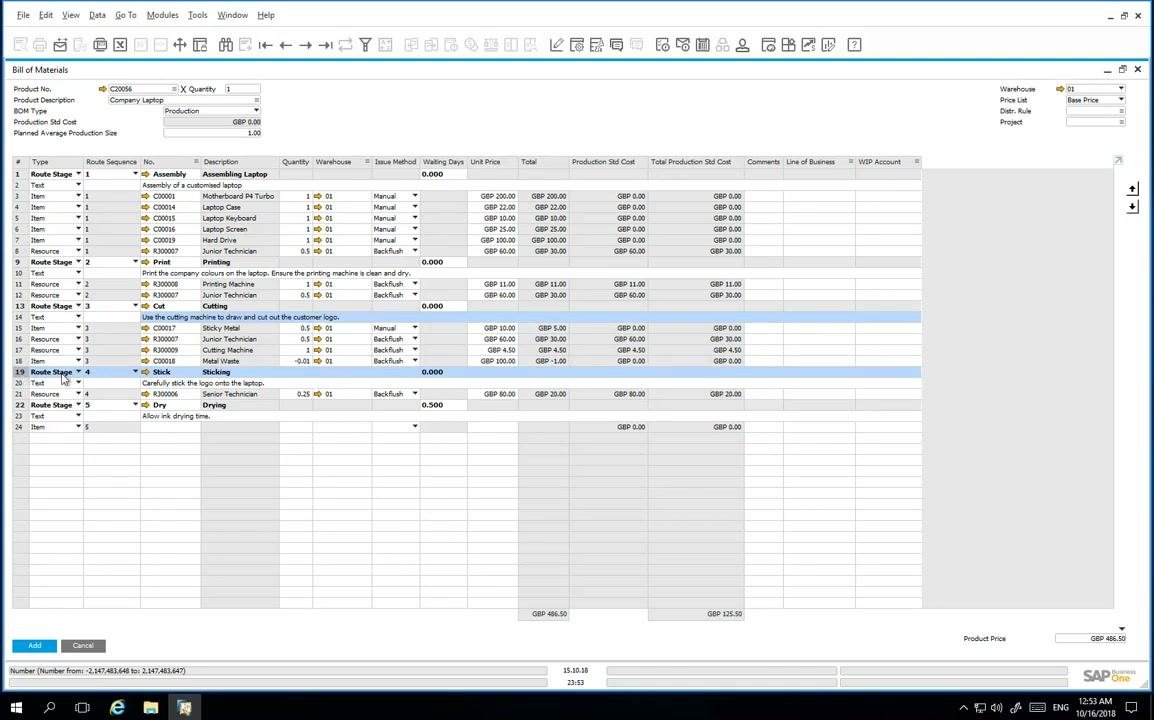
- Review the Product Price field at the bottom right of the BOM window.
- Note that the displayed price, for example
GBP 486.50, is an indicative price for the final product. - If needed, update the value manually to the price you want.
Review and add the BOM
Review all route stages
Check the following before you save: - Each route stage has the correct resources, items, and quantities. - Negative quantities, such as for Metal Waste, return byproducts to inventory. - Every description accurately reflects the production process.
Add the BOM to the system
- Confirm that all route stages, resources, items, and byproducts are correctly defined and sequenced.
- Confirm that all quantities, waiting periods, and descriptions are accurate.
- Click Add at the bottom left of the BOM window to save the completed BOM.
Summary and what's next
You now know how to create a bill of materials (BOM) in SAP Business One. The company laptop BOM includes route stages, explanatory text, components, resources, a byproduct, and a product price. For your own production process, define additional route stages, resources, and components as needed.
Generation details: cost, quality tiers
Docsie billed 2,500 credits ($1.75) to analyze this 5-minute video at standard quality. The rewrite, template fill and Word/PDF exports were included. The same video at each quality tier:
| Quality | Frames sampled | Credits | Approx. cost |
|---|---|---|---|
| Draft | every 16-30 s | 1,250 | $0.88 |
| Standard (this guide) | every 8-15 s | 2,500 | $1.75 |
| Detailed | every 4-7 s | 5,000 | $3.50 |
| Ultra | every 1-3 s | 10,000 | $7.00 |
Credits priced at $0.70 per 1,000; plans include a monthly allowance. Enterprise customers on on-premise or bring-your-own-model deployments run this on their own inference and pay no per-video credits.
Generated by Docsie Video-to-Docs on 2026-11-15 from a 4-minute video. Screenshots are frames from the source video and belong to their creator, SAP Business One, whose original is embedded above. If you own this video and want the guide removed or credited differently, contact us and we will act within one business day.