
How to Share a Report in Salesforce
Salesforce doesn't let you share individual reports directly—instead, you share the folder that contains them. This guide walks you through how to share a report in Salesforce by granting access to specific users, roles, role hierarchies, or public groups at the folder level.
Video: How to Share Reports in Salesforce Lightning by Rotive - Brian Hays. All credit for the demonstration goes to the creator; watch the original on YouTube. The written guide below was generated from this video by Docsie. Creator? Request a change or removal.
Salesforce doesn't let you share individual reports directly—instead, you share the folder that contains them. This guide walks you through how to share a report in Salesforce by granting access to specific users, roles, role hierarchies, or public groups at the folder level.
Prerequisites
- You must be logged in to Salesforce.
- You need the appropriate permissions to manage sharing on the report folder.
Navigate to the Reports section
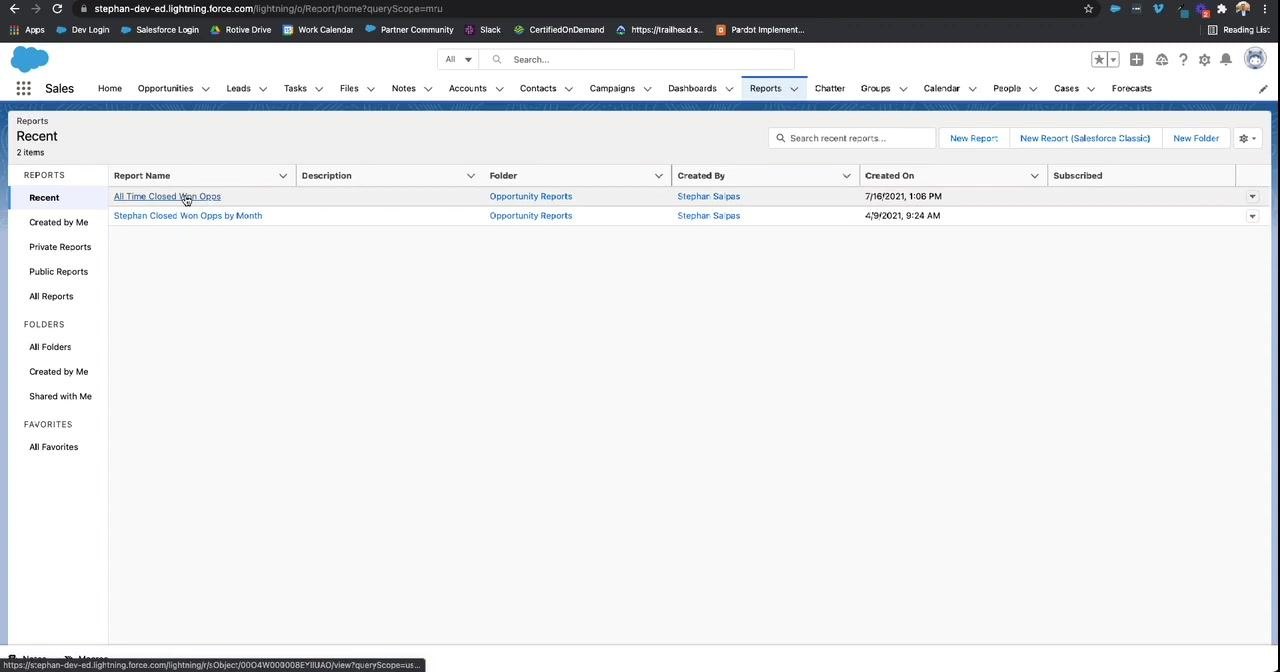
Open Salesforce and click the Reports tab in the top navigation bar. This displays your available reports, such as "All Time Closed Won Opps" and "Stephan Closed Won Opps by Month," both located in the "Opportunity Reports" folder.
Identify the report folder
Check the Folder column to see which folder contains the reports you want to share. In this example, both reports belong to the "Opportunity Reports" folder. Since individual reports cannot be shared, you'll need to share this folder instead.
Confirm that individual reports cannot be shared
Click the down arrow on the far right of a report row to see the available actions. You'll notice there is no "Share" option here—only Run, Edit, Subscribe, Export, Delete, Add to Dashboard, Favorite, and Move. This confirms that sharing must happen at the folder level.
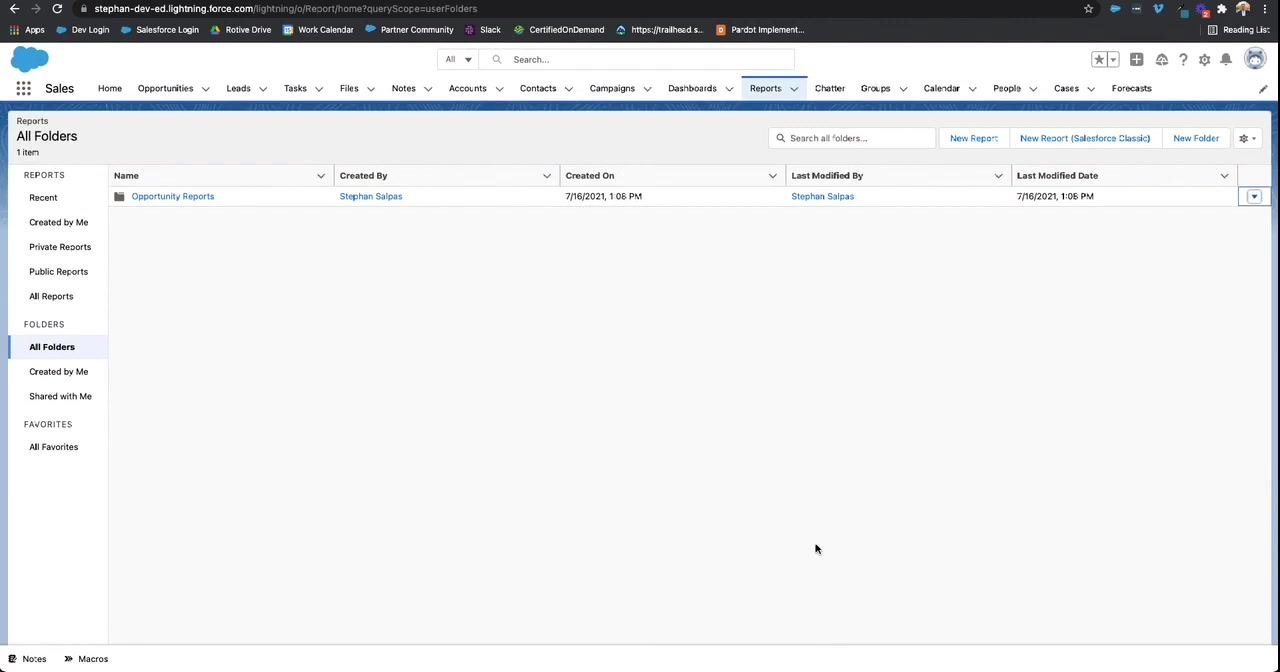
Access all folders
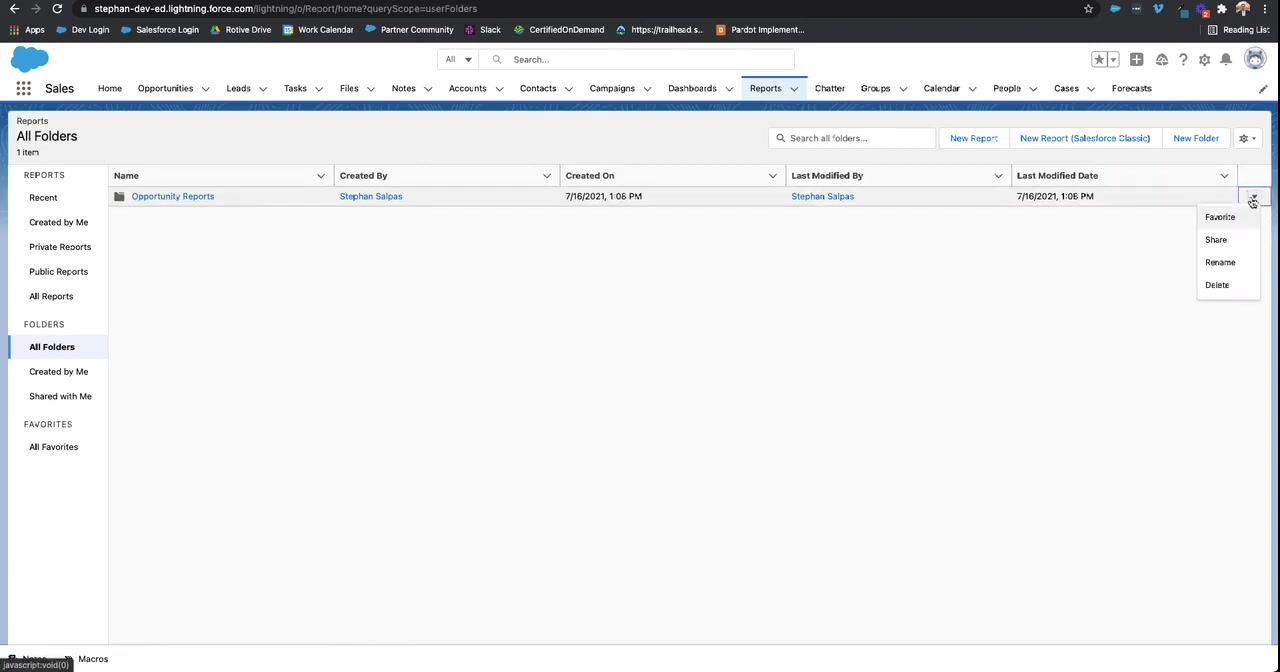
In the left sidebar, under FOLDERS, click All Folders. This shows you the full list of report folders, including "Opportunity Reports."
Open the folder sharing options
Find the folder you want to share, such as "Opportunity Reports." Click the down arrow on the far right of the folder row and select Share from the dropdown menu.
Share the folder with users
In the Share folder dialog, confirm that Share With is set to Users. In the Names field, type a user's name or click to browse the list, then select the person you want to add—for example, "Marty McFly." Set their access level, such as View, to grant read-only access.
Choose the right access level
For each user you add, select the access level that matches what they need:
- View: The user can only view reports in the folder.
- Edit: The user can edit reports in the folder.
- Manage: The user can manage the folder and its contents.
Share with roles or groups
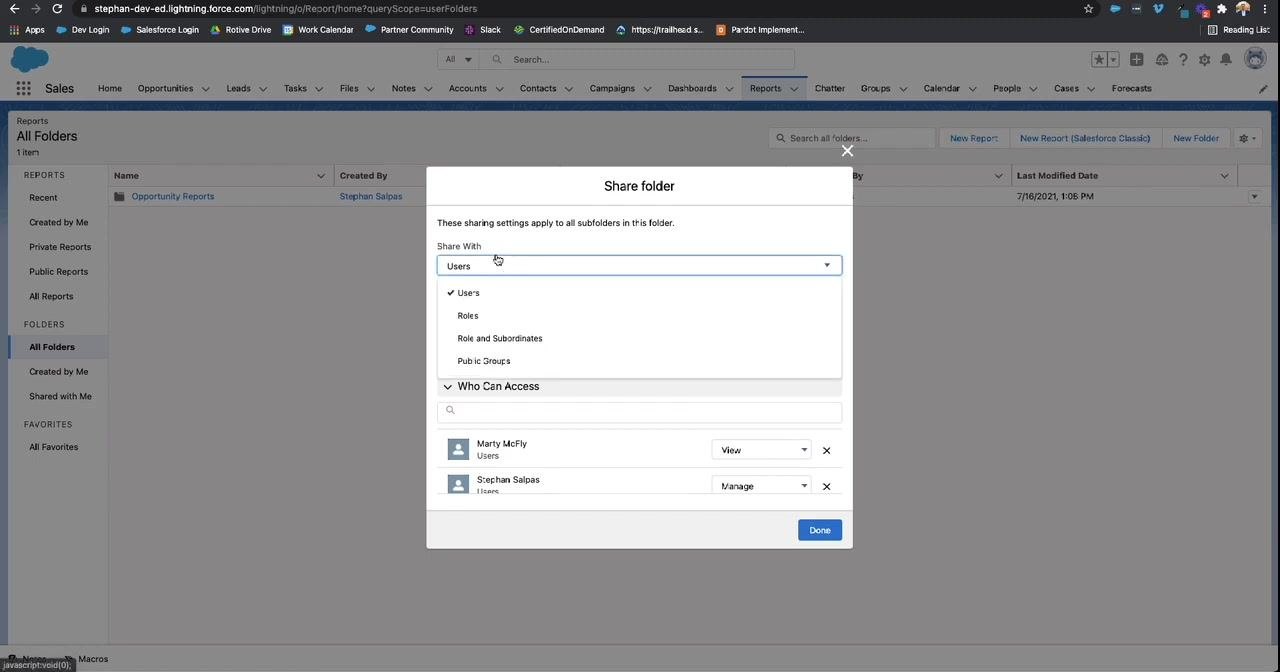
Open the Share With dropdown and select Roles, Role and Subordinates, or Public Groups, depending on who you want to grant access to. You can assign access levels to these groups the same way you do for individual users.
Share with a role hierarchy or public group
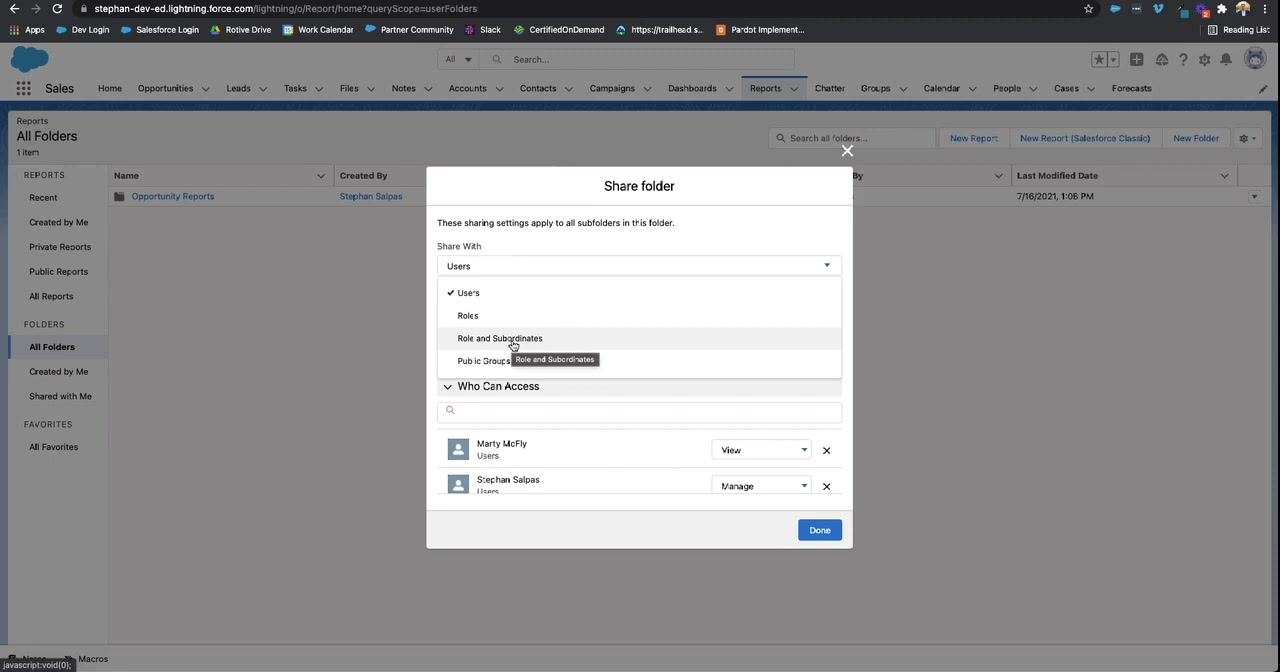
Select Role and Subordinates to grant access to users in a specific role along with everyone beneath it in the role hierarchy. Alternatively, select Public Groups to share the folder with a predefined group of Salesforce users. Click the dropdown to see the available public groups.
Select a public group
In the Names field, search for and select the public group you want to add, such as "All Internal Users." Set its access level—for example, View—to grant read-only access to the group.
Review who can access the folder
Check the Who Can Access section to confirm that all the users and groups you've added are listed with the correct access levels. In this example:
- "All Internal Users" (Public Groups) – View
- "Marty McFly" (Users) – View
- "Stephan Salpas" (Users) – Manage
Finalize and save the sharing settings
Click Done to apply the sharing settings and close the dialog. The folder is now shared with all the selected users, roles, and groups at their specified access levels.
Summary
You've successfully shared a Salesforce report folder with specific users, roles, and public groups. Everyone listed in the Who Can Access section now has the appropriate level of access to the reports inside that folder.
If you have questions or need further assistance, reach out to your Salesforce administrator or support team.
Generation details: cost, quality tiers
Docsie billed 1,500 credits ($1.05) to analyze this 3-minute video at standard quality. The rewrite, template fill and Word/PDF exports were included. The same video at each quality tier:
| Quality | Frames sampled | Credits | Approx. cost |
|---|---|---|---|
| Draft | every 16-30 s | 750 | $0.52 |
| Standard (this guide) | every 8-15 s | 1,500 | $1.05 |
| Detailed | every 4-7 s | 3,000 | $2.10 |
| Ultra | every 1-3 s | 6,000 | $4.20 |
Credits priced at $0.70 per 1,000; plans include a monthly allowance. Enterprise customers on on-premise or bring-your-own-model deployments run this on their own inference and pay no per-video credits.
Generated by Docsie Video-to-Docs on 2026-10-06 from a 2-minute video. Screenshots are frames from the source video and belong to their creator, Rotive - Brian Hays, whose original is embedded above. If you own this video and want the guide removed or credited differently, contact us and we will act within one business day.