
How to Create a Connected App in Salesforce
Connected Apps let external applications, such as Postman, connect and authenticate with your Salesforce instance using OAuth. This guide walks you through how to create a connected app in Salesforce, configure its OAuth settings, and retrieve the credentials you need for external integration.
Video: How to Create a Connected App in Salesforce? | What is a Connected App? (Tutorial 14) by MyTutorialRack (2021). All credit for the demonstration goes to the creator; watch the original on YouTube. The written guide below was generated from this video by Docsie. Creator? Request a change or removal.
Connected Apps let external applications, such as Postman, connect and authenticate with your Salesforce instance using OAuth. This guide walks you through how to create a connected app in Salesforce, configure its OAuth settings, and retrieve the credentials you need for external integration.
Prerequisites
- Access to a Salesforce account with permissions to open Setup.
- Administrative rights to create and manage connected apps in App Manager.
Navigate to Salesforce Setup
Log in to your Salesforce account, then click the gear icon (⚙️) in the upper right corner and select Setup. This takes you to the Setup Home page, where you can access all administrative tools.
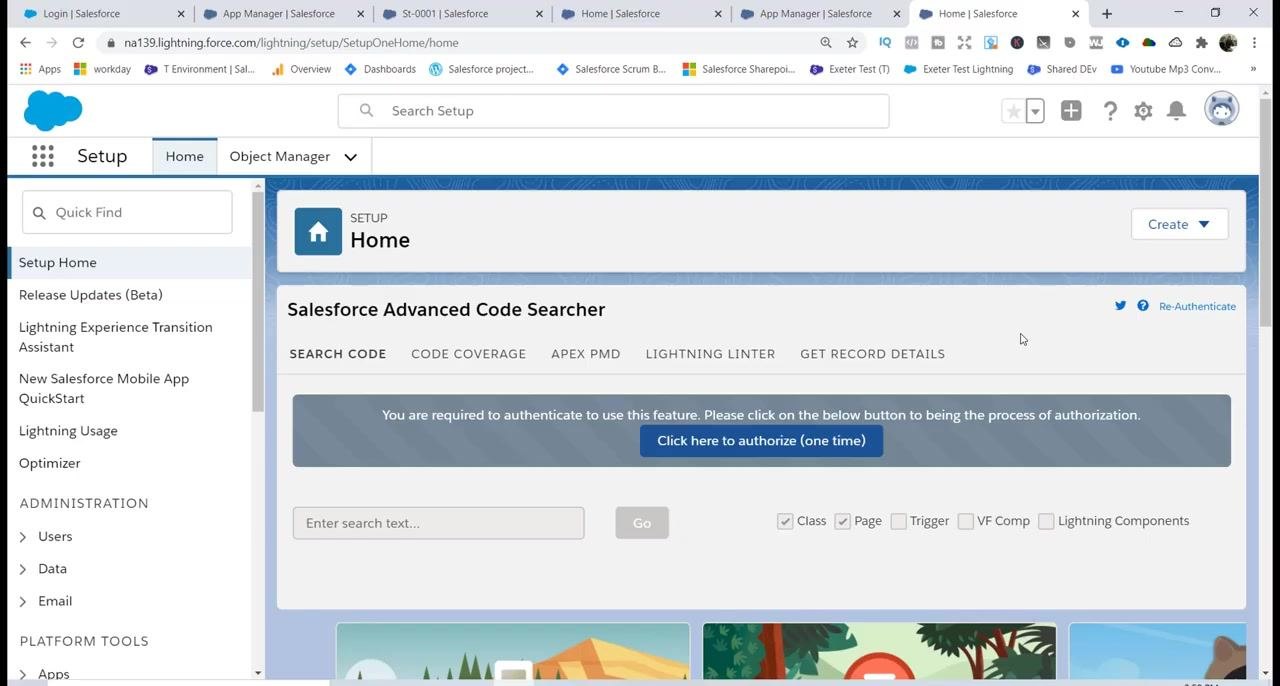
Open App Manager
In the left sidebar, locate the Quick Find search box and type app. Under the Apps section that appears, click App Manager to open it.
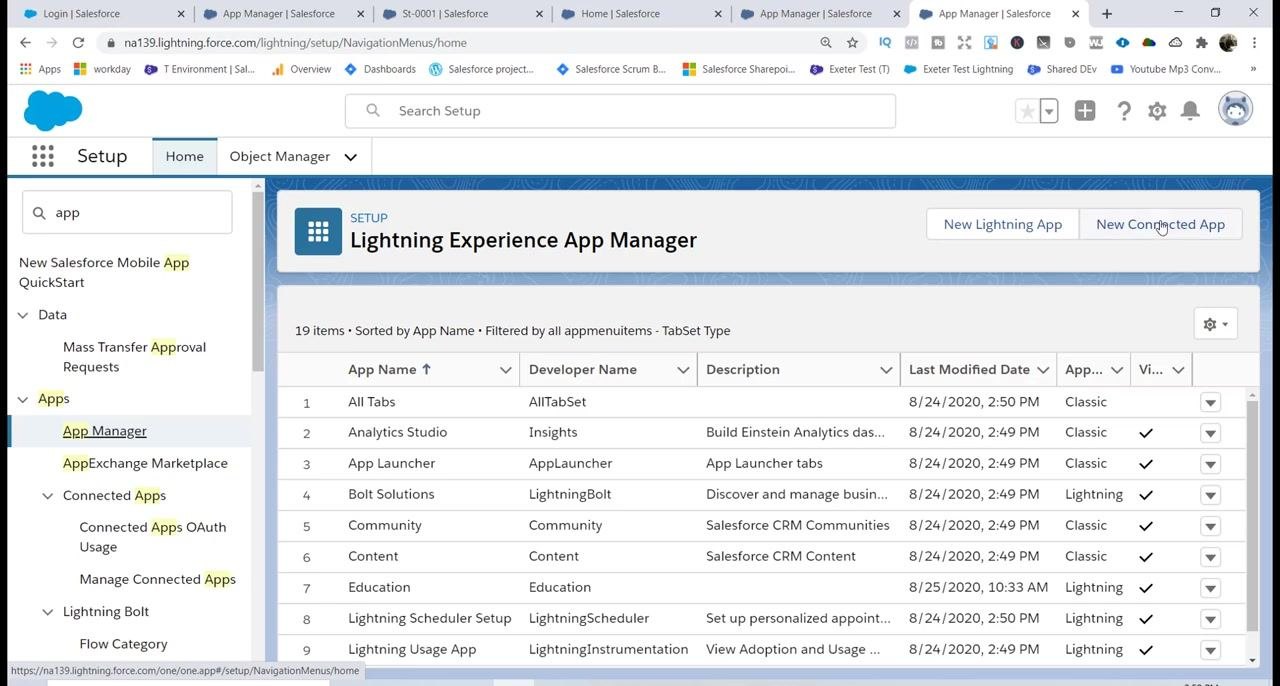
Start creating a new connected app
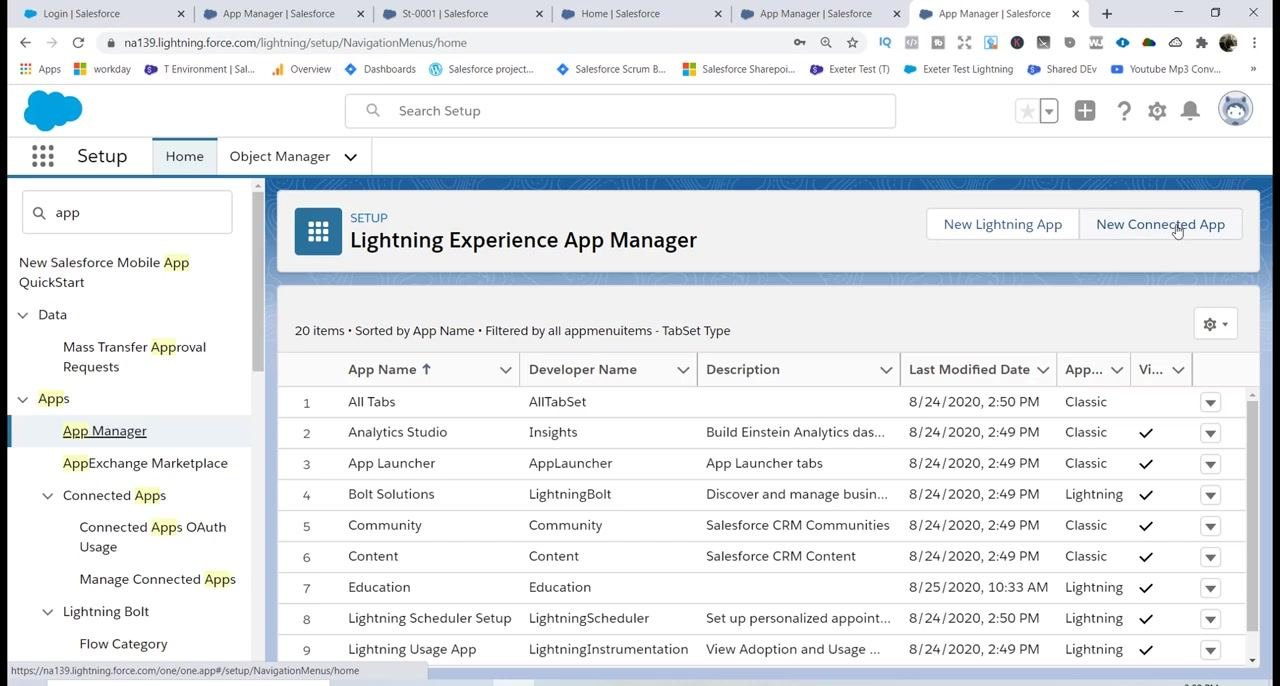
On the App Manager page, click the New Connected App button in the upper right corner to begin the setup process.
Enter basic information for the app
In the New Connected App form, fill in the following fields:
- Connected App Name:
TestSalesforce - API Name:
TestSalesforce(this is auto-filled based on the app name) - Contact Email:
info@mytutorialrack.com
Leave the remaining fields blank unless your integration has specific requirements.
Enable OAuth settings and set the callback URL
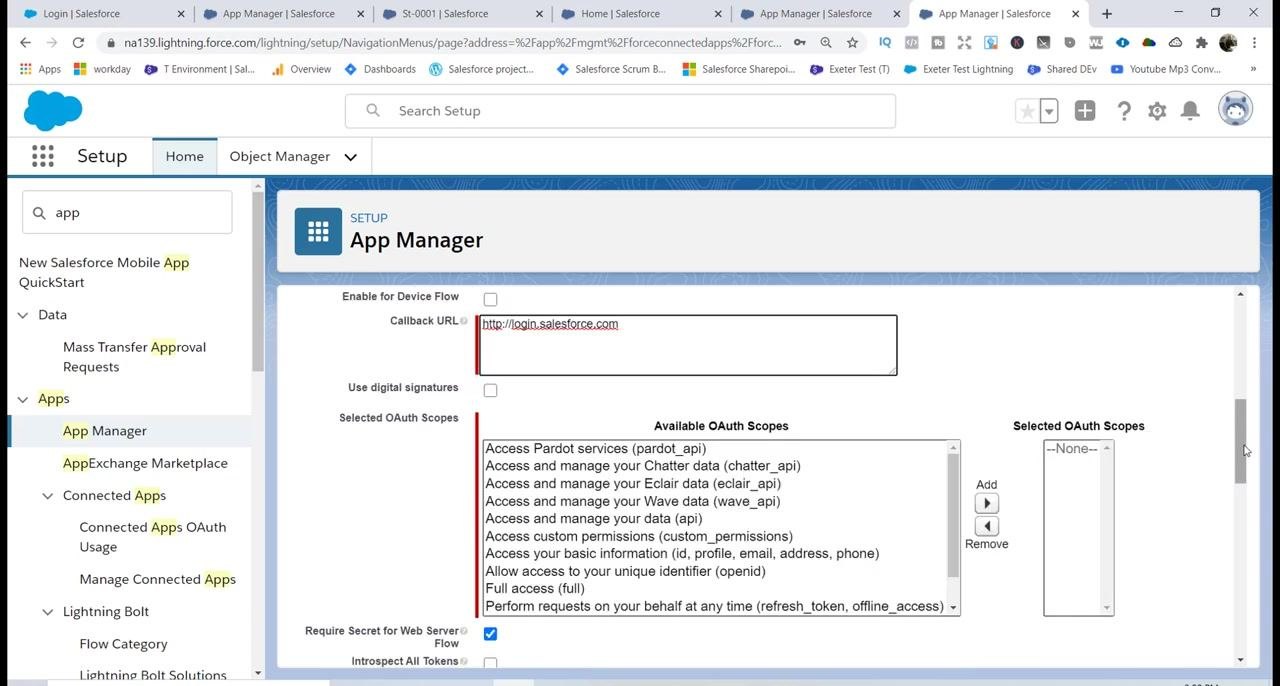
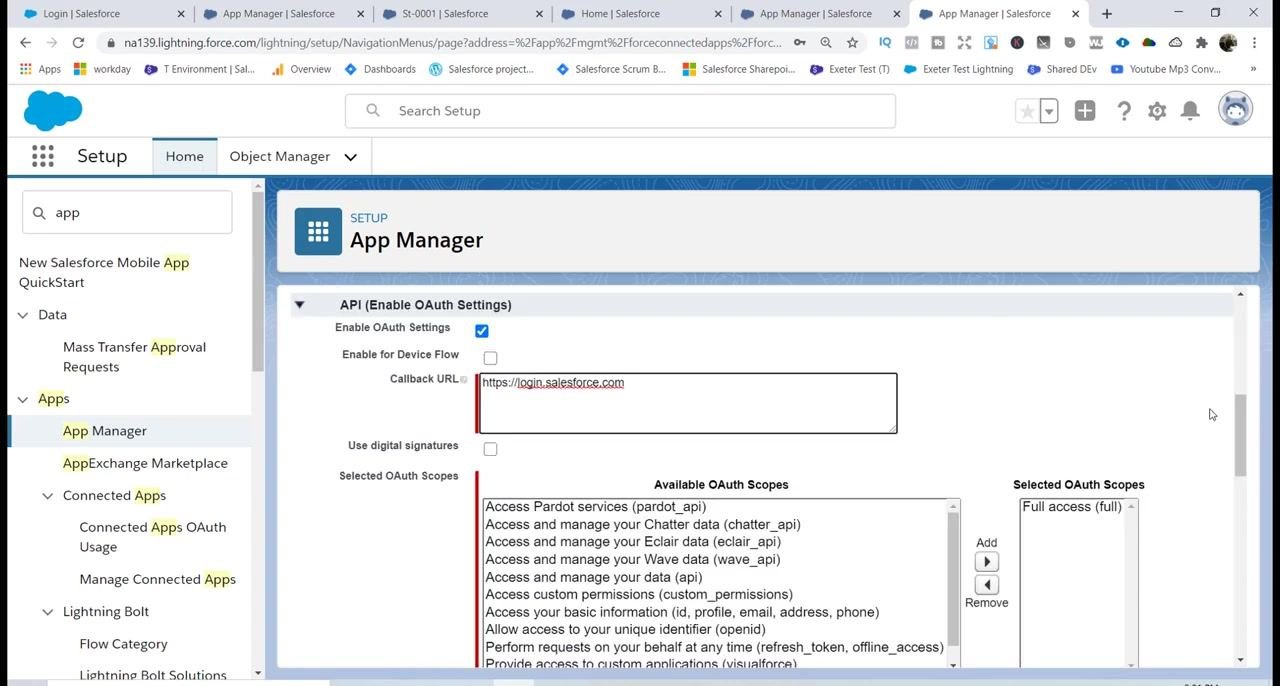
Scroll down to the API (Enable OAuth Settings) section and check the box labeled Enable OAuth Settings. In the Callback URL field that appears, enter http://login.salesforce.com for now — you will update this to a secure URL in a later step.
Select OAuth scopes
In the Available OAuth Scopes list, choose the level of access you want to grant the external application:
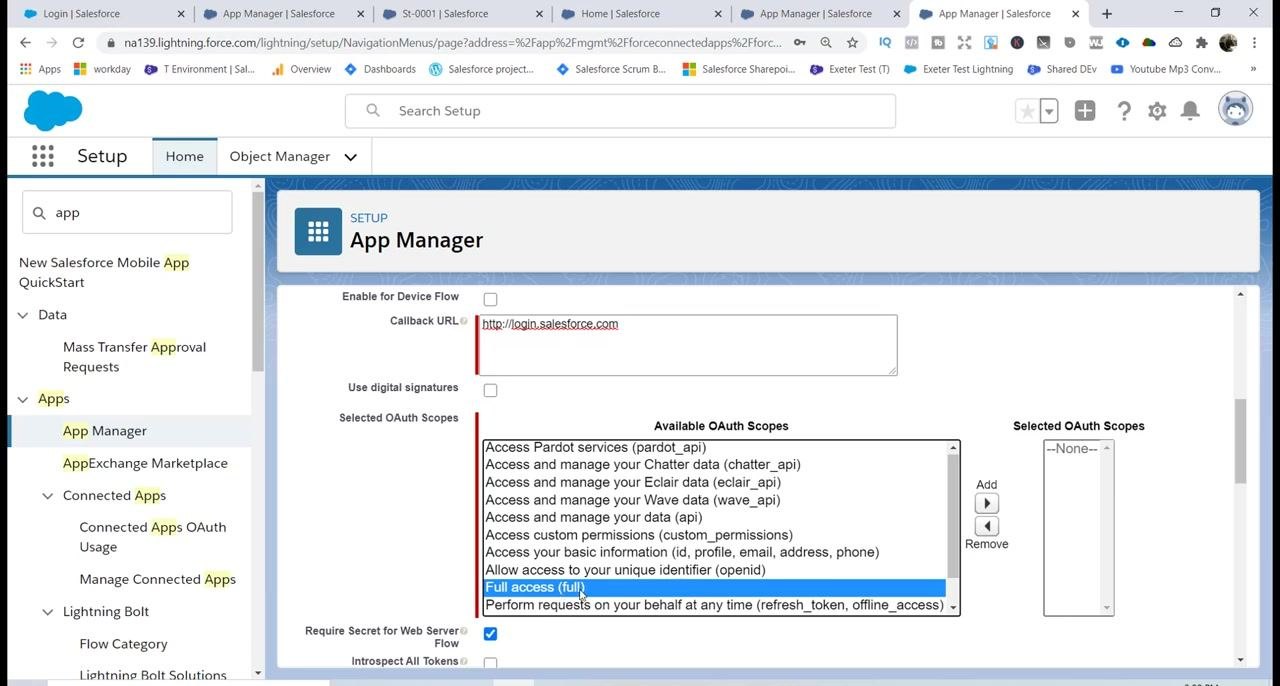
- For full access, select Full access (full).
- For more restrictive access, choose a scope such as Access and manage your Chatter data (chatter_api), depending on your requirements.
Click the Add arrow to move your selected scopes into the Selected OAuth Scopes list.
Add the full access scope
To grant the external application complete access to your Salesforce data, select Full access (full) in the Available OAuth Scopes list and click the Add arrow (>) to move it into Selected OAuth Scopes.
Only grant the minimum access required for your use case to enhance security.
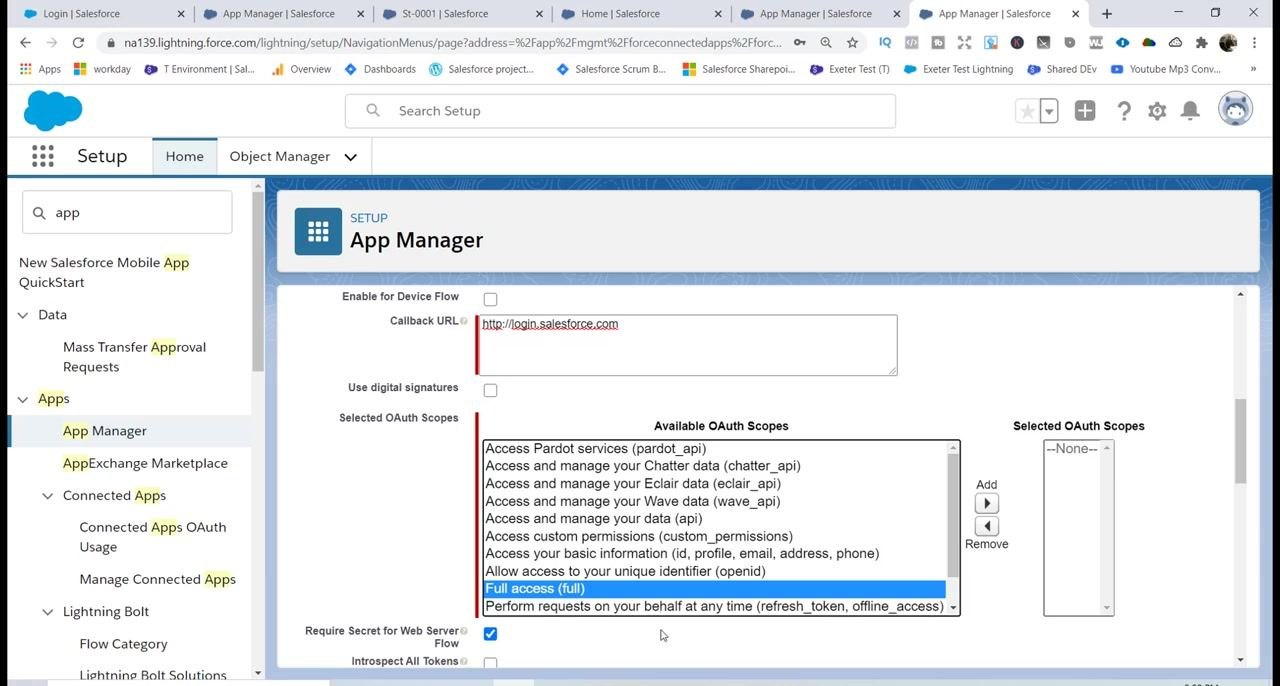
Update the callback URL to use HTTPS
For security compliance, ensure the Callback URL uses https:// instead of http://. Update the field to https://login.salesforce.com if necessary.
Save the connected app
Review all entered information, then scroll to the bottom of the form and click Save. A confirmation message appears: "Allow from 2 to 10 minutes for your changes to take effect on the server before using the connected app." Click Continue to proceed.
Retrieve the consumer key and consumer secret
After saving, navigate to Manage Connected Apps and locate your app (TestSalesforce). Click to view its details, then find the following credentials under API (Enable OAuth Settings):
- Consumer Key: displayed automatically (for example,
3MVG9l2zHsy...) - Consumer Secret: click Click to reveal to display the value (for example,
54974578E7A4...)
Copy both values — you will need them to authenticate external applications, such as Postman, with Salesforce.
Verify the connected app was created
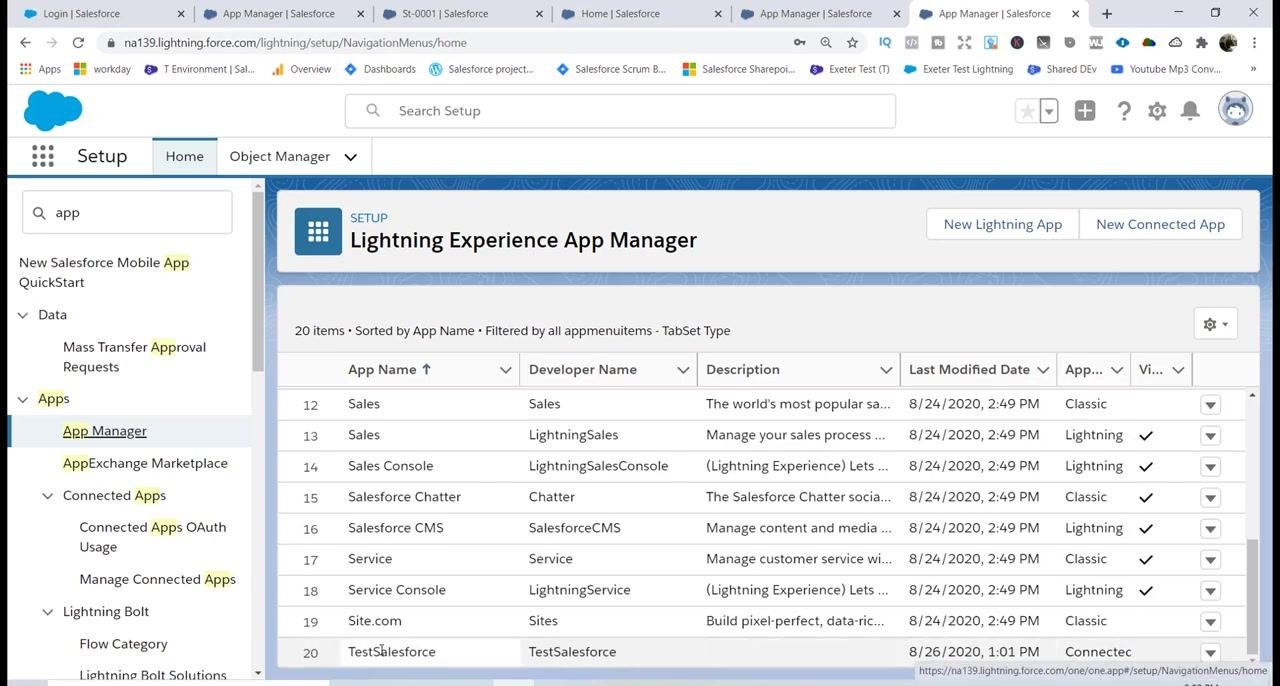
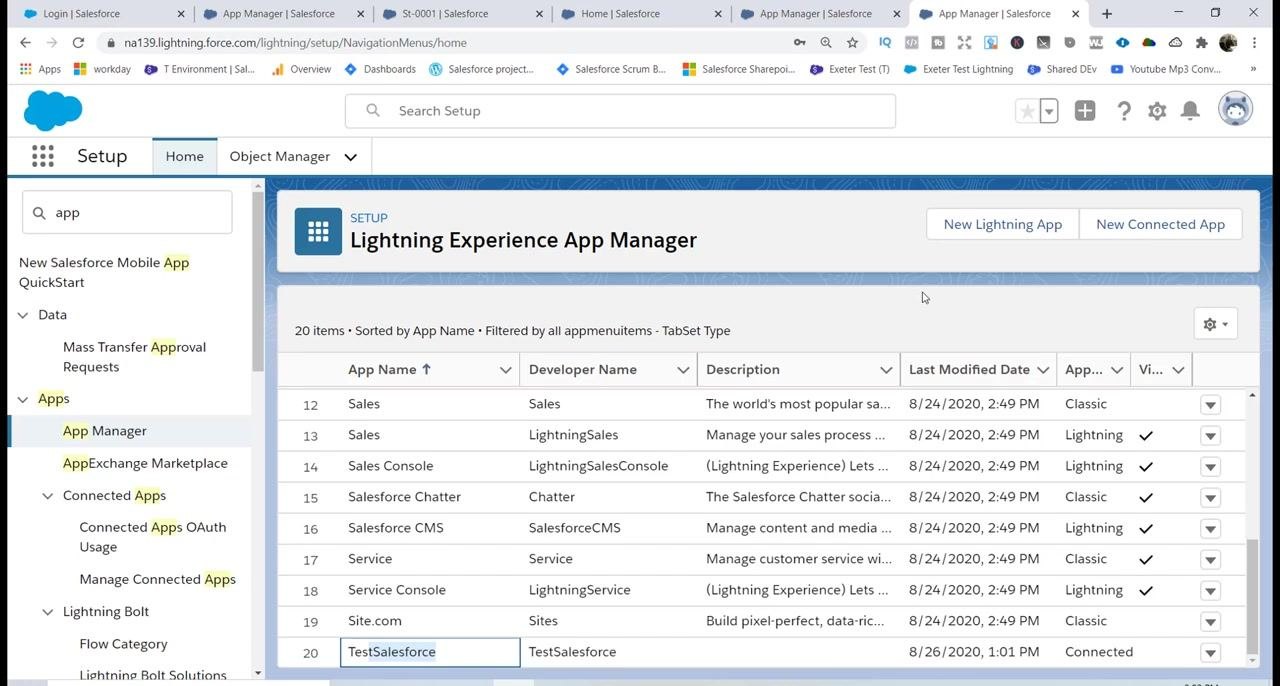
Return to the Lightning Experience App Manager and scroll through the list of apps. Confirm that TestSalesforce now appears at the bottom of the list.
Important notes
- The Consumer Key and Consumer Secret are required for OAuth authentication in external tools like Postman.
- Wait 2–10 minutes after saving before attempting to use the connected app.
- Always use
https://in your Callback URL for security. - Only grant the minimum necessary OAuth scopes to external applications.
Summary
You have now learned how to create a connected app in Salesforce, enabled OAuth settings, secured the callback URL, and retrieved the Consumer Key and Consumer Secret needed for external authentication.
What's next
Before moving on, confirm the following:
- Your new app (
TestSalesforce) appears at the bottom of the app list in Lightning Experience App Manager, with correct details for Developer Name, Description, Last Modified Date, App Type, and Visibility. - You have your Consumer Key, Consumer Secret, and Callback URL (using
https://) ready to use.
With these credentials in hand, you're ready to configure Postman to authenticate with Salesforce using OAuth 2.0 and test your connection with a REST API call.
Generation details: cost, quality tiers
Docsie billed 2,000 credits ($1.40) to analyze this 4-minute video at standard quality. The rewrite, template fill and Word/PDF exports were included. The same video at each quality tier:
| Quality | Frames sampled | Credits | Approx. cost |
|---|---|---|---|
| Draft | every 16-30 s | 1,000 | $0.70 |
| Standard (this guide) | every 8-15 s | 2,000 | $1.40 |
| Detailed | every 4-7 s | 4,000 | $2.80 |
| Ultra | every 1-3 s | 8,000 | $5.60 |
Credits priced at $0.70 per 1,000; plans include a monthly allowance. Enterprise customers on on-premise or bring-your-own-model deployments run this on their own inference and pay no per-video credits.
Generated by Docsie Video-to-Docs on 2026-09-08 from a 3-minute video. Screenshots are frames from the source video and belong to their creator, MyTutorialRack, whose original is embedded above. If you own this video and want the guide removed or credited differently, contact us and we will act within one business day.