
How to Create a Campaign in Salesforce
This guide walks you through accessing the Campaigns feature in Salesforce, creating a new campaign, entering its financial and descriptive details, reviewing the saved campaign, and managing leads and contacts associated with it. Campaigns allow you to attribute marketing spend to leads, measure the effectiveness of your marketing efforts, and report on performance in a clear, actionable way.
Video: CAMPAIGNS IN SALESFORCE | How to create a new campaign | Why would you use salesforce campaigns by Salesforce Emily (2021). All credit for the demonstration goes to the creator; watch the original on YouTube. The written guide below was generated from this video by Docsie. Creator? Request a change or removal.
This guide walks you through accessing the Campaigns feature in Salesforce, creating a new campaign, entering its financial and descriptive details, reviewing the saved campaign, and managing leads and contacts associated with it. Campaigns allow you to attribute marketing spend to leads, measure the effectiveness of your marketing efforts, and report on performance in a clear, actionable way.
Prerequisites
- Access to the Salesforce Sales Console.
- Permission to view and create records in the Campaigns tab.
- Access to the Sales app via the App Launcher.
Accessing the Campaigns tab
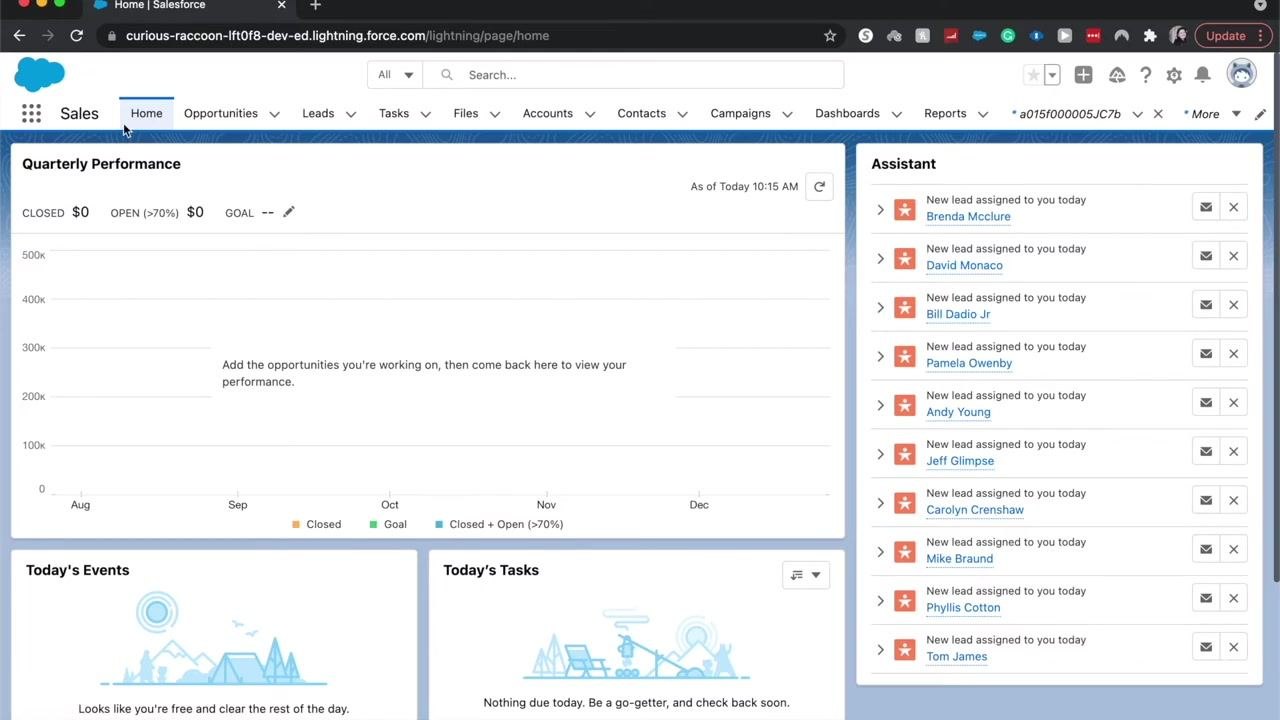
- Navigate to the Salesforce Sales Console home page. Confirm you are on the Sales Console home page. The top navigation ribbon should display options such as Home, Opportunities, Leads, Tasks, Files, Accounts, Contacts, Campaigns, Dashboards, and Reports. The main dashboard shows "Quarterly Performance," "Today's Events," "Today's Tasks," and an "Assistant" panel with new lead assignments.
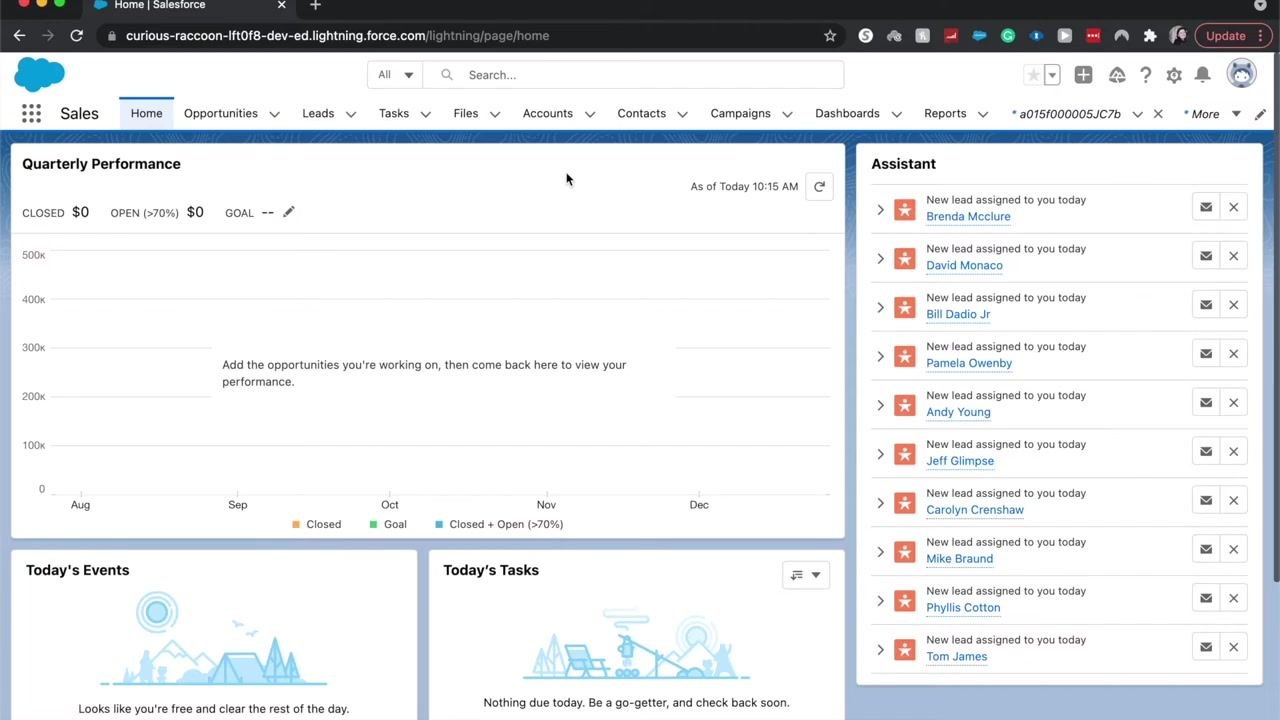
- Verify the top navigation ribbon. Confirm that the top ribbon includes the Campaigns tab. If Campaigns is not visible, you may not be in the correct app or console.
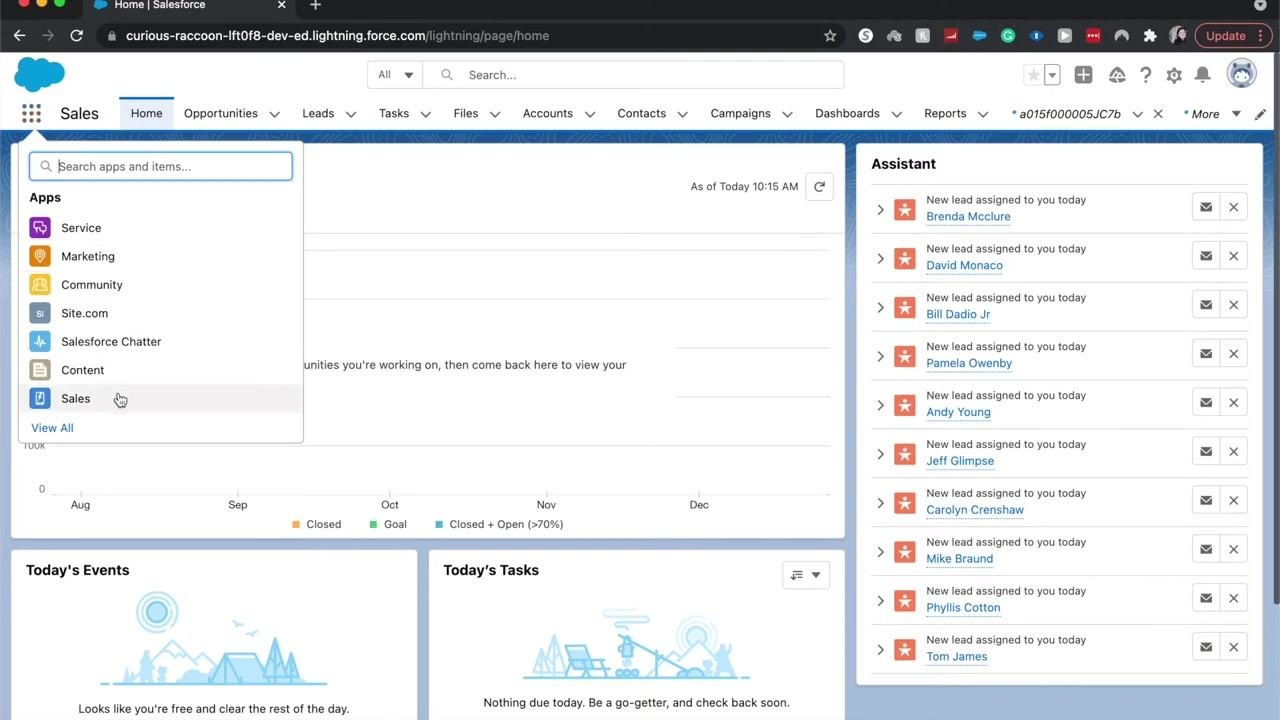
- Switch to the Sales app, if needed. Click the 3x3 grid (App Launcher) in the upper left corner. In the dropdown, search for "Sales" or select Sales from the list of available apps. This ensures you are in the correct workspace to access campaigns.
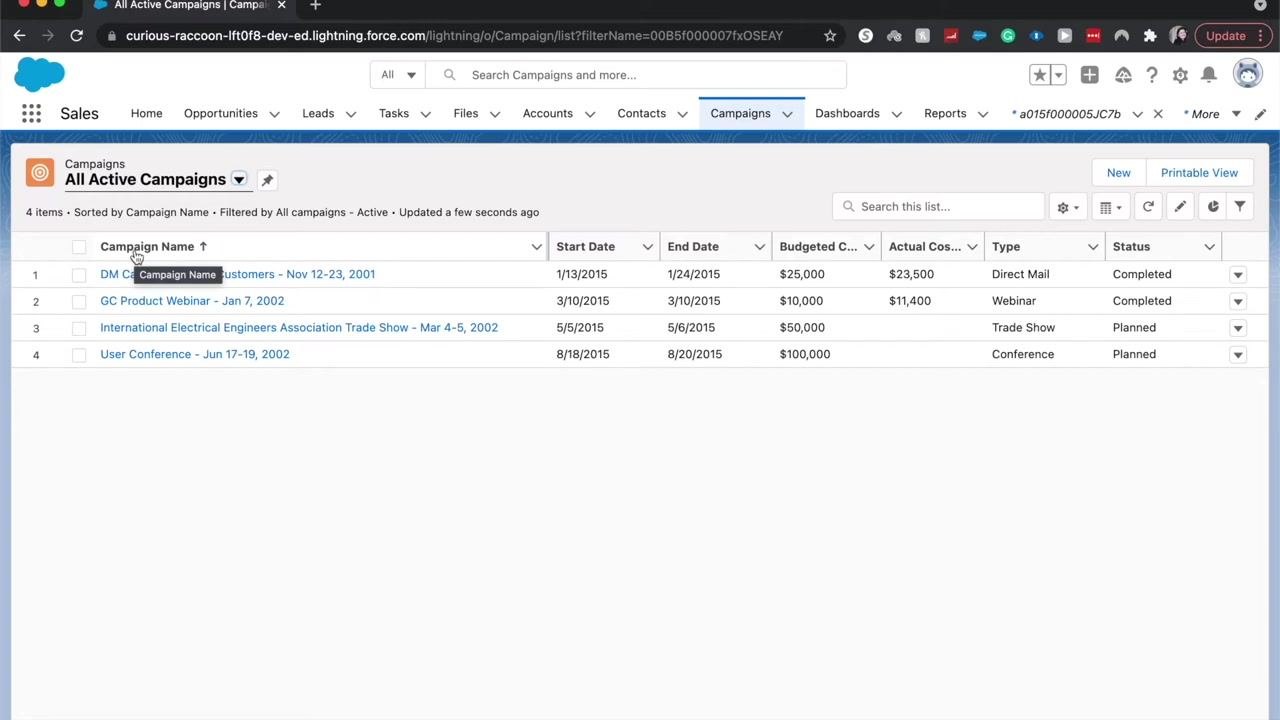
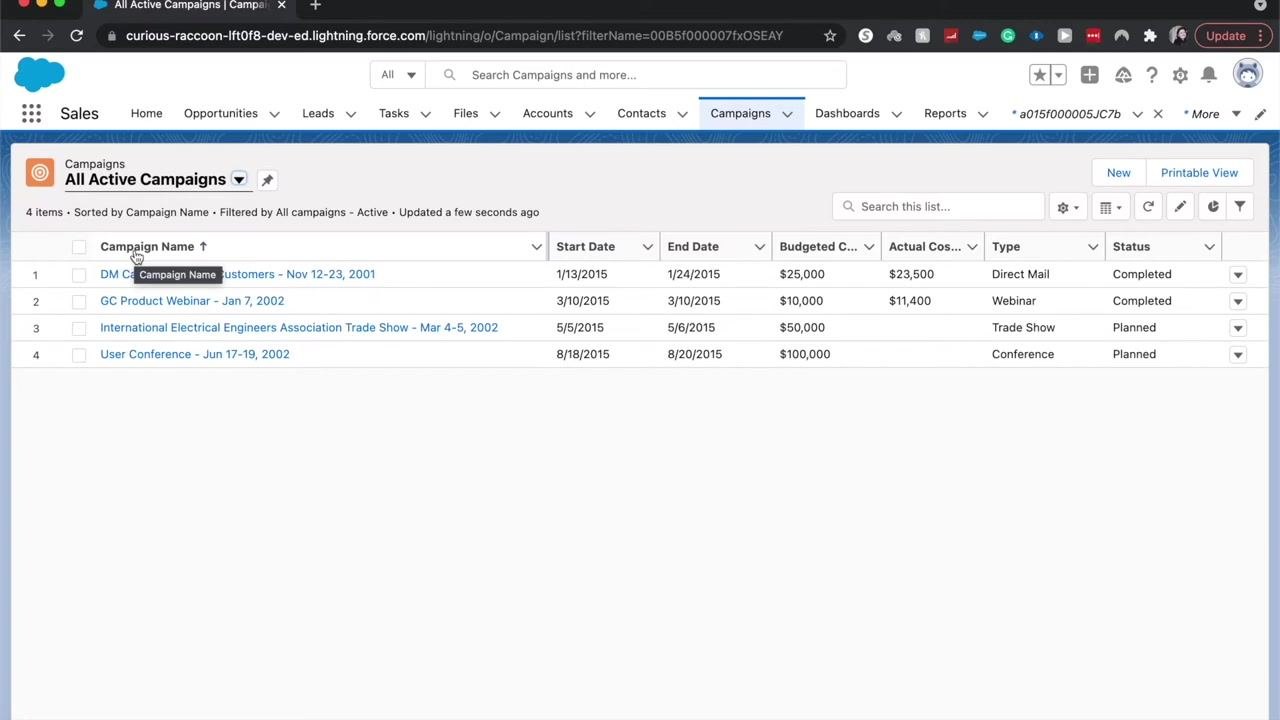
- Open the Campaigns tab. Once in the Sales app, click the Campaigns tab in the top navigation ribbon. You are taken to the "All Active Campaigns" view, which lists all current campaigns with columns for Campaign Name, Start Date, End Date, Budgeted Cost, Actual Cost, Type, and Status.
Campaigns in Salesforce can represent various marketing efforts such as ad campaigns, web ads, conferences, trade shows, and webinars. Each entry displays its type (for example, Direct Mail, Webinar, Trade Show, Conference) and its status (for example, Completed, Planned).
Creating a new campaign
- Open the New Campaign dialog.
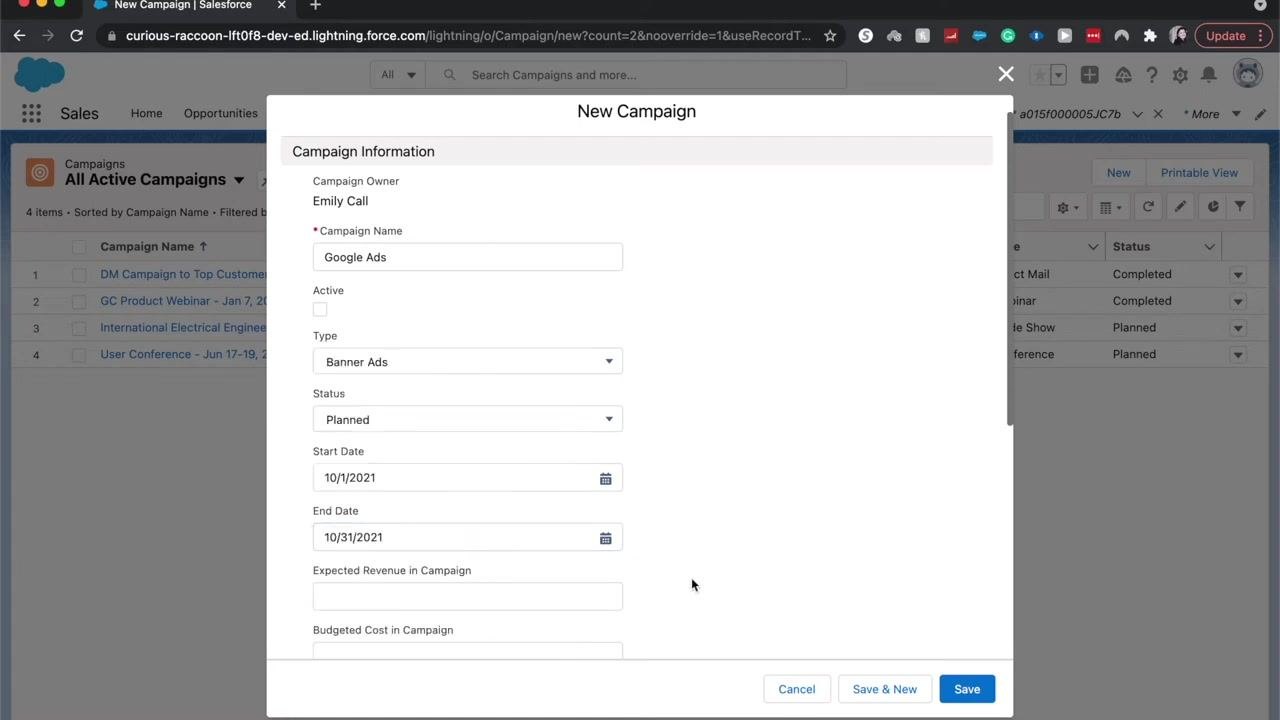
Click New in the Campaigns view. In the "Campaign Information" form, enter the following:
- Campaign Owner: auto-filled (for example, Emily Call)
- Campaign Name: enter "Google Ads"
- Type: select "Banner Ads" from the dropdown menu (scroll if necessary)
- Set the campaign status and dates. Set Status to "Planned" using the dropdown menu. Optionally enter the Start Date and End Date for the campaign (for example, the first month of your campaign). You can also fill in additional fields such as "Expected Revenue in Campaign" and "Budgeted Cost in Campaign" as needed.
- Enter the expected revenue. In the "Expected Revenue in Campaign" field (a currency field), enter $10,000 to represent the anticipated revenue from the campaign.
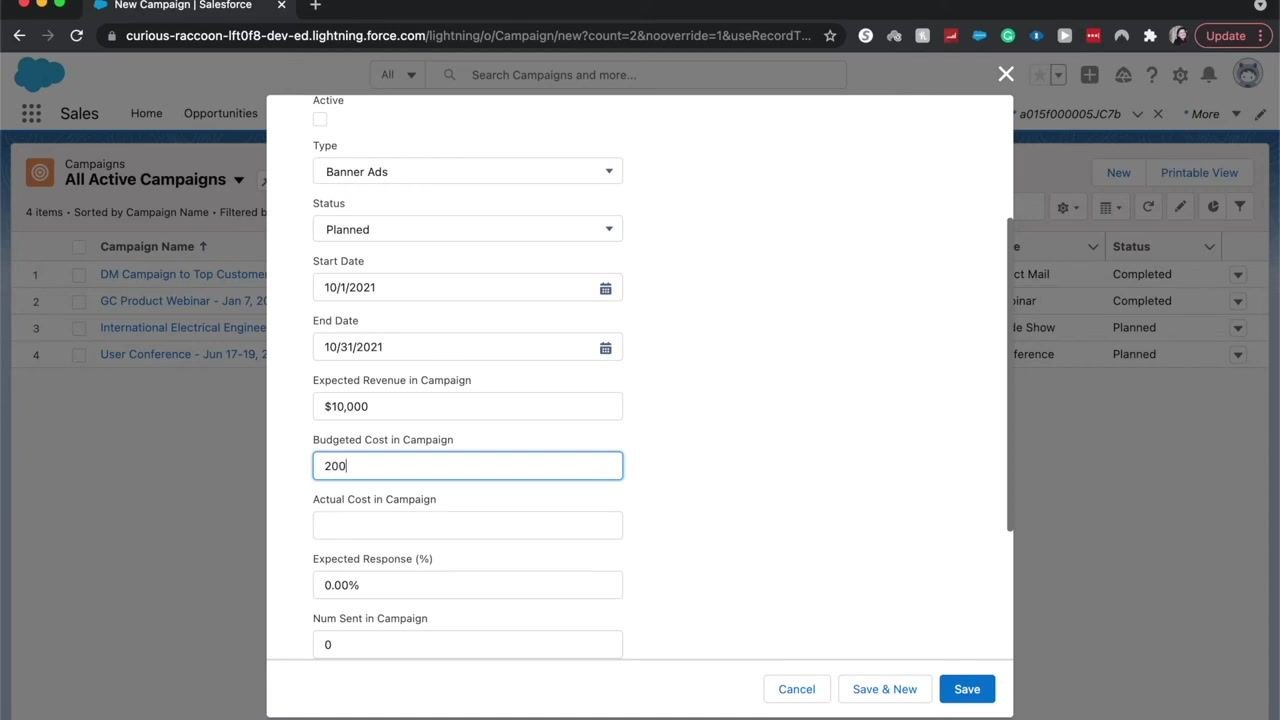
- Enter the budgeted cost. In the "Budgeted Cost in Campaign" field, enter $2,000 to reflect the extra marketing budget allocated for the campaign at the end of the year. The "Actual Cost in Campaign" field is not required at this stage and can be left blank.
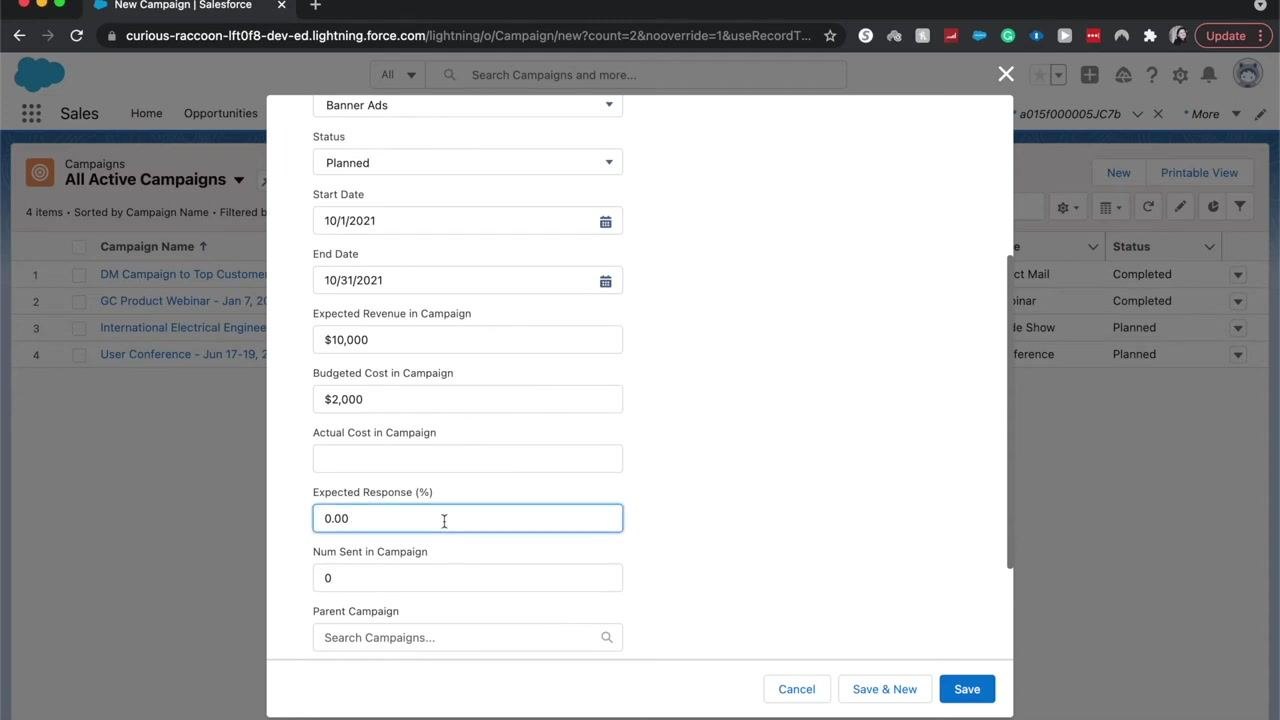
- Set the expected response percentage. In the "Expected Response (%)" field, enter 5.00 to indicate the anticipated response rate. Leave "Num Sent in Campaign" as 0 if you have not yet sent any communications.
- Add a campaign description. In the "Description" field under "Description Information," enter a description such as "Google Banner Ads for extra budget at the end of the year" to clarify the purpose and context of the campaign for future reference.
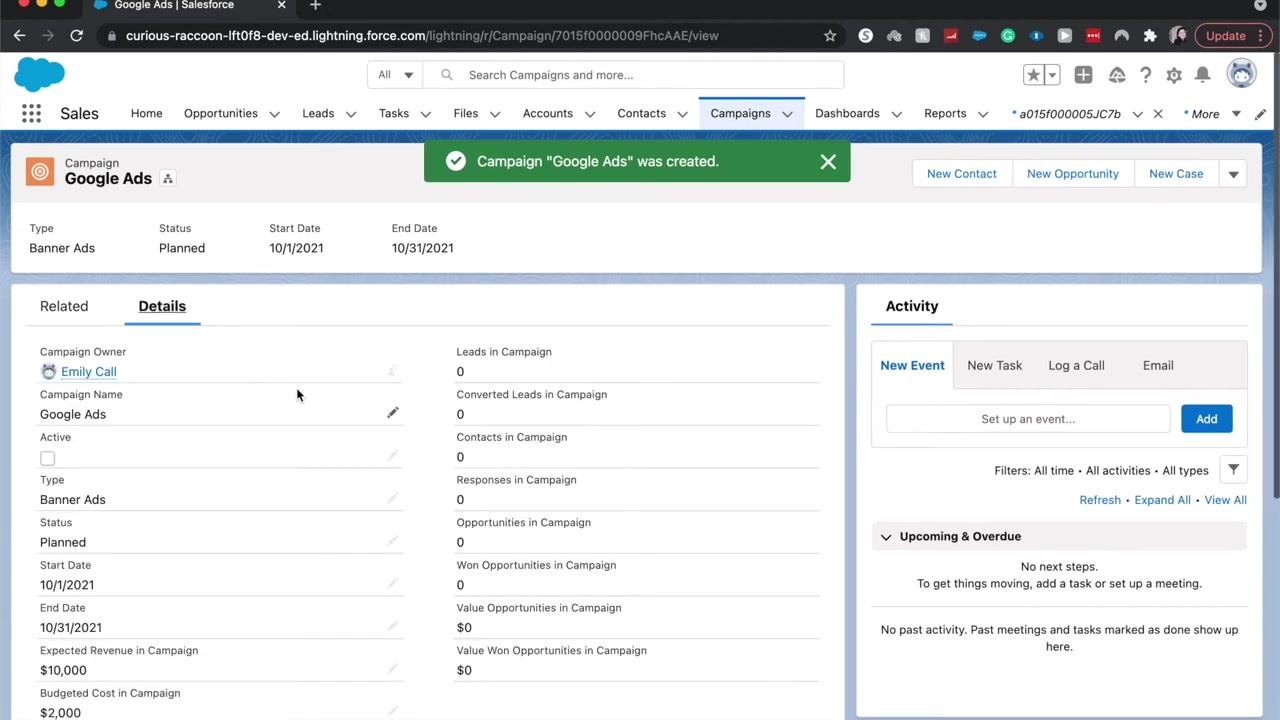
- Save the campaign. Click Save at the bottom right of the New Campaign dialog to create the campaign with all entered details. Alternatively, click Save & New to immediately begin creating another campaign.
Reviewing the created campaign
-
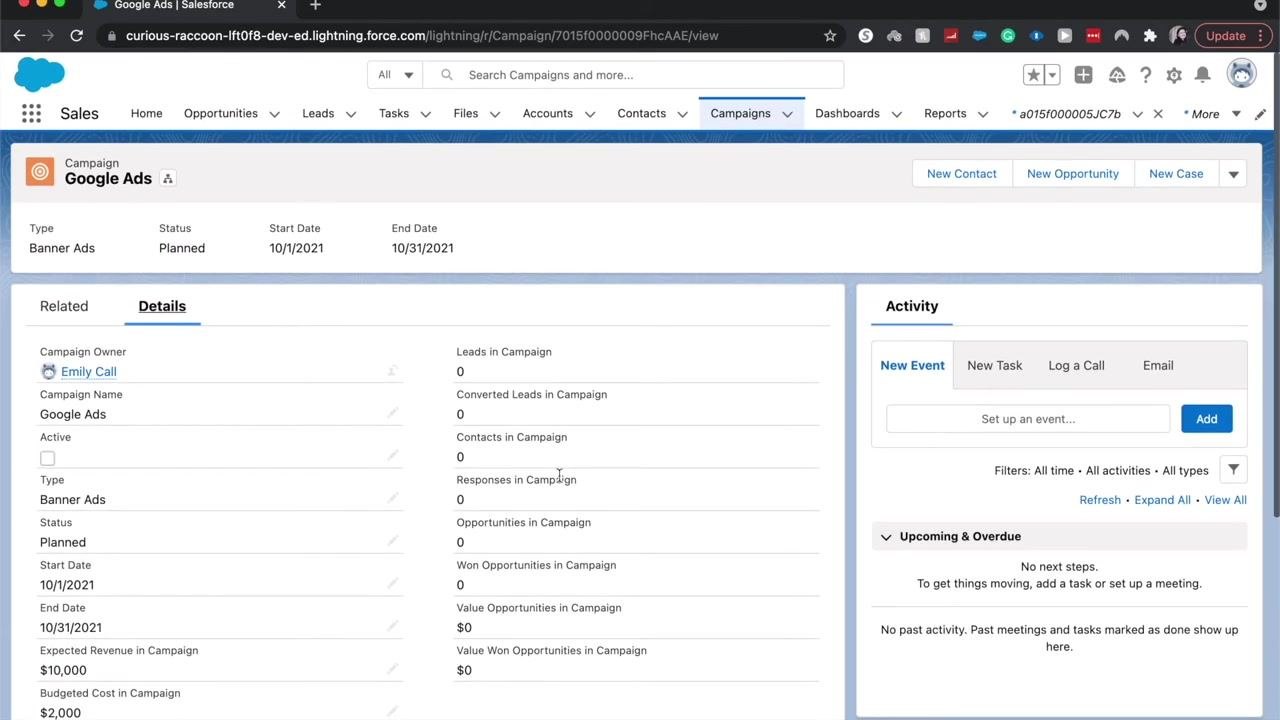
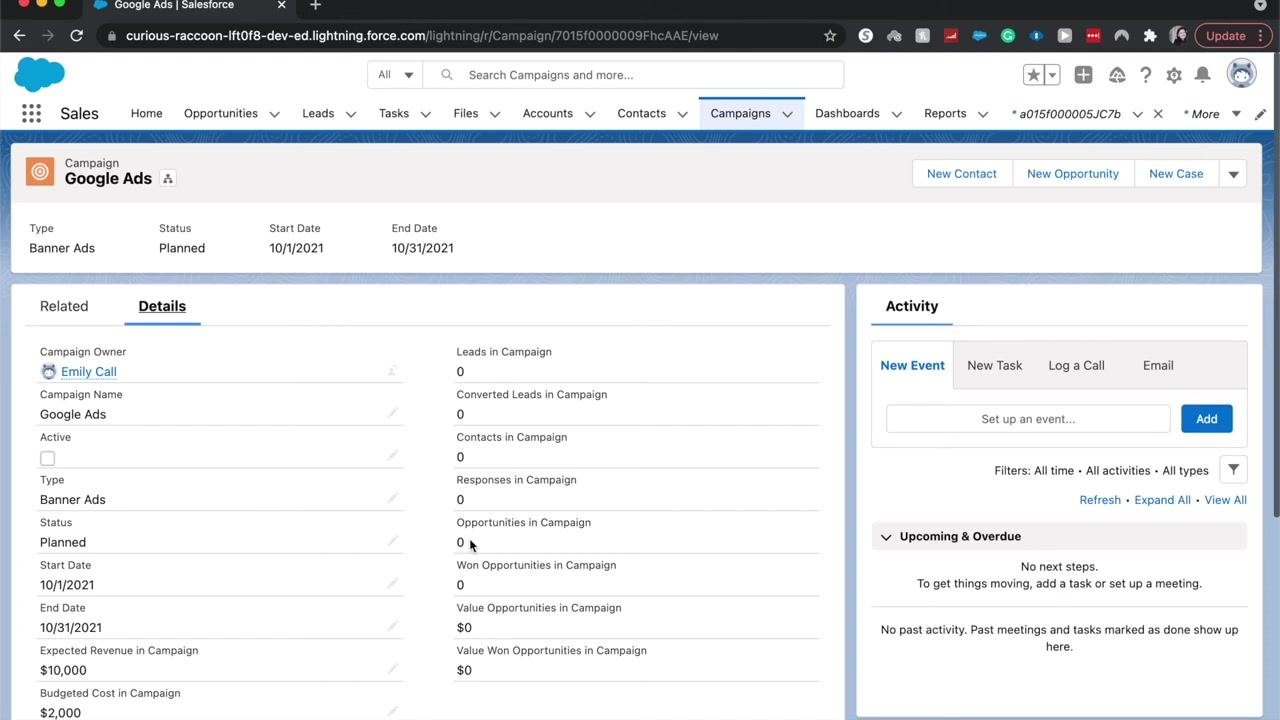
Review the campaign detail page. After saving, you are redirected to the campaign's detail page. Verify that all entered information is correct:
- Campaign Owner: Emily Call
- Campaign Name: Google Ads
- Type: Banner Ads
- Status: Planned
- Start Date: 10/1/2021
- End Date: 10/31/2021
- Expected Revenue in Campaign: $10,000
- Budgeted Cost in Campaign: $2,000
- Expected Response (%): 5.00
- Description: Google Banner Ads for extra budget at the end of the year
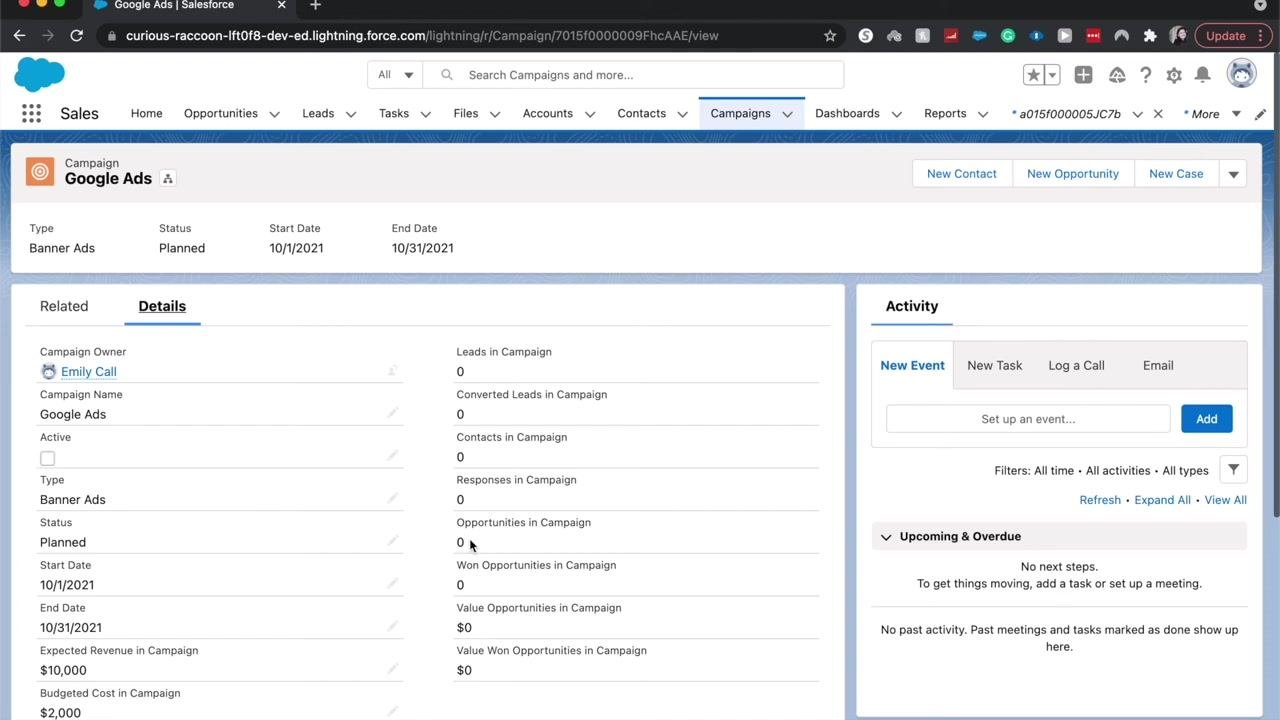
The page also displays related metrics such as Leads in Campaign, Converted Leads, Contacts, Responses, Opportunities, and Activity.
-
Understand campaign tracking. The campaign object allows you to track where leads and opportunities go after running your Google Ads. As leads are generated and added to Salesforce, you can monitor their progress and conversion directly from this campaign record.
Managing leads and contacts in your campaign
Leads generated from Google Ads are not automatically related to the campaign through the standard related lists unless you manually add them. If you want to add a lead to the campaign, do not simply create a new lead and set the lead source — use the related list functionality for proper attribution.
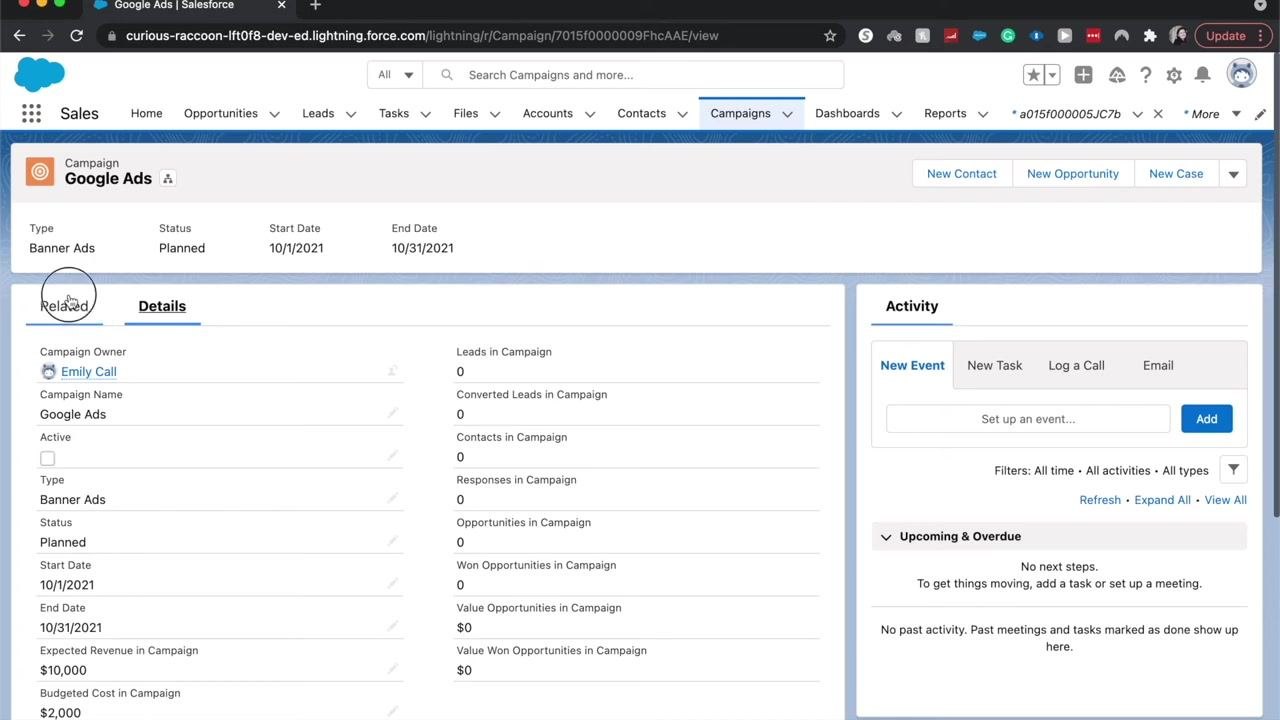
- Open the related list. Scroll to the Related tab on your campaign's detail page and locate the "Campaign Members" section.
-
Add leads or contacts. Click Add Leads to begin associating leads with your campaign, or click Add Contacts to associate existing contacts.
-
Add a new lead to the campaign. In the "Add Leads to Campaign" dialog, click + New Lead if the lead does not already exist in Salesforce. Fill in the required fields:
- Last Name
- Company
- Lead Source (choose from options such as Web, Phone Inquiry, Partner Referral, Purchased List, or Other)
- Lead Status (default is "Open - Not Contacted")
- Additional fields as needed (Title, Email, Phone, etc.)
Click Save to create the lead and associate it with the campaign.
-
Search for and add existing leads. In the "Add Leads to Campaign" dialog, use the search bar to find existing leads by name, title, company, phone, mobile, email, lead status, or owner alias. Select the desired leads and click Next to add them to the campaign. If no leads are found, the list displays "No items to display." Click Cancel if you do not wish to add any leads at this time.
- Consider alternative lead creation methods. Leads can also be created automatically via web forms (Web-to-Lead) or through custom integrations between Google Ads and Salesforce. These methods can streamline the process of capturing and attributing leads to your campaigns.
Reviewing campaign reporting and metrics
Campaigns in Salesforce are powerful tools for attributing marketing spend per lead, measuring the effectiveness and profitability of campaigns, and providing clear, actionable reporting on performance.
-
Monitor campaign metrics. Use the campaign detail page to monitor metrics such as:
- Leads in Campaign
- Converted Leads
- Contacts in Campaign
- Responses
- Opportunities
- Value of Opportunities
-
Analyze campaign performance. Regularly review the campaign's metrics to determine how much was spent per lead, the overall success and ROI of the campaign, and whether similar campaigns should be run in the future. All relevant campaign data is presented in a simple, easy-to-understand format for ongoing analysis.
What's next
If you have questions about Marketing Cloud or Salesforce campaigns, leave a comment or question for further assistance and engage with the community for tips, troubleshooting, and best practices.
By following these steps, you can access, create, and manage campaigns in Salesforce; enter accurate financial and descriptive details; attribute leads and contacts correctly; and use Salesforce's reporting features to evaluate the effectiveness of your marketing efforts.
Generation details: cost, quality tiers
Docsie billed 2,500 credits ($1.75) to analyze this 5-minute video at standard quality. The rewrite, template fill and Word/PDF exports were included. The same video at each quality tier:
| Quality | Frames sampled | Credits | Approx. cost |
|---|---|---|---|
| Draft | every 16-30 s | 1,250 | $0.88 |
| Standard (this guide) | every 8-15 s | 2,500 | $1.75 |
| Detailed | every 4-7 s | 5,000 | $3.50 |
| Ultra | every 1-3 s | 10,000 | $7.00 |
Credits priced at $0.70 per 1,000; plans include a monthly allowance. Enterprise customers on on-premise or bring-your-own-model deployments run this on their own inference and pay no per-video credits.
Generated by Docsie Video-to-Docs on 2026-09-08 from a 4-minute video. Screenshots are frames from the source video and belong to their creator, Salesforce Emily, whose original is embedded above. If you own this video and want the guide removed or credited differently, contact us and we will act within one business day.