
How to Merge Contacts in Salesforce
Maintaining clean and accurate donor data is essential for effective nonprofit management. When your database contains duplicate contact records, Salesforce recommends merging them rather than deleting one outright. This guide walks you through how to merge contacts in Salesforce Nonprofit Success Pack (NPSP) so that all values and related objects from both records are preserved.
Video: Nonprofit Salesforce How-To-Series: NPSP Merge Duplicate Contacts by Nonprofit Salesforce How-To-Series. All credit for the demonstration goes to the creator; watch the original on YouTube. The written guide below was generated from this video by Docsie. Creator? Request a change or removal.
Maintaining clean and accurate donor data is essential for effective nonprofit management. When your database contains duplicate contact records, Salesforce recommends merging them rather than deleting one outright. This guide walks you through how to merge contacts in Salesforce Nonprofit Success Pack (NPSP) so that all values and related objects from both records are preserved.
Prerequisites
- Access to Salesforce with the Nonprofit Success Pack installed.
- Permissions to view and edit contact records and use the Contact Merge tool.
- At least two suspected duplicate contact records to compare.
Steps to merge duplicate contacts
Identify duplicate contacts
Review your contact records for potential duplicates. For example, you might find two entries, "Sam Addy" and "Samuel Addy," sharing the same email address (saddy@salesforce.org). Matching email addresses or other key details like this are a strong signal that the records represent the same person.
Open the Nonprofit Success Pack home page
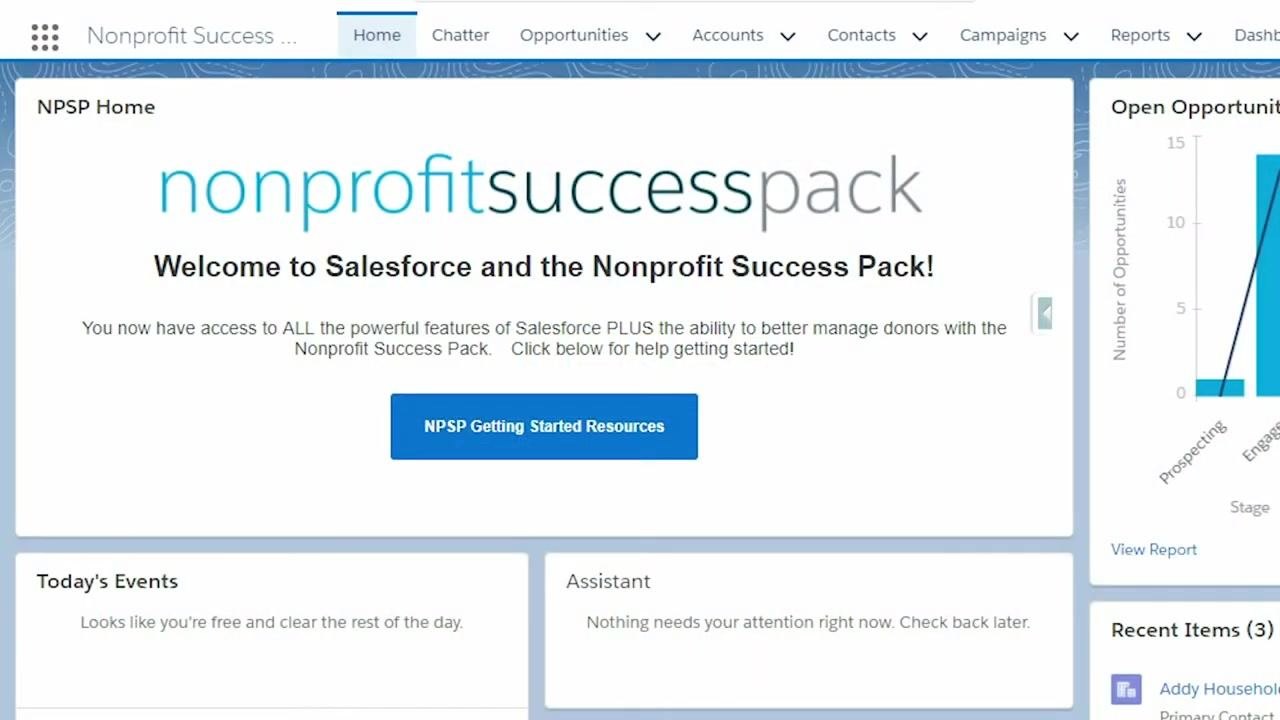
Log in to Salesforce and confirm you are on the NPSP Home page. You should see the welcome message "Welcome to Salesforce and the Nonprofit Success Pack!" along with full access to the Nonprofit Success Pack's features.
Search for the duplicate contacts
Use the search bar to look up the suspected duplicate contacts, for example by searching "Sam Addy." Review the results under the Contacts section and confirm that both records—such as "Sam Pontificus Addy XXIV" and "Samuel Addy"—share the same household account and email address.
Open the Contact Merge tool
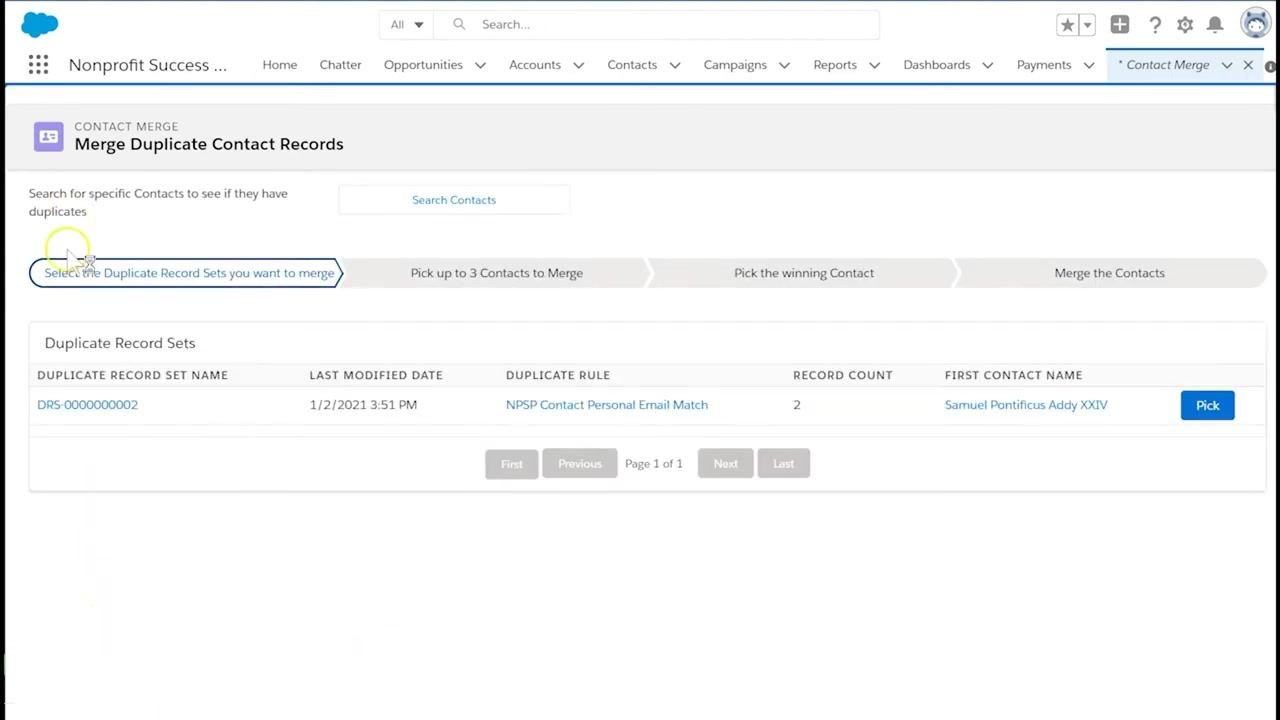
Select the App Launcher (grid icon in the top left), then search for and select Contact Merge. The Merge Duplicate Contact Records screen opens with two options:
- See Duplicate Contacts – displays all duplicate contacts identified by Salesforce's matching rules.
- Search Contacts – lets you search for specific contacts to merge.
Select Search Contacts to proceed with a manual search.
Search for the contacts to merge
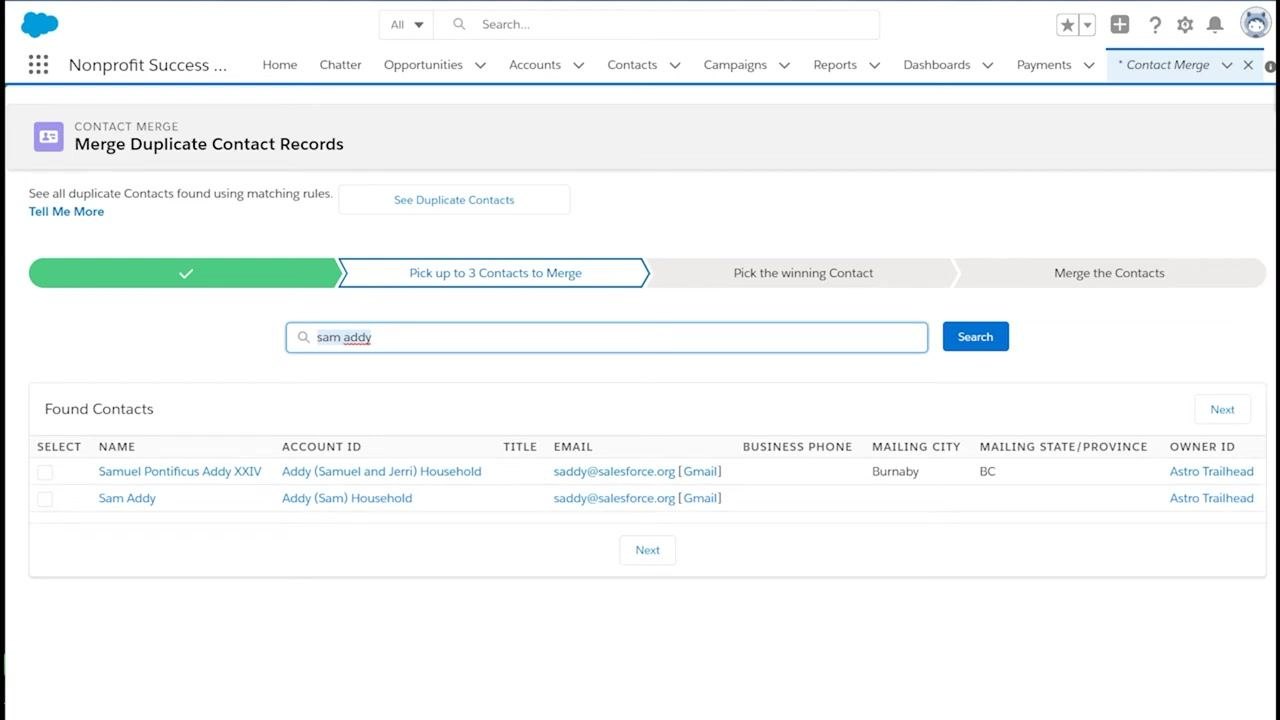
In the Search Contacts field, type "Sam Addy" and click Search. If both contacts don't appear, try a wildcard search such as "Sam*". Both "Samuel Pontificus Addy XXIV" and "Sam Addy" should now appear in the results, each with a checkbox for selection.
Select the contacts to merge
Use the checkboxes on the left to select the contacts you want to merge. You can select up to three contacts at a time. Click Next to continue.
Review field values side by side
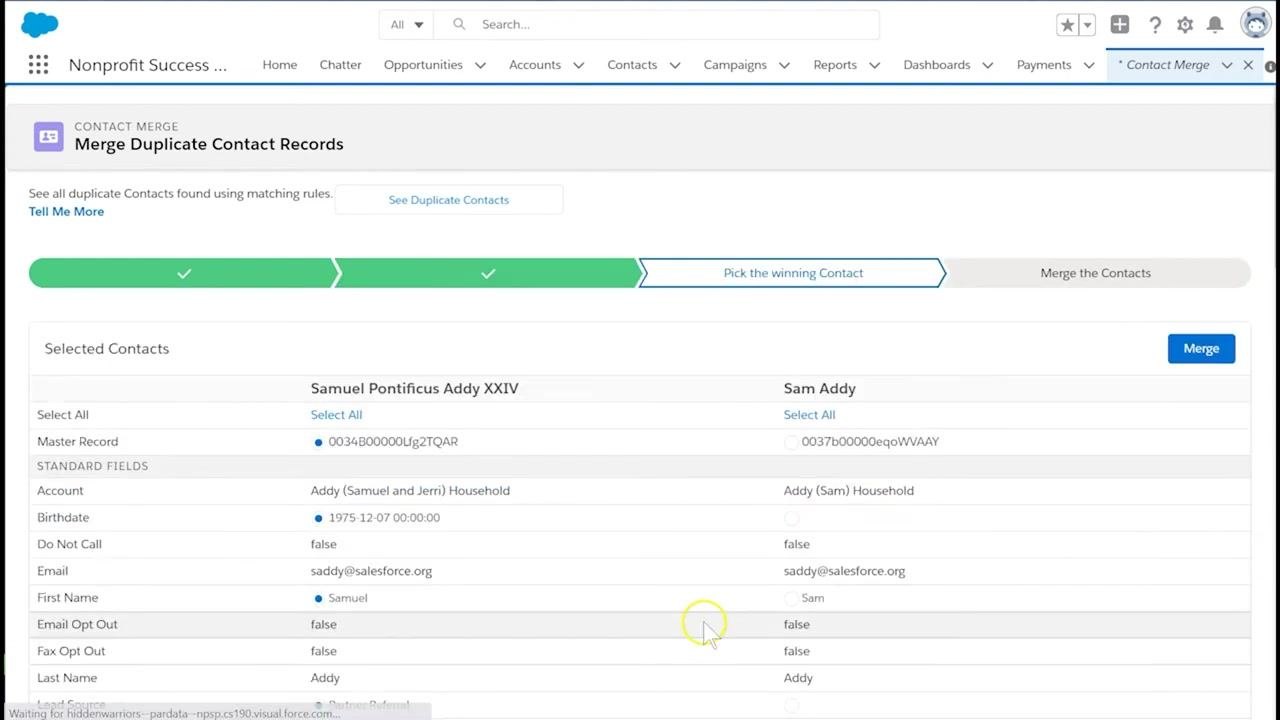
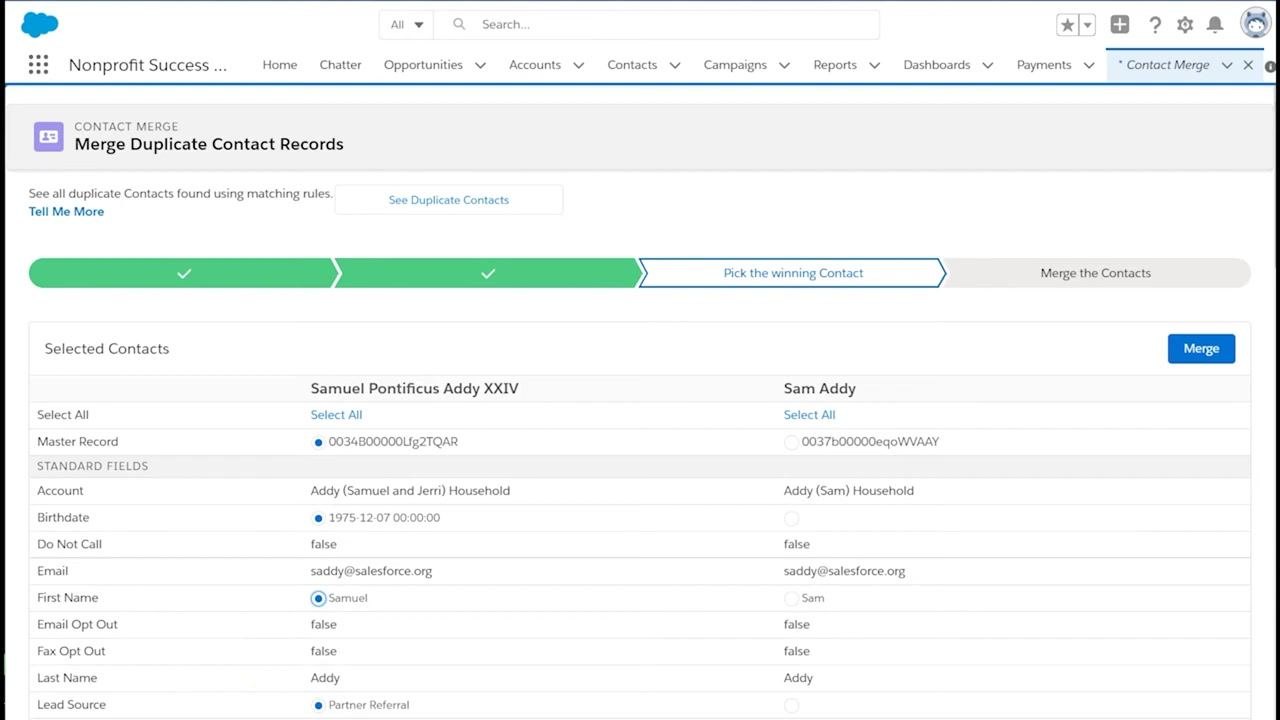
Salesforce displays both contacts' field values next to each other for comparison. The system defaults to whichever field is populated, but you should carefully review each value to confirm it's the most current and accurate one. Related records, such as donations and activities, remain intact throughout the merge.
Select the field values and master record to retain
Review each field that's populated in both records and select the radio button next to the value you want to keep. For example, to retain "Samuel" as the first name, select the radio button next to "Samuel" under the First Name field.
- The value you don't select (for example, "Sam") will be permanently deleted once the merge completes.
- If a record contains important information you might lose, copy and paste it into a document or text editor before proceeding.
- At the top of the merge screen, choose which contact will be the master record by selecting its radio button. The master record determines which contact and household account are retained after the merge.
Merge the contacts
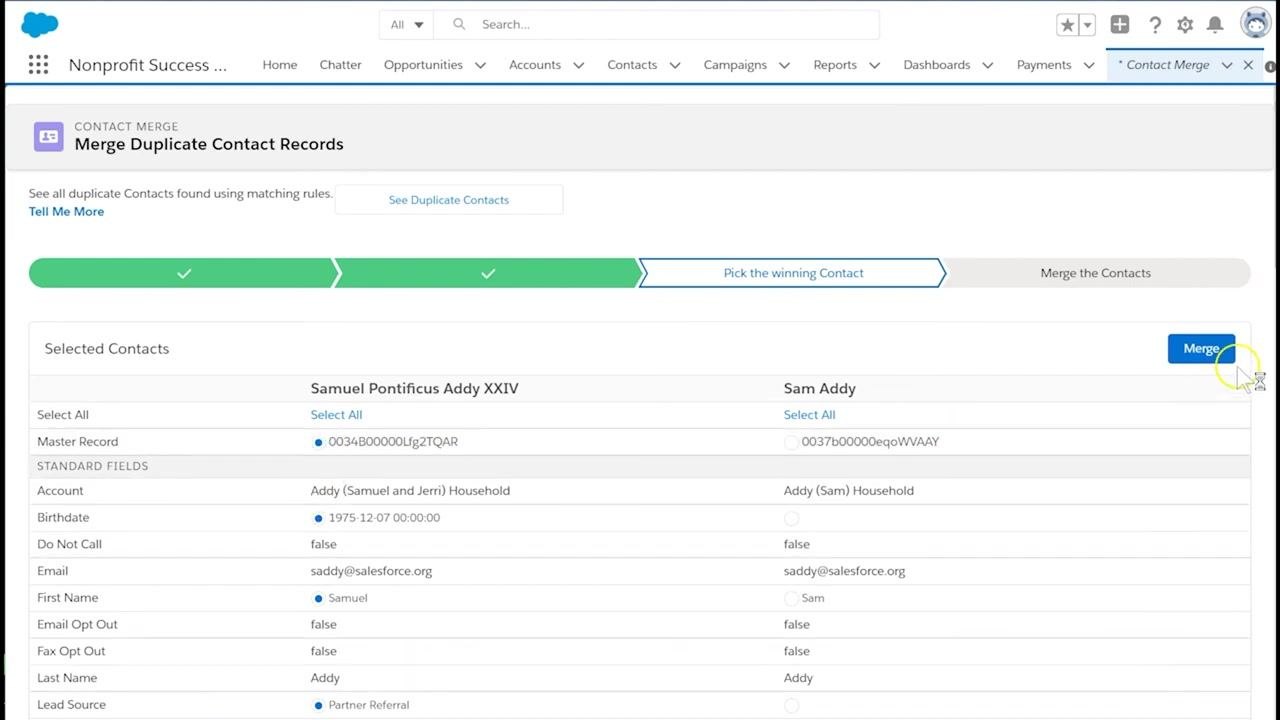
After selecting the desired field values and master record, click Merge.
Salesforce displays a warning prompt asking you to confirm the merge action. Click Merge again to confirm and complete the process.
Verify the merge and review related records
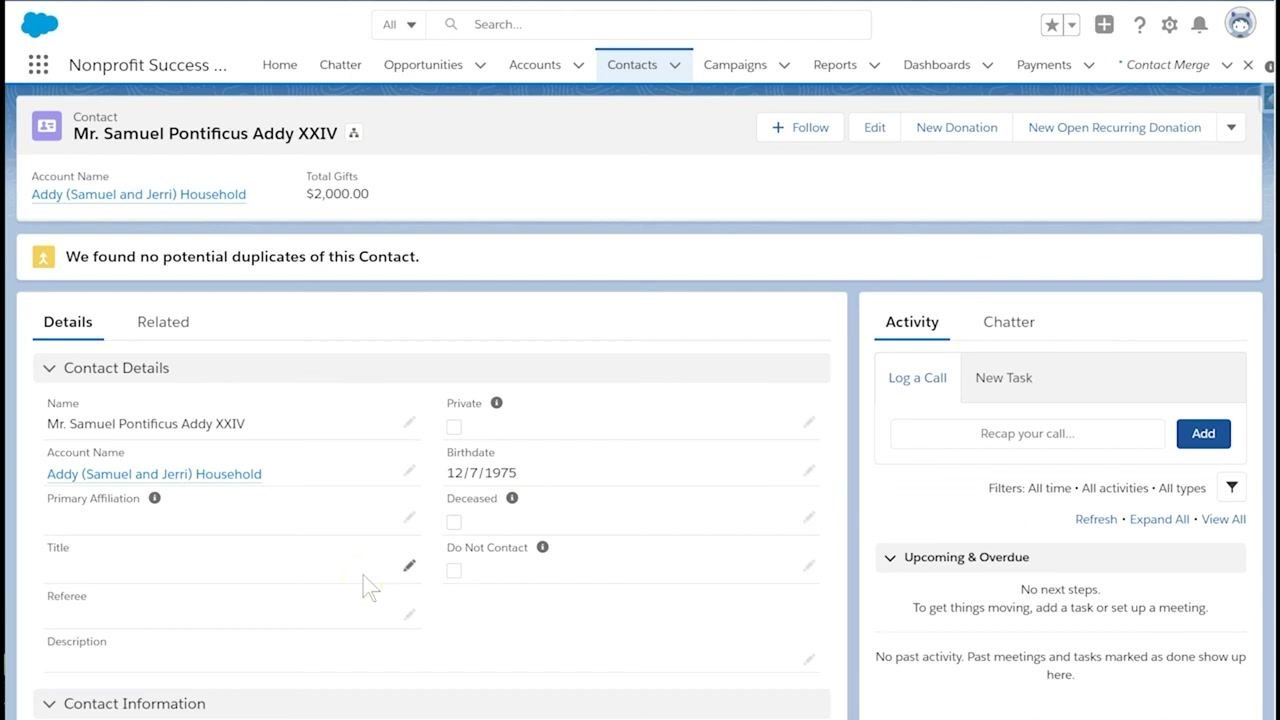
Once the merge completes, Salesforce moves all related records (such as donations and activities) to the master contact, and deletes the contact that wasn't selected as master, along with its household account.
Review the resulting contact record to confirm that all information and related objects merged correctly, and that no potential duplicates remain. For example, the merged contact "Mr. Samuel Pontificus Addy XXIV" should now display all related details and activities.
Also check related objects, such as affiliations and donations, to ensure no duplicates exist—for example, confirm there aren't two affiliations for the same time period and account.
Consult documentation for further guidance
For more information on managing duplicates and related records, refer to the official Nonprofit Success Pack documentation.
What's next
By following these steps, you ensure your Salesforce database stays clean, accurate, and free of duplicate contacts—while preserving all important data and relationships. Make reviewing for duplicates a regular part of your data maintenance routine to keep your donor records reliable over time.
Generation details: cost, quality tiers
Docsie billed 1,500 credits ($1.05) to analyze this 3-minute video at standard quality. The rewrite, template fill and Word/PDF exports were included. The same video at each quality tier:
| Quality | Frames sampled | Credits | Approx. cost |
|---|---|---|---|
| Draft | every 16-30 s | 750 | $0.52 |
| Standard (this guide) | every 8-15 s | 1,500 | $1.05 |
| Detailed | every 4-7 s | 3,000 | $2.10 |
| Ultra | every 1-3 s | 6,000 | $4.20 |
Credits priced at $0.70 per 1,000; plans include a monthly allowance. Enterprise customers on on-premise or bring-your-own-model deployments run this on their own inference and pay no per-video credits.
Generated by Docsie Video-to-Docs on 2026-10-06 from a 2-minute video. Screenshots are frames from the source video and belong to their creator, Nonprofit Salesforce How-To-Series, whose original is embedded above. If you own this video and want the guide removed or credited differently, contact us and we will act within one business day.