
How to Create a Flow in Salesforce
Salesforce Flow is a declarative, point-and-click automation tool that lets you automate business processes without writing code. This guide walks you through how to create a flow in Salesforce from start to finish — opening Flow Builder, adding a screen, configuring components, saving and activating your flow, and using the built-in debug tools to troubleshoot errors.
Video: Create and Debug Lightning Flow in Salesforce | SalesforceHunt | Flow by Salesforce Hunt. All credit for the demonstration goes to the creator; watch the original on YouTube. The written guide below was generated from this video by Docsie. Creator? Request a change or removal.
Salesforce Flow is a declarative, point-and-click automation tool that lets you automate business processes without writing code. This guide walks you through how to create a flow in Salesforce from start to finish — opening Flow Builder, adding a screen, configuring components, saving and activating your flow, and using the built-in debug tools to troubleshoot errors.
Prerequisites
- You must be logged in to your Salesforce org.
- You need access to Setup in your Salesforce environment.
Open Flow Builder and create a flow in Salesforce
- Make sure you are logged into your Salesforce environment.
- Locate the gear icon in the upper right corner of the Salesforce interface and click it to open the dropdown menu.
- Select Setup from the dropdown.
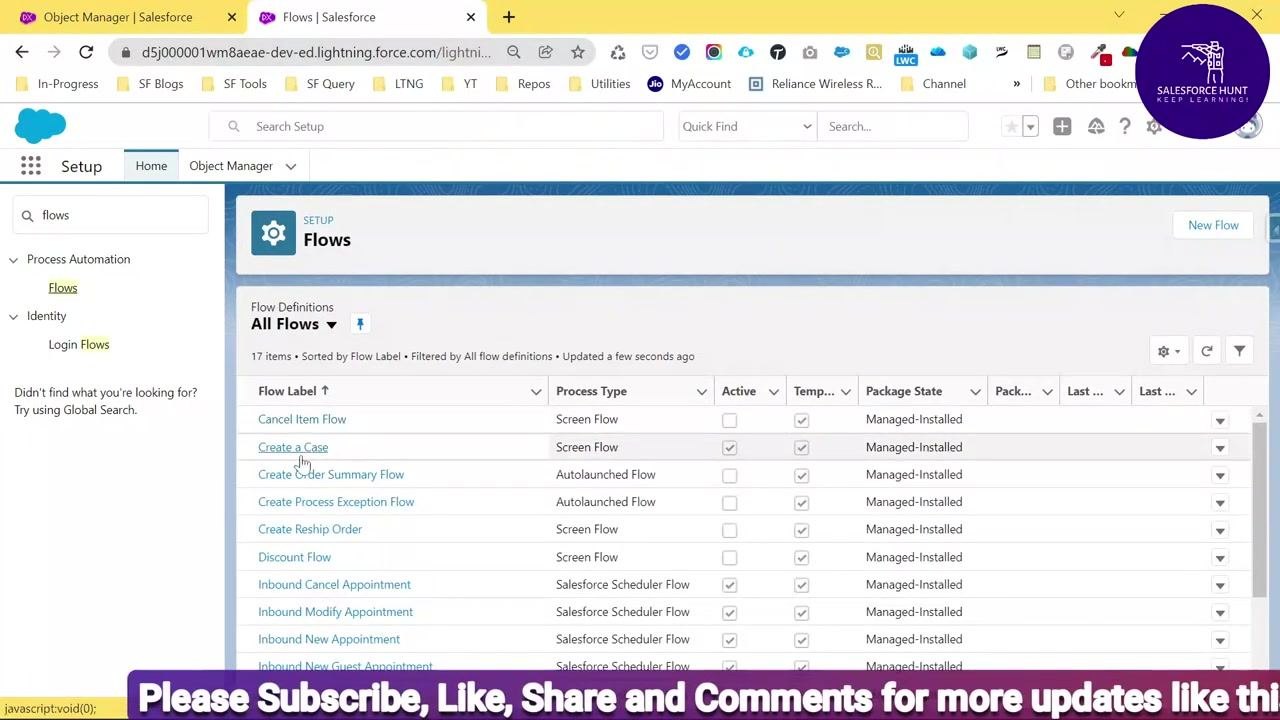
- In the Setup page, find the Quick Find search box on the left sidebar and type flows into it.
-
Under Process Automation, click on Flows.
-
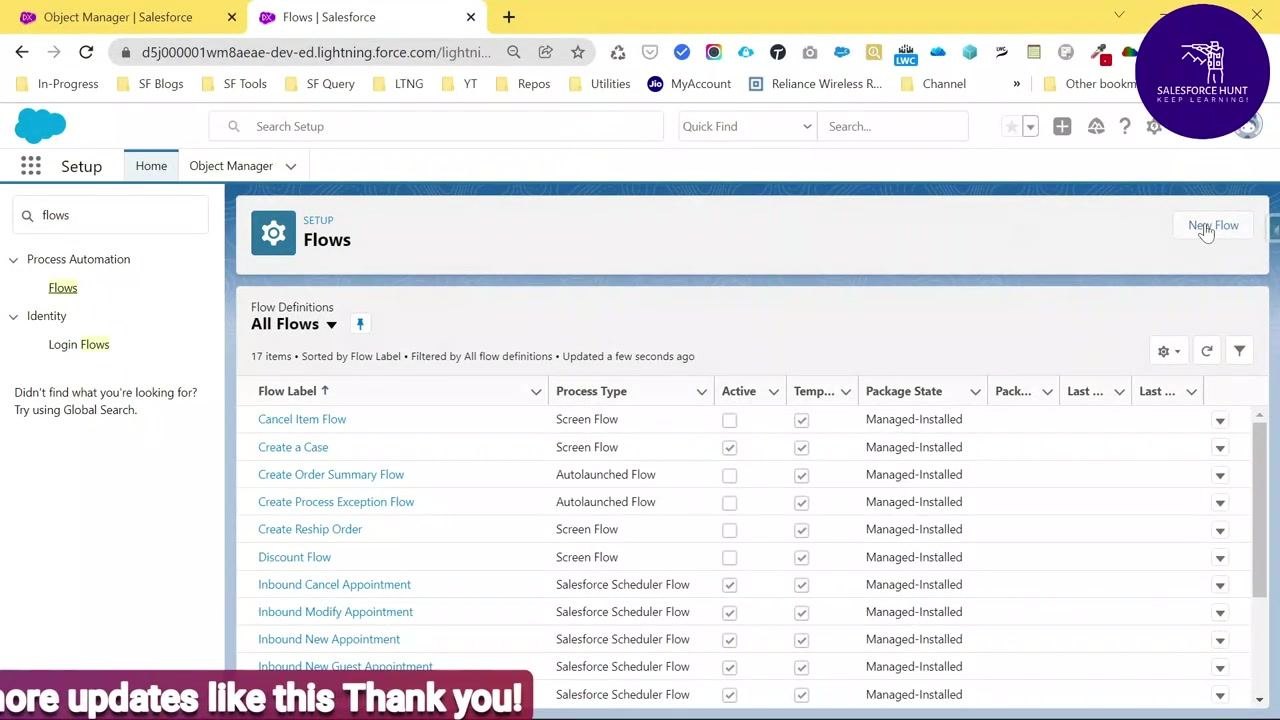
Review the Flows page, which displays a list of all existing flows, including those defined by Salesforce and any custom flows you have created. Each entry shows the flow label, process type, and other details.
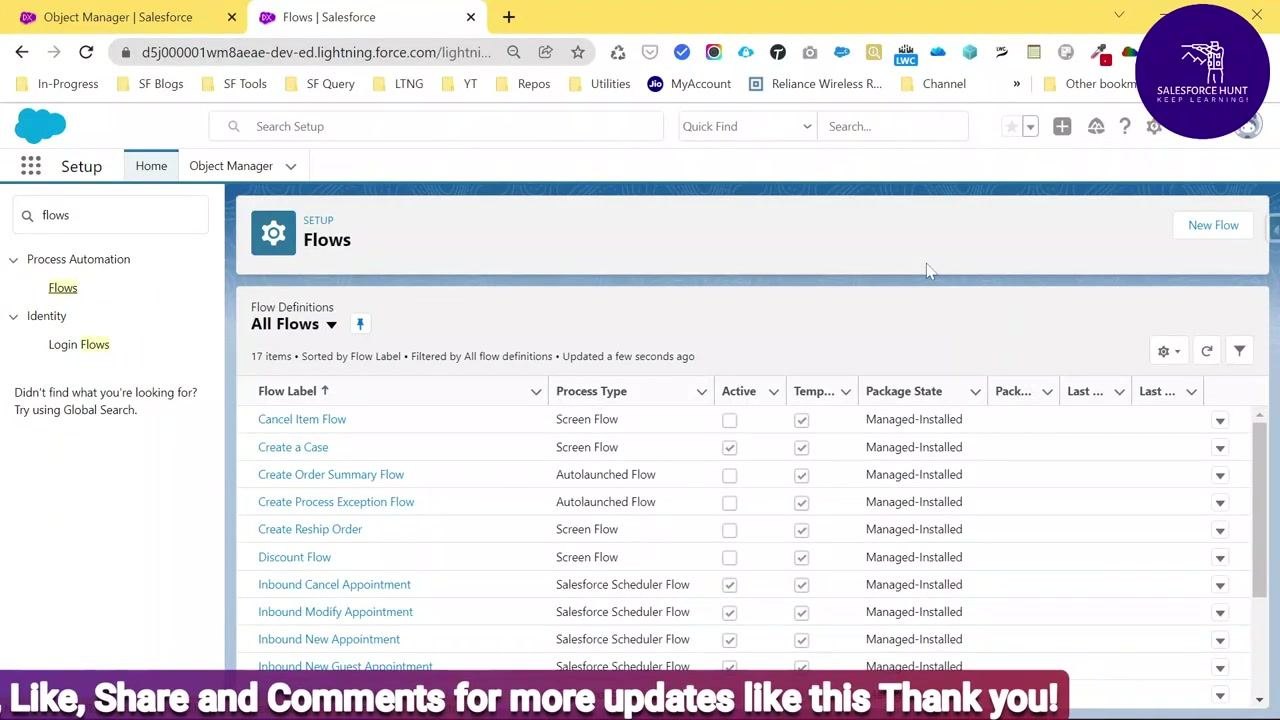
- Click the New Flow button located at the top right of the Flows page.
Choose a flow type
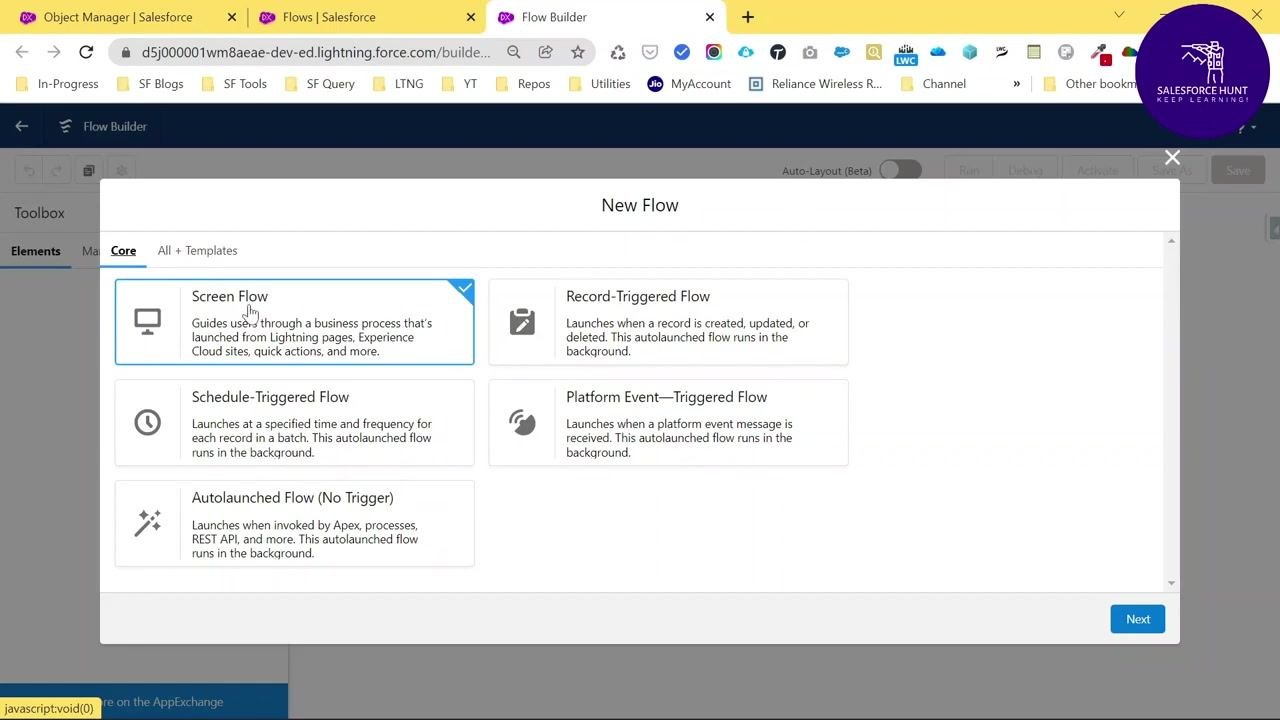
In the New Flow dialog, you can choose from several flow types:
- Screen Flow: Guides users through a business process with screens.
- Record-Triggered Flow: Runs when a record is created, updated, or deleted.
- Schedule-Triggered Flow: Runs at a specified time and frequency.
- Platform Event-Triggered Flow: Runs when a platform event message is received.
- Autolaunched Flow (No Trigger): Runs in the background, invoked by Apex, processes, or the REST API.
Select Screen Flow by clicking on it so that it is highlighted, then click Next to proceed.
Select a layout for your flow
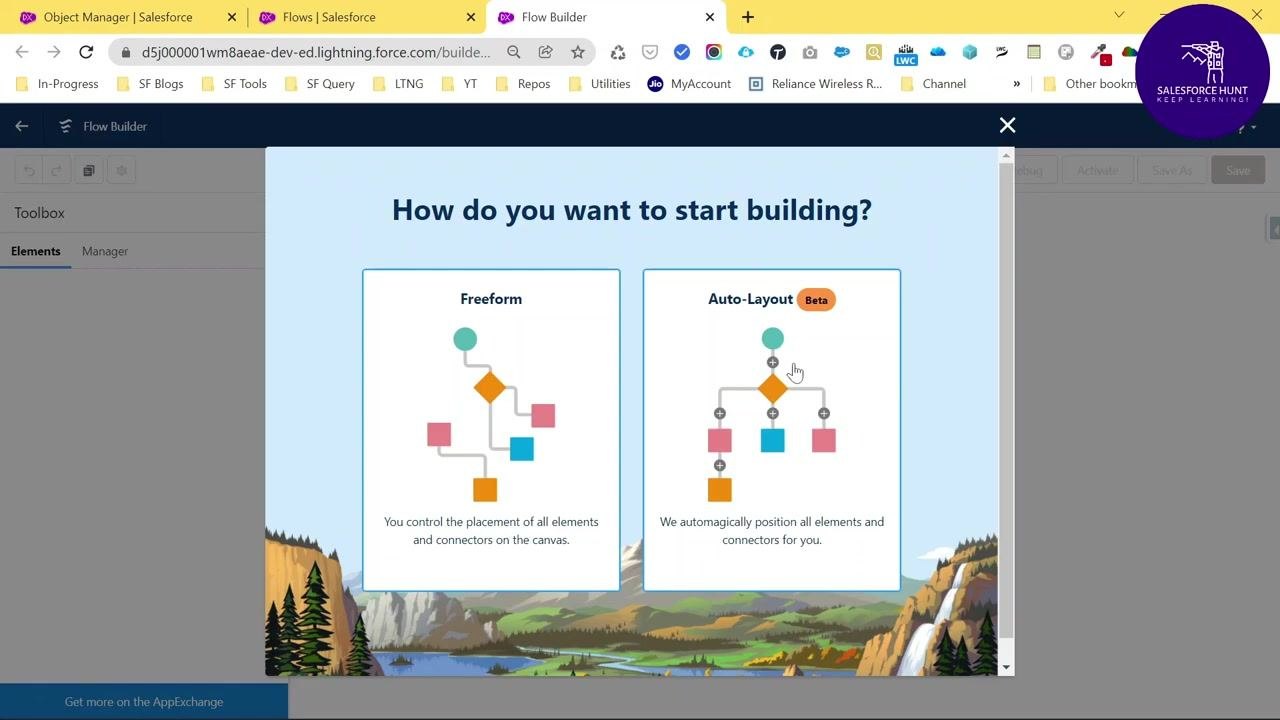
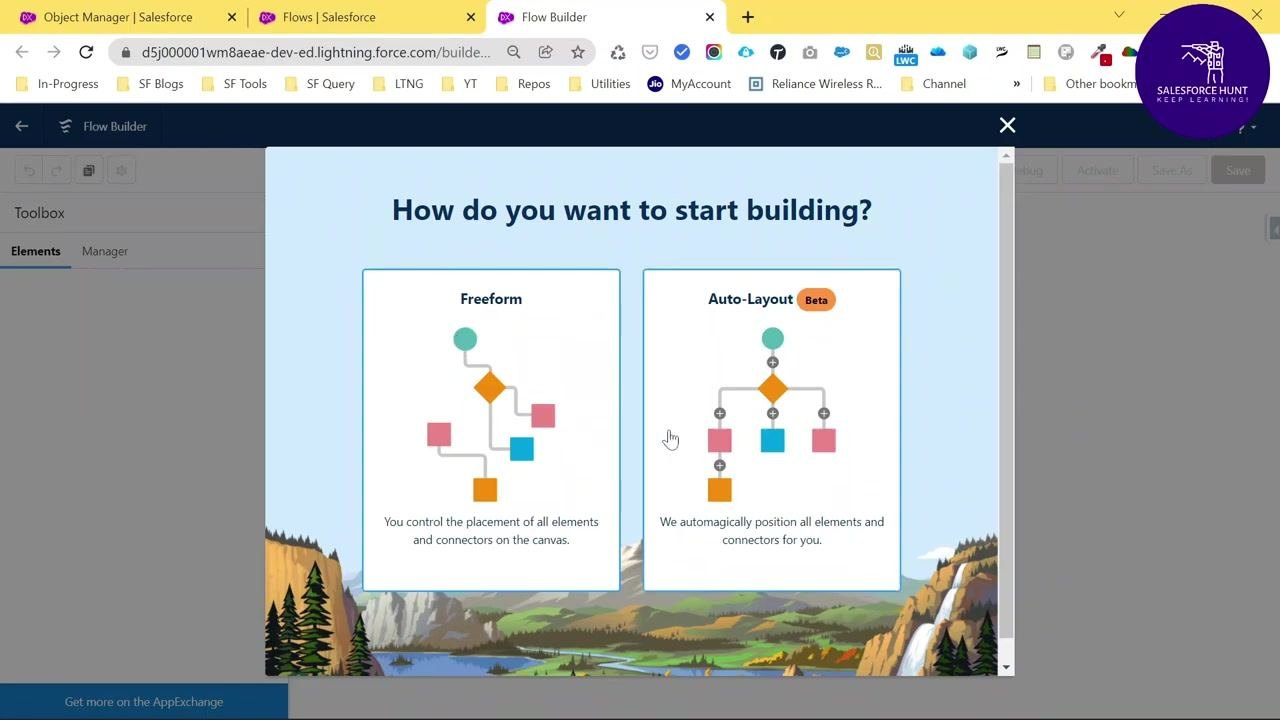
- When prompted with "How do you want to start building?", you will see two options:
- Freeform: Lets you manually place all elements and connectors on the canvas.
- Auto-Layout (Beta): Automatically positions all elements and connectors for you.
- Select Auto-Layout (Beta) by clicking on it. This option keeps your flow organized by arranging elements automatically.
Explore the Flow Builder canvas
- After selecting Auto-Layout, the canvas displays a Start node labeled "Screen Flow," an End node, and a plus (+) button between them labeled "Add Element." The canvas is organized into a Toolbox on the left, a Button Bar at the top right, and the main Canvas area where you build your flow.
- The Toolbox on the left lets you search within the flow and create new resources (variables, constants, formulas, and more) using the New Resource button. The Button Bar at the top right includes the Auto-Layout toggle along with Run, Debug, Activate, Save As, and Save controls.
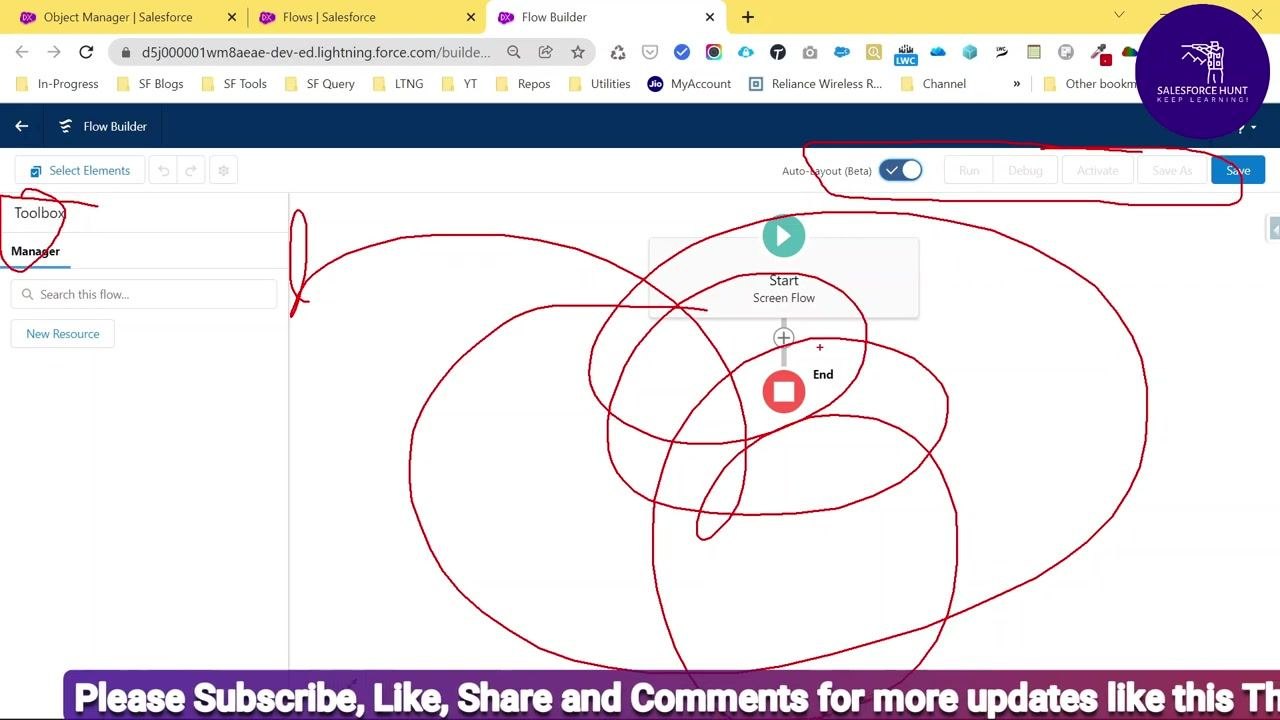
- The three main areas of Flow Builder are the Toolbox for managing elements and resources, the Button Bar for flow actions and settings, and the Canvas where you build your flow.
Add a screen element to your flow
-
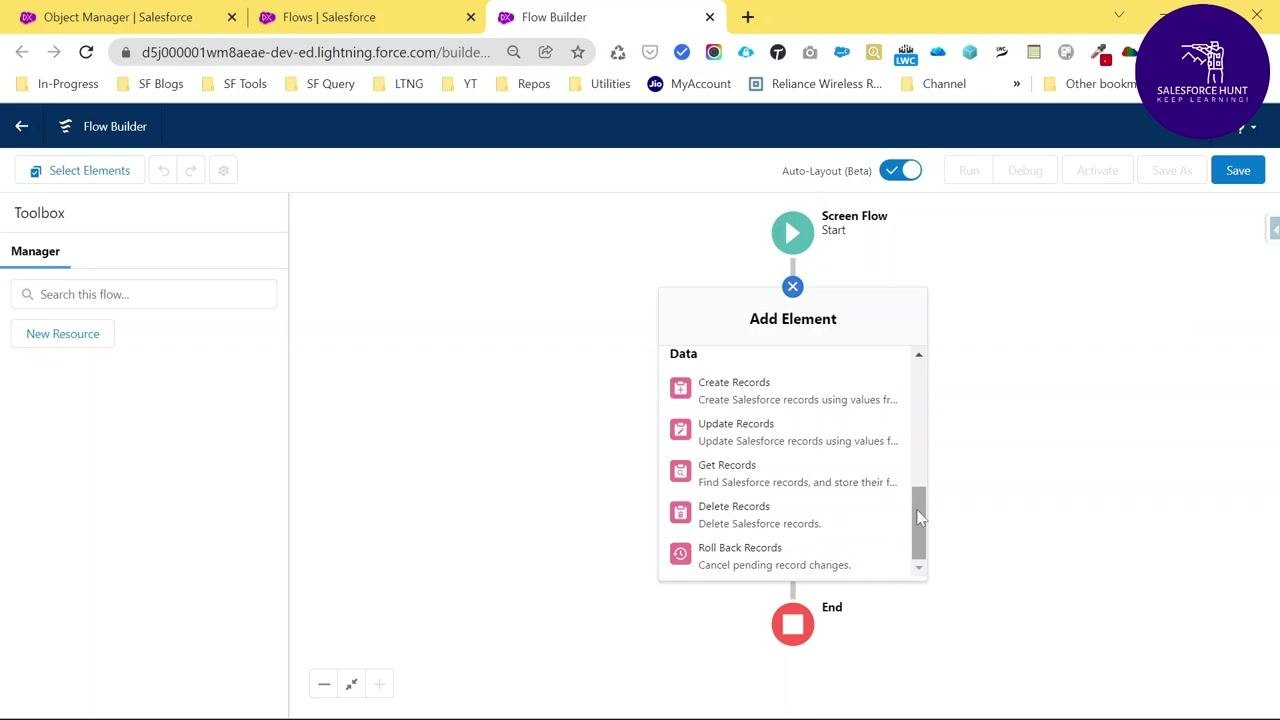
Click the plus (+) button between the Start and End nodes to open the Add Element dialog. Under Interaction, you'll find Screen (collects information from users who run the flow), Action (performs an action outside the flow, such as sending an email or posting to Chatter), and Subflow (launches another flow in your org). Scrolling down reveals Logic options such as Assignment, Decision, Loop, and Collection Sort.
-
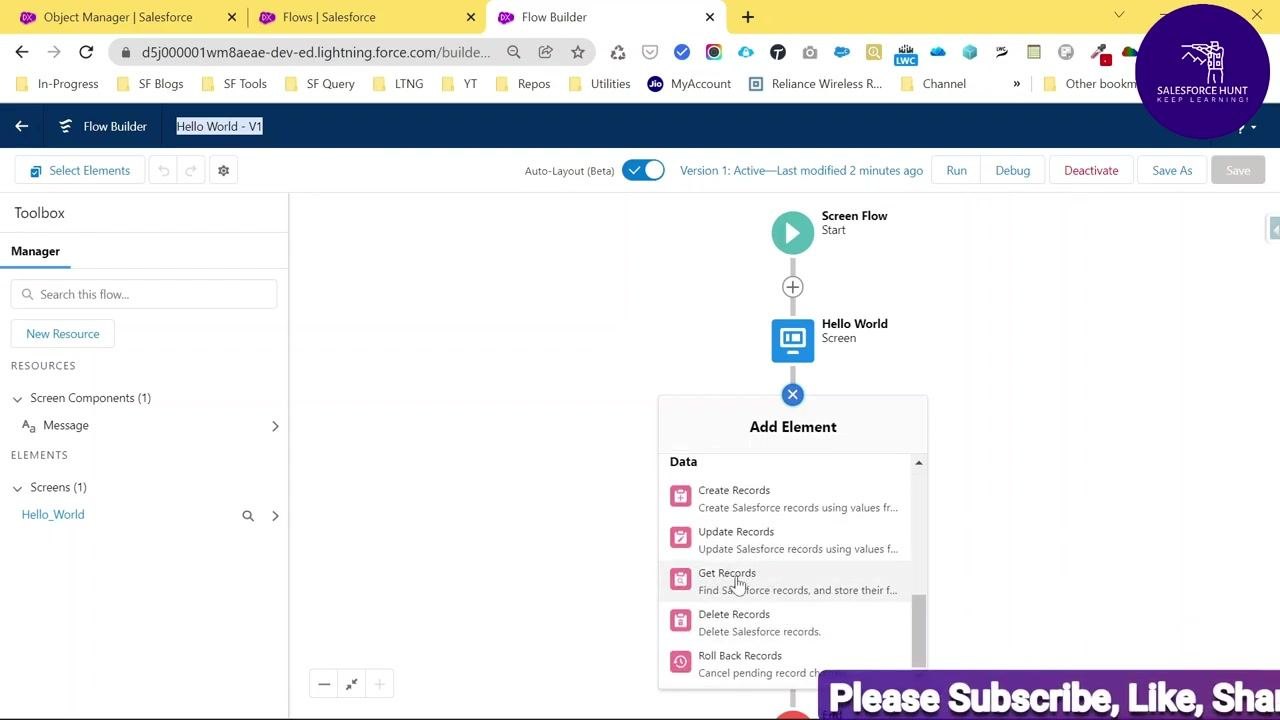
Under the Data section of the same dialog, you can also see options to Create Records, Update Records, Get Records, Delete Records, and Roll Back Records — these let you interact with Salesforce data within your flow.
- Click Screen under Interaction to open the New Screen configuration window. It contains two tabs: Components, for standard screen elements like inputs and display elements, and Fields (Beta), which lets you add record fields directly to your screen as a pilot feature.
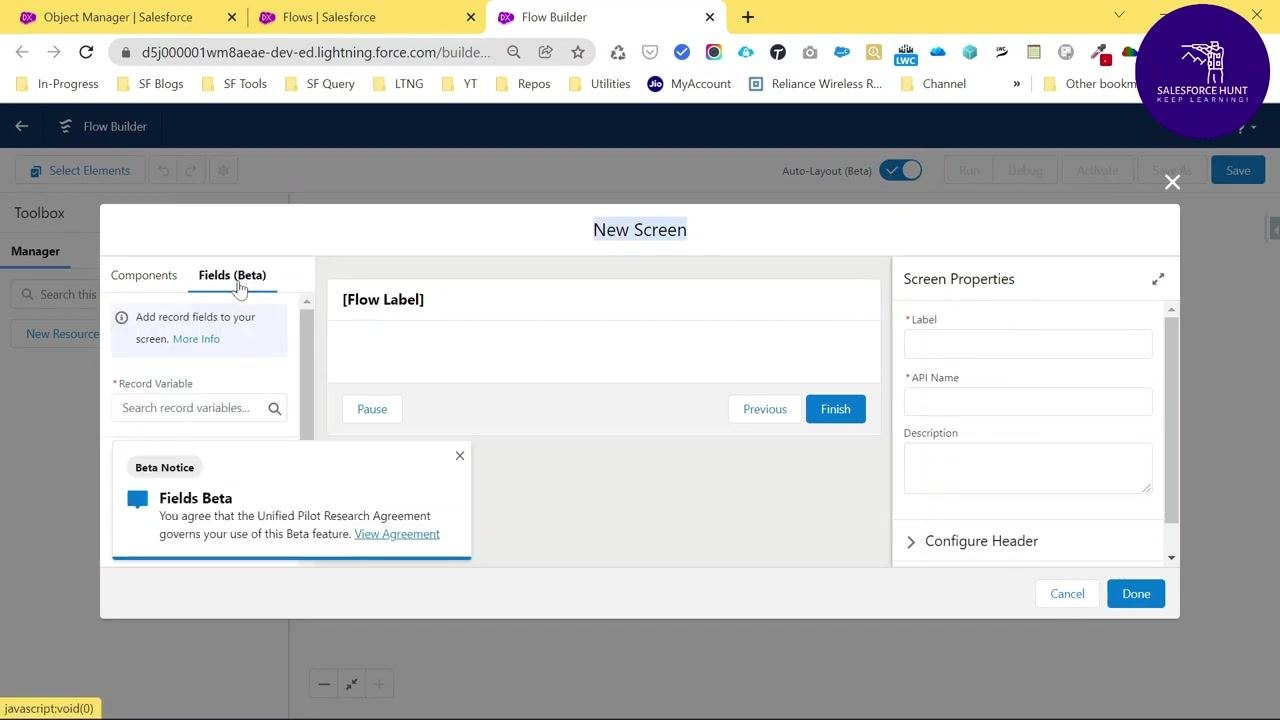
-
Under the Components tab, components are grouped into Display (Display Text, Section) and Inputs (Address, Checkbox, Date, Email, File Upload, First Name, Text, and more). Use Display Text to show information and input components to collect it.
-
On the right side, fill in the Screen Properties:
- Label: Enter a name for the screen, for example
Hello World. - API Name: Auto-generated from the label (for example
Hello_World), though you can edit it. - Description: Optional.
- Label: Enter a name for the screen, for example
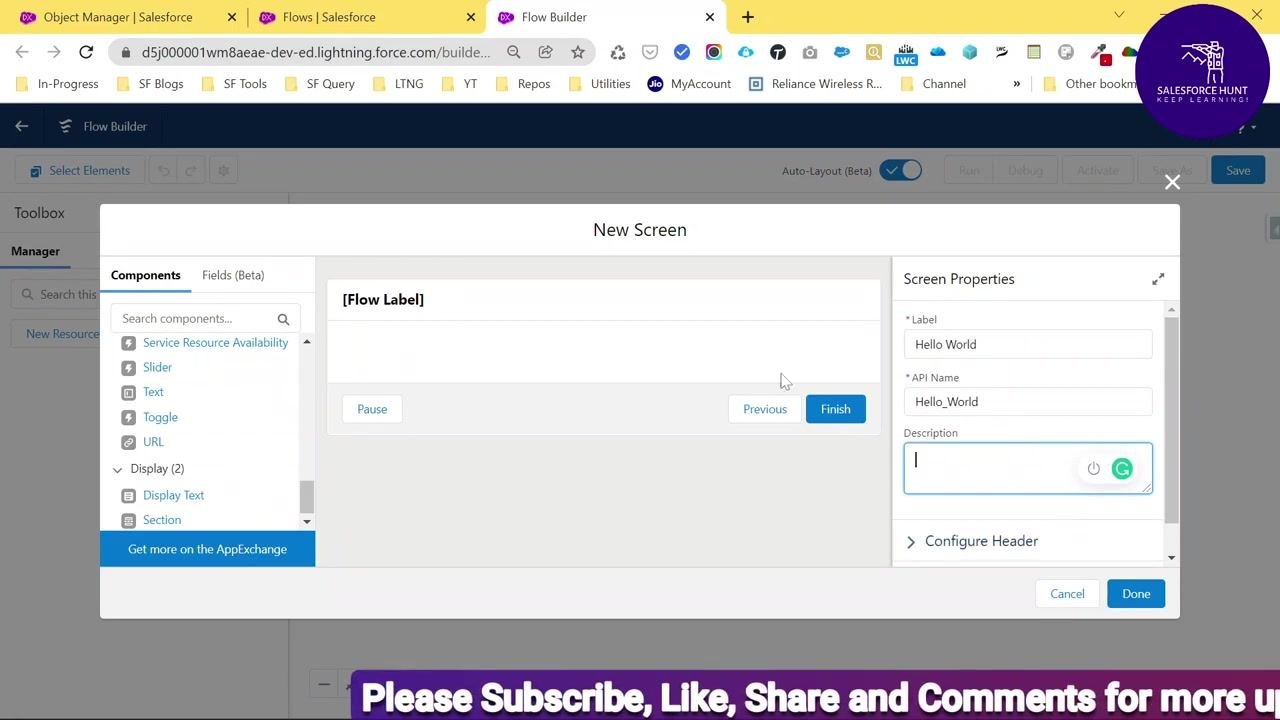
- Locate Display Text under the Display section in the Components tab, then drag and drop it into the main screen area to show static text or instructions to users running the flow.
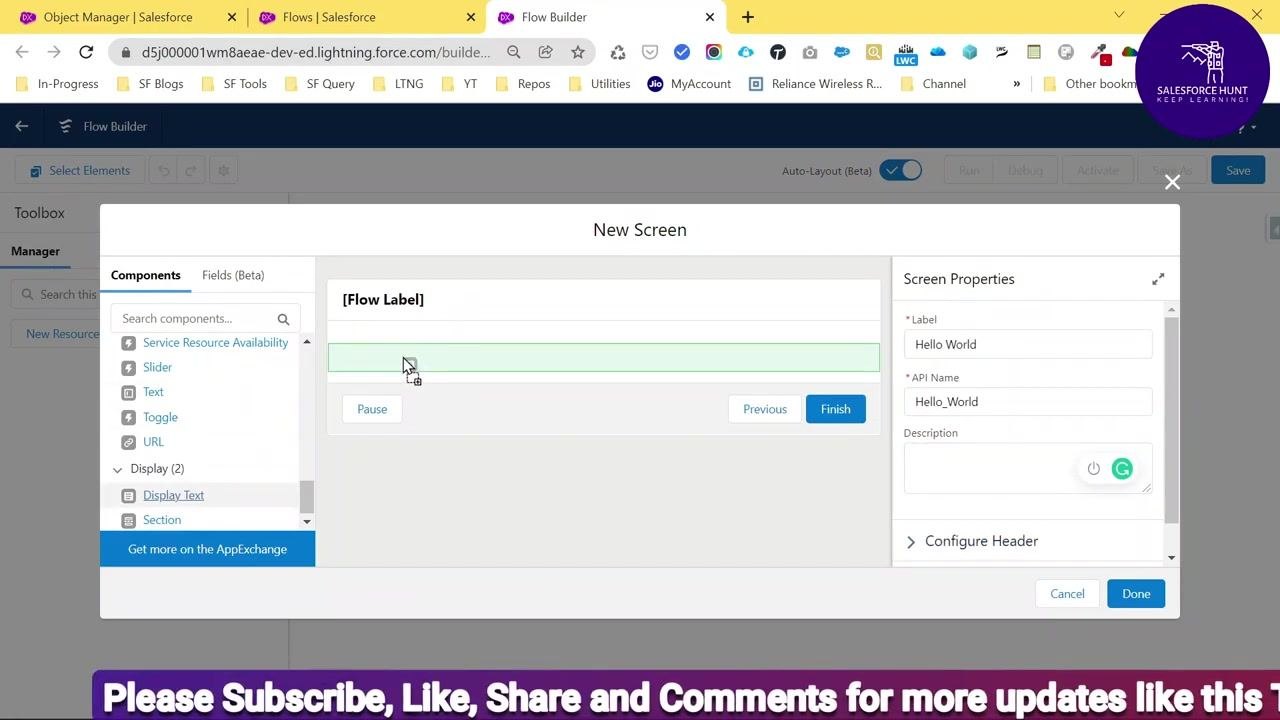
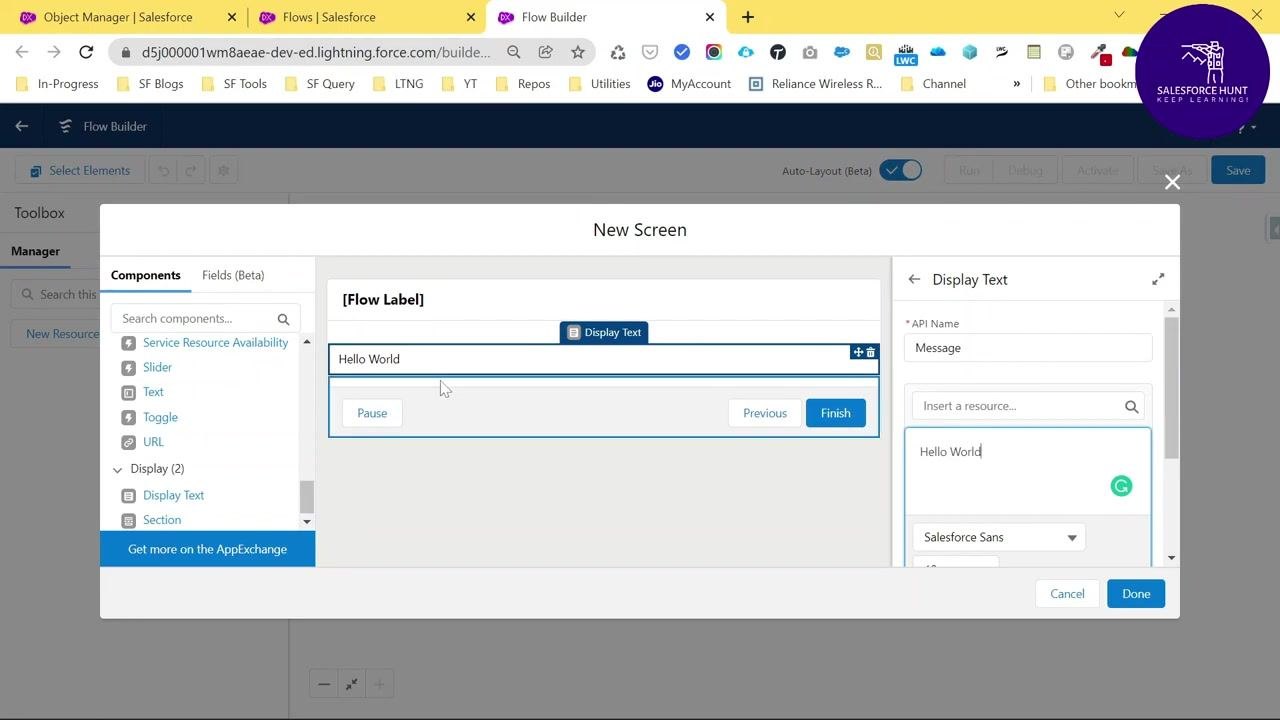
- In the New Screen window, the Components panel on the left also lists Service Resource Availability, Slider, Text, Toggle, URL, Display Text, and Section. The main screen area shows a placeholder labeled [Flow Label] with Pause, Previous, and Finish navigation buttons. You can expand Configure Header for additional header options, and click Done in the lower right to save your changes once components are added.
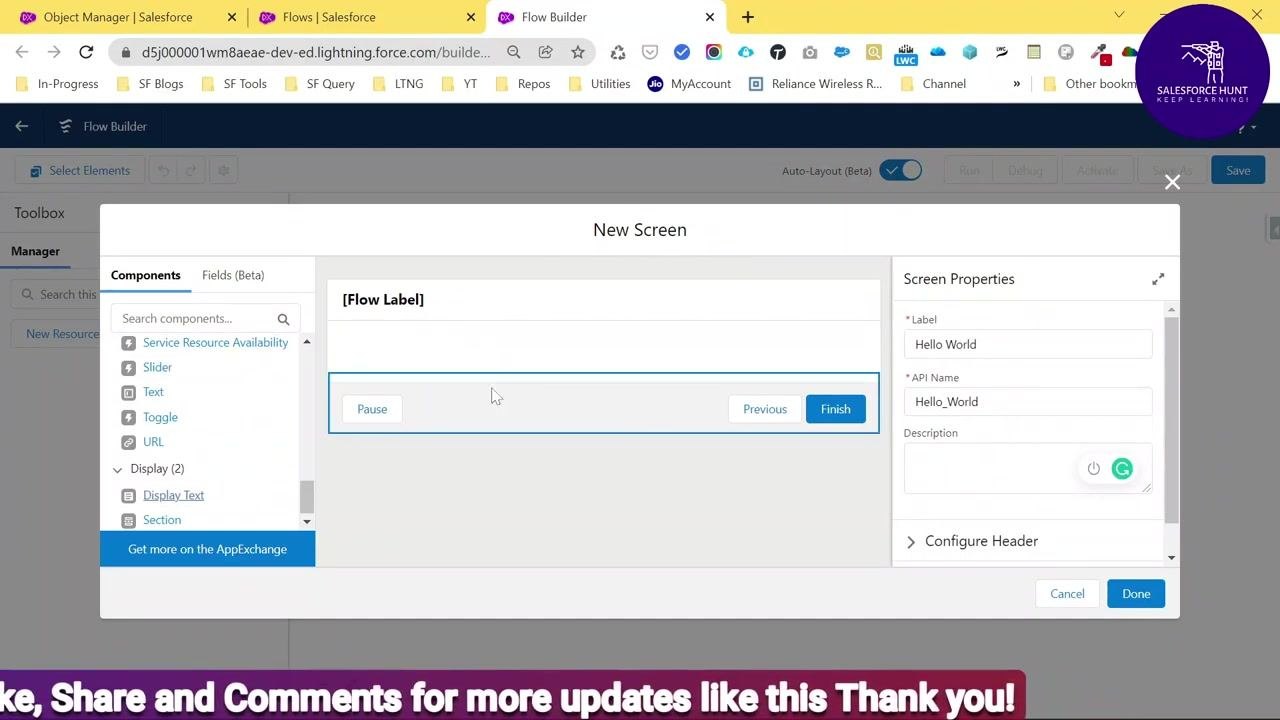
Configure the Display Text component
- In the Display Text configuration panel on the right, enter an API Name. You can choose from existing names shown in the dropdown or enter a new one, such as
Message.
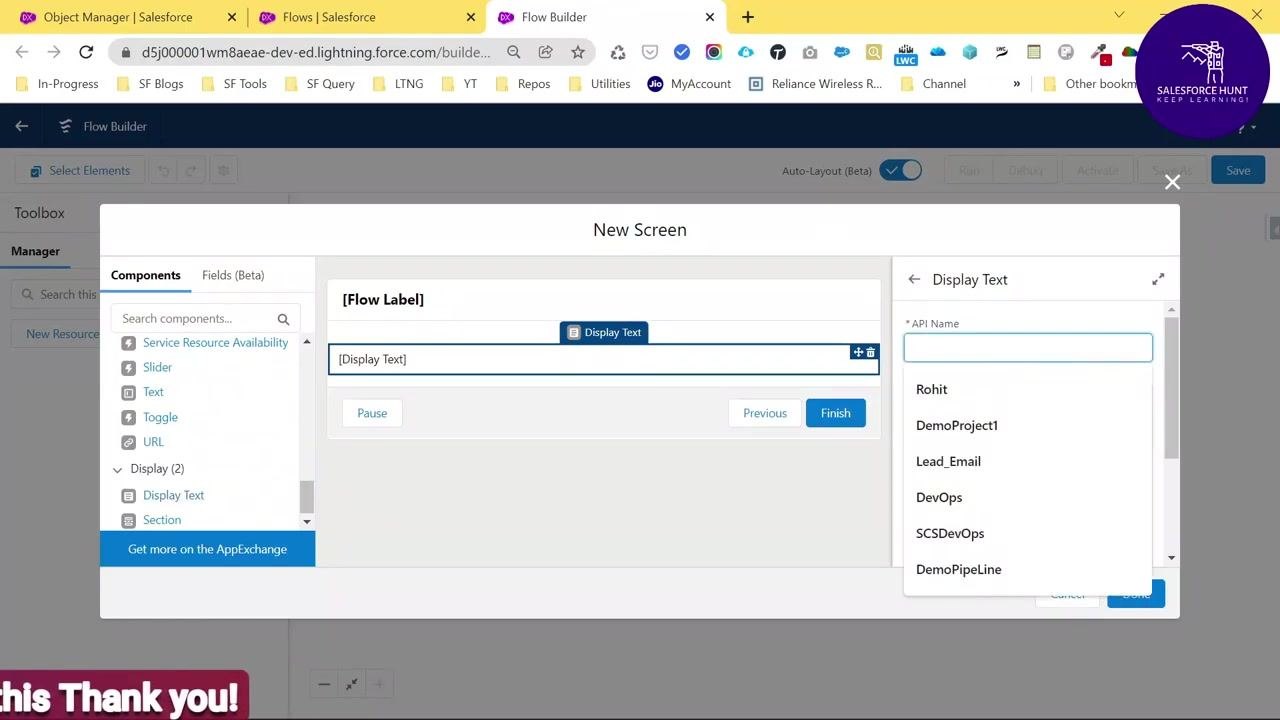
- In the message box, type the text you want to display — for example, "Hello World." You can use the default font, Salesforce Sans.
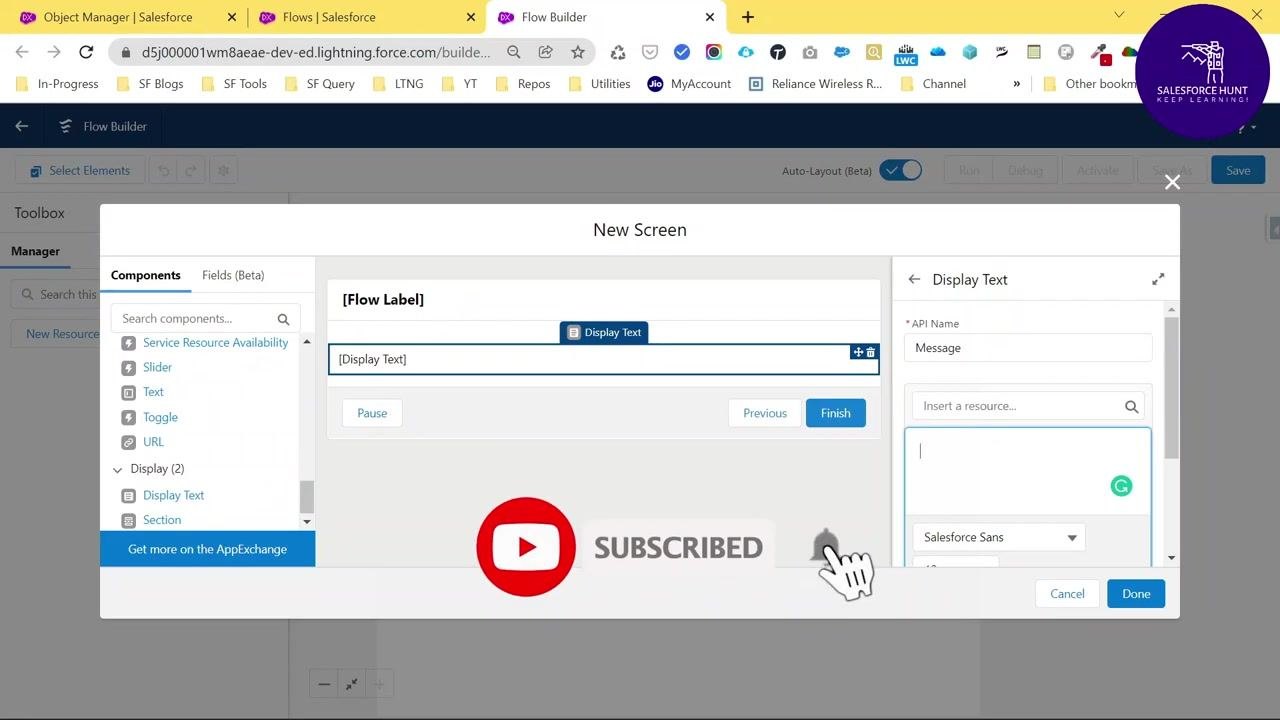
- As you type, confirm that the main screen area updates to reflect your entry.
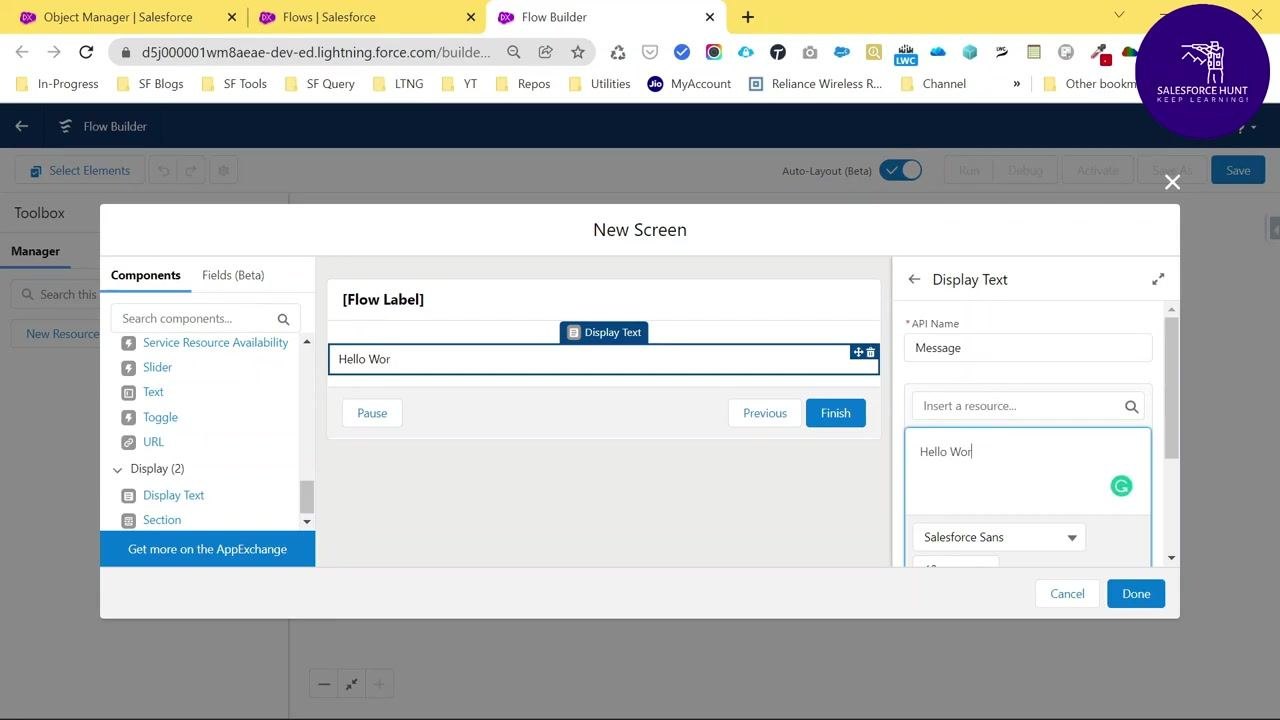
- Complete the entry by typing "Hello World" in the message box and verify that the main screen preview updates to show "Hello World."
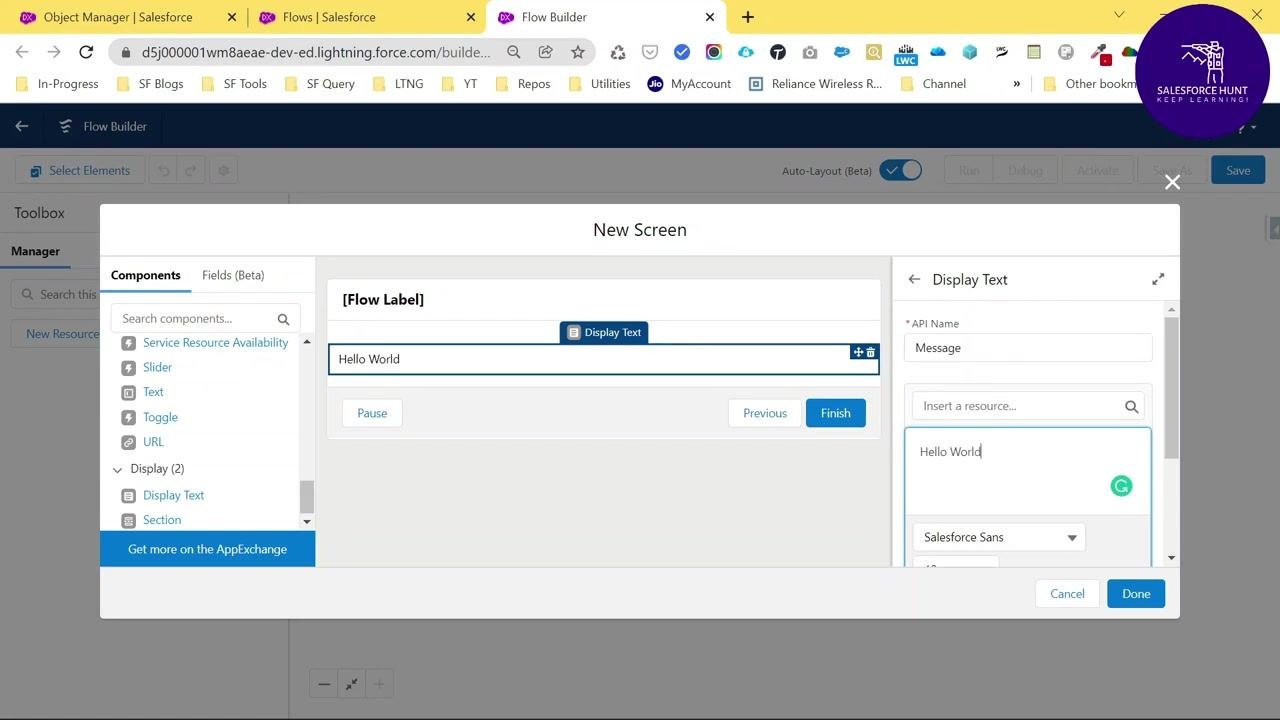
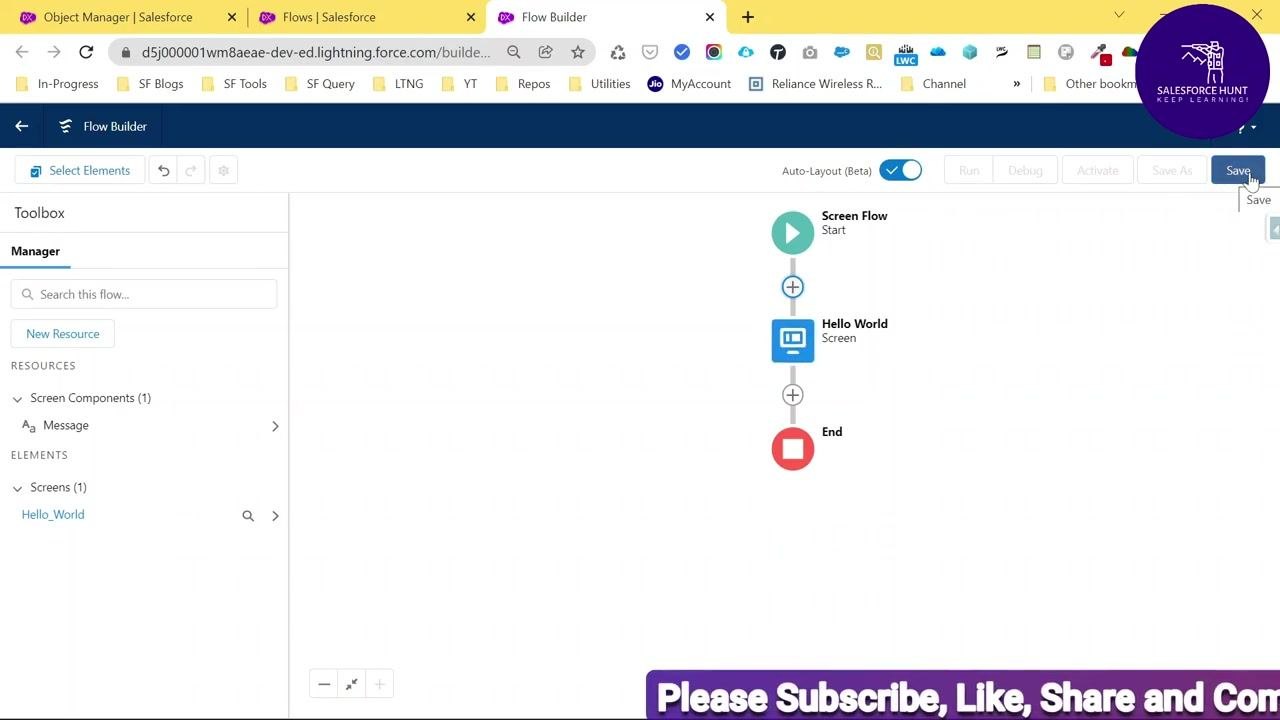
- Click Done in the Display Text configuration panel to save the component settings. In the Flow Builder canvas, confirm the flow sequence now reads: "Screen Flow" (Start) → "Hello World" (Screen) → "End."
Save your flow
- Click the Save button in the upper right corner of Flow Builder.
- In the Save the flow dialog, enter the Flow Label as "Hello World" and the Flow API Name as "Hello_World." You can optionally add a description for your flow, then click Save to confirm.
Activate, debug, and run your flow
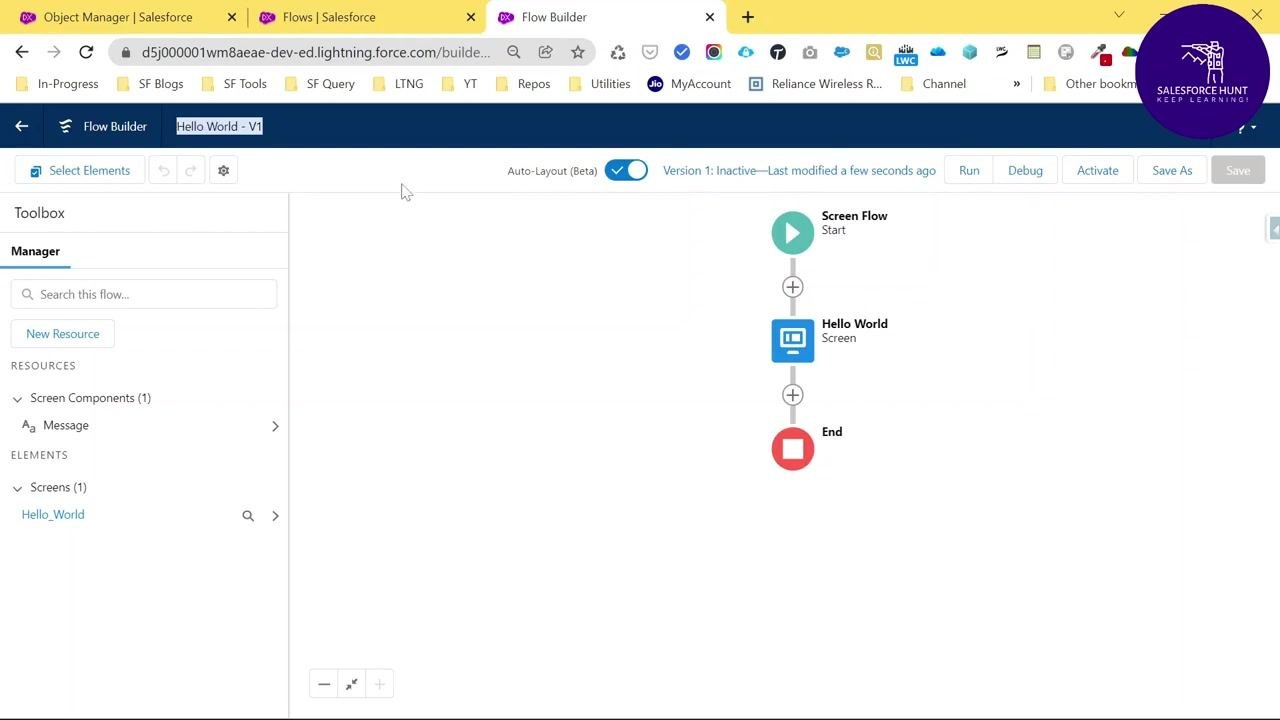
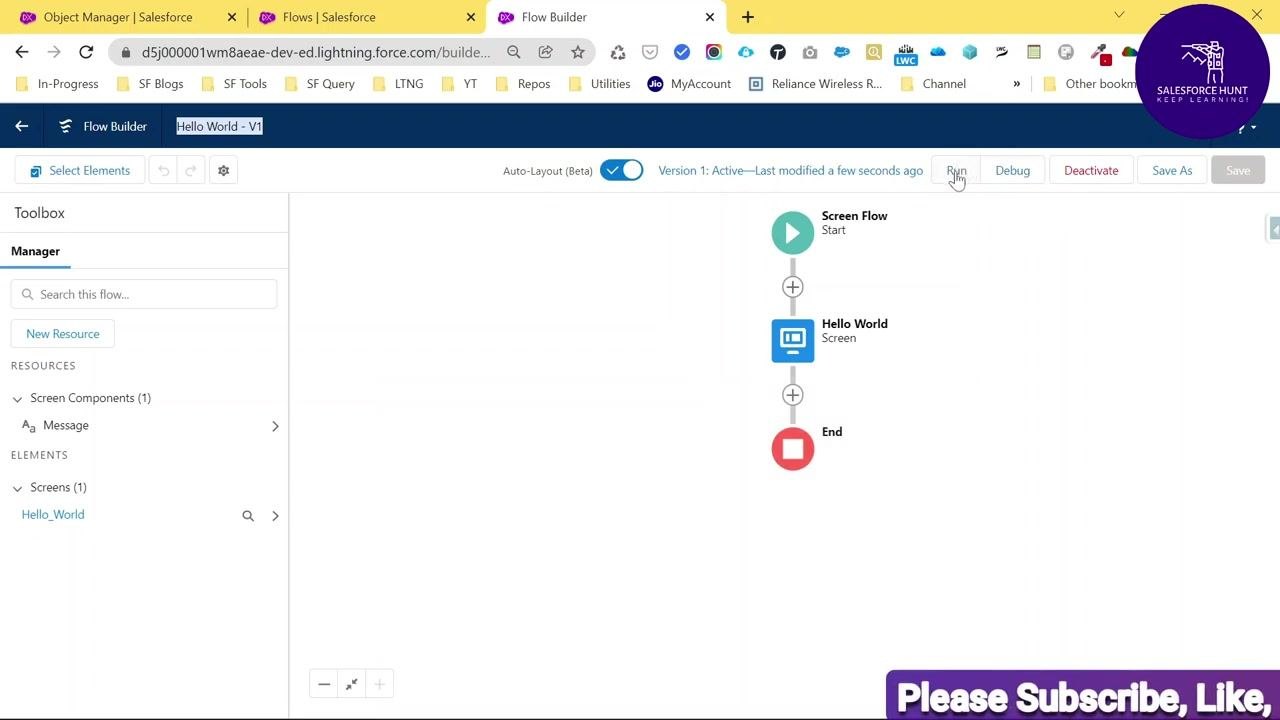
- After saving, review the available options at the top of Flow Builder: Run, Debug, Activate, and Save As. These let you test, debug, activate, or duplicate your flow. The saved flow is labeled "Hello World - V1" and is initially inactive.
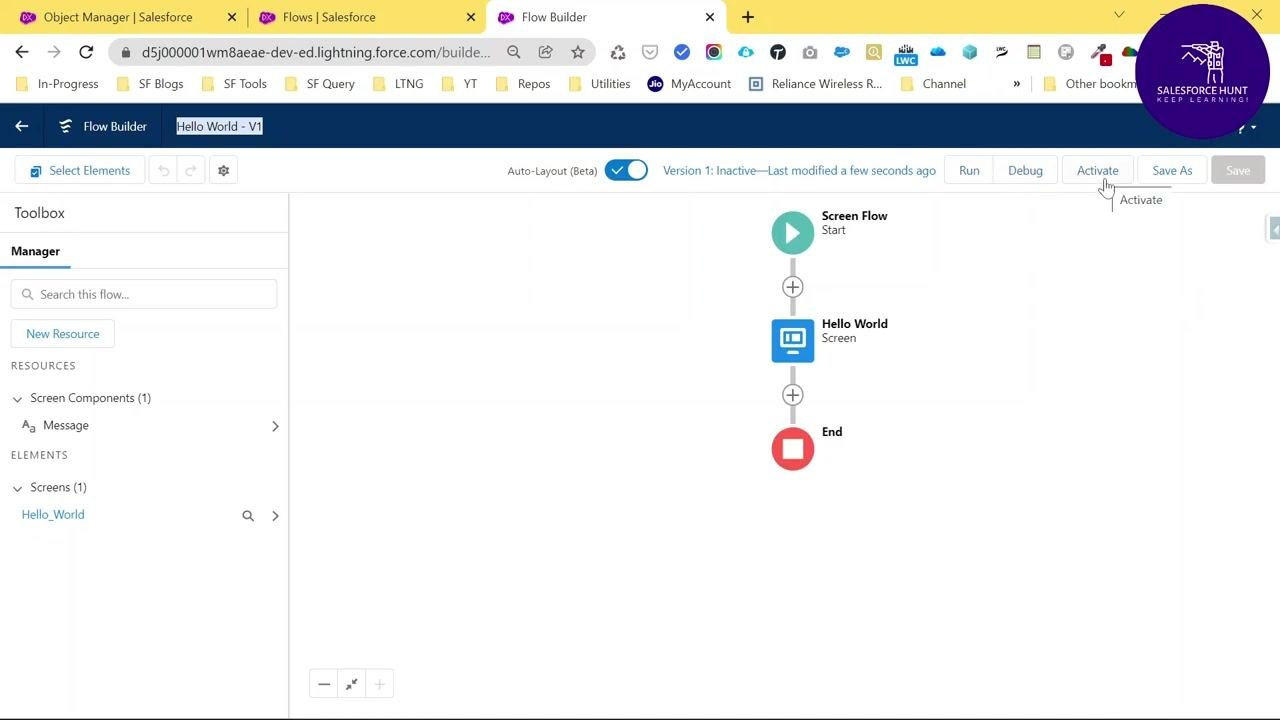
- Click the Activate button in the top right menu bar and confirm that the flow status changes to "Active" in the version indicator.
- Optionally, click Debug to step through the flow and observe its execution for troubleshooting before running it live.
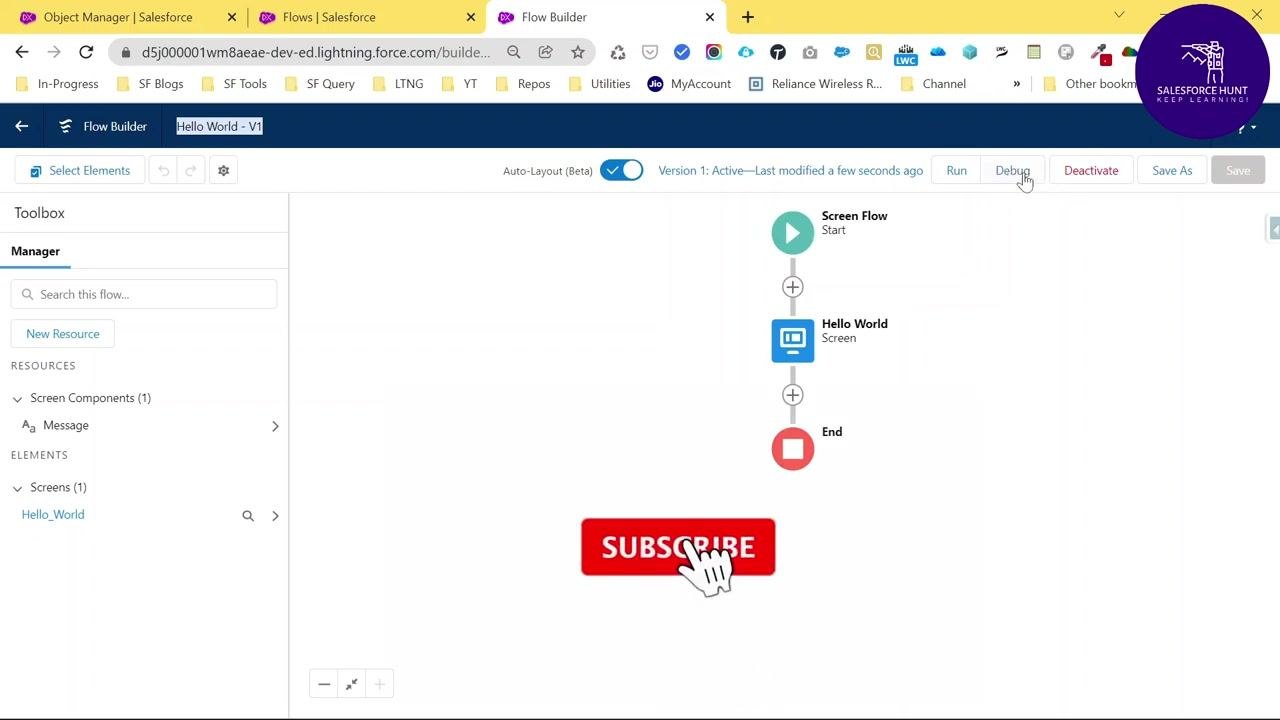
- Alternatively, click Run to execute the flow directly. A new window or tab opens, displaying the flow screen with the title "Hello World" and the configured display text.
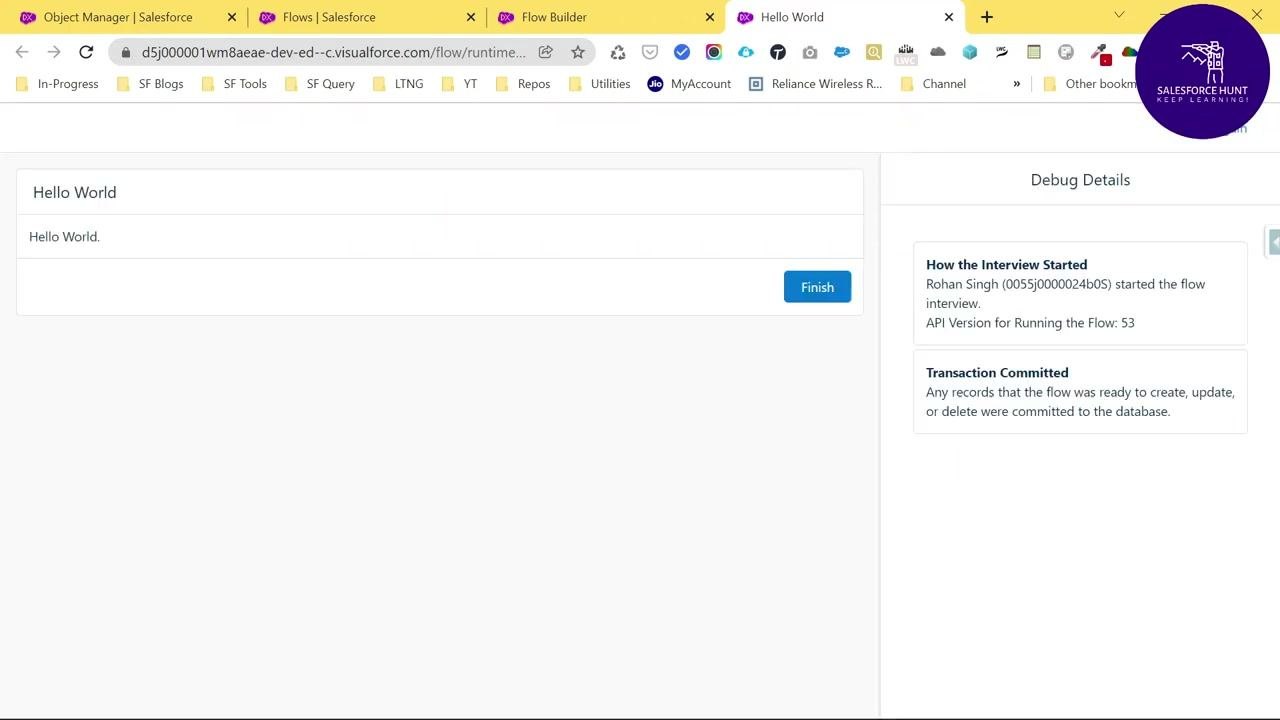
- On the flow runtime screen, review the title "Hello World" and the message "Hello World." Click Finish to complete the flow.
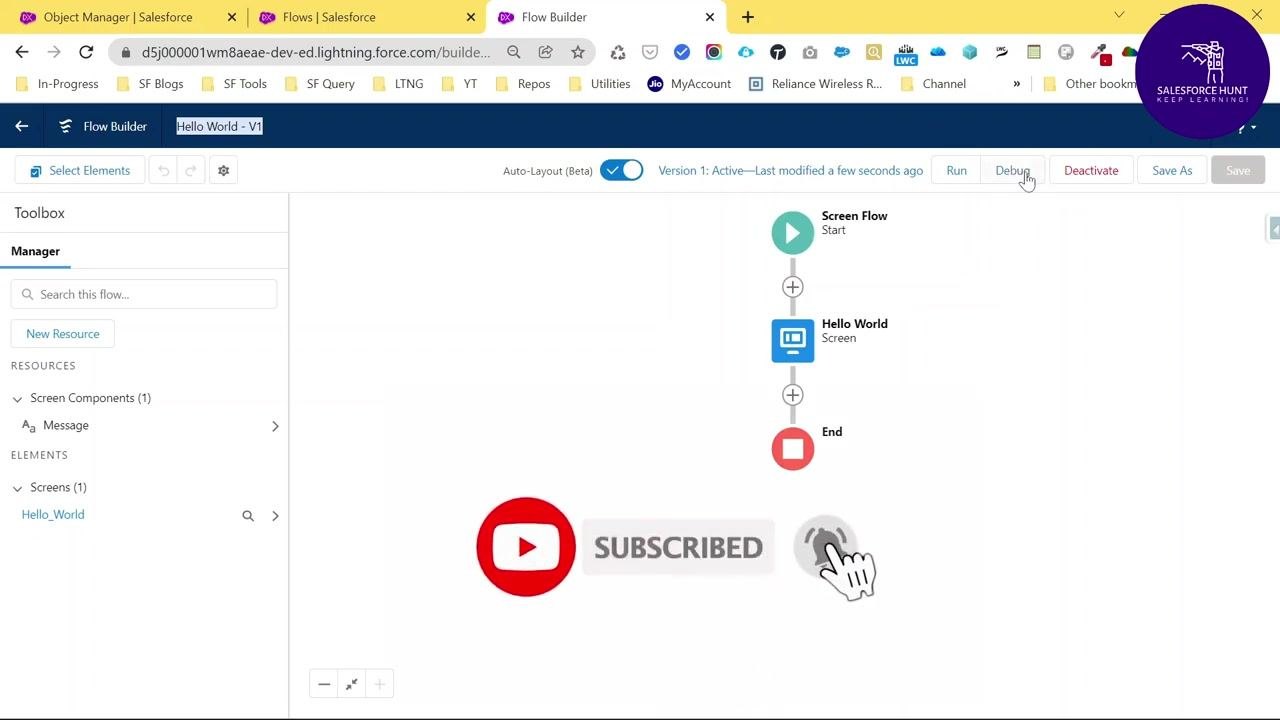
- After clicking Debug, review the Debug Details panel on the right, which shows How the Interview Started (the user who started the flow and the API version) and Transaction Committed (whether any records were created, updated, or deleted).
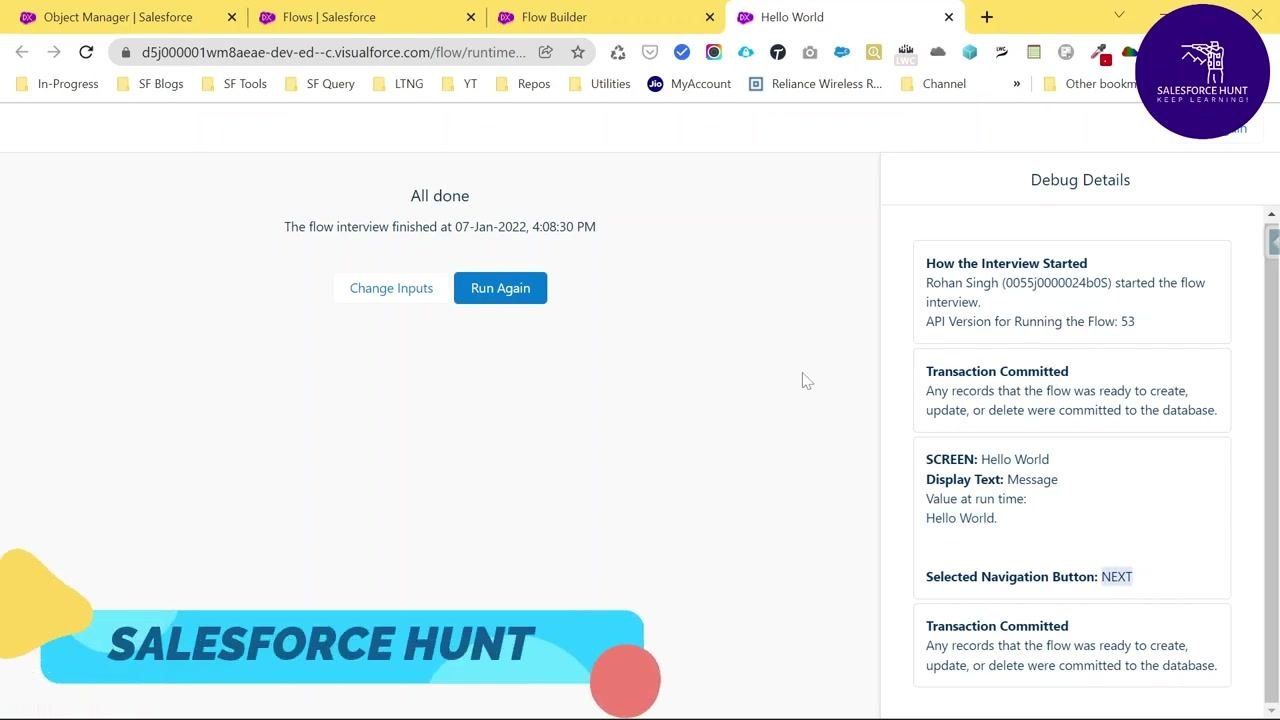
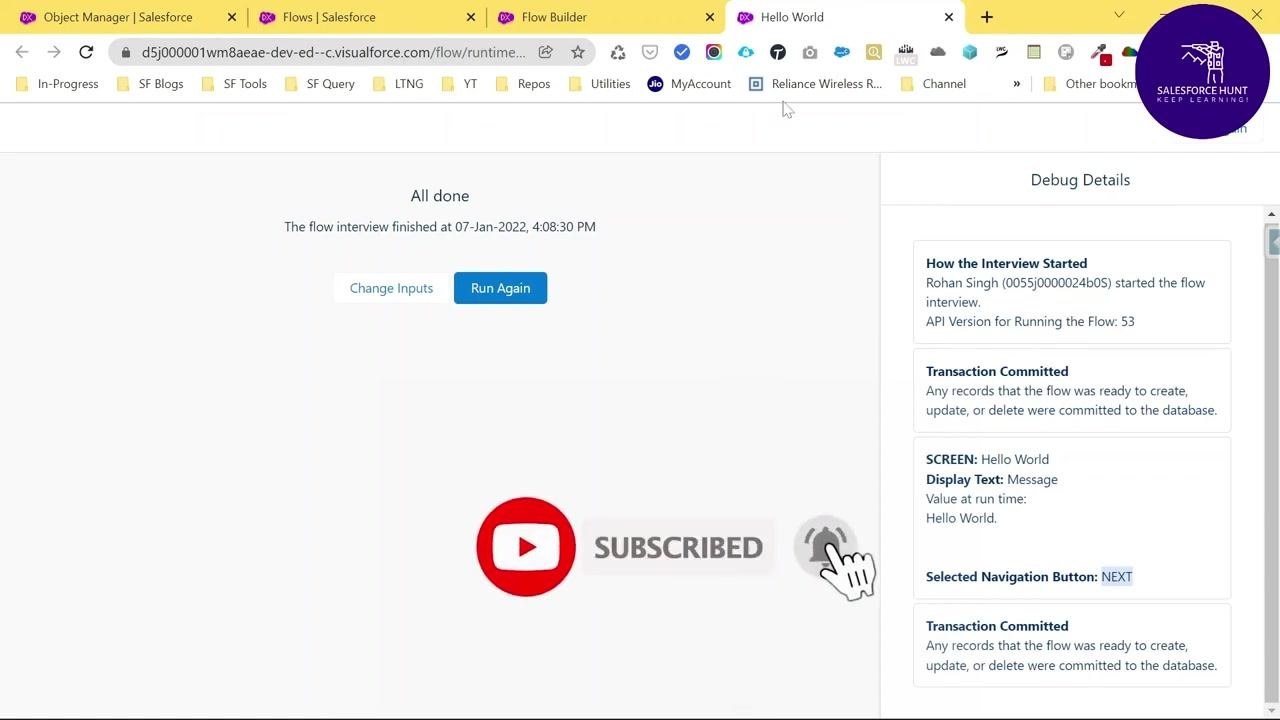
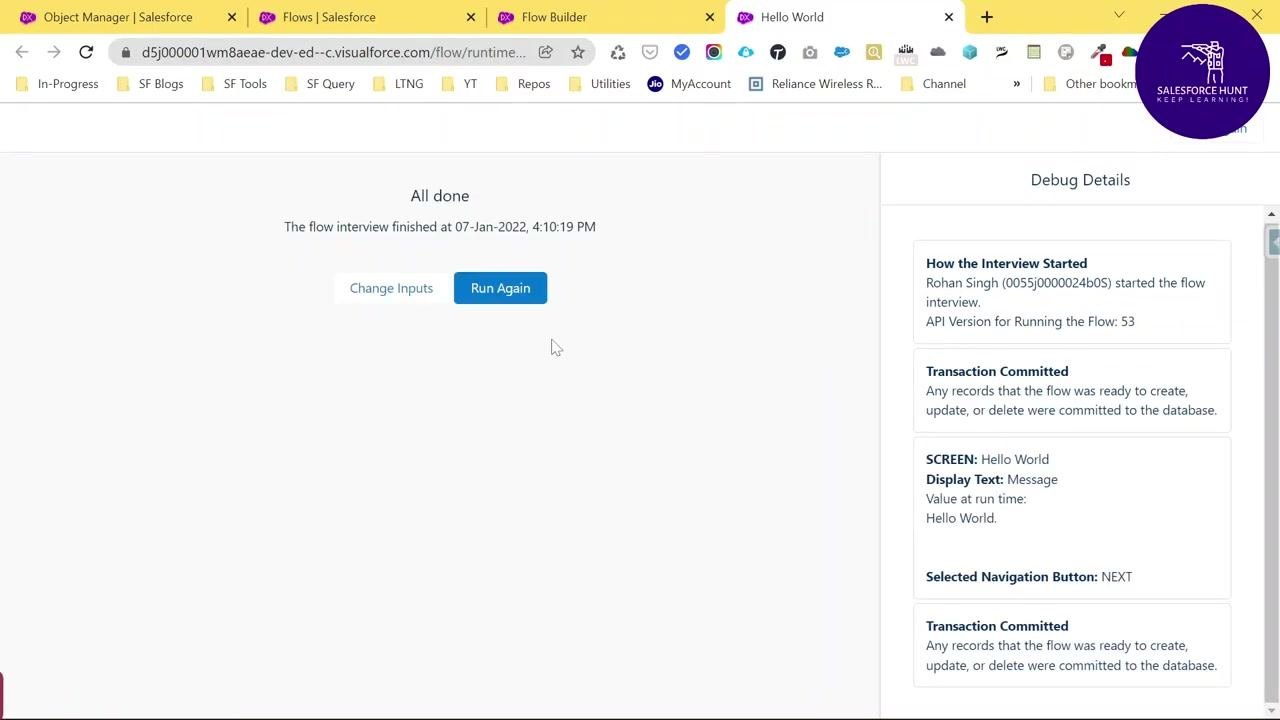
- Continue reviewing the Debug Details panel for additional information: SCREEN: Hello World, Display Text: Message, Value at run time: Hello World, Selected Navigation Button: NEXT, and confirmation that the transaction was committed. The main screen displays "All done" along with the flow interview finish time, plus options to Change Inputs or Run Again.
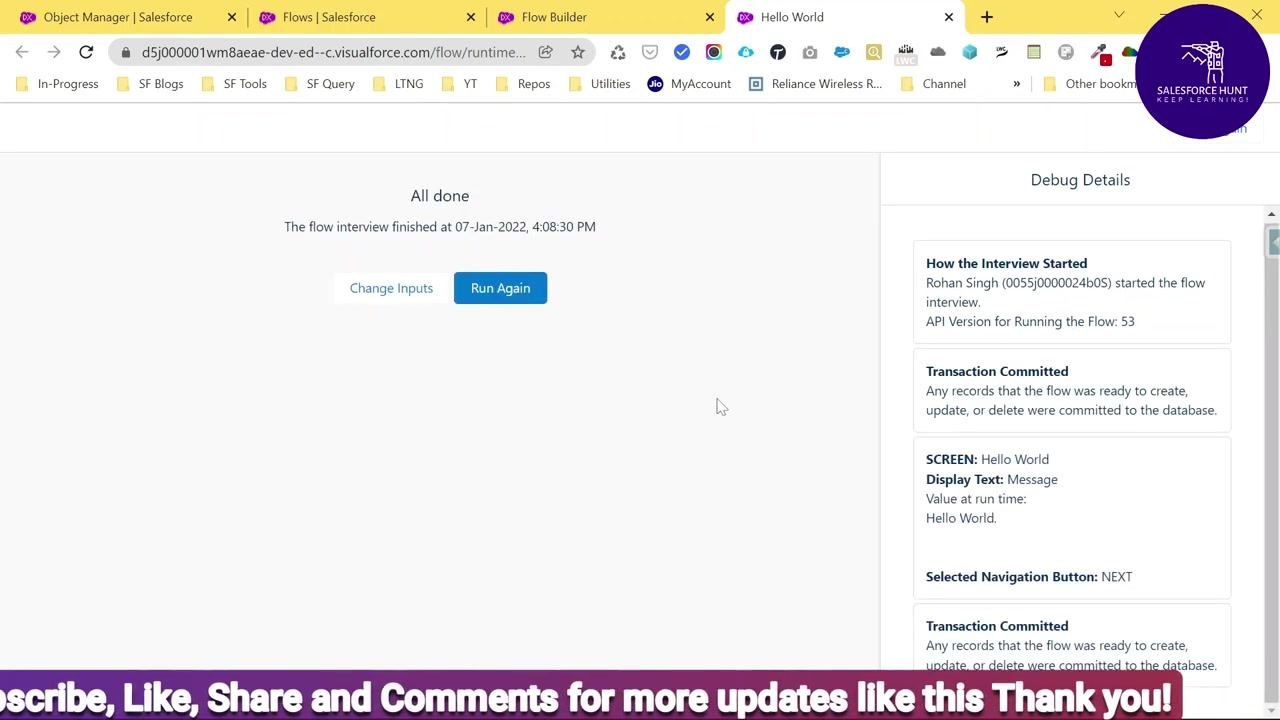
- Note the finish timestamp (for example "07-Jan-2022, 4:08:30 PM") and review the same Debug Details fields: How the Interview Started, Transaction Committed, SCREEN details, and Selected Navigation Button.
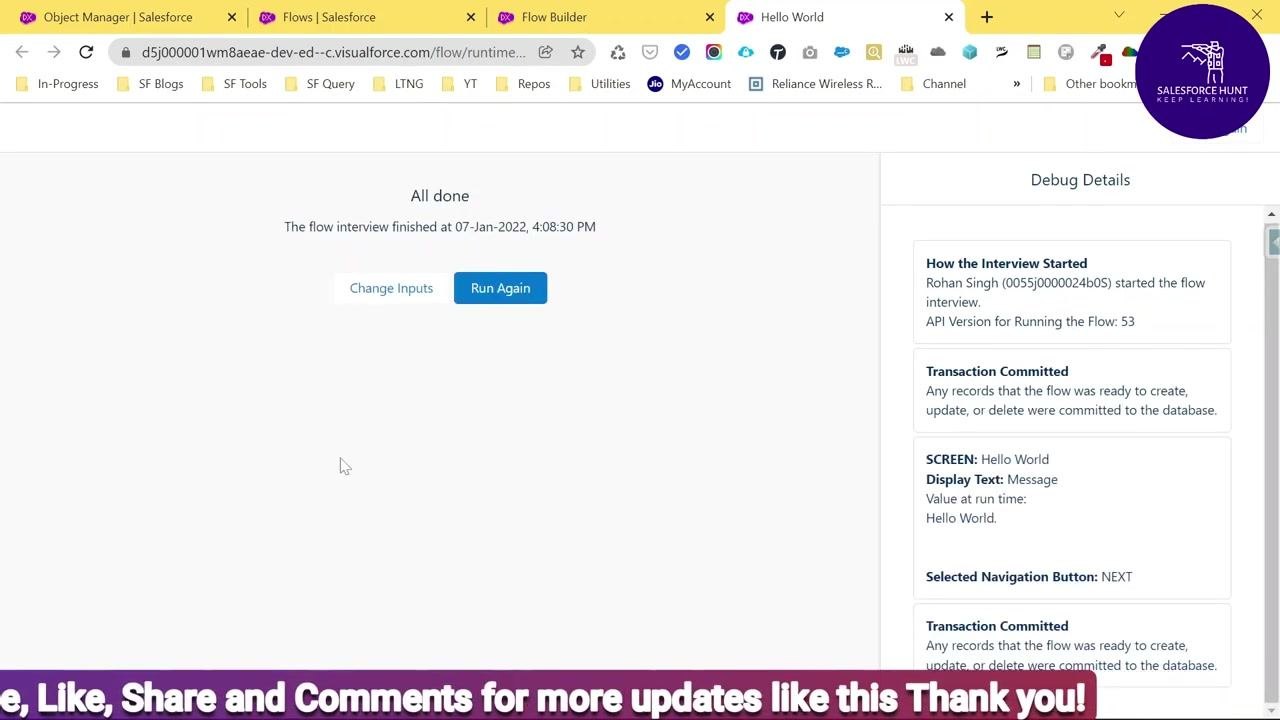
- Confirm the Display Text value ("Hello World.") and the navigation button used ("NEXT"), and make sure all transaction details are correct with no errors present.
Add a Get Records element
- Close the debug summary screen and return to the Flow Builder canvas. Click the + icon below the "Hello World" screen element, then select Get Records under the Data section of the Add Element dialog.
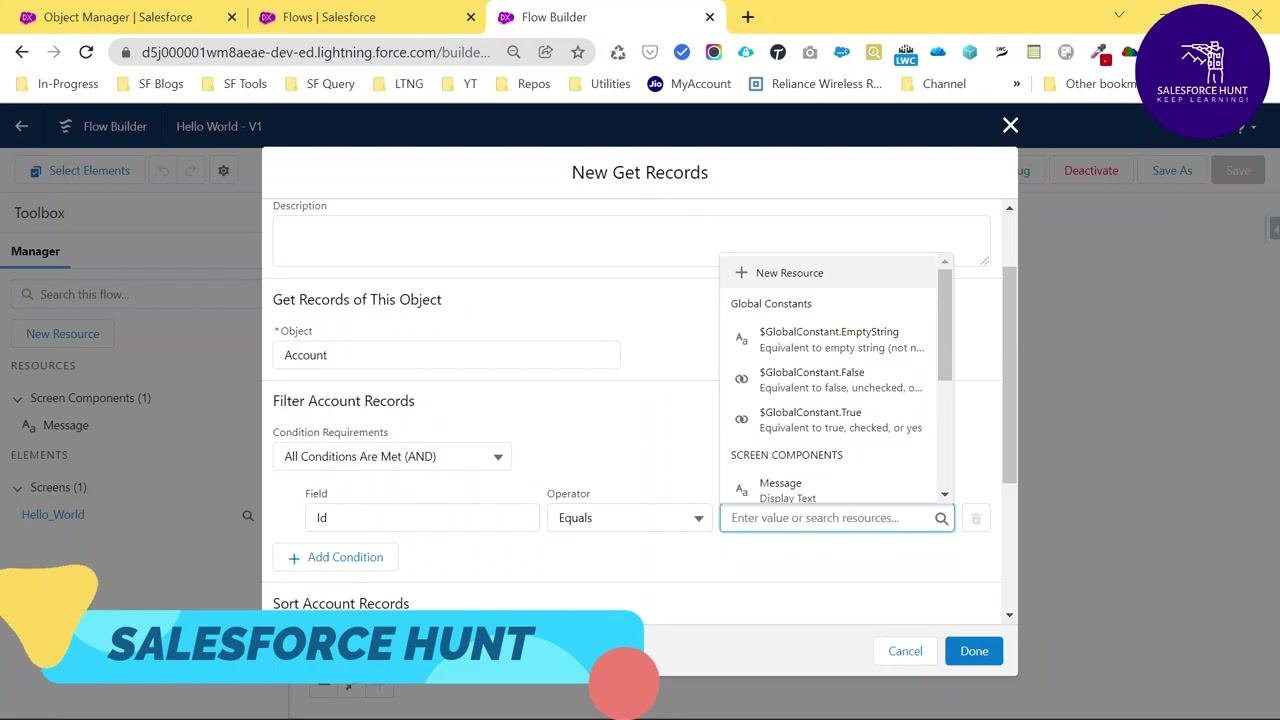
- In the New Get Records dialog, set the Label to
Get Records, the API Name toGet_Records, and enterAccountin the Object field.
- Under Filter Account Records, set Condition Requirements to
All Conditions Are Met (AND), selectIdin the Field dropdown, and set Operator toEquals. Leaving the Value field empty or supplying an invalid value will later cause an error — this is demonstrated in the troubleshooting steps below.
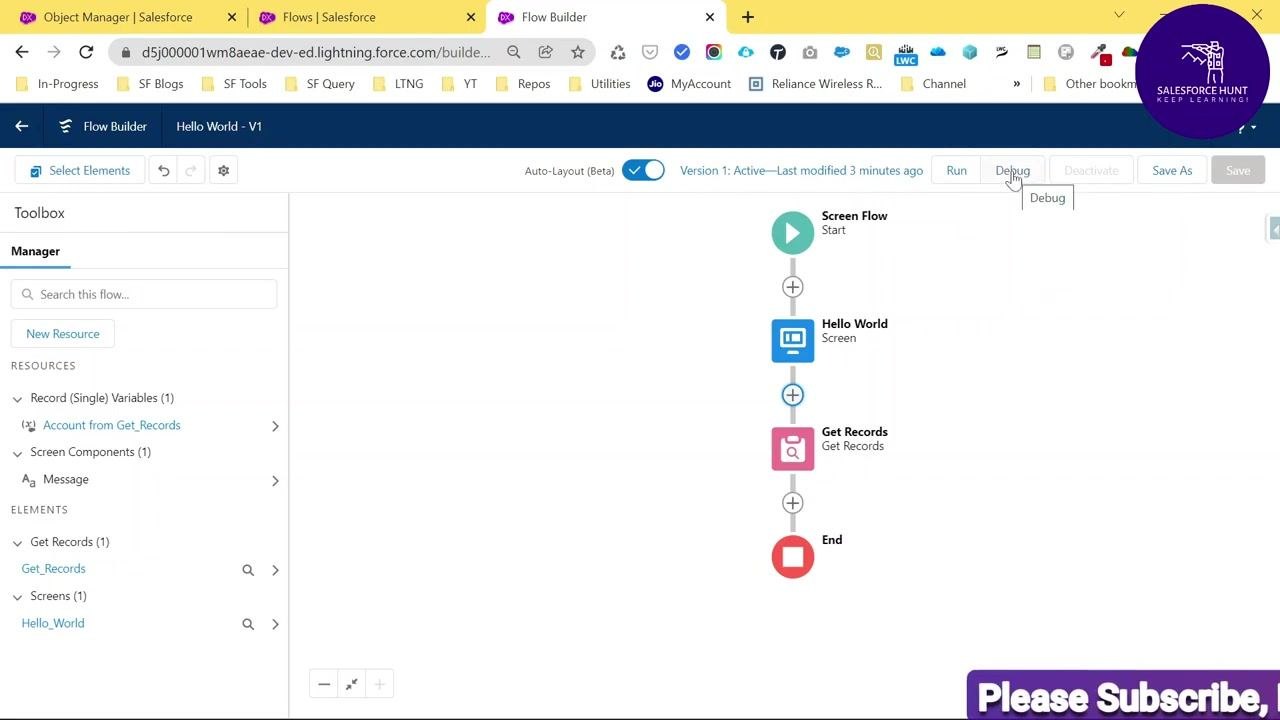
- Review the updated flow sequence, which now includes Screen Flow (Start) → Hello World (Screen) → Get Records (Get Records) → End. The left panel lists available resources, including "Account from Get_Records." Click Debug to test the updated flow.
-
In the Debug flow dialog, make sure Run the latest version of each flow called by subflow elements and Show details of what's executed and render flow in Lightning runtime are both checked. You can optionally select Run flow as another user. If no input variables are defined, you may see a message noting that the flow has no variables that allow input access. Click Run to start debugging.
-
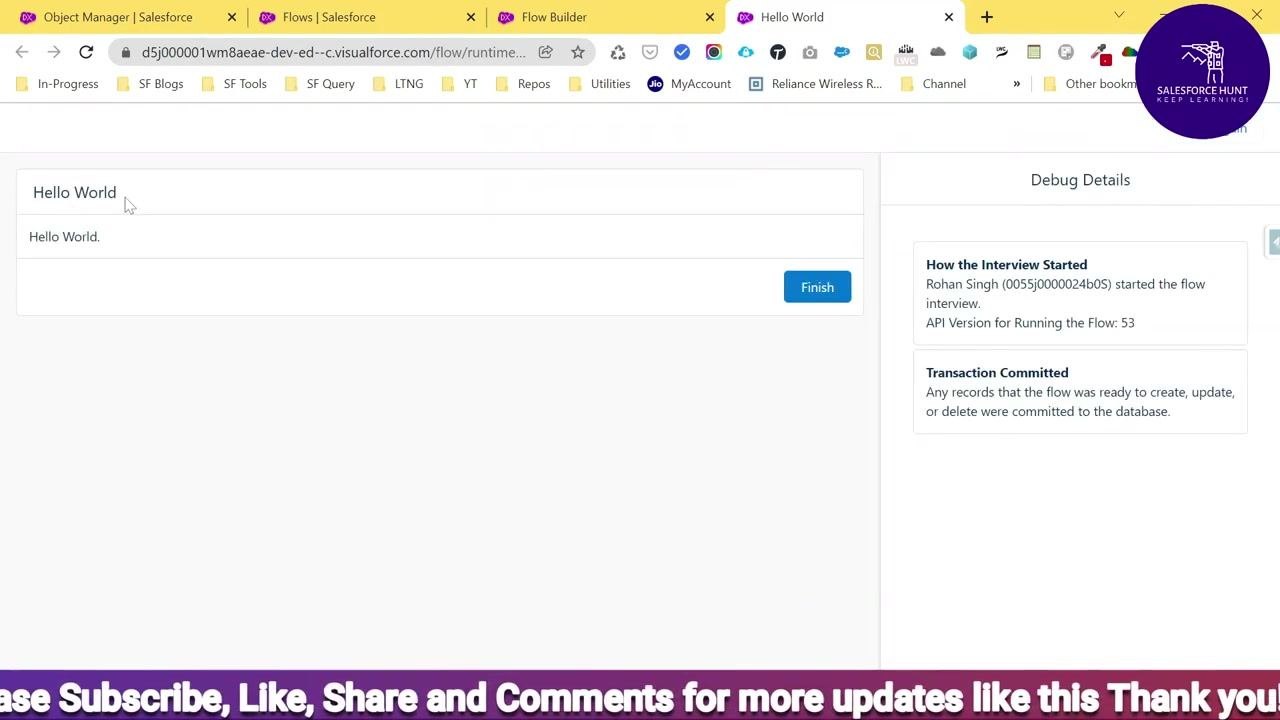
On the flow execution screen, review the title "Hello World," the message "Hello World.", and the Finish button. The right panel shows debug details, including user, API version, and transaction status.
Complete the flow and understand error handling
- On the completed flow screen, the message "Hello World" and "Hello World." is displayed with a Finish button ready to be clicked. The Debug Details panel on the right shows how the interview started and confirms that the transaction was committed.
-
Click Finish to complete the flow process. The confirmation screen displays "All done," the flow interview finish date and time, and options to Change Inputs or Run Again. The right panel provides debug details, including the screen name, display text, and navigation button used.
-
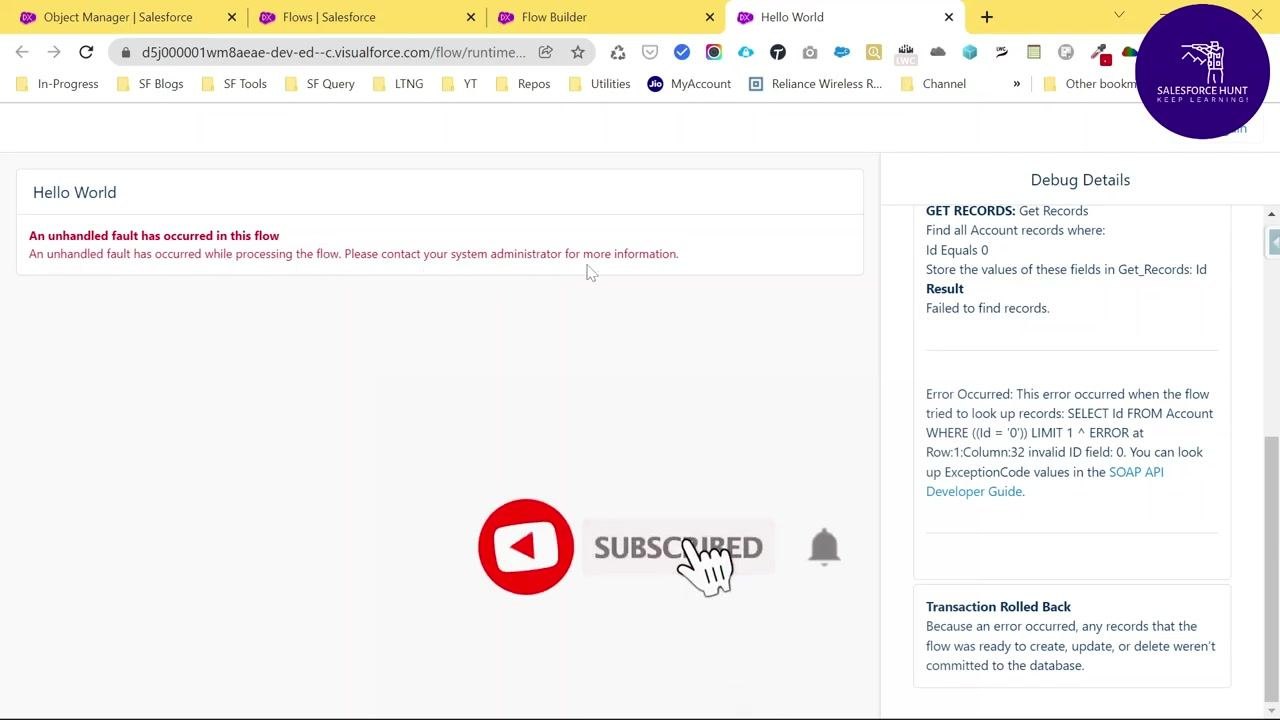
If an error occurs, a red error message appears: "An unhandled fault has occurred in this flow. Please contact your system administrator for more information." The right panel shows debug details, including the failed record lookup and error specifics.
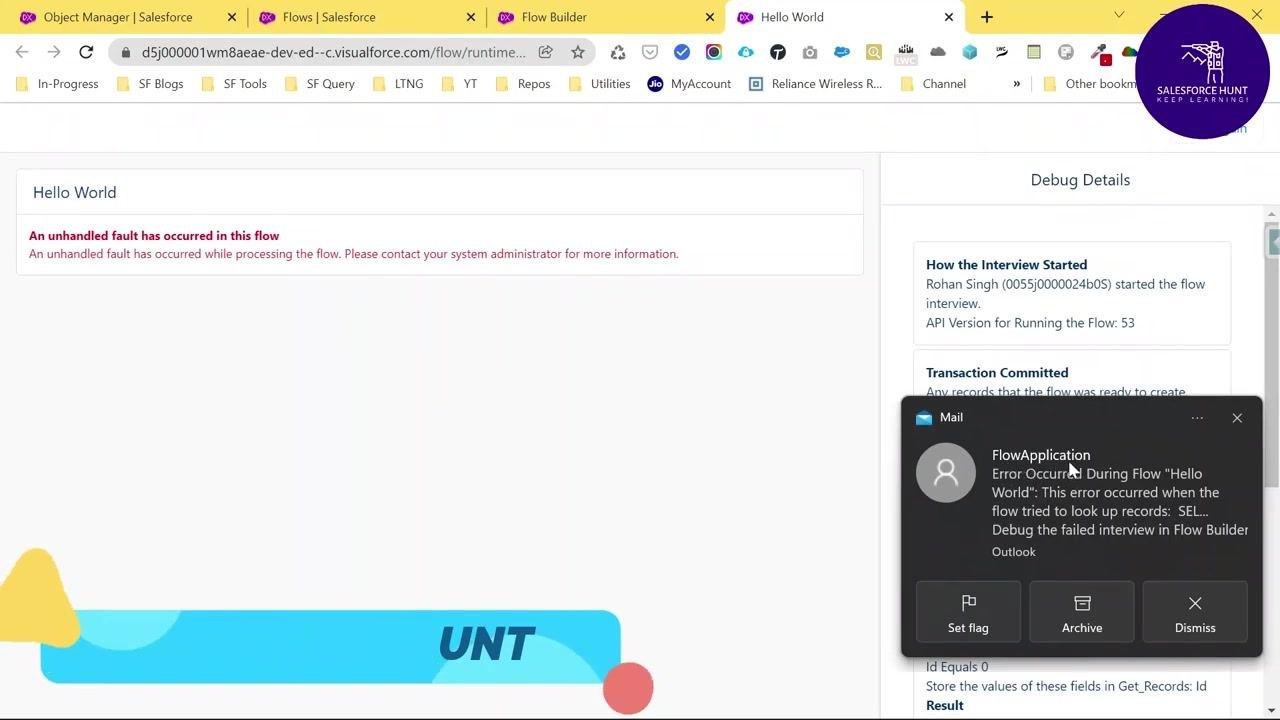
- When a flow application error occurs, a system notification (for example from Mail or Outlook) may appear, indicating that an error occurred during the flow and suggesting you debug the failed interview in Flow Builder.
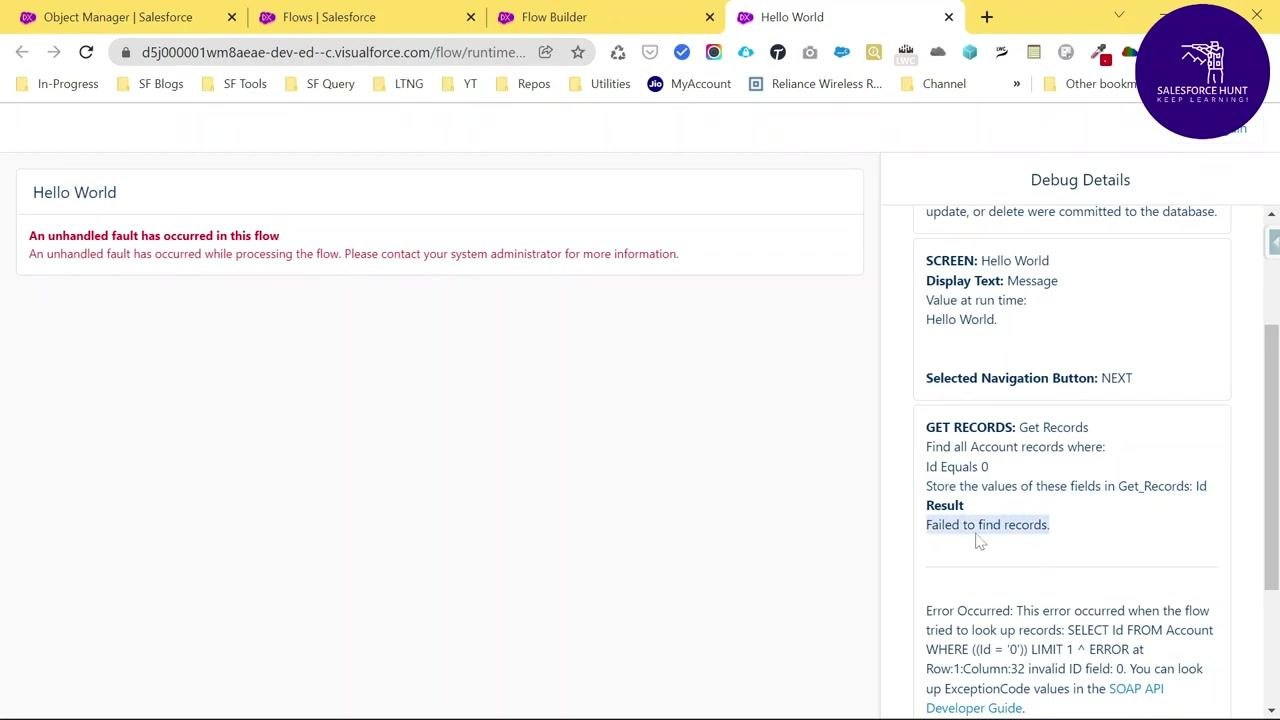
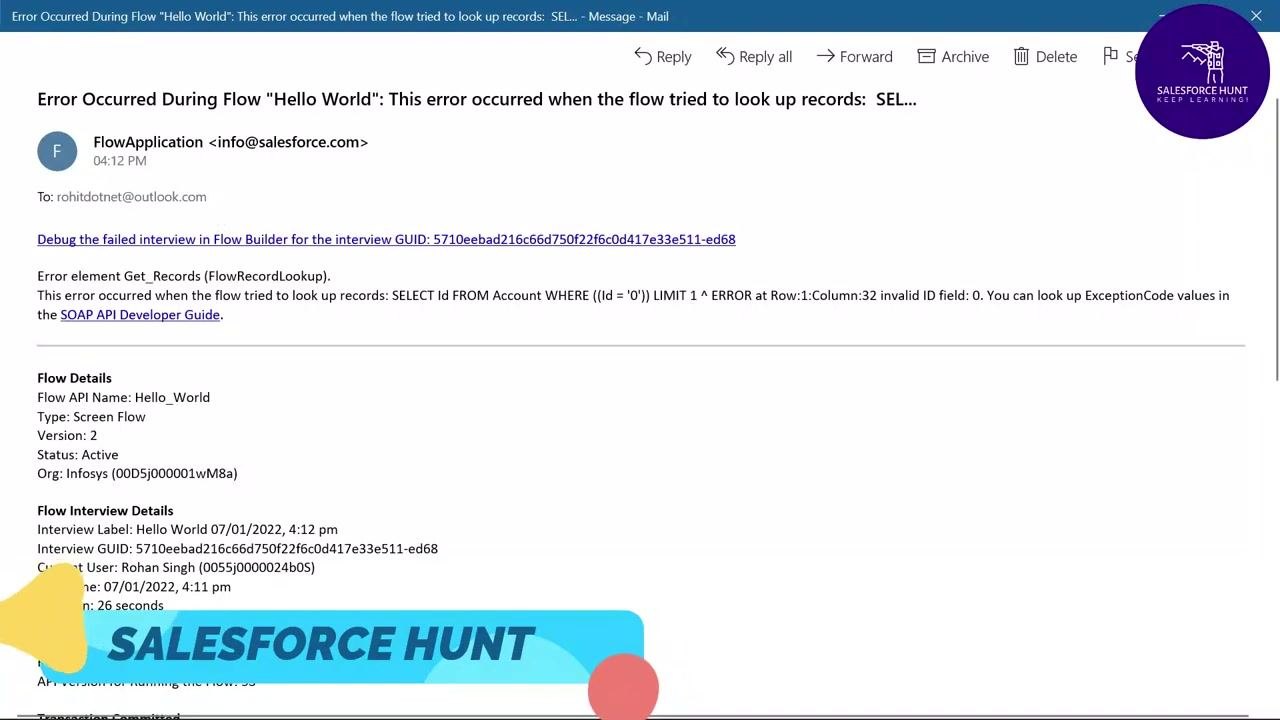
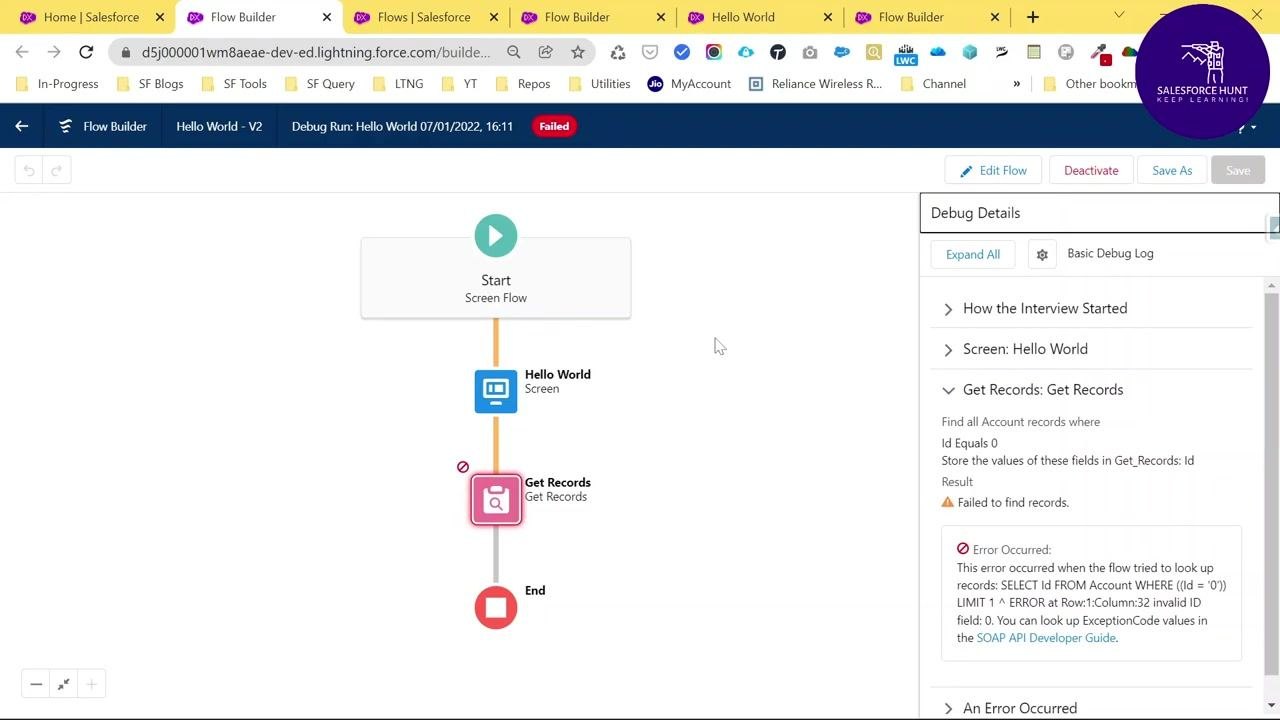
- The debug panel shows the exact query that failed, such as "Find all Account records where: Id Equals 0," with the result "Failed to find records." Additional error details identify the invalid ID field and reference the SOAP API Developer Guide. The error occurs because the query attempts to find an Account record where Id equals 0, which is not valid in Salesforce — the debug details specify the row and column of the error and confirm that the transaction was rolled back.
Troubleshoot flow errors using debug details and notifications
- When an unhandled fault occurs, the red error message appears on the flow screen, and the Debug Details panel on the right provides specifics about the failed step. For example, the "GET RECORDS" step fails because it attempted to find Account records where Id equals 0, which is invalid. The debug log shows the exact SOQL query, highlights the invalid ID field, and confirms the transaction was rolled back, meaning no changes were committed to the database.
-
Check your email for automatic error notifications sent from FlowApplication (info@salesforce.com). The email subject reads: "Error Occurred During Flow 'Hello World': This error occurred when the flow tried to look up records..." It includes a direct link to debug the failed interview in Flow Builder (with the interview GUID), details about the error element (Get_Records), the SOQL query that failed, a link to the SOAP API Developer Guide, and flow details such as API Name, Type, Version, Status, and Org.
-
Locate the debug link in the email, which reads: "Debug the failed interview in Flow Builder for the interview GUID: [GUID]." Clicking this link redirects you to the specific flow interview in Flow Builder so you can investigate the error directly.
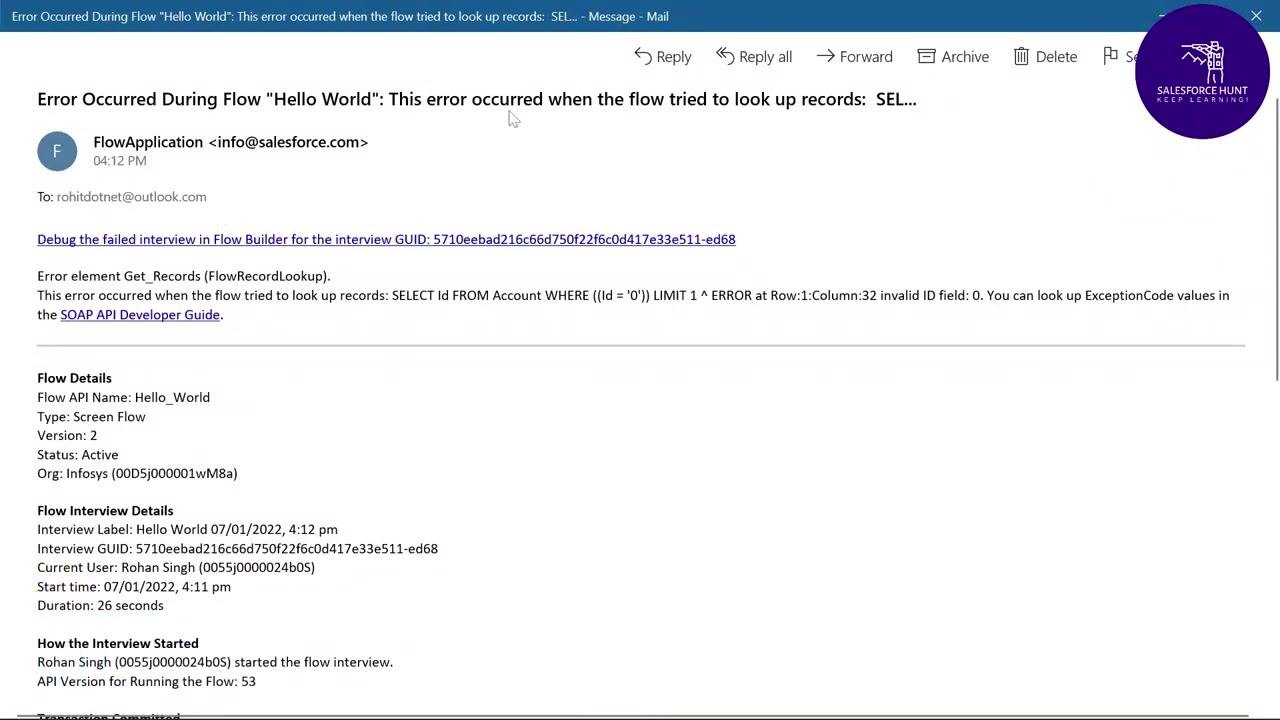
- Review the Flow Details and Flow Interview Details sections in the email. Flow Details may include the Flow API Name (Hello_World), Type (Screen Flow), Version, Status (Active), and Org. Flow Interview Details may include the Interview Label, Interview GUID, Current User, Start time, and Duration.
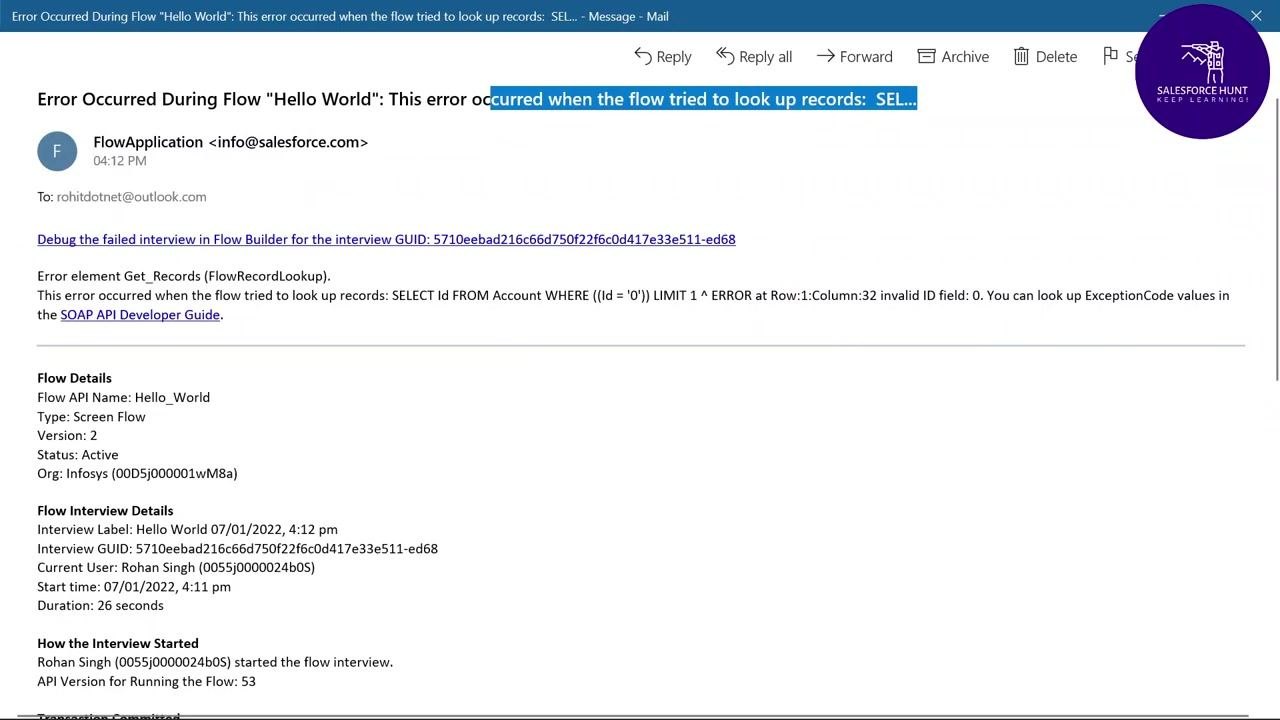
- Examine the remaining sections of the email: Transaction Committed confirms whether any records were created, updated, or deleted; SCREEN shows the screen name and display text; Selected Navigation Button indicates which button was pressed; GET RECORDS repeats the failed query and result; and the error message at the bottom details the invalid ID field with a reference to the SOAP API Developer Guide.
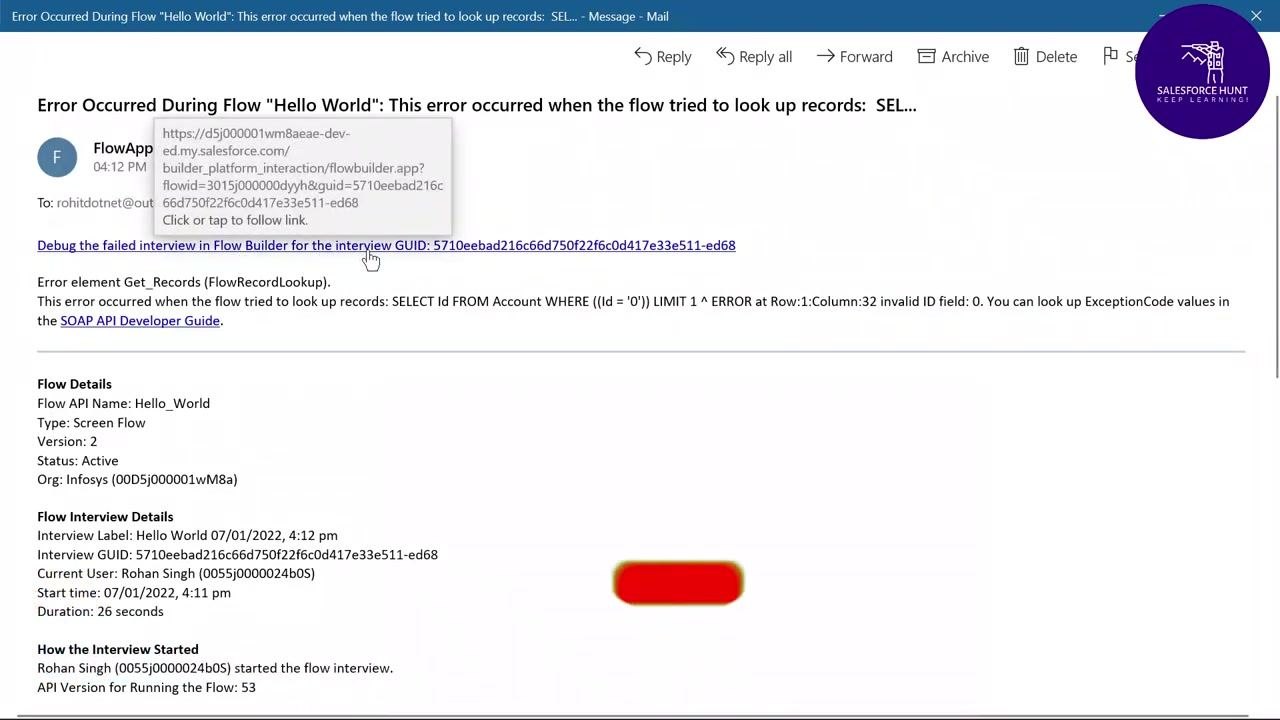
- Click the debug link in the email to open the failed flow interview directly in Flow Builder. The failed element is automatically highlighted in the flow diagram, and the Debug Details panel on the right shows the step-by-step execution, including where the error occurred.
Locate and debug failed flow interviews in Setup
- Click the Setup gear icon in the Salesforce navigation bar, then type
failin the Quick Find search box and select Paused And Failed Flow Interviews from the Process Automation section. The "All Failed Flow Interviews" list view appears, displaying failed flow runs with columns such as Interview Label, Flow API Name, Flow Version, Type, Last Modified By, Last Modified Date, Current Version, and Flow Interview Guid.
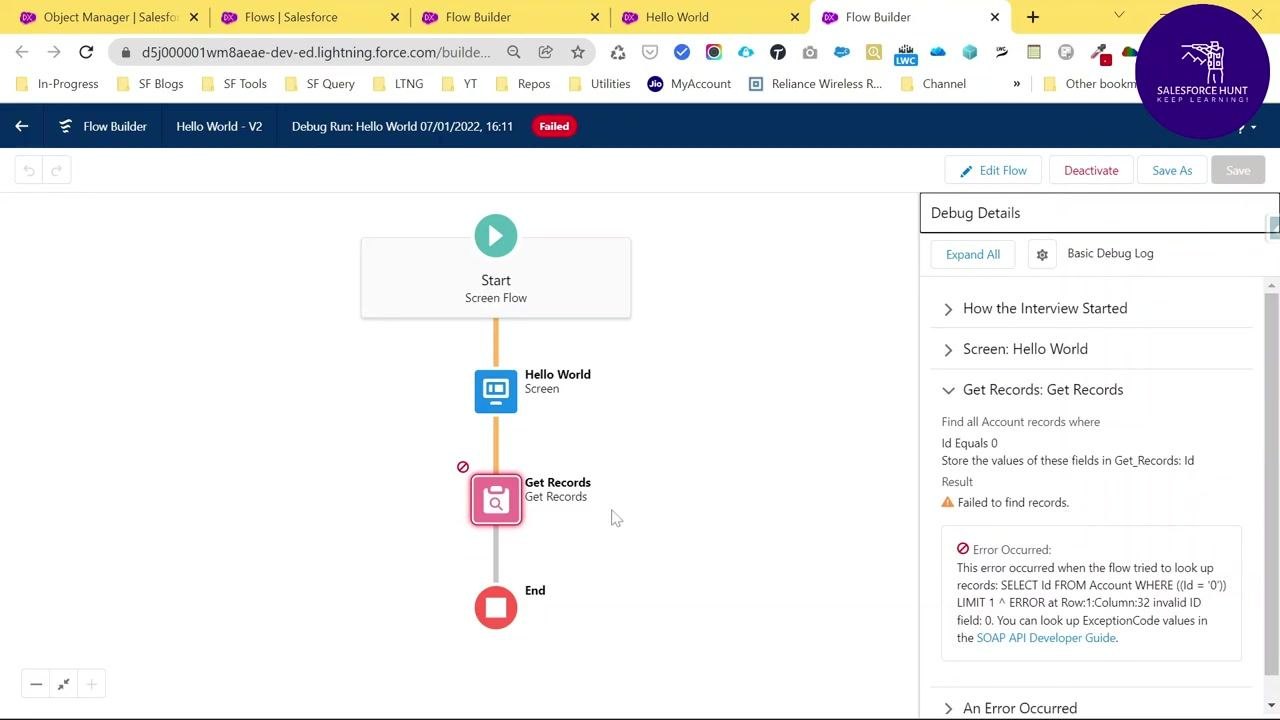
- Click the Interview Label link for the failed interview you want to investigate. Salesforce automatically redirects you to Flow Builder and opens the failed flow interview, with the failed element (for example "Get Records") highlighted in the flow diagram.
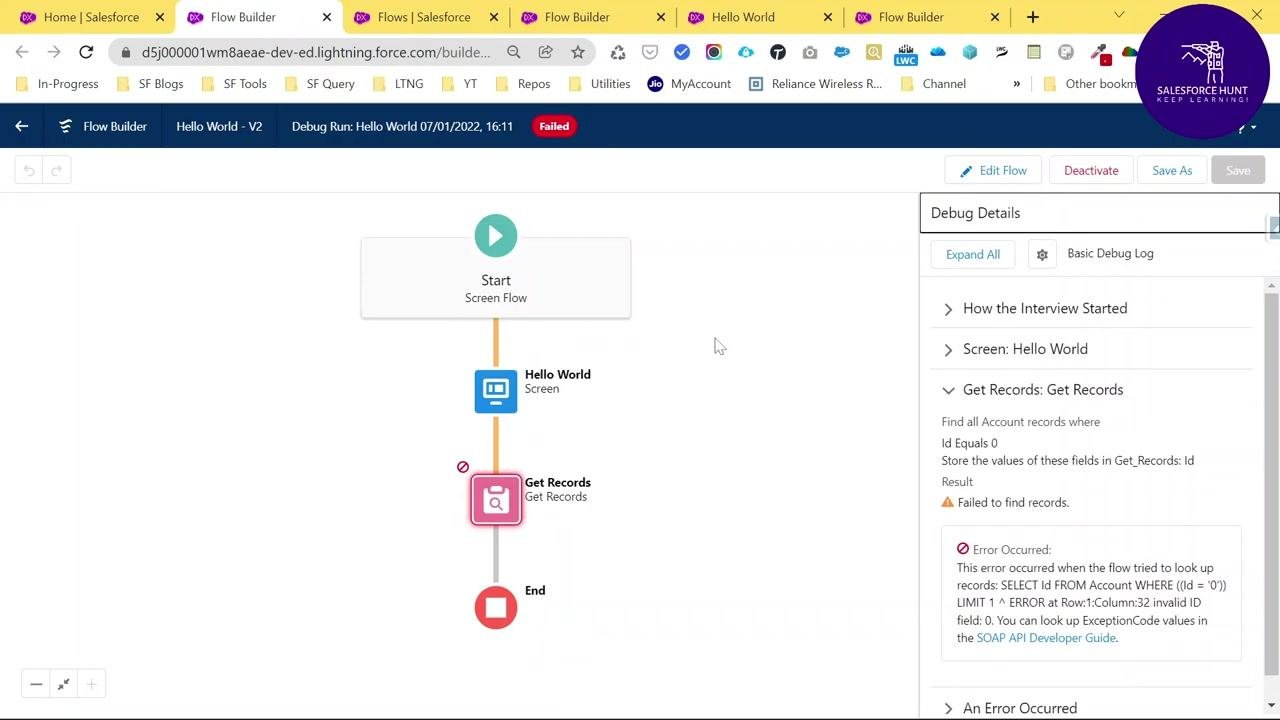
- Review the flow diagram sequence: Start (Screen Flow) → Hello World (Screen) → Get Records (Get Records) → End, with the "Get Records" element marked by an error icon. The Debug Details panel provides how the interview started, screen details, and the failed "Get Records" step, including the SOQL query ("SELECT Id FROM Account WHERE (Id = '0')"), the error message ("invalid ID field: 0"), and a link to the SOAP API Developer Guide. Use this information to identify and correct the cause of the flow failure.
What's next
Salesforce Flow is a declarative, point-and-click automation tool that lets admins and business users automate processes without writing code. Now that you know how to create a flow in Salesforce — from building a Screen Flow with Auto-Layout to adding a Get Records element and debugging errors — you can apply the same Flow Builder tools (Run, Debug, Activate, Save As) to build and troubleshoot other flow types, including Record-Triggered, Schedule-Triggered, Platform Event-Triggered, and Autolaunched flows.
Generation details: cost, quality tiers
Docsie billed 7,500 credits ($5.25) to analyze this 15-minute video at standard quality. The rewrite, template fill and Word/PDF exports were included. The same video at each quality tier:
| Quality | Frames sampled | Credits | Approx. cost |
|---|---|---|---|
| Draft | every 16-30 s | 3,750 | $2.62 |
| Standard (this guide) | every 8-15 s | 7,500 | $5.25 |
| Detailed | every 4-7 s | 15,000 | $10.50 |
| Ultra | every 1-3 s | 30,000 | $21.00 |
Credits priced at $0.70 per 1,000; plans include a monthly allowance. Enterprise customers on on-premise or bring-your-own-model deployments run this on their own inference and pay no per-video credits.
Generated by Docsie Video-to-Docs on 2026-10-01 from a 14-minute video. Screenshots are frames from the source video and belong to their creator, Salesforce Hunt, whose original is embedded above. If you own this video and want the guide removed or credited differently, contact us and we will act within one business day.