
How to Create a Custom Field in Salesforce
This guide shows you how to create a custom field in Salesforce, using two practical examples: a Text field and a Number field added to the Case object. You'll walk through the full process in Salesforce Setup — from selecting a field type to verifying the field on a live Case record.
Video: How to create custom fields in Salesforce lightning | adding new fields | Salesforce tutorial by Codekiat [Salesforce Tutorials]. All credit for the demonstration goes to the creator; watch the original on YouTube. The written guide below was generated from this video by Docsie. Creator? Request a change or removal.
This guide shows you how to create a custom field in Salesforce, using two practical examples: a Text field and a Number field added to the Case object. You'll walk through the full process in Salesforce Setup — from selecting a field type to verifying the field on a live Case record.
Prerequisites
Before you begin, make sure you have the following:
- A valid Salesforce login (username and password)
- Access to Setup and the Object Manager in your Salesforce organization
- Permission to modify the Case object and add new fields
Log in to Salesforce
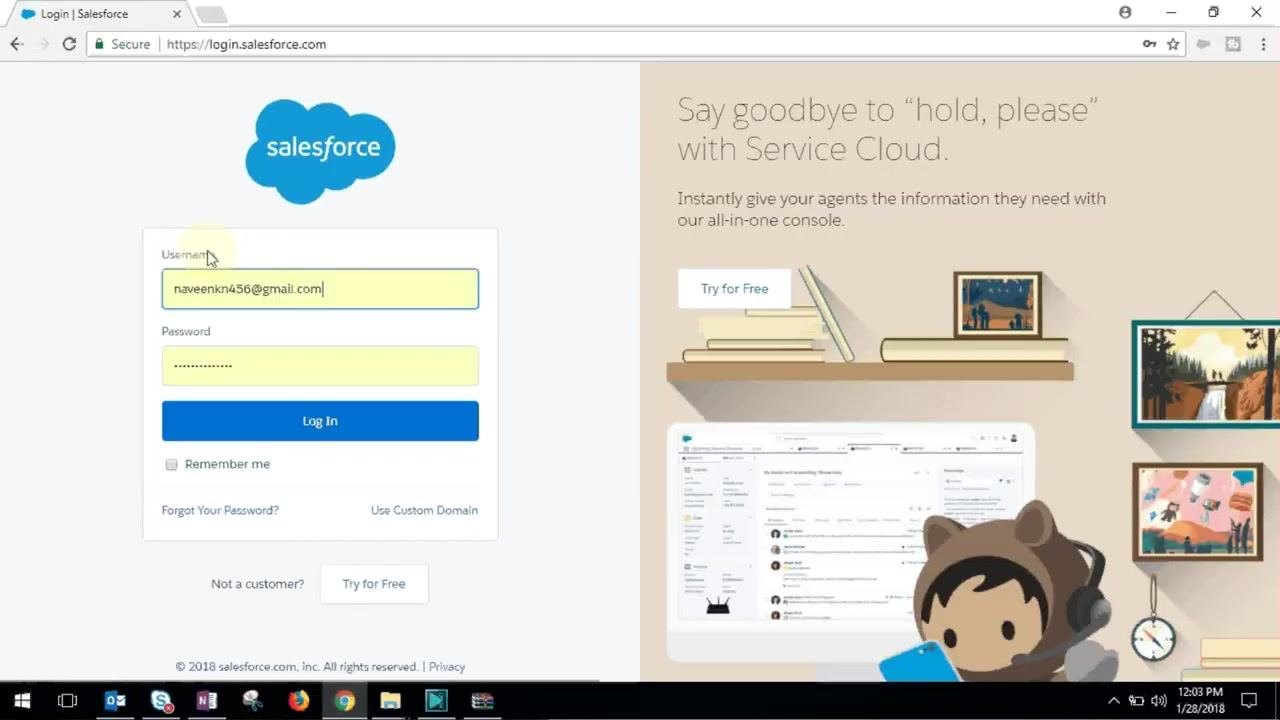
Go to https://login.salesforce.com, enter your username and password, and click the blue Log In button.
Open Salesforce Setup
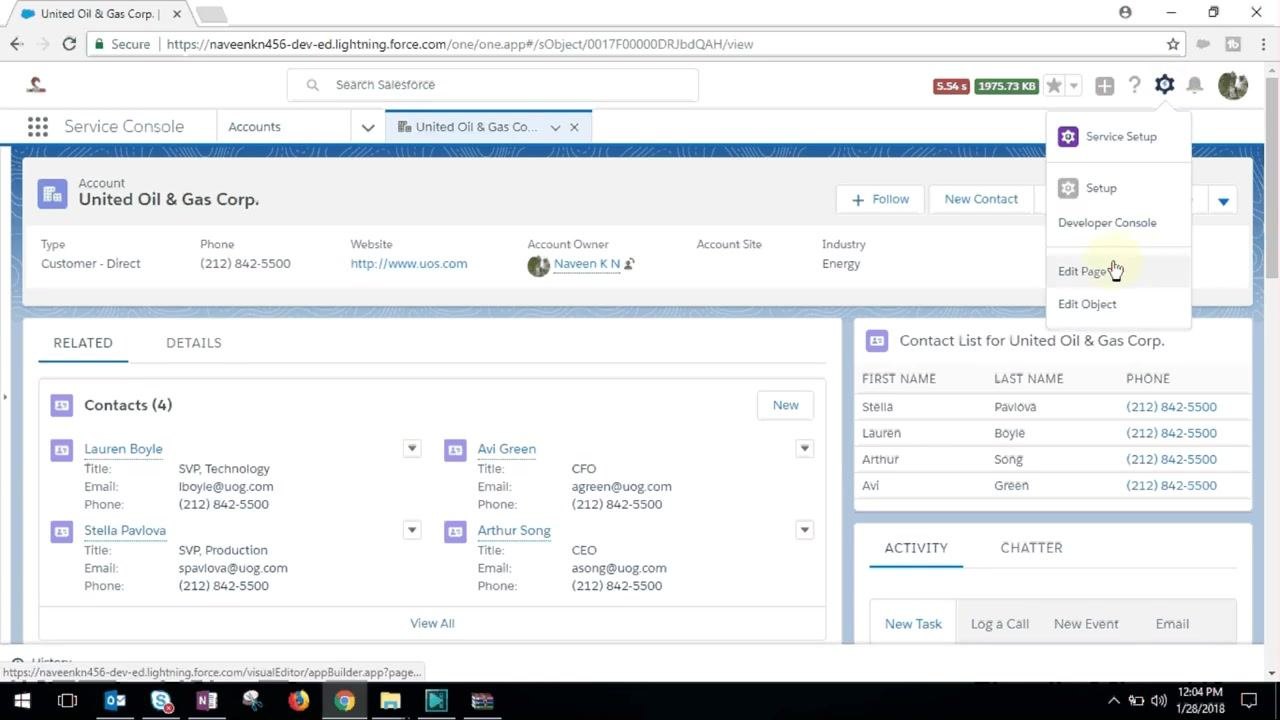
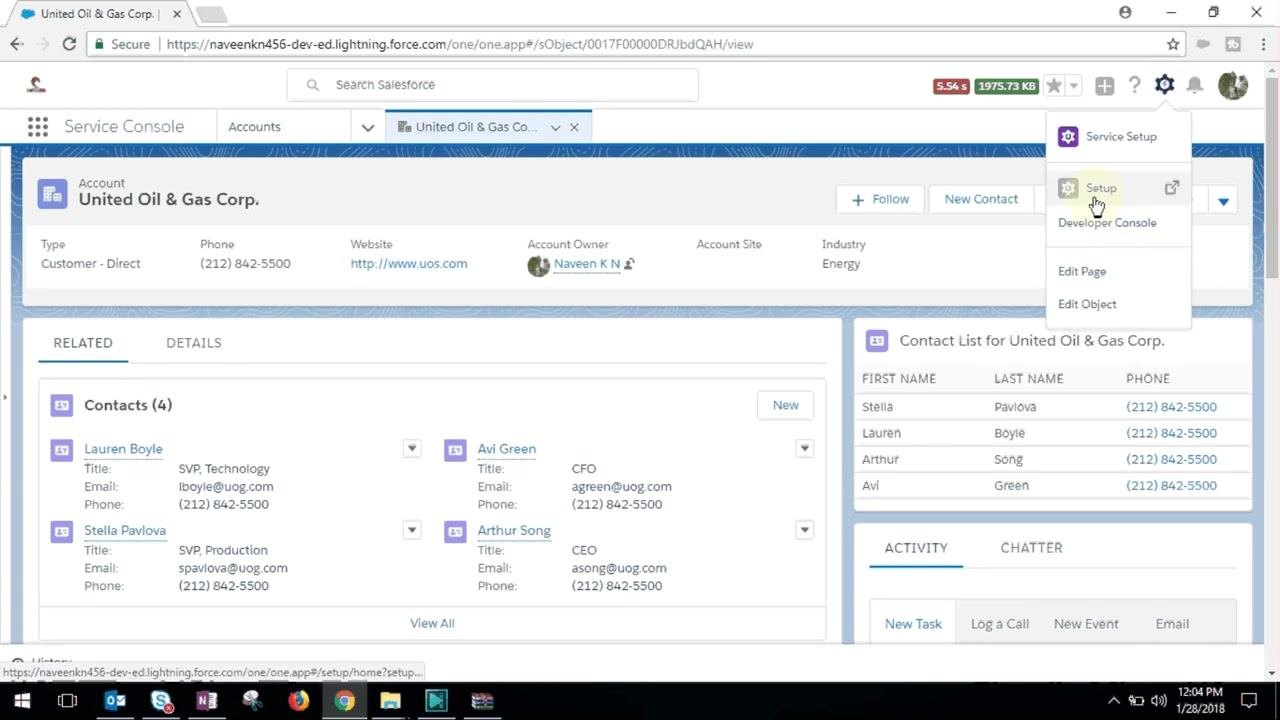
Once logged in, locate the gear icon in the upper right corner of the Salesforce interface. Click it to open the dropdown menu, then select Setup.
Navigate to Object Manager and select Case
In the Setup area, click Object Manager at the top of the page. In the Object Manager list, scroll down and select Case.
Open Fields & Relationships
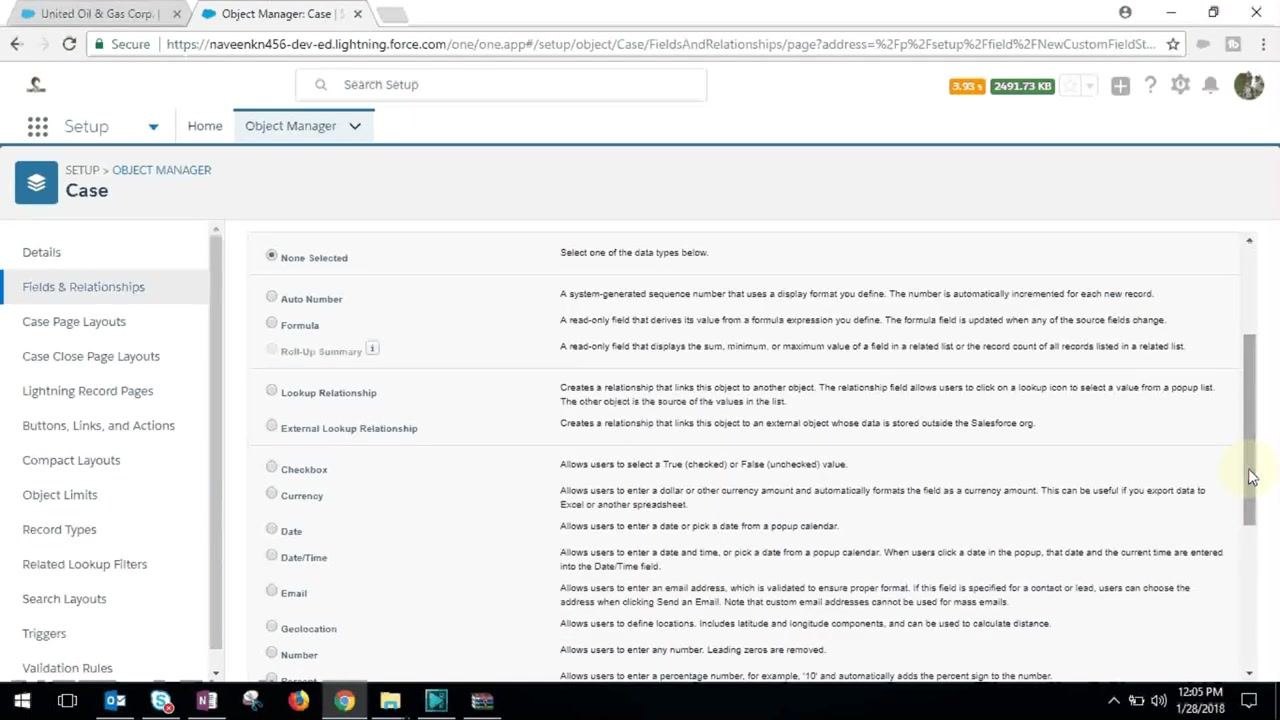
In the Case object setup, click Fields & Relationships in the left sidebar. Review the list of existing fields, then click the New button at the top right to start creating a new field.
Select the field type
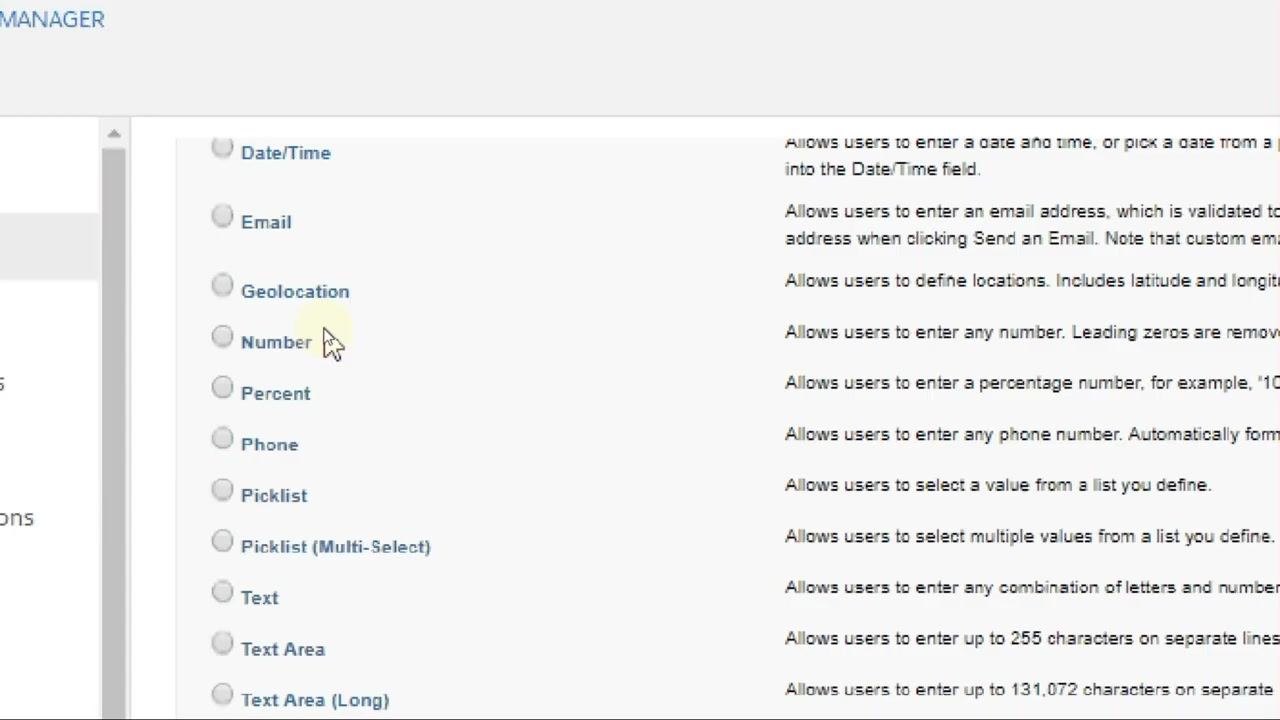
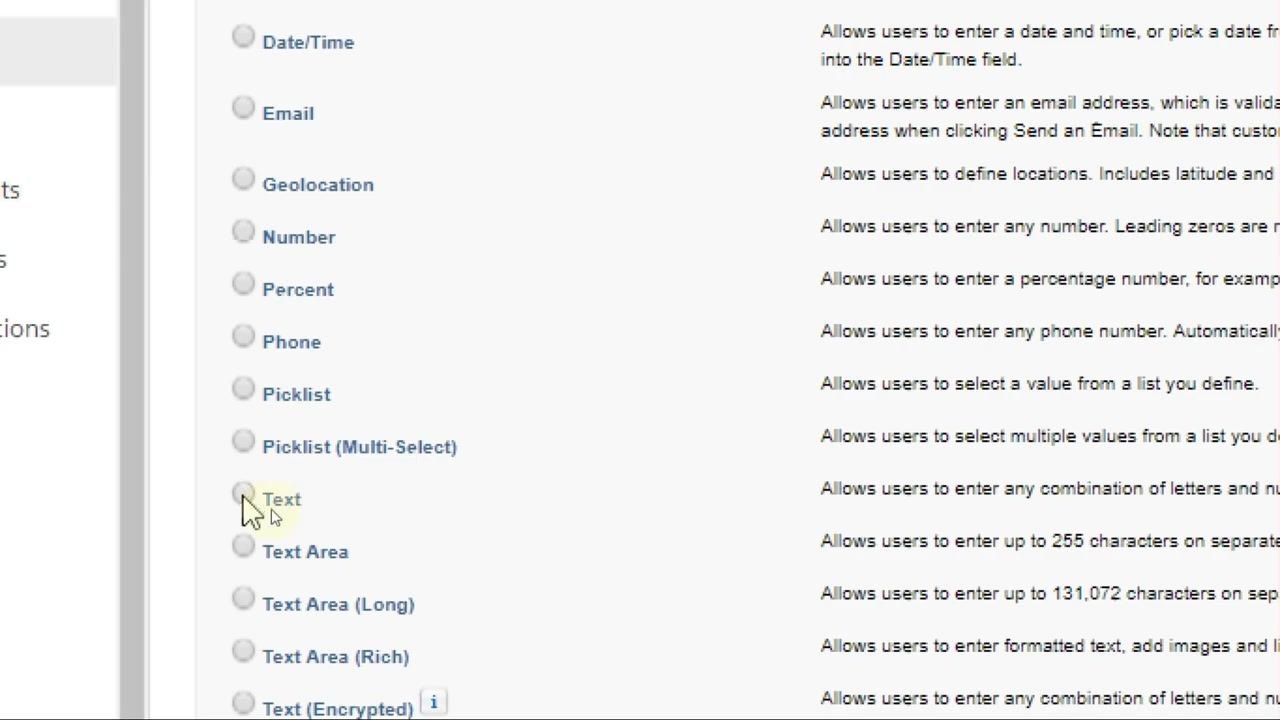
On the New Field screen, scroll down to view the available field types. For the first custom field, select Text by clicking its radio button. The description reads: "Allows users to enter any combination of letters and numbers."
Configure the Text field
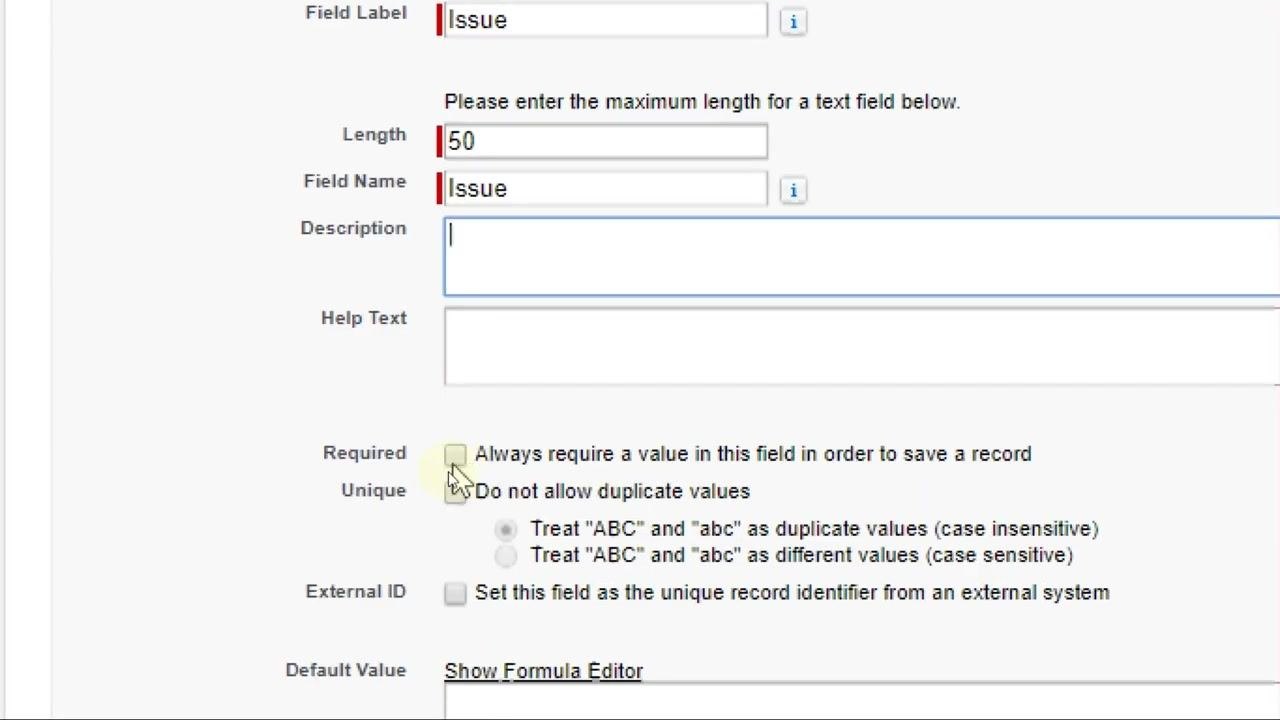
Under Step 2 of the New Custom Field screen, enter the field details:
- Field Label:
Issue - Length:
50 - Field Name: auto-populates as
Issue - Description and Help Text: leave blank (optional)
- Required: check Always require a value in this field in order to save a record only if you want to make the field mandatory; in this example, leave it unchecked
- Unique, External ID, and Default Value: leave as they are
Click the Next button at the top right or bottom right of the screen to continue.
Review field-level security
On the Establish field-level security screen, review the list of profiles. For this example, no changes are needed — leave all default selections as they are, then click Next to proceed.
Add the field to page layouts
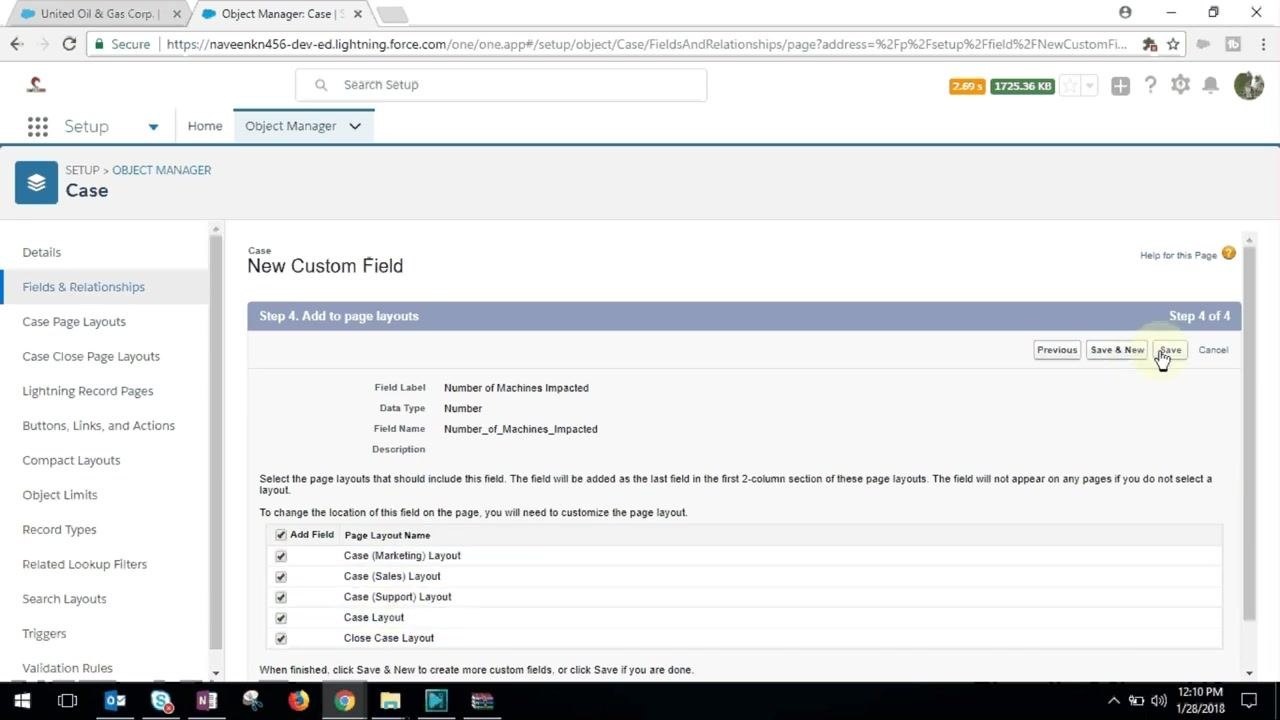
On the Add to page layouts screen, review the available layouts (for example, Case (Marketing) Layout, Case (Sales) Layout, Case (Support) Layout, Case Layout, and Close Case Layout). The new field is automatically added to all selected layouts.
Click Save & New to save the Text field and immediately begin creating the next custom field.
Select the Number field type
On the New Custom Field screen, select Number by clicking its radio button, then click Next to continue.
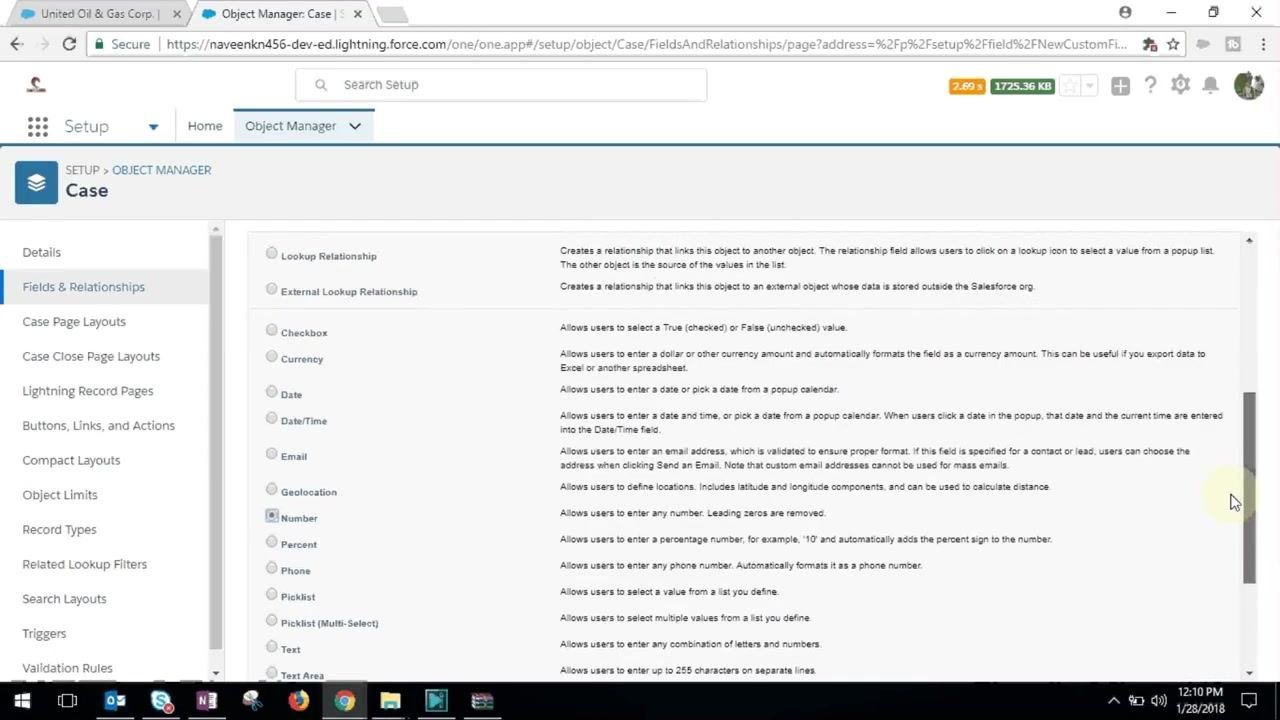
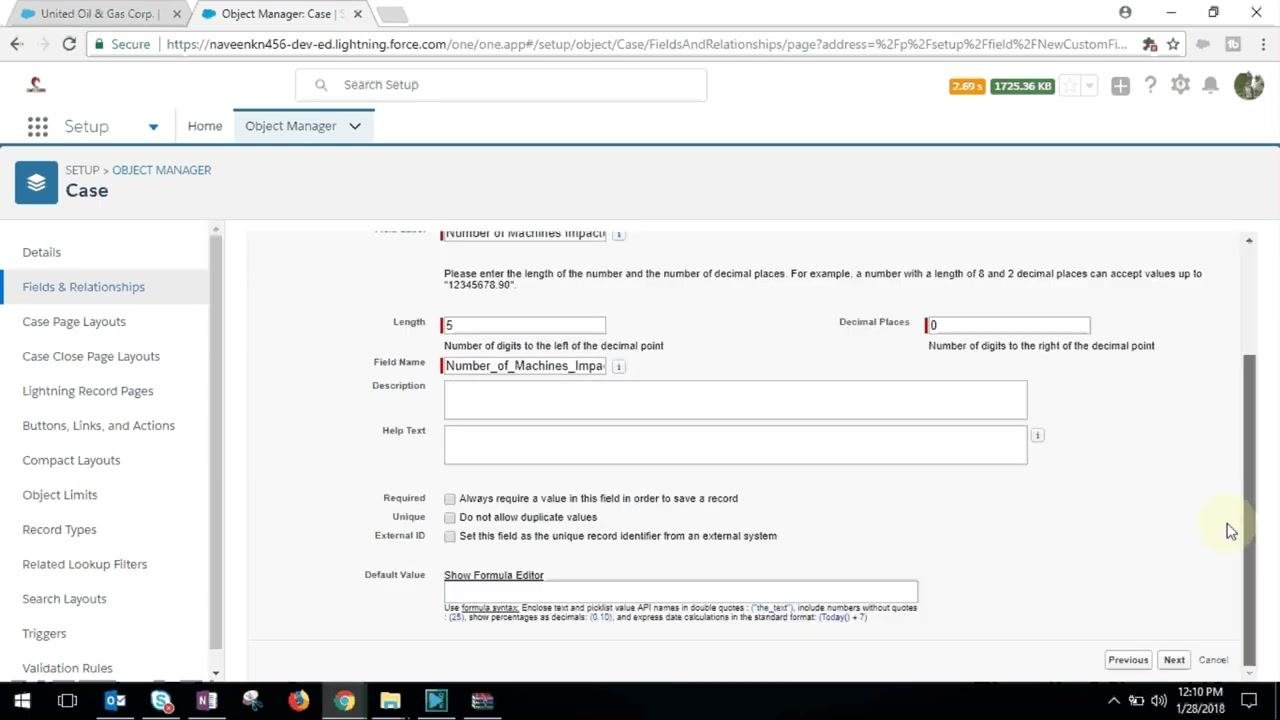
Configure the Number field
Under Step 2, enter the field details:
- Field Label:
Number of Machines Impacted - Length:
5 - Decimal Places:
0 - Field Name: auto-populates as
Number_of_Machines_Impacted - Description and Help Text: leave blank (optional)
- Required, Unique, and External ID: leave as they are
Click Next to continue.
Review field-level security for the Number field
On the Establish field-level security screen, review the list of profiles. As before, leave the default selections unchanged and click Next to proceed.
Finalize the Number field
On the Step 4. Add to page layouts screen, confirm the field will be added to all listed layouts (Case (Marketing) Layout, Case (Sales) Layout, Case (Support) Layout, Case Layout, Close Case Layout). Click Save to complete the creation of the field.
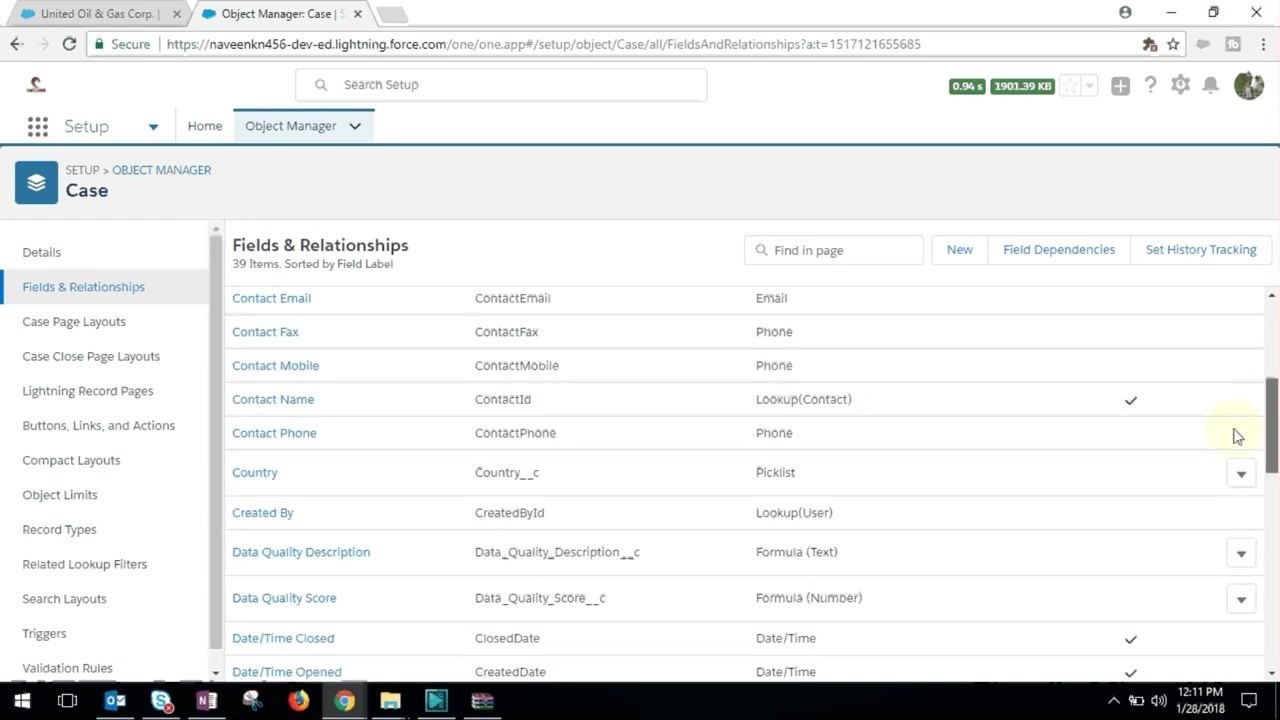
Verify both custom fields on the Case object
After saving, you're redirected to the Fields & Relationships list for the Case object. Confirm that both new fields appear in the list:
- Issue appears as a Text(50) field
- Number of Machines Impacted appears as a Number field
Scroll through the list to double-check that both fields are visible and correctly configured.
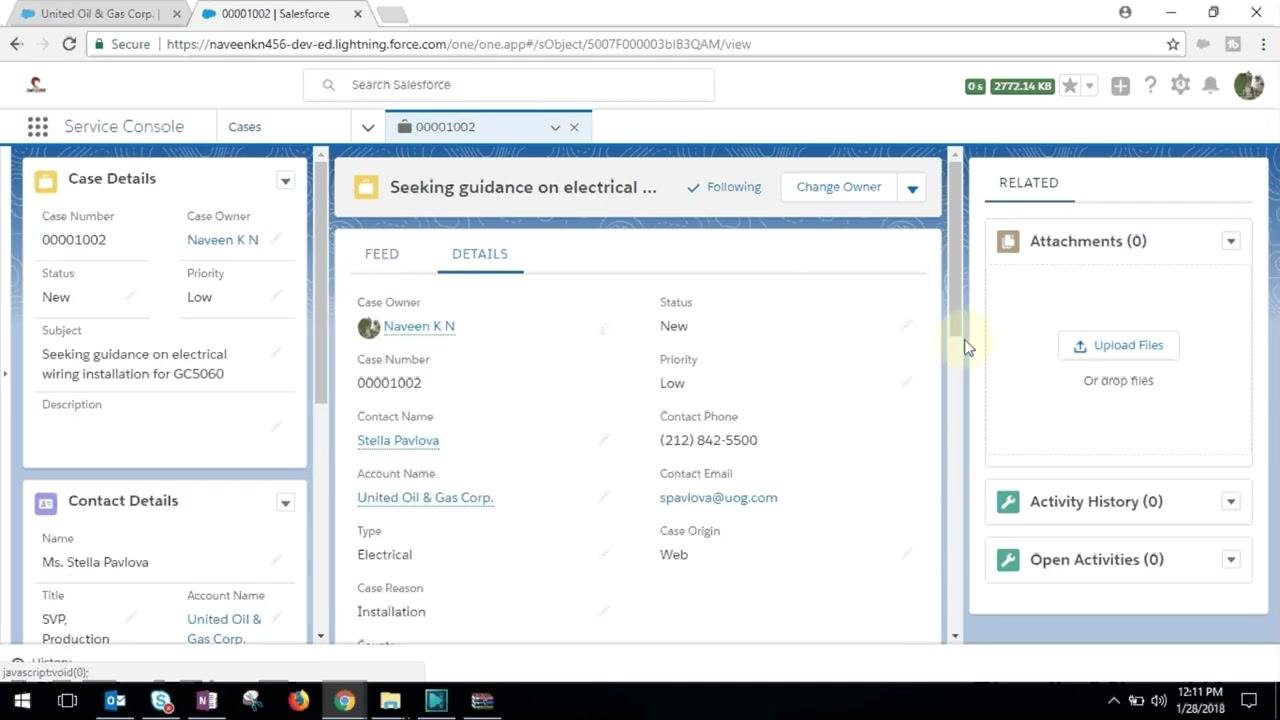
Verify the fields on a Case record
Return to the Service Console to confirm the fields appear on an actual Case record.
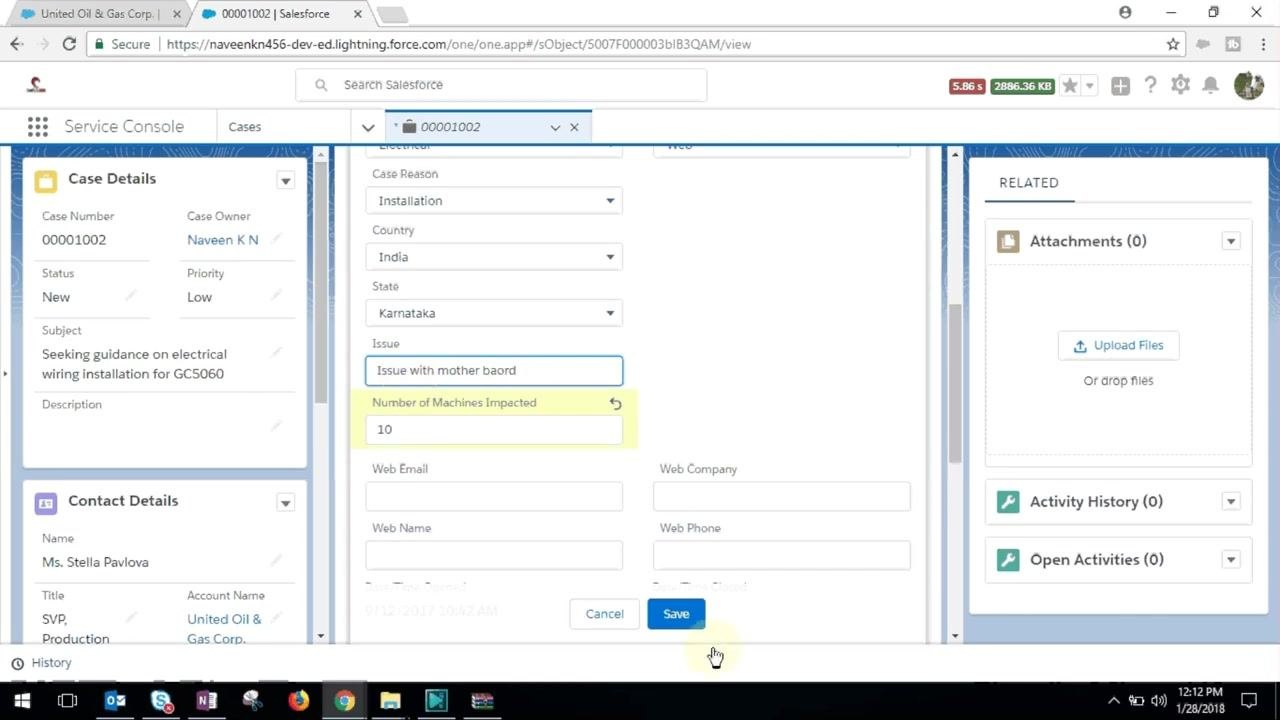
Open a Case record and go to the Details tab. Confirm that both Issue and Number of Machines Impacted are visible in the details section.
Test data entry
Enter a value in the Issue field (for example, "Issue with mother board") and a value in the Number of Machines Impacted field (for example, "10"). Click Save to save the record.
Confirm the saved data
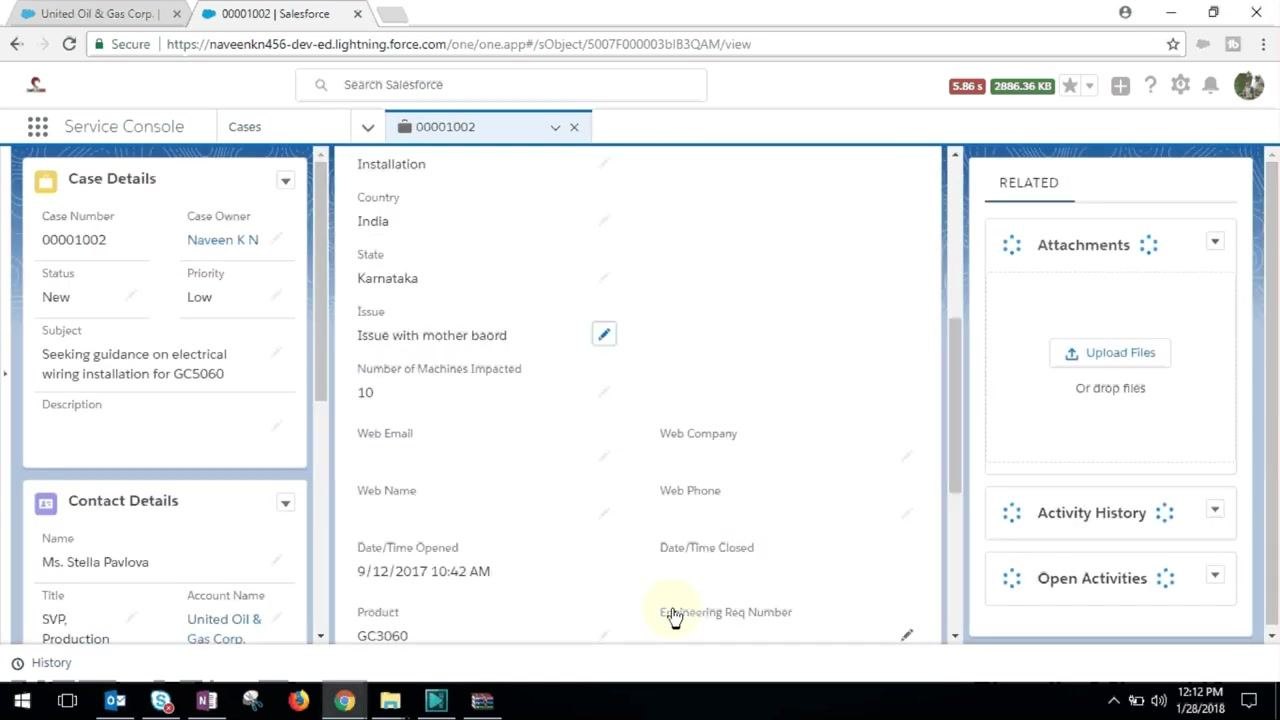
After saving, verify that the values you entered for Issue and Number of Machines Impacted display correctly in the Case details.
Summary
You have now created and verified two custom fields — a Text field and a Number field — on the Salesforce Case object, from field creation through page layout assignment and live data entry.
What's next
If you have further questions about creating custom fields, refer to the Salesforce documentation for details on field types, validation rules, and page layout options.
Generation details: cost, quality tiers
Docsie billed 2,500 credits ($1.75) to analyze this 5-minute video at standard quality. The rewrite, template fill and Word/PDF exports were included. The same video at each quality tier:
| Quality | Frames sampled | Credits | Approx. cost |
|---|---|---|---|
| Draft | every 16-30 s | 1,250 | $0.88 |
| Standard (this guide) | every 8-15 s | 2,500 | $1.75 |
| Detailed | every 4-7 s | 5,000 | $3.50 |
| Ultra | every 1-3 s | 10,000 | $7.00 |
Credits priced at $0.70 per 1,000; plans include a monthly allowance. Enterprise customers on on-premise or bring-your-own-model deployments run this on their own inference and pay no per-video credits.
Generated by Docsie Video-to-Docs on 2026-10-01 from a 4-minute video. Screenshots are frames from the source video and belong to their creator, Codekiat [Salesforce Tutorials], whose original is embedded above. If you own this video and want the guide removed or credited differently, contact us and we will act within one business day.