
How to Schedule a Query in PeopleSoft
This guide explains how to schedule a query in PeopleSoft. Use a scheduled query when your result set is too large for Query Viewer or Query Manager, or when you want to run a query in the future or on a recurring basis. Scheduled queries suit large data sets and automated query execution. You can start from the Schedule Query page or from Query Viewer, then monitor the run and download the output file.
Video: CSUSB PeopleSoft CS 9.2 Tutorial - Scheduling Queries by bgateb (2020). All credit for the demonstration goes to the creator; watch the original on YouTube. The written guide below was generated from this video by Docsie. Creator? Request a change or removal.
This guide explains how to schedule a query in PeopleSoft. Use a scheduled query when your result set is too large for Query Viewer or Query Manager, or when you want to run a query in the future or on a recurring basis. Scheduled queries suit large data sets and automated query execution. You can start from the Schedule Query page or from Query Viewer, then monitor the run and download the output file.
Prerequisites
You need access to the Schedule Query feature. If you do not have access, open a support ticket with ACBI through the ITS website. You can also visit the ITS Support page for assistance.

Schedule a query from the Schedule Query page
Open Schedule Query
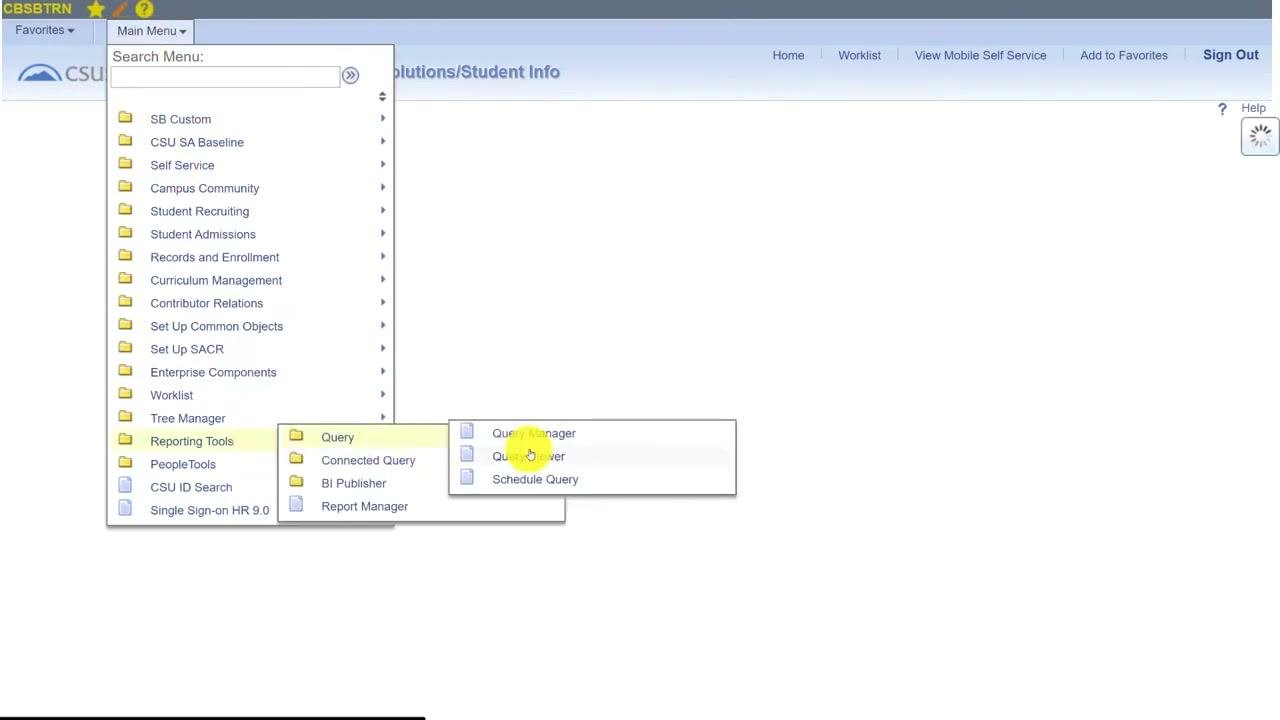
- From the main menu, go to Reporting Tools.
- Hover over Query.
- Select Schedule Query from the submenu.
Create a new Run Control ID
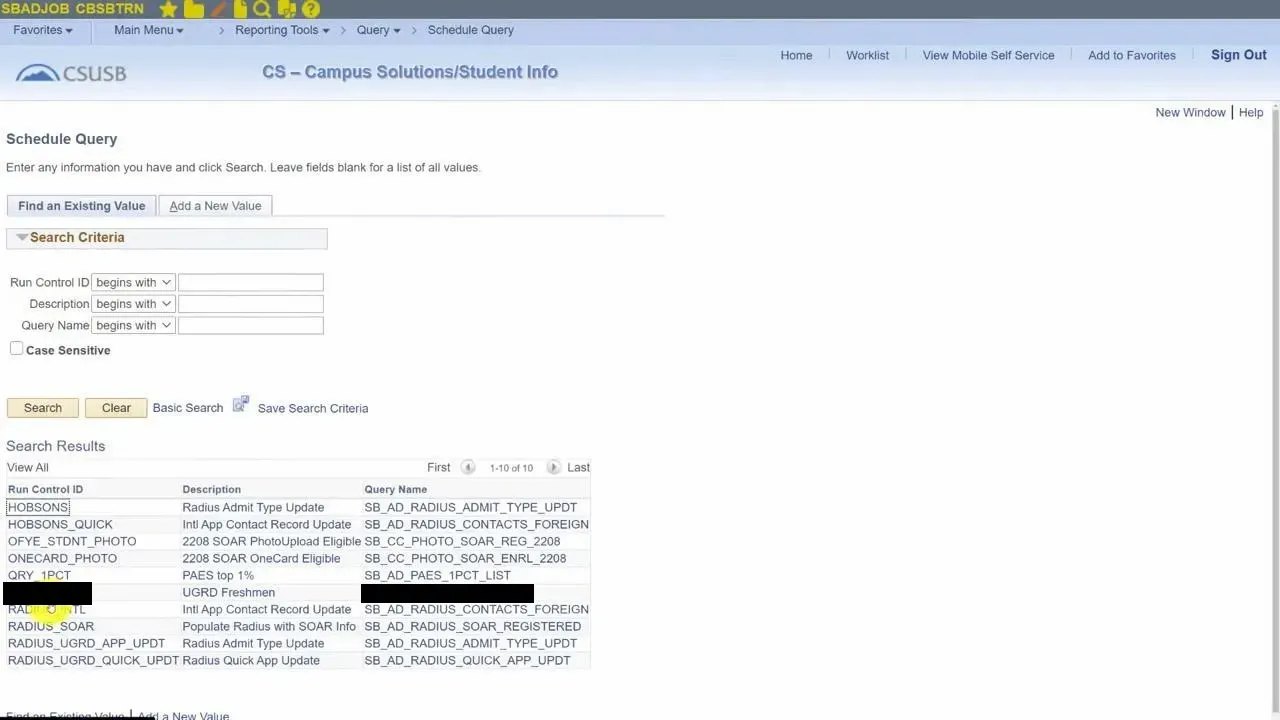
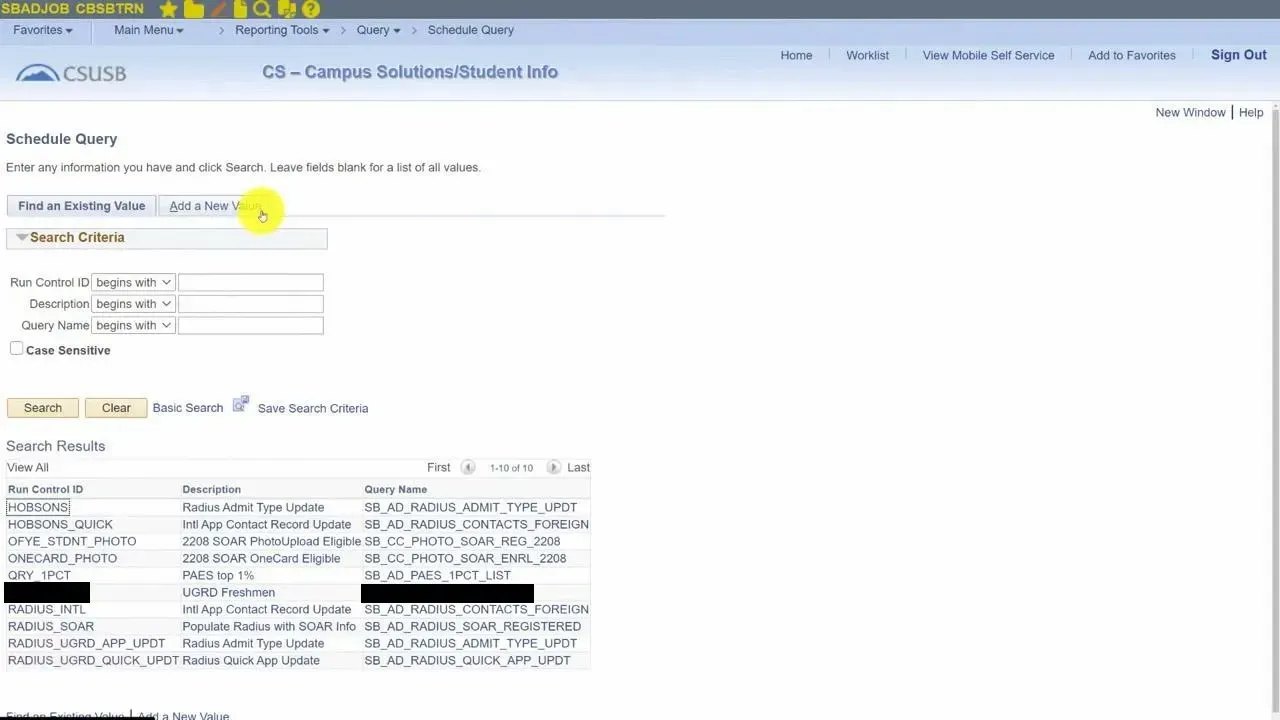
The Schedule Query page has two tabs: Find an Existing Value and Add a New Value. To reuse an existing Run Control ID, search on the Find an Existing Value tab. To create a new one, follow these steps:
- Click the Add a New Value tab.
- Type a unique name for your Run Control ID in the field.
- Click Add.
Enter the query name
- In the Query Name field, type the name of the query you want to schedule, for example
SB_AD_FTF_APPS%. - Click the Search button next to the field.
Select the query from the search results
Review the list of queries that match your search. Click the name of the query you want to schedule.
Enter prompt values
If your query requires prompts, a pop-up window appears.
- Type your prompt values in the fields. For example, enter
Admit Term = 2208. - Click OK to confirm your entries and close the prompt window.
Review and edit prompts
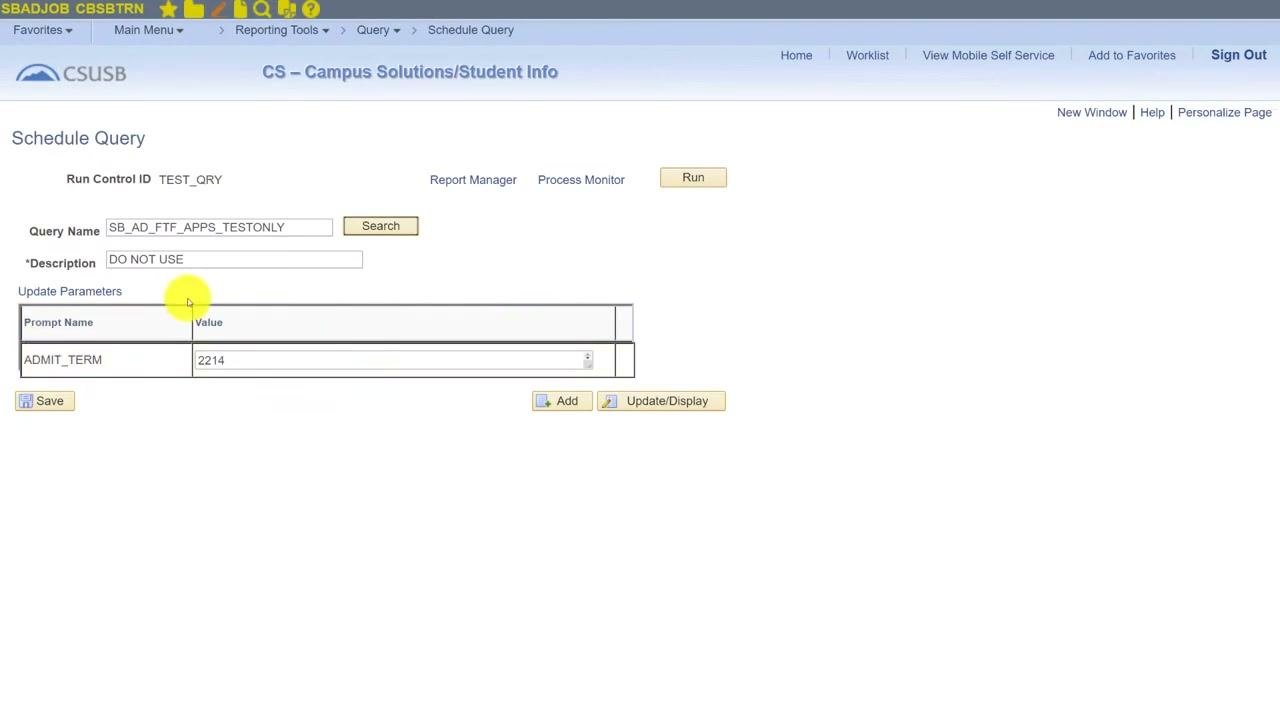
After you enter prompt values, you return to the Run Control setup screen. You can edit a prompt value directly in its value box. For example, change ADMIT_TERM to 2214.
Alternatively, click the Update Parameters link to reopen the prompt dialog box and make further changes.
Finalize the query and prompts
- Confirm that the query name (for example,
SB_AD_FTF_APPS_TESTONLY) and the prompt values are correct. - Click Run to continue to the Process Scheduler.
Schedule a query from Query Viewer
You can also schedule a query directly from Query Viewer.
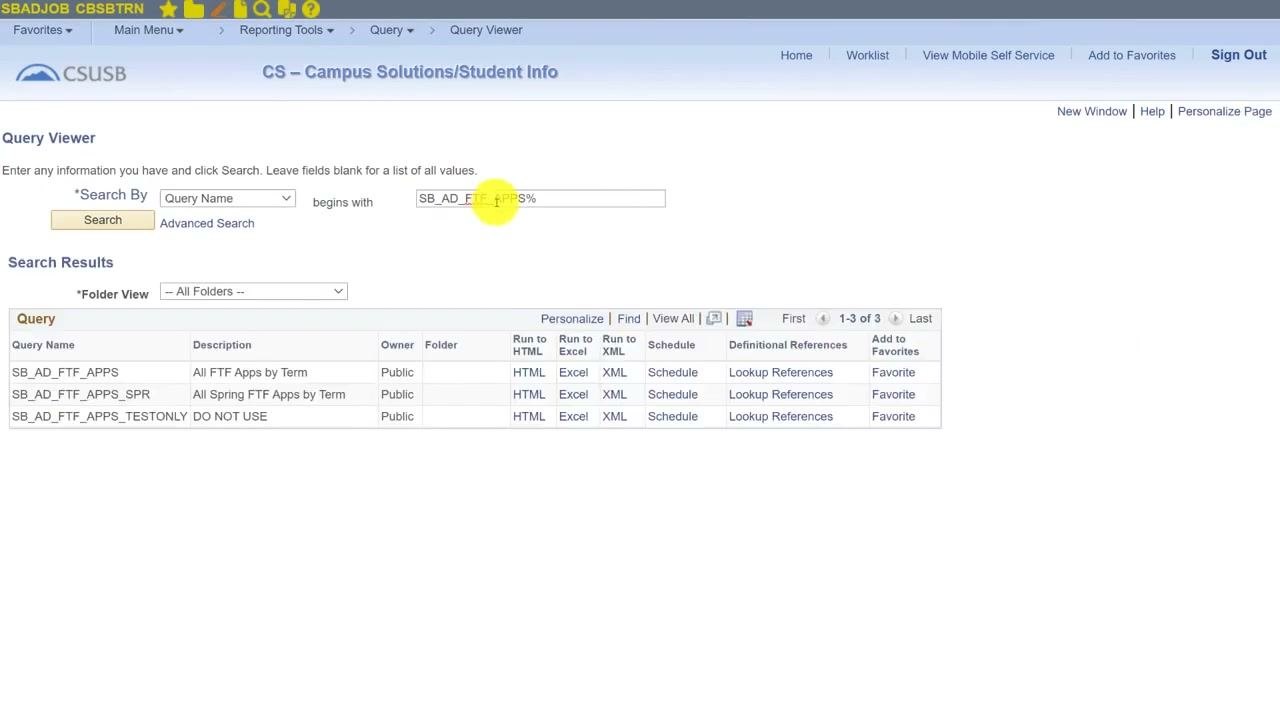
Find the query in Query Viewer
- From the main menu, go to Reporting Tools > Query > Query Viewer.
- Enter the query name, for example
SB_AD_FTF_APPS%, and click Search. - In the search results, find your query and click the Schedule link in the Schedule column.
Set up or reuse a run control
On the Scheduled Query screen, choose one of these options:
- Click the Add a New Value tab and enter a unique Run Control ID to create a new run control.
- Use the Find an Existing Value tab to search for and select a previously created run control.
To search for an existing run control, enter criteria such as Private Query, Query Name (for example, SB_AD_FTF_APPS_TESTONLY), and Run Control ID (for example, TEST_QRY). Then click Search.
Confirm prompt values
- On the Schedule Query setup screen, verify the Run Control ID (for example,
TEST_QRY), the Query Name (for example,SB_AD_FTF_APPS_TESTONLY), and the Description. - Enter or confirm the required prompt values, for example
ADMIT_TERM = 2214. - Click OK to continue.
Set the schedule and monitor the query
Configure Process Scheduler options
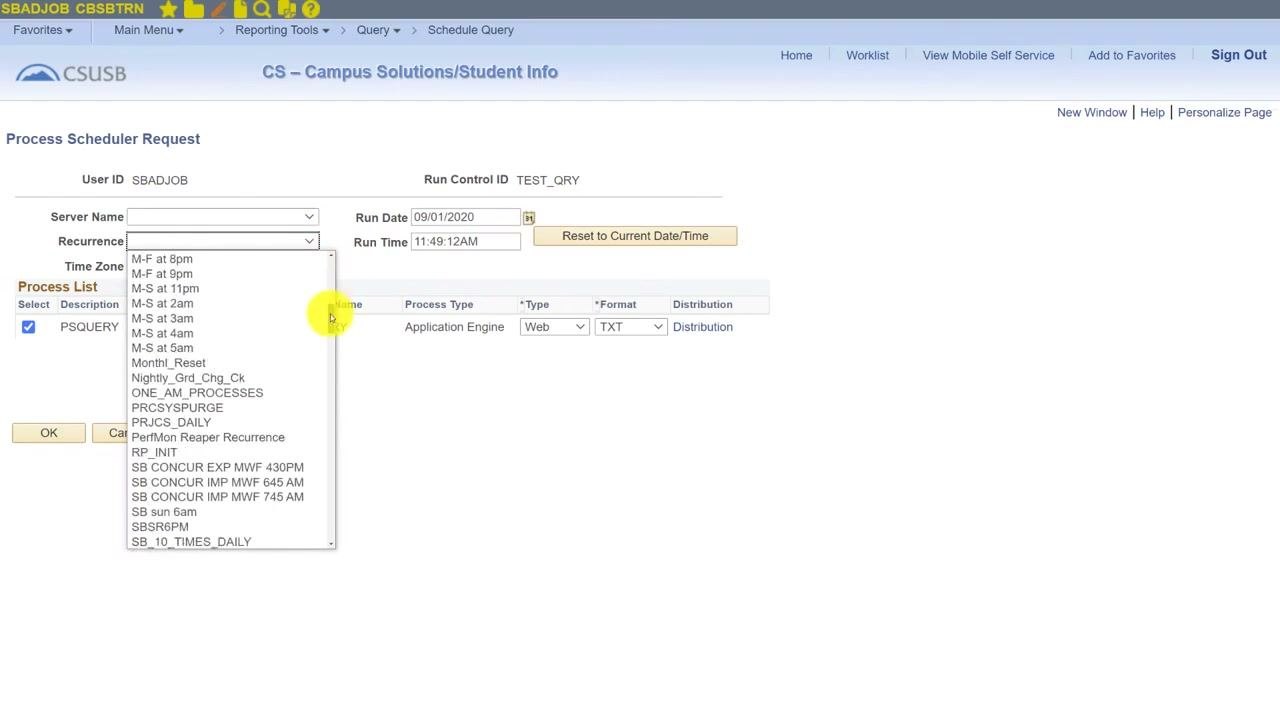
On the Process Scheduler Request screen, you can set when and how the query runs:
- Select a Recurrence from the dropdown, for example "M-F at 8pm" or "SB_DAILY_6AM".
- Enter a Run Date (for example,
09/01/2020) and a Run Time (for example,11:49:12AM) to schedule the query for the future. - Choose the output Format, for example
TXT,PDF,XLS, orXML.
Select the process in the Process List (for example, PSQUERY), then click OK to start the query.
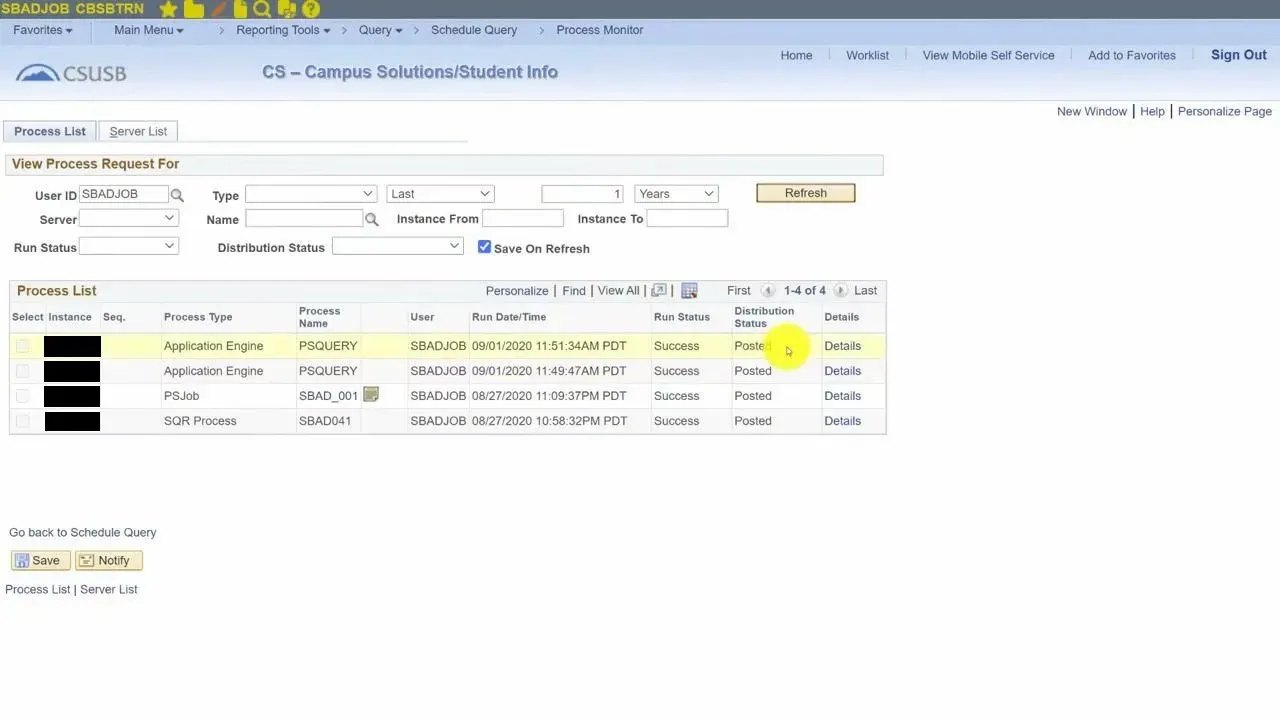
Track the query in Process Monitor
After you start the query, you return to the Run Control setup screen.
- Click Process Monitor to track the status of your scheduled query.
- Locate your process instance, for example
4870432. - Click Refresh to update the status. Wait until Run Status shows
Successand Distribution Status showsPosted. - Click Details next to your process instance to view log and trace files.
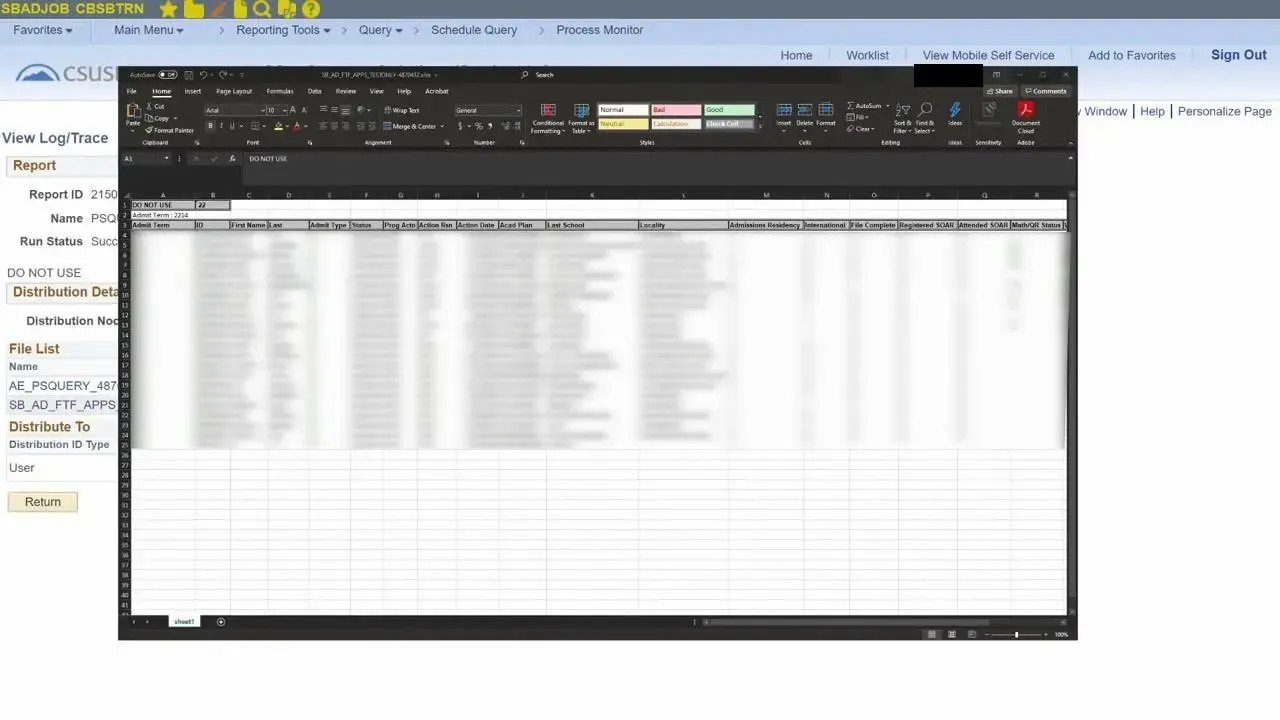
Download the query output file
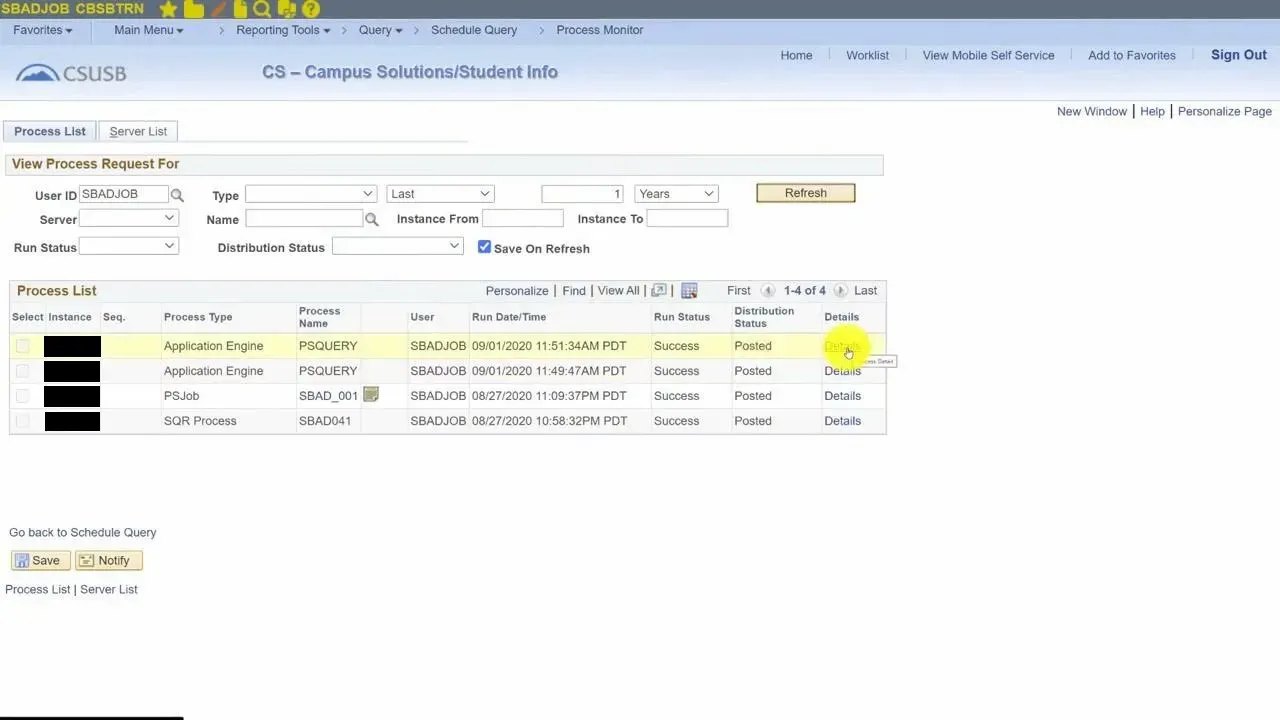
When the status shows Success and Posted, find your process instance in the Process List.
- Click the Details link next to your process instance.
- In Distribution Details, find your output file, for example
SB_AD_FTF_APPS_TESTONLY_4870432.XLS. - Click the file name to download your results.
Open and review the file
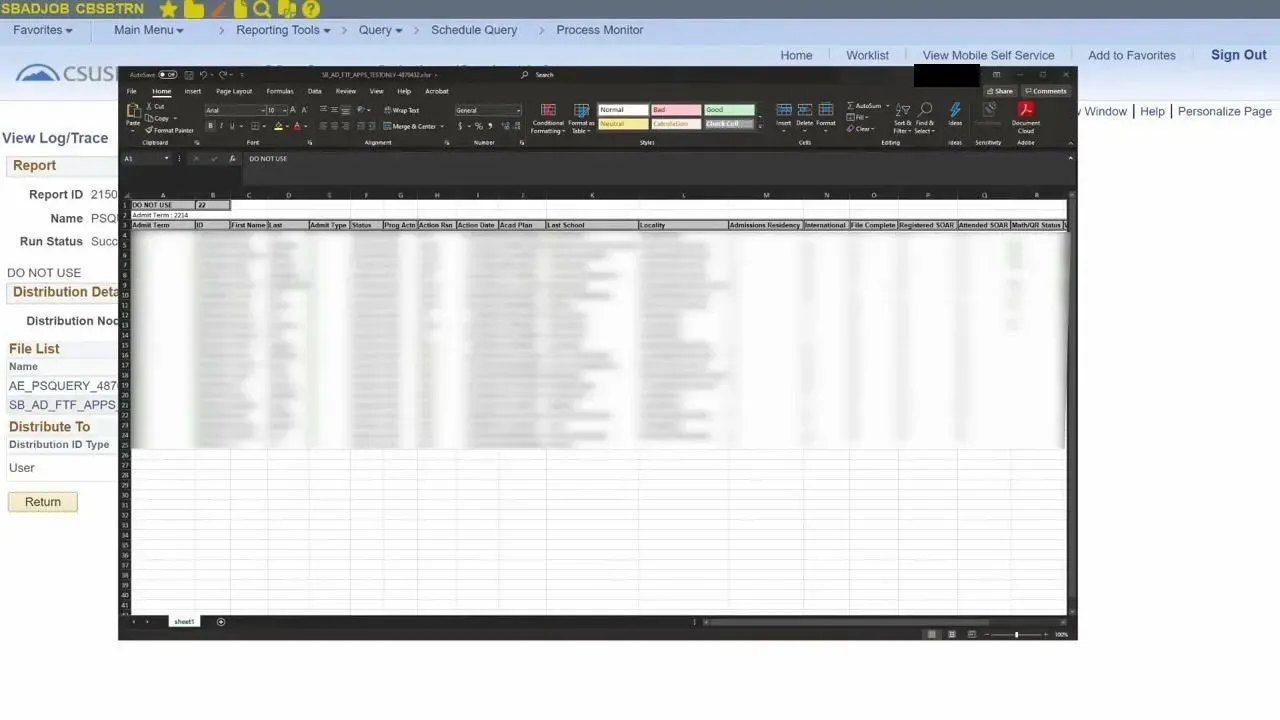
Open the downloaded file, for example an Excel spreadsheet, to review your results. Verify that the data matches your expectations, including columns such as Admit Term, ID, First Name, Last Name, Status, and other relevant fields.
Summary
You now know how to schedule a query in PeopleSoft from either Schedule Query or Query Viewer. You can create or reuse a run control, enter prompt values, set a recurrence or future run time, and choose an output format. You can then monitor the process in Process Monitor and download the results. Your data is processed and available in your preferred format and on your desired schedule.
Generation details: cost, quality tiers
Docsie billed 2,500 credits ($1.75) to analyze this 5-minute video at standard quality. The rewrite, template fill and Word/PDF exports were included. The same video at each quality tier:
| Quality | Frames sampled | Credits | Approx. cost |
|---|---|---|---|
| Draft | every 16-30 s | 1,250 | $0.88 |
| Standard (this guide) | every 8-15 s | 2,500 | $1.75 |
| Detailed | every 4-7 s | 5,000 | $3.50 |
| Ultra | every 1-3 s | 10,000 | $7.00 |
Credits priced at $0.70 per 1,000; plans include a monthly allowance. Enterprise customers on on-premise or bring-your-own-model deployments run this on their own inference and pay no per-video credits.
Generated by Docsie Video-to-Docs on 2026-11-15 from a 4-minute video. Screenshots are frames from the source video and belong to their creator, bgateb, whose original is embedded above. If you own this video and want the guide removed or credited differently, contact us and we will act within one business day.