
How to Create a Component Interface in PeopleSoft
A component interface lets you expose a PeopleSoft component's fields, records, and collections so that they can be accessed and manipulated by external applications or integrations. This guide walks through how to create a component interface in PeopleSoft, from opening Application Designer to exposing additional fields and saving your work.
Video: Creating a New Component Interface by Derek Tomei. All credit for the demonstration goes to the creator; watch the original on YouTube. The written guide below was generated from this video by Docsie. Creator? Request a change or removal.
A component interface lets you expose a PeopleSoft component's fields, records, and collections so that they can be accessed and manipulated by external applications or integrations. This guide walks through how to create a component interface in PeopleSoft, from opening Application Designer to exposing additional fields and saving your work.
Prerequisites
- Access to the PeopleSoft Application Designer environment.
- Knowledge of the name of the source component you want to base the interface on (for example,
USERMAINT).
Open Application Designer
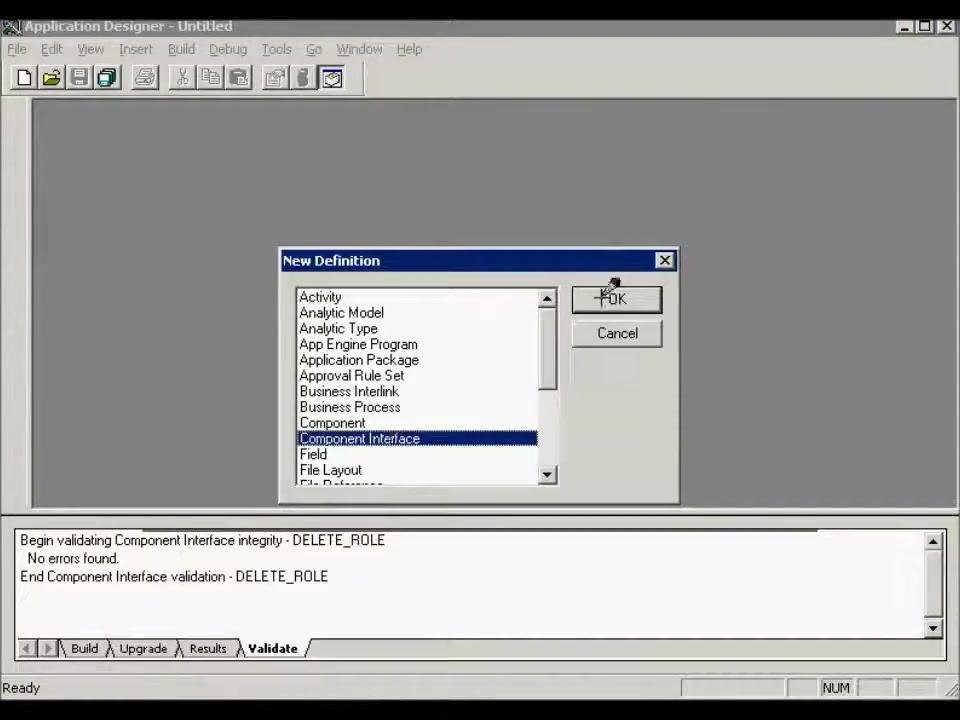
Make sure you are working within the Application Designer environment. The main window should display a blank workspace with toolbars and menus along the top, and the status bar at the bottom should read "Ready".
Start a new component interface definition
From the File menu, click New, or click the New icon (a blank page) on the toolbar. In the New Definition dialog, select Component Interface from the list of available definition types, then click OK to proceed.
Select the source component
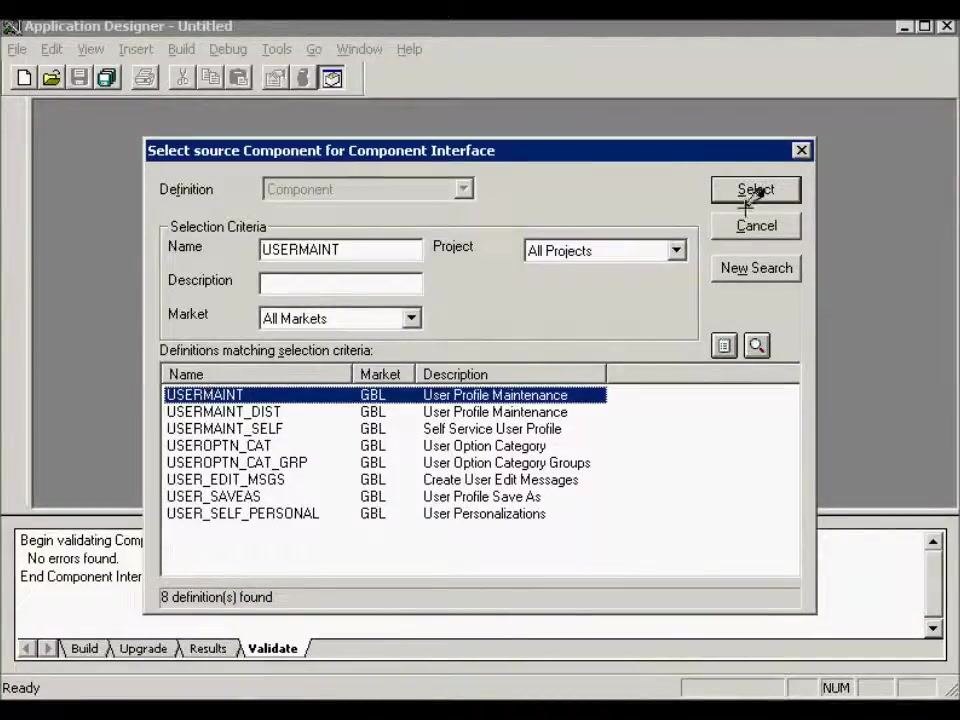
In the Select source Component for Component Interface dialog, enter the name of the component you want to base the interface on. For this example, enter USERMAINT in the Name field.
Make sure All Projects is selected for Project and All Markets is selected for Market. From the list of matching definitions, select USERMAINT (User Profile Maintenance), then click Select to continue.
When prompted, choose Yes to default the properties based on the component definition. This brings over the default keys and properties from the selected component.
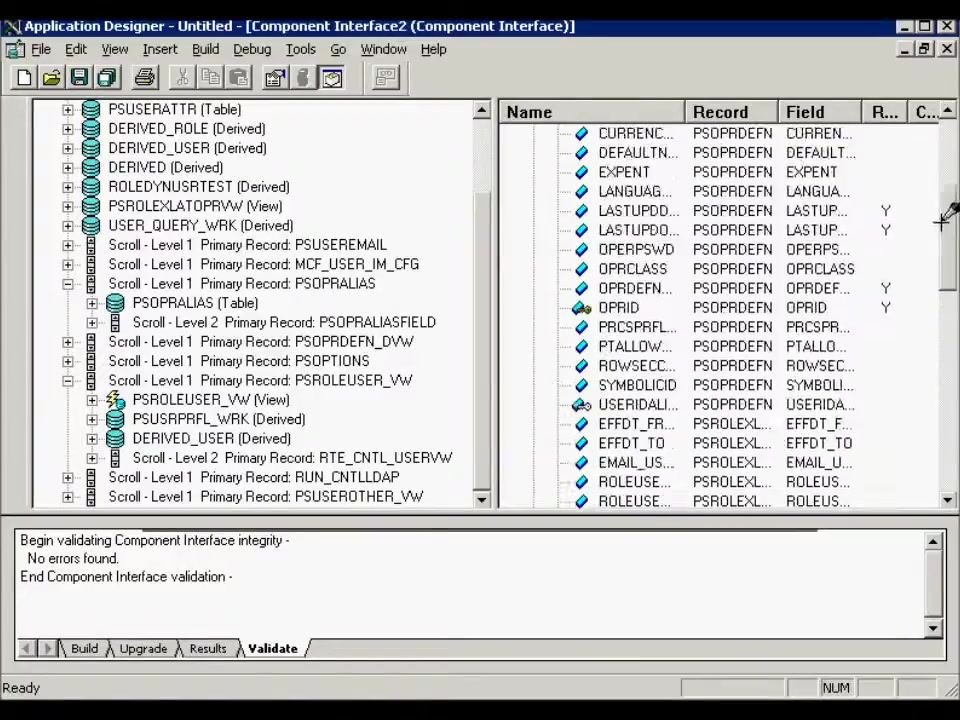
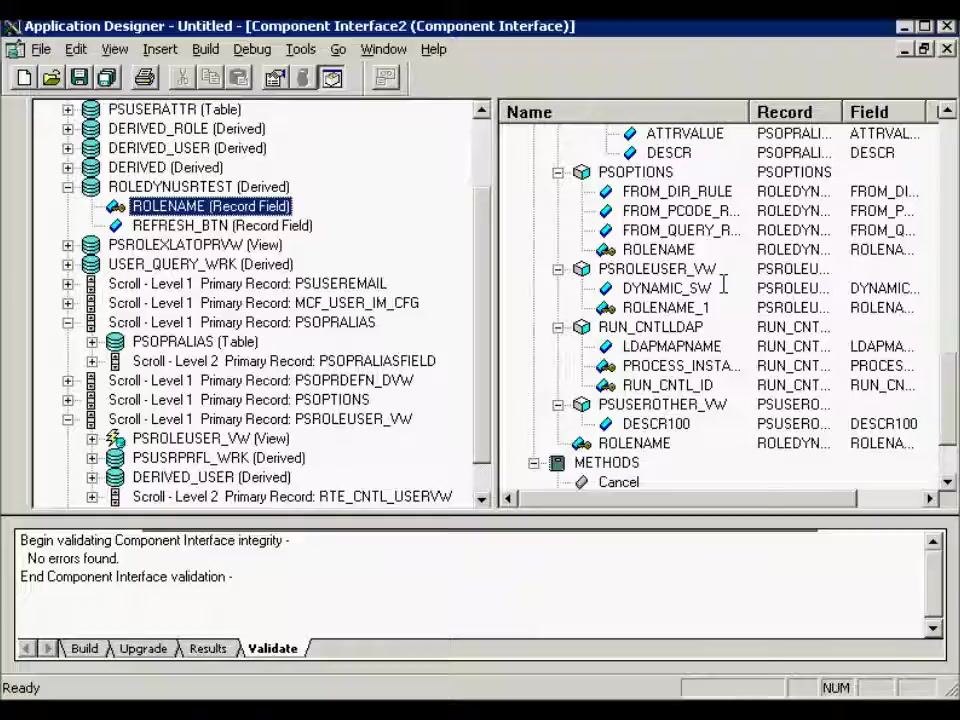
Once created, the component interface appears in Application Designer:
- The left pane shows the structure, including fields and collections (collections are marked with a cube icon).
- The right pane lists properties, including the Name, Record, and Field columns.
- A METHODS section is visible, listing available methods such as Cancel, Create, Find, Get, and Save.
Understand field and collection exposure
In the properties pane, fields are listed individually, while collections—identified by a cube icon—represent scrolls, or groups of related records. For example, PSOPRALIAS is a collection based on a scroll, and its child nodes, such as PSOPRALIASTYPE and PSOPRALIASFIELD, are part of that collection. The left pane visually distinguishes collections from single fields.
Only fields and records that are exposed in the component view can be manipulated through the component interface. If you need to access or update a particular field or record, make sure it is visible in the component view pane.
Expose additional fields or records
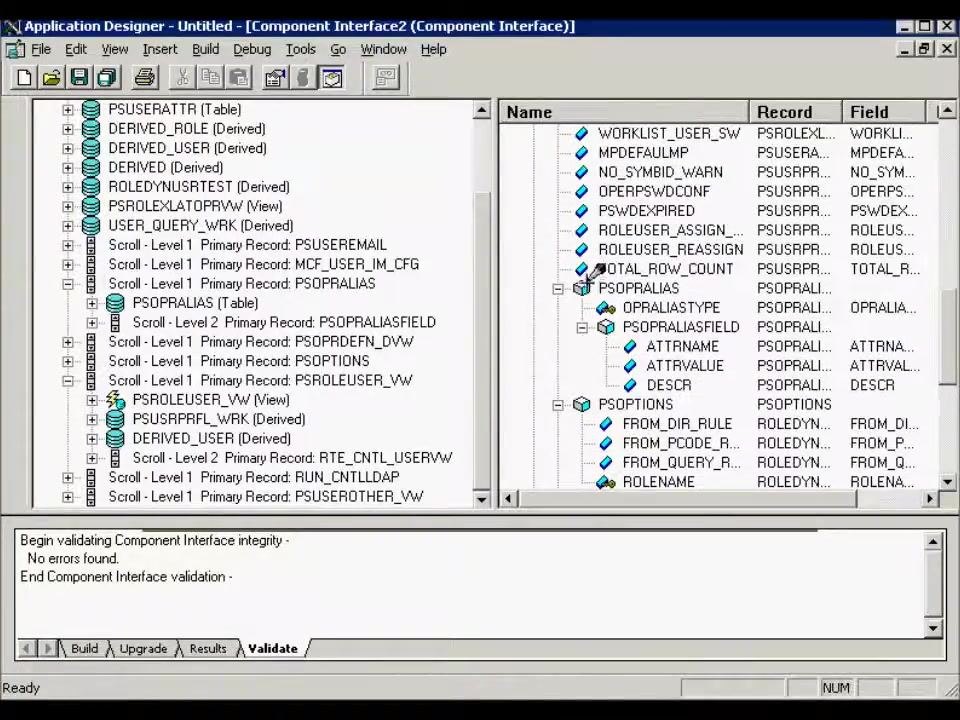
To expose a field or record, locate it in the left pane (component structure), then drag it into the right pane (component view). The field then appears in the component view, making it accessible for manipulation.
For example, drag the ROLENAME field from the component structure to the component view.
Verify exposed fields
Confirm that the newly exposed field appears in the component view under the appropriate collection or record. The field should now be listed alongside the other accessible fields and collections.
Once a field is exposed in the component view, you can access and manipulate it through the component interface in your application or integration.
Save your component interface
After creating and reviewing your component interface, save your work to preserve the current configuration. Click the Save icon on the toolbar, or select File > Save from the menu.
Summary
You have now learned how to create a component interface in PeopleSoft: starting a new definition, selecting a source component, reviewing the generated structure, exposing additional fields or records as needed, and saving your work. With the component interface saved, its exposed fields and collections are ready to be accessed through your application or integration.
Generation details: cost, quality tiers
Docsie billed 1,500 credits ($1.05) to analyze this 3-minute video at standard quality. The rewrite, template fill and Word/PDF exports were included. The same video at each quality tier:
| Quality | Frames sampled | Credits | Approx. cost |
|---|---|---|---|
| Draft | every 16-30 s | 750 | $0.52 |
| Standard (this guide) | every 8-15 s | 1,500 | $1.05 |
| Detailed | every 4-7 s | 3,000 | $2.10 |
| Ultra | every 1-3 s | 6,000 | $4.20 |
Credits priced at $0.70 per 1,000; plans include a monthly allowance. Enterprise customers on on-premise or bring-your-own-model deployments run this on their own inference and pay no per-video credits.
Generated by Docsie Video-to-Docs on 2026-10-12 from a 2-minute video. Screenshots are frames from the source video and belong to their creator, Derek Tomei, whose original is embedded above. If you own this video and want the guide removed or credited differently, contact us and we will act within one business day.