
How to Create a PS Query in PeopleSoft
PS Query is a reporting tool within Oracle PeopleSoft that allows you to retrieve and filter data from your organization's records without writing SQL manually. This guide walks you through how to create a PS Query in PeopleSoft, from logging in to the application through building, running, and saving a complete query using Query Manager.
Video: Oracle PeopleSoft PS Query - Basics - Tutorial by Peoplesoft Learning. All credit for the demonstration goes to the creator; watch the original on YouTube. The written guide below was generated from this video by Docsie. Creator? Request a change or removal.
PS Query is a reporting tool within Oracle PeopleSoft that allows you to retrieve and filter data from your organization's records without writing SQL manually. This guide walks you through how to create a PS Query in PeopleSoft, from logging in to the application through building, running, and saving a complete query using Query Manager.
Prerequisites
- Access to your organization's PeopleSoft login page and valid credentials.
- Permission to access the records you intend to query (for example, PSOPRDEFN).
- Familiarity with basic database concepts such as fields and filter conditions is helpful but not required.
Log in to PeopleSoft Application
Open your web browser and navigate to your organization's PeopleSoft login page. Enter your credentials:
- User ID: PS
- Password: (enter your password)
- Select a Language: English (default)
Click the Sign In button to access the application.
Access Query Manager
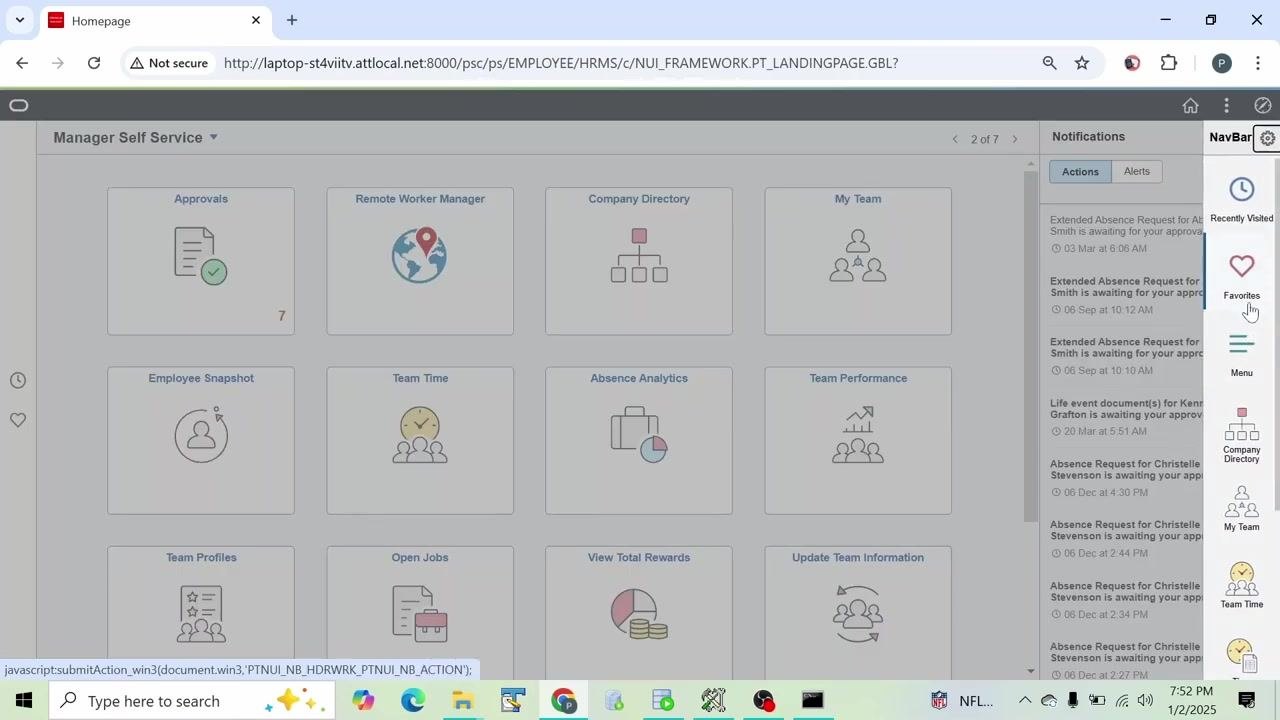
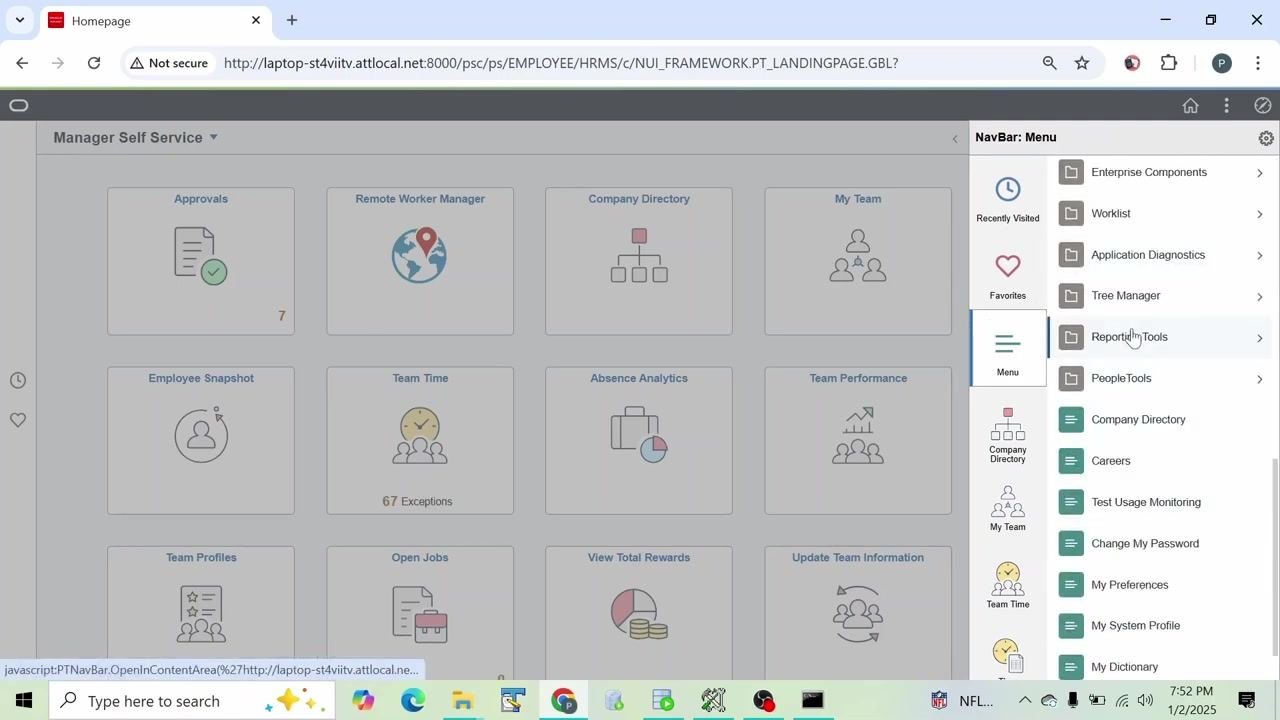
After logging in, you will see the PeopleSoft homepage. Locate the navigation bar (NavBar) on the right side of the screen, click the Menu icon, then scroll down and click Reporting Tools.
Under Reporting Tools, select Query, then click Query Manager to begin creating a new PS Query.
With Query Manager open, you are ready to build your query. The next steps cover how to select a source table, choose output fields, and apply filter criteria.
Start a new query
In Query Manager, begin creating a new query. Make sure you are on the Records tab before proceeding to select your source data.
Select the source table
In the Search By dropdown, select Record Name. In the begins with field, enter PSOPRDEFN, then click Search.
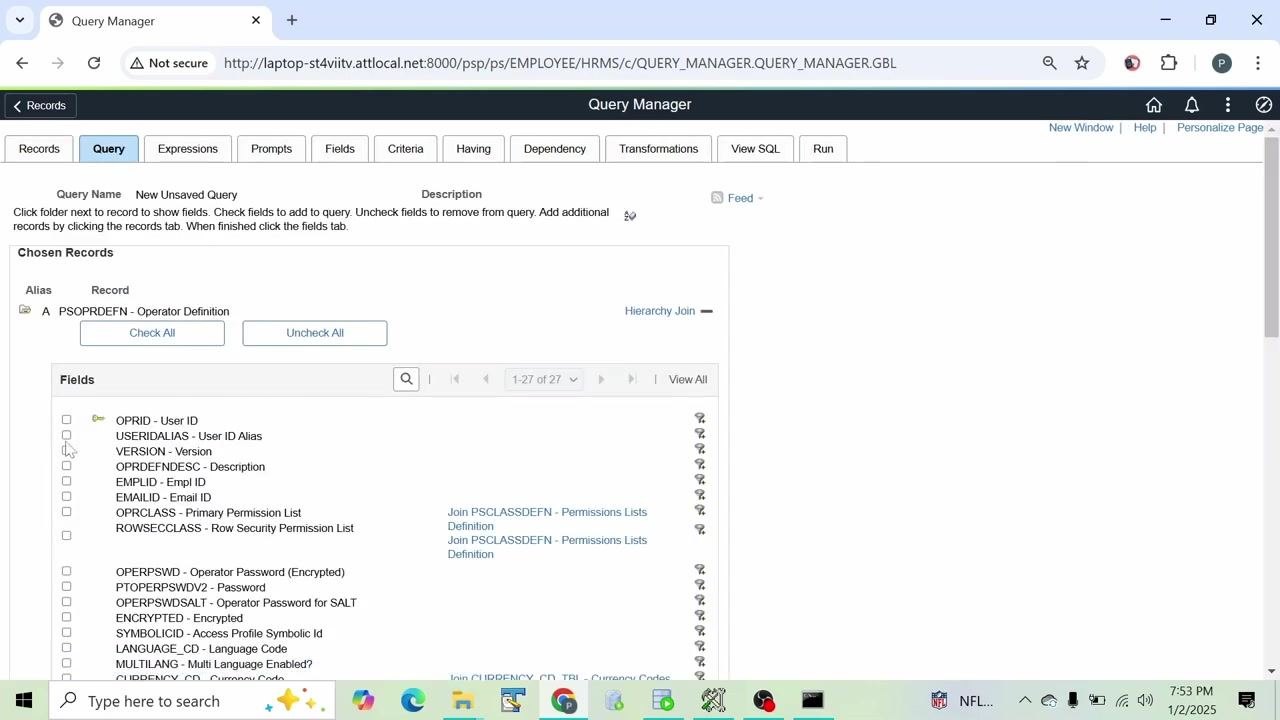
In the search results, locate the record PSOPRDEFN - Operator Definition and click Show Fields next to it to display its available fields.
Note on record access: The PSOPRDEFN record is visible here because you have access to it. If you do not see the record you need, you may have to request access or add the record to the Query Tree — a process covered in advanced PS Query sessions.
Choose output fields
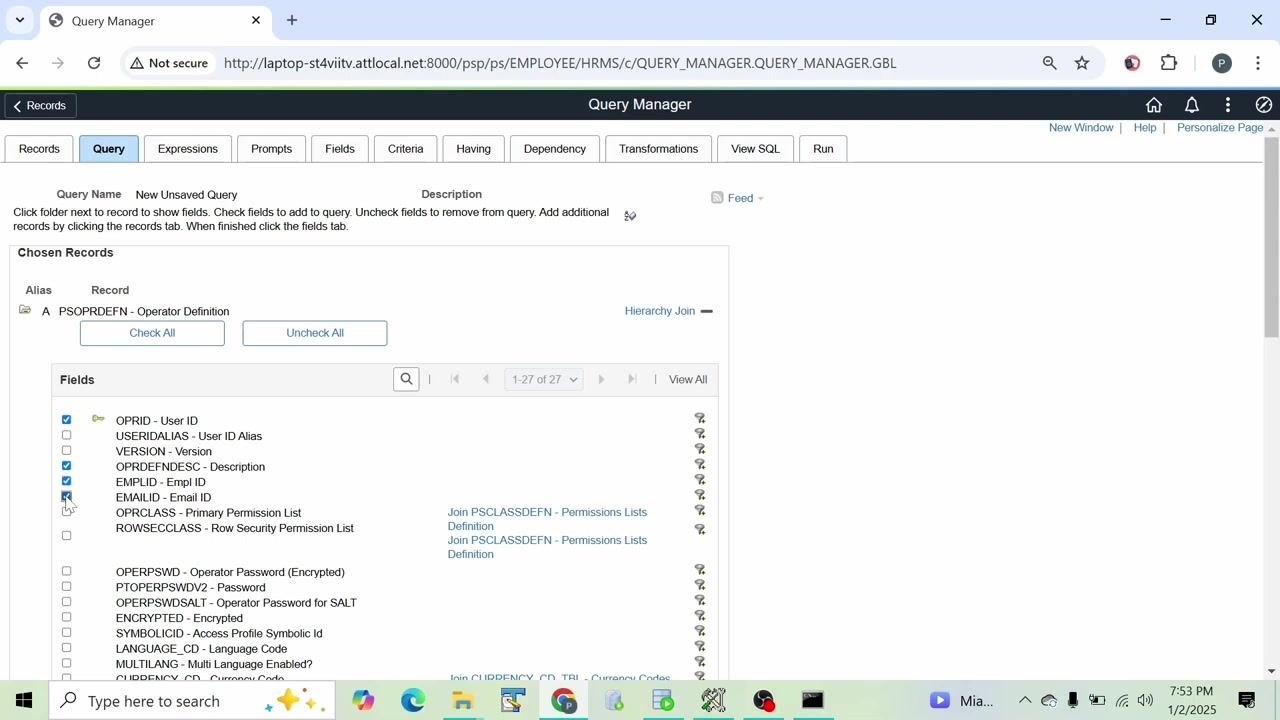
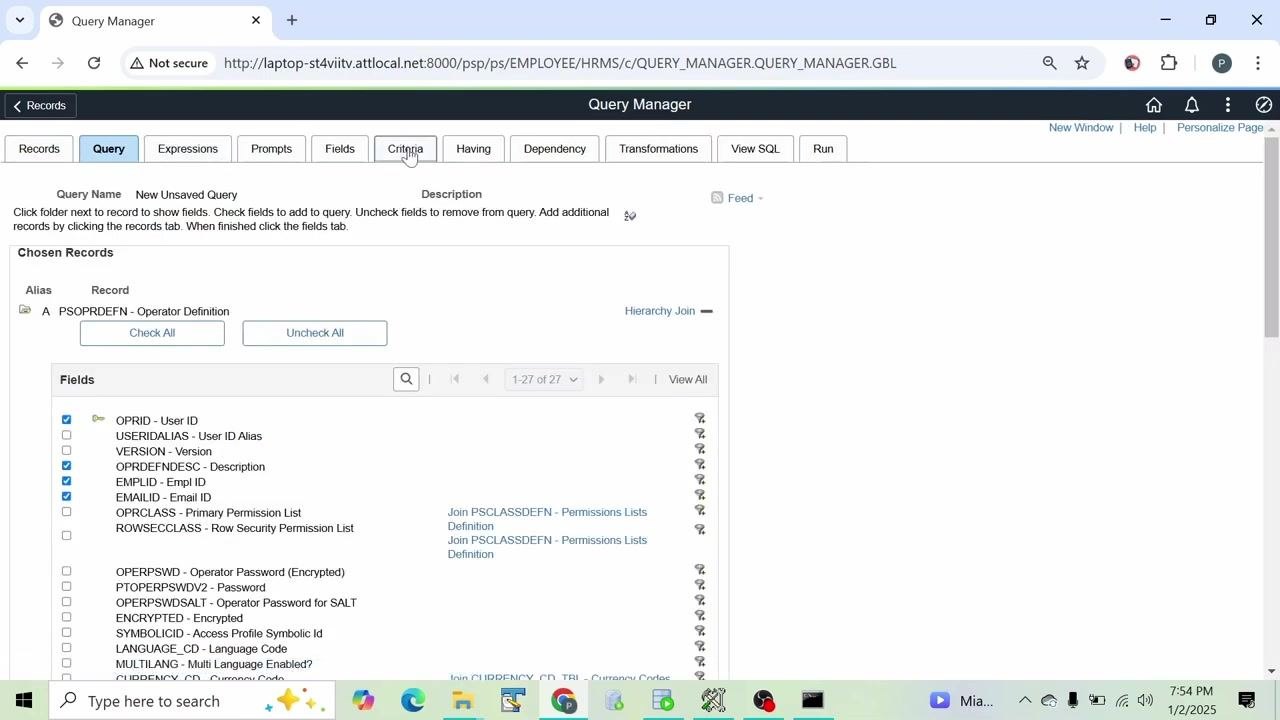
In the Fields list for the PSOPRDEFN record, select the following fields by checking their boxes:
- OPRID - User ID
- OPRDEFNDESC - Description
- EMPLID - Empl ID
- EMAILID - Email ID
These fields will be included in your query output.
Proceed to criteria
After selecting your fields, click the Criteria tab at the top of Query Manager. This tab lets you filter your results, similar to adding a WHERE clause in SQL.
Add a filter condition
In the Criteria tab, add a condition to filter your results. For example, to select all users whose account lock value equals 1, add a criterion on the relevant field (ACCOUNTLOCK = 1). This ensures your query only returns users with locked accounts.
Confirm that your query includes the correct filter:
- Field:
A.ACCTLOCK - Account Locked Out? - Condition Type:
equal to - Value:
1
At this point, you have built a basic query that selects user ID, description, employee ID, and email ID from the PSOPRDEFN table, filtered to show only locked accounts.
Preview the SQL statement
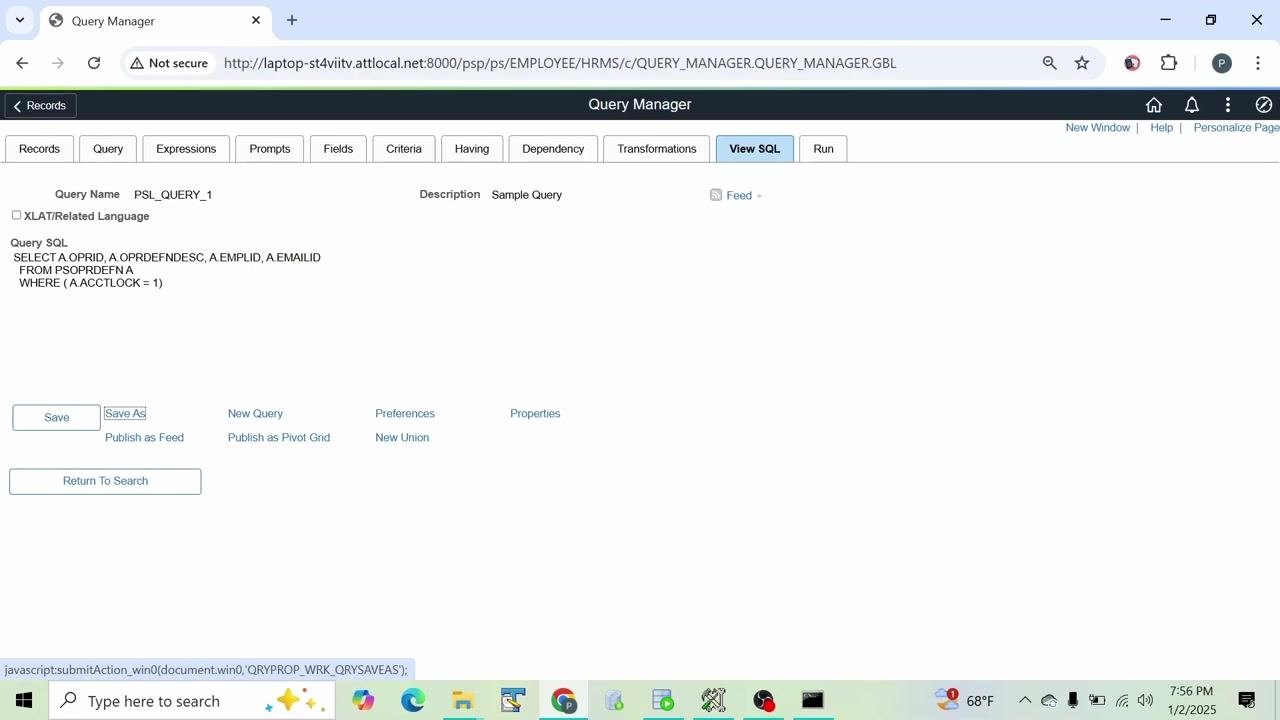
Optionally, click the View SQL tab to see the SQL statement generated by your query. It should resemble:
SELECT A.OPRID, A.OPRDEFNDESC, A.EMPLID, A.EMAILID FROM PSOPRDEFN A WHERE (A.ACCTLOCK = 1)
Run the query
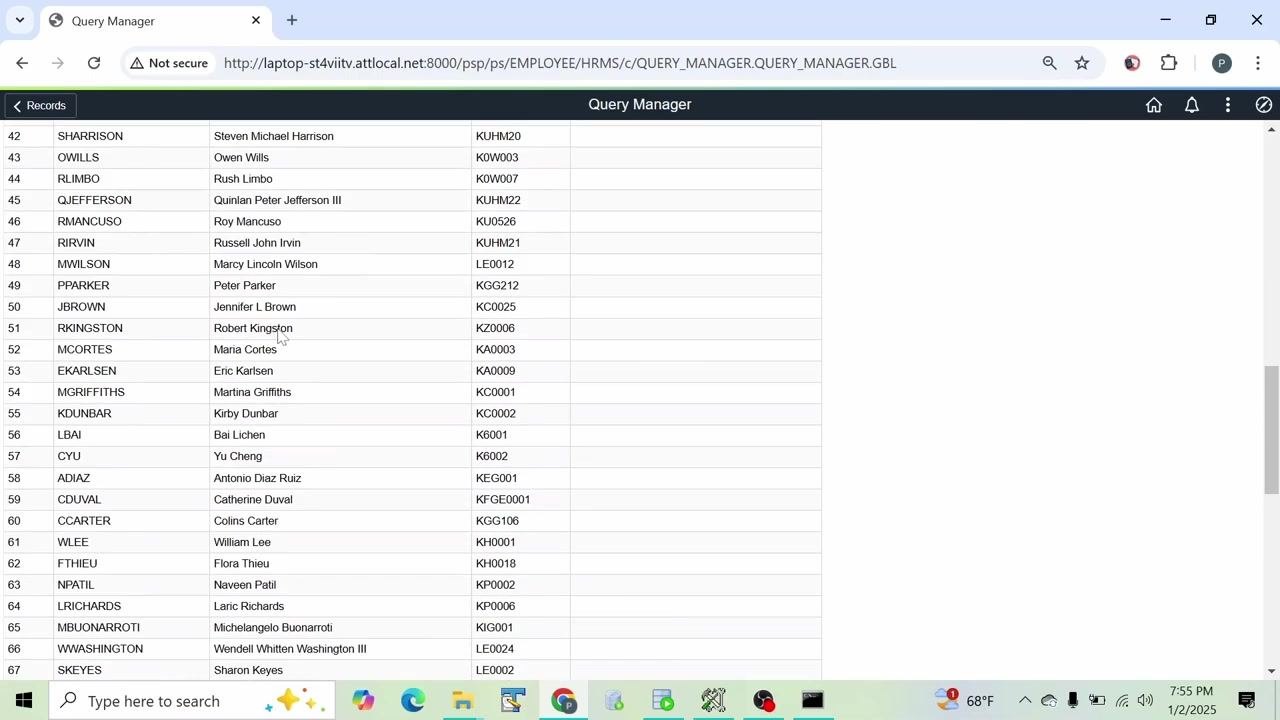
Click the Run tab at the top of Query Manager. The results will display all users where the account lock value is 1.
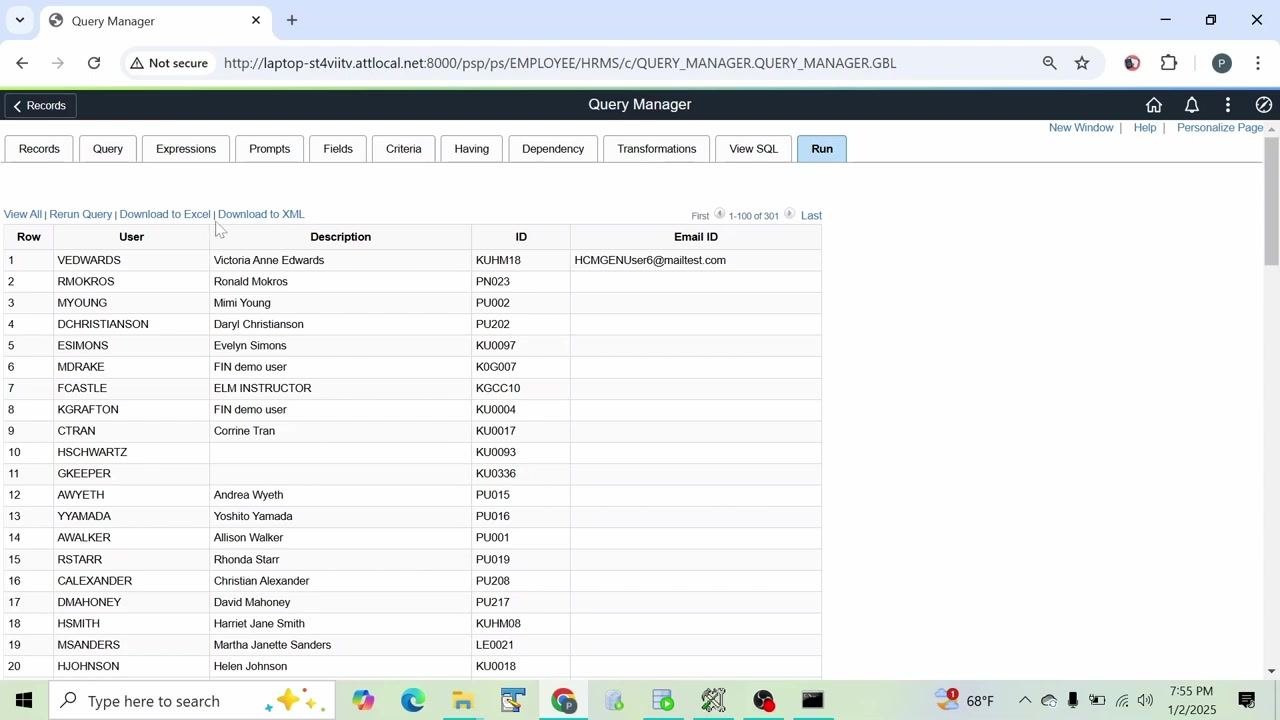
Export or rerun the results
At the top of the results grid, you have several options:
- Click Download to Excel to export the results as an Excel file.
- Click Download to XML to export the results as an XML file.
- Click Rerun Query to refresh the results if needed.
Save the query
Click Save As to save your query. In the dialog that appears:
- Enter
PSL_Query_1in the Query field. - Enter
Sample Queryin the Description field. - Leave Folder blank, or specify one if required by your organization.
- Set Query Type to
User. - Set Owner to
Publicif you want anyone with access to PS Query to retrieve this query. - Optionally, provide a detailed Query Definition.
Click OK to save the query. Your query is now saved and available for future use.
Summary
By following these steps, you have successfully learned how to create a PS Query in PeopleSoft — from logging in and navigating to Query Manager, to selecting a source table, choosing output fields, applying filter criteria, running the query, and saving it. The resulting query finds all users with locked accounts and returns their user ID, description, employee ID, and email ID.
What's next
You can now share, rerun, or modify this saved query as needed. For more advanced options, such as adding records to the Query Tree or exploring additional query types, refer to advanced PS Query sessions.
Generation details: cost, quality tiers
Docsie billed 3,000 credits ($2.10) to analyze this 6-minute video at standard quality. The rewrite, template fill and Word/PDF exports were included. The same video at each quality tier:
| Quality | Frames sampled | Credits | Approx. cost |
|---|---|---|---|
| Draft | every 16-30 s | 1,500 | $1.05 |
| Standard (this guide) | every 8-15 s | 3,000 | $2.10 |
| Detailed | every 4-7 s | 6,000 | $4.20 |
| Ultra | every 1-3 s | 12,000 | $8.40 |
Credits priced at $0.70 per 1,000; plans include a monthly allowance. Enterprise customers on on-premise or bring-your-own-model deployments run this on their own inference and pay no per-video credits.
Generated by Docsie Video-to-Docs on 2026-10-11 from a 5-minute video. Screenshots are frames from the source video and belong to their creator, Peoplesoft Learning, whose original is embedded above. If you own this video and want the guide removed or credited differently, contact us and we will act within one business day.