
How to View Your Pay Stubs in Paylocity
This guide walks you through how to view your pay stubs in Paylocity using the Paylocity website. You'll learn how to log in, locate your checks, review pay stub details, download individual pay stubs as PDFs, and filter checks by date range.
Video: Paylocity Training Video: Viewing and Printing Your Paystub by The Independence Center. All credit for the demonstration goes to the creator; watch the original on YouTube. The written guide below was generated from this video by Docsie. Creator? Request a change or removal.
This guide walks you through how to view your pay stubs in Paylocity using the Paylocity website. You'll learn how to log in, locate your checks, review pay stub details, download individual pay stubs as PDFs, and filter checks by date range.
Prerequisites
- An active Paylocity account with login credentials.
- Access to the Paylocity website (this guide covers the website, not the mobile app).
Note: If you prefer to learn about pay stubs using the Paylocity app instead, visit theindependencecenter.org, click Employee Login, scroll to the Payroll section, and view the videos covering the Paylocity app. This guide focuses only on the website.
Log in and access your dashboard
Log in to the Paylocity website using your credentials. After logging in, you should land on the main dashboard page automatically.
If you do not see the dashboard, look for the black box in the upper left-hand corner and click Self-Service Portal to navigate to the correct page.
Locate the Pay box
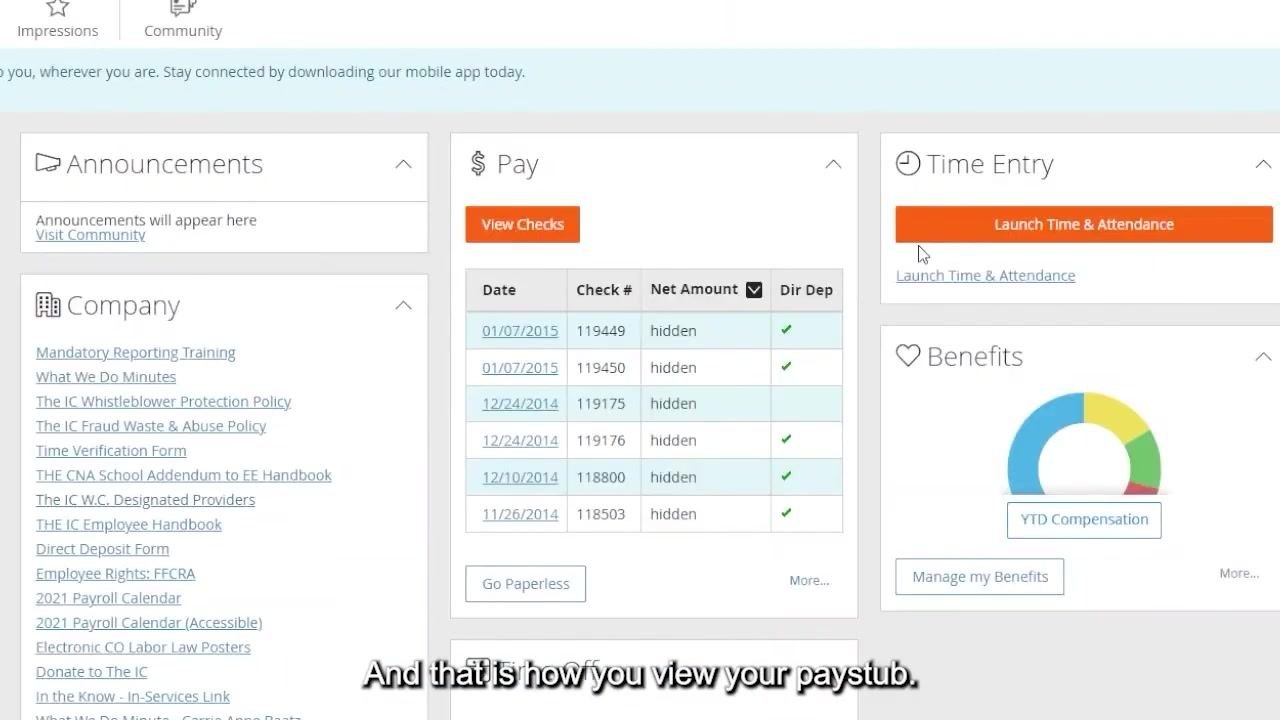
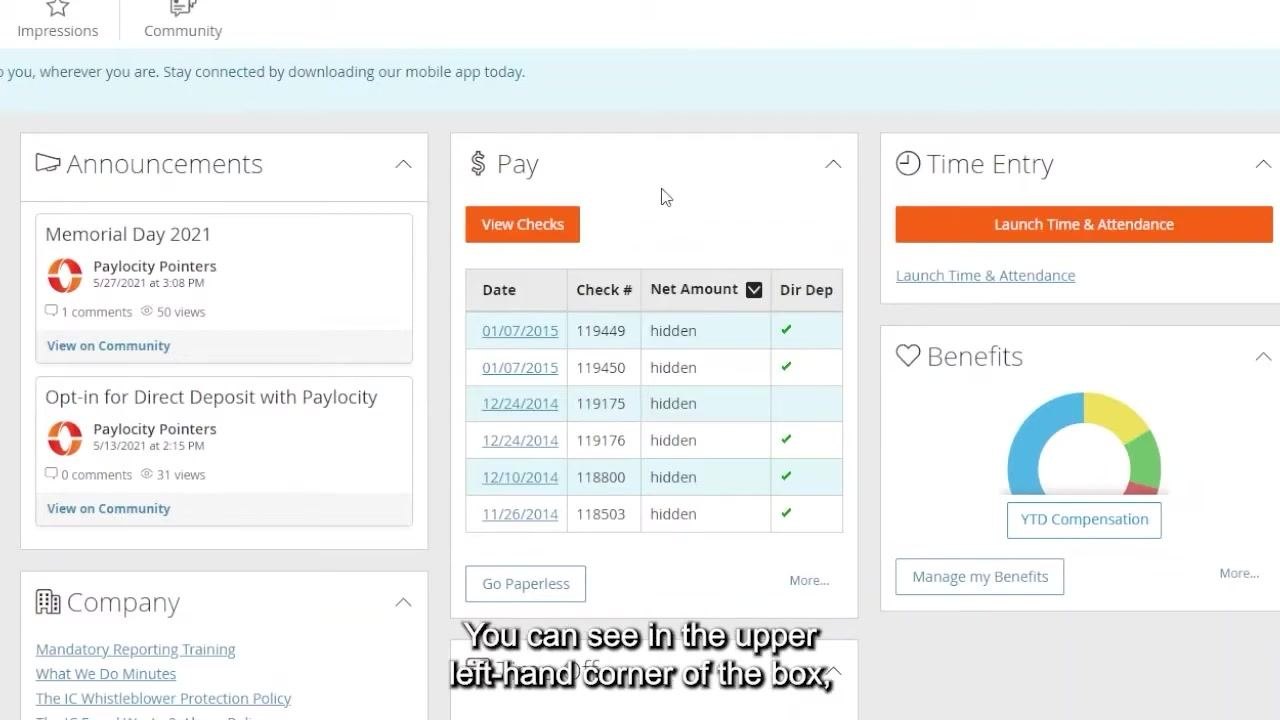
Once on the dashboard, you'll notice the page is divided into three columns, each containing several boxes. The middle column contains the Pay box at the top, labeled with a dollar sign ($) and the word "Pay" in the upper left corner. Underneath it, you'll see the View Checks button.
View your checks
In the Pay box, click the orange View Checks button. This displays your paychecks for the current year by default.
Filter by date range if needed
If no checks appear for the current year, use the filter options to select a different date range:
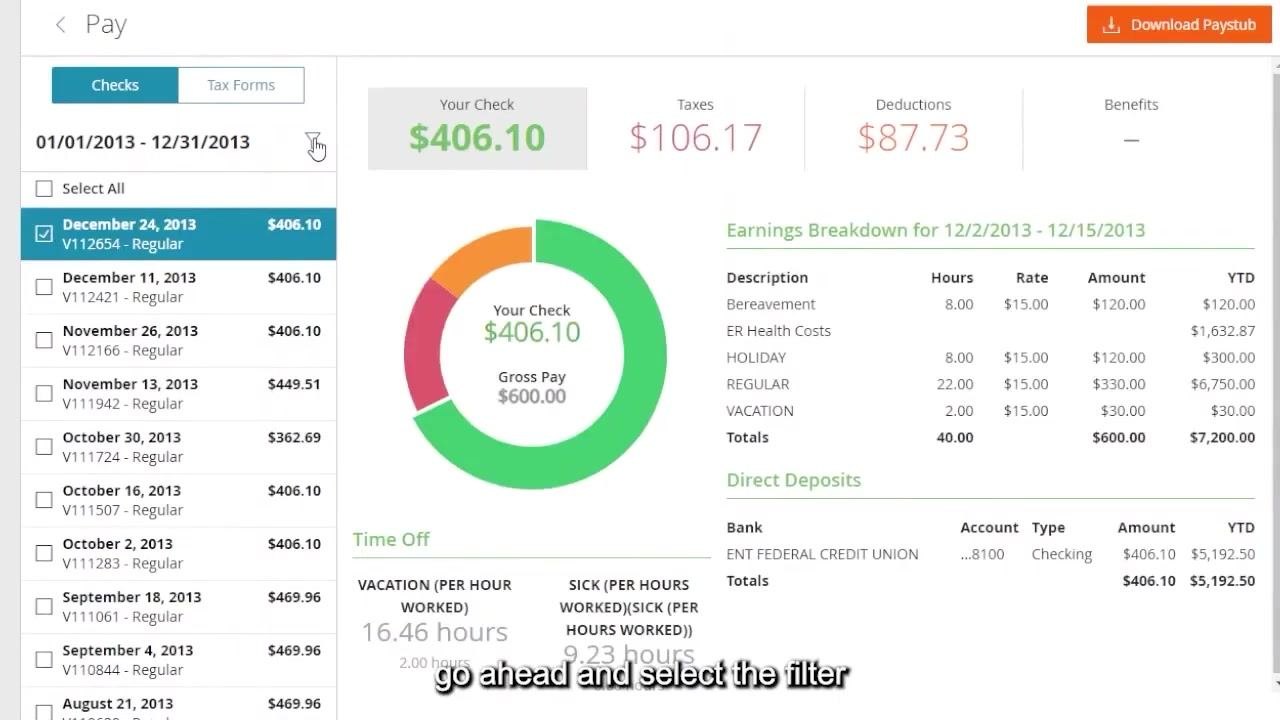
- Under Filter Checks on the left side, select a preset (for example, "Last Year") or manually enter a Start Date and End Date.
- For example, you might enter Start Date = 01/01/2013 and End Date = 12/31/2013.
- Click the orange Apply button to update the results.
Review your pay stub details
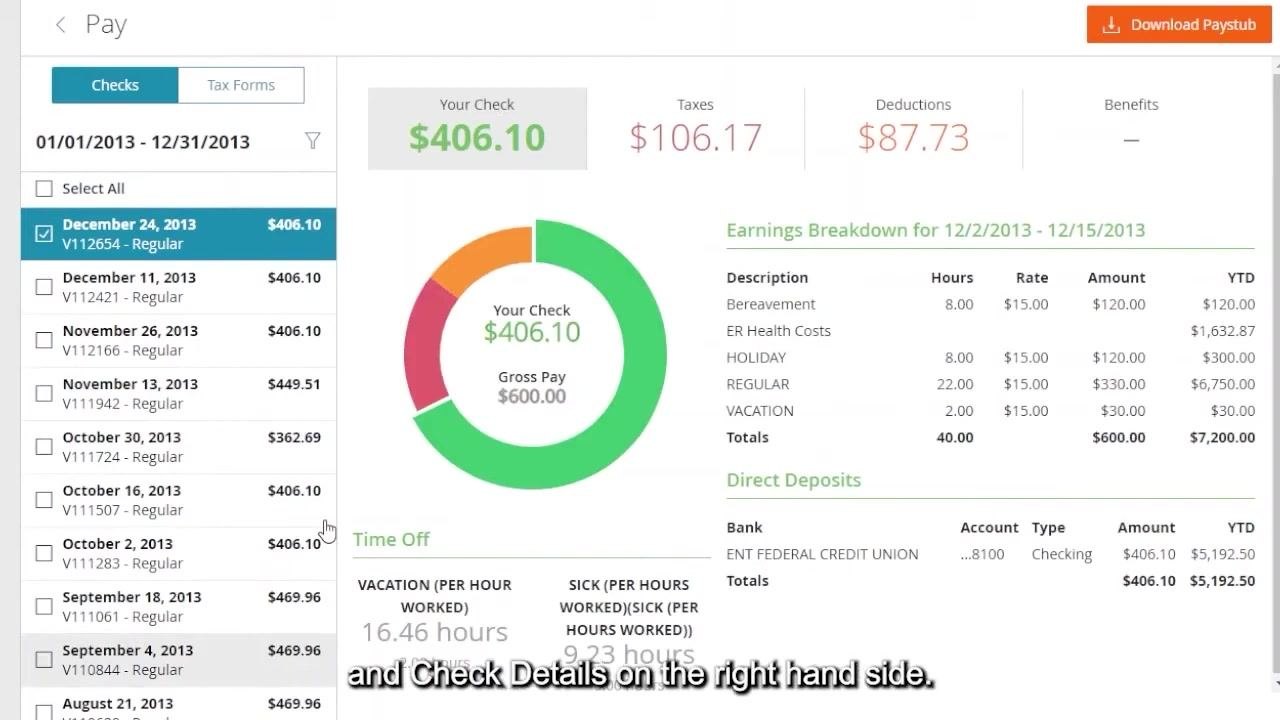
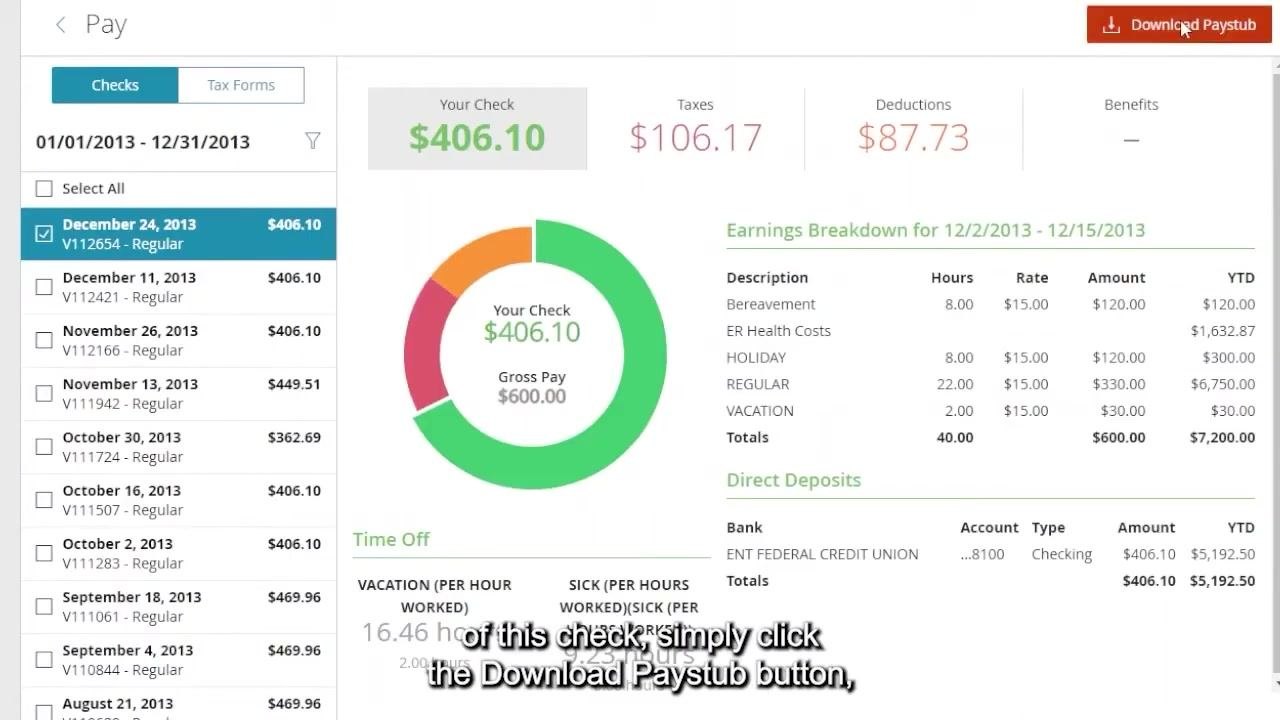
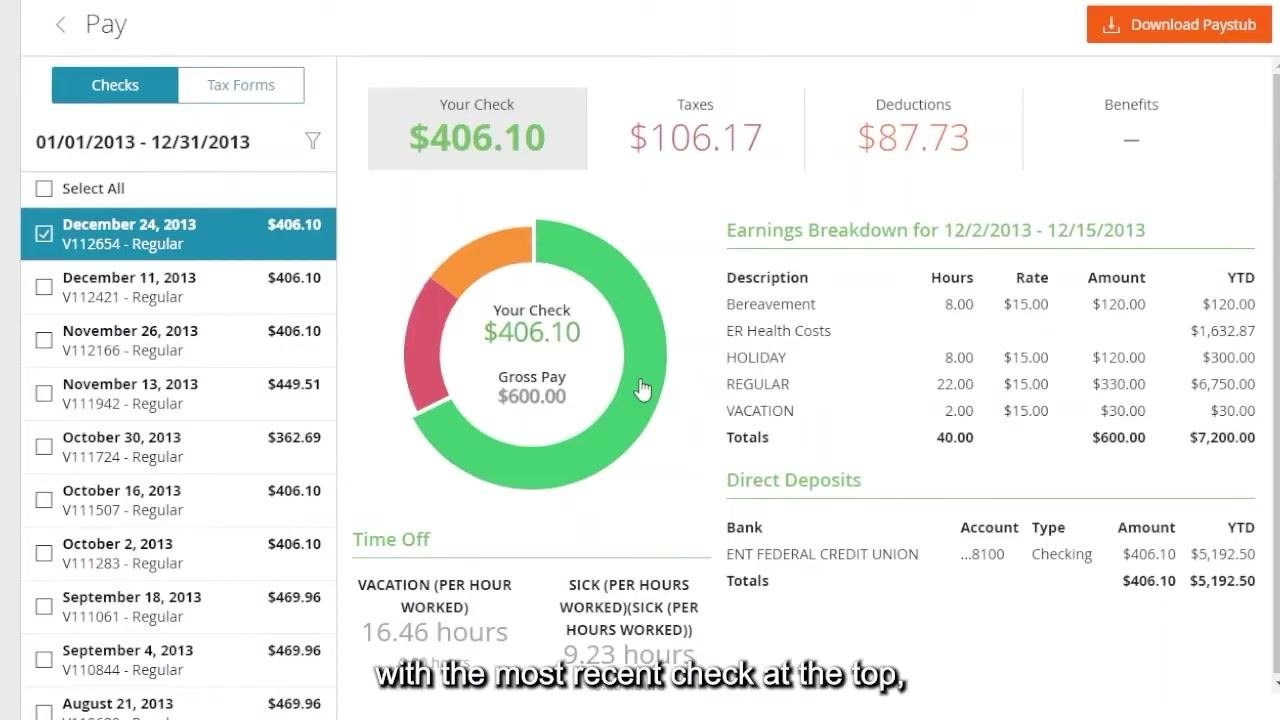
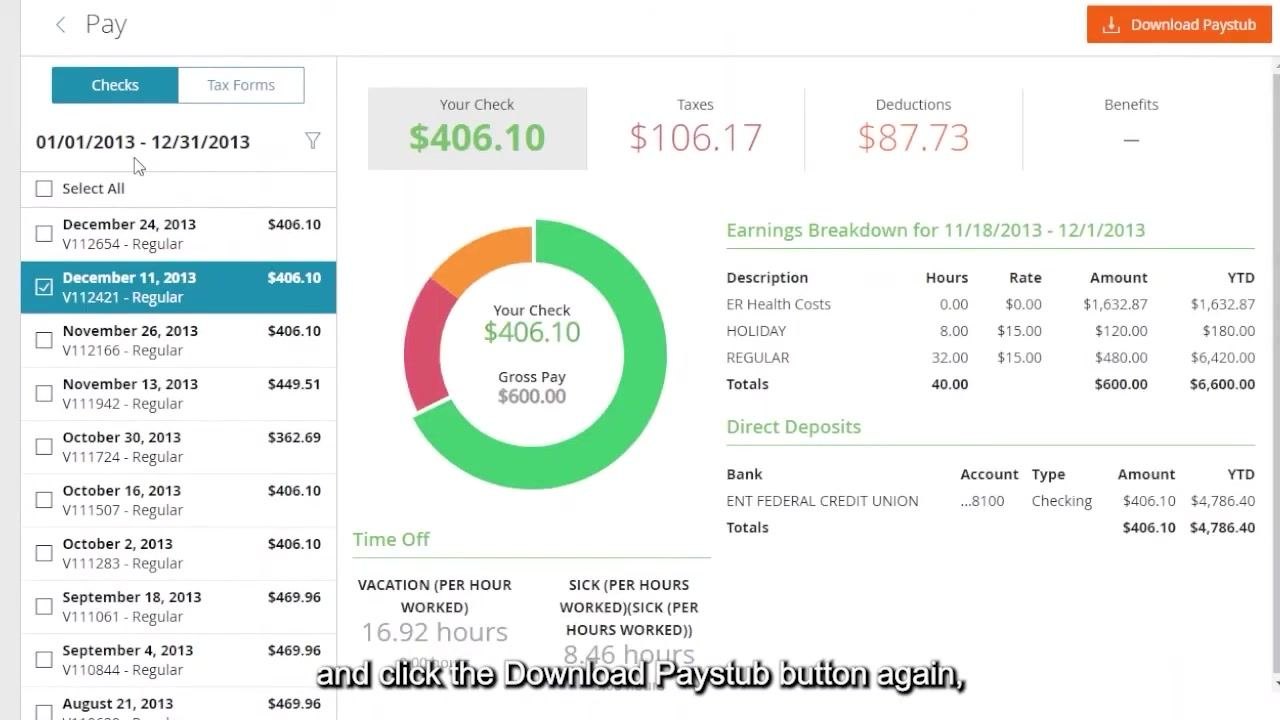
After applying the filter, a list of checks appears on the left side of the screen in chronological order, with the most recent check at the top. The details for the selected check appear on the right, including:
- Check amount (for example, $406.10)
- Taxes (for example, $106.17)
- Deductions (for example, $87.73)
- Earnings breakdown (description, hours, rate, amount, year-to-date)
- Direct deposit information (bank, account, type, amount, year-to-date)
- Time off balances (vacation, sick hours)
Select the check you want
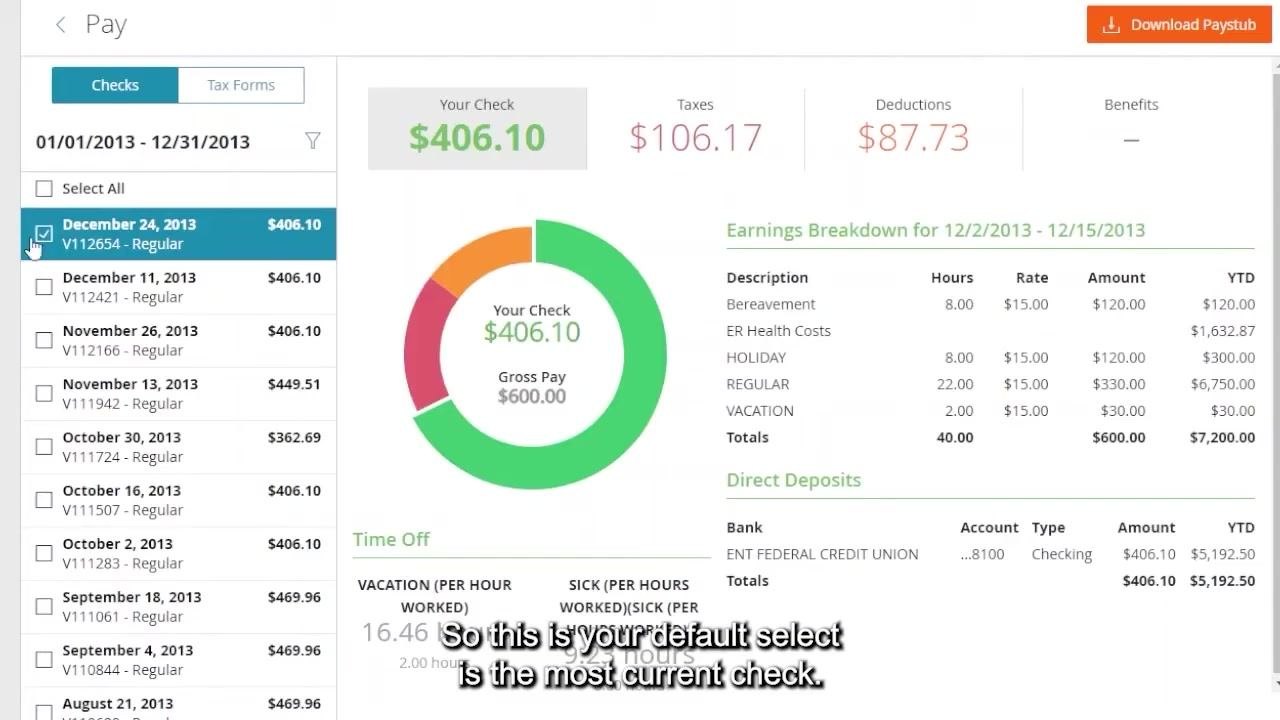
The first check in the list is selected by default, and the details on the right correspond to that selection. You can select a different check from the list to view its details instead.
Download your pay stub
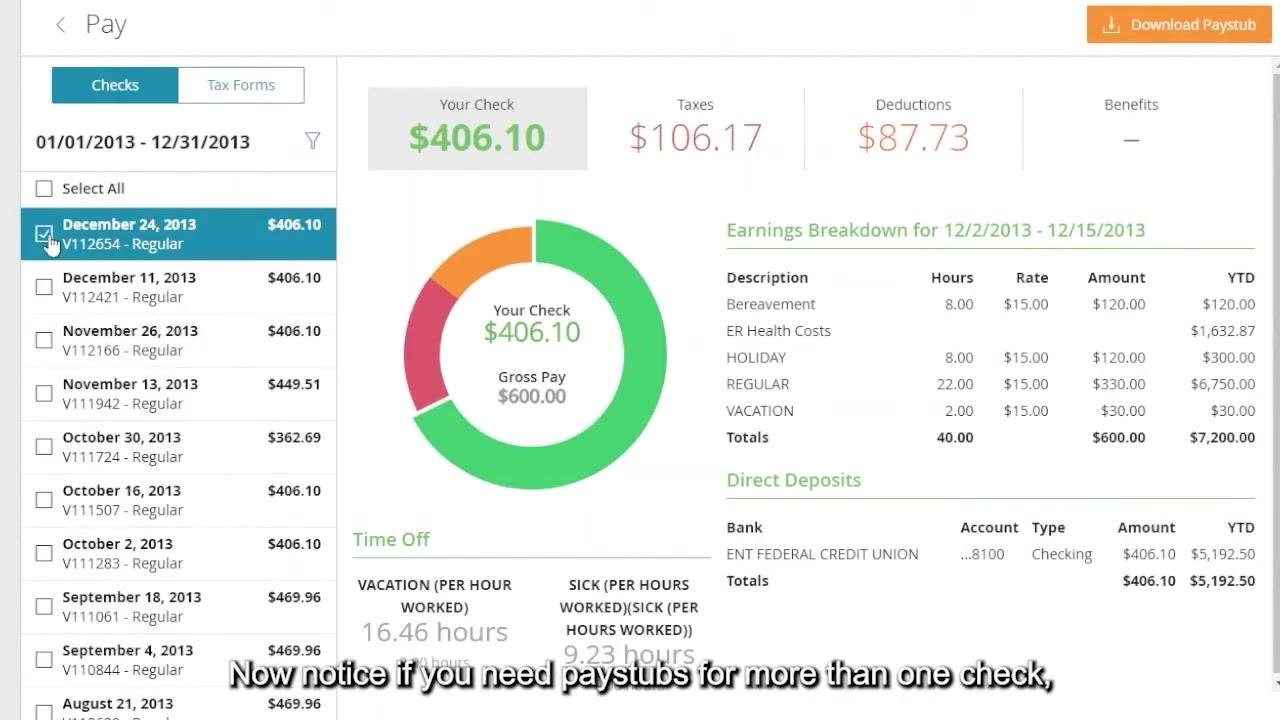
To create a pay stub for the selected check, make sure the check you want is highlighted in blue with a checkmark, then click the orange Download Paystub button in the upper right corner of the screen.
Wait for the PDF to generate
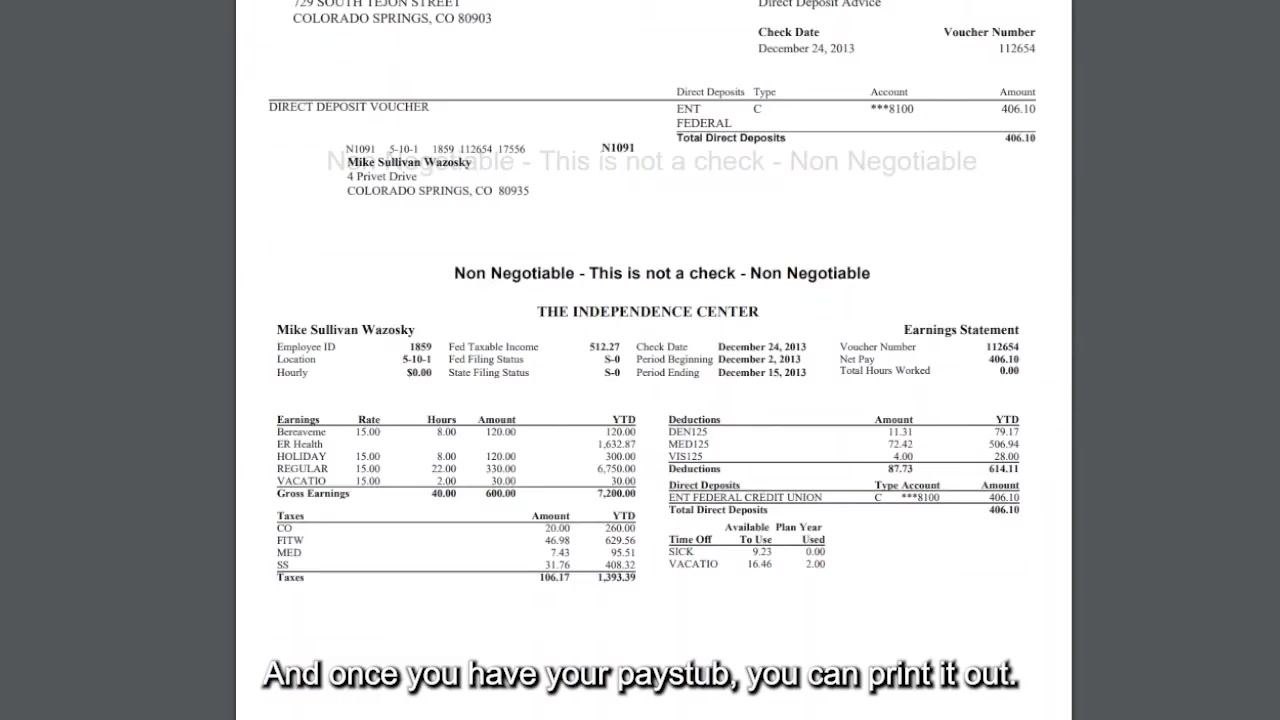
The system will generate a PDF of your pay stub. A loading indicator may appear briefly while the PDF is being created.
Review, print, or save your pay stub
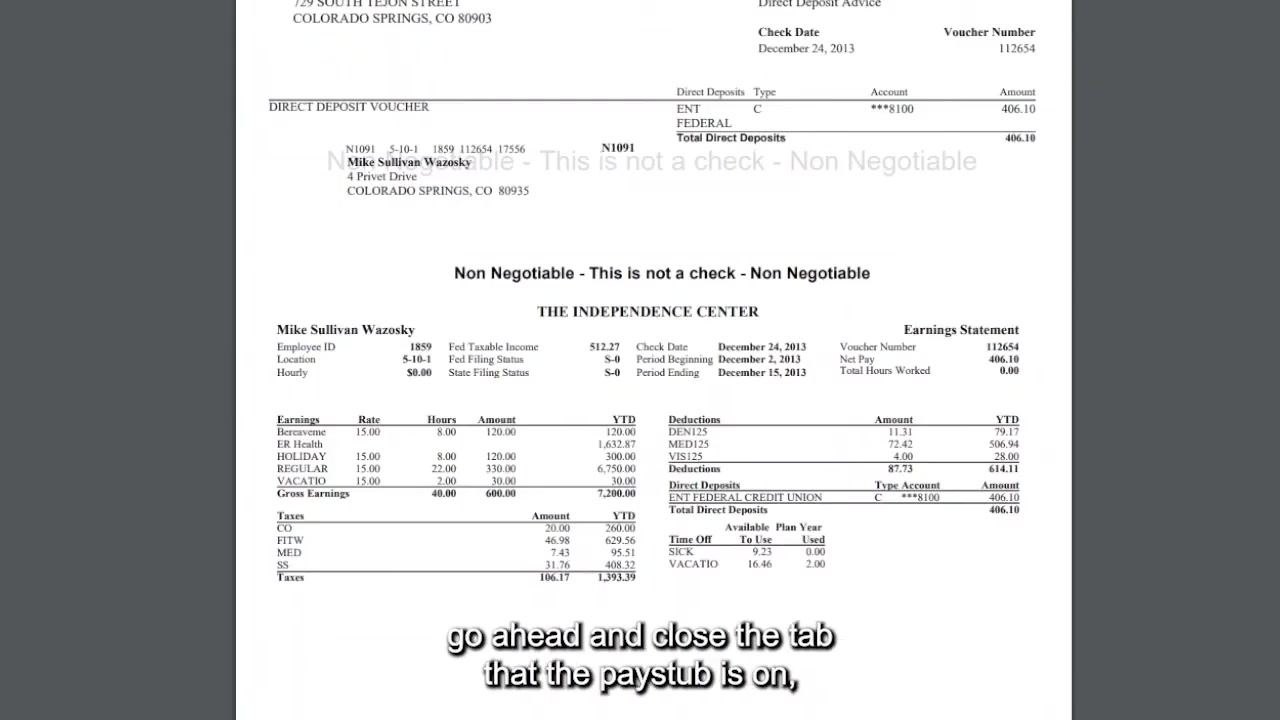
Once ready, the PDF pay stub opens in a new browser tab or window. You can review it, print it, download it, save it to a file, email it, or simply view it on screen. There is no requirement to save or print it — you can use it however you need.
Return to the checks list
When you finish viewing or saving your pay stub, close the browser tab or window containing the pay stub to return to the Paylocity website.
Download pay stubs for additional checks
If you need pay stubs for more than one check, you must download each one individually:
- Deselect the check you just downloaded.
- Select the next check you're interested in from the list.
- Click Download Paystub again.
- Repeat this process for each check you need.
Important: Do not select multiple checks at once. If you select more than one check, the system combines all selected checks into a single summary rather than generating individual pay stubs. This summary shows the total for all selected checks, which is usually not helpful if you need separate pay stubs.
Filter checks to find a different year or range
If you're not viewing the correct year or list of checks, use the filter feature to adjust your view. Click the filter icon or link near the list of checks.
In the Filter Checks panel:
- Click YTD (Year-To-Date) to filter checks for the current year.
- You may also see other preset options such as Q1, Q2, Q3, Q4, or Last Year.
- Confirm the Start Date and End Date fields if you need a custom range.
- Click Apply to update the list of checks.
After applying the filter, review the updated list of checks for the selected year or range. If no checks are available for the selected period, a message such as "No Checks Available" appears, and the main area may show "No Checks Selected" with a magnifying glass icon.
Return to the landing page
When you're finished reviewing your checks or pay stubs, click the Back button to the left of the word "Pay" at the top of the screen. This returns you to your landing page, where you can access other features such as Announcements, Company resources, Pay, Time Entry, and Benefits.
Summary
You've now completed the process of viewing and managing your pay stubs in Paylocity:
- Log in to the Paylocity website and access the Self-Service Portal if needed.
- Locate the Pay box in the middle column and click View Checks.
- Use filters to select the appropriate date range if no checks are shown.
- Review the list of checks and detailed pay stub information.
- Select a single check and click Download Paystub to generate a PDF.
- View, print, or save the PDF as needed, then close the tab to return to the checks list.
- Repeat the download process one check at a time for additional pay stubs, avoiding multiple selections at once.
- Use the filter feature to switch between years or date ranges, and use the Back button to return to your landing page.
What's next
For further assistance, refer to your organization's help resources or contact your payroll administrator.
Generation details: cost, quality tiers
Docsie billed 2,500 credits ($1.75) to analyze this 5-minute video at standard quality. The rewrite, template fill and Word/PDF exports were included. The same video at each quality tier:
| Quality | Frames sampled | Credits | Approx. cost |
|---|---|---|---|
| Draft | every 16-30 s | 1,250 | $0.88 |
| Standard (this guide) | every 8-15 s | 2,500 | $1.75 |
| Detailed | every 4-7 s | 5,000 | $3.50 |
| Ultra | every 1-3 s | 10,000 | $7.00 |
Credits priced at $0.70 per 1,000; plans include a monthly allowance. Enterprise customers on on-premise or bring-your-own-model deployments run this on their own inference and pay no per-video credits.
Generated by Docsie Video-to-Docs on 2026-10-06 from a 4-minute video. Screenshots are frames from the source video and belong to their creator, The Independence Center, whose original is embedded above. If you own this video and want the guide removed or credited differently, contact us and we will act within one business day.